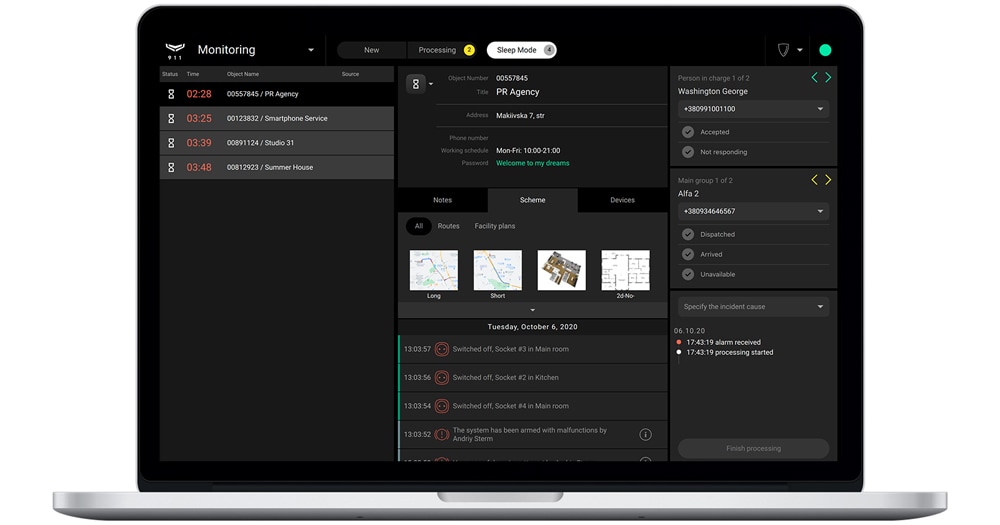
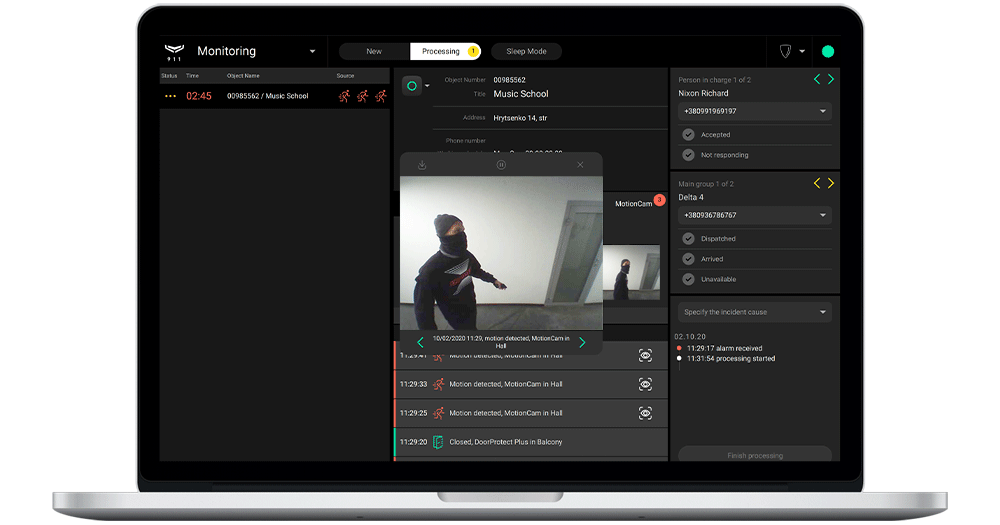
Company owners and heads of installers of the service and installation companies have an ability to hide objects list from installers, who are working in the company account in the Ajax PRO mobile app. This can make the installer’s job easier and reduce the risk of changing the settings of the wrong object.
To hide the list of objects:
- Open the Ajax PRO Desktop app.
- Switch to the company account.
- Go to the Company module and open Service settings.
- Enable the Search objects in mobile app by full hub ID toggle.
This feature is available only for employees in the Company owner or Head of installers roles in the service or installation companies.
After enabling the Search objects in mobile app by full hub ID feature, installers have to enter the full hub ID in the searching field of the Ajax PRO mobile app to see a specific object with a particular hub.
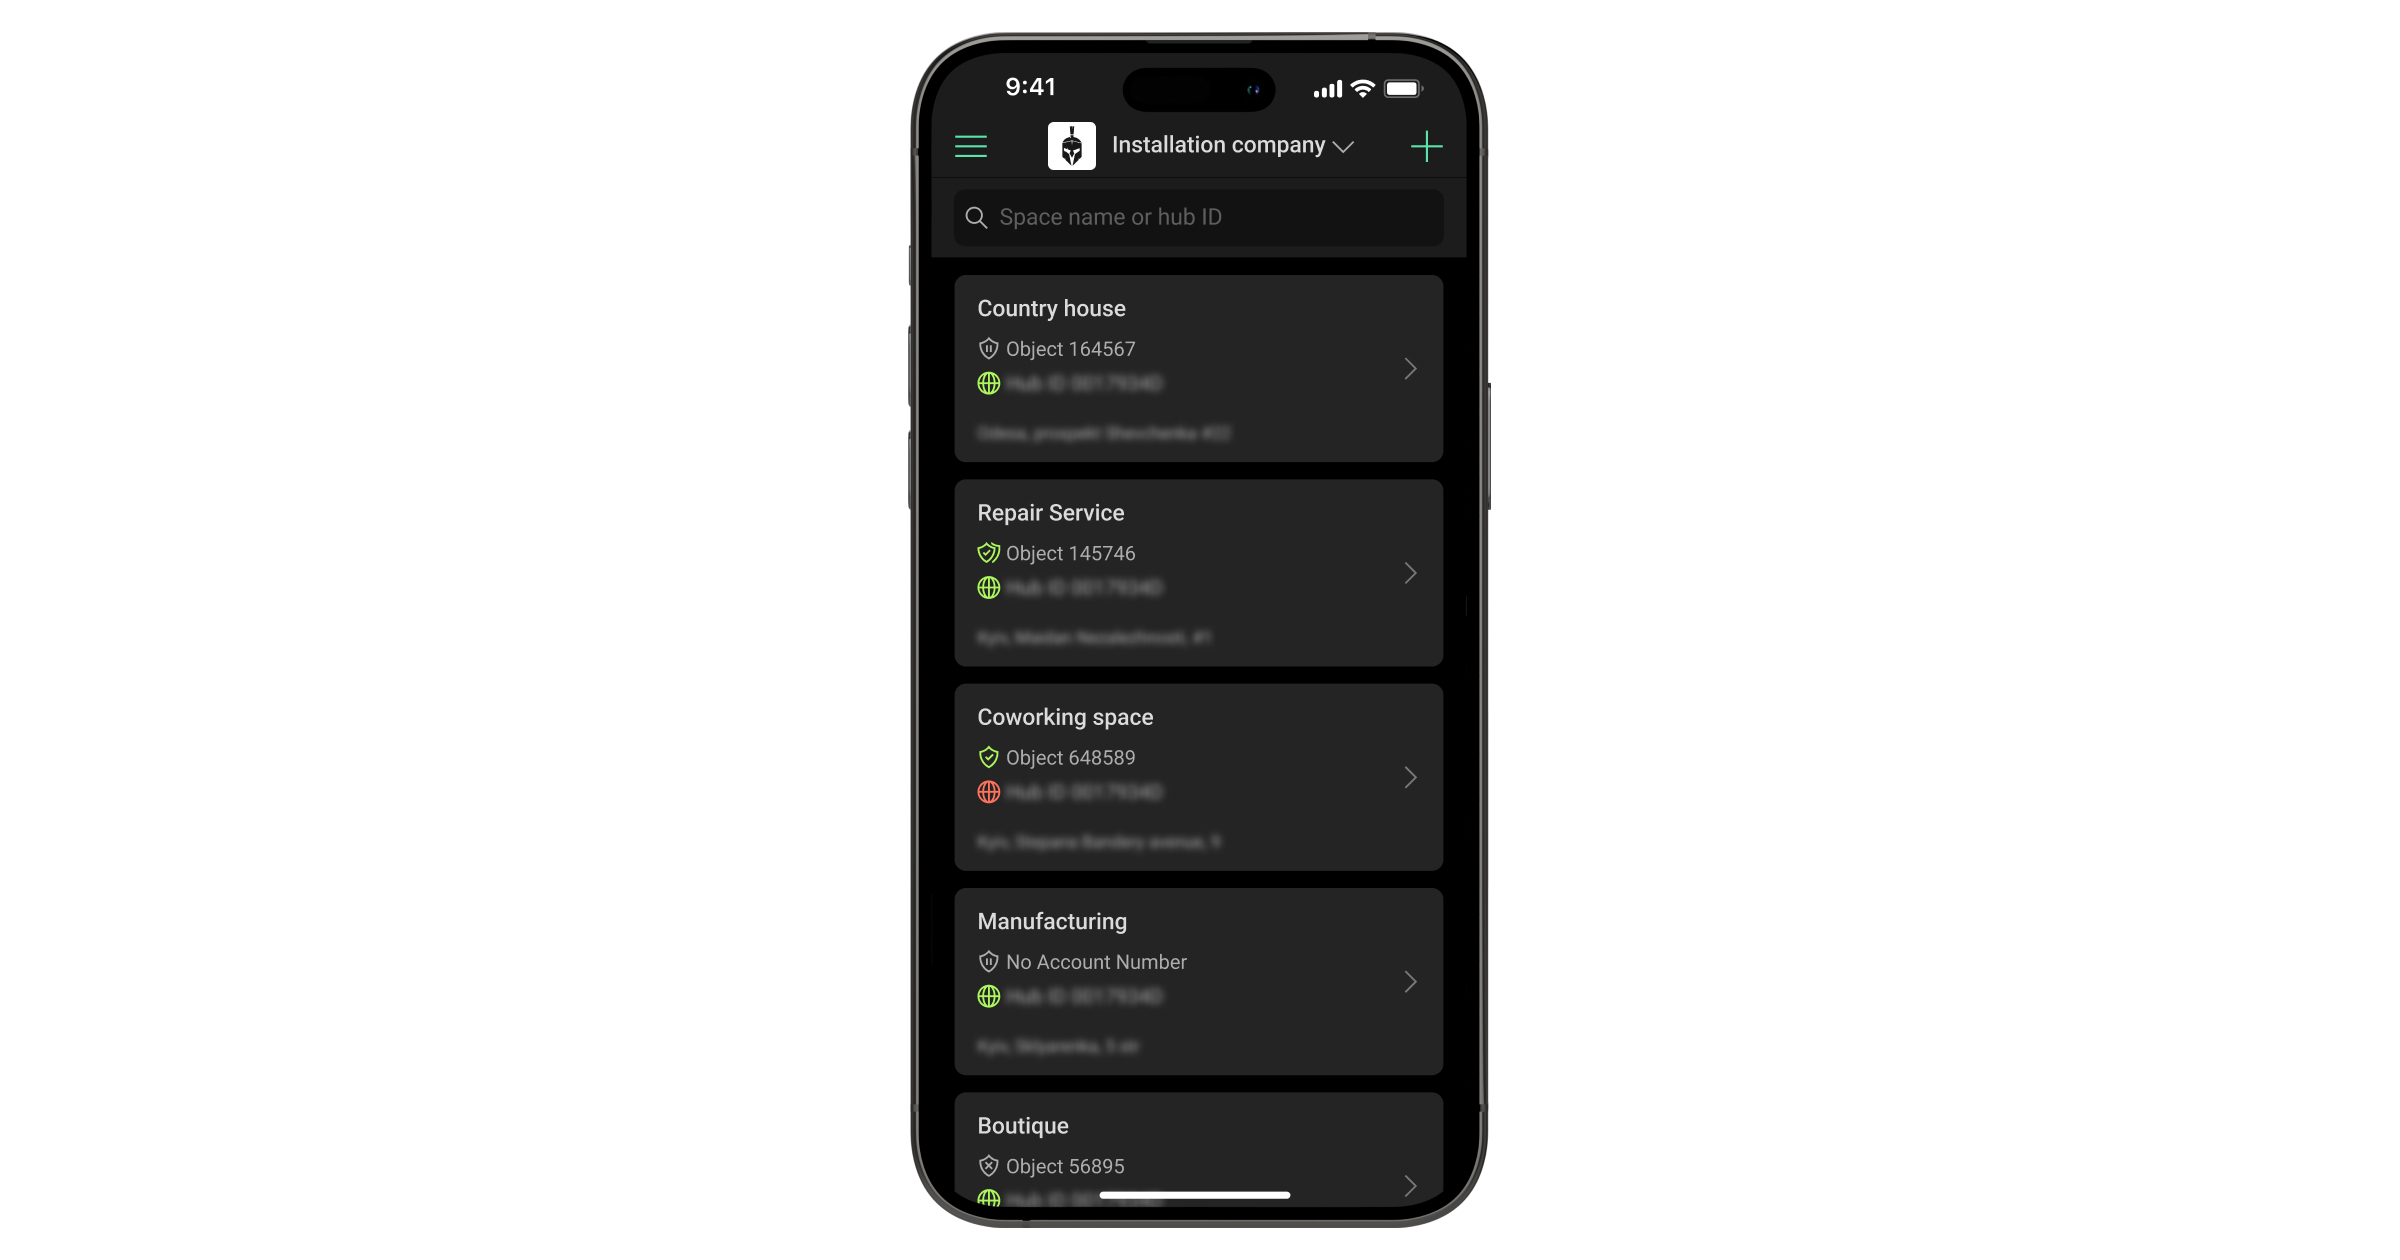
Search objects in mobile app by full hub ID is disabled
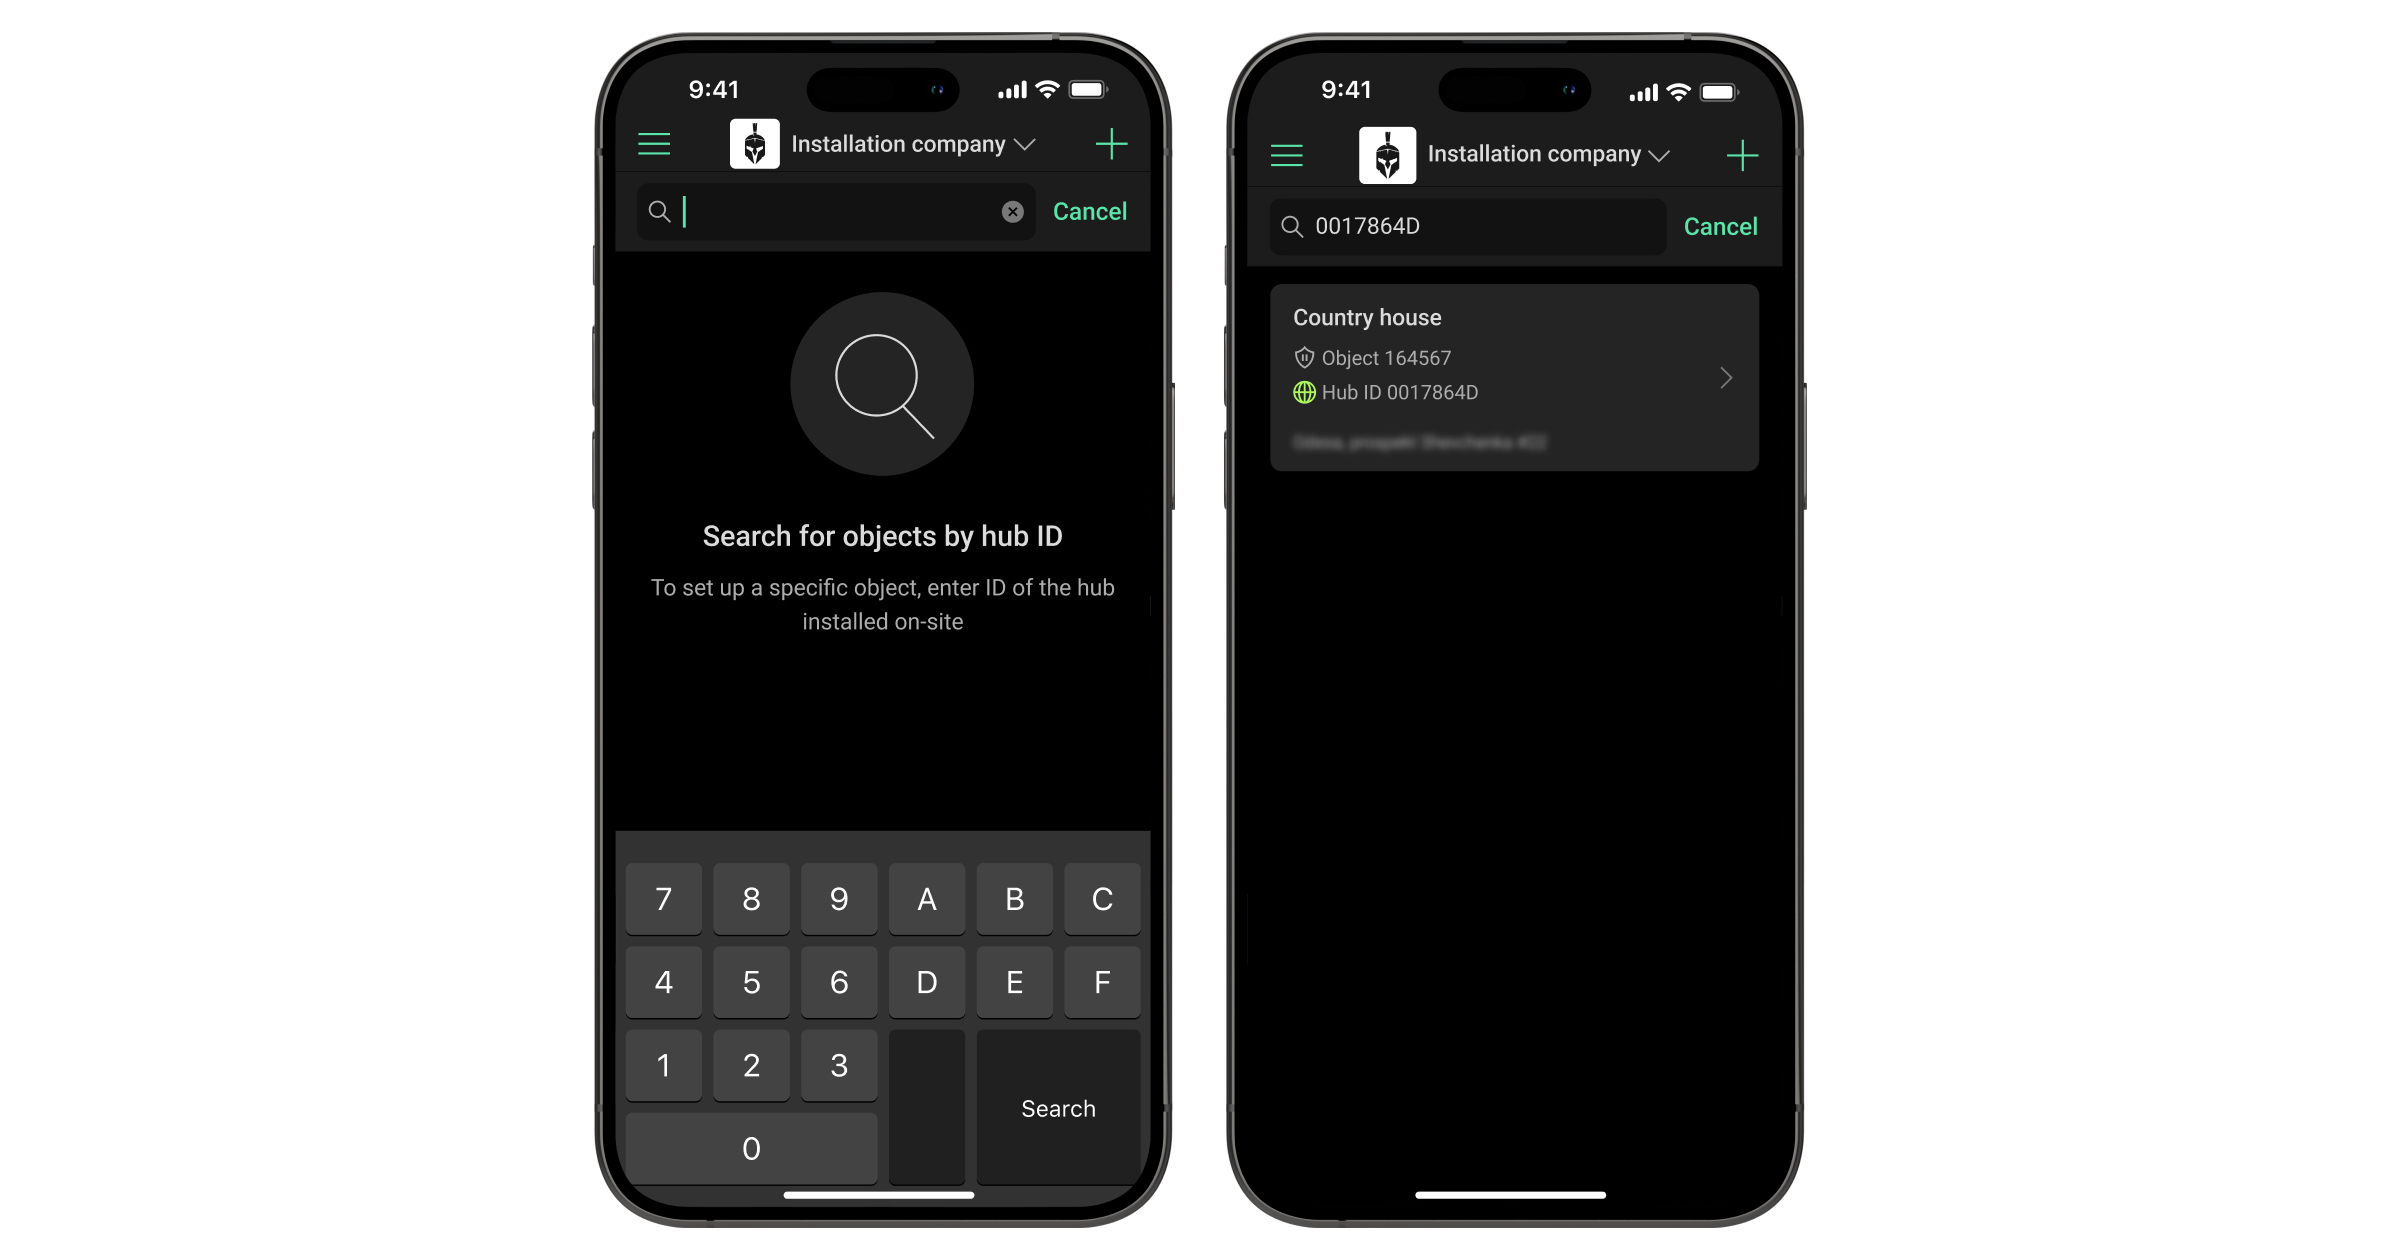
Search objects in mobile app by full hub ID is enabled