
The Ajax security system controlled by the hub with OS Malevich 2.10 and higher can be configured following the requirements of PD 6662:2017 (hereinafter referred to as PD 6662). This Published Document introduces measures to improve security systems reliability and prevent false alarms, which include:
- Alarm confirmation
- Selective system integrity check
- System restoration after alarm
- Two-stage arming
- Alarm transmission delay when disarming
- Device auto deactivation by timer
The PD 6662 features are configured only in PRO apps: Ajax PRO Desktop and Ajax PRO: Tool for Engineers.
There are two ways to configure your security system according to PD 6662 manually or using the wizard.
To use the wizard, go to the hub service settings, click PD 6662 setting wizard and follow the app prompts.
If you want to configure the system manually, set up each of the parameters according to this manual.
Apps to configure the system to comply with PD 6662
What is the Alarm confirmation feature and how to configure it
Alarm confirmation is a separate event that the hub transmits to a monitoring station and system users if a specific device or devices have been triggered several times within a specified time. By responding to confirmed alarms only, security companies and police reduce the number of unnecessary dispatches.
There are 2 types of alarm confirmation:
- Intrusion alarm confirmation
- Hold-up alarm confirmation
The Ajax apps handle the alarm confirmation events as an alarm and activate the in-app siren sound. The sirens at the object do not respond to the Hold-up alarm confirmation event. However, sirens can respond to the Intrusion alarm confirmation event if Alert with siren on alarm confirmation is enabled in the cross zone settings.
The alarm confirmation feature in OS Malevich 2.21 extends the functionality of confirmed alarms, which has been implemented in OS Malevich 2.8 and OS Malevich 2.10 versions. The update does not affect set settings and selected devices.
How to set up intrusion alarm confirmation
To enable the intrusion alarm confirmation, you need to set up at least one alarm confirmation zone (cross zone) for the system. Each zone can be set individually, dividing the protected object into separate zones.
How to set up an alarm confirmation for the hold-up device
DoubleButton is a wireless hold-up device with advanced protection against accidental alarm activation. Using the Jeweller encrypted radio protocol, the device communicates with the hub at a range of up to 1,300 meters in a line of sight. The pre-installed battery life is up to 5 years.
The hold-up alarm confirmation event is transmitted if the hold-up device is activated by two sequential presses of different types: short and long (in any sequence), or two specified DoubleButtons have been activated within the specified time. Also, confirmation of the hold-up device alarm can be sent in case of DoubleButton alarm and tamper alarm of any security detector or device.
To set up the hold-up alarm confirmation:
1. In Ajax PRO app, select the required space and go to:
- Hub → Settings
 → Service → Alarm confirmation
2. Enable Hold-up alarm confirmation.
3. Click the Devices parameter. Select at least one device that will participate in the alarm confirmation.
4. Adjust the hold-up Alarm confirmation timer of 8 to 20 hours (1-hour increments)
The hold-up alarm confirmation timer is the time during which the selected devices must be activated to generate the alarm confirmation event.
5. Click Save to save the settings.
What is the selective System integrity check feature and how to configure it
System integrity check is a parameter responsible for checking the status of all security detectors and devices before arming. Integrity check is disabled by default.
When setting up, you can choose the hub states to be included in the integrity check:
- Battery charge level
- Power supply availability
- Lid state
- Noise level
- Server connection status
- Monitoring station connection
Please note,when System integrity check is enabled, the statuses of other security devices (tampers, battery level, states of bistable detectors) are checked regardless of the selected hub states.
To set up system integrity check:
1. In Ajax PRO app, go to:
- Hub → Settings → Service → System integrity check
2. Enable System integrity check.
3. Select the states of the hub, which should be taken into account when checking the system integrity before arming (all states are enabled by default).
4. Enable the Arming permission option, if necessary. When enabled, the system users can arm the system even with malfunctions.
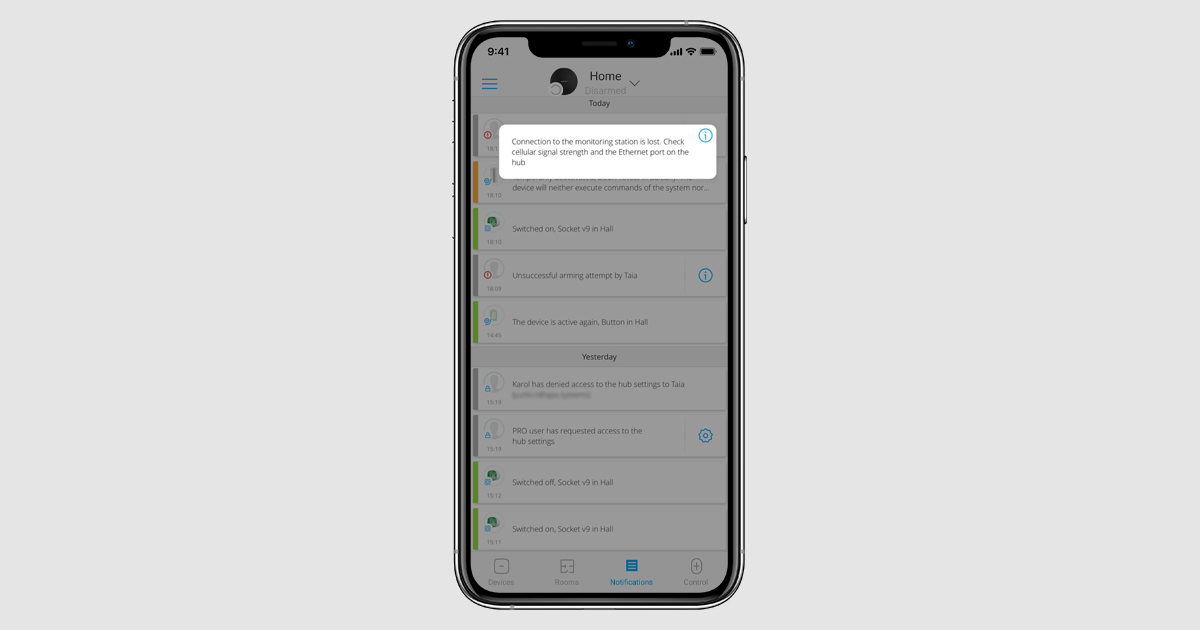
When arming with malfunctions, users and a monitoring station receive relevant notifications. The list of system malfunctions opens in Ajax apps when tapping on the i icon located in the notification feed entry.
5. Click Back to save the settings.
What is the Restoration after alarm feature and how to configure it
The feature prevents the system from being armed if an alarm has been activated or a malfunction has been detected previously. To arm the system, an authorized user or PRO should restore it. The types of alarms and malfunctions that require system restoration are specified when setting up the feature.
The Restoration after alarm feature eliminates situations when the user arms the system having detectors that generate false alarms.
How the Restoration after alarm feature works
After an alarm or malfunction occurs, the Ajax app displays a warning icon ![]() that opens the system restoration window. The system restoration window is also displayed when arming the system, group, or activating Night mode.
that opens the system restoration window. The system restoration window is also displayed when arming the system, group, or activating Night mode.
To arm the system, all alarms or malfunctions must be reset. Only authorized users or PROs can restore the system after alarms or malfunctions.
If a user doesn’t have the right to reset the alarm or malfunction, they can send a corresponding request. To do this, click on the icon ![]() and select Send request.
and select Send request.
After sending a request, all users or PROs with access to the system restoration after an alarm or malfunction will receive notifications.
How to set up system restoration after alarm or malfunction
1. In Ajax PRO app, go to:
- Hub → Settings → Service → Restoration after alarm
2. Specify the types of events that require system restoration:
- Lid opening
- Single intrusion alarm
- Single hold-up alarm
- Confirmed intrusion alarm
- Confirmed hold-up alarm
- External power failure
- Server connection loss
- Other malfunctions
To comply with PD 6662, set the restoration after Intrusion alarm confirmation and Hold-up alarm confirmation (if the DoubleButton is added and Hold-up alarm confirmation activated).
3. Click Back to save the settings.
4. Grant restoration permissions to system users. This can be done in the Ajax app (Hub → Settings ![]() → Users → User Settings → Restoration After Alarm).
→ Users → User Settings → Restoration After Alarm).
Please note that restore permissions are configured for each user separately, and each user can have permissions for different types of alarms.
What is the Two-stage arming feature and how to configure it
When the feature is enabled, the system requires additional confirmation before activating security. With this feature enabled, the system can be armed in 4 ways:
- Using the app
- Using a control device and second-stage detector
- Using two control devices
- Using a single control device
Please note that two-stage arming does not apply to the Night mode. It can be activated as usual. Scheduled arming is subject to the same settings as for arming using the app. In case of an unsuccessful scheduled arming attempt, system users will receive relevant notifications.
When the feature is enabled, the set exit delays are ignored. Instead, Arming completion timer or Arming delay timer (if arming is initiated via the app) are in effect.
For the convenience of users, Ajax sirens can notify about arming, delays, and unfinished arming, if such options are enabled in the siren settings.
- If the external power supply of the wireless street siren is not connected or Superior HomeSiren Jeweller / HomeSiren Jeweller is used: the siren beeps approximately once a second, this interval gradually increases; after 7.5 minutes, the siren beeps every 15 minutes.
- If the wireless street siren external power supply is connected or Superior HomeSiren Fibra / Superior StreetSiren Fibra / Superior StreetSiren DoubleDeck Fibra / Superior StreetSiren Plus Fibra is used: the siren beeps approximately once a second until arming is canceled or finished.
This feature is supported by:
- StreetSiren Jeweller / Superior StreetSiren Fibra / Superior StreetSiren DoubleDeck Jeweller / Superior StreetSiren DoubleDeck Fibra / StreetSiren DoubleDeck Jeweller / Superior StreetSiren Plus Jeweller / Superior StreetSiren Plus Fibra (with firmware version 3.72 and later)
- Superior HomeSiren Jeweller / Superior HomeSiren Fibra / HomeSiren Jeweller (with firmware version 5.55.2 and later)
If the firmware version is lower, the siren will not indicate unfinished arming.
The option works if the Beep on entry/exit delay option is enabled in the siren settings.
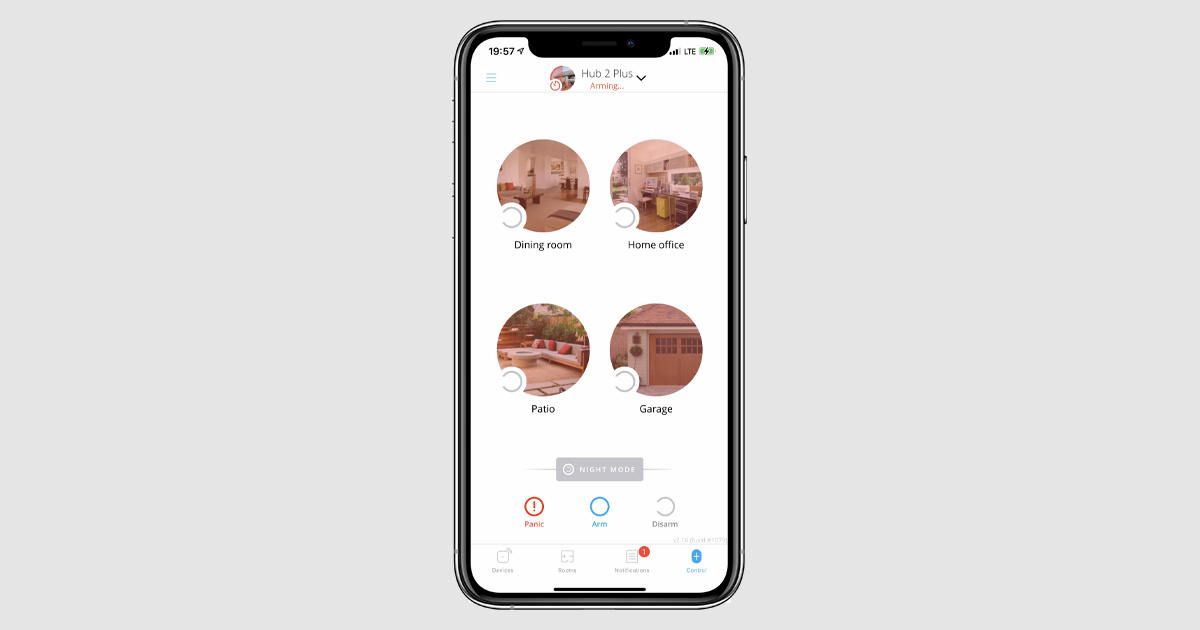
Arming using the app
The system activates security if no detector is triggered within a specified period of time after arming via the app. This reduces the risk of accidentally arming the system and receiving a false alarm while there are still people inside.
Ajax sirens can beep during the Arming completion timer if it is enabled in their settings. The countdown before arming is also displayed in the app.
If any of the system detectors is triggered during the countdown, arming will be canceled and users will be notified. The CMS does not receive a notification about canceled arming.
Arming with control device and second-stage device
The security mode is activated after arming using Ajax SpaceControl Jeweller, Ajax SpaceControl S Jeweller, or the Ajax keypad* followed by restoration of the second-stage detector (returning to its initial state).
This way, it is possible to activate the armed mode after closing the front door in order to avoid false alarms when leaving the room later than the exit delay time expires.
Detectors that can perform as a second-stage device:
- Superior DoorProtect Jeweller / DoorProtect Jeweller / Superior DoorProtect Fibra and/or wired detectors connected to it
- Superior DoorProtect Plus Jeweller / DoorProtect Plus Jeweller / Superior DoorProtect Plus Fibra / Superior DoorProtect G3 Fibra and/or wired detectors connected to it
- Wired detectors connected to Superior GlassProtect Jeweller / GlassProtect Jeweller / Superior GlassProtect Fibra
- Bistable detectors connected to Transmitter Jeweller / Superior Transmitter Fibra / MultiTransmitter Jeweller / Superior MultiTransmitter Fibra
If the selected second-stage detector is not restored, the system stays disarmed and does not register alarms. Users and a monitoring station will receive a notification about unfinished arming.
To finish arming, the second-stage detector should be restored. For example, by closing the front door on which the DoorProtect detector, selected as a second-stage device, installed.
If you don’t want to finish arming, disarm the security system using Ajax SpaceControl Jeweller, Ajax SpaceControl S Jeweller, the Ajax keypad*, or in the Ajax app.
If the detector was in its normal state when arming, to finish arming, you need to trigger the detector and return it to normal state.
For example, if the front door (on which the second-stage DoorProtect is installed) was closed when pressing the Arm button, to finish arming, the door needs to be opened and closed again.
Arming using two control devices
The system can be armed using different control devices — for example, using the Ajax keypad*, Ajax SpaceControl S Jeweller, and Ajax SpaceControl Jeweller. The last device used for arming should be marked as a second-stage device. The feature helps to avoid false alarms due to unintentional security activation.
Only the Ajax SpaceControl Jeweller and Ajax SpaceControl S Jeweller key fobs can be selected as the second-stage device.
If the second-stage device does not activate the security mode within the specified time, the system remains disarmed (goes into an unfinished arming state) and does not register alarms. Users and a monitoring station receive relevant notifications.
To finish arming, it is necessary to activate the security mode using the selected Ajax SpaceControl Jeweller or Ajax SpaceControl S Jeweller.
If you don’t want to finish arming, press the disarm button on Ajax SpaceControl Jeweller, Ajax SpaceControl S Jeweller, the Ajax keypad*, or the Ajax app.
Arming using a single control device
Two-stage arming can be performed using single Ajax SpaceControl Jeweller or Ajax SpaceControl S Jeweller. The first press of the Arm launches the Arming completion timer.The second one confirms arming..
If the selected Ajax SpaceControl Jeweller or Ajax SpaceControl S Jeweller does not activate the security mode by the second pressing within the specified time, the system goes into an unfinished arming state and does not register alarms. Users and a monitoring station receive relevant notifications.
To finish arming, it is necessary to activate the security mode using the selected Ajax SpaceControl Jeweller or Ajax SpaceControl S Jeweller.
If you don’t want to finish arming, disarm the security system using Ajax SpaceControl Jeweller, Ajax SpaceControl S Jeweller, the Ajax keypad*, or the Ajax app.
How to set up two-stage arming
To set up two-stage arming using a control device:
1.In Ajax PRO app, go to:
- Hub → Settings → Service → Arming/disarming process.
2. Enable Two-stage arming.
3. Set the Arming completion timer to the value of 60 to 240 seconds (5-second increments).
Arming completion timer is the time during which the second-stage device (for example, Ajax SpaceControl S Jeweller or Ajax SpaceControl Jeweller) should be activated in order to confirm the arming.
4. Tap on Second stage device and select the devices (minimum 1). You can select several key fobs or a single key fob + detector.
5. If necessary, specify the value for the Opening detector stabilization timer of 0 to 5 seconds (1-second increments).
Opening detector stabilization timer is the time during which the system ignores any detector triggerings after the door is closed. The timer helps to avoid false alarms due to residual vibration of the door after closing.
If you use DoorProtect S Plus Jeweller, DoorProtect Plus Jeweller, or Superior DoorProtect Plus Fibra, the system also ignores alarms from the accelerometer and on the tilt angle change during the specified time.
To set up two-stage arming via the app:
1. In Ajax PRO app, go to:
- Hub → Settings → Service → Arming/disarming process.
2. Enable Two-stage armingin.
3. Set the Arming delay timer of 30 to 60 seconds (5-second increments). Please note that when this option is enabled, the system ignores exit delays.
Arming delay is the time during which the room should remain empty to complete the second stage of arming. If any detector is triggered during the countdown, the arming is canceled and the hub remains Disarmed.
Alarm transmission delay when disarming
The disarming process according to PD 6662 requires the activation of the Alarm transmission delay feature as well as disabling the Ajax keypad* to disarm the system before the Delay when entering expires.
Alarm transmission delay allows you to postpone the alarm transmission if the entry delay has expired and the security system has not been disarmed. When the entry delay expires, the system raises an alarm locally: it activates the connected sirens but does not transmit the alarm to a monitoring station and security system users. This provides users with additional time to disarm the system without a false alarm for a security company.
To set up the disarming process:
1. In Ajax PRO app, go to:
- Hub → Settings → Service → Arming/disarming process.
2. Set the Alarm transmission delay of 0 to 60 seconds (5-second increments).
The Alarm transmission delay starts only after the entry delays have expired.
3. Activate the Allow disarming by keypadoption, if necessary. The option allows using the keypad as an alternative device for disarming.
According to PD 6662, the security system cannot be disarmed using the keypad until the Alarm transmission delay has expired. Please note, the system does not comply with PD 6662 if this option is enabled
4. Click Back to save the settings
Device auto deactivation by timer
The Ajax security system can ignore alarms or other events of devices without removing them from the system. Under certain settings, notifications about events of a specific device are not transmitted to a monitoring station CMS and security system users.
The Devices auto deactivation feature is used to automatically exclude devices from operation. It can be of two types: by the timer and by the number of alarms.
In order for the security system to comply with PD 6662, the value of the Restoration timer parameter should match the value of the Intrusion confirmation timer.
How to set up devices auto deactivation on a timer
1. In Ajax PRO app, go to:
- Hub → Settings → Service → Devices auto deactivation
2. Set the Restoration timer value to match the Intrusion confirmation timer value.
3. Click Back to save the settings.
* — KeyPad TouchScreen Jeweller, Superior KeyPad Plus Jeweller, and Superior KeyPad Outdoor Fibra comply with PD 6662:2017.
LED indication settings
You can configure the hub’s LED indication in accordance with PD 6662. Hub’s LED will inform of alerts and malfunctions, as well as arming/disarming events and delays when entering/leaving.
1. In Ajax PRO app, go to:
- Hub → Settings → Service → LED indication
2. Select British disco.
3. Click Back to save the settings.
More information about British disco LED indications you can find here.