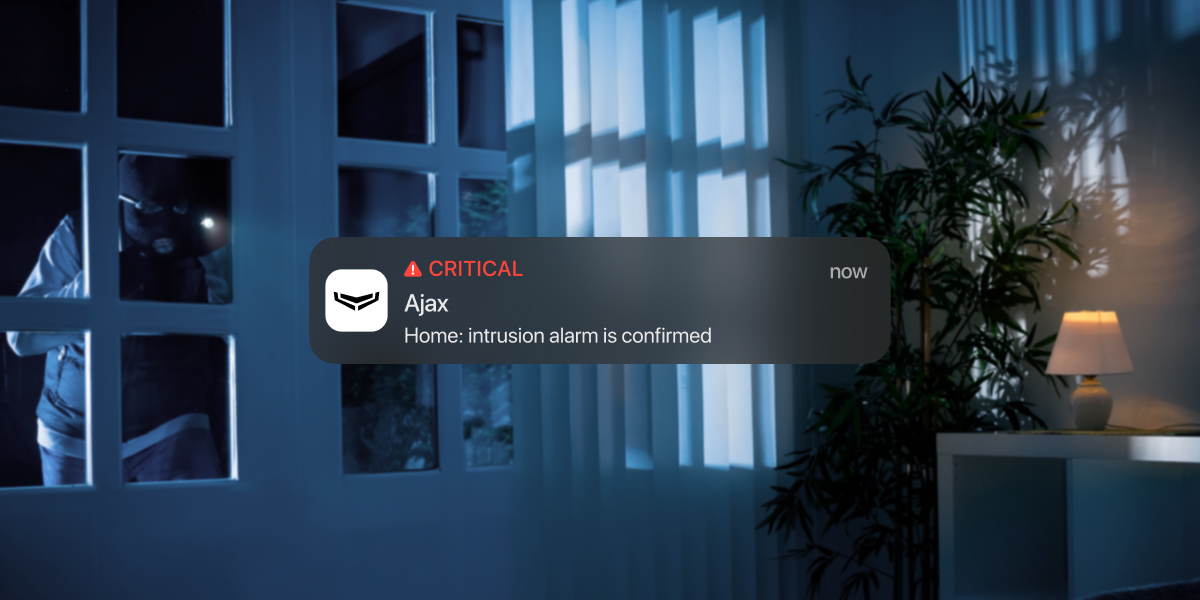
Alarm confirmation is a separate event the hub transmits to a monitoring station and system users if the particular device or devices have been triggered within a set time. By reacting only to confirmed alarms, a security company and police reduce unnecessary dispatches.
The alarm confirmation feature in OS Malevich 2.21 extends the functionality of confirmed alarms, which has been implemented in OS Malevich 2.8 and OS Malevich 2.10 versions. The update does not affect set settings and selected devices.
The alarm confirmation feature introduces additional events to be transmitted to a monitoring station and users. At the same time, you can configure how the system reacts and notifies in case of an unconfirmed alarm.
The feature is configurable only in Ajax apps for PROs.
The feature complies with PD 6662:2017 and ANSI/SIA CP-01-2019 requirements. Follow the links to learn how to set up the Ajax system according to these standards:
How the alarm confirmation feature works
Confirmed alarm event (condition) can be received by monitoring software supporting SIA (DC-09), ADEMCO 685 or Contact ID. Also, the alarm confirmation feature is available in PRO Desktop — a monitoring app by Ajax Systems.
The confirmed alarm event structure completely replicates the alarm message structure but differs in the code: BV instead of BA for SIA and E139 instead of E130 for Contact ID and ADEMCO 685. The group and zone ID for these messages is 0.
There are 2 types of alarm confirmation:
- Intrusion alarm confirmation: intrusion detectors (opening, motion), keypads, sirens, integration modules, and panic buttons (including in mobile Ajax apps) are involved.
- Hold-up alarm confirmation: only hold-up devices (DoubleButton Jeweller) are involved.
The intrusion and hold-up alarm confirmations work independently. Please note that fire and leak detectors cannot be involved in alarm confirmation.
How intrusion alarm is confirmed
If a device that is involved in intrusion alarm confirmation is triggered when the system is armed:
- The system starts the Intrusion confirmation timer and activates sirens, sends warnings, or does not notify about the single triggering, depending on the Reaction to single alarm configuration in the cross zone settings.

The Intrusion confirmation timer counts the time during which the selected devices must be triggered for the alarm to be confirmed. If a triggered detector does not participate in the intrusion alarm confirmation, the timer does not start.
- If the required number of triggerings occurs in the same cross zone until the Intrusion confirmation timer expires, the system transmits a confirmation event to users and a monitoring station.
The Ajax apps handle the Intrusion alarm confirmation event as an alarm and activate the in-app siren sound. The sirens at the object are activated if Alert with siren on alarm confirmation is enabled in the cross zone settings.
The intrusion alarm confirmation feature considers the following events, even if the system is not armed at the moment:
- The device is triggered in the Always active mode.
- Tamper is triggered when Allow alarm confirmation by lid opening event is enabled in the cross zone settings.
- Accelerometer is triggered when Alert if moved is enabled in the device settings.
- Masking is detected when Anti-masking protection is enabled in the device settings.
An intrusion alarm confirmation event is not transmitted if:
- The Intrusion confirmation timer expires before the required number of triggerings occurs in the same cross zone.
- Devices that are not involved in intrusion alarm confirmation have been triggered.
How hold-up alarm is confirmed
|
What is DoubleButton Jeweller DoubleButton Jeweller is a wireless hold-up device with advanced protection against accidental activation. The device communicates with the hub via the encrypted Jeweller radio protocol; the communication range in a sight line is up to 1,300 meters. The pre-installed battery powers the device for up to 5 years. |
Hold-up alarm confirmation is transmitted if DoubleButton is activated by pressing in two ways: short and long (in any sequence) or two specified DoubleButton devices have been activated within a specified time. A hold-up alarm is confirmed when a DoubleButton alarm is followed by a tamper alarm of any security device (and vice versa).
The Ajax apps handle the Hold-up alarm confirmation event as an alarm and activate the in-app siren sound.The sirens at the object do not respond to an alarm confirmation event but do respond to regular alarms (if enabled).
Note that a hold-up alarm confirmation event is not transmitted if:
- DoubleButton was activated by pressing in only one manner. For instance, DoubleButton was activated twice with a short press.
- DoubleButton and Button in the panic mode were pressed.
- DoubleButton and in-app panic button were pressed.
- DoubleButton and the panic button on the KeyPad or KeyPad Plus have been pressed.
How to enable intrusion alarm confirmation
To enable the intrusion alarm confirmation, you need to set up at least one alarm confirmation zone (cross zone) for the system. Each zone can be set individually, dividing the protected object into separate zones.
To create and configure a cross zone in the Ajax PRO app:
- Select the required space and go to:
- Hub → Settings
 → Service → Alarm Confirmation
- Hub → Settings
- Click Add cross zone to create a new one.
- Enter a name for the cross zone and click Add.
- Select at least one device and configure other cross zone settings in the next dialogue.
While selecting the devices for the cross zone, consider their reciprocal placement at the protected object. Note that the same device can be added to several cross zones.
Setting Description Name Alarm confirmation zone name. Displayed in the SMS text and notifications in the event feed.
To change the name, click on the text field. The name can contain up to 24 Latin characters or up to 12 Cyrillic characters.
Devices Menu to select devices for the specified cross zone. The sequential triggerings of the selected devices will confirm the alarm in the zone.
If the group mode is enabled, the devices are bunched into groups accordingly.
At least one device must be selected for this option.
Intrusion confirmation timer Sets the time during which the alarm can be confirmed by the following triggerings of the devices in the same cross zone.
You can set from 30 minutes to 1 hour. The default value is 30 minutes.
The countdown is started by the first device triggering and restarted by each following single triggering until the alarm gets confirmed.
Reaction to single alarm Sets how the system should notify of single intrusion alarms. The reaction is applied only to the particular cross zone and events triggered by its devices.
Four options are available:
- Alarm (set by default) — the system notifies of a single device triggering as of a regular alarm.
- Postponed warning — the system notifies of a single device triggering if the alarm was confirmed or after the Intrusion confirmation timer expires if the alarm was not confirmed. Sirens will not be activated in case of a single triggering.
- Warning — the system notifies of a single device triggering as of a regular event without raising an alarm and activating the sirens.
- Don’t notify — the system does not notify of a single triggering if the alarm is not confirmed.
Number of triggerings to confirm alarm Sets the number of triggerings that should occur to confirm the alarm. You can set from 2 to 5 triggerings.
The default value is 2.
Consider numerous triggerings of the device If enabled, repeated triggerings of one device in the zone can be considered as a reason to confirm the alarm.
This option is disabled by default.
Restore auto-deactivated devices after confirmation timer expiration If enabled, the devices that were automatically deactivated during the unconfirmed alarm will be re-activated once the Intrusion confirmation timer expires so that other possible alarms can be confirmed.
This option is disabled by default.
Alert with siren on alarm confirmation If enabled, the sirens and keypads with buzzers will alert when the alarm confirmation event occurs.
This option is enabled by default.
Allow alarm confirmation by lid opening event If enabled, an intrusion can be confirmed even if the only alarms in the zone were lid opening events.
This option is disabled by default.

Lid opening events are considered alarms regardless of the system arm mode.
Include devices with entry delay If enabled, an alarm can be confirmed by triggering devices with Delay When Entering enabled that are added to the zone. The device should be triggered during the intrusion confirmation time.
This option is enabled by default.
When the option is disabled, each triggering of a device with Delay When Entering restarts the Intrusion confirmation timer.
Scenarios Opens the menu for creating and configuring automation scenarios.
Use scenarios to set what actions automation devices should execute on alarm confirmation in the cross zone.
Delete zone Deletes the alarm confirmation zone. - Click Save to apply the changes.
The maximum number of cross zones you can create depends on the hub model.
| Hub model | Number of cross zones |
| Hub (2G) Jeweller | The feature is not supported |
| Hub (4G) Jeweller | 1 |
| Hub Plus Jeweller | 25 |
| Hub 2 (2G) Jeweller and Hub 2 (4G) Jeweller | 9 |
| Hub 2 Plus Jeweller | 25 |
| Hub BP Jeweller and Hub BP Jeweller (without casing) | 9 |
| Ajax Superior Hub G3 Jeweller | 25 |
| Ajax Superior Hub Hybrid (2G), Ajax Superior Hub Hybrid (4G), and Ajax Superior Hub Hybrid (4G) (without casing) | 9 |
| Ajax Superior Hub Hybrid 2 and Ajax Superior Hub Hybrid 2 (without casing) | 25 |
| Ajax Superior MegaHub and Ajax Superior MegaHub (without casing) | 100 |
| EN54 Fire Hub Jeweller | 25 |
If the group mode is enabled for your system, the confirmed alarm will activate the sirens added to the same group with the device that has confirmed the alarm.
Also, you can add Superior Button Jeweller, Button Jeweller, Ajax SpaceControl Jeweller, and any third-party alarm devices connected via integration modules to the cross zone. The in-app Panic button and DoubleButton Jeweller can not be added to the cross zone.
How to enable hold-up alarm confirmation
- In the Ajax PRO app, select the required space and go to:
- Hub → Settings → Service → Alarm confirmation
- Hub → Settings
- Enable Hold-up alarm confirmation.
- Click the Devices parameter. Select at least one device to be involved in alarm confirmation.
- Adjust the hold-up Alarm confirmation timer — from 8 to 20 hours (increments of 1 hour).
The hold-up Alarm confirmation timer counts the time during which the selected devices must be activated for the alarm to be confirmed.
- Click Save to save the settings.