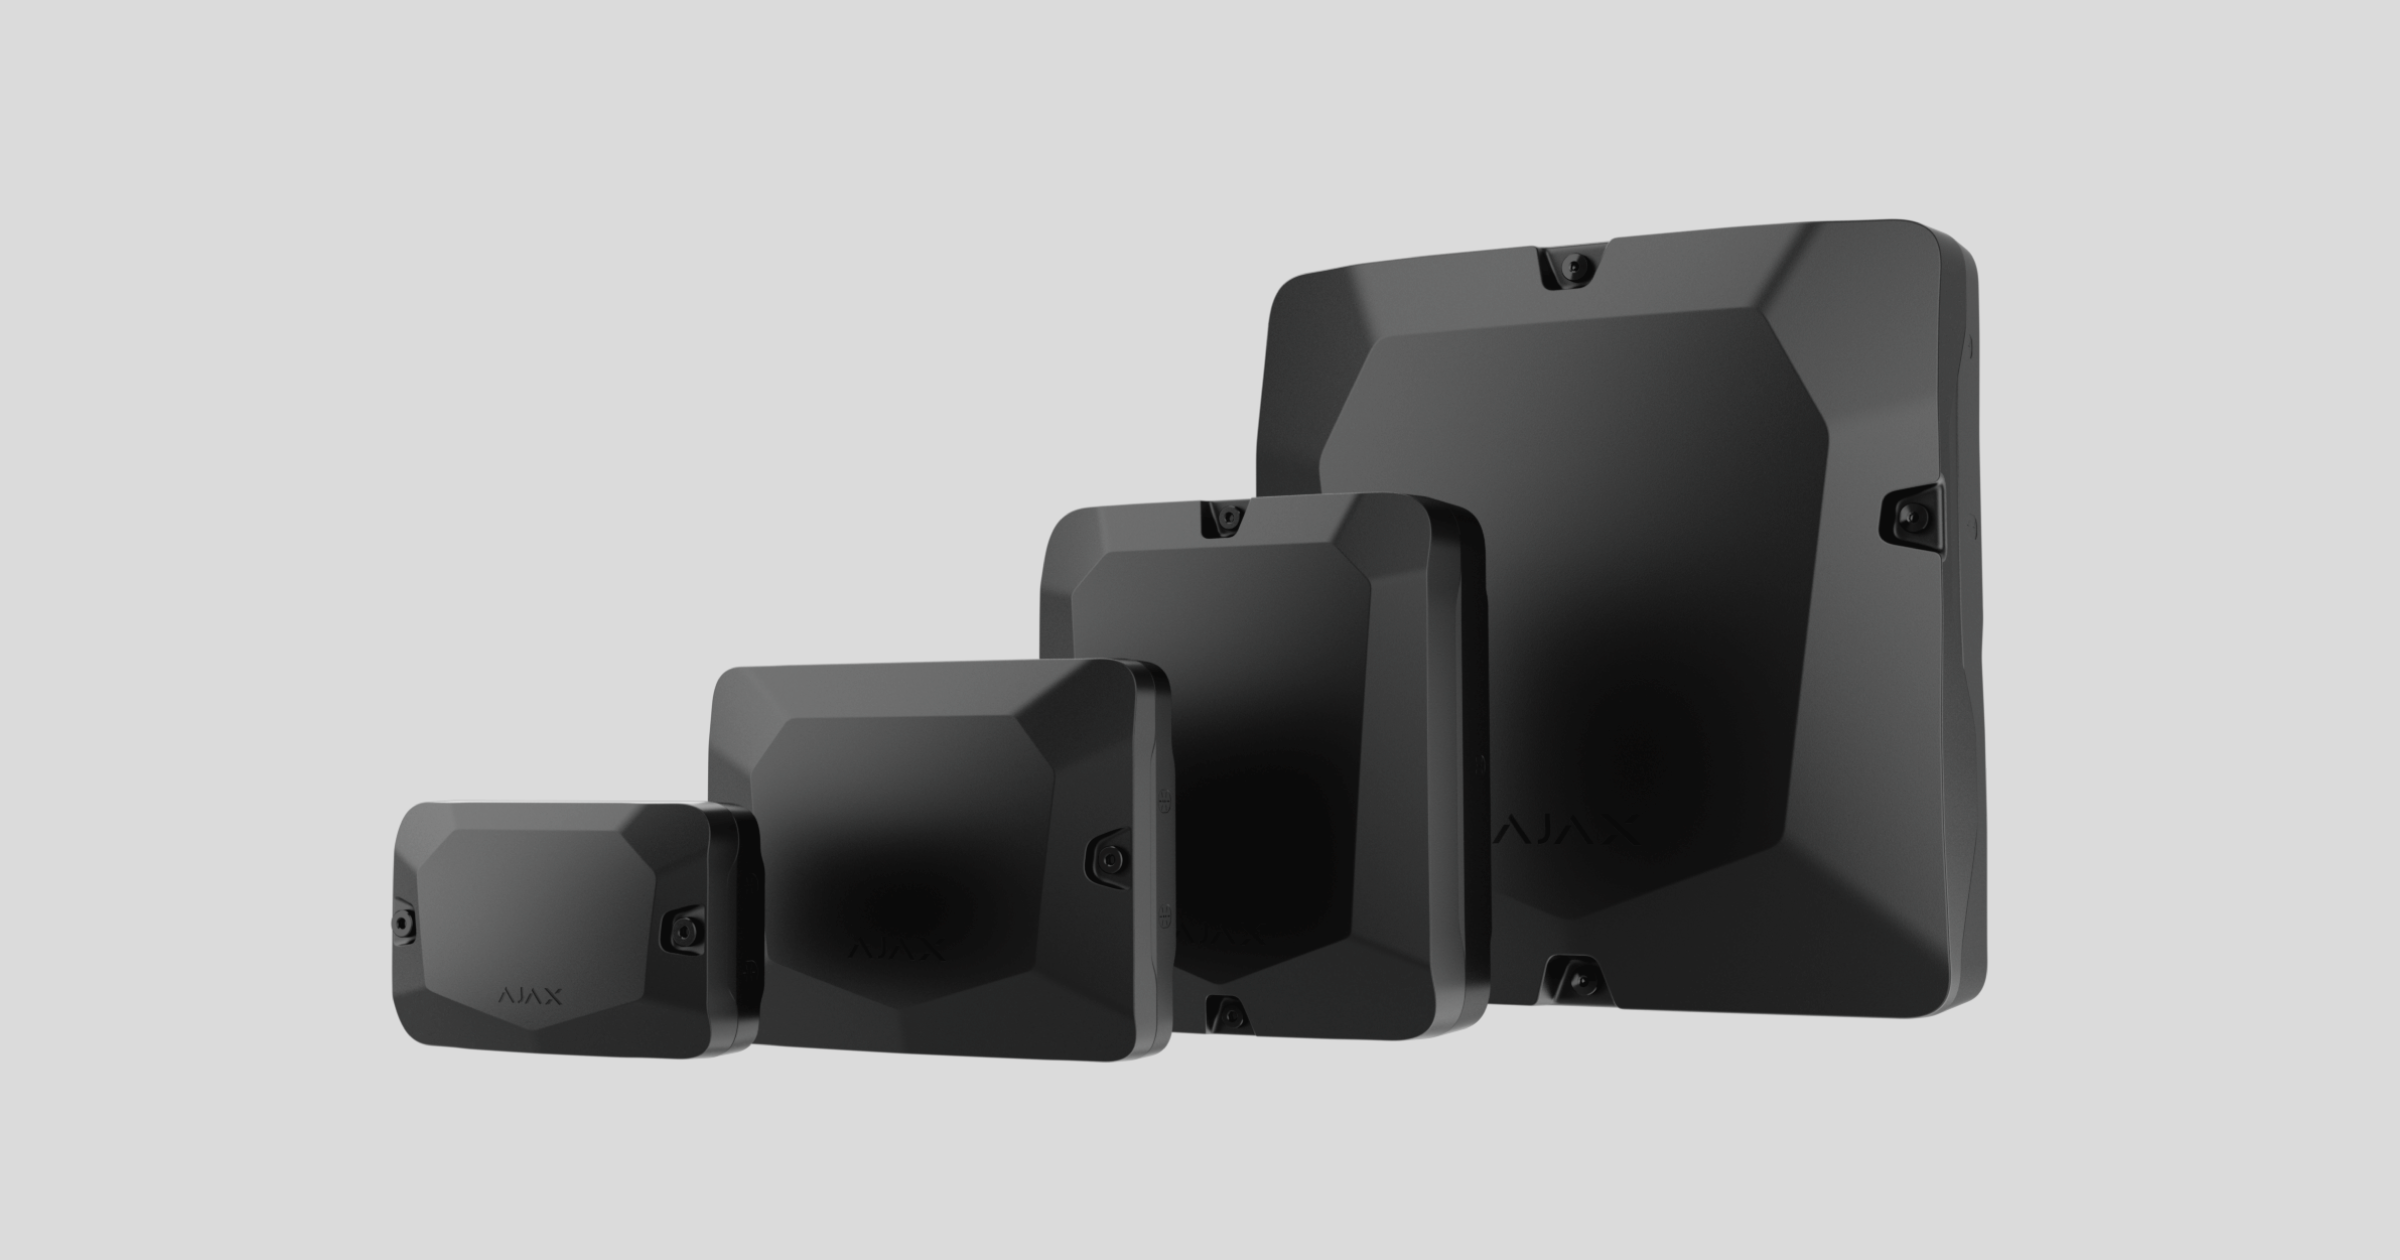
Case is the casing designed to install one or more compatible Ajax devices. The complete set includes the tamper board to protect devices from sabotage. Case has fasteners to fix the cables and channels for convenient cable organization. The casing is intended for indoor use only.
Case is produced in several versions. Each model has a different number of slots depending on the device combination:
- Case A (106) — one Ajax device;
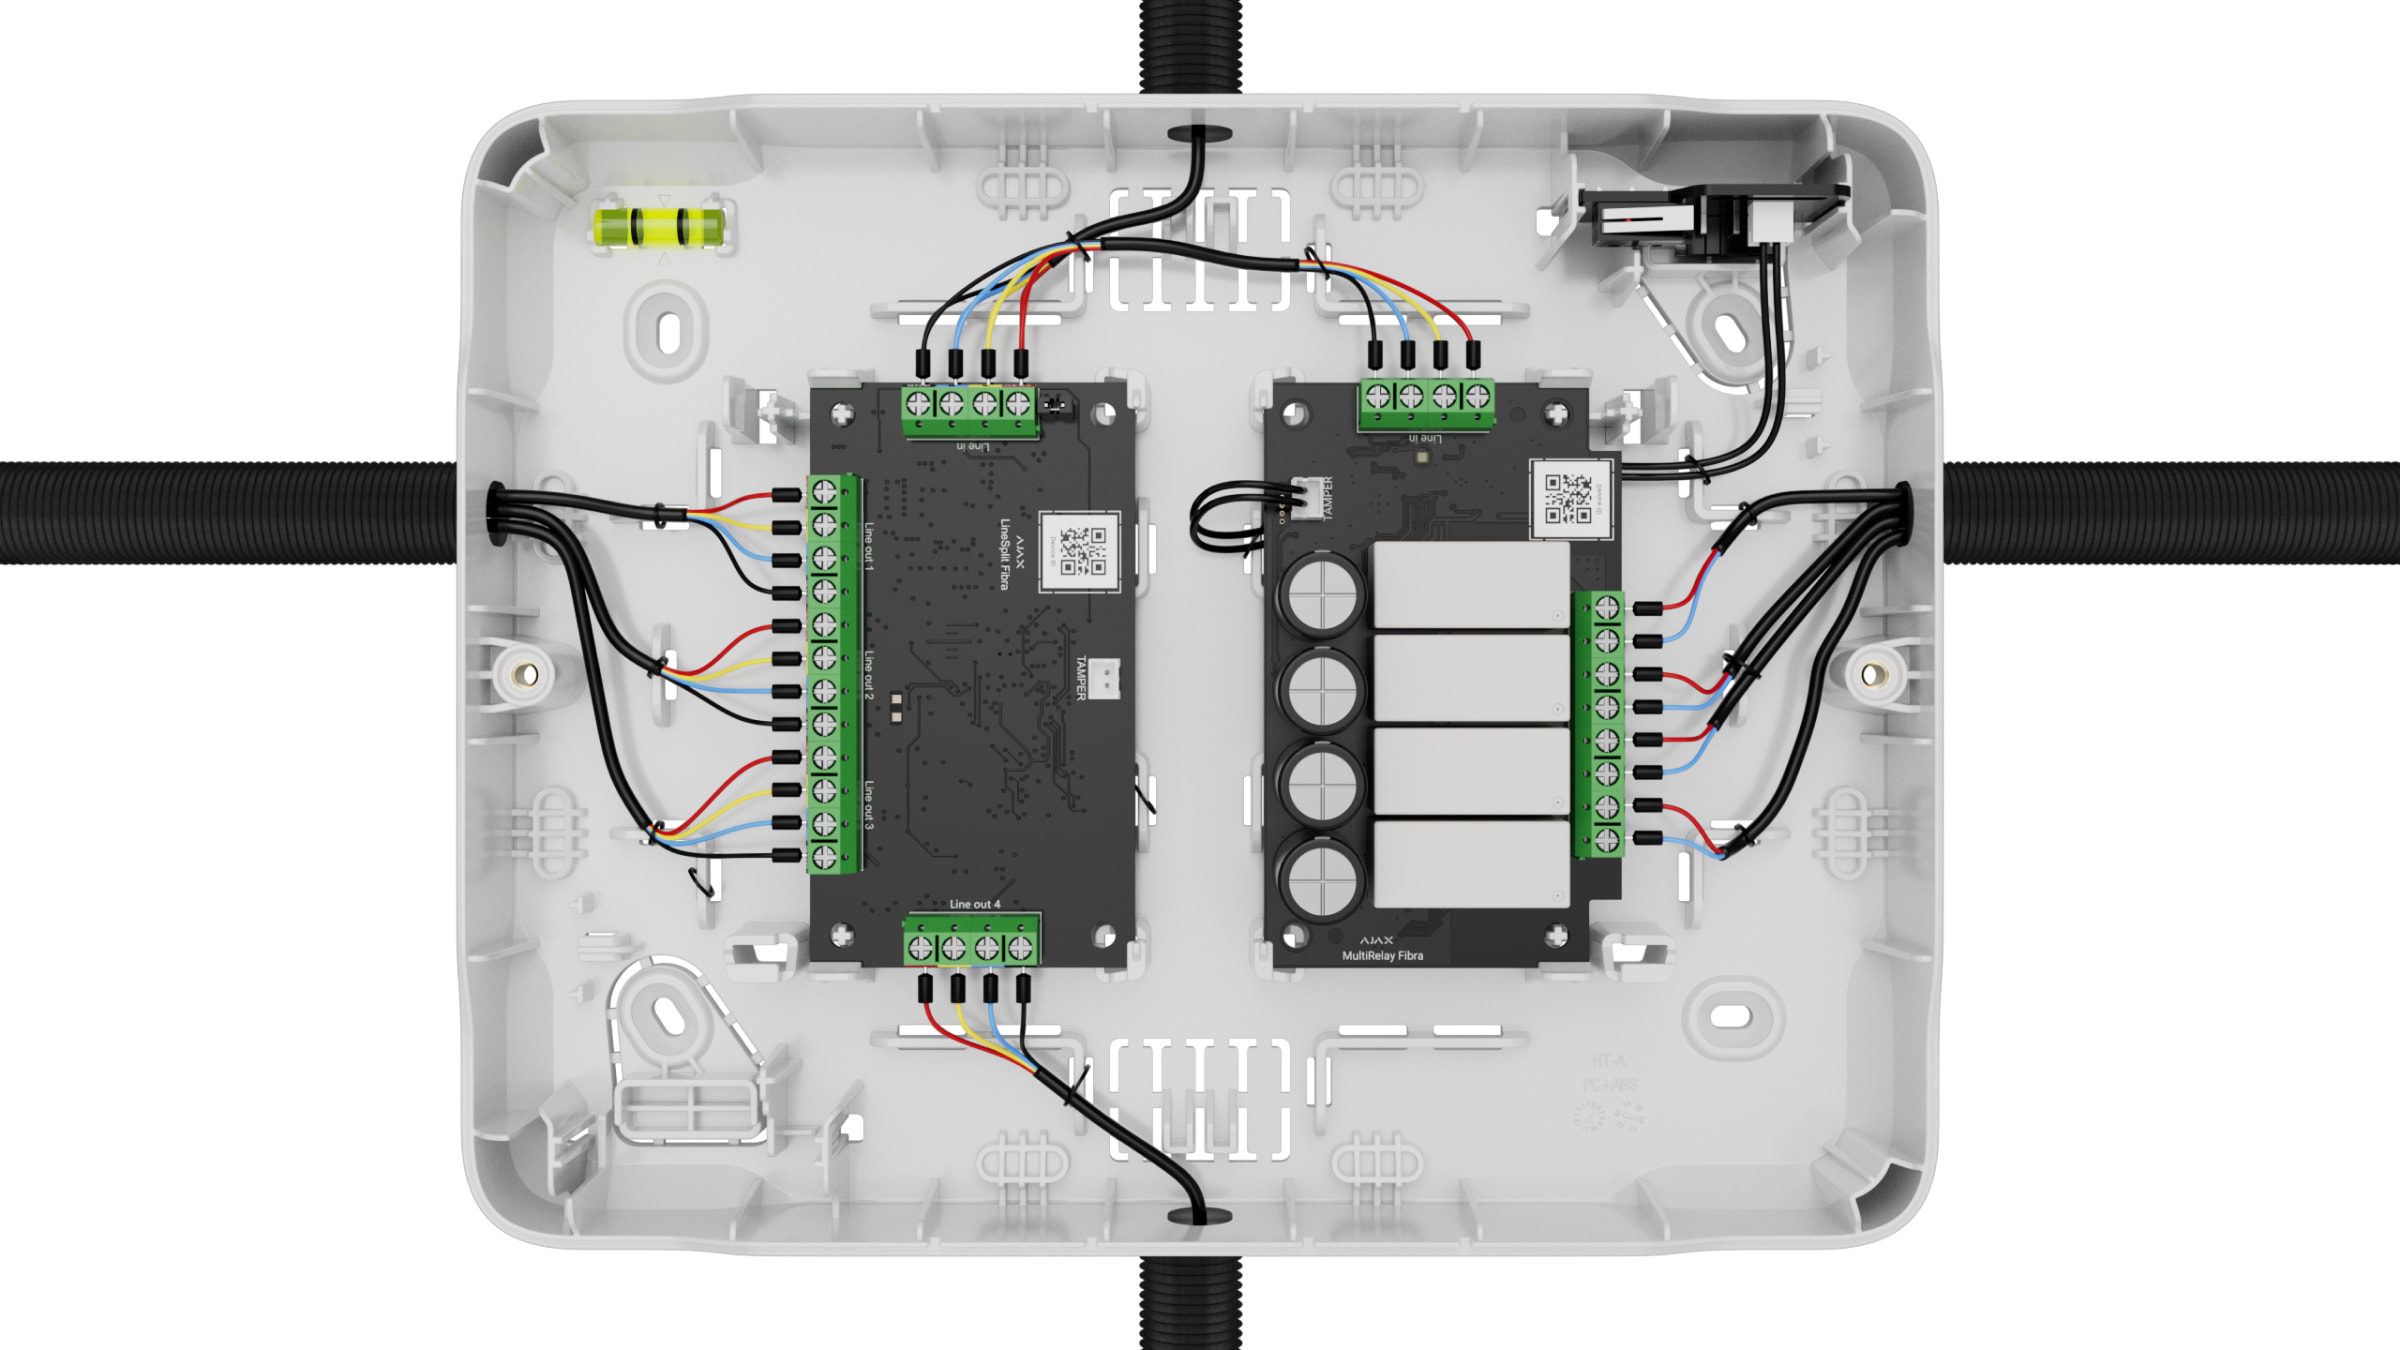
- Case B (175) — up to two Ajax devices;
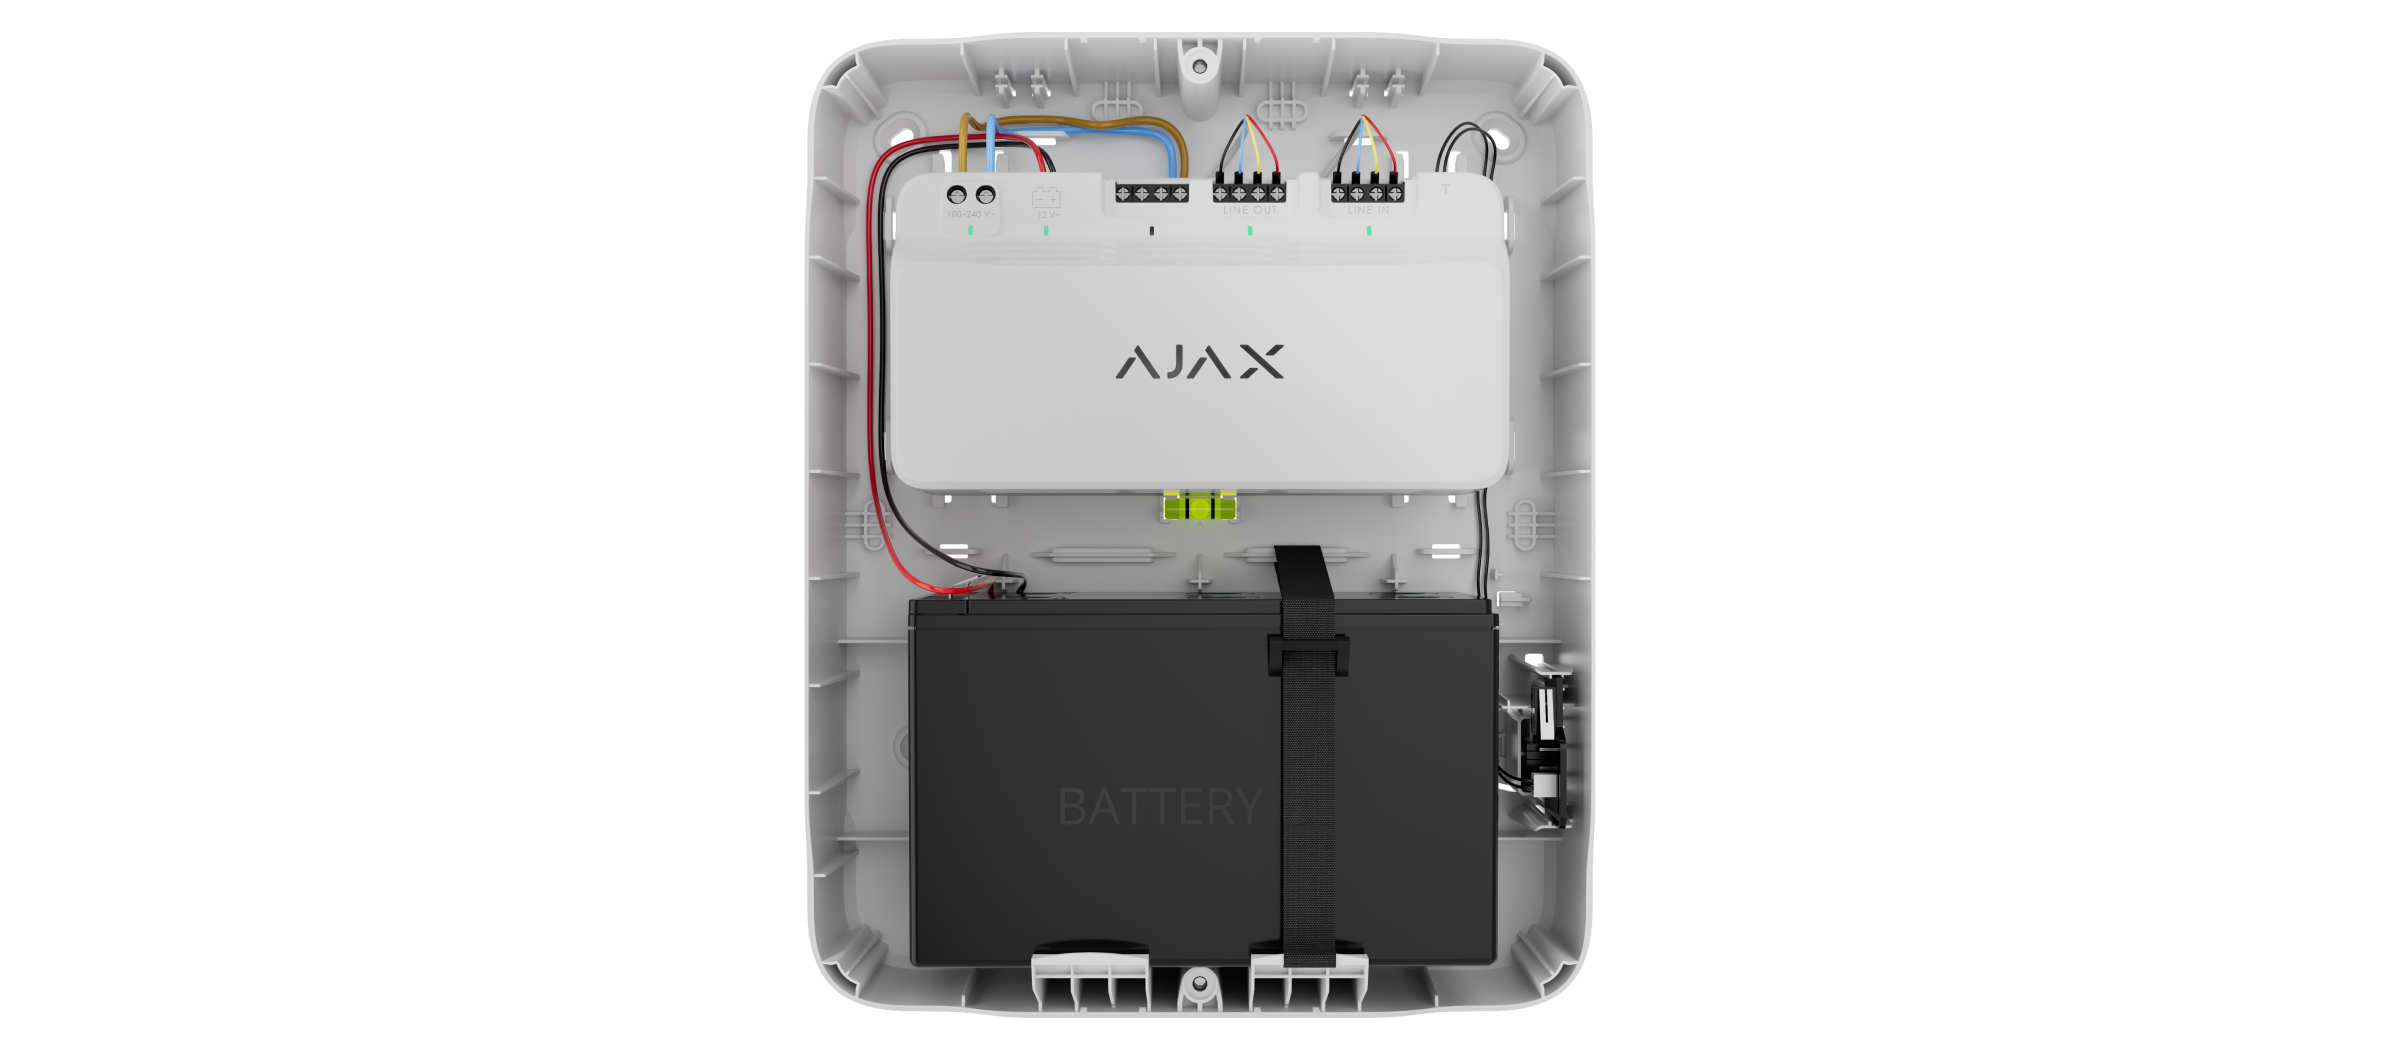
- Case C (260) — one Ajax device and 7 Ah battery;
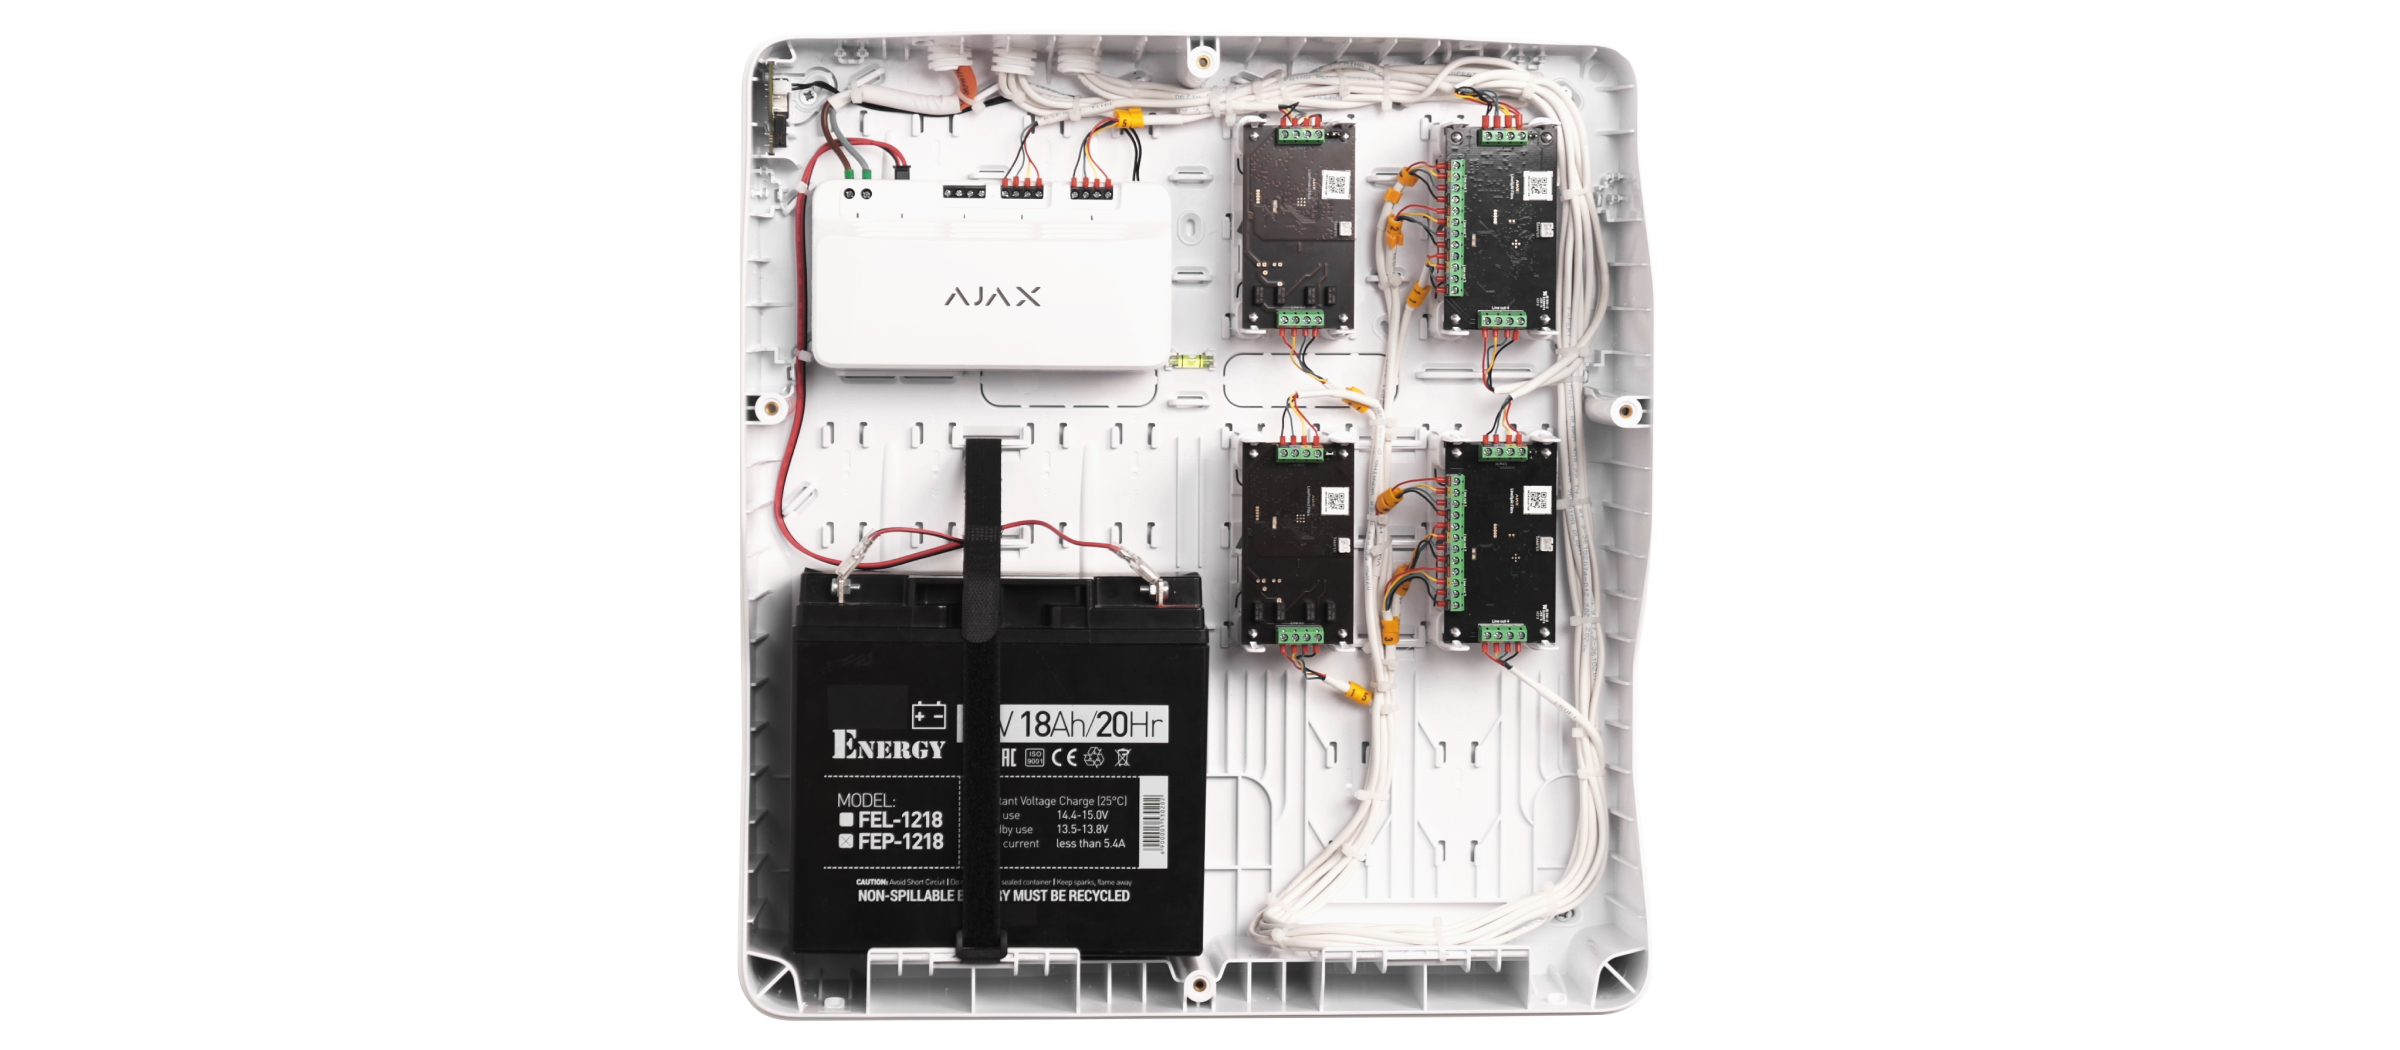
- Case D (430) — up to eight devices and two 18 Ah batteries.
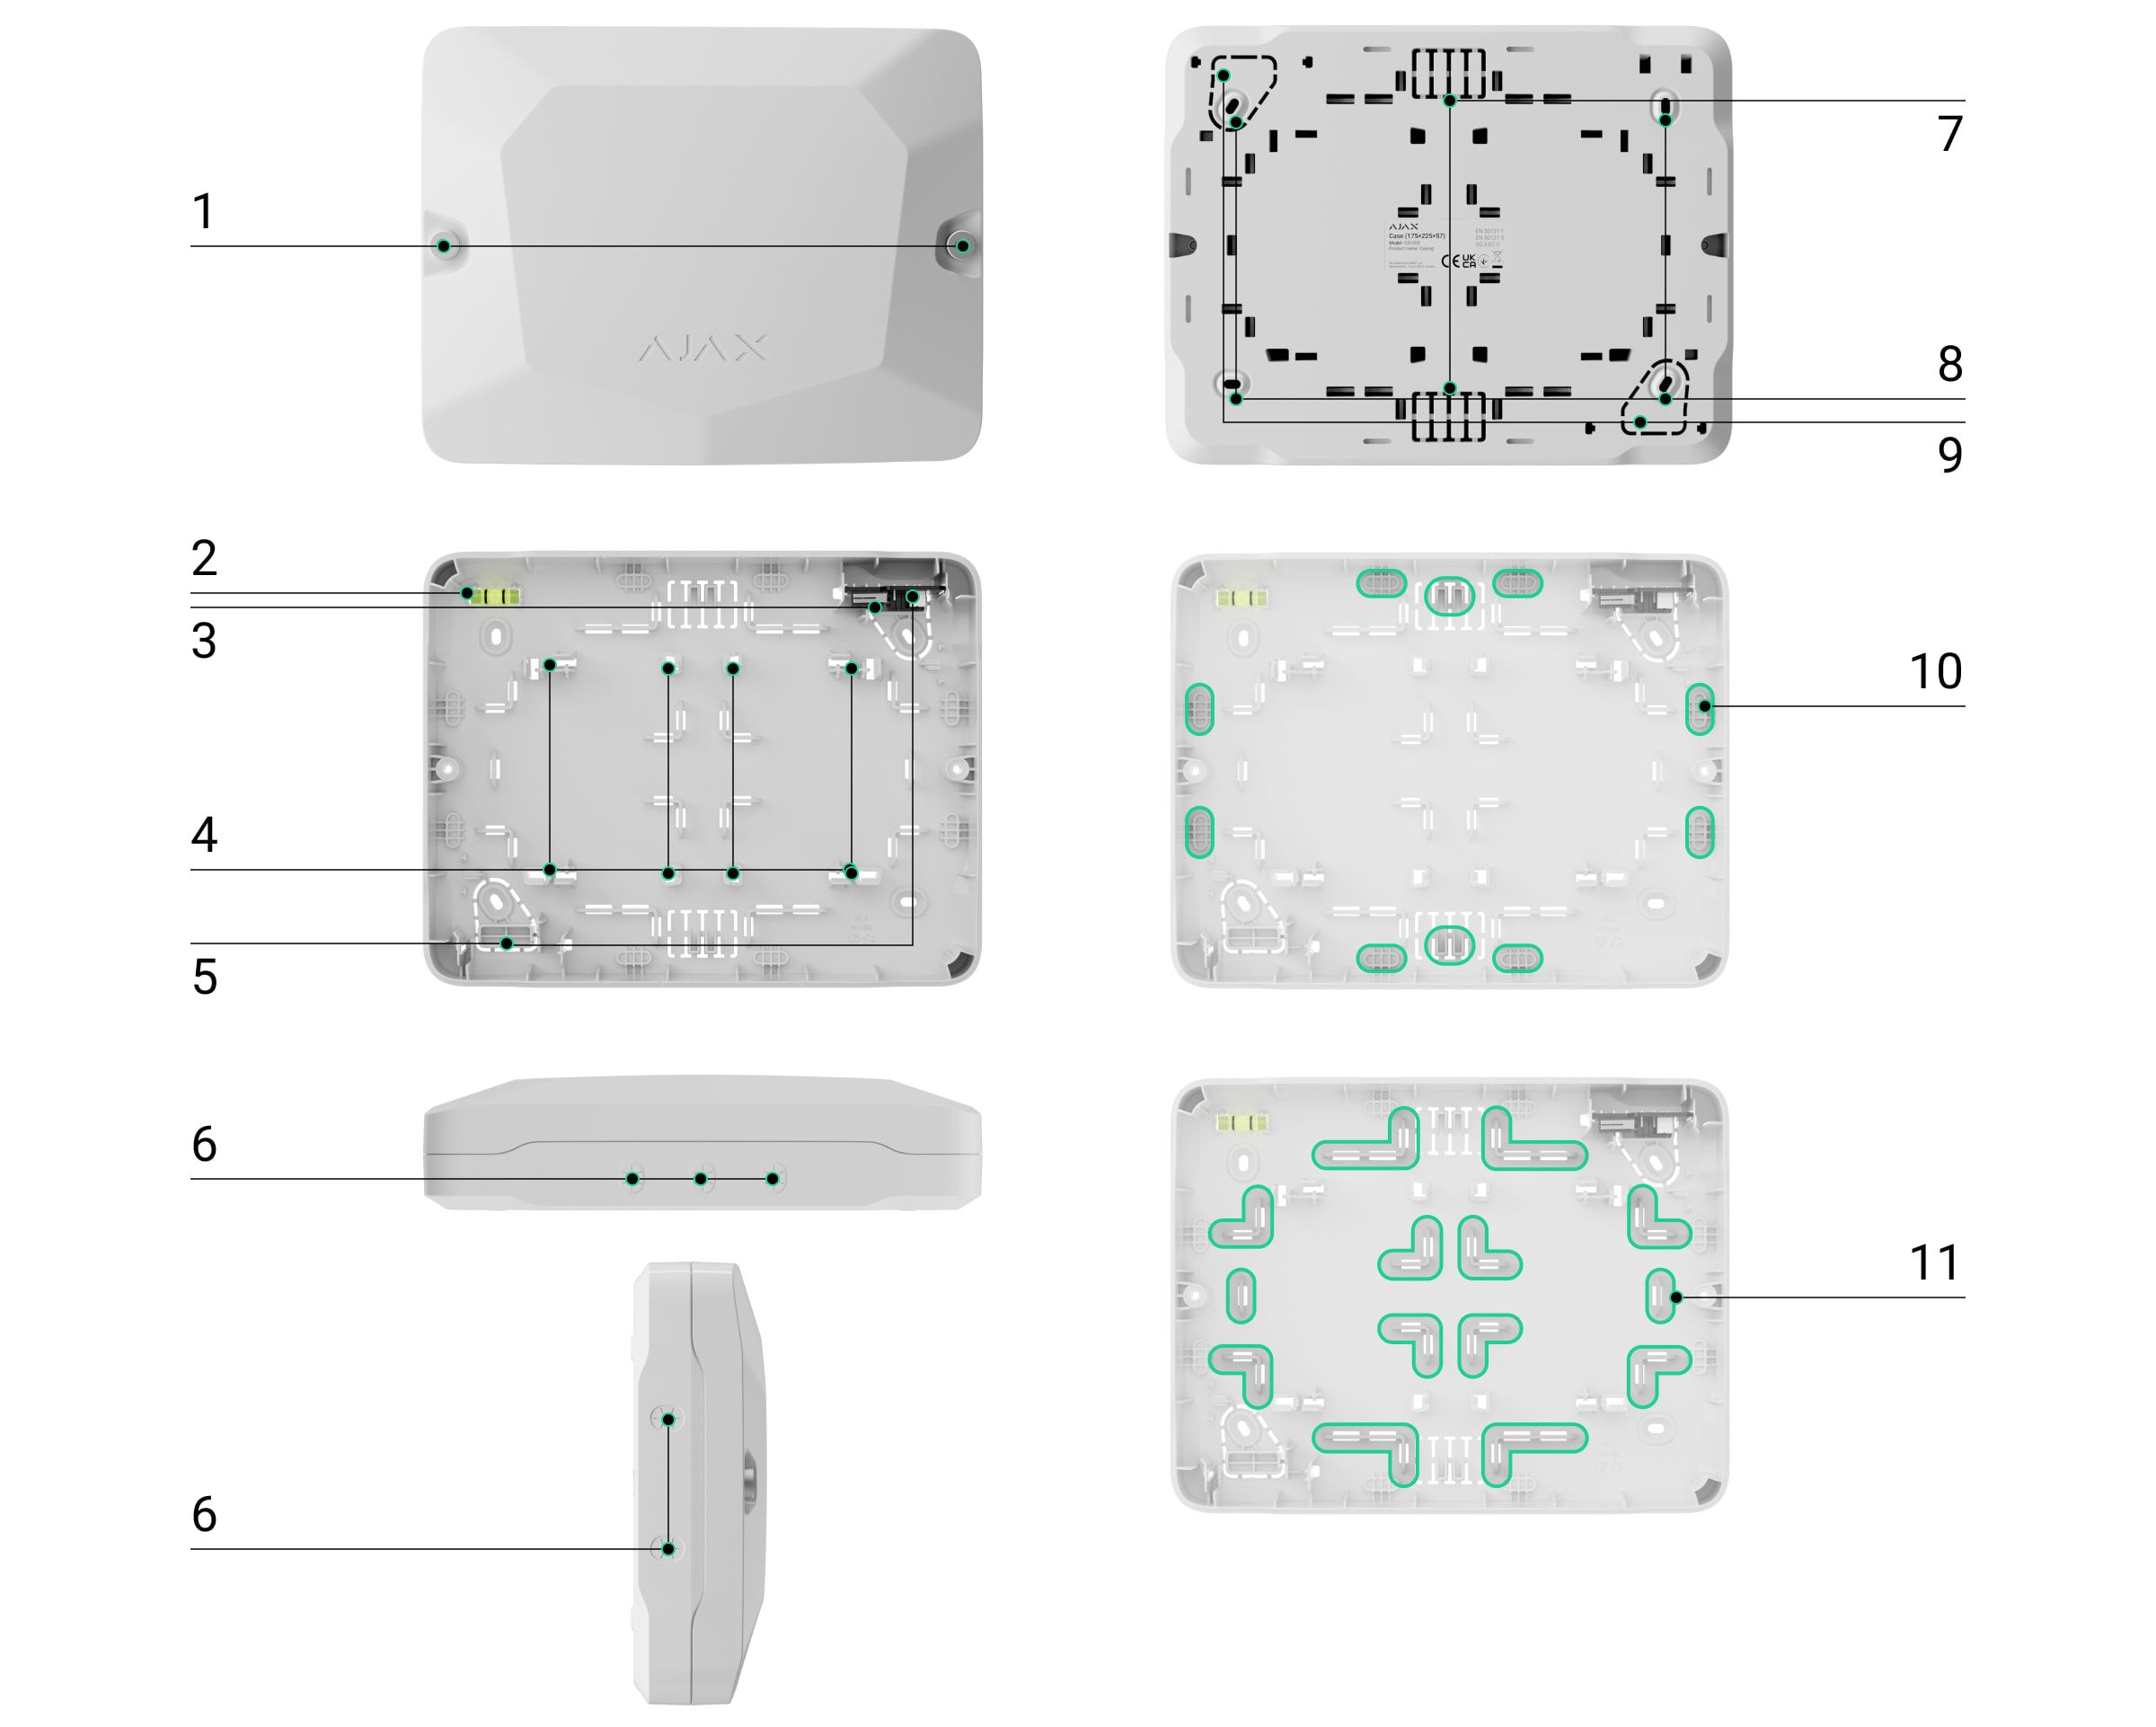
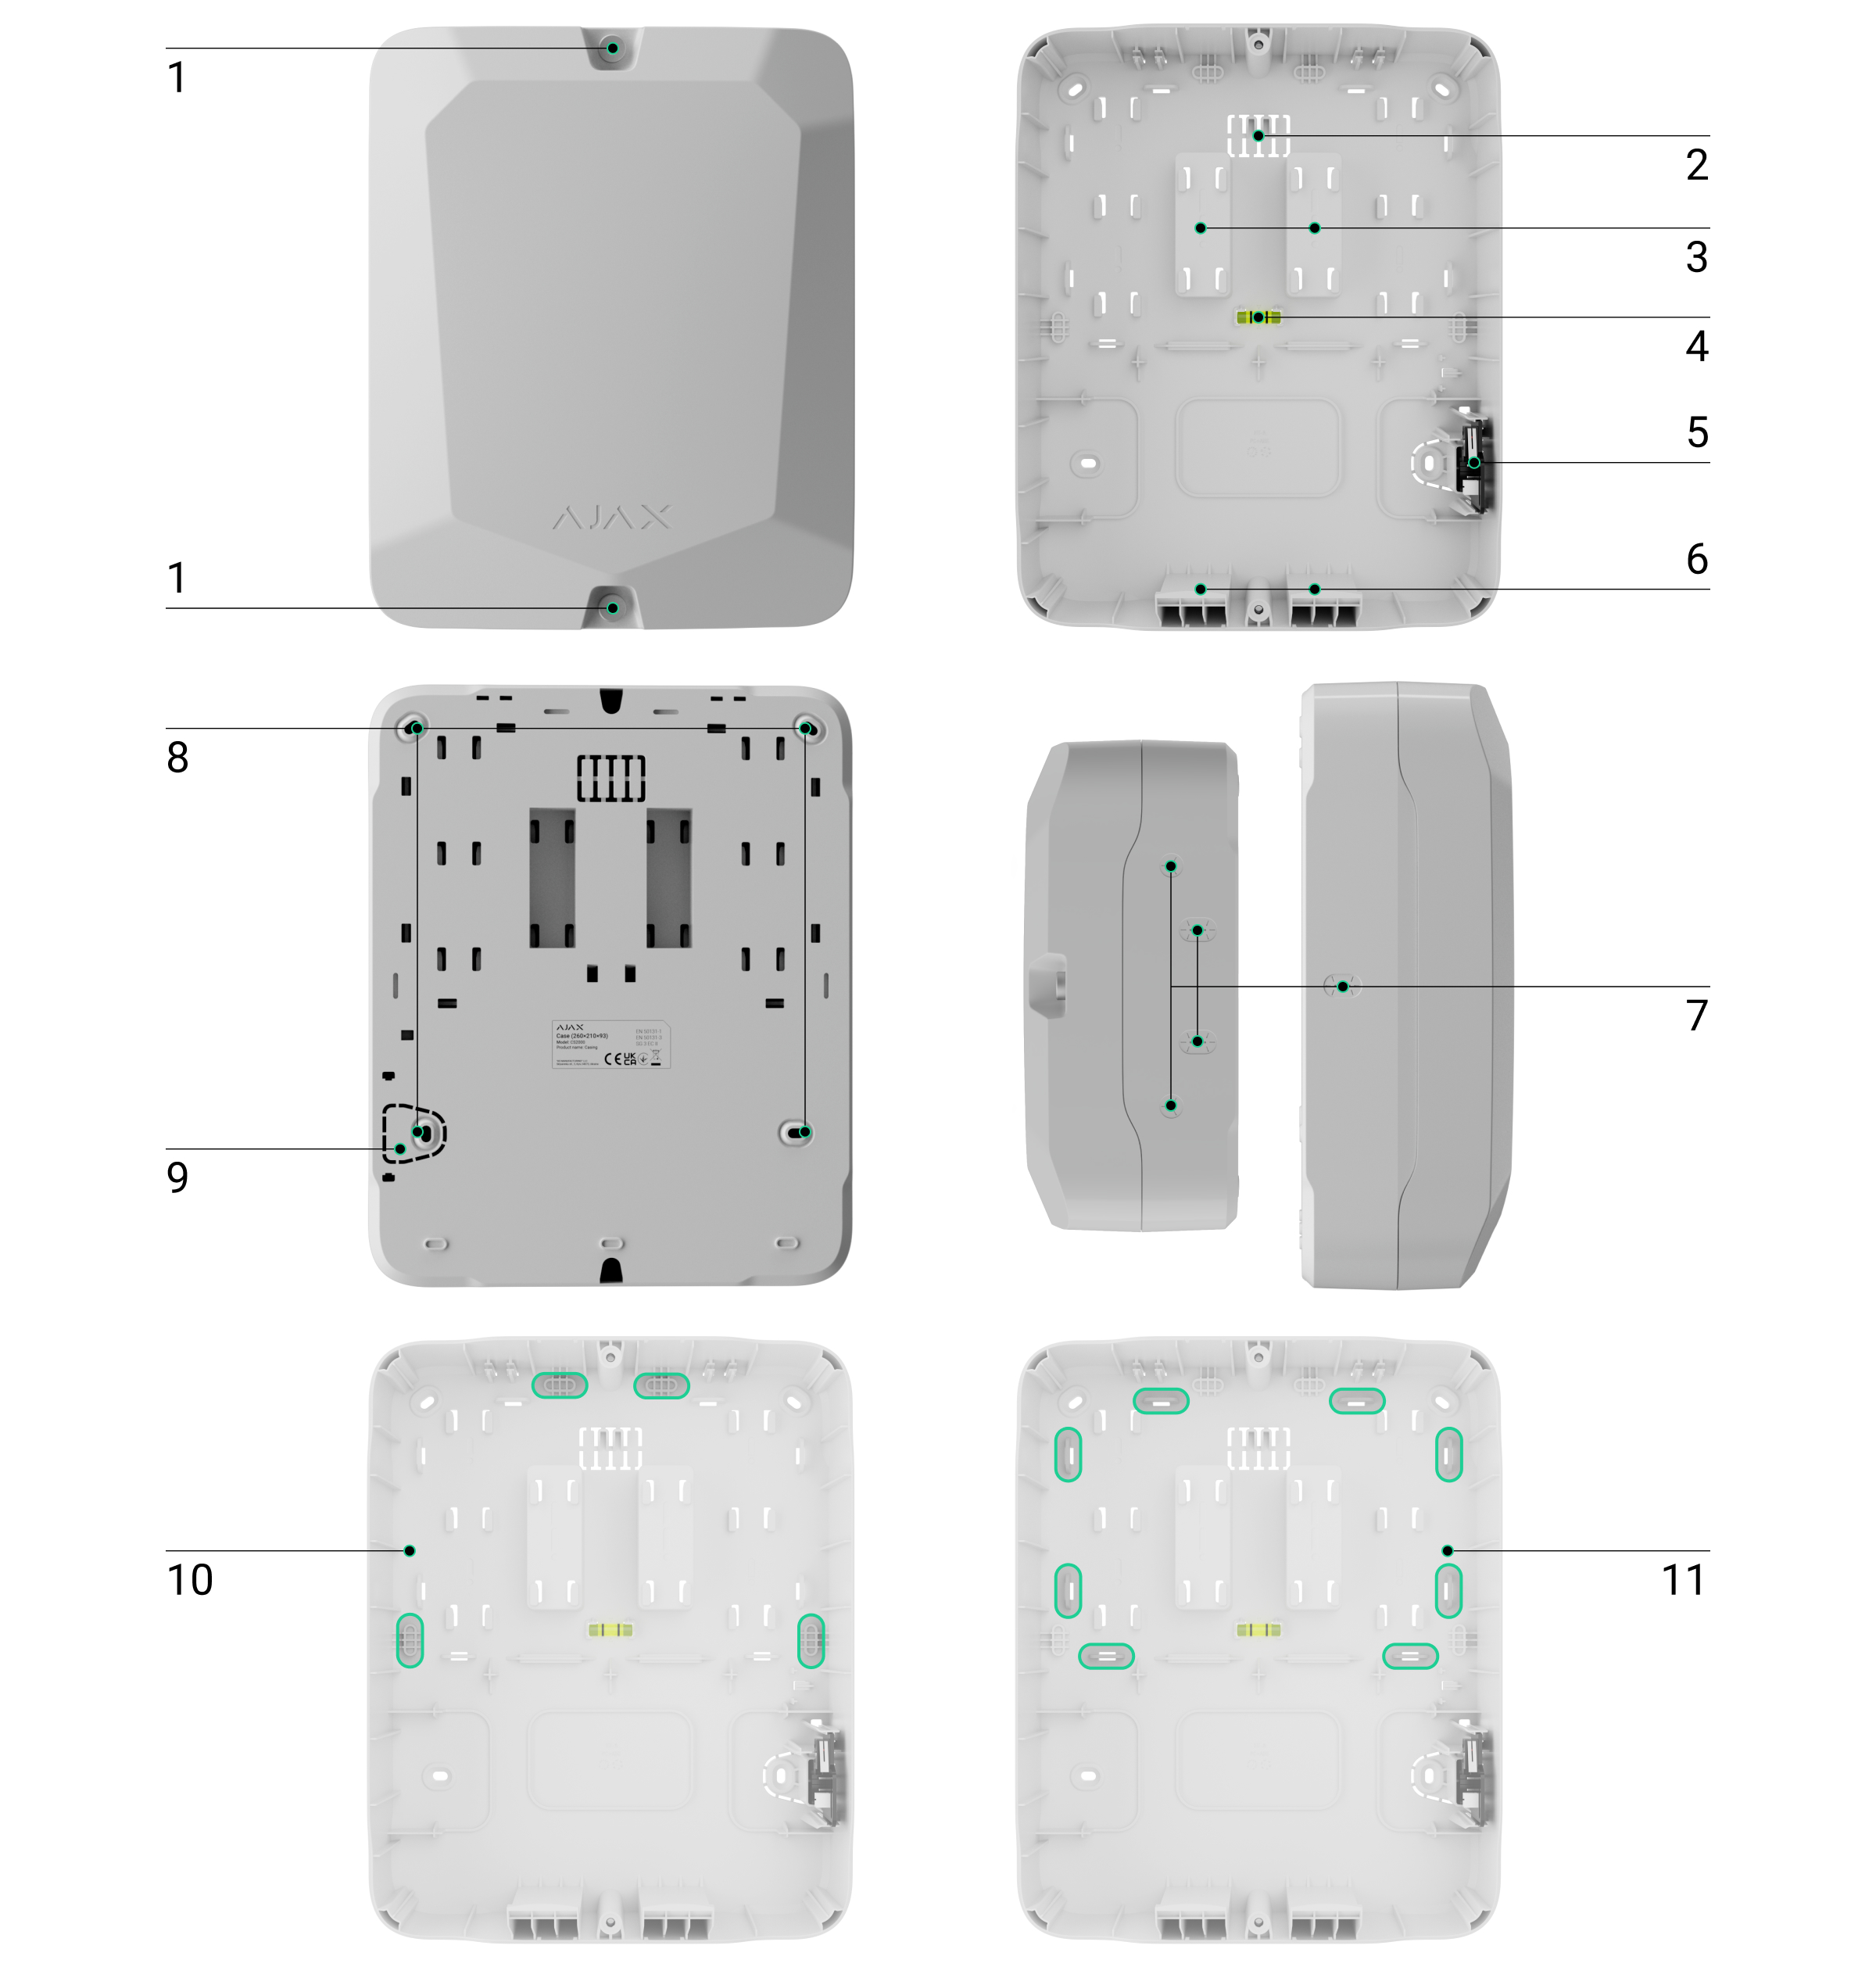
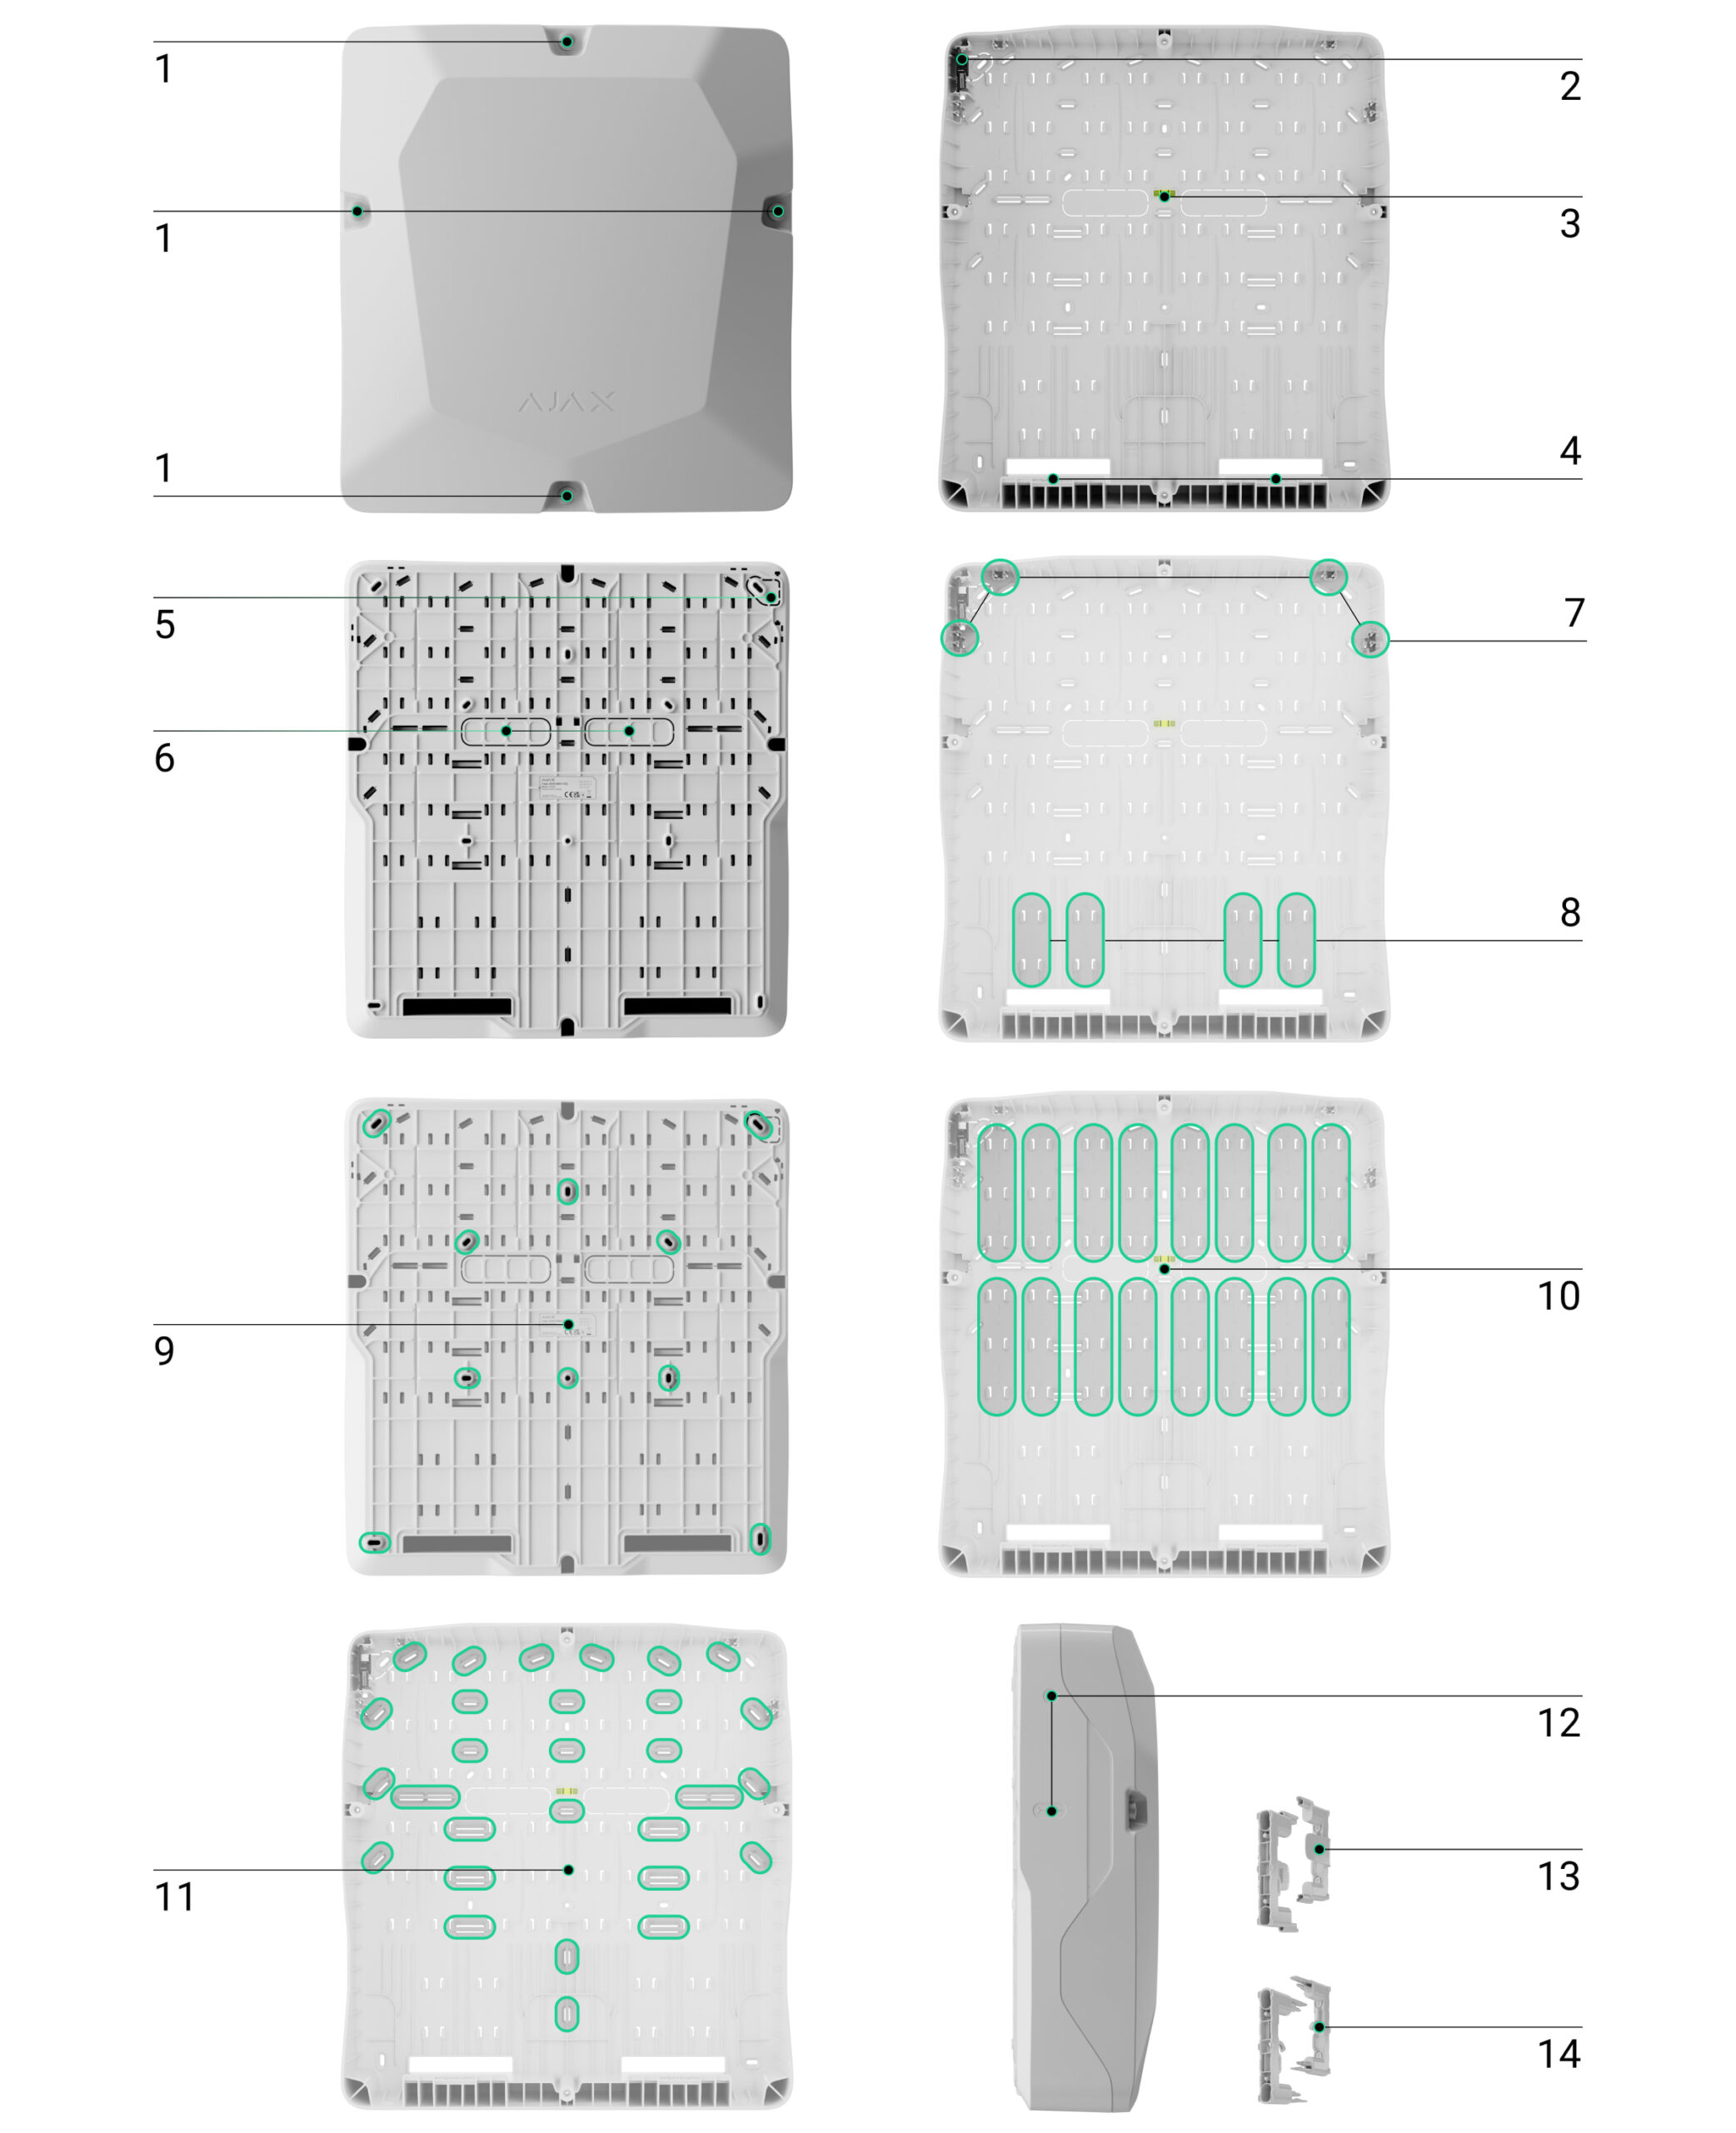
Functional elements
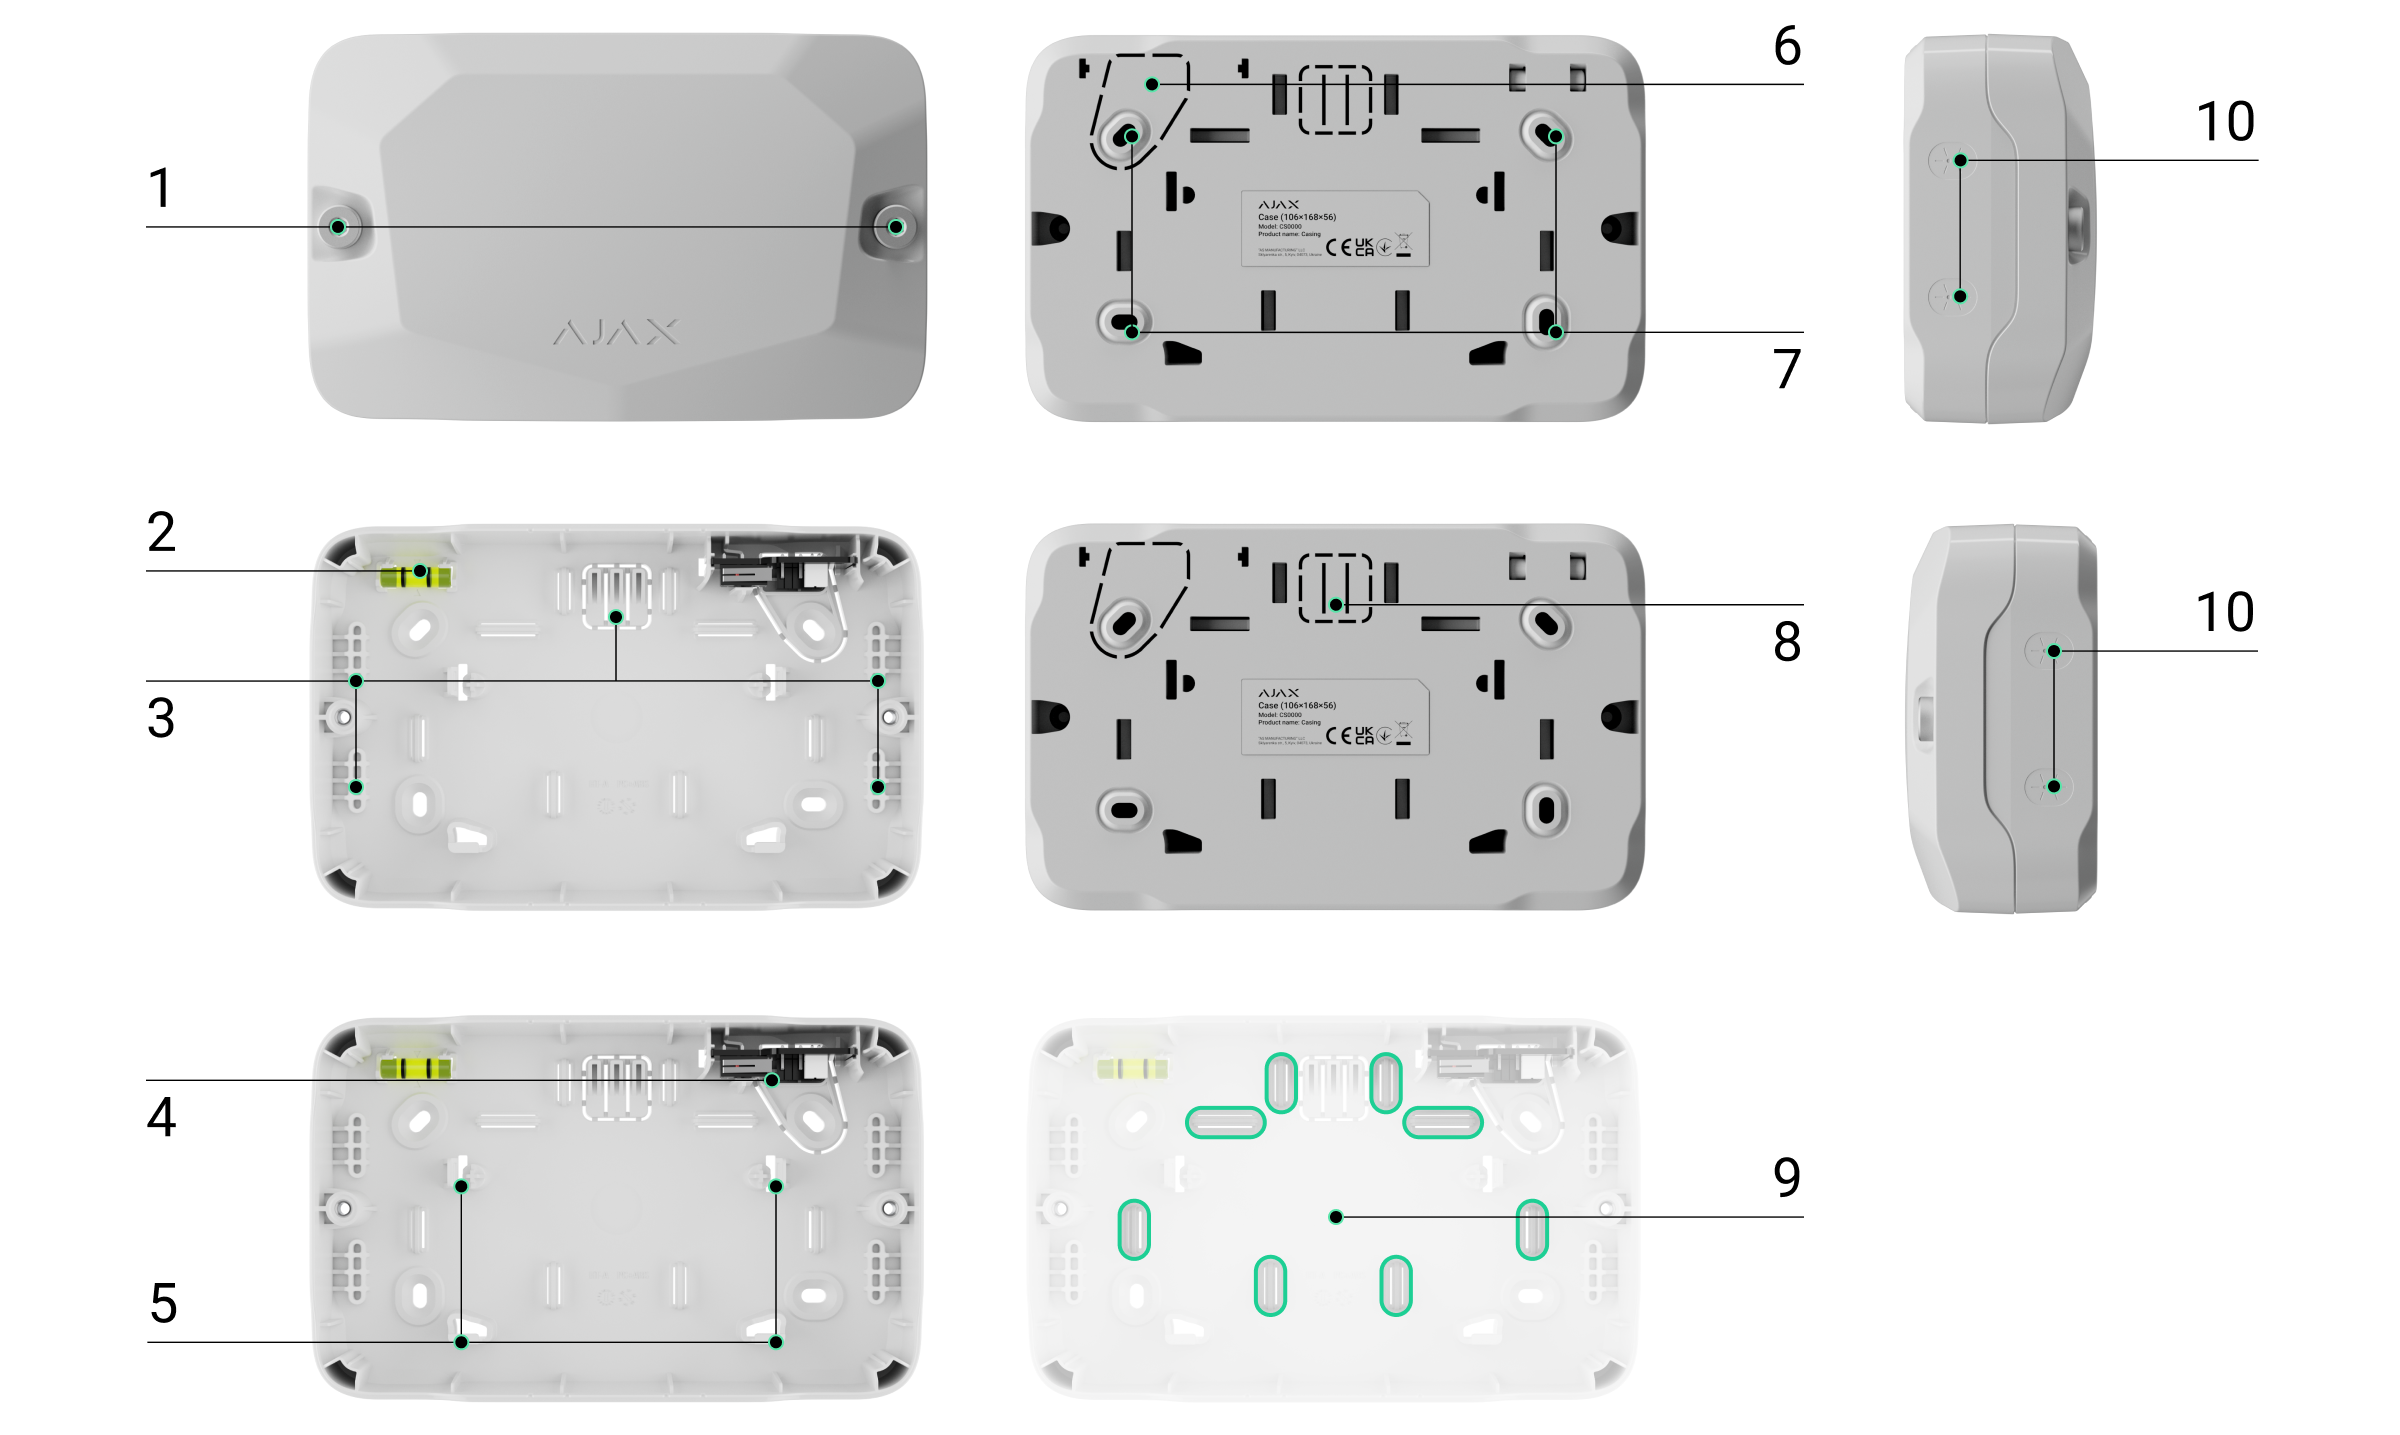
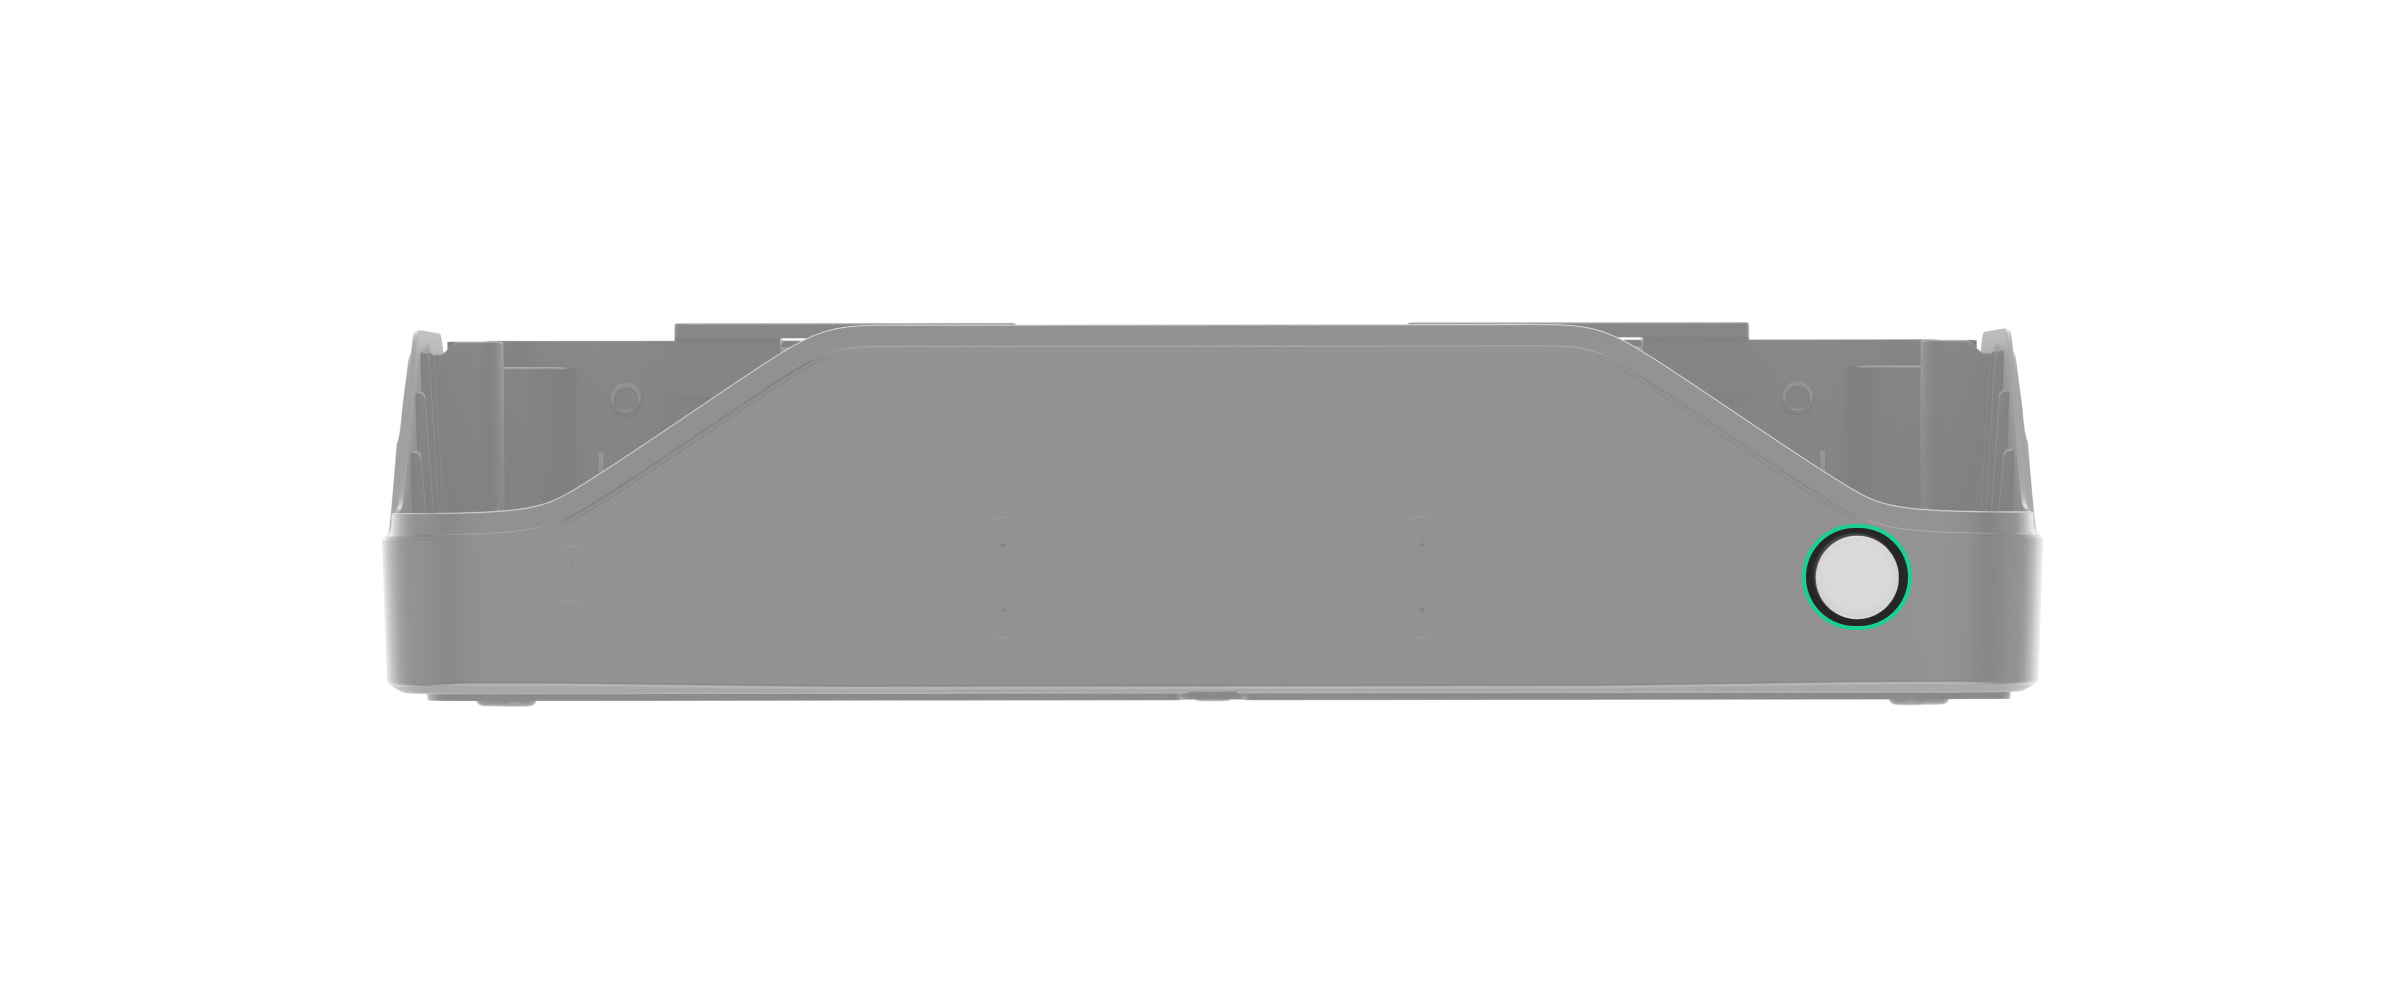
- Holding screws to secure the casing lid. Can be unscrewed with a bundled hex key (Ø 4 mm).
- Bubble level to check the inclination angle of the mount during installation.
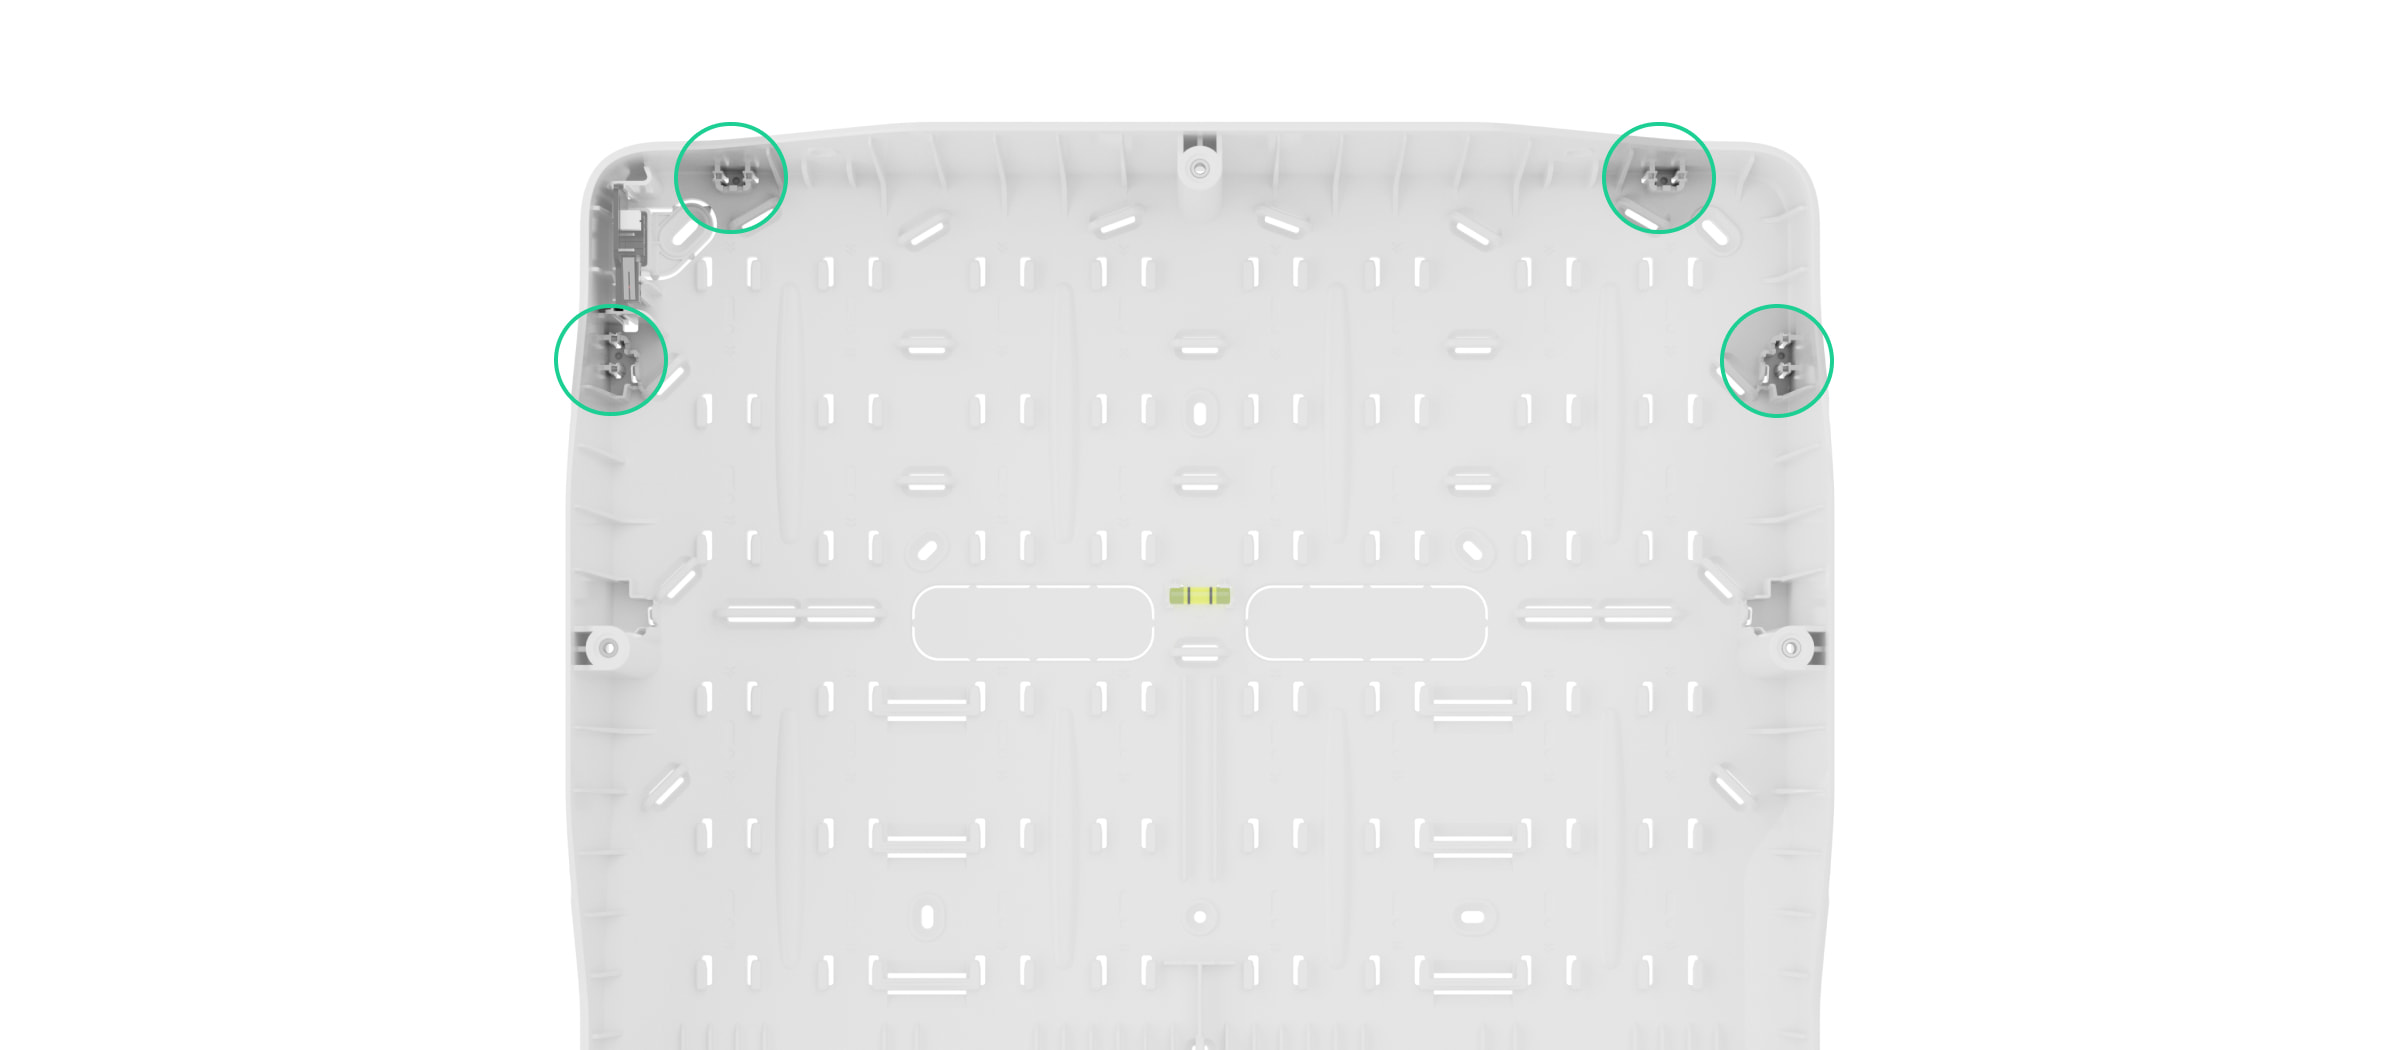
- Stoppers to protect a device during drilling.
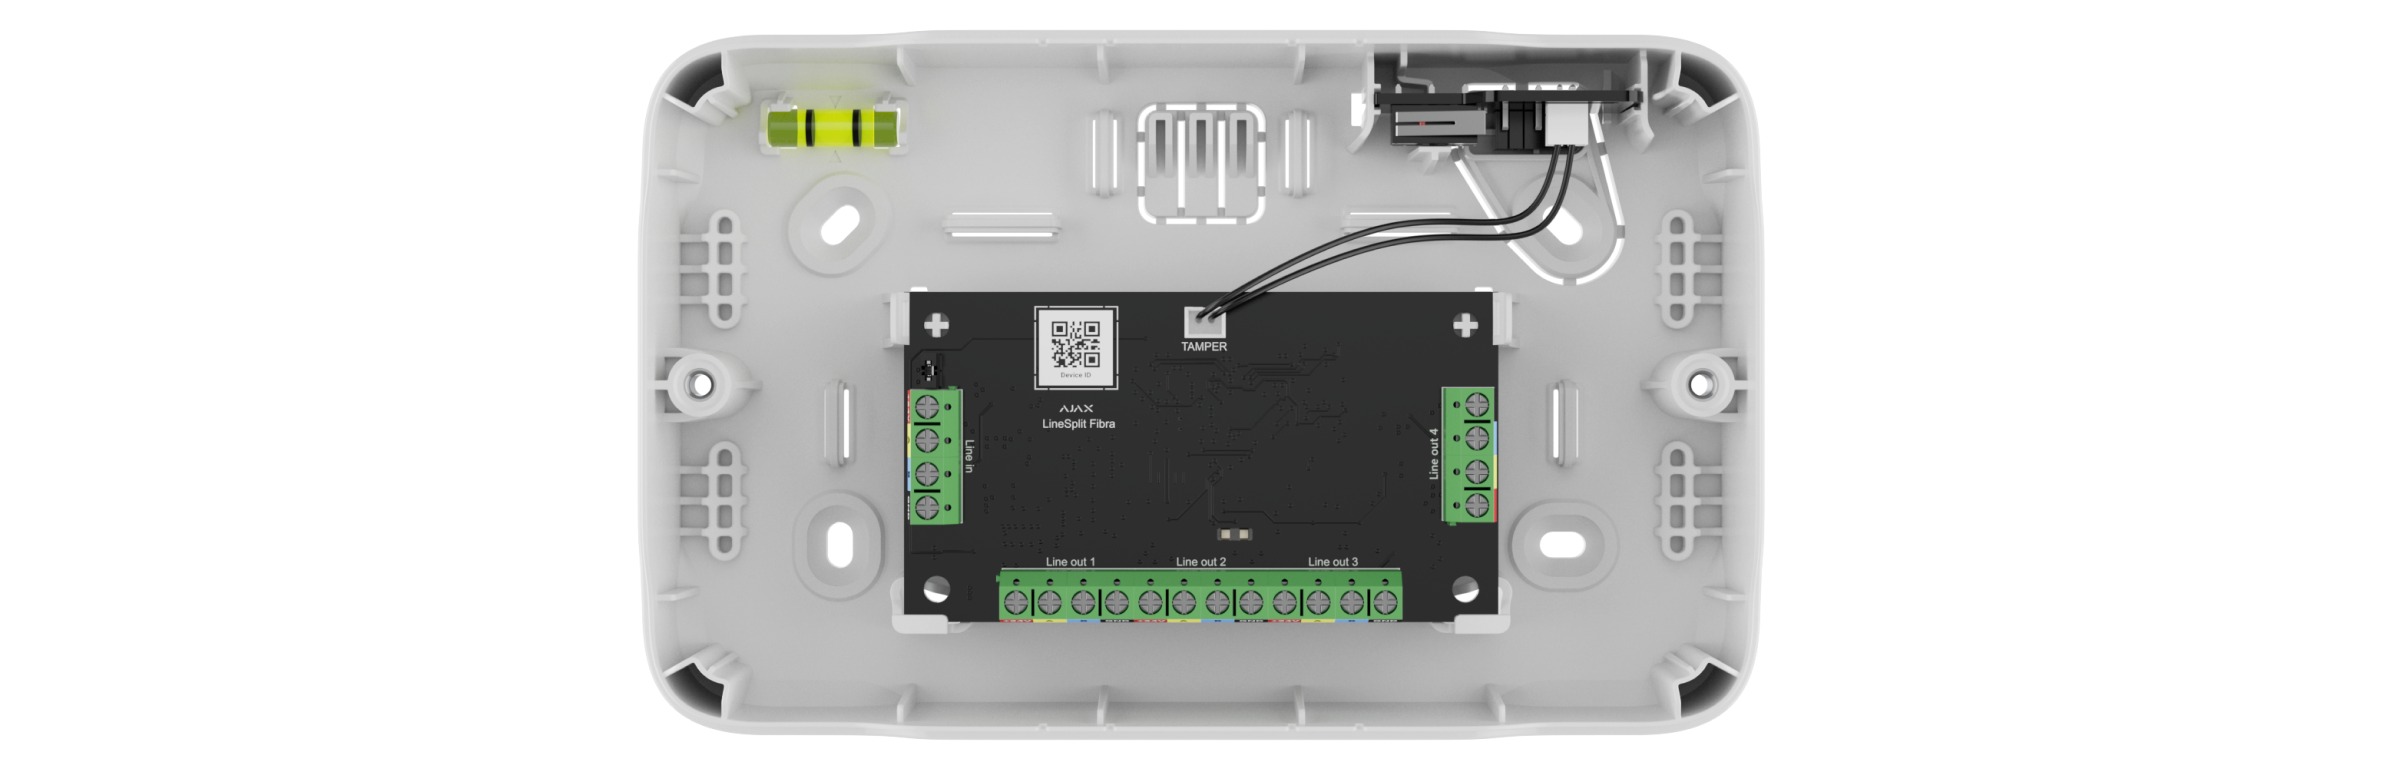
- The tamper board with a wire to connect an Ajax device.
- Latches to attach a device.
- Perforated part of the casing. Do not break it off. This part is necessary for tamper triggering in case of any attempt to detach the casing from the surface.
- Holes to attach the casing to the surface.
- Perforated part to run the wires.
- Fasteners to fix the cables with ties.
- Recesses to drill the holes conveniently.
Compatible devices
The number of devices installed into Case depends on the dimensions of the casing and its configuration.
| Devices/Cases | Case A (106) 1 device |
Case B (175) up to 2 devices |
Case C (260) 1 device |
Case D (430) up to 8 devices |
| Superior LineSplit Fibra | + | + | – | + |
| Superior LineProtect Fibra | + | + | – | + |
| Superior MultiRelay Fibra | + | + | – | + |
| Superior LineSupply (45 W) Fibra | – | – | + | + |
| Superior LineSupply (75 W) Fibra | – | – | + | + |
| Superior Hub Hybrid (4G) (without casing) | – | – | – | + |
| Superior MultiTransmitter Fibra (without casing) | – | – | 1 | 2 |
| 9 Ah battery | – | – | – | 2 |
| 18 Ah battery | – | – | – | 2 |
Key features
Case has latches for attaching devices without tools. Slide the latch to remove the device.
The device is fixed in two positions. You can turn it 180°.
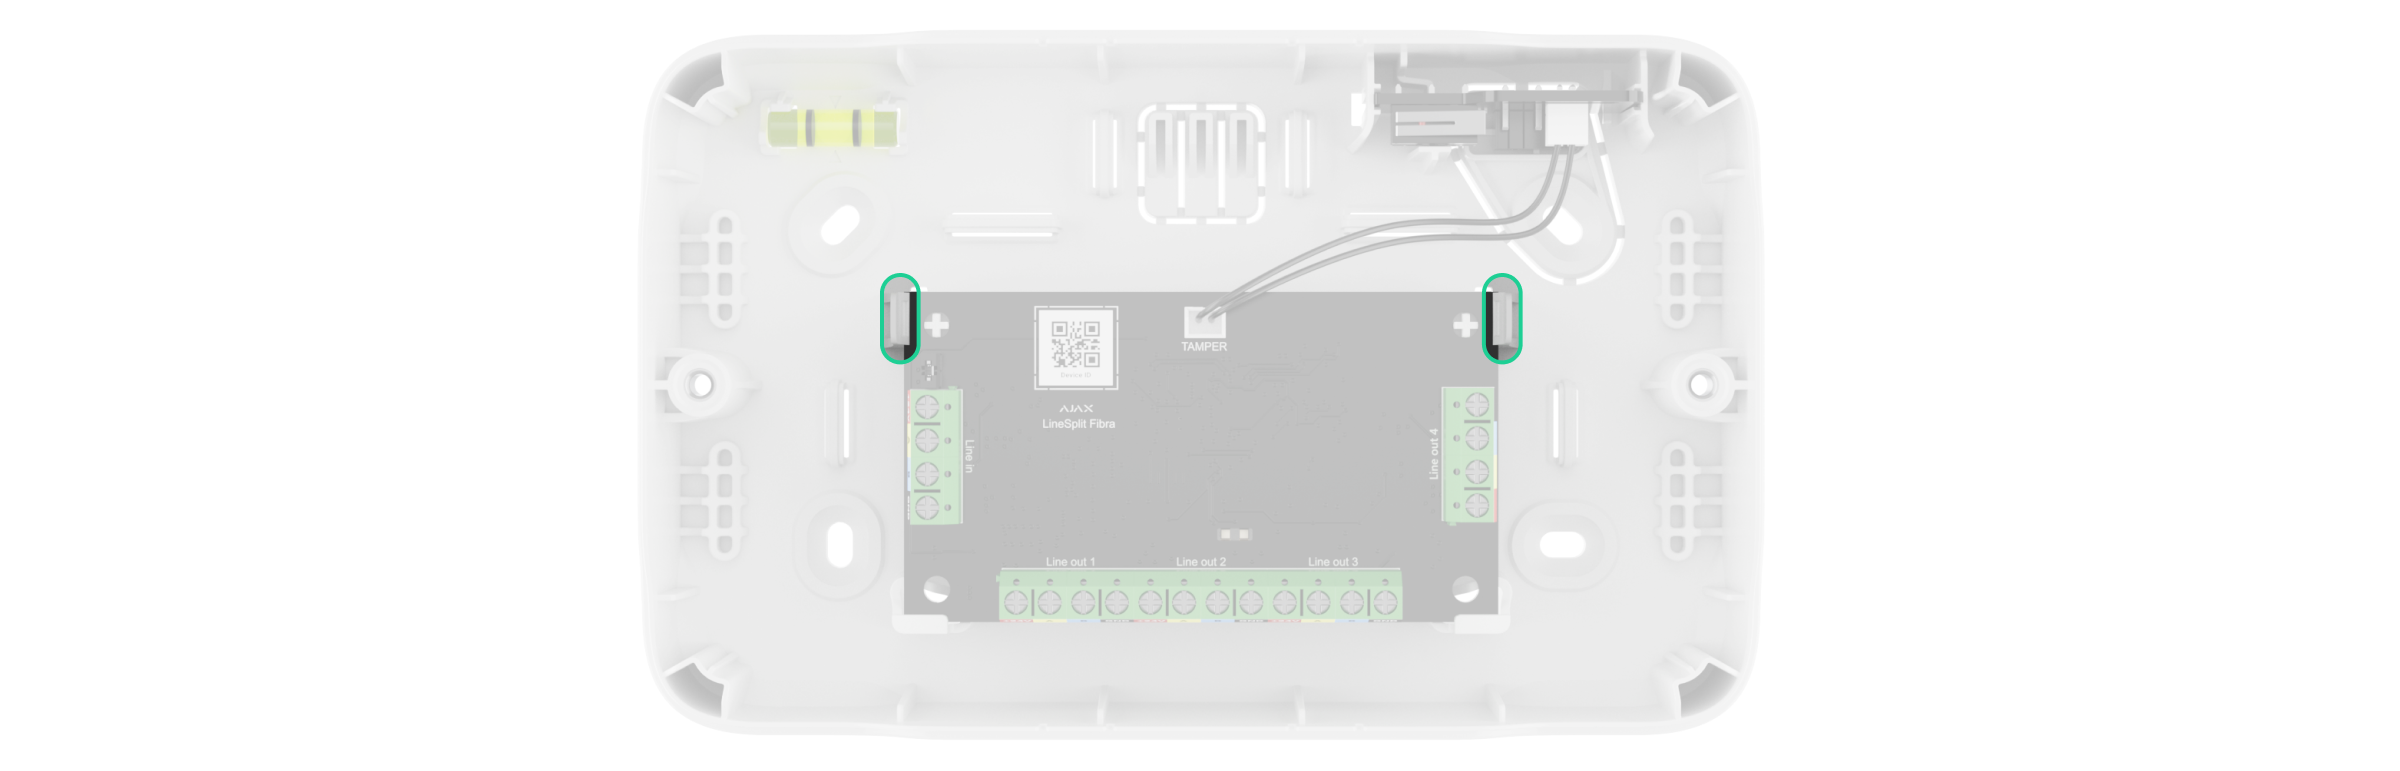
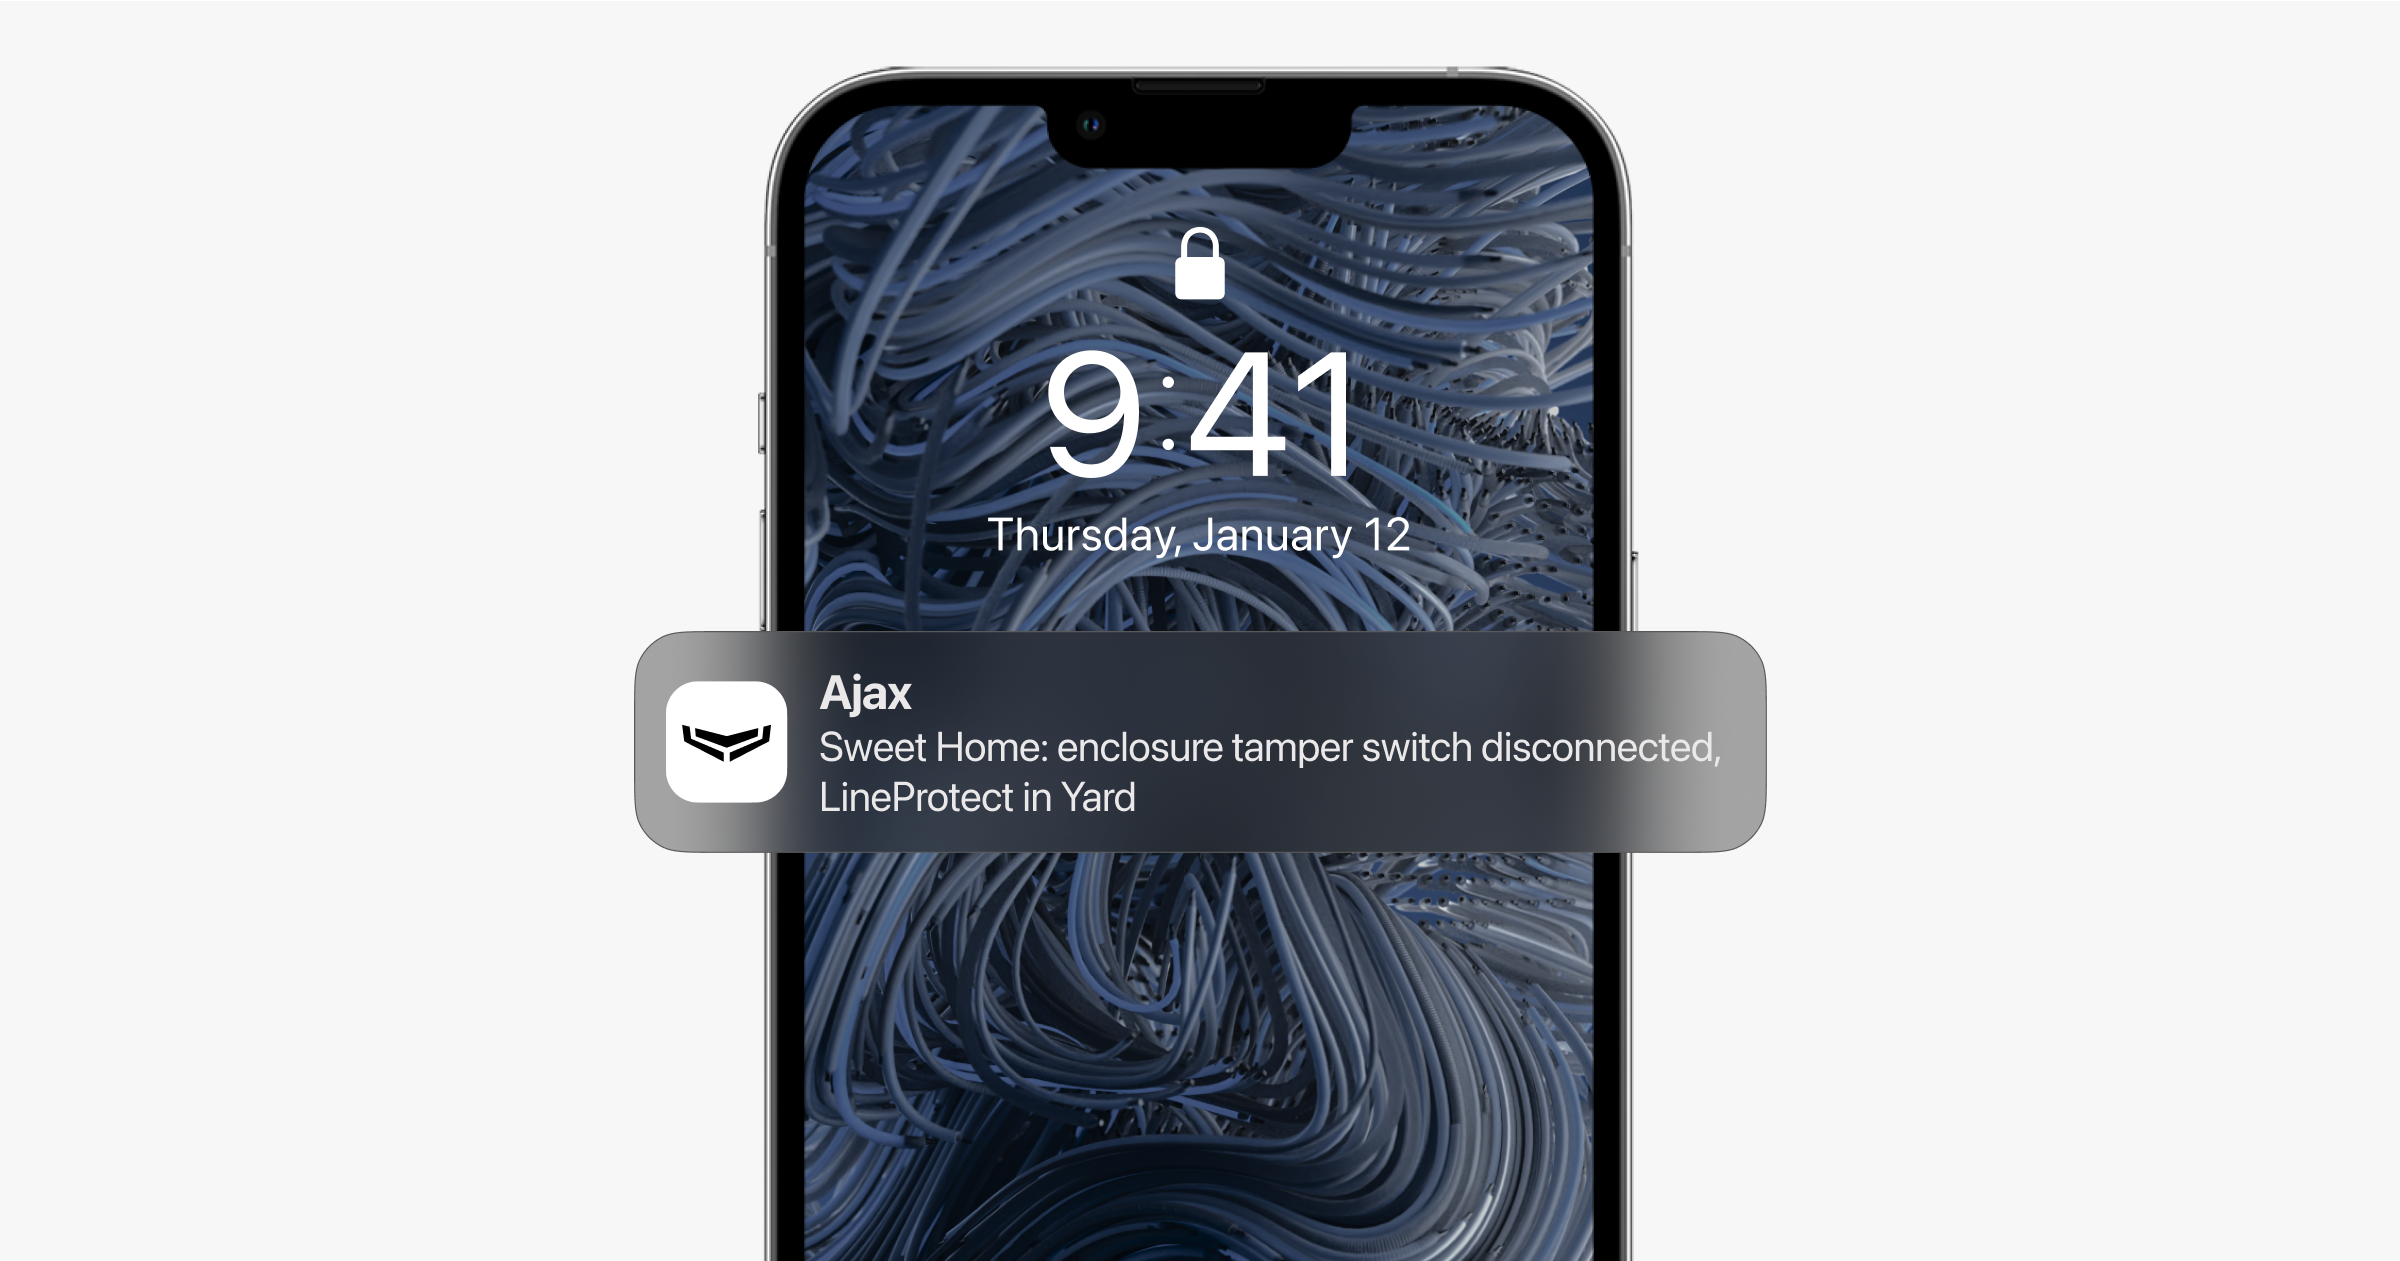
The casing has a tamper board. It connects to the Ajax device with a wire in the complete set. The tamper detects attempts to open the lid or detach the casing from the surface. In the case of a sabotage attempt, users and the CMS will receive a notification about the tamper triggering of the device.
Case has fasteners to fix the cables with ties and channels for convenient cable routing. The casing has perforated parts to run the cables through the back side. There are recesses to place the drill conveniently (in case you need to drill holes and run the cables along the side, bottom, or top). During drilling, the tool rests on plastic stoppers, ensuring the installed devices remain protected.
The lid of Case A (106) or Case B (175) can be rotated 180° during installation.
The bubble level is provided to check the inclination angle of the mount during installation. Wider holes ensure that the casing is correctly installed, even if there are errors during installation.
Case C (260) and Case D (430) have battery holders at the bottom of the casing to prevent accidental dislodgement. The holding stripe for securing the battery is included with Case D (430).
Case D (430) has sixteen slots for plastic holders for Fibra modules installation. Holders are available in two versions:
- Module Holder (type A) for Superior LineSplit Fibra, Superior LineProtect Fibra, Superior MultiRelay Fibra attachment;
- Module Holder (type B) — for Superior Hub Hybrid (4G) (without casing) and Superior MultiTransmitter Fibra (without casing).
There are four Module Holder (type A) in the complete set. Additional holders and Module Holder (type B) are sold separately.
Superior LineSupply Fibra doesn’t require holders for installation.
Selecting the installation site
It is advisable to choose an installation site where Case is hidden from prying eyes — for example, in the pantry. This will help reduce the likelihood of the system sabotage. Note that the device is intended for indoor installation only.
The Case installation site must comply with the recommendations for mounting the devices installed in the casing.
Follow these recommendations when designing the Ajax system project for an object. The system should be designed and installed by professionals. The list of authorized Ajax partners is available here.
Case cannot be installed
The casing can be damaged if you install it:
- Outdoors.
- Inside premises with temperature and humidity values that do not correspond to the operating parameters.
Preparing to install devices into Case
Which Case to choose
Use Case configurator to get the most optimal placement of your Fibra devices in the casing.
Cable arrangement
When preparing to cable routing, check the electrical and fire safety regulations in your region. Strictly follow these standards and regulations. Tips for cable arrangement are available in this article.
Cable routing
We recommend you read the Selecting the installation site section carefully before installation. Avoid deviations from the system project. Violating the basic installation rules and the recommendations of this manual may lead to incorrect operation and loss of connection with devices installed into Case.
Preparing cables for connection
Remove the insulating layer and strip the cable with a special insulation stripper. The ends of the wires inserted into the device terminals must be tinned or crimped with a sleeve. This ensures a reliable connection and protects the conductor from oxidation.
Installation
Before installation, ensure that you have selected the optimal location for the casing and that it complies with the requirements of this manual.
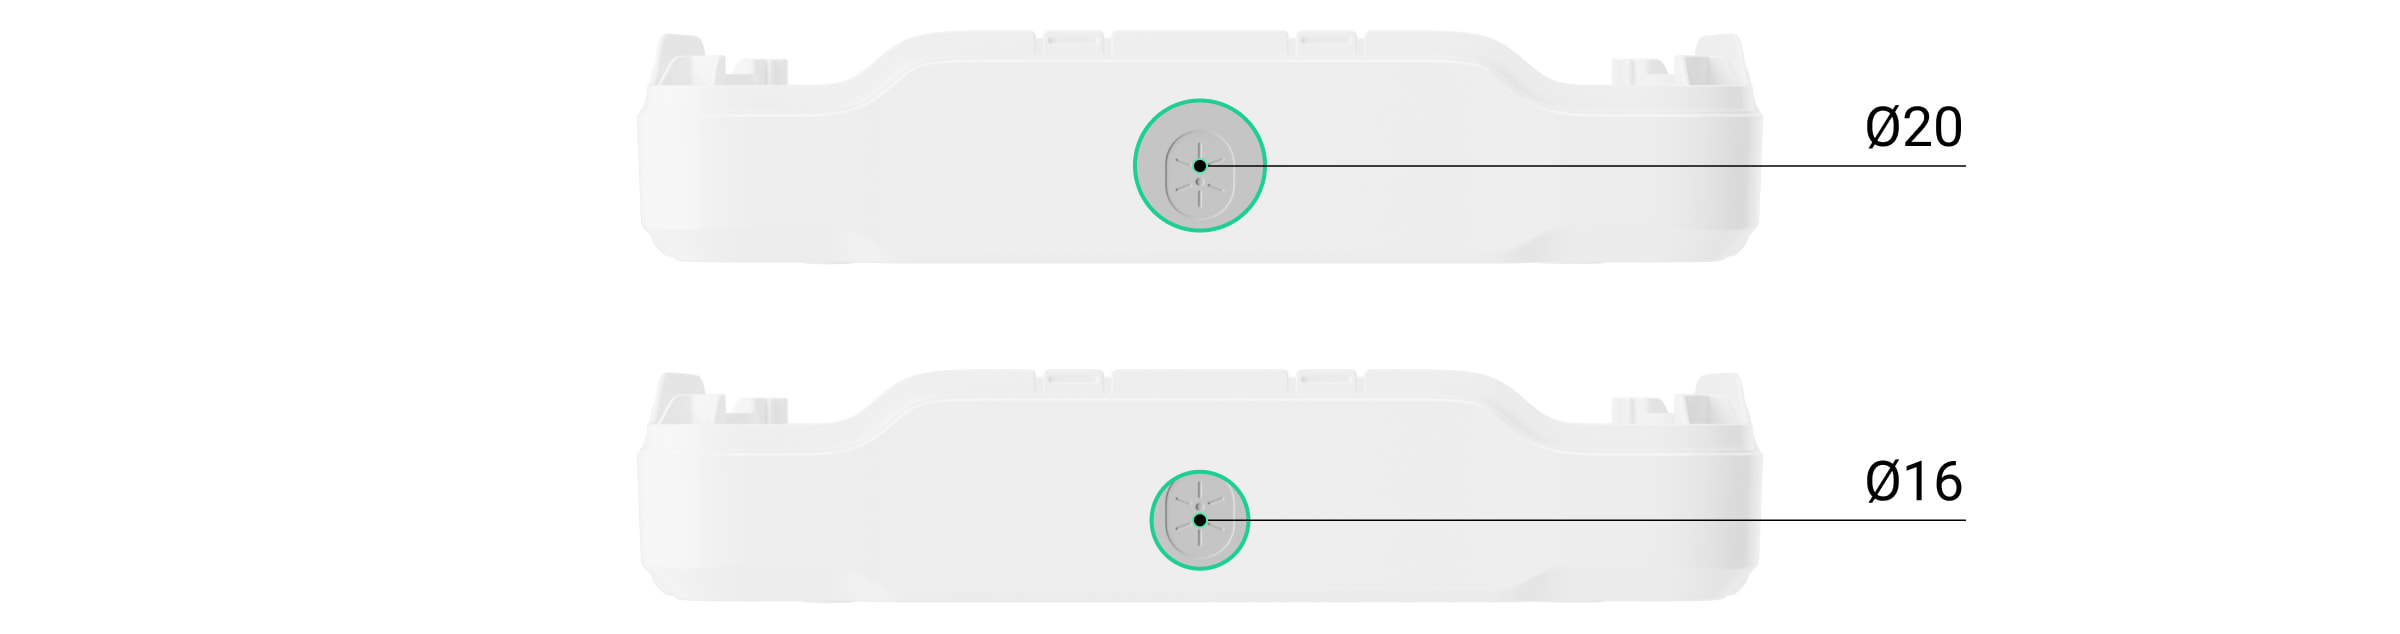
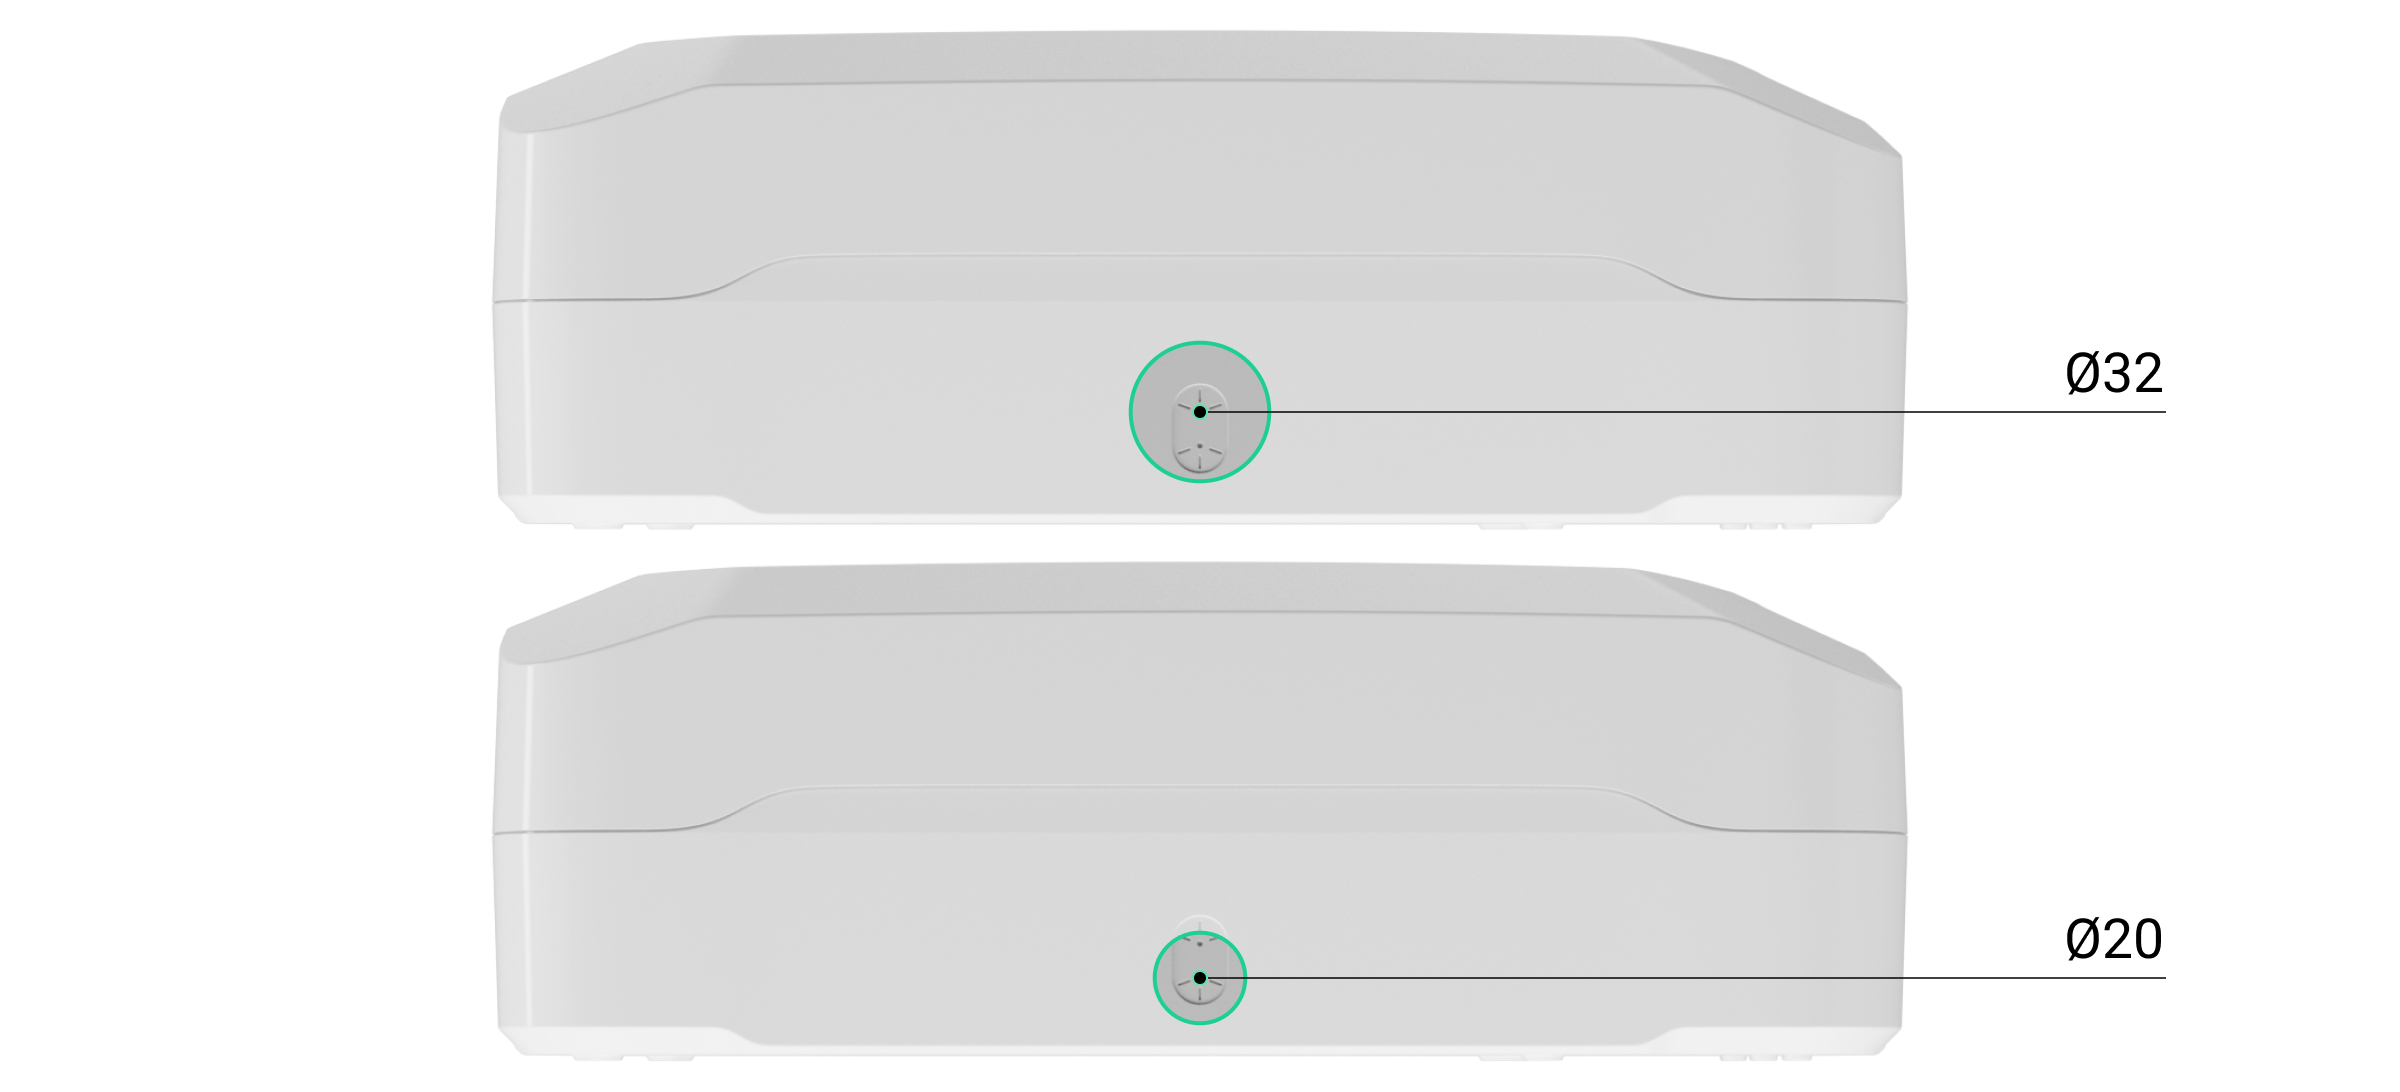
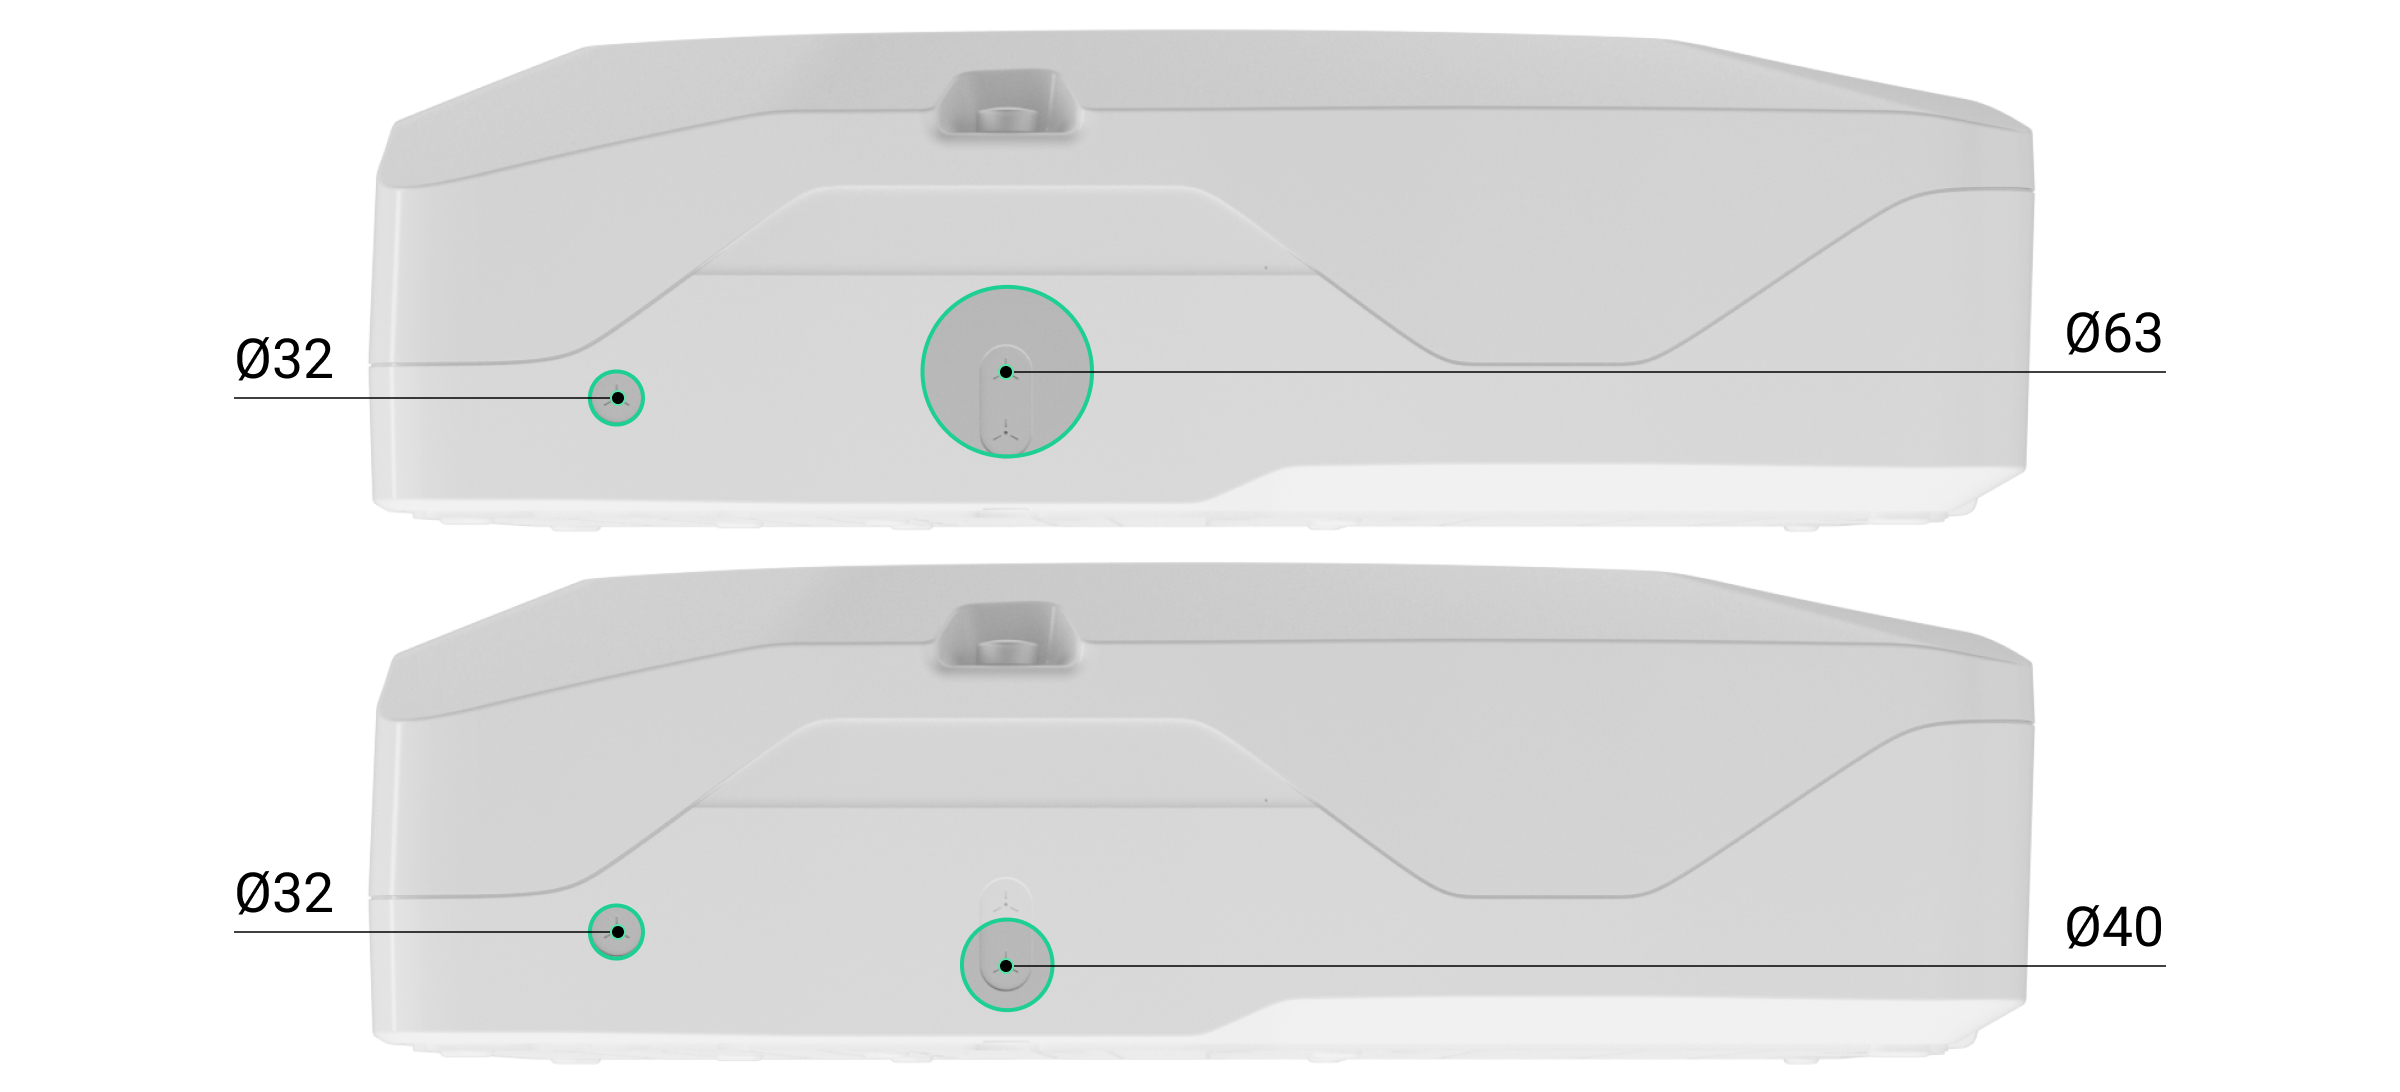
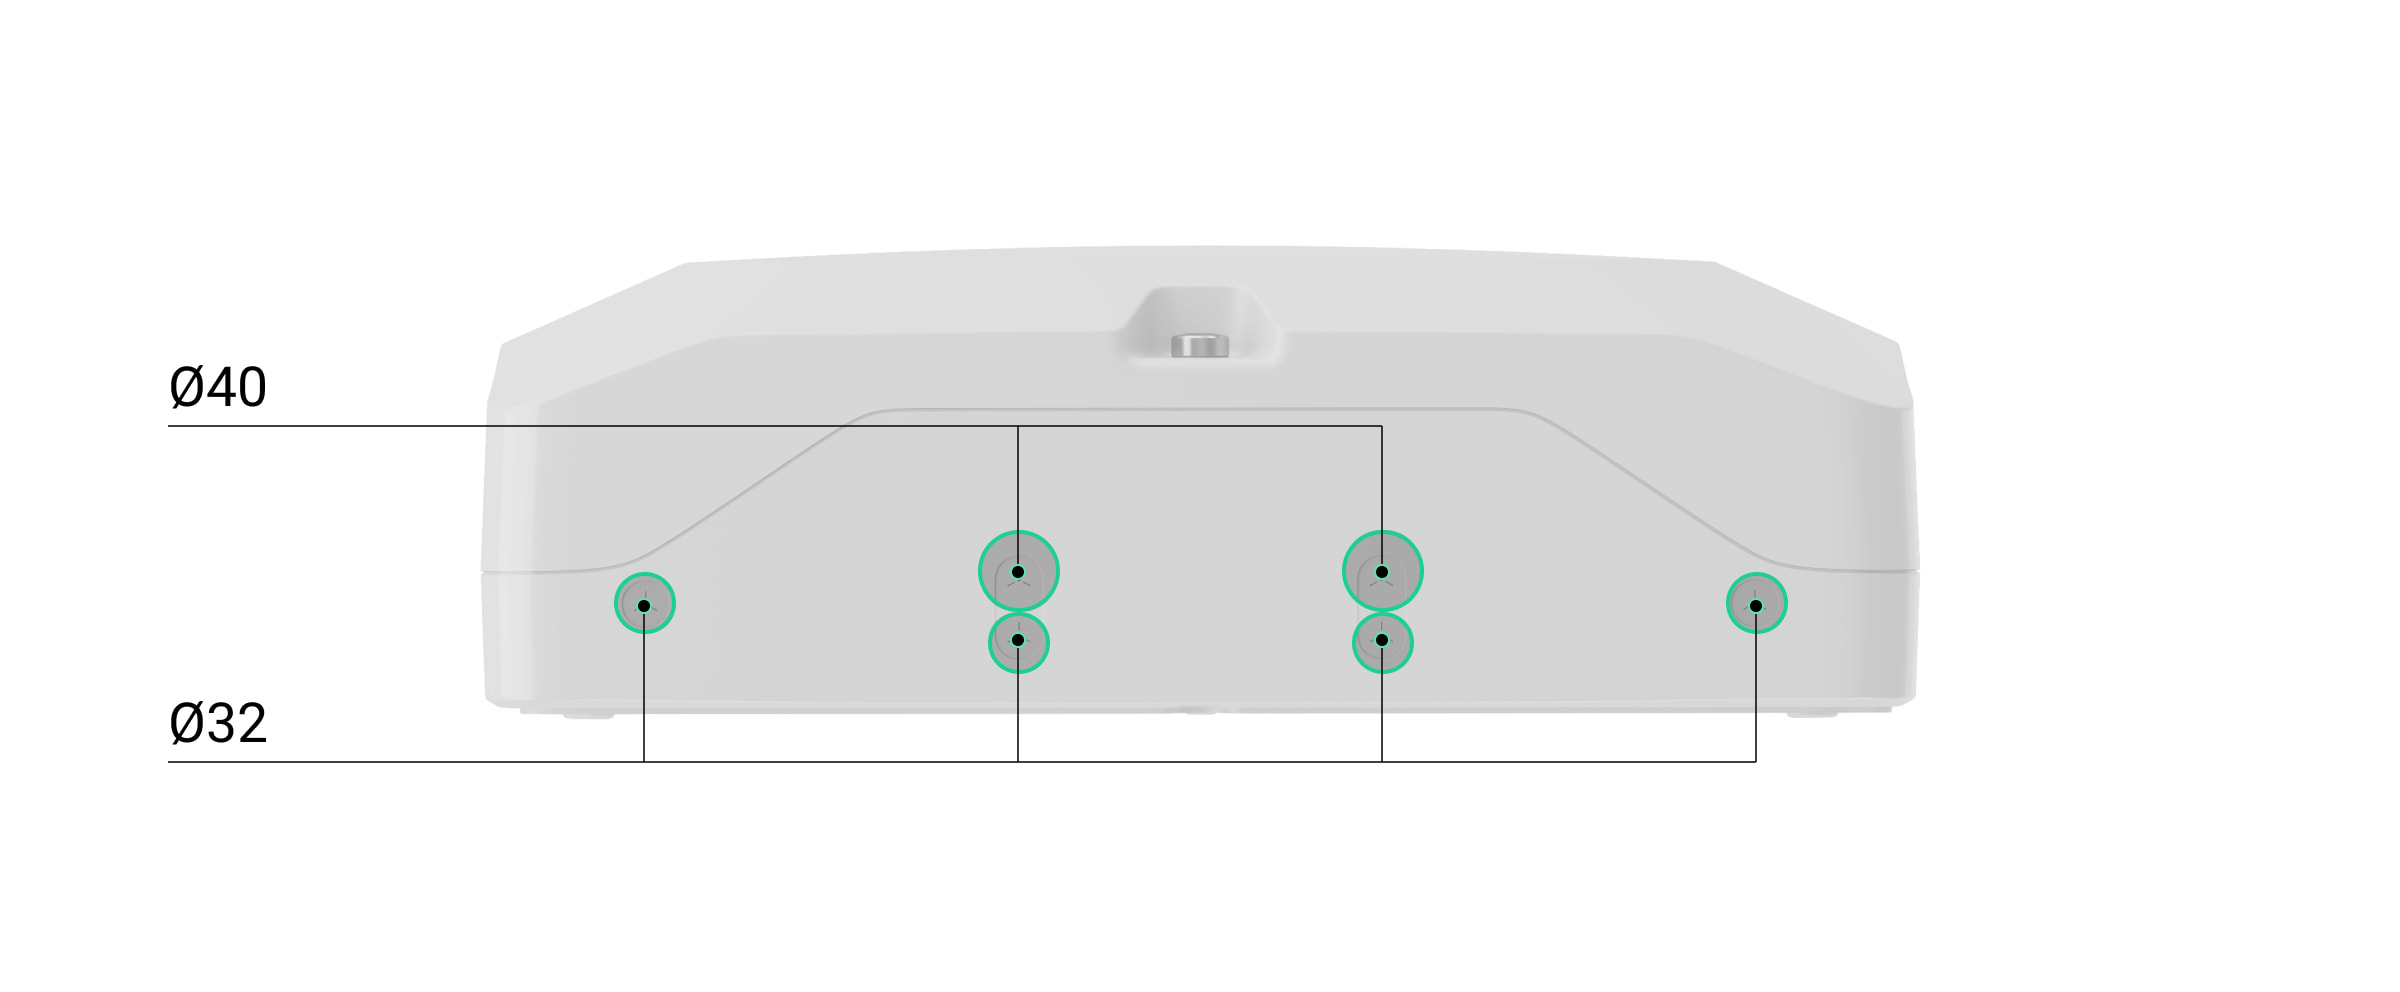
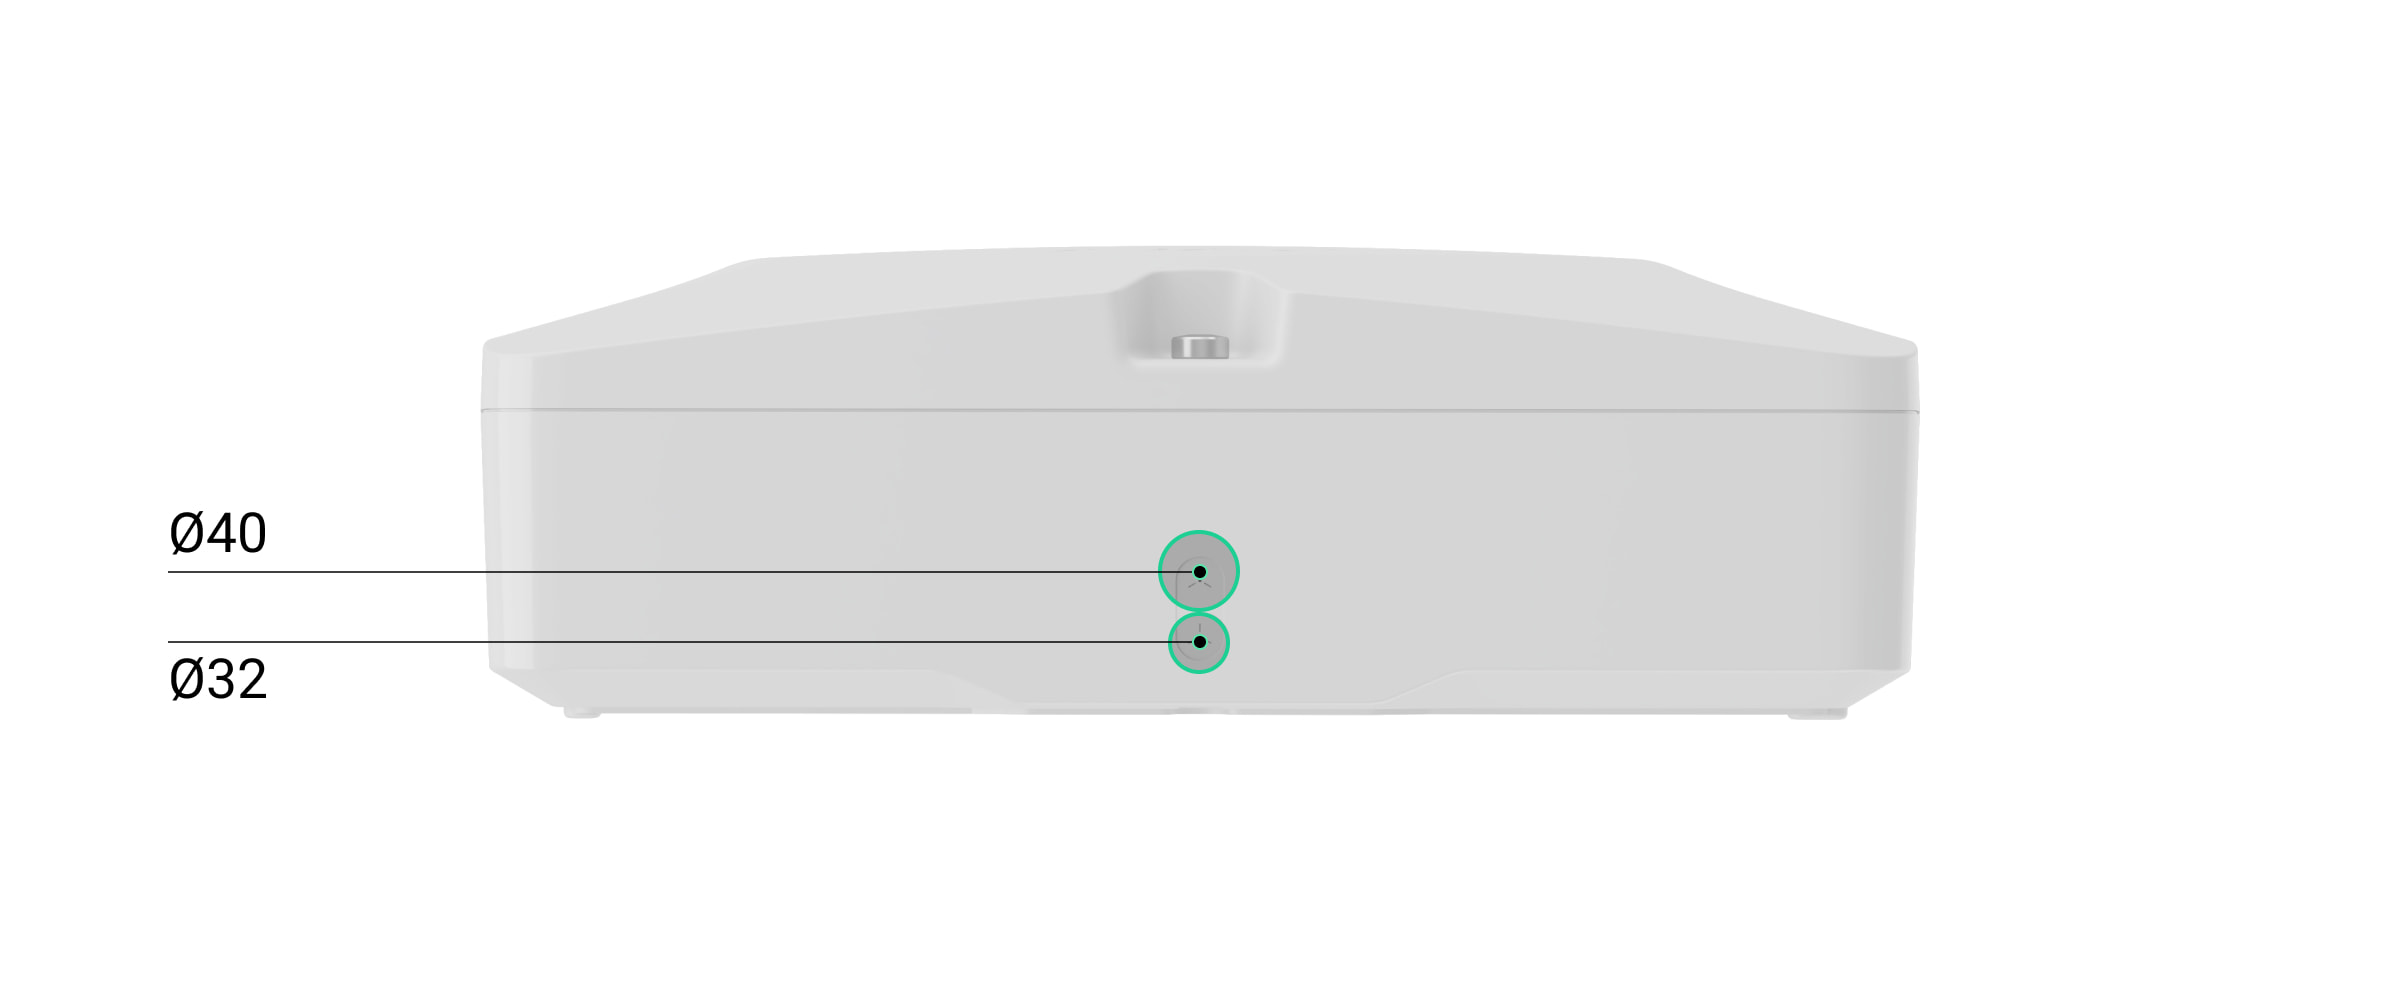
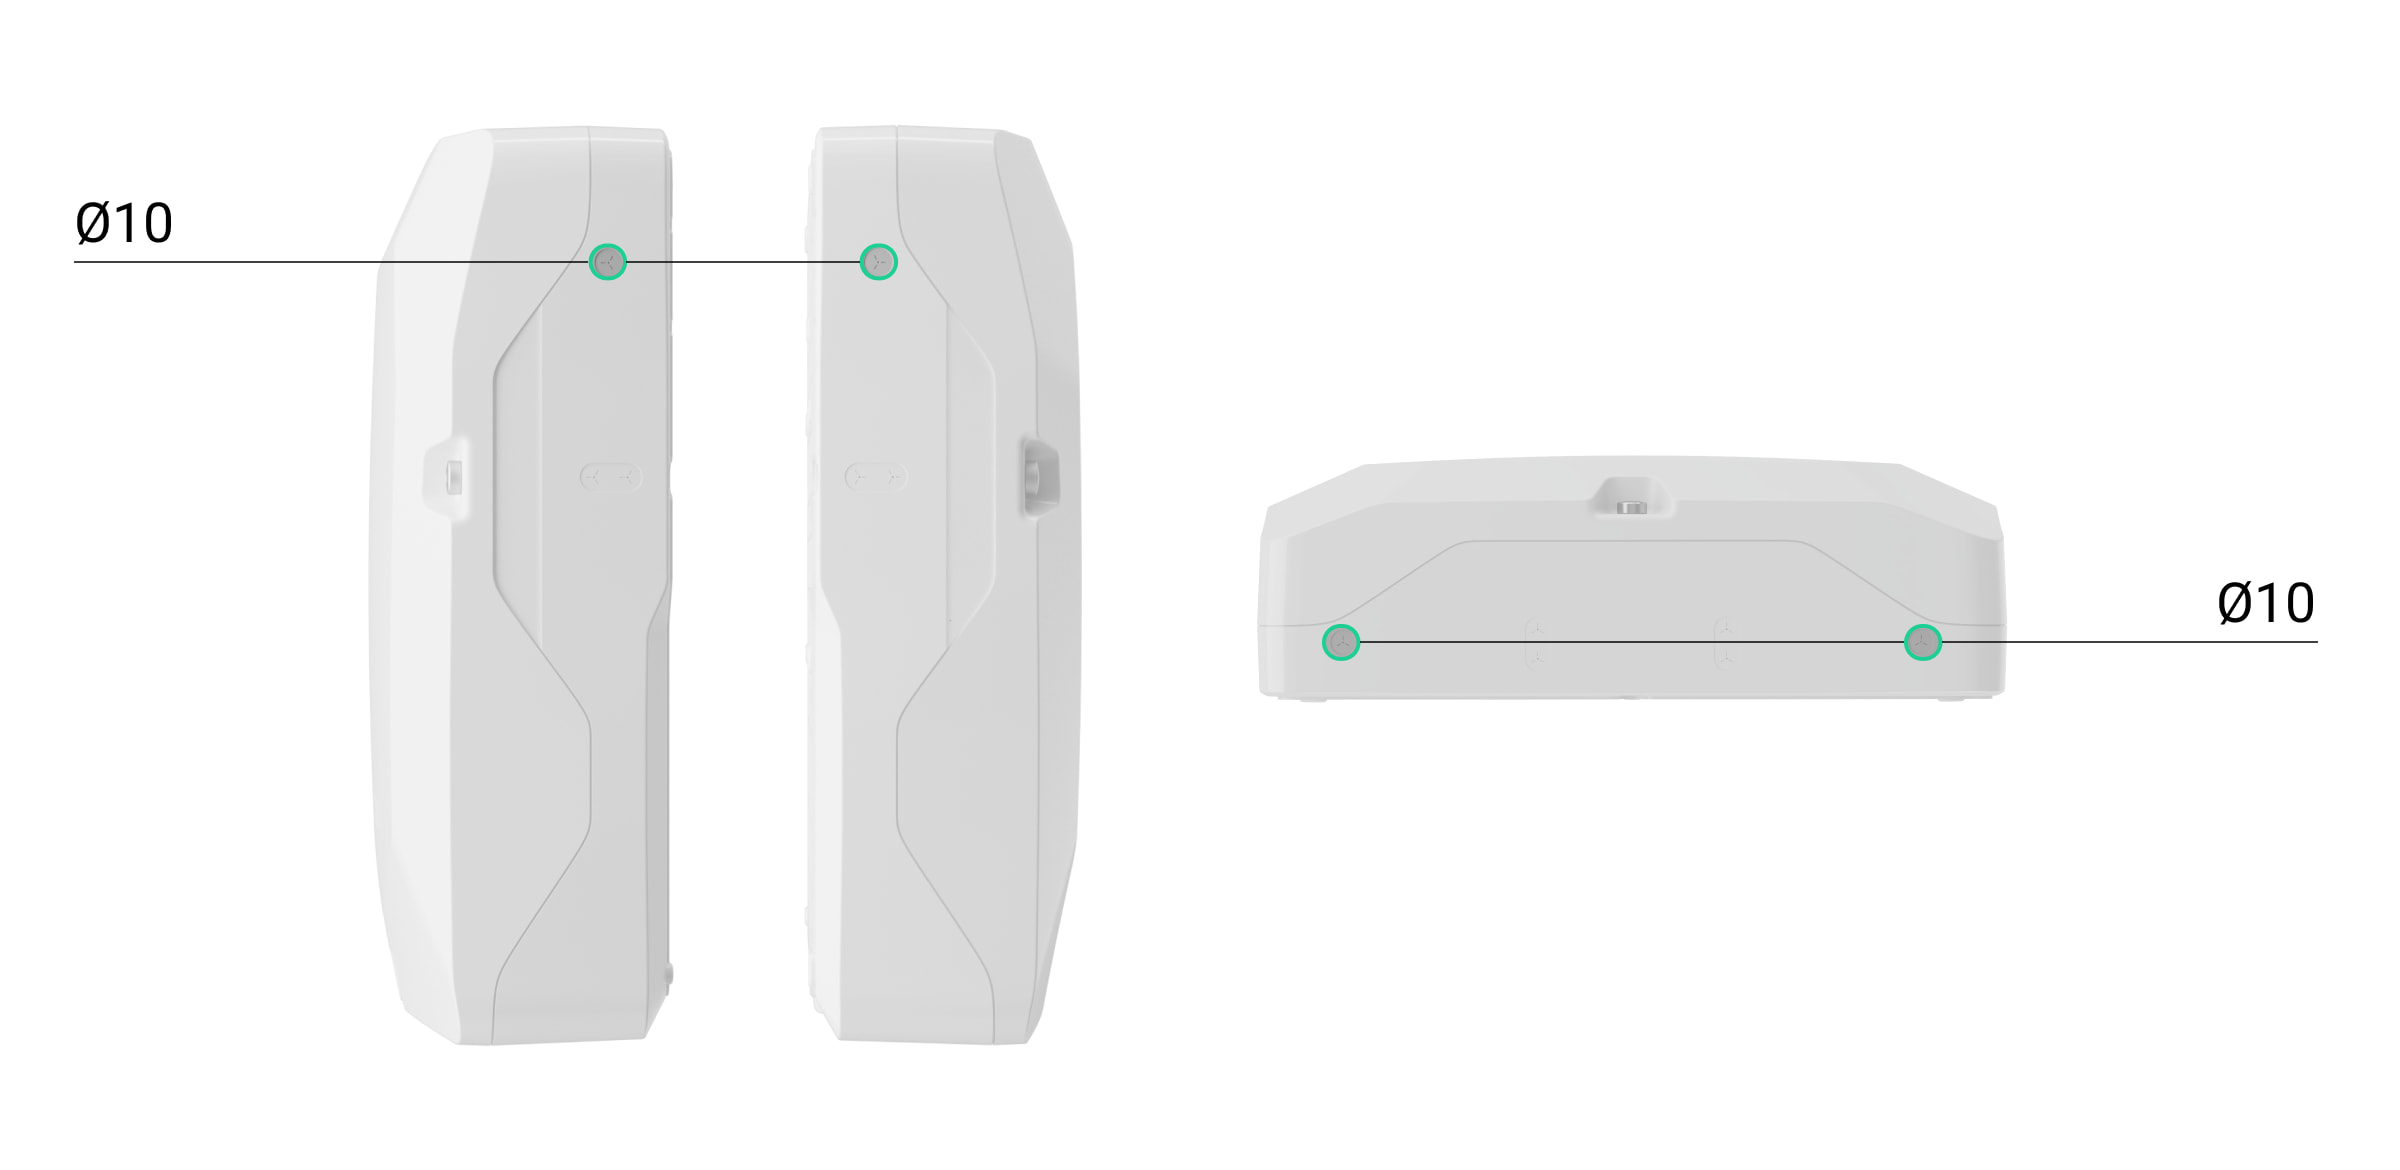
- Prepare cable holes in advance: drill the holes in the bottom or side of the casing or break out the perforated part on the back of Case. We recommend using a hole saw for plastic Ø16 mm or Ø20 mm.
Insert the pipe, corrugated pipe or conduit into the holes in the casing.
- Route the cables and lead them through the pre-prepared holes. Secure Case on the vertical or horizontal surface at the selected installation site with the bundled screws using all fixation points. One of them is in the perforated part above the tamper — it is required for tamper triggering if someone tries to detach the casing.

- Secure the device in the casing. Connect the cables to the corresponding terminals. Fix the cables with ties using fasteners.
- Connect the tamper board to the appropriate device connector.
- Place the lid on the casing and fasten it with the bundled screws.
- Check the state of the lid in the Ajax app. If the app shows the Front lid open state, check the tightness of Case.

Maintenance
The device does not require maintenance.
Technical specifications
Warranty
Warranty for products of Limited Liability Company “Ajax Systems Manufacturing” is valid for 2 years after purchase.
If the device does not function correctly, please contact Ajax Technical Support first. In most cases, technical issues can be resolved remotely.
Contact Technical Support:
Manufactured by “AS Manufacturing” LLC
