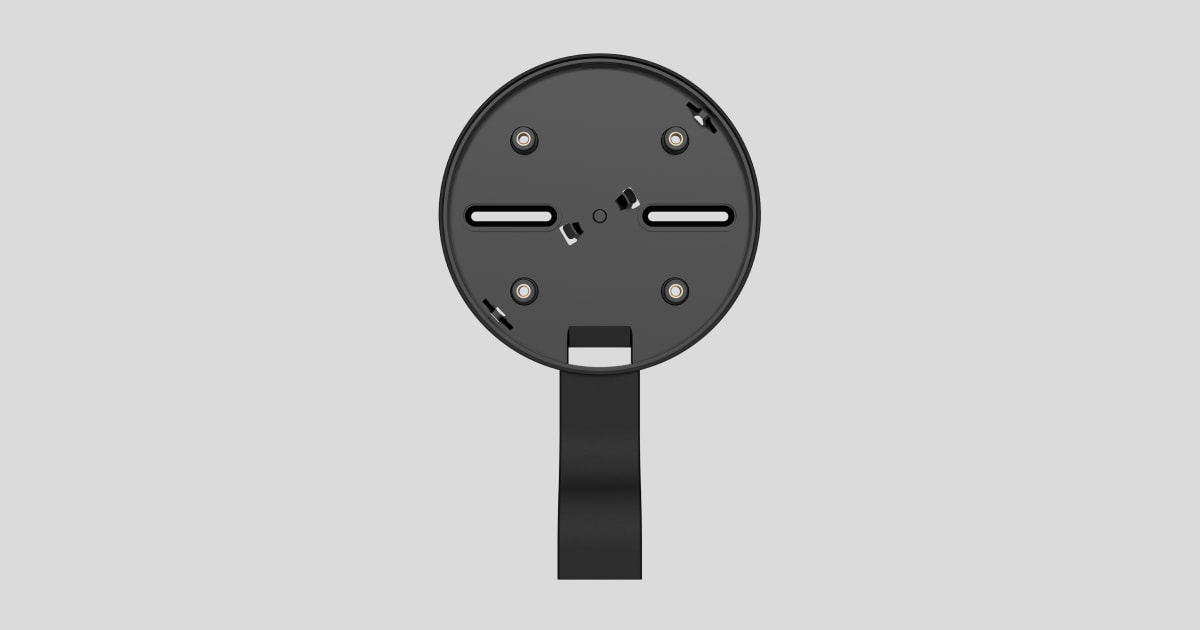
CableTrunk is an accessory designed for mains-powered FireProtect 2 AC detectors. It allows you to neatly route the fire detector’s power cable from the standard cable trunking. Use CableTrunk when it is impossible to route the power cable from the back of the detector and hide it inside walls or ceiling. The accessory provides lateral power wiring to the fire detector.
Functional elements
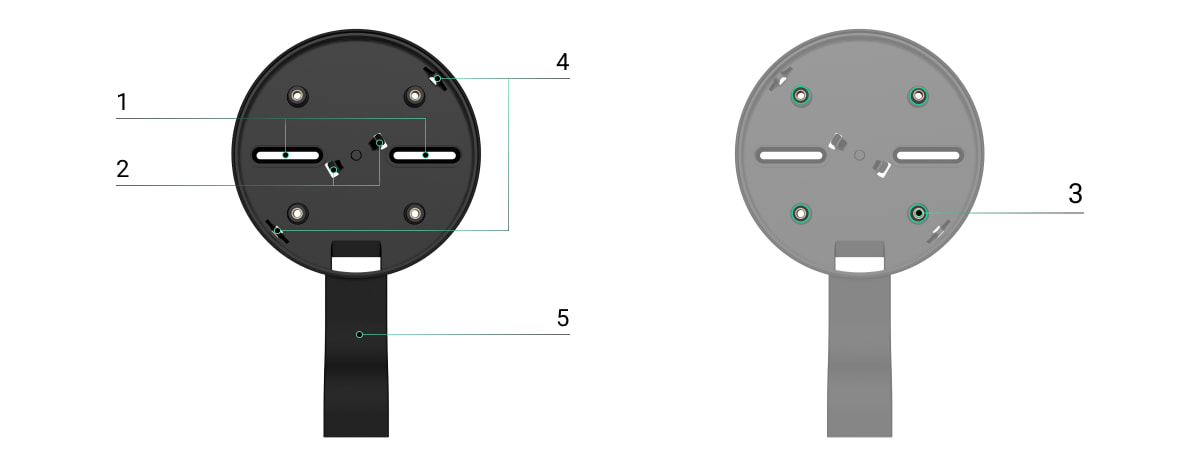
- Fixing points to attach CableTrunk to the surface.
- Latches to attach the fire detector’s SmartBracket before fixing it with screws.
- Fixing points to attach the fire detector’s SmartBracket to CableTrunk with screws.
- Stoppers to fix the fire detector’s SmartBracket in one of two available positions.
- Trunk to run the power cable.
Compatible devices
You can install any FireProtect 2 AC detector on CableTrunk.
Key features
CableTrunk is compact and makes the fire detector installation quick and effortless. It features latches for attaching the detector’s SmartBracket before fixing it with screws.
The CableTrunk construction provides the possibility of fixing the detector in four positions. This allows the power cable to be routed from the detector’s side and ensures the visibility of the detector’s LED indication for the user.
Selecting the installation site
The installation site of CableTrunk must comply with recommendations for installing FireProtect 2 AC detectors. Follow them when designing the Ajax system project for an object.
Preparing to install
Cable arrangement
Check your region’s electrical and fire safety regulations when preparing for cable routing. Strictly follow these standards and regulations.
Cable routing
We recommend you read the Selecting the installation site section carefully before installation. Avoid deviations from the system project. Violating the basic installation rules and the recommendations of this manual may lead to incorrect operation and loss of connection with devices installed with CableTrunk.
Installation
Before installation, ensure that you have selected the optimal location for CableTrunk and that it complies with the requirements of this manual.
To install CableTrunk:
- Power off the cable that you will connect to the detector.
- Match the accessory with the cable output point from the cable trunking and mark the locations for the drill holes on the surface where you plan to install CableTrunk. Drill two holes.
- Route the power cable from the cable trunking to CableTrunk. The recommended cable length is at least 15 cm.
- Secure CableTrunk on the surface with bundled screws using two fixation points.

- Route the power supply cable through the hole in the mounting panel.
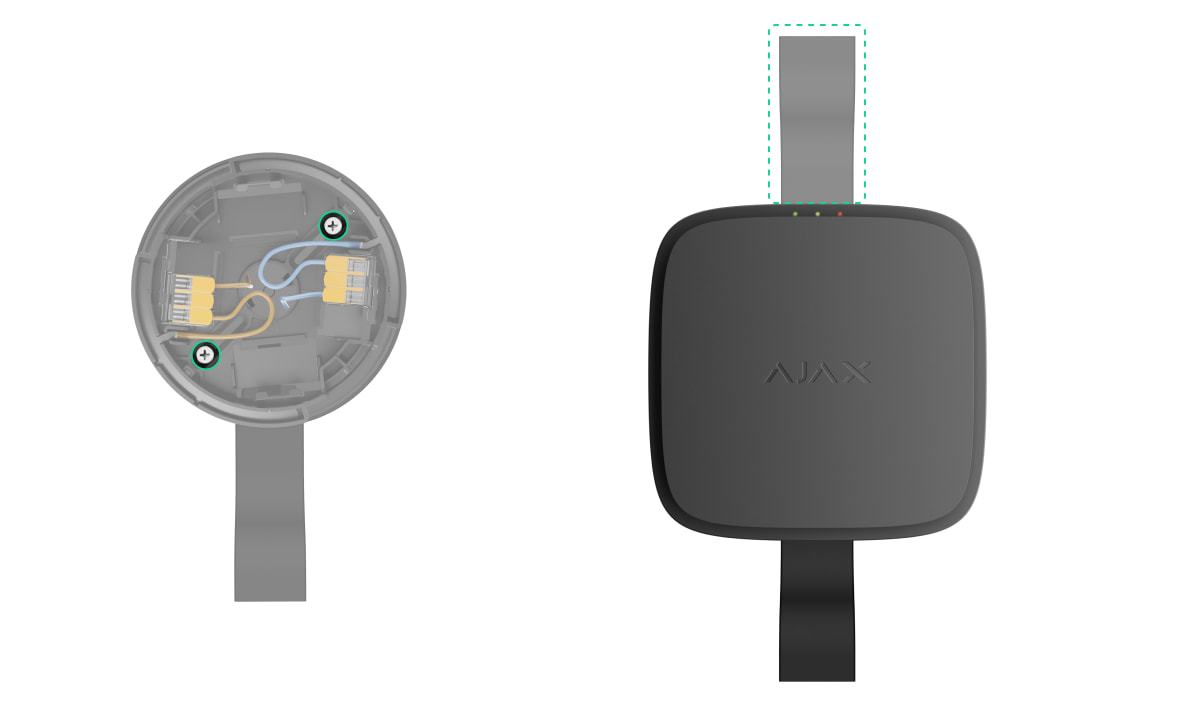
- Place the fire detector’s SmartBracket (without the protective cover) into CableTrunk. Fix it with latches.
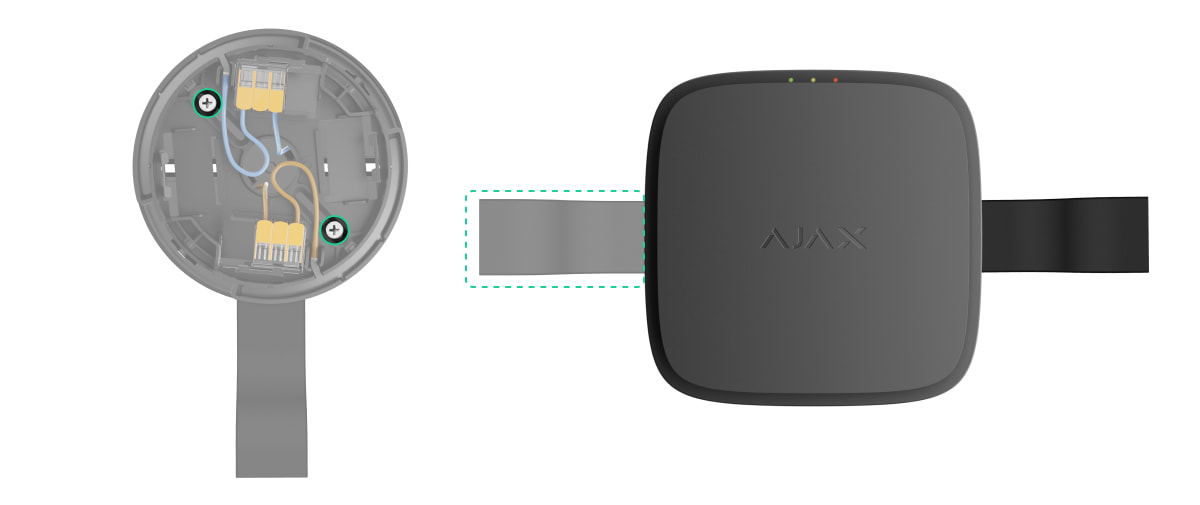
- Connect the power cable wires to the appropriate WAGO terminals. You can find more details in the FireProtect 2 AC detector user manual.
- Turn SmartBracket slightly clockwise or counterwise to select the fixing positions. When turning, the mounting panel will stop with a clicking sound; this means that SmartBracket is fixed in one of two positions.
Depending on the selected position, the detector LEDs will be placed at an angle of 0/90/180/270 degrees relative to the cable trunking.
- Secure SmartBracket on CableTrunk with bundled screws using two fixation points. Make sure they do not damage or deform the mounting panel.
- Secure wires with the protective cover and place the fire detector on the SmartBracket mounting panel.
- Adjust the position of the detector if necessary.
- Turn on the external power supply.


Maintenance
The device does not require maintenance.
Warranty
Warranty for products of Limited Liability Company “Ajax Systems Manufacturing” is valid for 2 years after purchase.
If the device does not function correctly, please contact Ajax Technical Support first. In most cases, technical issues can be resolved remotely.
Contact Technical Support:

