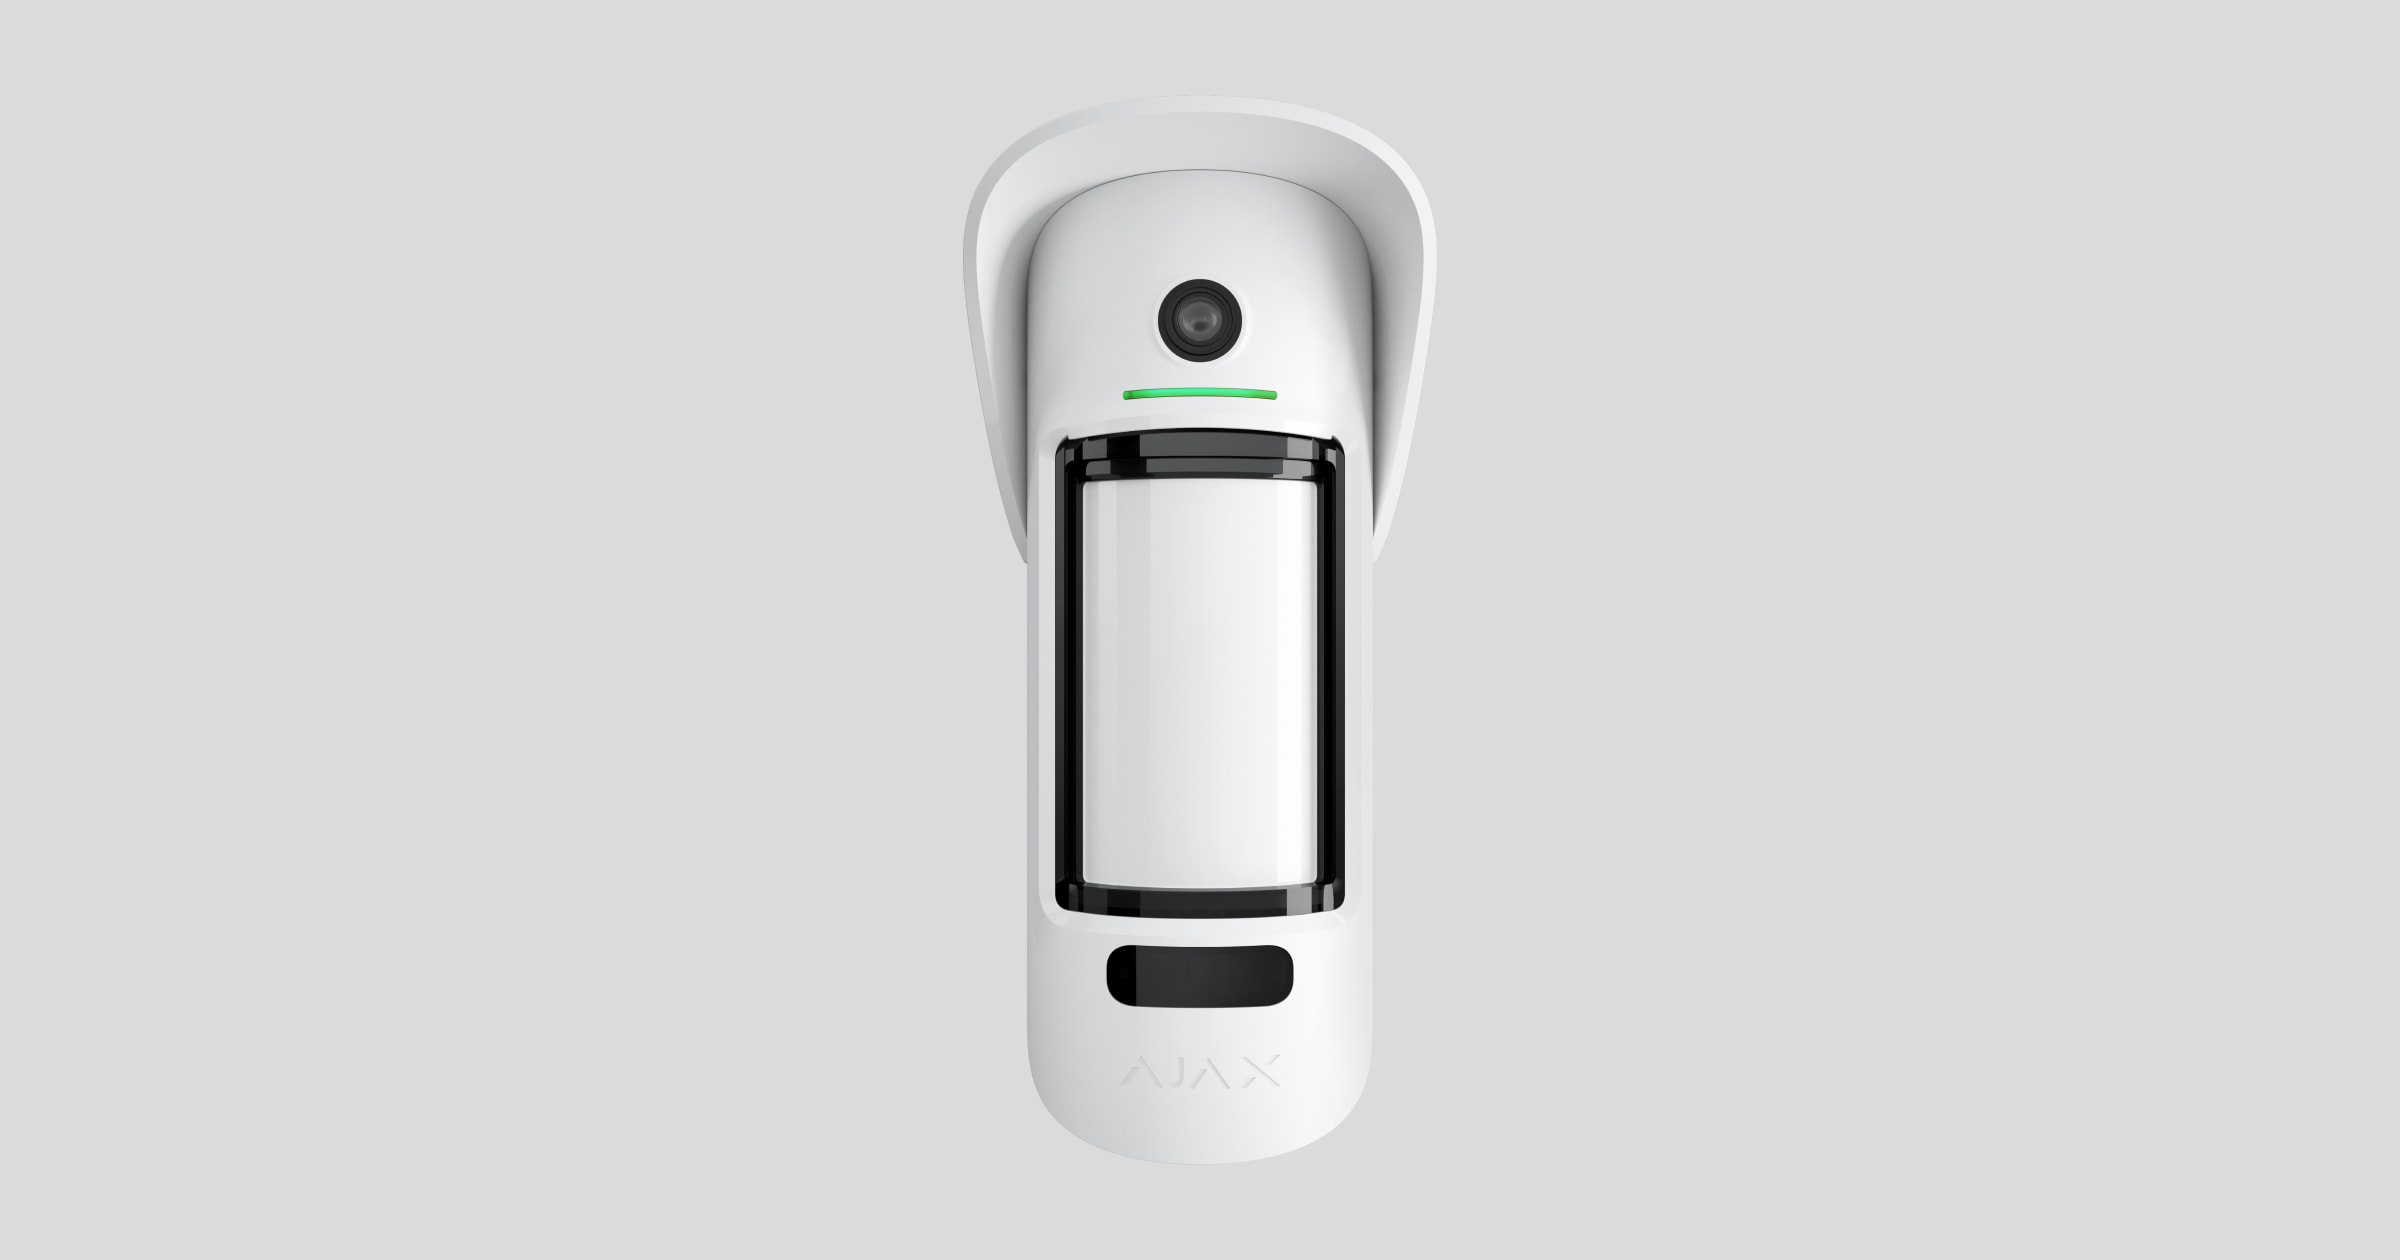
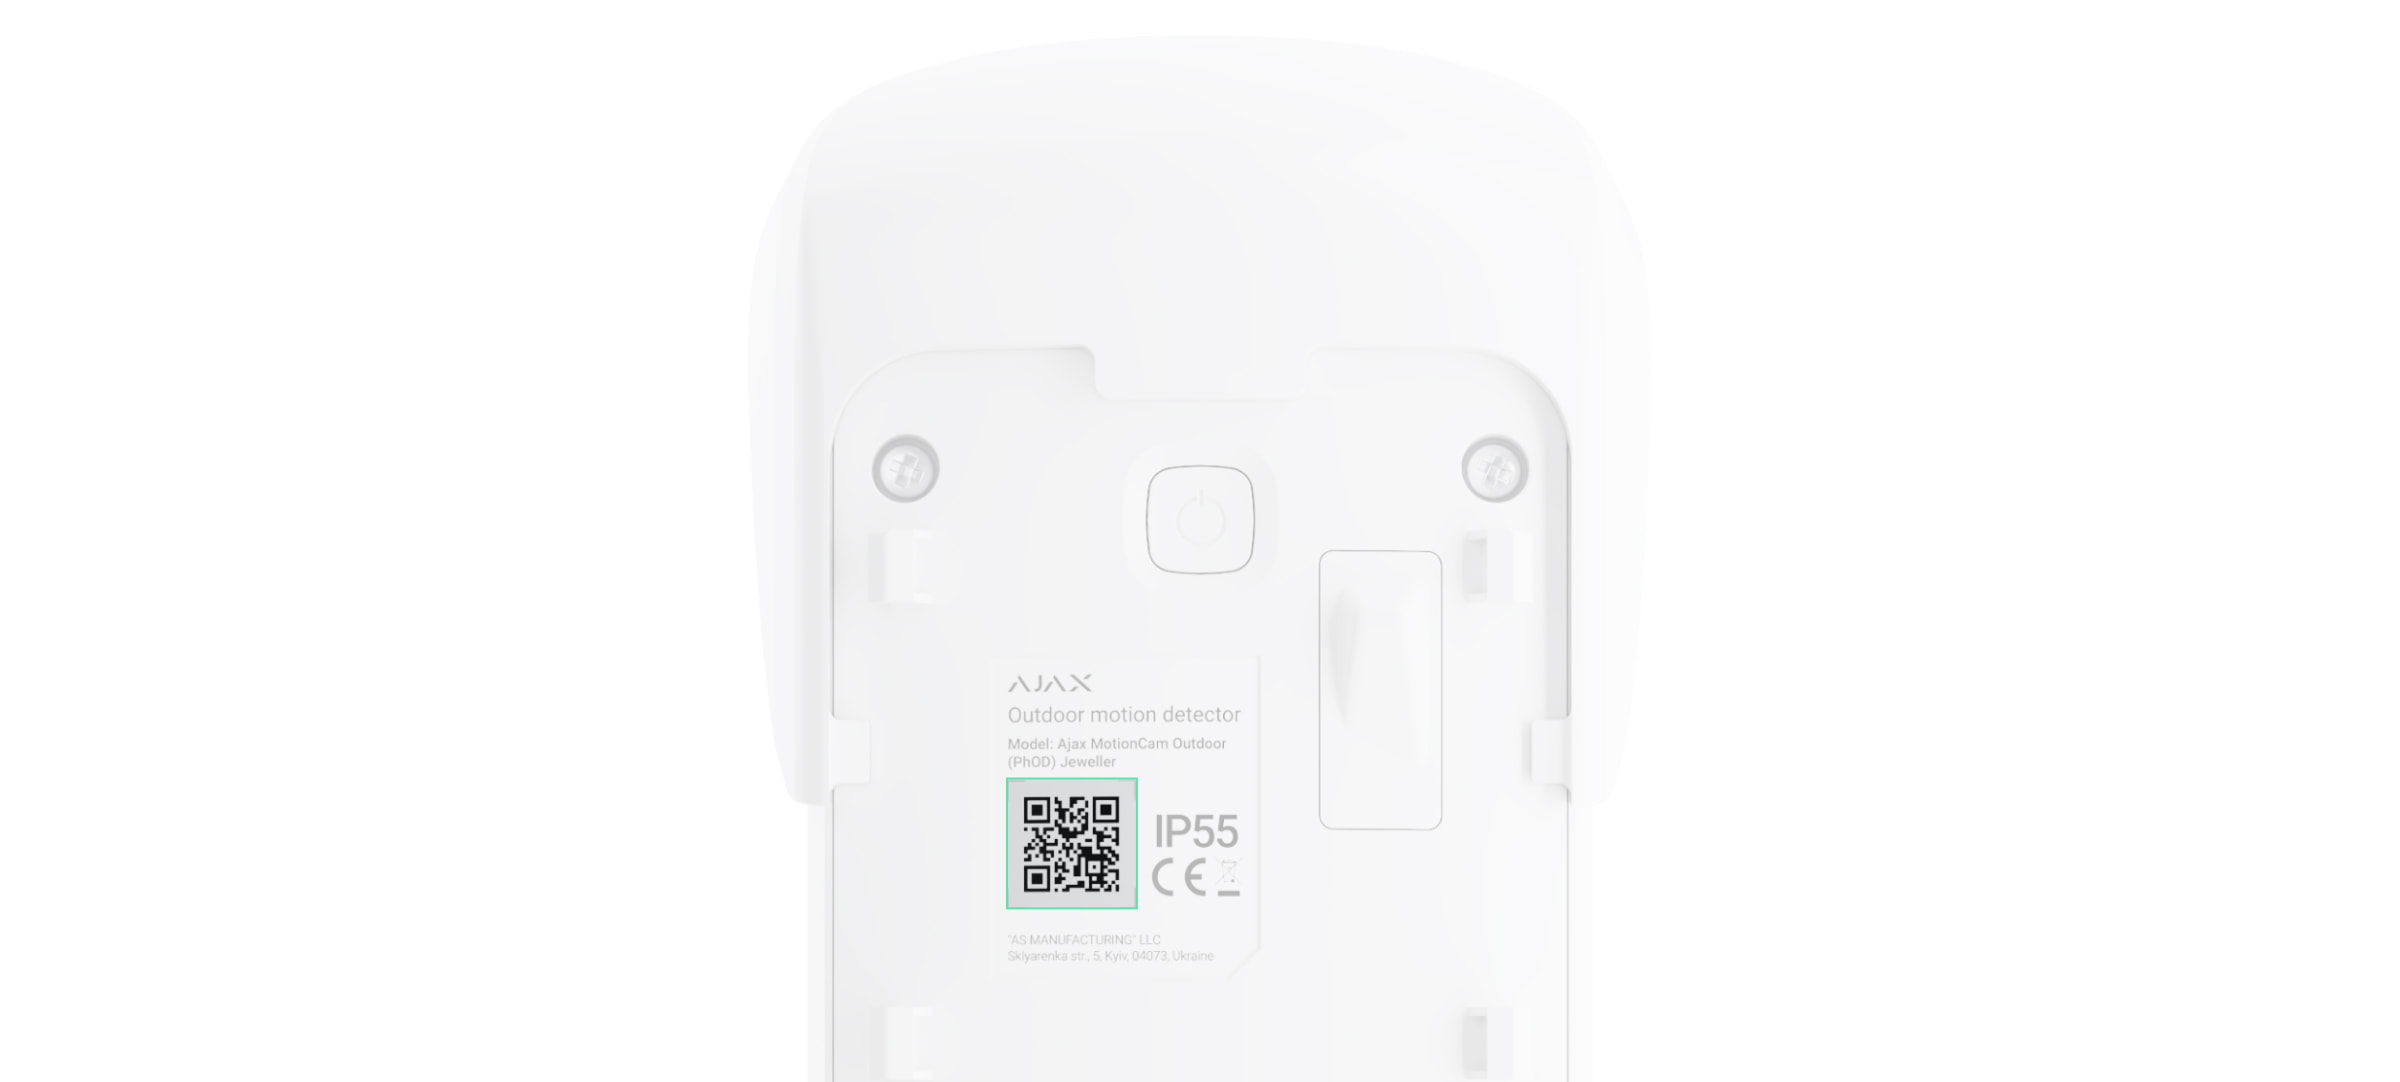
MotionCam Outdoor (PhOD) Jeweller is a wireless IR motion detector for indoor and outdoor use supporting Photo by alarm, Photo on demand, Photo by scenario, Photo by schedule, and Photo by arming/disarming features.
It has an adjustable range of motion detection up to 15 meters¹. The device detects attempts to block the view thanks to the anti-masking system. The detector does not react to animals up to 80 cm tall when installed and configured correctly.
A hub is required for the detector to operate.
MotionCam Outdoor (PhOD) Jeweller works as part of the Ajax system, communicating with the hub over two secure radio protocols; the detector uses Jeweller to transmit alarms and events and Wings² to transmit photos. The hub communication range is up to 1,700 meters in an open space.
1 Detection zone up to 9×13 meters is evaluated by UL.
2 Not evaluated by UL.
A version of the detector without the support of Photo on demand, Photo by scenario, Photo by schedule, and Photo by arming/disarming features is also available for purchase.
Functional elements
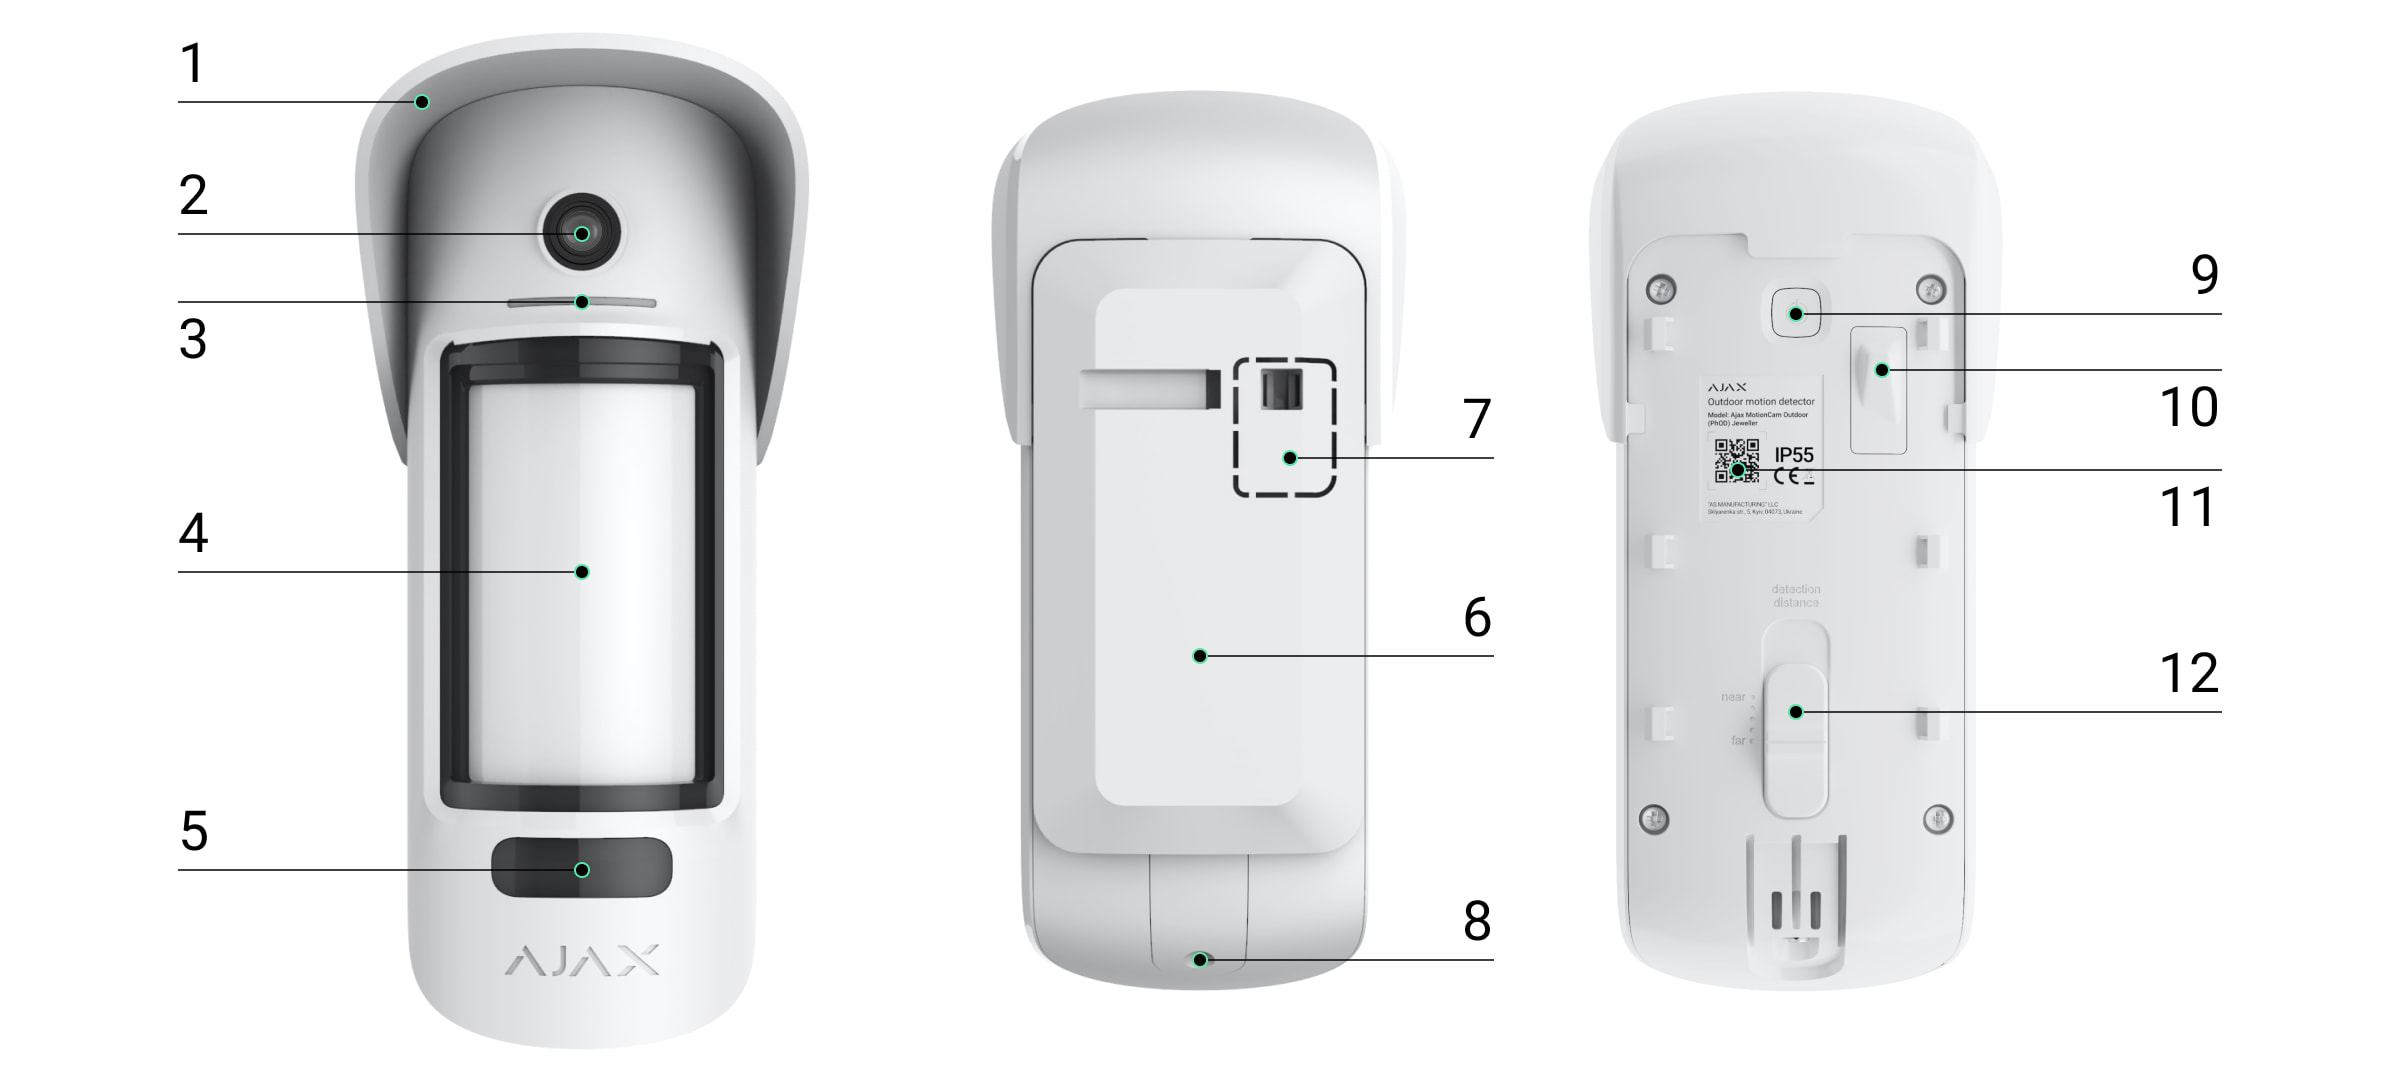
- Hood for protecting the camera and anti-masking sensors from rain and snow.
- Camera.
- LED indicator.
- Motion detector lens.
- IR backlight. It is used for night photos and low light conditions.
- SmartBracket mounting panel. To remove the panel, slide it down.
- Perforated part of the mounting panel. Necessary for tamper triggering in case of any attempt to detach the detector from the surface. Do not break it off.
- The hole for attaching the SmartBracket mounting panel with a screw.
- Power button.
- Tamper button. Triggers when an attempt to detach the detector from the surface or remove the mounting panel.
- Detector’s QR code / identifier. Used to connect MotionCam Outdoor (PhOD) Jeweller to the Ajax system.
- Detection distance scrollbar.
Compatible hubs and range extenders
MotionCam Outdoor (PhOD) Jeweller requires a hub to operate.
Connection to other hubs, radio signal range extenders, ocBridge Plus¹, and uartBridge¹ is not provided.
1 Not evaluated by UL.
Operating principle
MotionCam Outdoor (PhOD) Jeweller is a wireless motion detector supporting photo verification. It detects motion with two built-in infrared (IR) sensors by capturing moving objects with temperatures close to the human body. After a motion is detected, the built-in camera takes a series of photos, allowing you to dynamically assess what is happening at the site, saving users from unnecessary anxiety and security companies from false calls of patrol.
As soon as an armed detector detects motion, it instantly sends an alarm to the hub, activating the connected sirens, triggering scenarios, and notifying users and the security company. All MotionCam Outdoor (PhOD) Jeweller alarms and events are recorded in the notification feed of the Ajax app.
Users know exactly where motion is detected. The notifications contain the hub’s name (name of the secured facility), name of the device, and virtual room to which the detector is assigned.
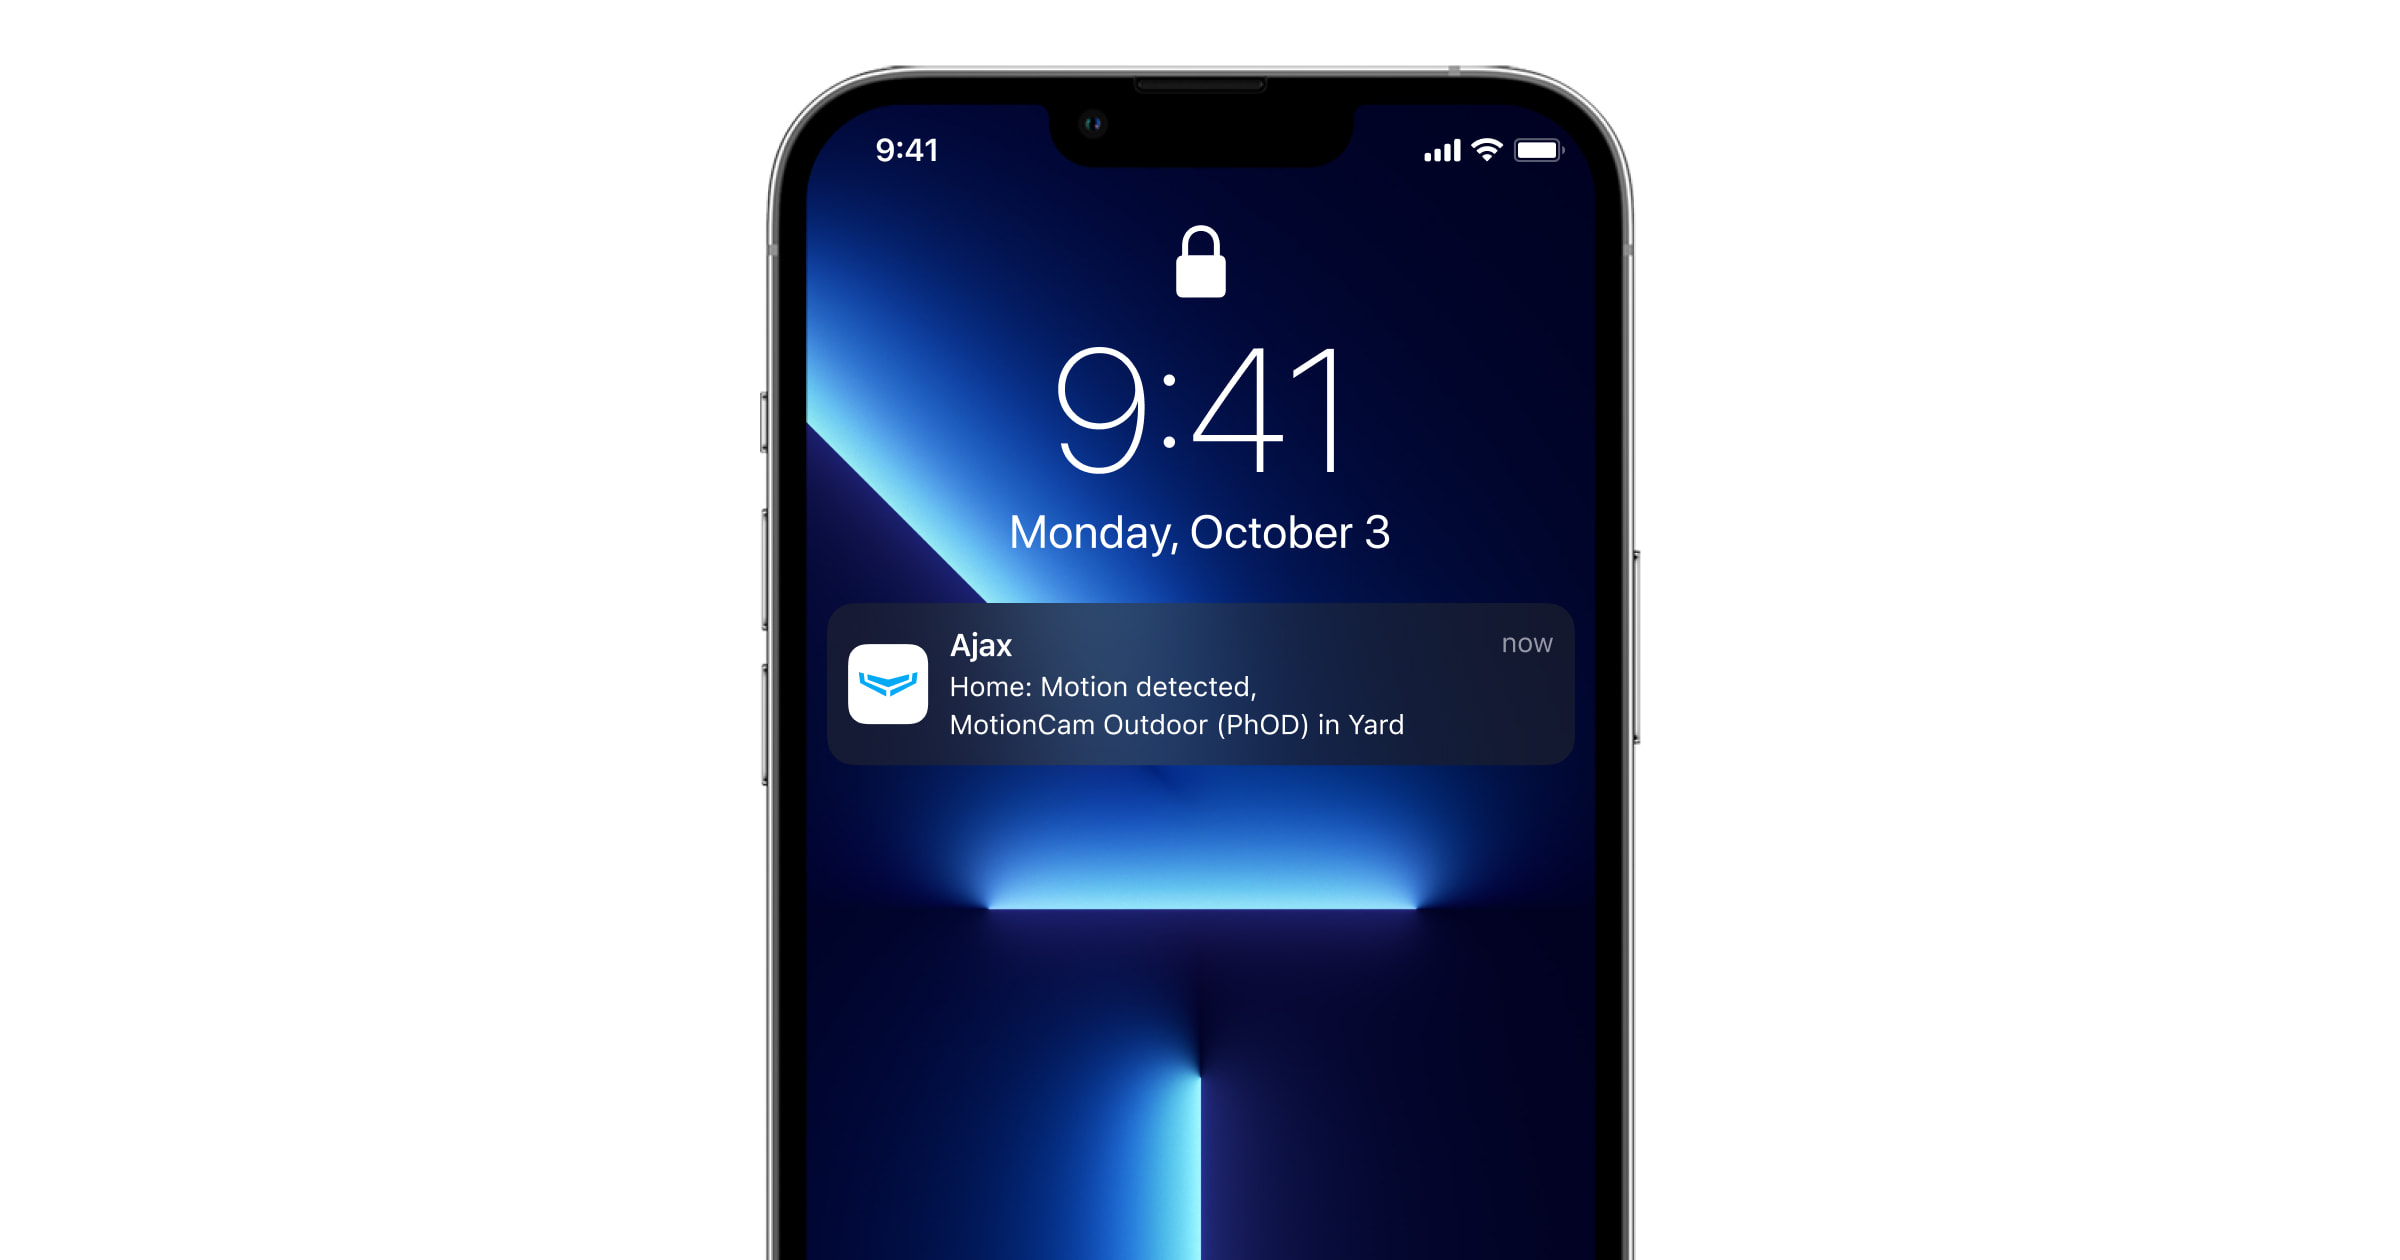
Photo verification
Photo verification allows assessing what is happening in the secured facility. The built-in camera¹ can take from 1 to 5 images with a resolution of 320 × 176 and up to 3 images with 640 × 352 pixels. The number of photos and their resolution are set in the detector settings.
MotionCam Outdoor (PhOD) Jeweller can transmit visual confirmations of alarms and show the reason of the alarms from other Ajax devices. Photo verification allows you to take an on-demand photo at any time to check the situation at the facility, find out the cause of the alarm, or see what the children are doing.
The detector has an infrared backlight for shooting in the dark, which activates insufficient light. MotionCam Outdoor (PhOD) Jeweller takes black and white photos when shooting in these conditions.
There are several types of photo verification: photo by alarm, photo by scenario, photo on demand, photo by schedule, and photo by arming/disarming.
1 The MotionCam Outdoor (PhOD) Jeweller camera and photo verification feature are not evaluated by UL.
Photo by alarm
If the Photo by alarm feature is configured in the MotionCam Outdoor (PhOD) Jeweller settings, the detector alarms in the Ajax apps are accompanied by photos or an animated series, depending on the selected viewing mode. The detector takes a photo only when armed.
The detector does not switch to the armed mode instantly. The switching time depends on two factors: the exit delay (specified in the detector settings) and the hub–detector ping interval (hub settings, Jeweller section).
In the first case, the delay is set by an administrator or a PRO user with system configuration rights. In the second case, the delay occurs because the hub takes one ping interval to notify the detector about the security mode changing.
Click on the MotionCam Outdoor (PhOD) Jeweller alarm notification in the event feed to view the photos. Photos are available to all users with access to the event feed.
A series of photos are played back in the application as animation. It helps to evaluate the unfolding of the incident over time. You can also view all the photos individually by clicking on the icon at the bottom of the screen.

You can save photo verification as video or images by clicking the download icon.
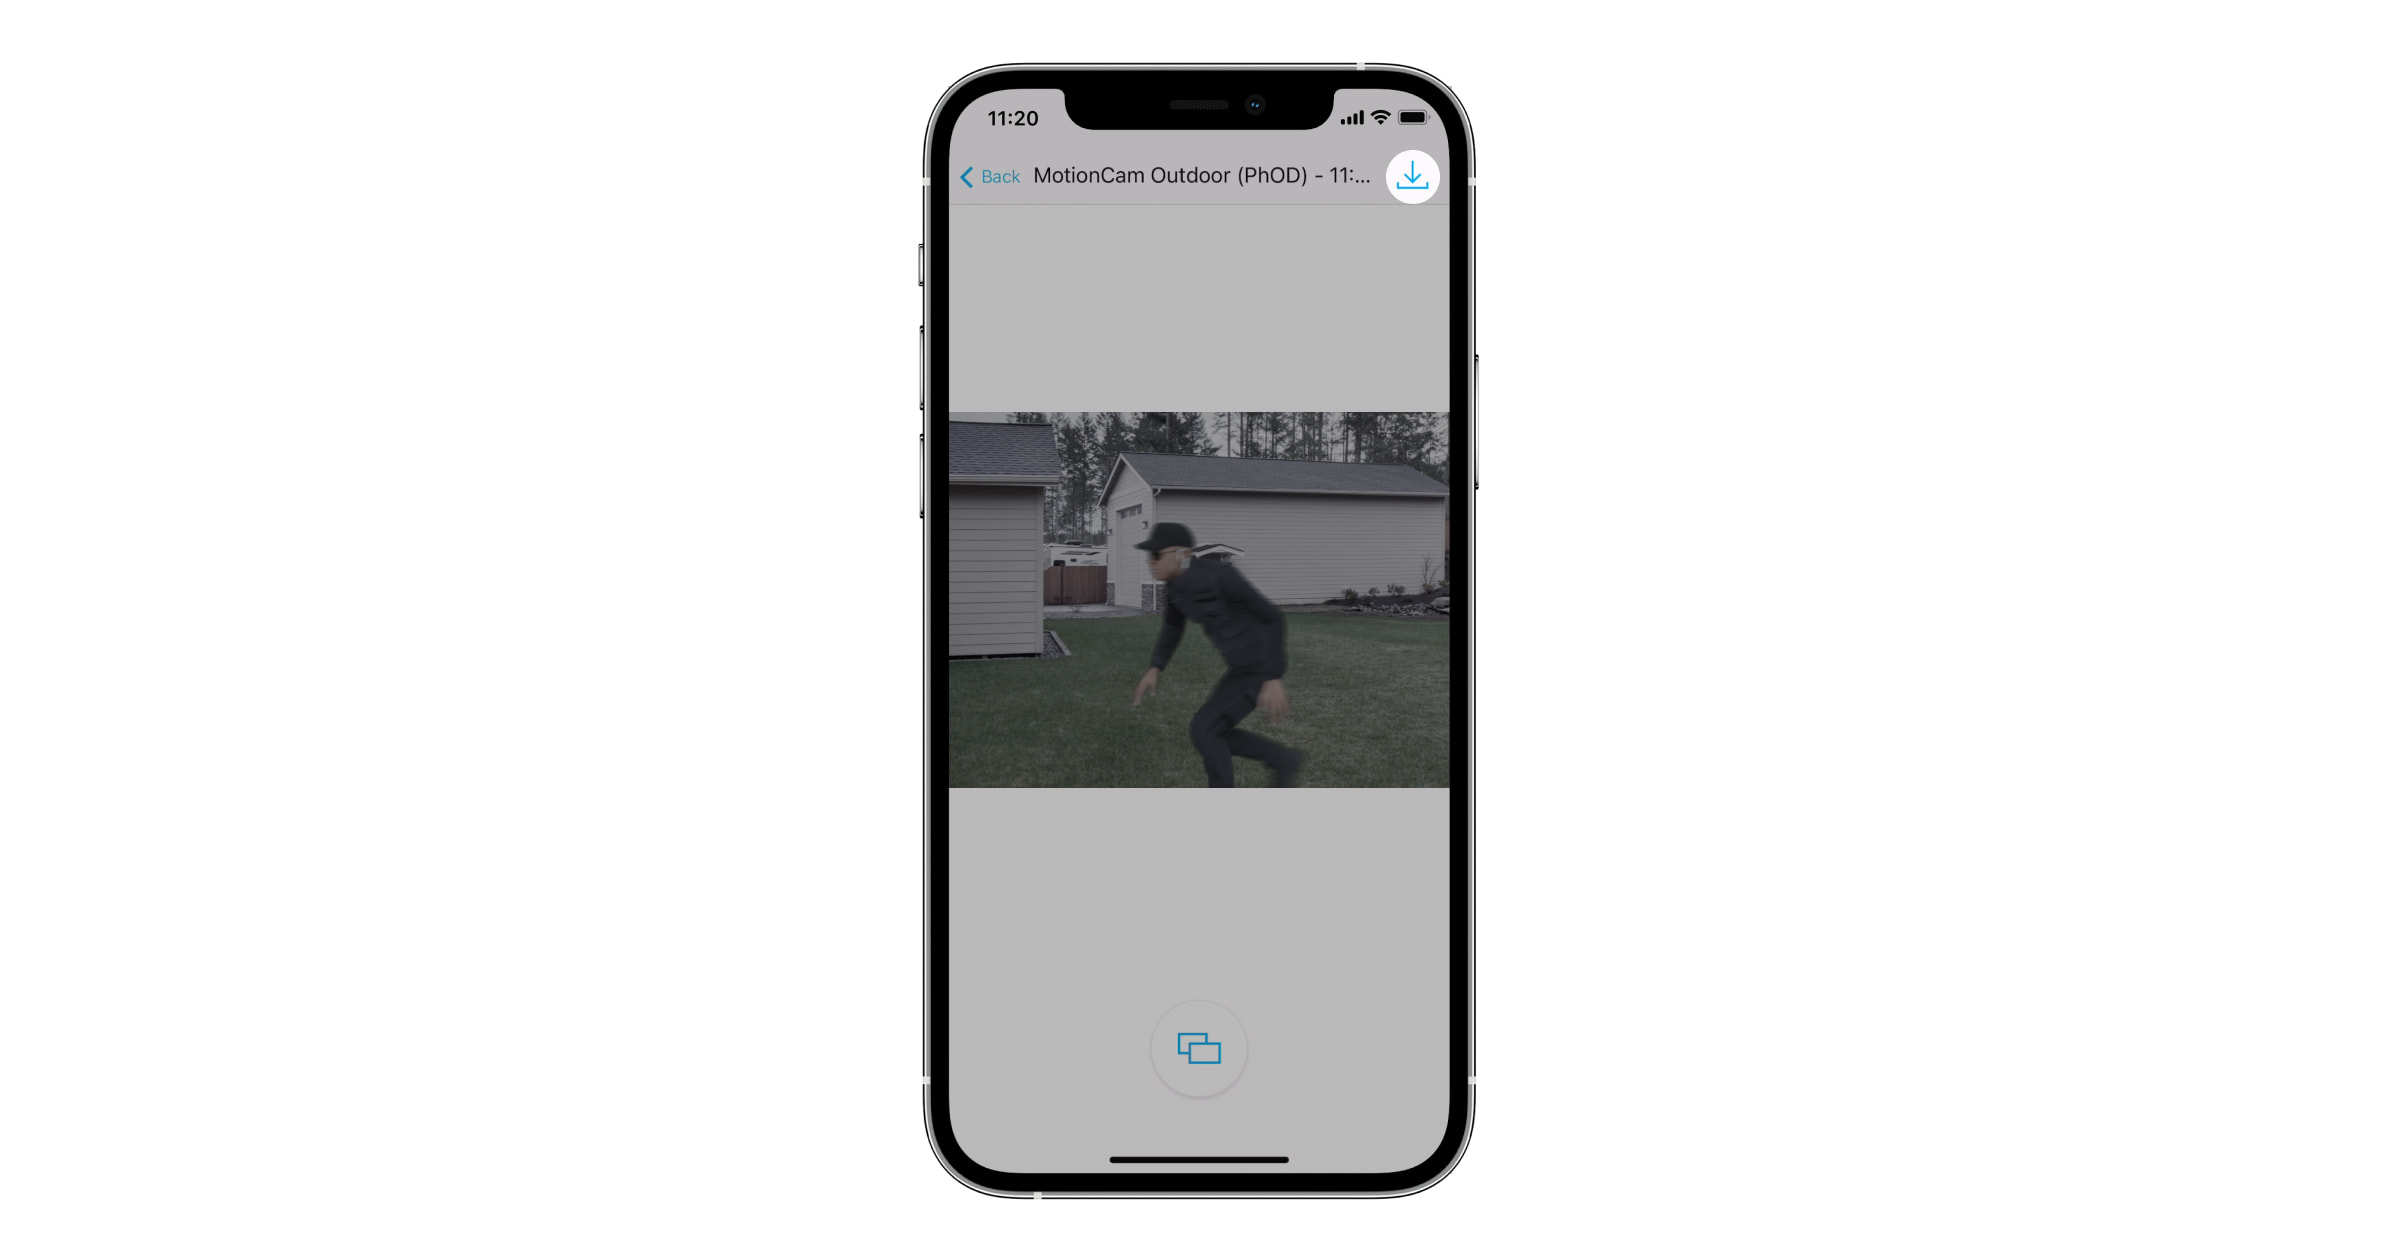
Photo on demand
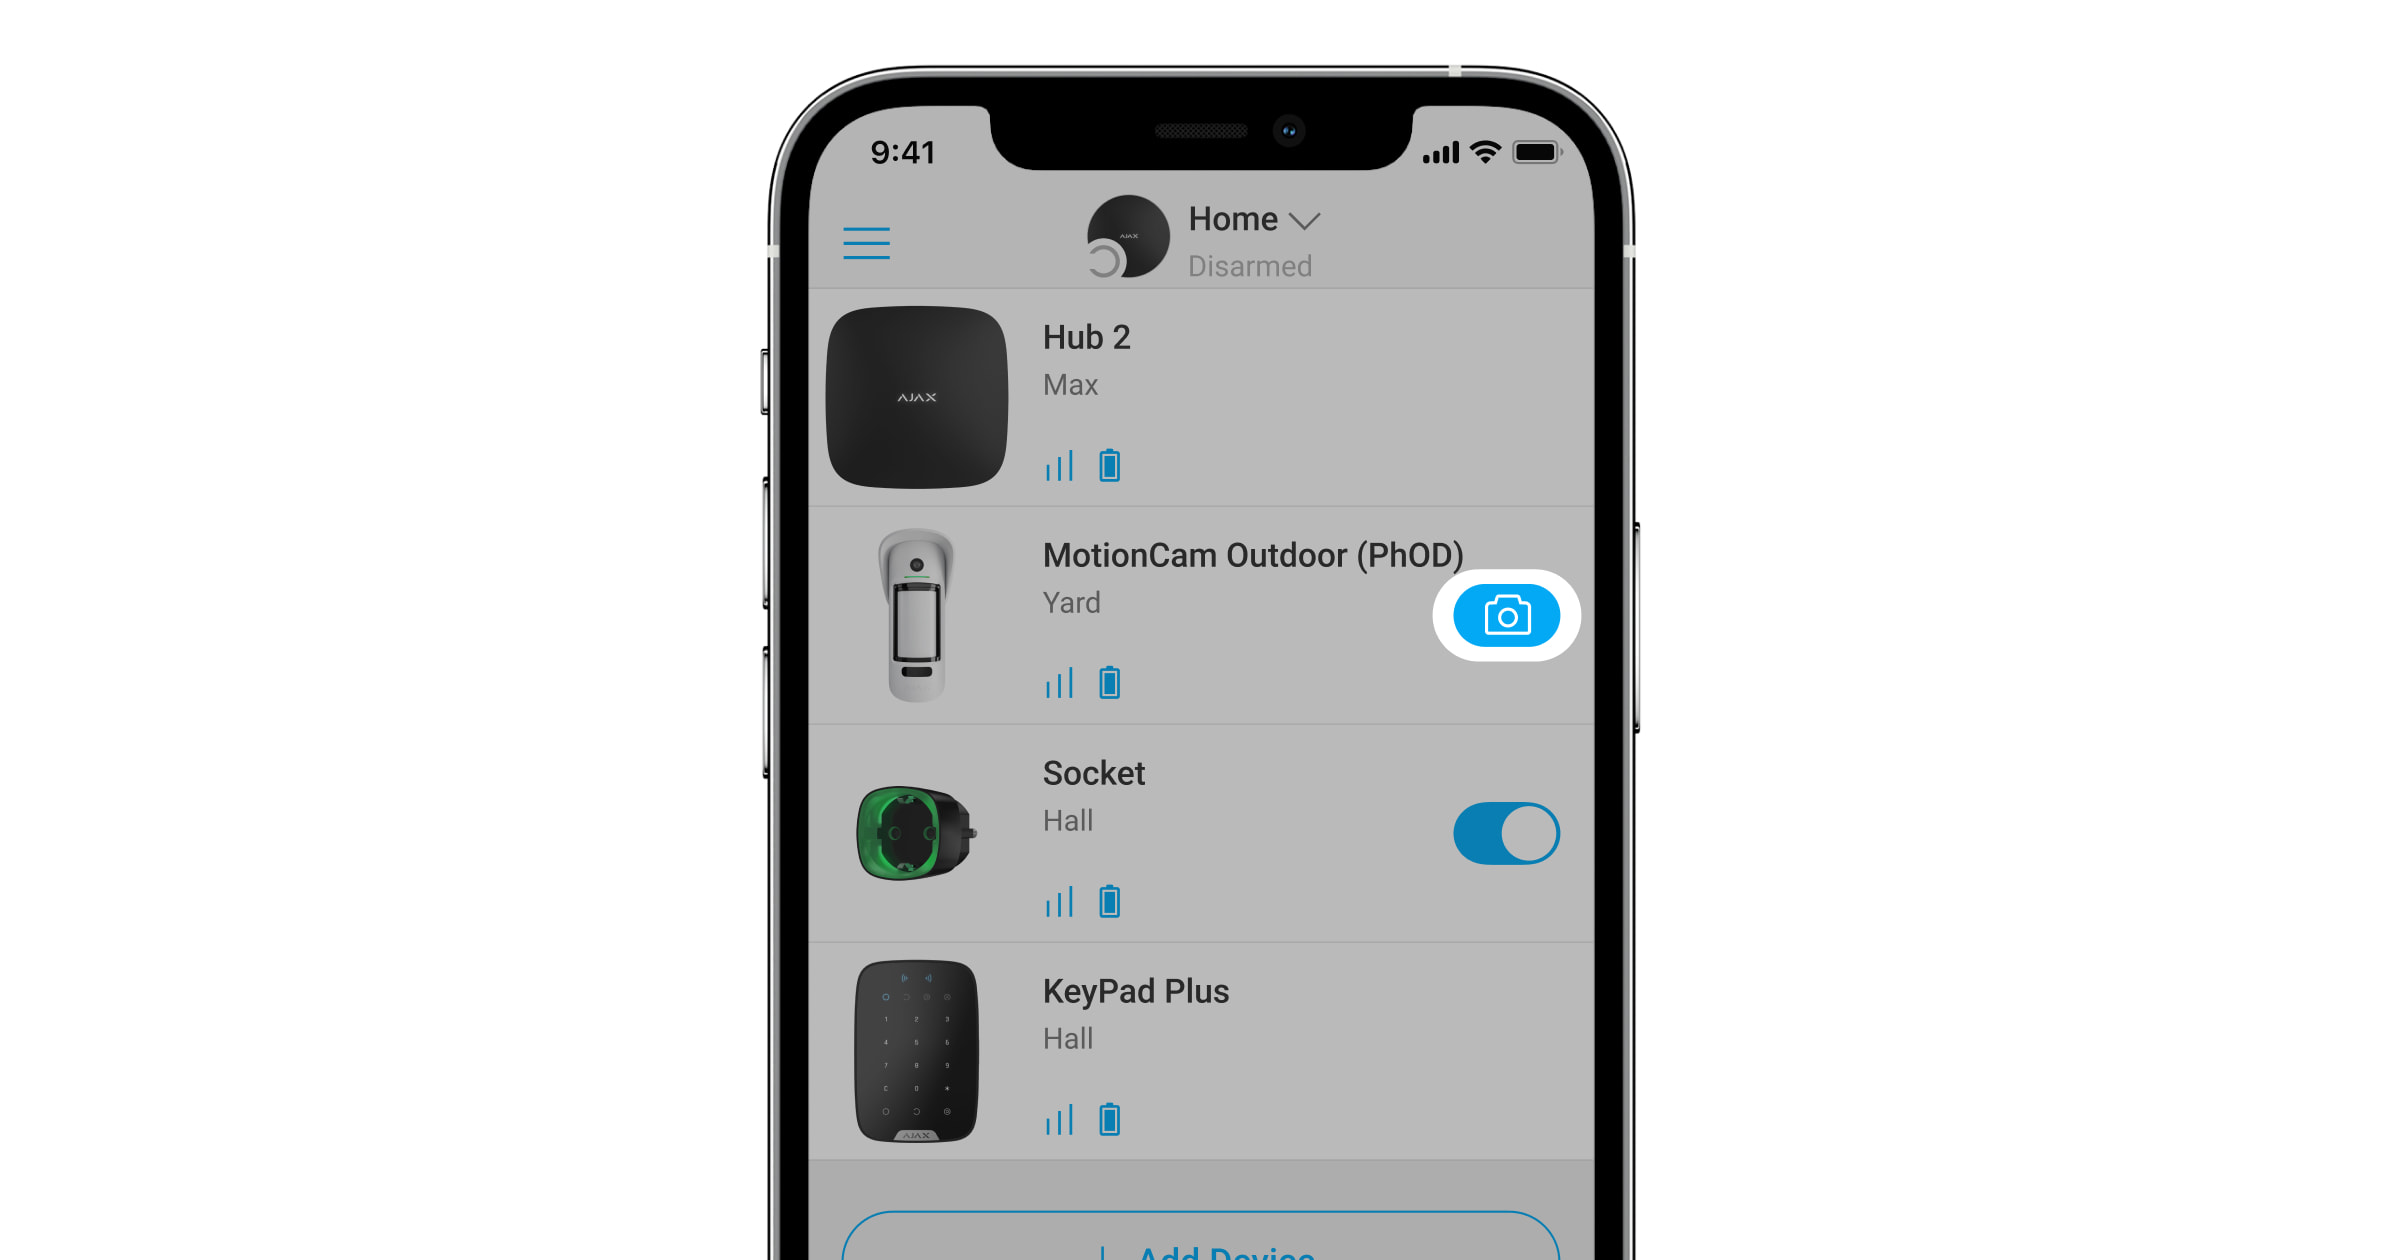
The Photo on demand feature allows users to take pictures with the built-in cameras of detectors with photo verification. With this feature, you can check the situation at the facility: find out what the children are doing, check if your pet is OK, or simply monitor the situation at home. Depending on the settings, photos can be taken at any time or when MotionCam Outdoor (PhOD) Jeweller is armed.
By default, the Photo on demand feature is disabled for all users. Users with the right to manage privacy settings (hub settings, Privacy section) determine who can take and view photos on demand and which detectors with photo verification can take pictures. PRO users cannot manage privacy settings, but they can take photos on demand if granted permission.
Privacy settings do not apply to photos taken by detectors triggered in case of an alarm. All system users who have access to the hub event feed can view the photos taken in case of an alarm.
Photos on demand are not sent to the security company monitoring station.
PRO Desktop users can take and view photos on demand only from a personal account if a hub administrator has granted them the appropriate access rights. Taking and viewing photos on demand is not available for a security company profile in the PRO Desktop app.
Photo by scenario
The Photo by scenario feature allows creating a scenario for motion detectors with photo verification, according to which they will take pictures in case of alarm from other Ajax devices.
By default, the Allow photo by scenario option is disabled for all detectors. A hub admin or a user with access to privacy settings can enable it.
In the system settings, you can also set precisely when a detector with photo verification can take pictures according to a scenario: always or when MotionCam Outdoor (PhOD) Jeweller is armed.
Photos by scenario are available to all system users with access to the event feed. The event of taking a photo after the alarm from specified devices is sent to the security company monitoring station via SIA DC-09 (SIA-DCS) and other proprietary protocols. The event code is 730.
The photos taken by scenario are available to the CMS engineers if the CMS software supports photo verification. Photos by scenario are also available in the PRO Desktop app.
Photos by scenario will not be sent to the CMS if only a direct connection with the monitoring station is used.
Photo by schedule
The Photo by schedule feature allows you to create a scenario for motion detectors with photo verification. These detectors will take pictures by schedule.
Enable the Allow photo by scenarios option before creating a scheduled scenario. A hub admin or a user with access to privacy settings can enable this option.
You can precisely set when a detector with photo verification can take pictures according to a scheduled scenario: always or when it is armed.
Photos taken by schedule are available to all system users with access to the event feed. The event of taking a photo is sent to the CMS via SIA DC-09 (SIA-DCS) and other proprietary protocols. The event code is 731.
If the CMS software supports photo verification, photos taken by schedule are available to the CMS engineers. These photos are also available in PRO Desktop.
Photos taken by schedule are not sent to the CMS if only a direct connection with the monitoring station is used.
Photo by arming/disarming
The Photo by arming/disarming feature allows users to receive photos from a built-in camera when the security state changes. With this feature, you can check the situation at the facility when the system is armed, disarmed, or switched to Night mode.
Before creating an arming/disarming scenario, enable the Allow photos by scenarios option. A space admin or a user with access to privacy settings can enable this option.
The Photo by arming/disarming scenario is available in the hub’s settings with OS Malevich 2.29 and later. The feature allows you to configure conditions under which the selected detectors take photos: when arming, when disarming, when Night mode is enabled, or when Night mode is disabled. Also, you can set up whether to consider or ignore entry/exit delays.
Photos by arming/disarming are available to all system users with access to the event feed. The event of taking a photo is sent to the CMS via SIA DC-09 (SIA-DCS) and other proprietary protocols. The event code is 732.
If the CMS software supports photo verification, the CMS engineers can access photos by arming/disarming. These photos are also available in PRO Desktop.
Photos by arming/disarming will not be sent to the CMS if only a direct connection with the monitoring station is used.
Photo delivery time
The photo delivery time depends on the selected resolution, detector connection method (the detector connects to the hub directly or via the range extender), Wings signal strength, and the Internet connection speed. The alarm messages are delivered immediately.
| Photo resolution | Delivery time1 | ||
| When connected directly to the hub2 | When connected to the hub via ReX 2 (ReX 2 transmits photos via Wings)3 | When connected to the hub using ReX 2 (ReX 2 transmits photos via Ethernet)4 | |
| 320 × 176 pixels (default) |
up to 9 seconds | up to 37 seconds | up to 24 seconds |
| 640 × 352 pixels | up to 20 seconds | up to 50 seconds | up to 32 seconds |
1 The detector needs up to 3 seconds to start the Photo on demand shooting.
2 The delivery time of one photo when the signal strength between the hub and the detector is 2–3 bars, and the hub is connected via Ethernet, Wi-Fi or 4G.
3 Values were calculated with a signal strength of 3 bars between ReX 2 Jeweller and the detector or between the hub and ReX 2 Jeweller. The hub works via Ethernet, Wi-Fi or 4G.
4 Values were calculated with a signal strength of 3 bars between ReX 2 Jeweller and the detector. The hub is connected via Ethernet, Wi-Fi or 4G.
Jeweller and Wings data transfer protocols
Jeweller and Wings are two-way wireless data transfer protocols that provide fast and reliable communication between hub and devices. The detector uses Jeweller to transmit alarms and events. Wings are used to transmit photos.
Both protocols support encryption and authentication to prevent forgery. Connection with devices is monitored via a hub–detector polls system. Their statuses are displayed in real-time in the Ajax apps. The polling frequency is set by a user or a PRO with system configuration rights.
Protection against false alarms
MotionCam Outdoor (PhOD) Jeweller uses the SmartDetect algorithm like other Ajax indoor detectors.
With the SmartDetect algorithm, the detector instantly analyses the thermal diagram read by the sensor:
- The intensity of infrared radiation.
- Size of the heat spot.
- Speed of movement.
- Time spent in the detection area.
- Other parameters.
Usually, at this point, the detector is ready to make a decision: ignore or raise the alarm. But if the situation is quite not clear, the detector activates the two-step LISA algorithm. As soon as both infrared (IR) sensors detect movement, LISA performs correlation and spectral analysis of the signals to instantly distinguish between real threats and interferences.
Correlation analysis
When motion is detected, the LISA algorithm analyses and compares the waveforms of two signals from the infrared sensors in real time. If waveforms are similar, the detector raises the alarm.
Spectral analysis
When both IR sensors detect motion, but correlation analysis does not reveal sufficient similarity of waveforms, LISA compares the frequency components of the signals.
Protection against faster battery discharging
To prevent rapid battery discharge, MotionCam Outdoor (PhOD) with firmware version 7.58.5.14 and later has the Notify on risk of fast battery discharge setting. Once the device detects that it is installed incorrectly, system users will receive notifications in Ajax apps, and similar information will be displayed in the device states.
Upon motion detection by one of the IR sensors, the detector takes photos. If the detector verifies the alarm, photos and the alarm are sent to the central monitoring station and Ajax apps; otherwise, the photos are deleted. In case of the detector’s incorrect installation and a high frequency of filtered-out triggers by the LISA algorithm, the battery life of the detector decreases. Enable the Notify on risk of fast battery discharge feature in the device settings to save the battery charge.
Consider changing the device placement if you receive a notification about incorrect installation.
Pet immunity

When properly installed and configured, MotionCam Outdoor (PhOD) Jeweller does not react to animals up to 80 cm tall. The weight of the animal makes no difference.
To effectively ignore all outdoor-typical interference, these detectors are equipped with two infrared sensors that read signals from two areas of space. They will raise the alarm if both sensors detect motion simultaneously.
If the detector is installed correctly at the height of 0.8–1.3 meters from the ground level, animals can enter the detection zone of only one of the detector’s sensors. This is why MotionCam Outdoor (PhOD) Jeweller rejects such triggers as false and does not raise the alarm.
Temperature compensation
Temperature compensation¹ is a software mechanism that allows you to maintain the thermal diagram contrast even if the ambient temperature is close to the human body temperature.
With each ambient temperature measurement, the detector introduces a correction according to the table of coefficients stored in its memory — increases or decreases the sensitivity of the IR sensors. This allows the detector to effectively identify motion over the entire operating temperature range from –25°C to +50°C.
1 Not evaluated by UL.
Protection against masking
Masking is an attempt to block the view of the detector by painting over it, covering it, placing an obstacle in front of the detector’s lens, or otherwise.
MotionCam Outdoor (PhOD) Jeweller detects the following types of masking:
- Obstacle in front of the detector lens at a distance of up to 10 cm (the maximum distance depends on the type of material).
- Painting over the detector lens.
- Sticking over the detector lens.
| Masking type | Time to alarm, seconds |
Time to restore, seconds |
|
The obstacle in front of the detector’s lens (up to 10 cm from the lens) |
7 | 20 |
| Painting over the detector lens with varnish or paint | 100 | 20 |
| Sticking over the lens or the front side of the detector | 100 | 20 |
* The maximum time for masking detection is 180 seconds (depends on the type of obstacle and the distance to it).
The system informs the users and the security company about masking. For additional protection and informing, siren response to masking in the detector settings can be enabled.
The masking-detection function is always active and works regardless of the detector or system security mode.
A Hood visor is provided and included in the detector kit for additional protection of the camera and the masking-detection system from false alarms in case of heavy rain or snow.
Sending events to the CMS
The Ajax system can transmit alarms and events to the PRO Desktop monitoring app as well as the central monitoring station (CMS) via SurGard (Contact ID), SIA DC-09 (SIA-DCS), ADEMCO 685 and other proprietary protocols. A list of all supported protocols is available by the link.
MotionCam Outdoor (PhOD) Jeweller transmits the following events to the monitoring station:
- Motion alarm.
- Masking alarm.
- MotionCam Outdoor (PhOD) Jeweller visual alarm verifications.
- Photo by scenario.
- Photo by schedule.
- Photo by arming/disarming.
- Tamper alarm/recovery.
- Hub connection loss/restoration.
- Permanently enabling/disabling of the detector.
- Unsuccessful attempt to arm the security system (with the system integrity check enabled).
When an alarm is received, the security company monitoring station operator knows what happened and where to send the fast response team. The addressability of Ajax devices allows sending events, the type of the device, the name and group assigned to it, and the room to the PRO Desktop and the CMS. The list of transmitted data may differ depending on the monitoring station software and the selected communication protocol.
The ID and loop number are available in the device states.
Sending photo confirmations to the CMS
Photos from the motion detector are transmitted to the security company station if the CMS software supports the reception of photo verifications. A list of such CMSs is available by the link. At the same time, Ajax PRO Desktop supports receiving photo verifications without additional setup.
Photo on demand is not sent to the security company’s CMS.
PRO Desktop users can only take and view photos on demand from a personal account if the hub administrator has granted them such right. Taking and viewing photos on demand is not available for the security company profile in the PRO Desktop.
Adding a device
To connect MotionCam Outdoor (PhOD) Jeweller to the hub, the detector must be located at the same secured facility as the system (within the range of the hub’s radio network). For the detector to work via the ReX 2 Jeweller radio signal range extender, you must first add the detector to the hub and then connect it to ReX 2 Jeweller in the range extender’s settings.
The hub and the device must operate at the same radio frequency; otherwise, they are incompatible. The radio-frequency range of the device might vary based on the region. We recommend purchasing and using Ajax devices in the same region. You can verify the range of operating radio frequencies with the technical support service.
Before adding a device
- Install an Ajax app.
- Log in to an account or create a new one.
- Select a space or create a new one.
- Add at least one virtual room.
- Add a compatible hub to the space. Ensure the hub is switched on and has internet access via Ethernet, Wi-Fi, and/or mobile network.
- Check the statuses in the Ajax app to ensure the space is disarmed, and the hub is not starting an update.
How to connect MotionCam Outdoor (PhOD) Jeweller
- Open the Ajax app. Select the space to which you want to add the device..
- Go to the Devices
tab and tap Add device.
- Scan or manually input the QR code located on the detector.
- Assign a name to the device.
- Tap Add.
- Switch on the device by holding the power button for 3 seconds.
The connected detector will appear in the list of hub devices in the Ajax app. Updating the statuses of devices in the list depends on the Jeweller settings; the default value is 36 seconds.
If the connection fails, turn off the detector and try again. If the maximum number of devices has already been added to the hub (depending on the hub model), you will receive a notification in the app during the adding.
MotionCam Outdoor (PhOD) Jeweller only works with one hub. When connected to a new hub, the detector stops sending commands to the old one. When added to a new hub, the detector is not removed from the device list of the old hub. This must be done through the Ajax app.
Malfunctions
When a device detects a malfunction (e.g., there is no connection with the hub via the Jeweller protocol), the Ajax app displays a malfunction counter in the device field. All faults are shown in the detector states. Fields with faults are highlighted in red.
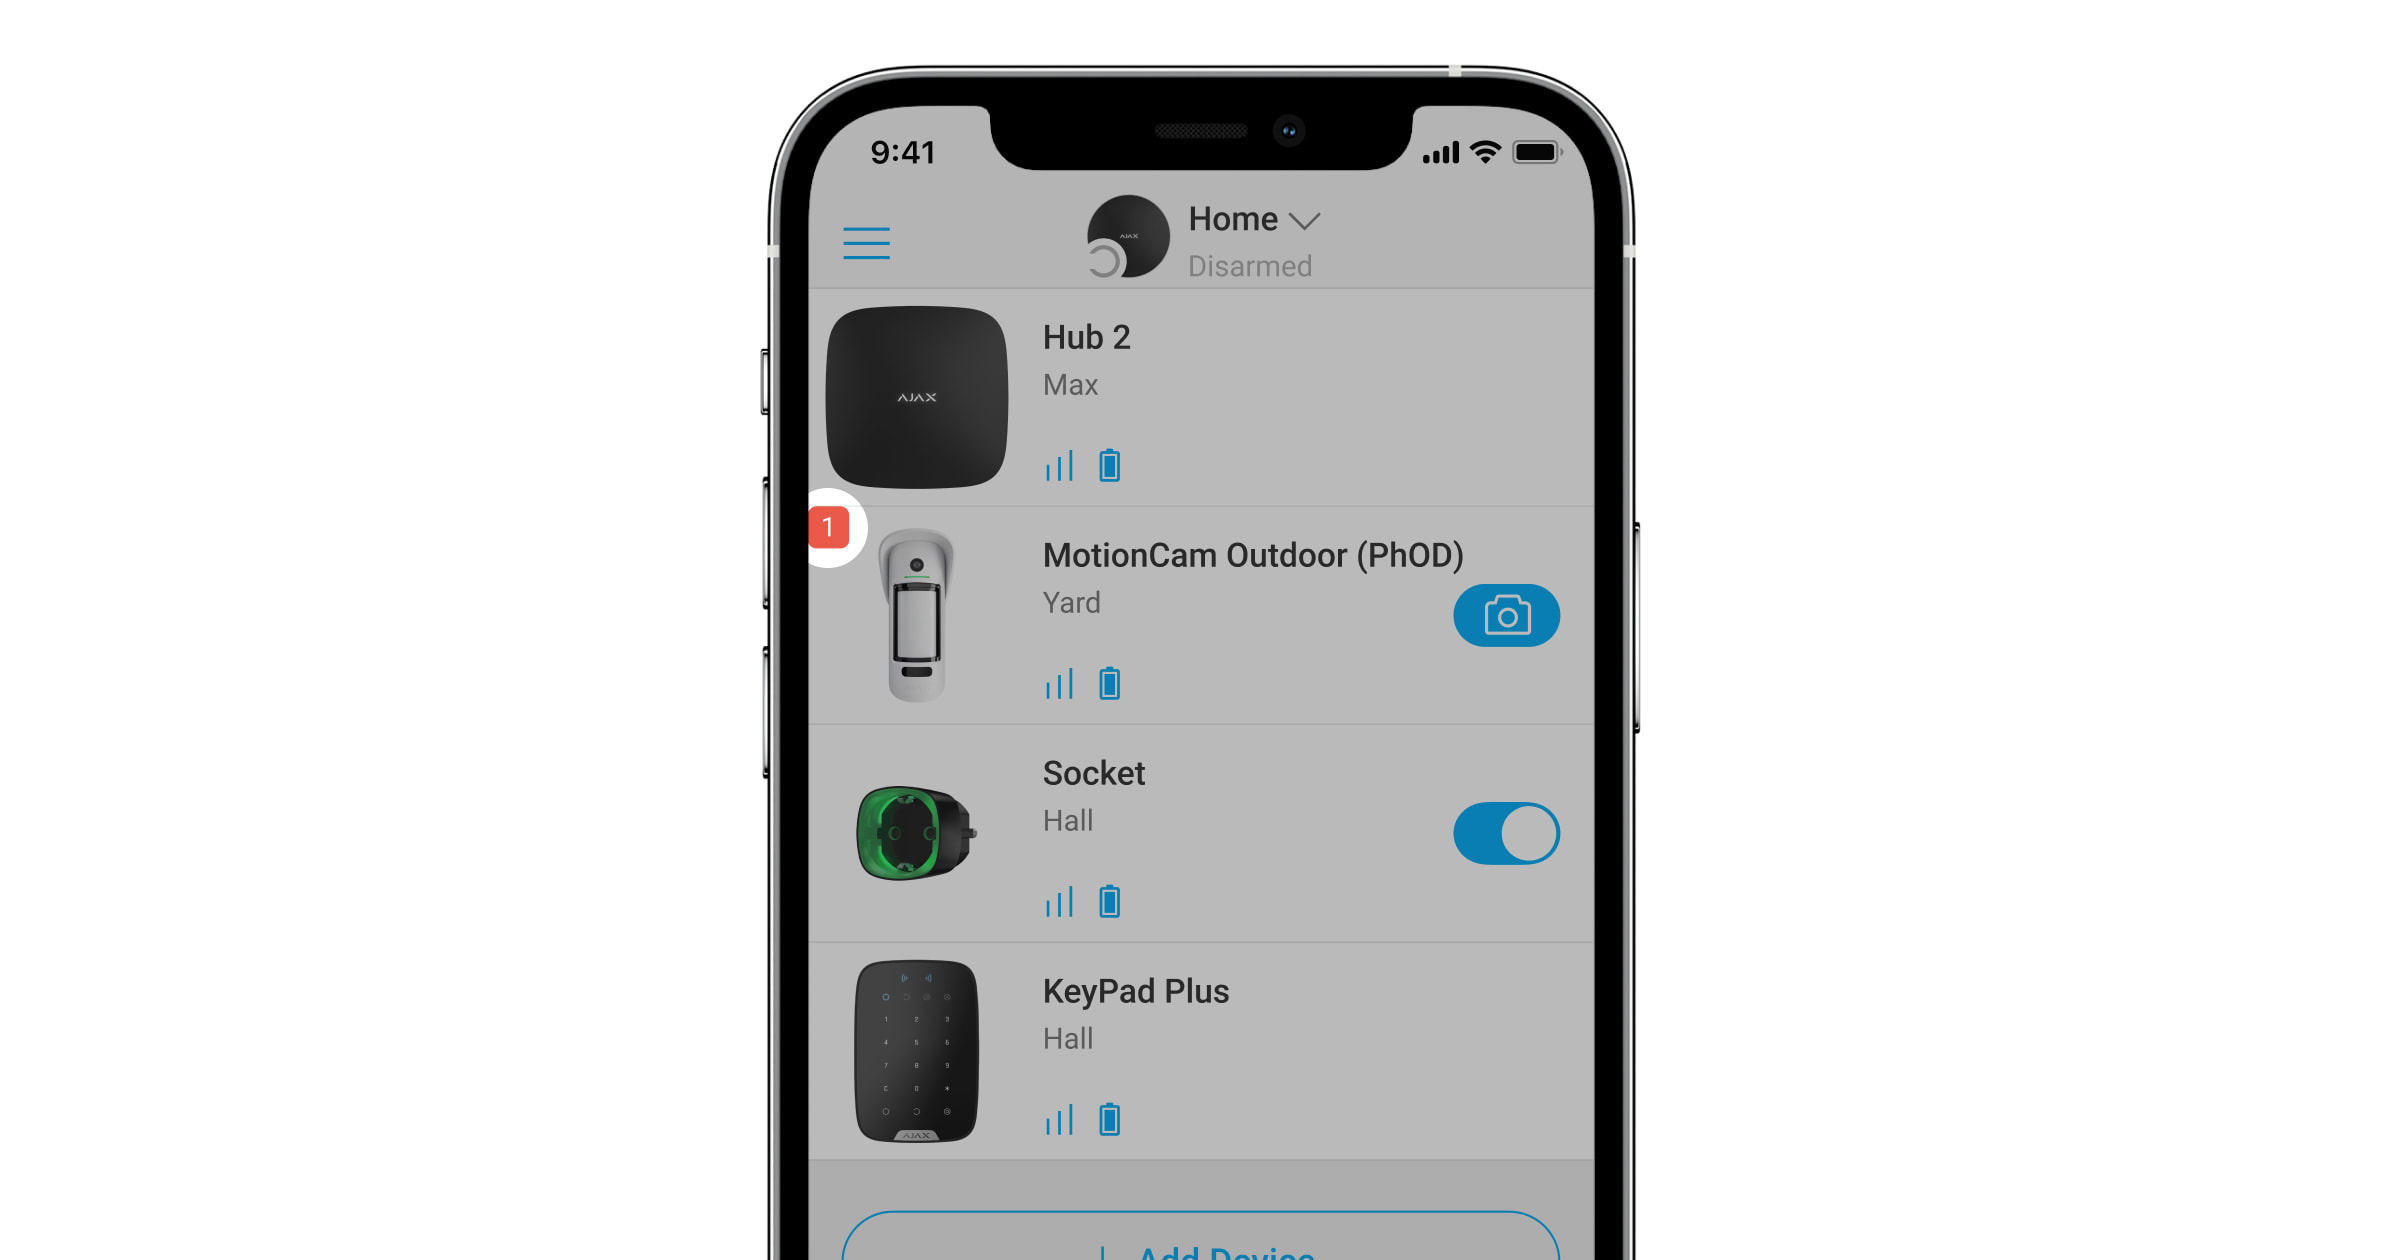
A malfunction is displayed if:
- The detector temperature is out of acceptable limits: below –25°C and above +60°C.
- The detector enclosure is open (tamper is triggered).
- No connection with the hub or radio signal range extender via Jeweller.
- No connection with the hub or radio signal range extender via Wings.
- The detector battery is low.
Icons
The icons represent some of the MotionCam Outdoor (PhOD) Jeweller states. They can be viewed in the Ajax apps on the Devices tab. To access them:
- Sign in to the Ajax app.
- Select the space if you have several of them or using a PRO app.
- Go to the Devices
tab.
| Icon | Meaning |
|
Jeweller signal strength. Displays the signal strength between the hub and the detector. The recommended value is 2–3 bars. |
|
|
Battery charge level of the detector. |
|
|
The detector has a malfunction. The list of malfunctions is available in the detector states. |
|
|
Device installation issues, consider changing the device placement. The description is available in the detector states. Available only for the detector with firmware version 7.58.5.14 and later. |
|
| Displayed when the detector is operating via a radio signal range extender. | |
|
The detector operates in the Always active mode. |
|
|
For MotionCam Outdoor (PhOD) Jeweller, photos on demand are included. |
|
|
|
Entry and/or exit delay is enabled. |
|
MotionCam Outdoor (PhOD) Jeweller will be armed when Night mode is activated. |
|
| MotionCam Outdoor (PhOD) Jeweller has detected motion. The icon is displayed when the detector is armed. | |
|
The device is in the signal attenuation test mode. |
|
|
MotionCam Outdoor (PhOD) Jeweller is disabled. |
|
|
MotionCam Outdoor (PhOD) Jeweller has been deactivated due to exceeding the preset number of alarms. |
|
|
MotionCam Outdoor (PhOD) Jeweller has tamper triggering events deactivated. |
|
|
MotionCam Outdoor (PhOD) Jeweller is deactivated until the first event of disarming the system. |
|
|
MotionCam Outdoor (PhOD) Jeweller has tamper alarms deactivated until the first event of disarming the system. |
|
| The device has lost connection with the hub or the hub has lost connection with the Ajax Cloud server. | |
|
The device has not been transferred to the new hub. |
States
The states display information about the device and its operating parameters. MotionCam Outdoor (PhOD) Jeweller states are available in the Ajax apps. To view them:
- Sign in to the Ajax app.
- Select the space if you have several of them or using a PRO app.
- Go to the Devices
tab.
- Select MotionCam Outdoor (PhOD) Jeweller from the list.
| Parameter | Value |
| Data import | Displays the error when transferring data to the new hub:
|
| Malfunction |
Clicking on The field is displayed if a malfunction is detected. |
| Device installation issues |
Clicking on This information appears if the detector is often triggered without an actual intrusion when the Notify on risk of fast battery discharge feature is enabled in the device settings. Available only for the detector with firmware version 7.58.5.14 and later. |
| Temperature |
Detector temperature. It is measured on the processor of the detector and changes gradually. The acceptable error between the value in the app and the ambient temperature is 2°C. The value is updated as soon as the detector identifies a temperature change of at least 1°C. |
| Jeweller signal strength |
Signal strength between the detector and the hub or the range extender via the Jeweller channel. The recommended value is 2–3 bars. Jeweller is a protocol for transmitting MotionCam Outdoor (PhOD) Jeweller events and alarms. |
| Connection via Jeweller | Connection status on the Jeweller channel between the detector and the hub or the range extender:
|
| Wings signal strength |
Signal strength between the detector and the hub or the range extender via the Wings channel. The recommended value is 2–3 bars. Wings is a protocol for transmitting MotionCam Outdoor (PhOD) Jeweller photos. |
| Connection via Wings | Connection status on the Wings channel between the detector and the hub or the range extender:
|
| Transmitter power |
Displays the selected power of the transmitter. The parameter appears when the Max or Attenuation option is selected in the Signal attenuation test menu. |
| Battery charge | The battery charge level of the device:
The Ajax apps and the security company will receive appropriate notifications when the batteries are low. After sending a low battery notification, the detector can work for up to 2 months. |
| Lid | The status of the detector’s tamper that responds to detachment of the device from the surface or opening of the body:
|
| Sensitivity | The sensitivity level of the motion detector:
The sensitivity is selected based on the results of the detection zone test. |
| Anti-masking | Detector masking state:
|
| Always active |
When this option is enabled, the detector is always armed. This means that the detector will constantly respond to motion and raise alarms regardless of the system arming mode. |
| Permanent deactivation | Shows the status of the device deactivation function:
|
| One-time deactivation | Shows the status of the device one-time deactivation setting:
|
| Photo on demand |
Displayed if Photo on demand is enabled in the hub settings in the Privacy section. |
| Alarm Reaction | |
| Operating mode | Shows how the detector reacts to alarms:
|
| Delay when entering |
Delay time when entering: from 5 to 120 seconds. Delay when entering (alarm activation delay) is the time the user has to disarm the security system after entering the secured area. |
| Delay when leaving |
Delay time when leaving: from 5 to 120 seconds. Delay when leaving (arming delay) is the time the user has to leave the secured area after the security system arms. |
| Night mode delay when entering |
Delay time when entering in the Night mode: from 5 to 120 seconds. Delay when entering (alarm activation delay) is the time the user has to disarm the security system after entering the premises. |
| Night mode delay when leaving |
Delay time when leaving in the Night mode: from 5 to 120 seconds. Delay when leaving (arming delay) is the time the user has to leave the premises after the security system arms. |
| Firmware |
Detector firmware version. |
| ID | Detector ID. It is also available on the QR code on the detector enclosure and its package box. |
| Device № | The number of the device loop (zone). |
Settings
The motion detection range is set using the switch on the detector’s body (under the SmartBracket).
To change the detector settings in the Ajax app:
- Select the space if you have several of them or using a PRO app.
- Go to the Devices
tab.
- Select MotionCam Outdoor (PhOD) Jeweller from the list.
- Go to Settings by clicking on the gear icon
.
- Set the required parameters.
- Click Back to save the new settings.
| Settings | Value |
| Name |
Detector name. It is displayed in the list of hub devices, SMS text, and notifications in the event feed. To change the detector name, click on the pencil icon The name can contain up to 12 Cyrillic characters or up to 24 Latin characters. |
| Room |
Select the virtual room to which the MotionCam Outdoor (PhOD) Jeweller is assigned. The room name is displayed in the text of SMS and notifications in the events feed of the Ajax apps. |
| Alarm LED indication | When the option is disabled, the LED indicator of the detector doesn’t notify about alarms and tamper triggerings. |
| Sensitivity | The motion detector sensitivity level. The choice depends on the type of the object, the presence of probable sources of false alarms, and the specifics of the protected area:
Before selecting the sensitivity level, conduct the detection zone test. If during the test, the detector doesn’t react to movement in 5 cases out of 5, the sensitivity should be increased. |
| Anti-masking |
MotionCam Outdoor (PhOD) Jeweller detects masking when this option is enabled. The device detects the following types of masking:
|
| Image resolution | The resolution of the photos taken by the camera of the detector:
The higher the resolution, the more detailed the image is. It takes longer to transfer higher-resolution photos. The selected resolution is set for Photo by alarm, Photo by scenario, Photo on demand, Photo by schedule, and Photo by arming/disarming. |
| Photo by alarm | The number of photos taken by the camera of the detector:
The selected number of shots is set for Photo on alarm and Photo by scenario. |
| Alarms with photo verification |
The number of alarms accompanied by photos. You can specify 1 to 10 alarms or set up the transmission of a photo each time the detector is alarmed. An alarm counter with photo verification is reset when the security system is disarmed and re-armed. The setting is available if the Always active option is disabled. When this option is enabled, the detector sends photos on every alarm. |
| Notify on risk of fast battery discharge |
If enabled, the user gets a notification when incorrect installation affects the device’s battery life because the detector often triggers without an actual intrusion. The feature is available for MotionCam Outdoor (PhOD) with firmware version 7.58.5.14 and later. |
| Photo on demand | The number of photos the detector’s camera takes when capturing photos on demand:
The setting is available if the Photo on demand function is enabled. |
| Always active |
When this option is enabled, the detector is always armed. This means that the detector will constantly respond to motion and raise alarms regardless of the system arming mode. |
| Alert with a siren if motion is detected | If active, sirens added to the system are activated when MotionCam Outdoor (PhOD) Jeweller detects motion. |
| Alert with a siren if masking is detected |
If active, sirens added to the system are activated when MotionCam Outdoor (PhOD) Jeweller detects masking. The field is displayed and active if the Anti-masking option is enabled. |
| Scenarios |
Opens the menu for creating and setting scenarios for the MotionCam Outdoor (PhOD) Jeweller detector. The menu allows you to create a scenario where the detector takes pictures when specified Ajax devices are triggered or by schedule. |
| Alarm Reaction | |
| Operating mode | Specify how this device will react to alarms:
|
| Delay when entering |
Delay time when entering: from 5 to 120 seconds. Delay when entering (alarm activation delay) is the time the user has to disarm the security system after entering the secured area. |
| Delay when leaving |
Delay time when leaving: from 5 to 120 seconds. Delay when leaving (arming delay) is the time the user has to leave the secured area after the security system arms. |
| Arm in night mode |
If active, the detector switches to the armed mode when Night Mode is enabled. |
| Night mode delay when entering |
Delay time when entering in Night mode: 5 to 120 seconds. Delay when entering (alarm activation delay) is the time the user has to disarm the security system after entering the premises. |
| Night mode delay when leaving |
Delay time when leaving in Night mode: 5 to 120 seconds. Delay when leaving (arming delay) is the time the user has to leave the premises after arming. |
| Jeweller signal strength test |
Switches the detector to the Jeweller signal strength test mode. The test allows you to check the signal strength between the detector and the hub or the range extender over the Jeweller wireless data transfer protocol to determine the optimal installation location for the device. The recommended value is 2–3 bars. |
| Wings signal strength test |
Switches the detector to the Wings signal strength test mode. The test allows you to check the signal strength between the detector and the hub or the range extender over the Wings wireless data transfer protocol to determine the optimal installation location for the device. The recommended value is 2–3 bars. |
| Detection zone test |
Switches the detector to the detection zone test mode. The test enables users to check how the detector responds to movement and to determine the optimal installation location. If, during the test, the detector does not respond to motion in 5 cases out of 5, increase the sensitivity or change the detector’s location. |
| Signal attenuation test |
Switches the device to the signal attenuation test mode. During the test, the transmitter power is decreased or increased to simulate a change in the environment to test the communication stability between the detector and the hub. |
| User guide | Opens the MotionCam Outdoor (PhOD) user manual in the Ajax app. |
| Permanent deactivation |
Allows the user to disable the device without removing it from the system. Three options are available:
More about permanent deactivation The system can also automatically deactivate devices when the preset number of alarms is exceeded. |
| One-time deactivation |
Allows the user to disable events of the device until the first disarm. Three options are available:
|
| Unpair device | It unpairs the detector: disconnects it from the hub, and deletes its settings. |
Setting up the Photo on demand feature
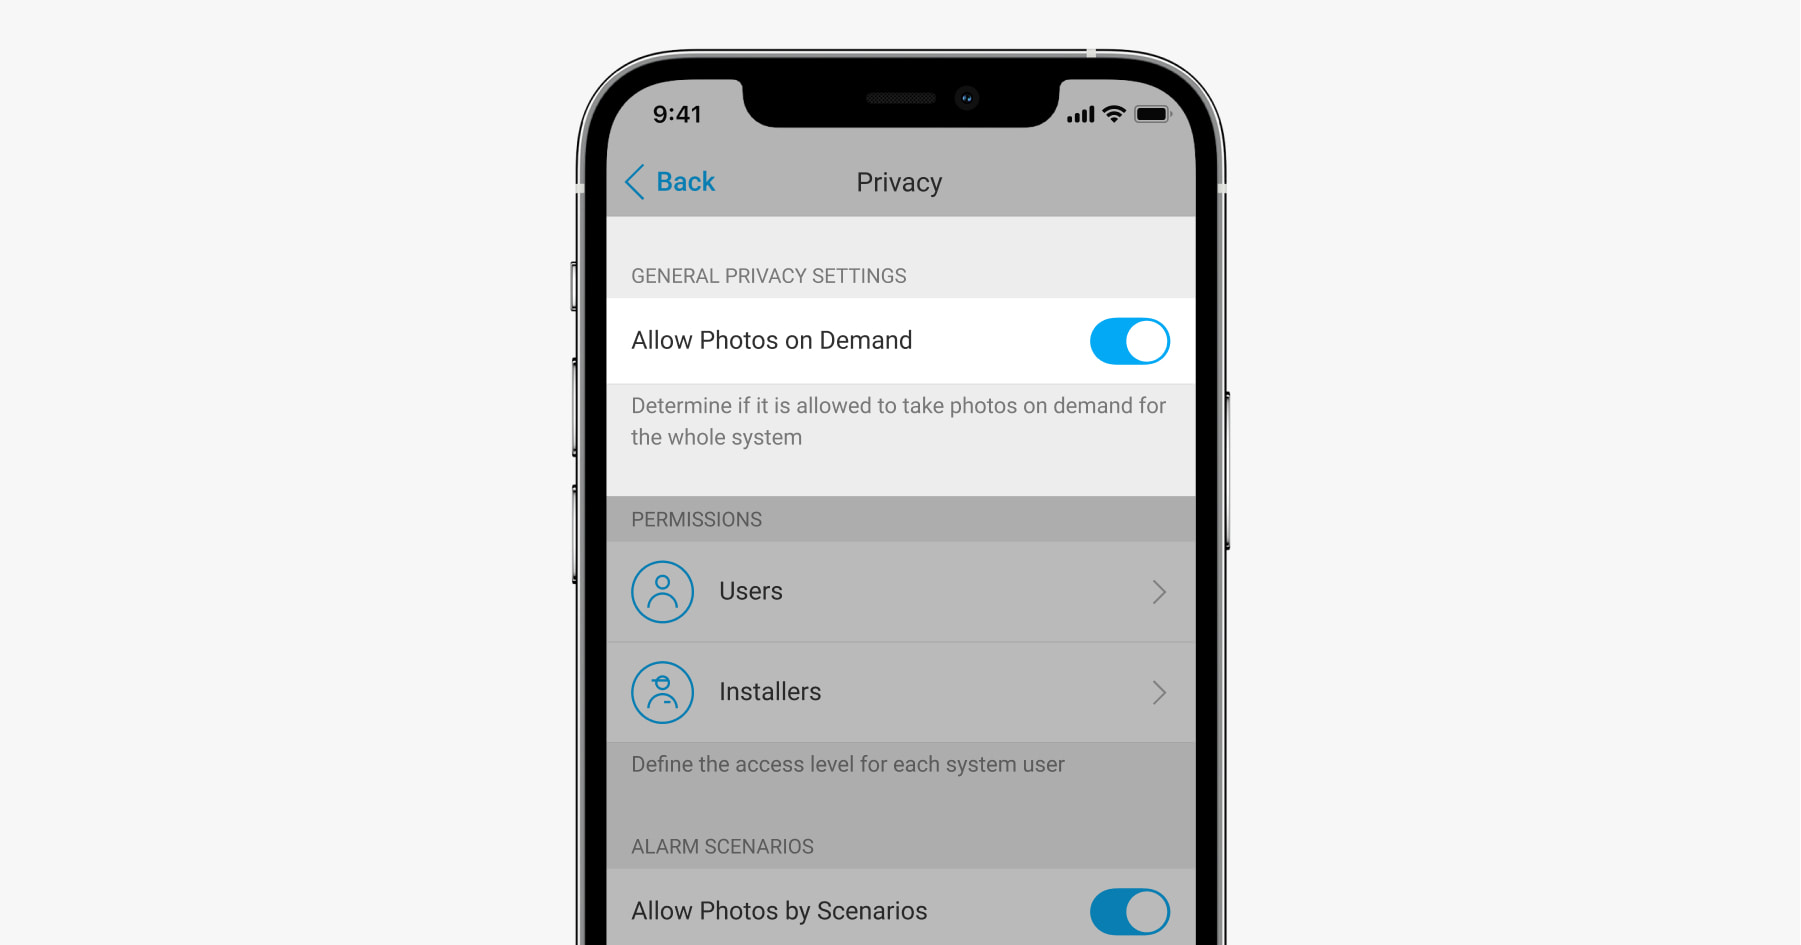
A hub admin or a user with access to privacy settings can enable and configure the Photos on demand feature. To do this, in the Ajax app:
- Select the space if you have several of them.
- Go to the Devices
tab and select a hub.
- Click the gear icon
to go to the hub Settings.
- Select the Privacy menu and enable the Allow photos on demand option.
- Select the user category:
- Users.
- Installers (PRO app users).
- Select a specific user or a PRO. A list of cameras, DVRs, and detectors with photo verification added to the hub will open.
- Select the detector to which you want to provide access.
- Enable the Take & view photo option.
- Specify when the user can take on-demand photos: always or when the detector is armed.
- Click Back to save the settings.
- Repeat steps 6–10 for other detectors you want to provide access. The blue icon marks detectors to which the user already has access.
After saving the privacy settings, all users with access to the event feed will receive a notification about who has received access rights and which user has granted these rights.
Setting up the Photo by scenario feature
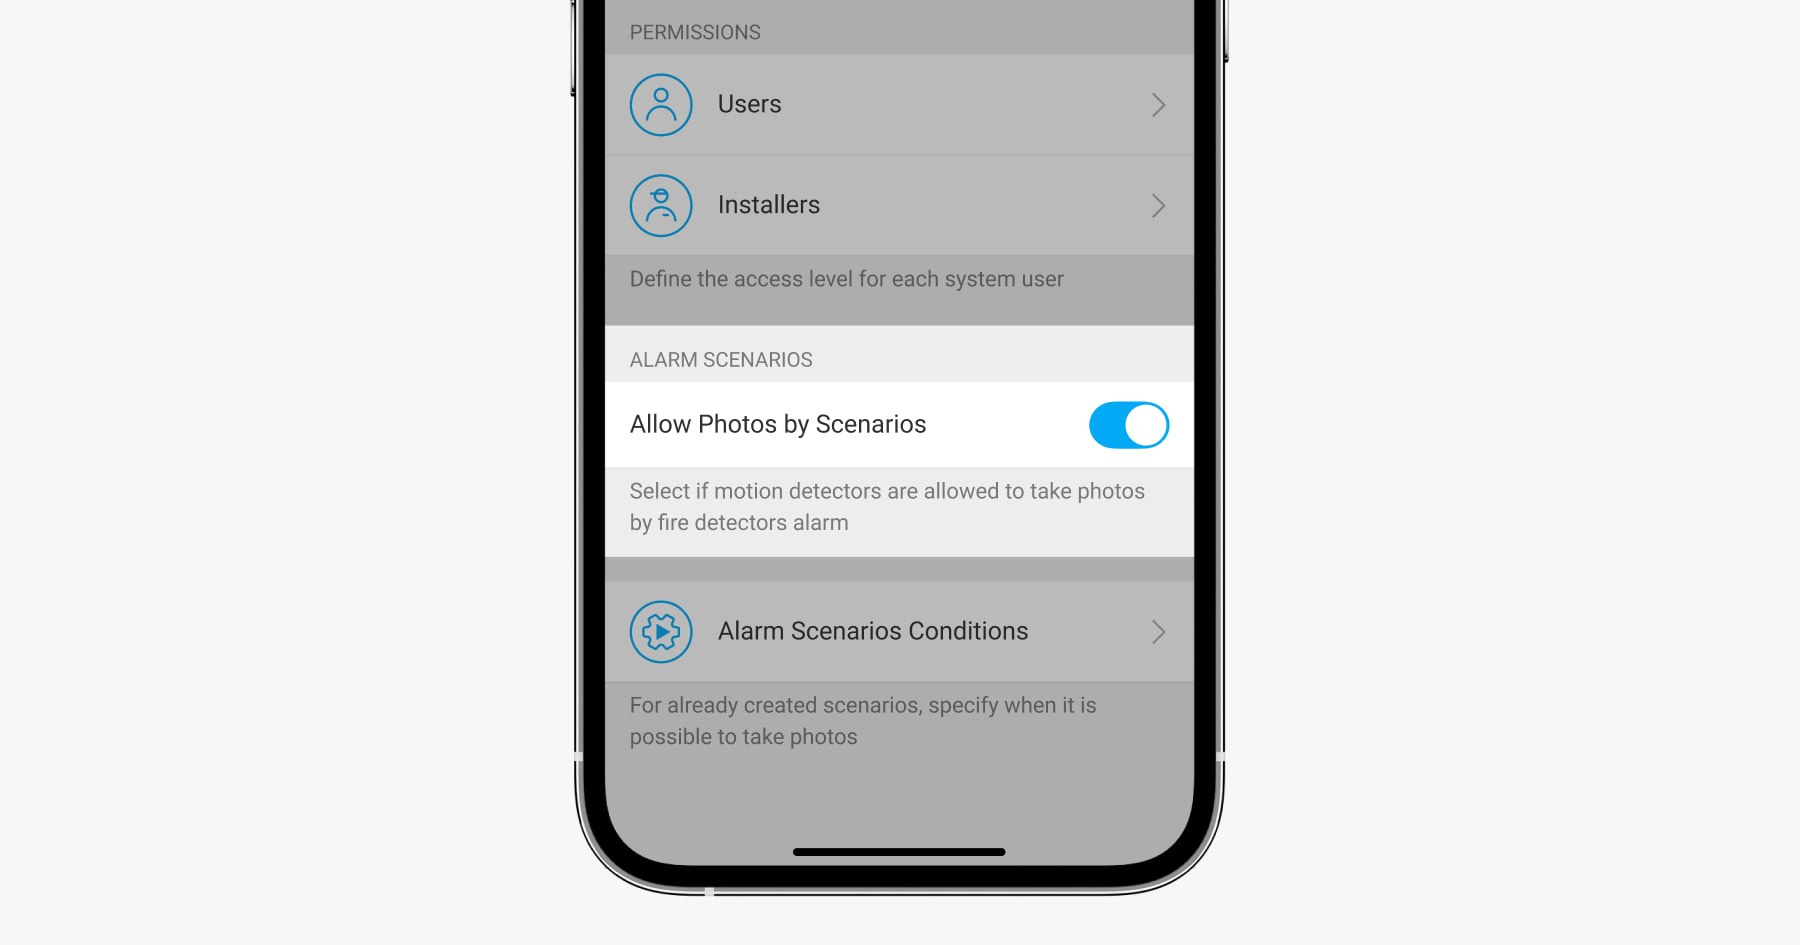
A hub admin or a user with access to privacy settings can enable the Photo by scenario feature. To do this, in the Ajax app:
- Select the space if you have several of them.
- Go to the Devices
tab and select a hub.
- Click on the gear icon
to go to the hub Settings.
- Select the Privacy menu and enable the Allow photos by scenario option.
- Click Back to save the settings.
How to create a scenario for taking photos in case of alarms from specified devices
A hub admin or PRO with system configuration rights can create and set up a scenario. To do this:
- In the Ajax app, select the space if you have several of them or if you are using a PRO app.
- Go to the Devices
tab and select a detector with photo verification.
- Click on the gear icon
to go to the detector settings.
- Select the Scenarios item from the list.
- Define Ajax devices and the types of alarms for which the detectors will take photos.
- Click Next.
- Specify:
- Name of the scenario.
- The number of devices that trigger a scenario (available if there are two or more Ajax devices in the system):
Any — the scenario will be triggered when at least one device is alarmed.
All selected — the scenario will be triggered when all selected devices are alarmed. - Triggering time for all devices (available if, in the Devices triggering the scenario block, the All selected option is specified).
- When the detector can take photos: always or when it is armed. By default, the detector takes photos by scenario only in the armed mode.
Note that only the hub admin can specify when the detector takes photos.
- Click Save. The scenario will appear in the list of device scenarios.
The scenario will not be executed if the Allow photos by scenario option is disabled in the privacy settings (hub settings, Privacy menu).
To delete or edit a scenario, click on it in the list. You can also disable the scenario with a toggle next to the scenario name: its settings will be saved but not executed after the alarm from other devices.
Disabled (PhOD) detectors cannot take photos by scenario, and disabled devices do not trigger the scenario for taking photos.
Setting up the Photo by schedule feature
A hub admin or PRO with system configuration rights can create and set up a scheduled scenario. To do this:
- Open the Ajax app and select the space if you have several or if you are using the Ajax PRO app.
- Go to the Devices
tab and select a detector with photo verification.
- Click on the gear icon
to go to the detector Settings.
- Select the Scenarios item from the list.
- Select the scenario type By schedule.
- Specify:
- Name of the scenario.
- Device action — only Take photo by default. The quantity of photos equals the quantity of Photos on demand in settings.
- Execution time — 24h or 12h format, depending on the device time format. Click the field to set the defined time for the detector.
- Repeat — click the field to set the day of the week.
- When the detector can take photos: always or when the system is armed. By default, MotionCam (PhOD) Jeweller takes photos by schedule only in the armed mode.
Note that only the hub admin can specify when the detector takes photos.
- Click Save. The scenario will appear in the list of device scenarios.
Indication
The MotionCam Outdoor (PhOD) Jeweller LED indicator may light up red or green depending on the detector’s status. The indication can be disabled in the detector settings.
Indication upon pressing the power button
| Indication | Event |
| Lights up red while the power button is pressed. | Pressing the button when the detector is on. |
| Lights up green. | Turning the detector on. |
| First lights up red, then flashes three times and goes off. | Turning the detector off. |
Enabled detector indication
| Indication | Event | Note |
| Lights up green for 1 second. | Motion alarm / tamper triggering. | The detector records movement once every 5 seconds. |
| Lights up green for 0.5 seconds. | Shooting photos on demand/by scenario. | The indicator lights up when taking a photo on demand or by scenario, even if the LED indication is turned off in the detector settings. |
| Lights up green for a few seconds. | Connecting the detector to the hub. | |
| Lights up red and blinks after the first activation. | Hardware error. | The detector needs to be repaired; please contact Support Service. |
| Lights up red and flashes a few minutes after installing the mount. | The calibration was not successful; something was blocking the view of the detector, or it was installed incorrectly. |
Recalibrate. To do this, remove the device from the SmartBracket mount and reinstall it. Recalibration will start automatically. Make sure that, this time, nothing obstructs the view of the detector. |
| In case of an alarm, it slowly lights up green and goes out. | Detector batteries need to be replaced. The detector continues operating, detecting motion, and transmitting alarms to the hub. | The procedure for replacing the batteries is described in the article How to replace the batteries in the MotionCam Outdoor (PhOD) Jeweller detector. |
| Lights up green and flashes 3 times per second. | The batteries are completely discharged. The detector no longer detects motion and does not transmit alarms to the hub. | The procedure for replacing the batteries is described in the article How to replace the batteries in the MotionCam Outdoor (PhOD) Jeweller detector. |
Functionality testing
The Ajax system provides several types of tests to make sure that the installation place is chosen correctly. MotionCam Outdoor (PhOD) Jeweller tests do not start immediately, but not later than over a single hub–detector ping interval (36 seconds by default). You can change the ping interval of devices in the Jeweller menu of the hub settings.
To run a test in the Ajax app:
- Select the space if you have several or use a PRO app.
- Go to the Devices
menu.
- Select MotionCam Outdoor (PhOD) Jeweller from the list.
- Go to Settings
.
- Choose a test:
- Run the test.
1 Not evaluated by UL.
Selection of the installation location
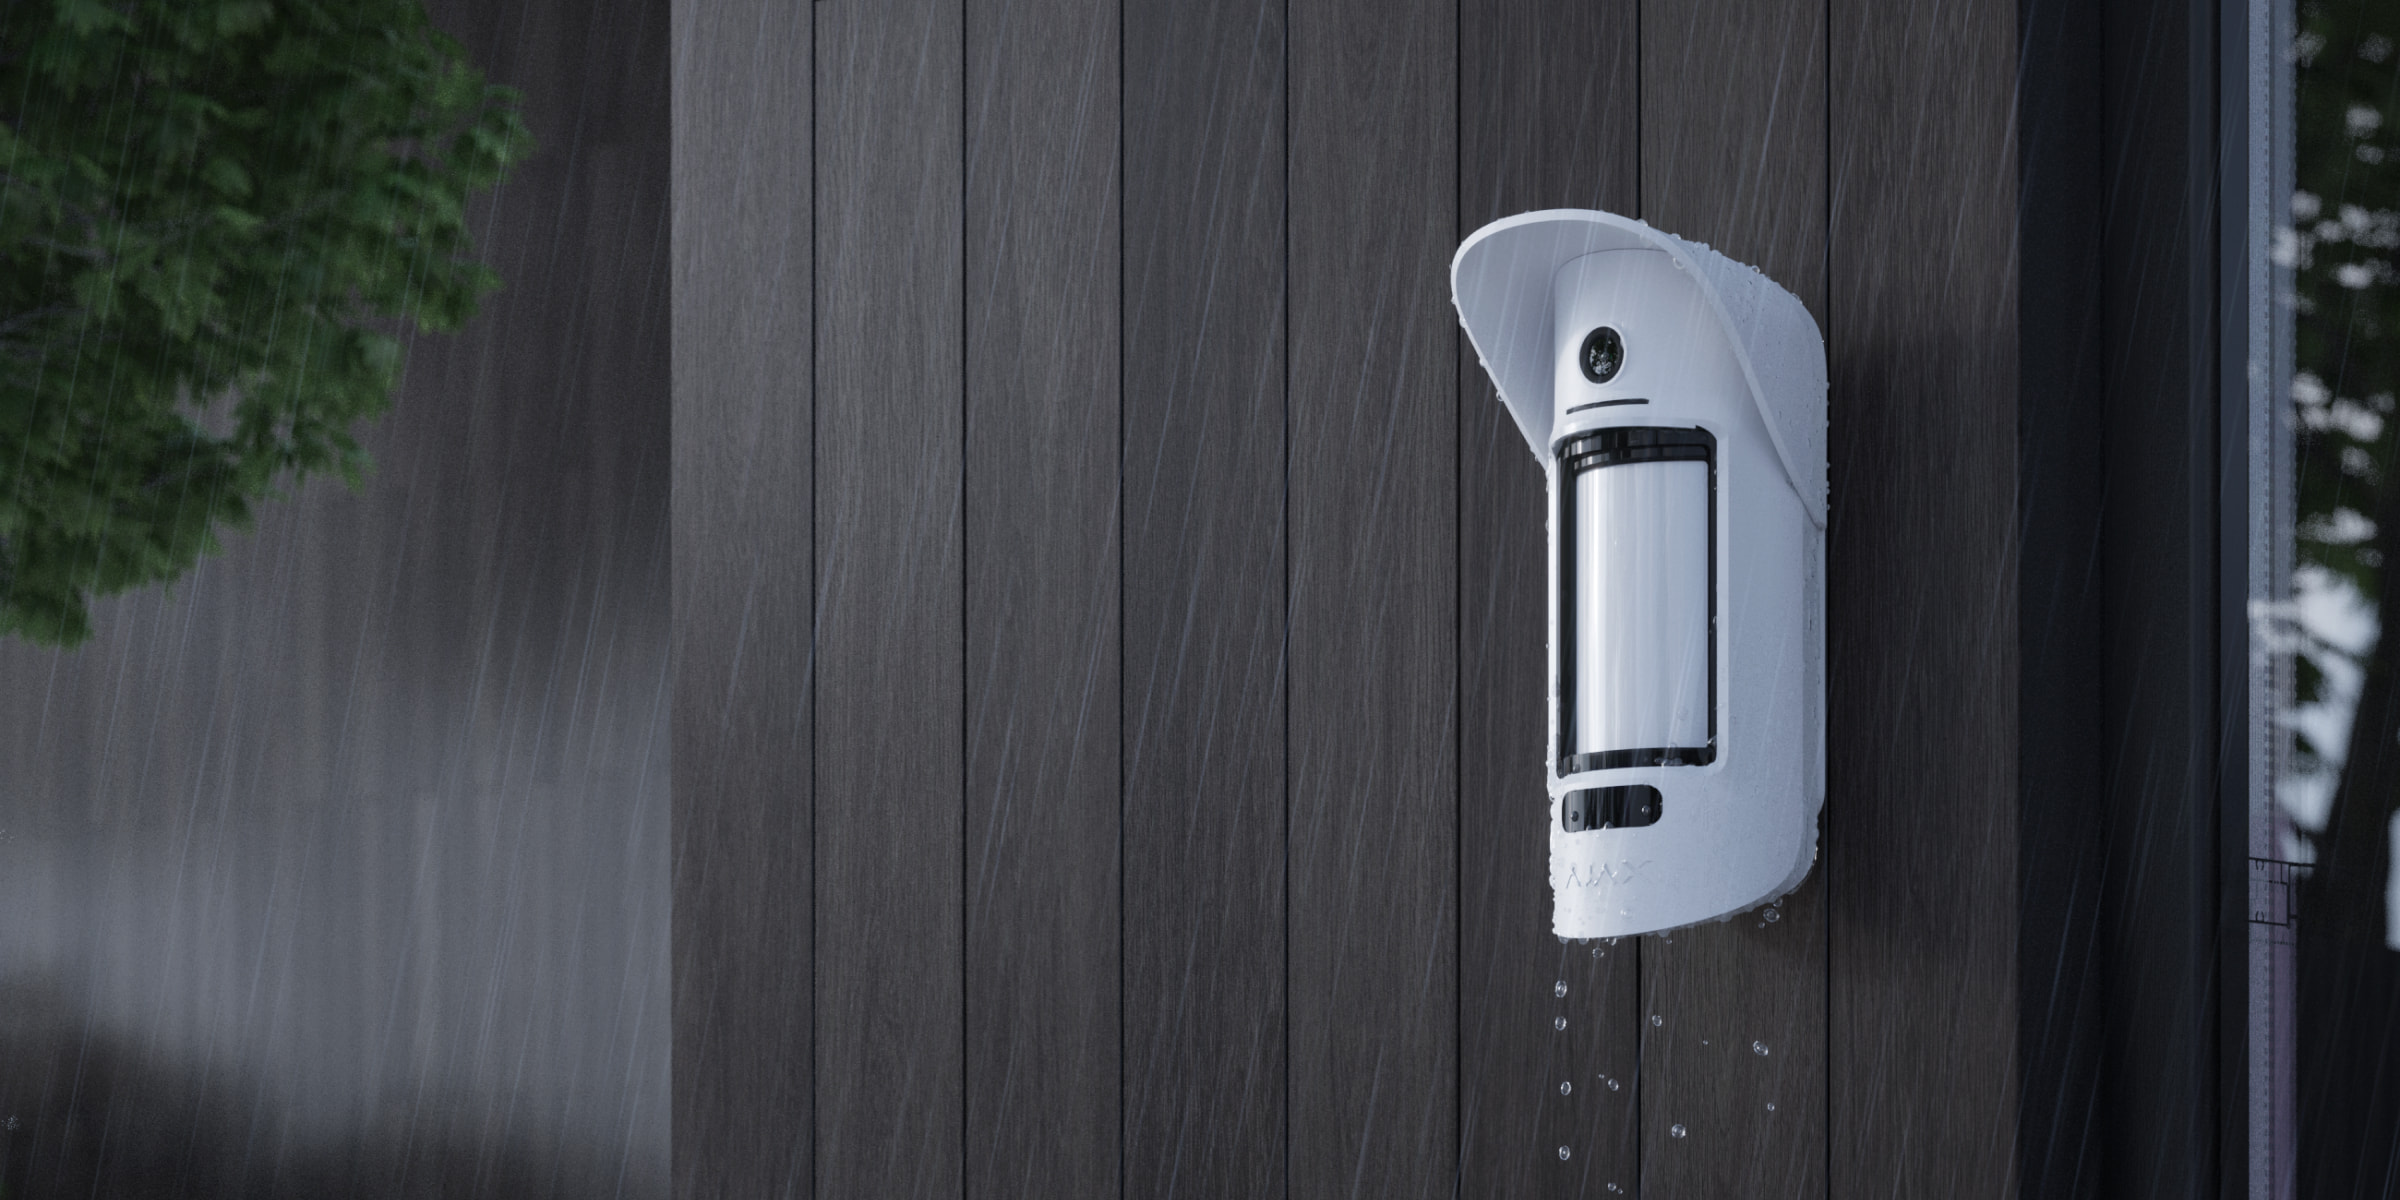
MotionCam Outdoor (PhOD) Jeweller is suitable for protecting the territory of the protected object: private houses, parking lots, unheated premises, and other objects. The detector is suitable for installation both outdoors and indoors.
The detector is placed 0.8–1.3 meters above ground level. This height is a prerequisite for the effective work of the Pet immunity function. Installation at a different height can lead to incorrect detector operation; it will react to animals (false alarms) or will not detect human movement.
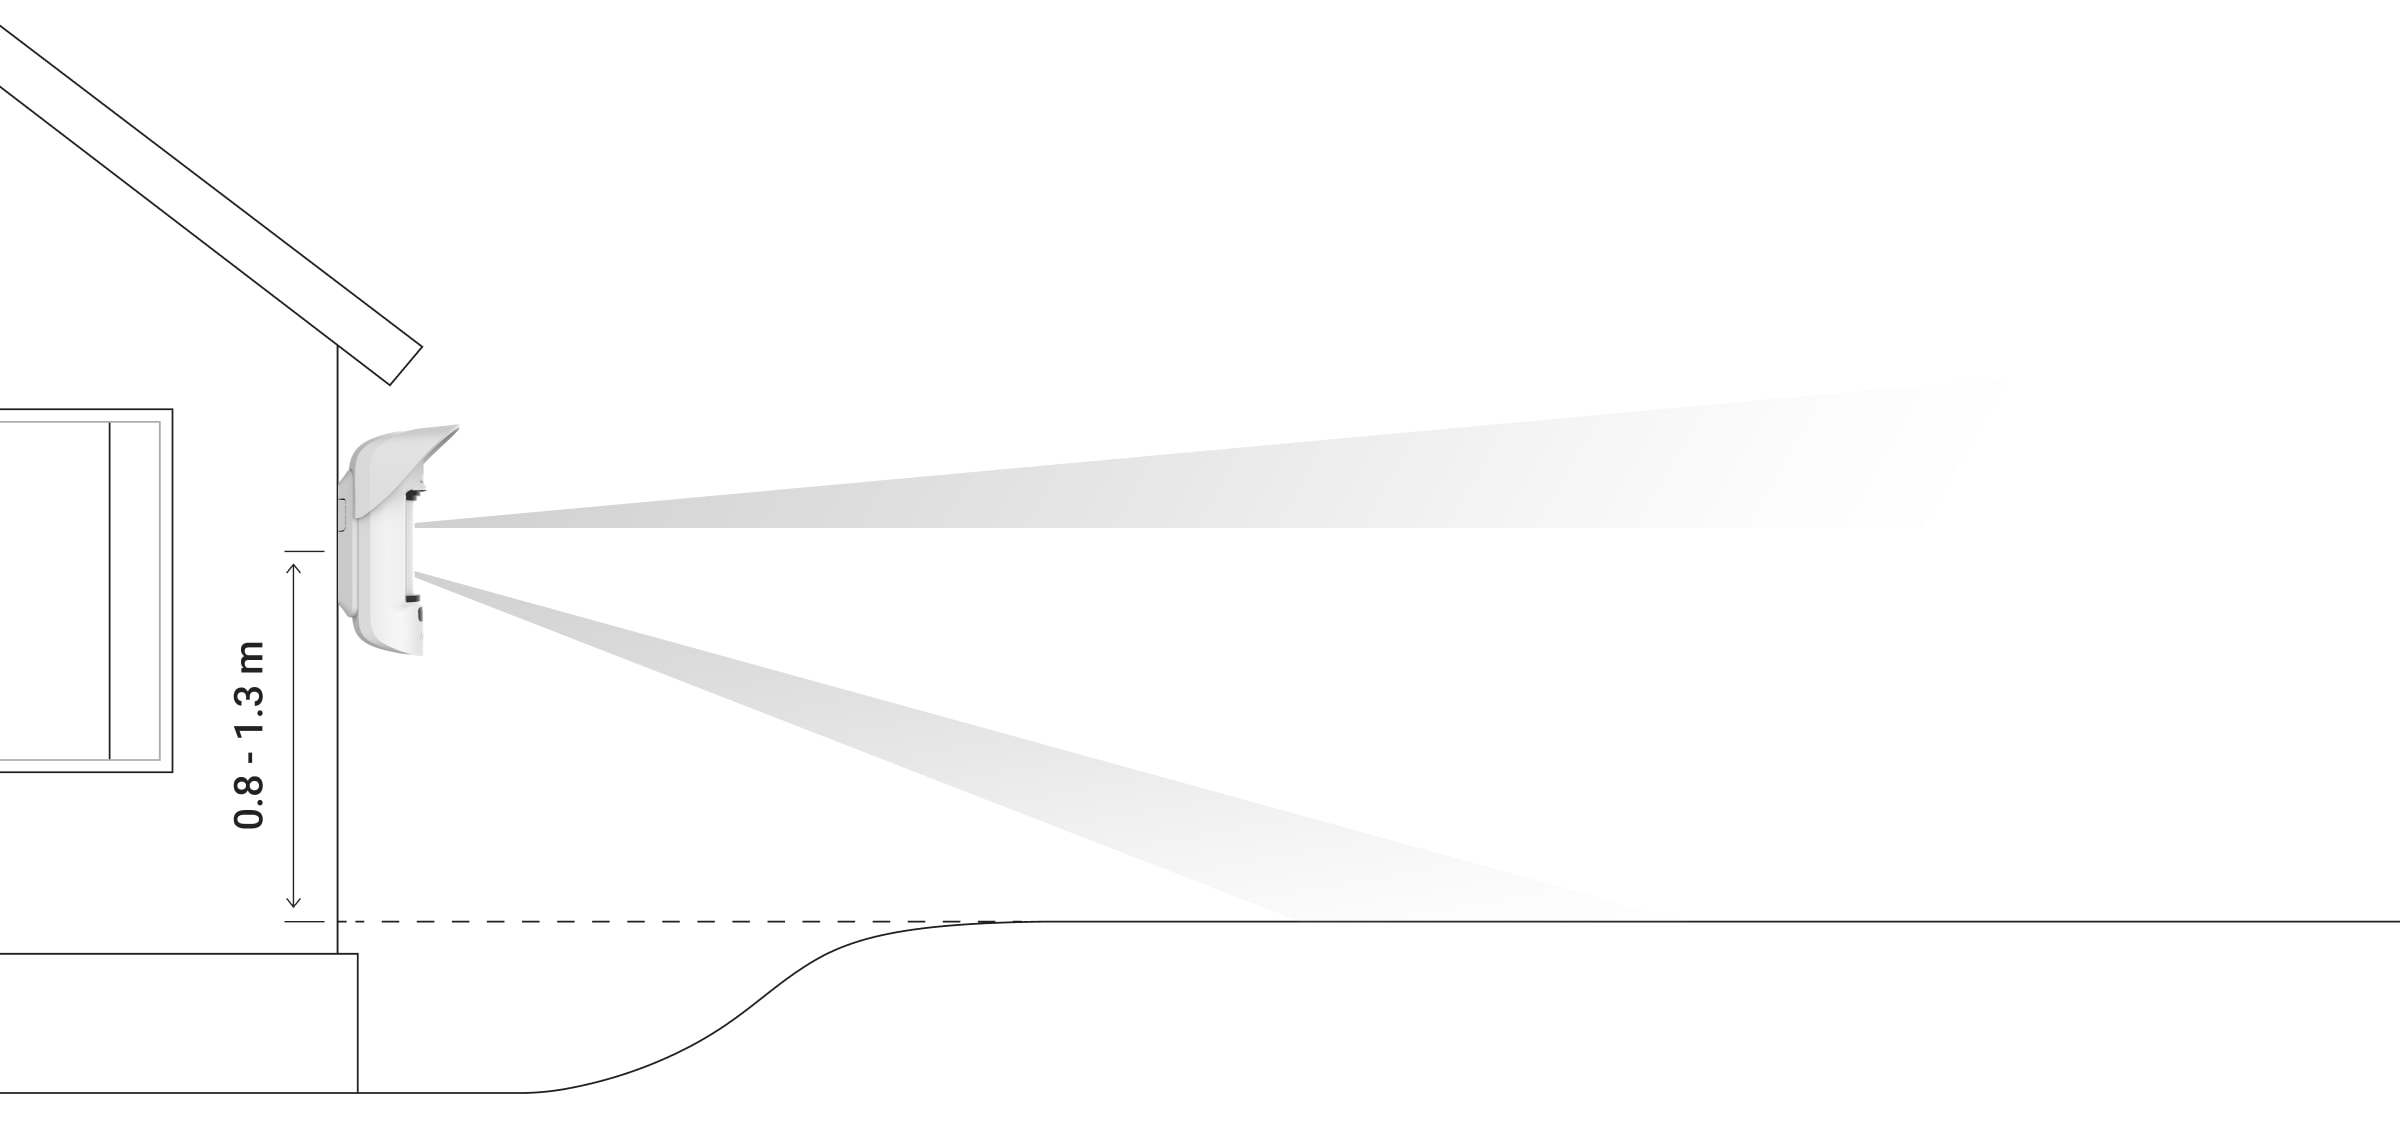
The detector should be installed on a flat, stable surface — for example, on the wall of a house or a solid fence. If the detector is installed on a shaky (unstable) surface, this will result in false alarms.
MotionCam Outdoor (PhOD) Jeweller with firmware version 7.58.5.14 and later has the Notify on risk of fast battery discharge setting. Once the device detects that it is installed incorrectly, system users will receive notifications in Ajax apps, and similar information will be displayed in the device states. If you receive a notification about incorrect installation, change the device placement to save the battery charge.
The detector’s body is placed so that the lens axis is parallel to the ground, and the intruder’s expected entry path runs perpendicular to the lens axis. If the area is not flat, the installation height is calculated from the area’s highest point monitored by the detector.
We recommend placing the detector in a corner so that it has no “blind” zones and is more complicated for an intruder to bypass — for example, in the corner of a fence. Furniture, plants, and ornamental and glass structures should not obstruct the view of the detector or its camera.
If the detector cannot be installed in a corner, it can be mounted on a flat vertical surface: a wall or a fence. In this case, install another detector that will overlap the blind spots of the first MotionCam Outdoor (PhOD) Jeweller.
When choosing the location of the detector, consider the parameters that affect its operation:
- Motion detector detection area.
- The viewing angle of the detector’s camera and the presence of obstacles in front of it.
- Jeweller and Wings signal strength.
- Distance between the detector and the hub.
- Presence of barriers for radio signal passage between devices: walls, interfloor ceilings, large objects located in the room.
Consider the recommendations for placement when developing the facility’s security system project. The security system must be designed and installed by specialists. The list of authorized Ajax partners is available here.
Signal strength
Jeweller and Wings signal strength is determined by the number of undelivered or corrupted data packages exchanged between the detector and the hub or the range extender within a certain time.
The icon in the Devices
menu indicates the signal strength. The signal strength is also displayed in the detector states.
The value of the signal strength:
- Three bars — excellent signal strength.
- Two bars — good signal strength.
- One bar — low signal strength, stable operation is not guaranteed.
- Crossed out icon — no signal.
Check the Jeweller and Wings signal strength at the installation site. The detector should have a signal strength of 2 or 3 bars on both communication channels.
If the signal strength is as low as one or zero bars, we cannot guarantee the stable operation of the security system. Relocating the device as repositioning by even 20 cm can significantly improve the signal reception.
If the detector still has a low or unstable signal after moving, use ReX 2. MotionCam Outdoor (PhOD) Jeweller is not compatible with other range extenders.
Detection zone
When choosing where to place the detector, be sure to use the Detection zone test to determine the sector in which the detector recognizes motion as accurately as possible.
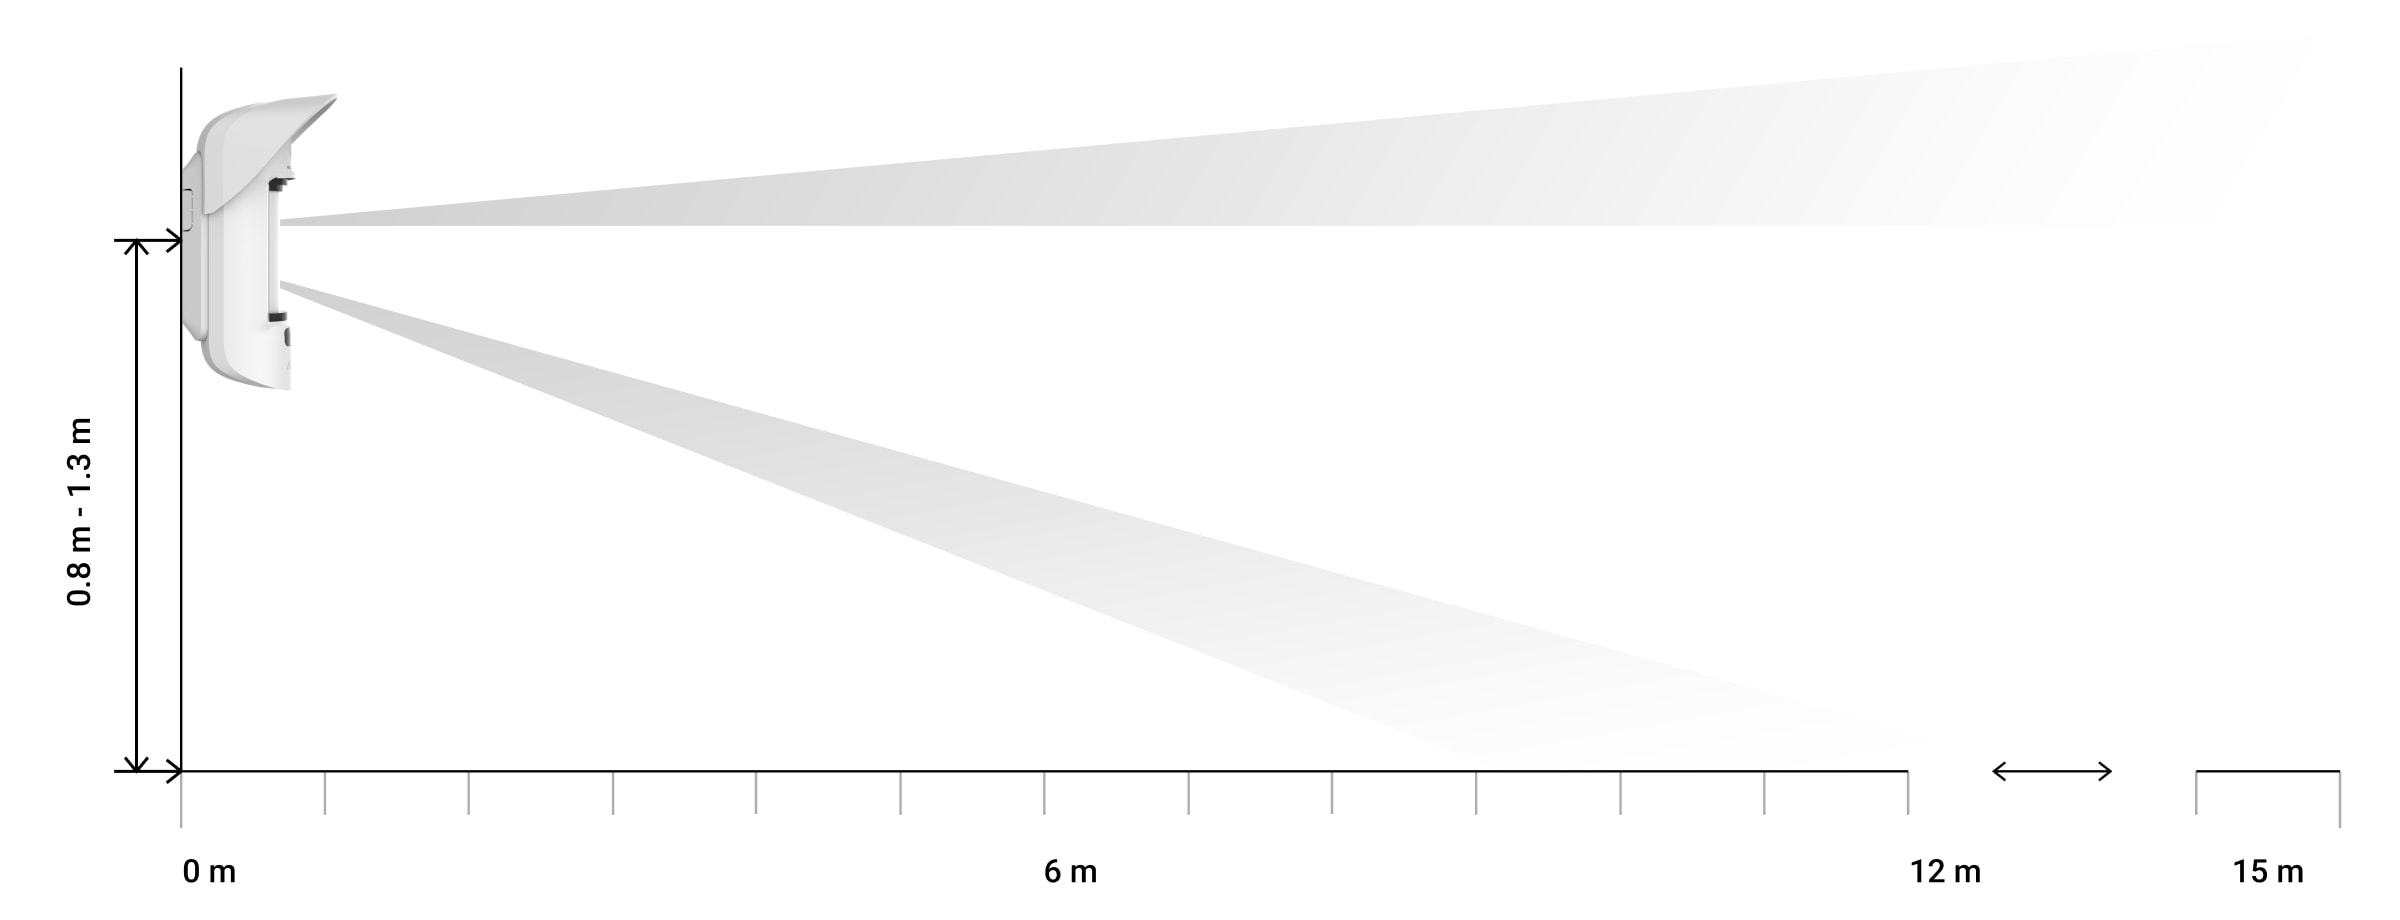
The detection distance is adjusted using the Detection Distance scrollbar on the rear panel of the detector. When choosing the installation location, consider the maximum detection range of the detector. It depends on the sensitivity, the position of the Detection Distance scrollbar, the type and speed of the person’s movement (running, walking), and the ambient temperature.

| Scrollbar position | Motion detection range when installed at the height of 0.8–1.3 meters |
| First bar (corresponds to the near inscription on the detector body) | Up to 4 meters |
| Second bar | Up to 5 meters |
| Third bar | Up to 7 meters |
| Fourth bar | Up to 12 meters |
| Fifth bar (corresponds to the far inscription on the detector body) | Up to 15 meters |
When installed at the height of 0.8–1.3 meters, the detection range was tested at a medium level of sensitivity with the ambient temperature of +23°C and clear weather. Motion type — walking. Other conditions may produce different results.
When selecting an installation location, also consider the horizontal viewing angle of the detector and the width and size of the detection area. Incorrect detector placement can lead to false alarms.
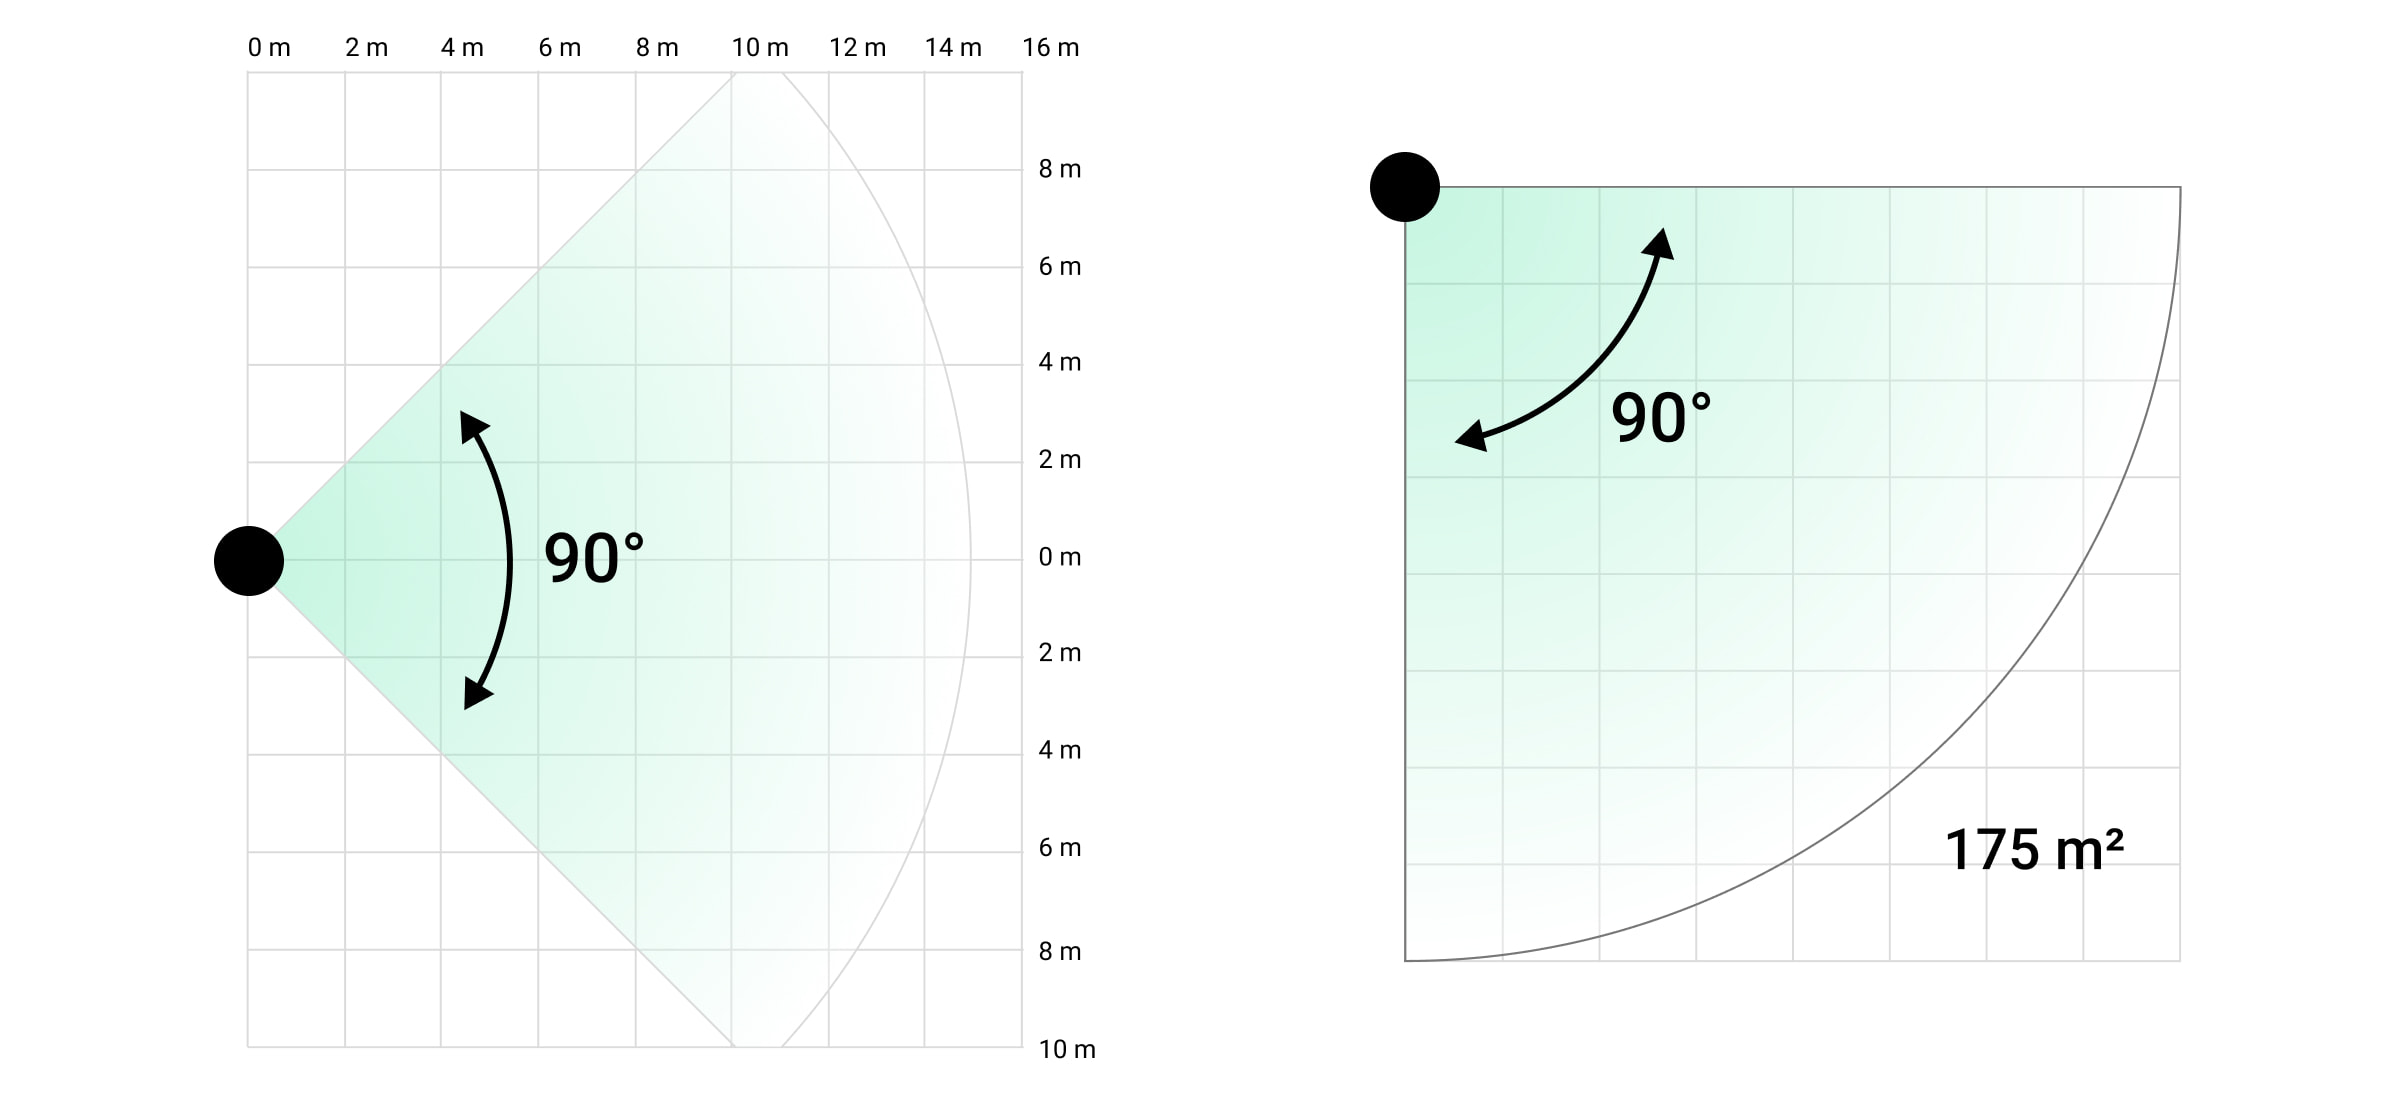
Also, refer to this table when choosing where to place the detector.
| Detection distance | Detection zone width |
| 1 meter | 2 meters |
| 3 meters | 6 meters |
| 4 meters | 8 meters |
| 6 meters | 12 meters |
| 7 meters | 14 meters |
| 9 meters | 18 meters |
| 12 meters | 24 meters |
| 13 meters | 26 meters |
| 15 meters | 30 meters |
Avoid situations when the detector identifies movement at a greater distance than required. To do this, adjust and set the desired detection distance. This will reduce the likelihood of false alarms in response to external factors.
If you set the slider to the fifth bar (corresponding to the inscription far on the detector’s body), ensure that the detector’s visibility is limited. The best place to install the detector may be within an enclosed place. E.g., when the detection zone of the detector is limited by a fence or a wall of a building. This will also reduce the likelihood of false alarms on external factors: passing cars or other likely sources of false alarms.
Do not install the detector
- Near the metal objects and mirrors. They can shield and attenuate the radio signal.
- Opposite trees with leaves in the detection zone of both IR sensors of the detector. This can lead to false alarms in warm weather.
- In places where the detection zone of the detector might include bushes 80 cm high or above. This can lead to false alarms in warm weather.
- In places where objects and structures may obstruct the detector’s view — for example, behind a flower or a column. This way, the detector’s view will be limited, and it will be more difficult to detect motion.
- In places where glass structures may obstruct the detector’s view. The detector doesn’t register any movement behind the glass.
- In places with low or unstable signal strength.
- Closer than 1 meter to the hub.
Detector installation
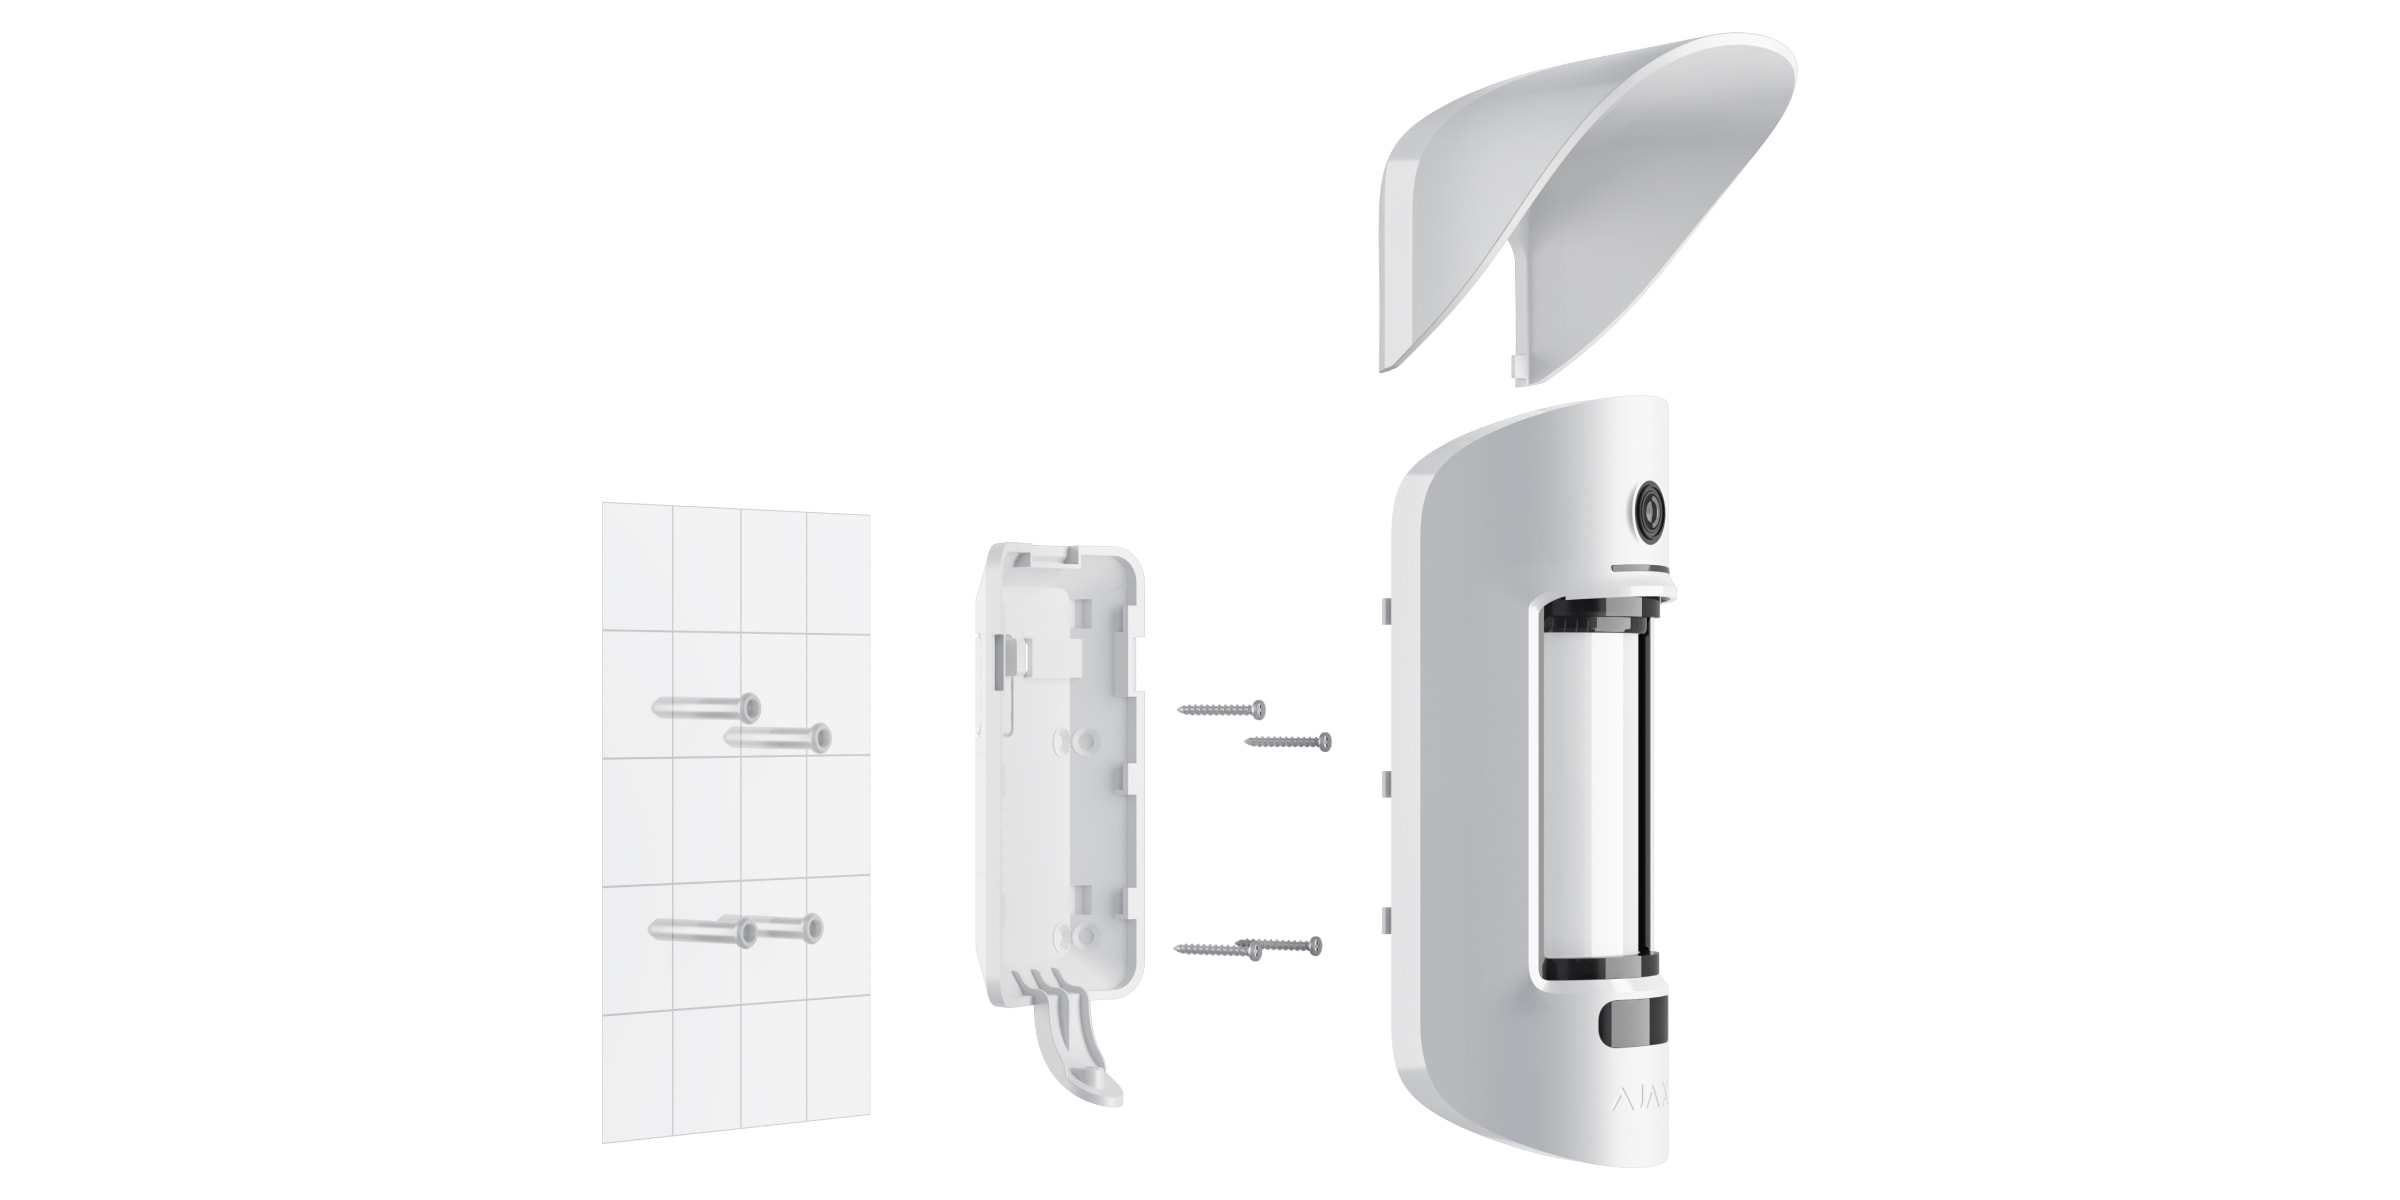
Before installing the detector, make sure that you have selected the optimal location and that it complies with the requirements of this manual. Set the desired detection range (Detection distance slider).
To install MotionCam Outdoor (PhOD) Jeweller:
- Attach the SmartBracket panel with the bundled ties or other temporary fasteners. Installation height is 0.8–1.3 meters from ground level.
To install the SmartBracket mount on ties, first, make holes in it.
- Install the detector on the SmartBracket panel. Automatic calibration of the masking sensors will start.
- Leave the detection zone, and make sure there is no movement within the detector’s field of view. This is necessary for the correct calibration of the masking sensors. The detector’s light will turn green and blink once per second during calibration. Calibration takes up to 2 minutes.
- Run the Jeweller and Wings signal strength tests. The recommended value is two or three bars. If the signal strength is as low as one or zero bars, we cannot guarantee the stable operation of the security system. Relocating the device as repositioning by even 20 cm can significantly improve the signal reception. If the detector still has a low or unstable signal after moving, use ReX 2 Jeweller.
- Run a detection zone test. To test the motion detector, walk within sight of the detector, watch the response of the LED indicator, and determine the detection area. Test the lower sensor first and then the upper one. This will help define and set the required maximum detection distance of the detector (determined by the lower sensor). Then, run the detection zone test for both sensors and the masking sensors test. If there is no response to movement, select another sensitivity level and detection distance (Detection Distance scrollbar), and check the tilt angle of the detector.
- Take some test photos to ensure that the camera is capturing the desired area and that no obstacles are blocking its view.
- Fasten the SmartBracket panel with the bundled screws using all fixation points. (One of them is in the perforated part of the mounting panel above the tamper.) When using other fasteners, ensure they do not damage or deform the mounting panel.
You can mount the MotionCam Outdoor (PhOD) Jeweller detector on a vertical surface or in the corner with the mounting panel. SmartBracket has special holes that need to be drilled to fix the panel with the bundled screws.
- Place the MotionCam Outdoor (PhOD) Jeweller on the mounting panel wait for the calibration to complete.
- Tighten the screw on the bottom of the detector’s body. The screw is needed for more reliable fastening and protection of the detector from quick dismantling.
- Check the tamper status in the Ajax app.
Maintenance
Check the functioning of the detector regularly. The optimal frequency of checks is once every three months. Clean the detector body of dust, cobwebs, and other contaminants as they emerge. Use a soft dry cloth suitable for equipment care.
Do not use substances that contain alcohol, acetone, petrol, or other active solvents to clean the detector. Wipe the lens gently, as scratches may impair the detector sensitivity.
The calculated battery life of the detector will be up to 3 years from a built-in battery at the rate of 1 alarm per day with the standard Jeweller settings (ping period – 36 seconds). The security system will send an appropriate notification if the detector batteries are nearly depleted. The LED will light up and go out gradually when the detector identifies any movement or if the tamper triggers.
MotionCam Outdoor (PhOD) Jeweller can work up to 2 months after the low battery signal. We recommend you replace the batteries immediately upon notification. It is advisable to use lithium batteries. They have a large capacity and are less affected by temperatures.
Technical specifications
Warranty
Warranty for the Limited Liability Company “Ajax Systems Manufacturing” products is valid for 2 years after the purchase.
If the device does not function correctly, please contact the Ajax Technical Support first. In most cases, technical issues can be resolved remotely.
Contact Technical Support:
