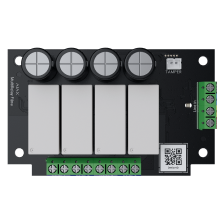
The maximum resistive load of each MultiRelay Fibra relay is:
- 5 A at 30 V⎓,
- 10 A at 110–230 V~.
Do not connect the relay to electrical circuits where the load may be higher.

Soon to be: Superior MultiRelay Fibra
Four-channel relay with dry contacts
The maximum resistive load of each MultiRelay Fibra relay is:
Do not connect the relay to electrical circuits where the load may be higher.
To configure switching notifications for each MultiRelay Fibra relay, in the Ajax app:
To configure notifications for all automation devices:
To configure MultiRelay Fibra in pulse mode, in the Ajax app:
To remove the single MultiRelay Fibra relay from the device list and Automation Menu:
When the Active toggle is disabled, the relay does not execute system commands and scenarios and does not notify about events.
In the MultiRelay Fibra states, the relay will change the state to Inactive. It will not be displayed in the device list and Automation Menu.
Terminating resistor is a consistent load for a long line. It is required to avoid the influence of the signal reflected from the end of the line. A 120 Ohm terminating resistor is included in the complete set of a hub.
A terminating resistor is installed between signal terminals of the last device in the line created using the Beam topology.
With the Ring topology, a terminating resistor is not needed.
MultiRelay Fibra is designed for indoor use only. We recommend installing MultiRelay into Case. The casing is sold separately and available in multiple versions. Installing a single module, several modules, or several other devices into Case is possible. You can select Case with the required number of slots in the configurator.
Case has mounts for modules, wire channels, and a tamper board that is connected to the MultiRelay connector.
Tamper board is a single board with a tamper button. The button contacts change a state when you try to open the casing lid or detach it from the surface. An Ajax hub receives a notification about the tamper triggering of the device. The hub activates the sirens added to the system, triggers scenarios, and notifies users and the security company.
Case has the tamper board. It’s connected to the Ajax device with a loop in the complete set.
MultiRelay Fibra has temperature protection. When the temperature of one of the relays exceeds the permissible value, all closed contacts automatically open. The toggle of the relay that was enabled turns red. The user and the security company receive a notification about overheating in Ajax apps.
The relay functionality is restored when the temperature drops to the permissible level. After the power is restored, the relay contacts return to their previous state.
If, after the relay has been switched off due to overheating, the user has changed the state using the toggle in the app, the contacts will take this state after the temperature returns to normal.
When operating in pulse mode, the relay recovers from overheating in the off state.
MultiRelay Fibra allows you to configure the relay contacts state in case of a power outage.
When the toggle Keep state after power outage is disabled, the relay contacts return to normal state in case of a power outage.
If the normal state of the relay contacts is Normally Open and the relay contacts are closed at the time of a power outage, they will open. When the power is restored, the connected electric appliance will not be supplied with current.
If the toggle Keep state after power outage is enabled, the current state of the relay contacts saves in case of a power outage.
The option is available for bistable mode.
To configure the contacts state in case of a power outage, in the Ajax app:
