To install the Ajax security system, you’ll need a smartphone with Ajax PRO app installed and some basic tools like a screwdriver and a drill. This article demonstrates the essential stages of hardware installation and describes the app features that allow you to administer thousands of Ajax security systems.
Connecting and configuring a control panel
Ajax control panels — hubs — are ready to operate straight out of the box. There is no need to disassemble the hub: the system is configured via the app, and the SmartBracket mounting panel simplifies fixing the device on the surface.
How to connect a hub:
- Slide down the SmartBracket mounting panel.
- Plug the power supply and Ethernet cables to the sockets, insert a SIM card prepared in advance (optionally).

The SIM card provides a hub with a backup communication channel for transmitting alarms and events via the Internet, SMS and calls. Keep in mind that you should have enough funds on the account to pay for corresponding services, and requesting the PIN code should be disabled.
- Switch on the hub and wait until the Ajax logo turns green or white.
- Open the Ajax PRO: Tool For Engineers app and create an account (if you don’t have one).
- Add the hub by pressing “+” in the app.
- Type the name of the hub and scan the QR code located on the hub’s body, or enter the hub ID manually.
- Press “OK” and wait until the hub appears on the list.
Find comprehensive instructions on connecting a hub in its user manual: Main menu → Help → your hub model.
Once the hub becomes available in the app, you can configure it. In the hub’s settings, you’ll find a menu with the communication parameters (the Jeweller radio protocol settings) and communication with the Ajax Cloud server (Ethernet and GSM settings), user permissions, notifications, security schedule, reminders for a geofence, etc. Find a detailed description of each menu in the hub user guide.
Please note that the System Integrity Check function—checking the status of all devices before arming—is disabled by default. To comply with EN 50131 (the European standard for security systems), this function should be enabled. You can enable it in the hub settings: the Service menu.
Useful links:
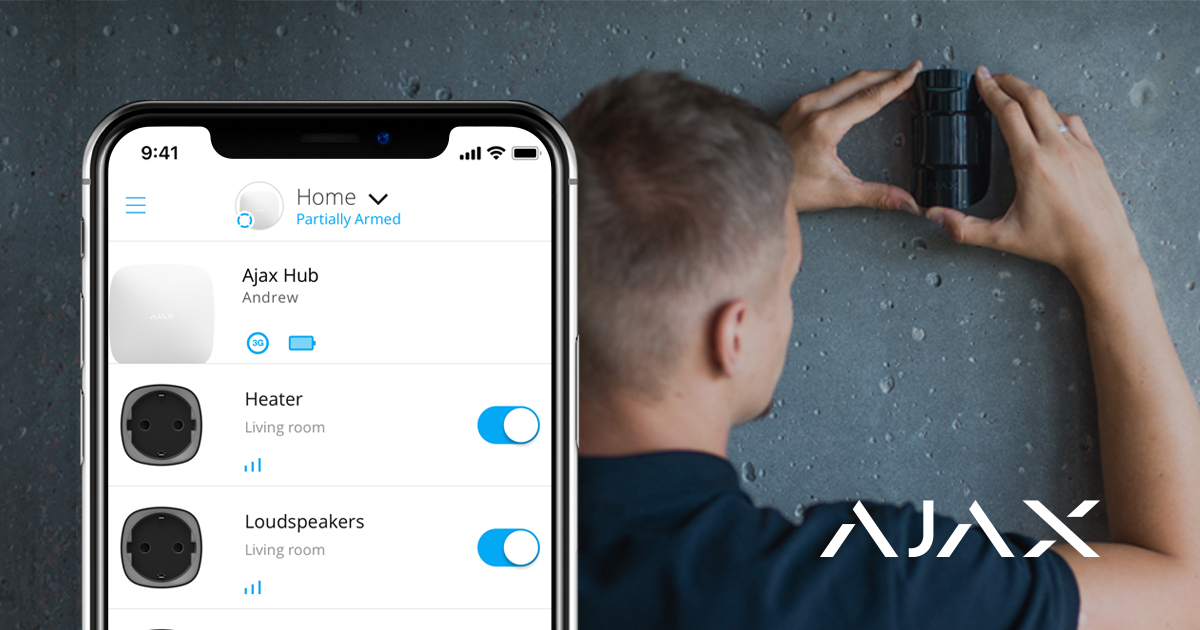
Connecting and setting up devices
Ajax devices connect to the hub in the app. When adding a new device, name it and assign it to the virtual room. This increases the informativeness of system notifications about alarms and events.
To add a new device:
- Open the Ajax PRO app.
- Tap on the added hub and go to the Rooms tab at the bottom of the screen.
- Create a Room, name it, and set a photo (optionally). Create several rooms if necessary.
- Tap on the created room and press Add Device. Name the device, scan its QR code, and click Add.
If the room has already been created, devices can be added through the Devices tab
: Add Device button. - Switch on the device on the countdown: the device will appear in the list of hub’s devices.
- Follow the same procedure to pair other devices.
Once a device is paired with a hub, you can configure it in the app. Open the Ajax PRO app → Select your hub → go to the Devices tab ![]() → select the device you want to configure and tap on it.
→ select the device you want to configure and tap on it.
Click the gear icon to go to the settings. You can set up the sensors’ sensitivity, delays on entry/exit, the number of alarms, indications, and other parameters that provide a quick response to threats. Find additional information about the device settings in the user guide — a link is located at the bottom of the device settings screen.
Using the radio signal extender, you can double the communication range of connected devices. With multiple radio signal extenders, you can expand the coverage of a single security system up to 35 km². However, keep in mind that radio signal extenders can only be connected directly to the hub: the possibility of connecting one range extender to another is not provided. The number of radio signal extenders connected depends on the model of the hub.
| Hub | 1 ReX |
| Hub Plus | up to 5 ReX |
| Hub 2 | up to 5 ReX / ReX 2 |
| Hub 2 Plus | up to 5 ReX / ReX 2 |
Useful links:
Testing radio signal
Walls, ceilings, and other barriers can shorten the radio communication range. Find recommendations on installation in the user guide of the particular device. Use the Ajax PRO app to measure the radio signal strength at the planned installation location.
- Temporarily attach the device in the planned installation location (for example, with the bundled double-sided tape).
- Conduct the Jeweller signal strength test and, additionally, the Wings signal strength test for MotionCam detectors.
- If the tests confirmed stable signal reception (2-3 bars in the app), fix the device with screws.
Useful links:
Adding users and determining their permissions
Family members, friends, neighbors, colleagues, or security personnel might have access to the security system. Before inviting new users, we recommend creating an Ajax account for them. When users are added, you can manage their permissions inside the system: restrict access to specific groups, cameras, and system settings or determine the types of notifications.
- Tap on the hub in the device list in the app and go to Settings by clicking the gear icon .
- Go to the Users menu.
- Press Send Invite Code and type in the email address of the Ajax account you want to invite.
- Press Send.
Setting up automation scenarios
Ajax security system provides functionality for setting up the reaction of Relay, WallSwitch and Socket in response to an alarm, changing of the security mode, activation by schedule or by pressing Button in the control mode. The security system can be programmed to change the security mode by schedule.
Use scenarios to automate your security system and reduce the number of routine actions. For instance, set up water shut-off in case of LeaksProtect flood detector alarm, scheduled heater activation, or automatic closing of the electric lock when arming.
Verifying alarms
Ajax security system can confirm alarms to eliminate reactions to false alarms. The Alarm Confirmation function implies creating a list of at least two devices — their alarms will be taken into account for confirming. Once the device from the list raises the alarm, the hub launches the confirmation timer and expects another device from the list to be triggered. If such an alarm occurs, the system sends an event with a confirmed alarm code to the monitoring station. If the confirmation detector hadn’t been triggered, the system ignores the alarm and does not notify users or the security company.
Also, the system can confirm intrusion with photos made by MotionCam motion detectors. When spotted motion, MotionCam can take a single shot or a series of 2 to 5 images. A series of images are shown in the app as cyclical animations, allowing you to evaluate what is happening on the object in dynamics.
Connecting cameras and DVRs
Ajax supports protocol RTSP, a standard protocol in the video surveillance market. It’s used in most personal and professional surveillance cameras and DVRs. There are two ways of integrating cameras into Ajax: by using a simplified connection or by setting up an RTSP link.
Ajax supports simplified connection of:
How to set up video surveillance by an RTSP link:
- Go to the Devices tab in the Ajax app and scroll down.
- Press Add device, then choose Add camera.
- Select the RTSP camera option: camera name, link to the video stream, and the room to which video surveillance device is assigned.
- Press Add. The video stream will be added to the Ajax app and become available for viewing.
Setting up security groups
Enable Group Mode to distribute devices by groups and customize security according to premise purpose, schedule, or user permissions. Users can manage the security mode of every group separately.
Where it can be useful:
- For homes and apartments: Keep particular rooms, garage, or safe always under protection. Give family members, roommates, or tenants access to the security of specific areas only.
- For offices and stores: restrict employees’ access to authorized spaces. Use personal KeyPad passcodes for specific groups to control when and who had disarmed the office.
How to enable group mode:
- Go to the Group settings (Devices tab → Hub → Settings → Groups).
- Create groups, set custom photos (optionally), assign all devices to groups, and activate group mode.
The maximum number of groups depends on the hub model: Hub and Hub 2 support up to 9 groups, Hub Plus and Hub 2 Plus — up to 25. Keep in mind that one device can be assigned to one group only.
Connecting security monitoring
The Monitoring Station menu in the hub settings can help you to configure all the nuances of connecting the alarm response company: IP address, ports, connection channels, encryption and alarm confirmation features.
The administrator user can send monitoring requests directly from the app.
- Go to the Devices tab → Hub → Settings → Security Companies.
- Pick up the security company from the list and tap on it.
- Press Send Monitoring Request.
- Wait for the security company to process the request. When done, the siren icon near the hub in the device list will indicate successful connection.
Keep in mind that photo verification of alarms can not be transferred via Contact ID (Sur-Gard) or SIA protocol. Pictures from MotionCam detectors can be displayed in the Ajax apps, Ajax PRO Desktop app featuring monitoring function, as well as SBN, Manitou and ABsistemDC(NG)v2 CMS software.
Useful links:
How this all helps to do security business
We are aimed at helping security businesses to be focused on client service. More satisfied clients mean more equipment sold. To spread this practice, we are constantly upgrading the software and expanding the product line. Our hassle-free approach can become your baseline in sales and service. Your clients will be happy to receive new features with free software updates. And you will always be ready to offer them new devices and support them remotely. Find distributors in your region or become a partner to do business with Ajax.