The Ajax system provides the possibility to configure automation devices and Ajax WaterStop Jeweller in response to an alarm, armed mode change, schedule, or temperature. The security can be programmed to change the security mode by schedule, and the automation device can react to the LightSwitch or Button Jeweller press. Additionally, the user can control automation devices from the KeyPad TouchScreen Jeweller, Superior KeyPad TouchScreen Fibra, Ajax Superior KeyPad TouchScreen G3 Jeweller, KeyPad Outdoor Jeweller, and Superior KeyPad Outdoor Fibra.
This manual’s information applies to the actual OS Malevich and Ajax apps versions.
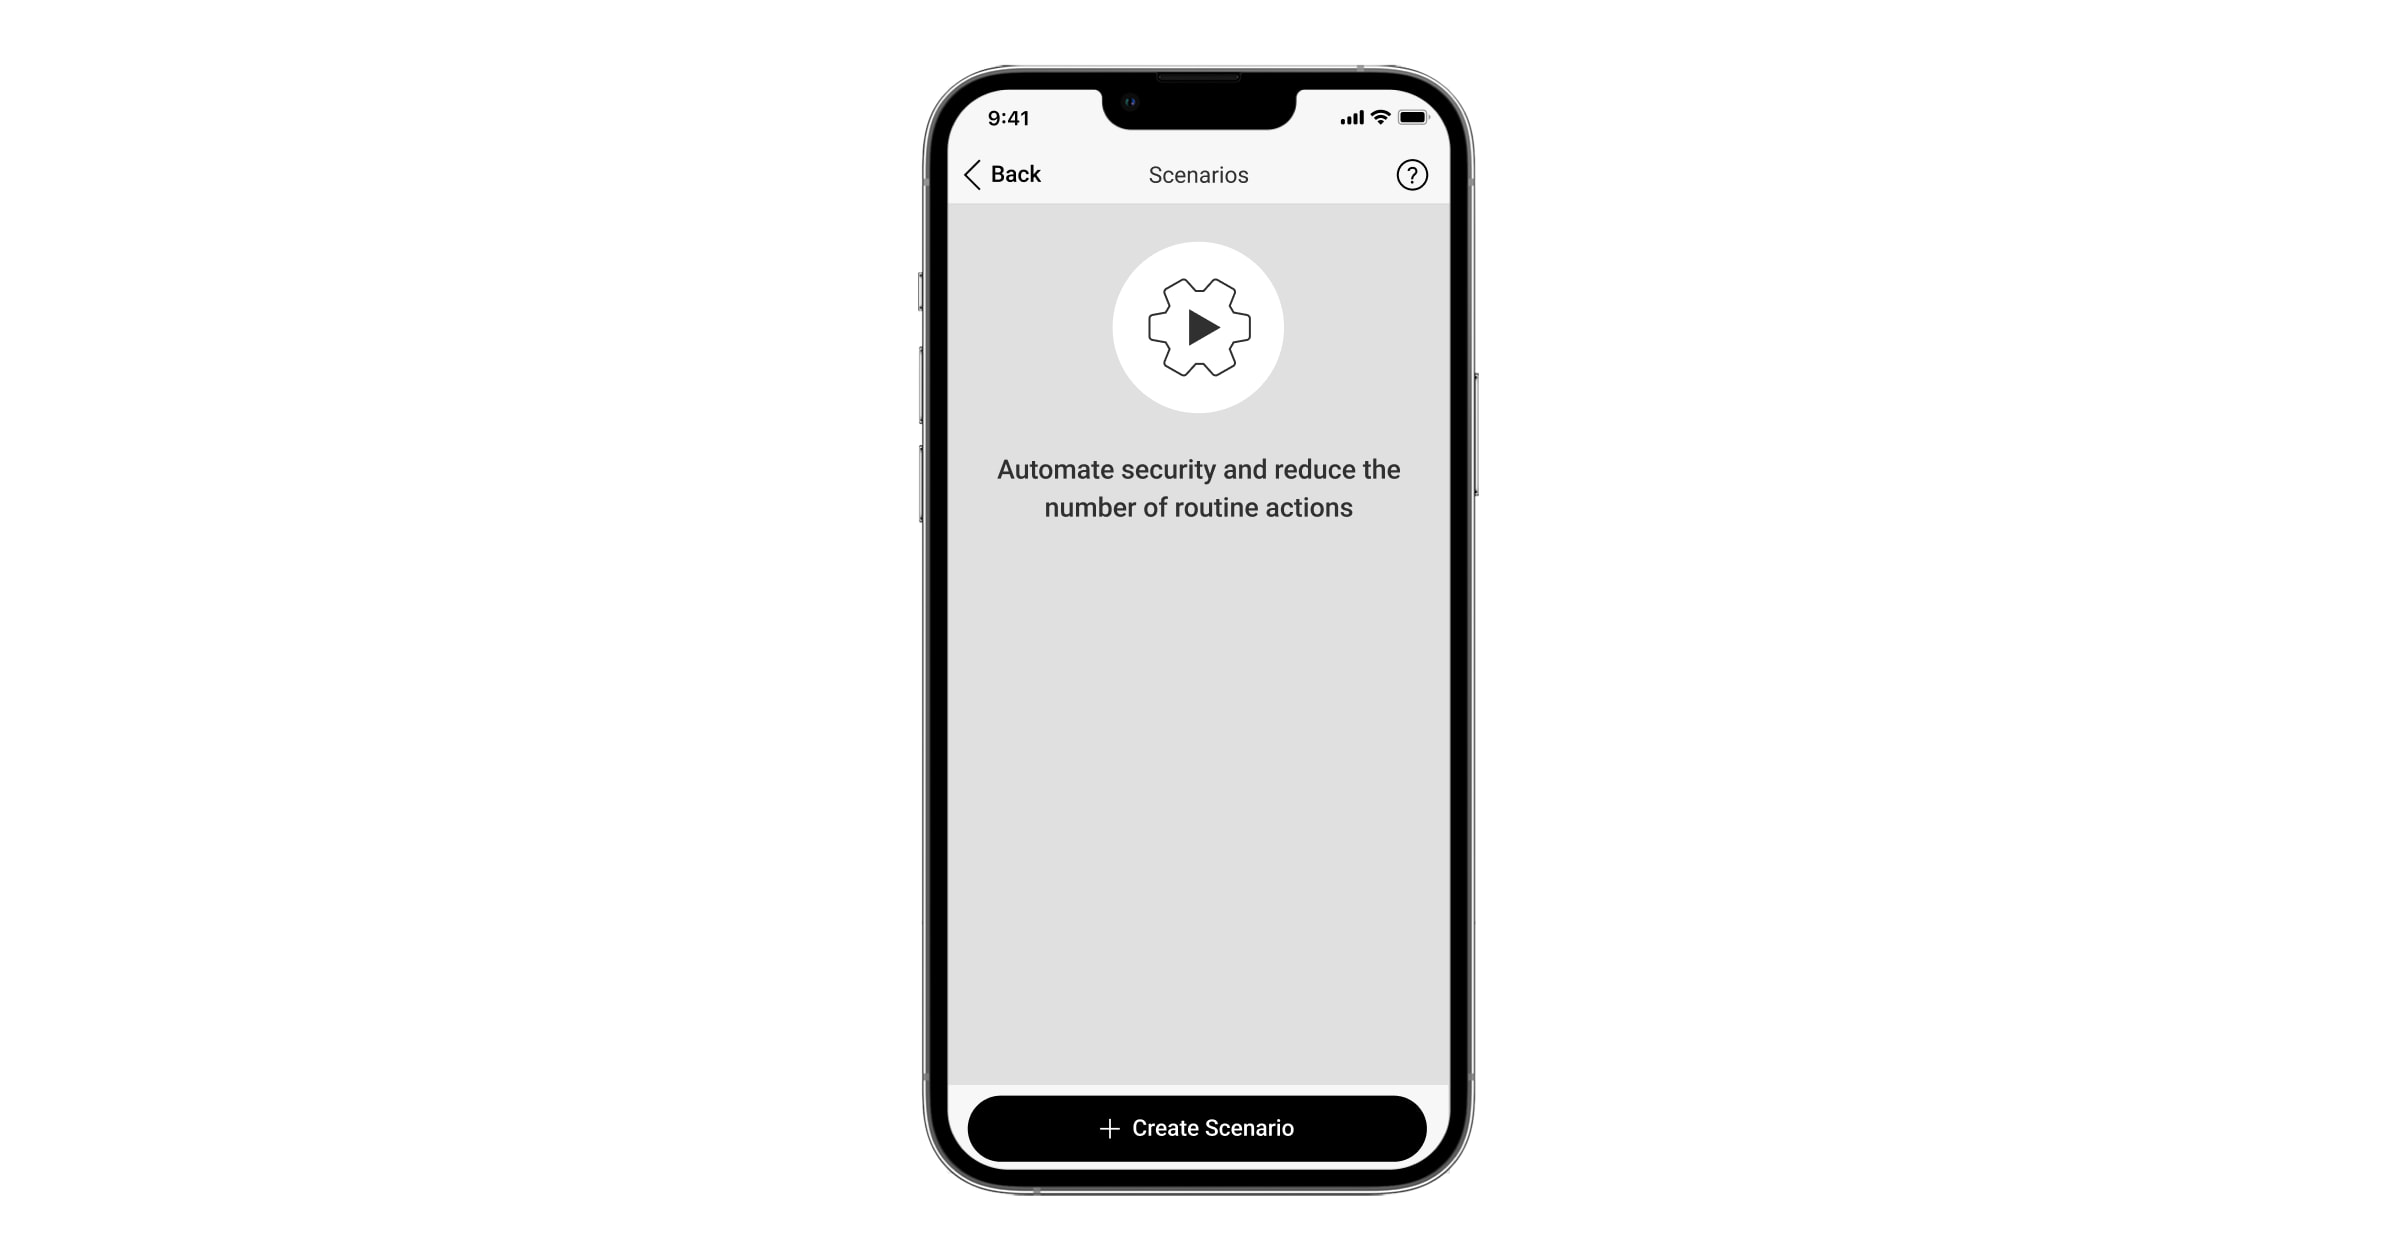
Scenarios can be used to automate a system and reduce the number of routine actions. For instance, to shutoff water in case of LeaksProtect Jeweller flood detector alarm, turn on the heater when the temperature is low, or for automatic closing the electric lock when arming.
Only a PRO or a user with admin rights can create a scenario in the Ajax app.
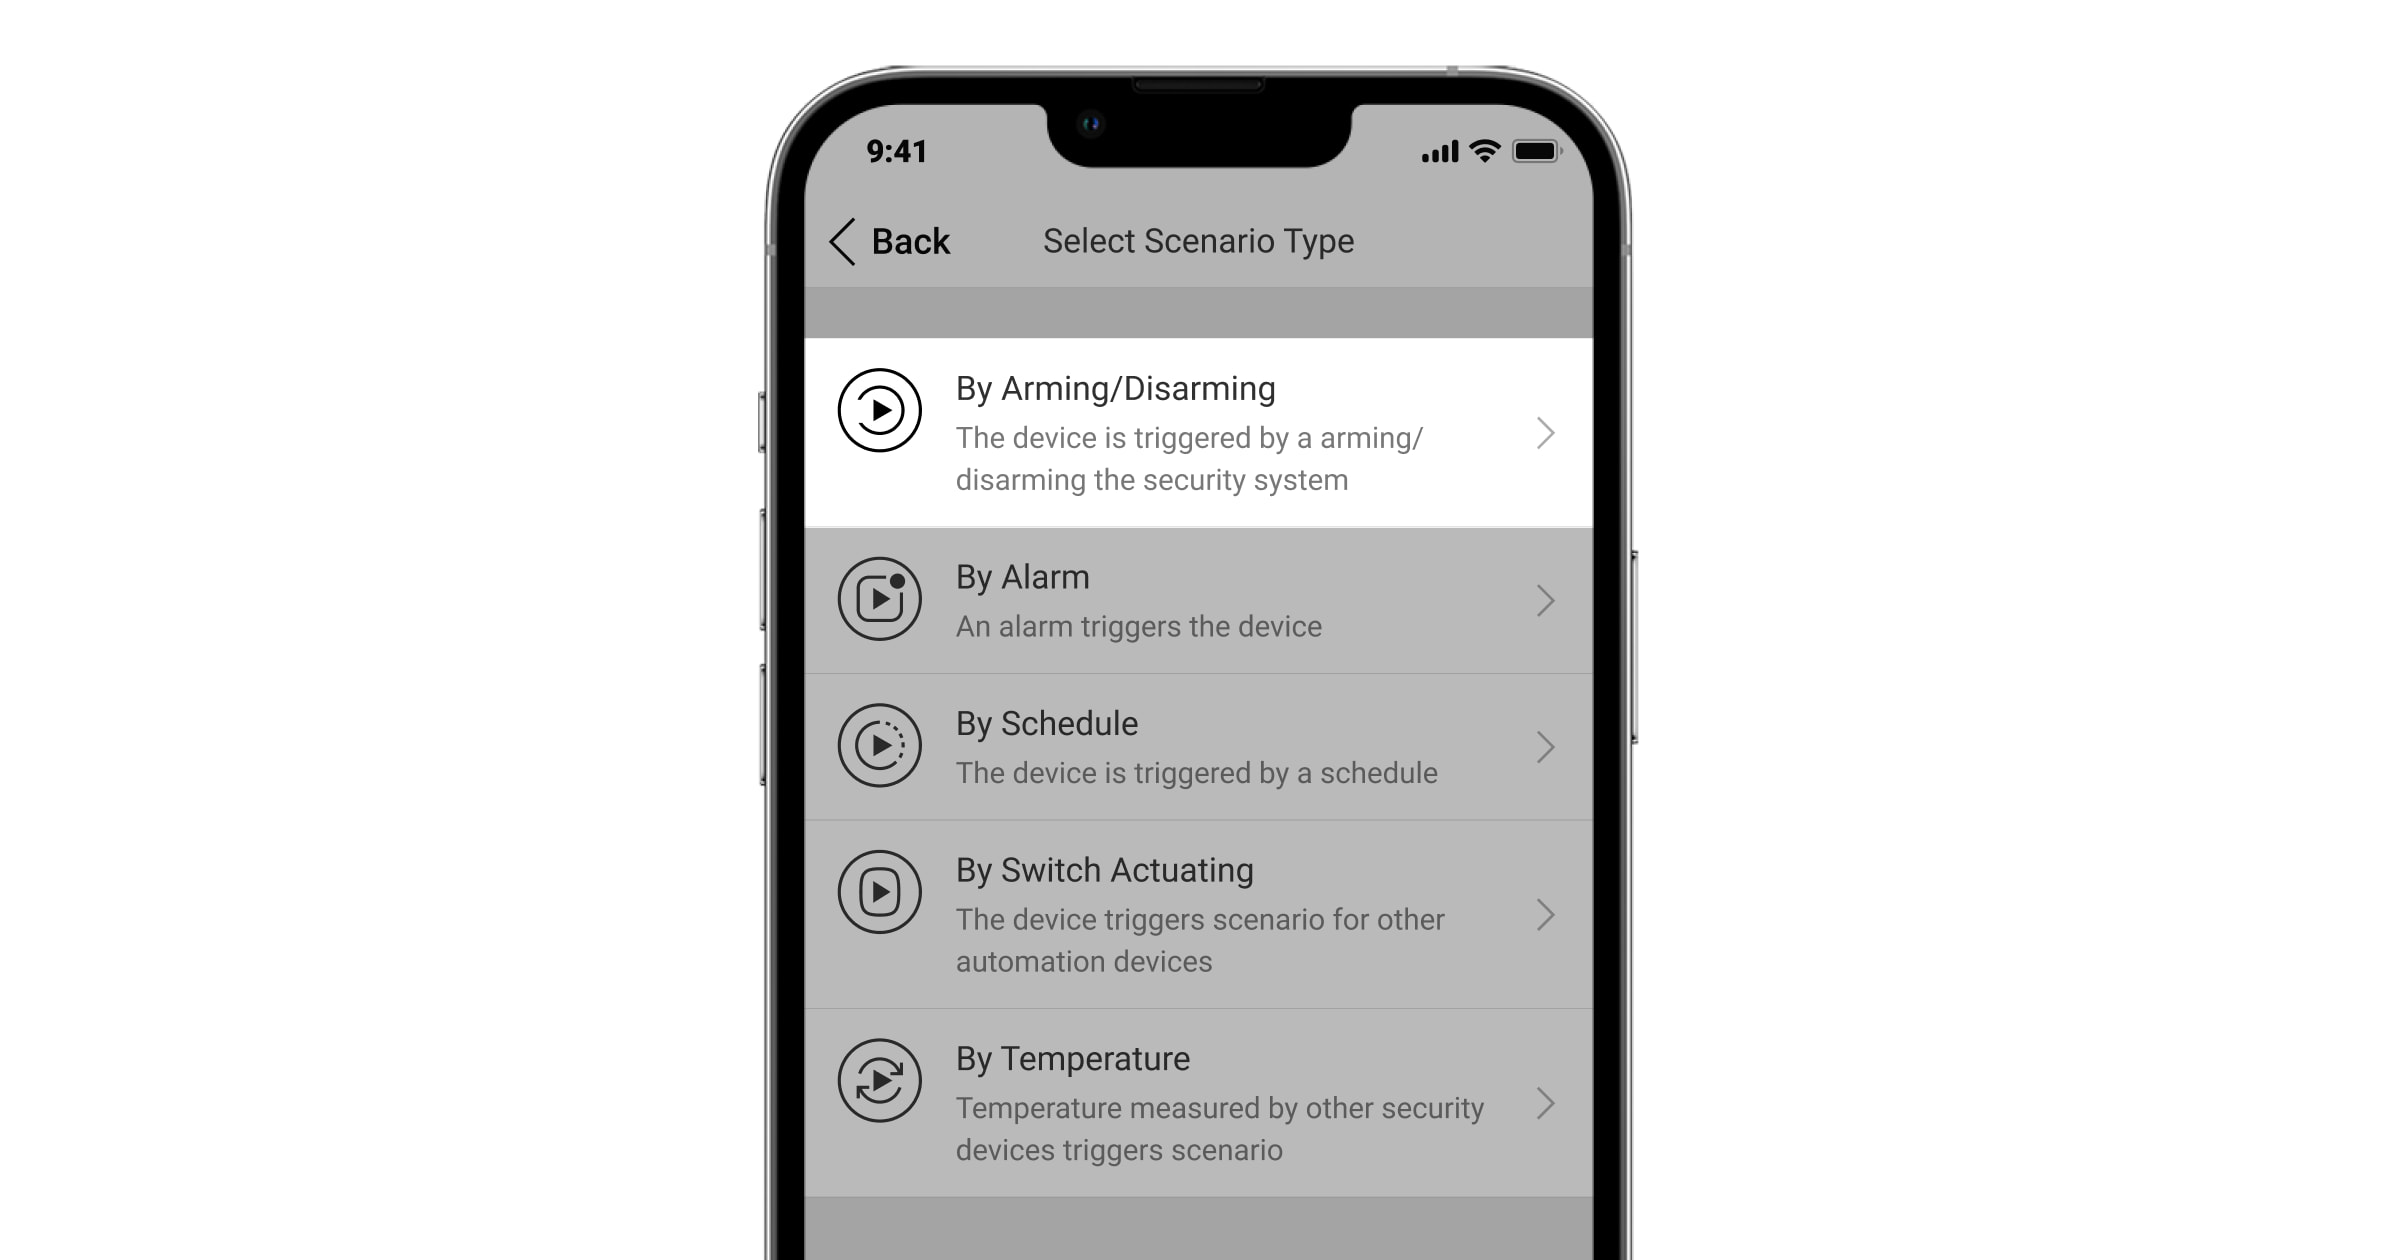
The following types of scenarios are available in the Ajax security system:
- By Button press — the automation device is triggered by long or short pressing of Button Jeweller.
- By alarm — the scenario runs with an alarm of one or more devices, specific detector sensors, and by pressing the panic button.
- By alarm confirmation — the scenario runs when the alarm is confirmed in the selected zone.
- By schedule — the scenario runs at the time set in the settings of this scenario. This scenario type can include the action of an automation device or the change of security mode.
- By arming/disarming — the automation device is triggered when the user arms/disarms the group or the entire security system or when the Night mode is activated.
- By temperature — the scenario runs when the temperature of one or more devices becomes higher or lower than the threshold set in the scenario settings. The temperature scenarios can be triggered only by devices that display the temperature in Ajax apps.
- By temperature, humidity, CO2 concentration — the scenario runs if one of the selected parameters becomes higher or lower than the threshold set in the scenario settings.
- By touching LightSwitch — the scenario runs when the user presses the LightSwitch touch button.
- When controlling from KeyPad TouchScreen Jeweller/Superior KeyPad TouchScreen Fibra/Ajax Superior KeyPad TouchScreen G3 Jeweller — the user can run the scenario or toggle the automation device from the KeyPad screen.
- When controlling from Superior KeyPad Outdoor Fibra/KeyPad Outdoor Jeweller — the user can run one scenario or toggle the automation device from the KeyPad.
If the device is offline, it will not execute the scenario as it misses the scenario trigger (e.g., during a power outage or when the connection between the hub and device is lost).
Use case: The automated action is scheduled for 10 a.m., so it must start at 10 a.m. The electrical power goes out at 9:55 a.m. and is restored ten minutes later. The automation scenario won’t start at 10 a.m. and will not start immediately after the power is back on. This scheduled action is missed.
The number of scenarios that the hub supports, depends on its hardware capabilities:
Multiple devices can be selected as a trigger for one By temperature scenario. However, each device selected as a trigger counts as one scenario from the hub’s overall limit of scenarios (e.g., if you select four detectors for one scenario by temperature, the system counts that as four scenarios).
At the same time, only one reaction to arming/disarming for every automation device can be created. Scenarios of this type are not included in the general limit of the scenarios.
Reaction to security mode change
This scenario type allows setting up the action of the automation device when changing the security mode or activating the Night mode. Arming scenarios for all automation devices except LifeQuality Jeweller can be performed after an exit delay expires for intrusion devices. In this case, the scenario will start after the longest delay.
To set up a reaction to security mode change:
- Open the Ajax app.
- Select a space.
- Go to the Devices
 tab.
tab. - Select the automation device.
- Go to Settings by clicking on the gear icon
 .
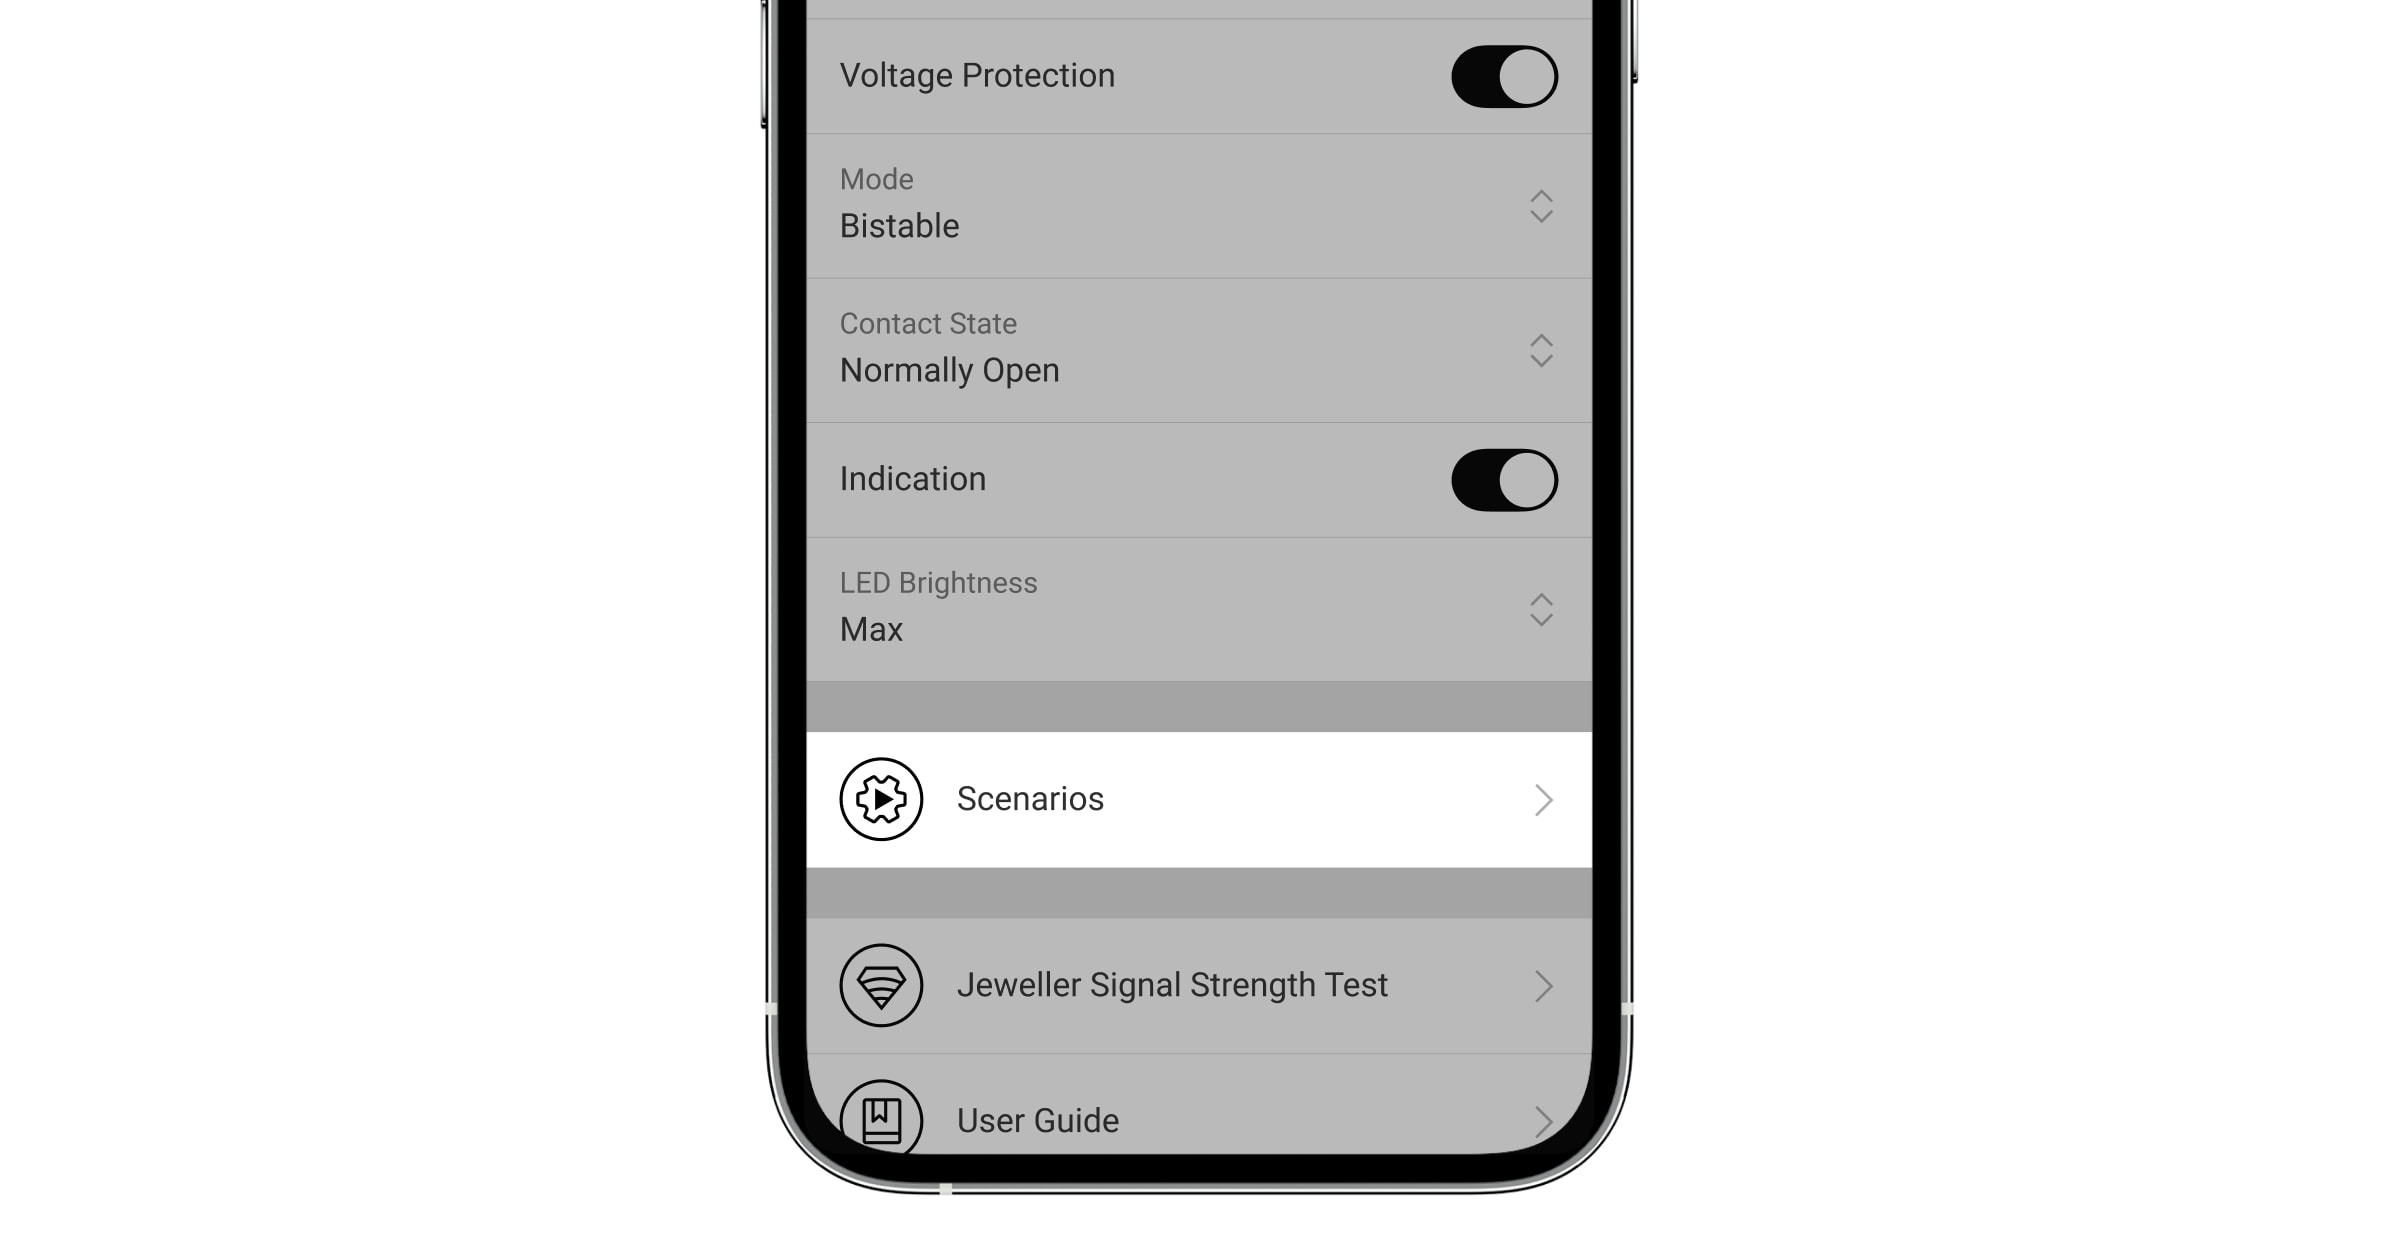
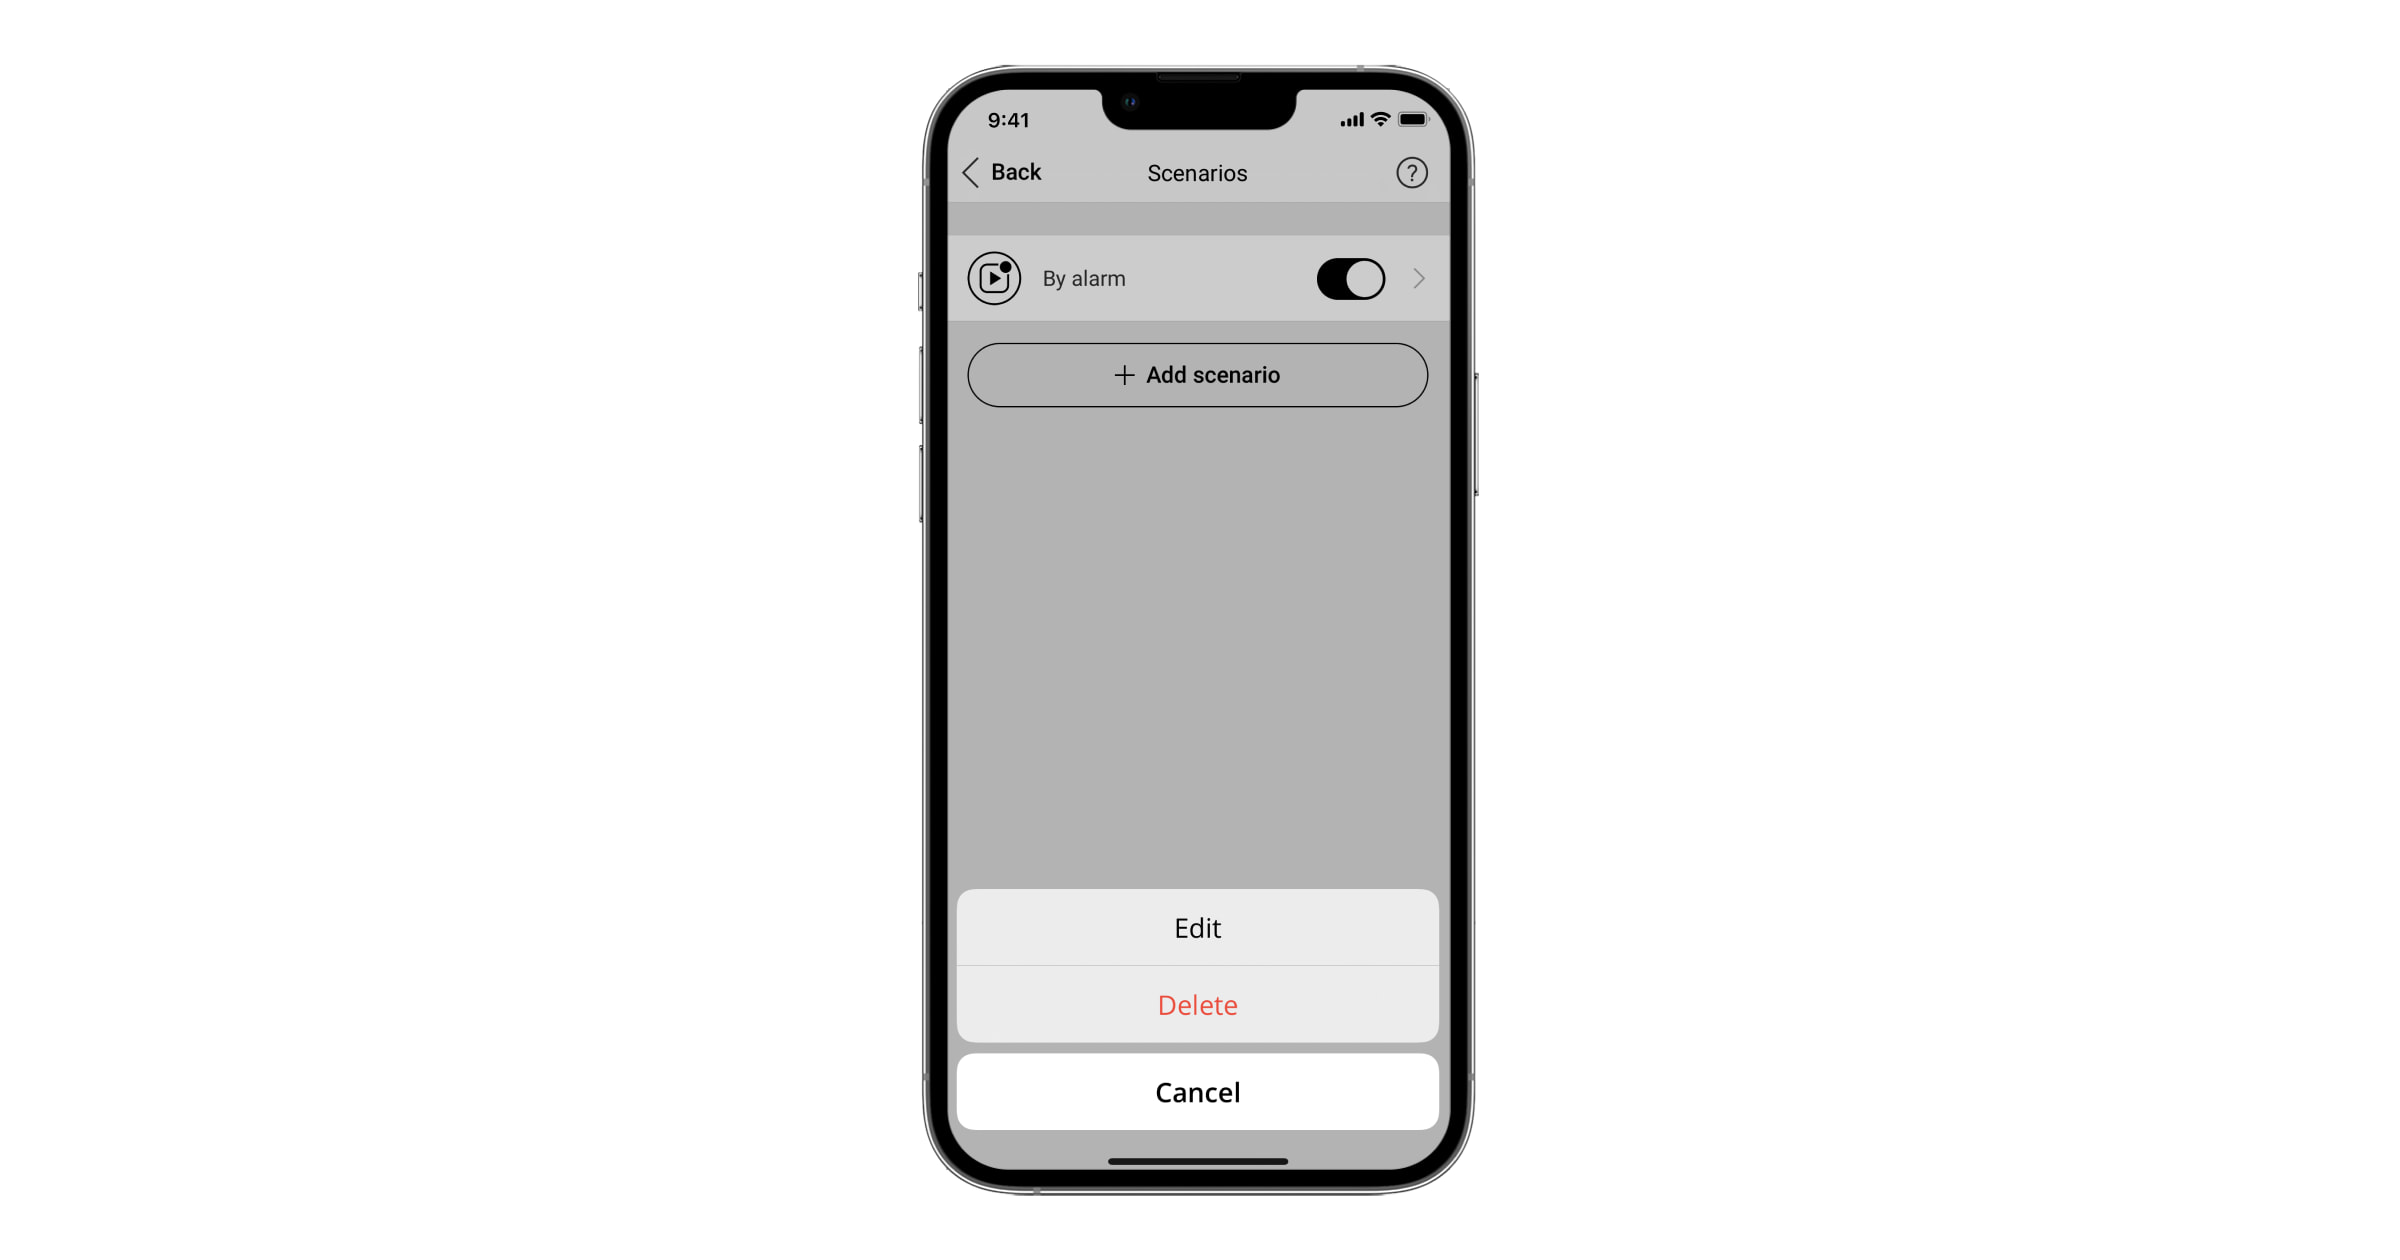
. - Go to the Scenarios menu. Click Create scenario if you are creating a scenario for the first time, or Add scenario if scenarios have already been created in the security system.
- Select By arming/disarming.
- Select the action Switch on, Switch off or No reaction in When arming and When disarming sections. Enable the Perform with exit delay toggle for automation devices in the When arming section if you want the scenario to execute after the exit delay expiration for intrusion devices.

No reaction action cannot be set simultaneously for arming and disarming. In Pulse mode, Pulse is displayed instead of the Switch on and Switch off options.
- Set whether the device reacts to activation of the Night mode. When turning on/off the Night mode, the device will perform the actions set for arming/disarming. A separate reaction to Night mode activation is not provided.
- Click Save. The scenario will appear in the list of device scenarios.
A PRO or a user with admin rights can create only one reaction to security mode change for one automation device. Such a scenario always appears at the top of the saved scenarios under Arming/Disarming.
To delete or edit a scenario, click on it in the list of scenarios. This type of scenario cannot be temporarily disabled without deleting.
Scenario by alarm
Automation devices can be configured to react on an alarm of one, several, or all connected devices. Combined detectors have various alarms; thus, the response to all types of alarms, part of them, or to a single type of alarm can be set. For instance, configure turning the light on if DoorProtect Plus Jeweller detects impacts on the door or close the roller shutters if CombiProtect Jeweller detects a window glass break.
To create scenario by alarm:
- Open the Ajax app.
- Select a space.
- Go to the Devices tab.
- Select the automation device.
- Go to Settings by clicking on the gear icon .
- Go to the Scenarios menu. Click Create scenario if creating a scenario for the first time, or Add scenario if scenarios have already been created in the security system.
- Select By alarm.
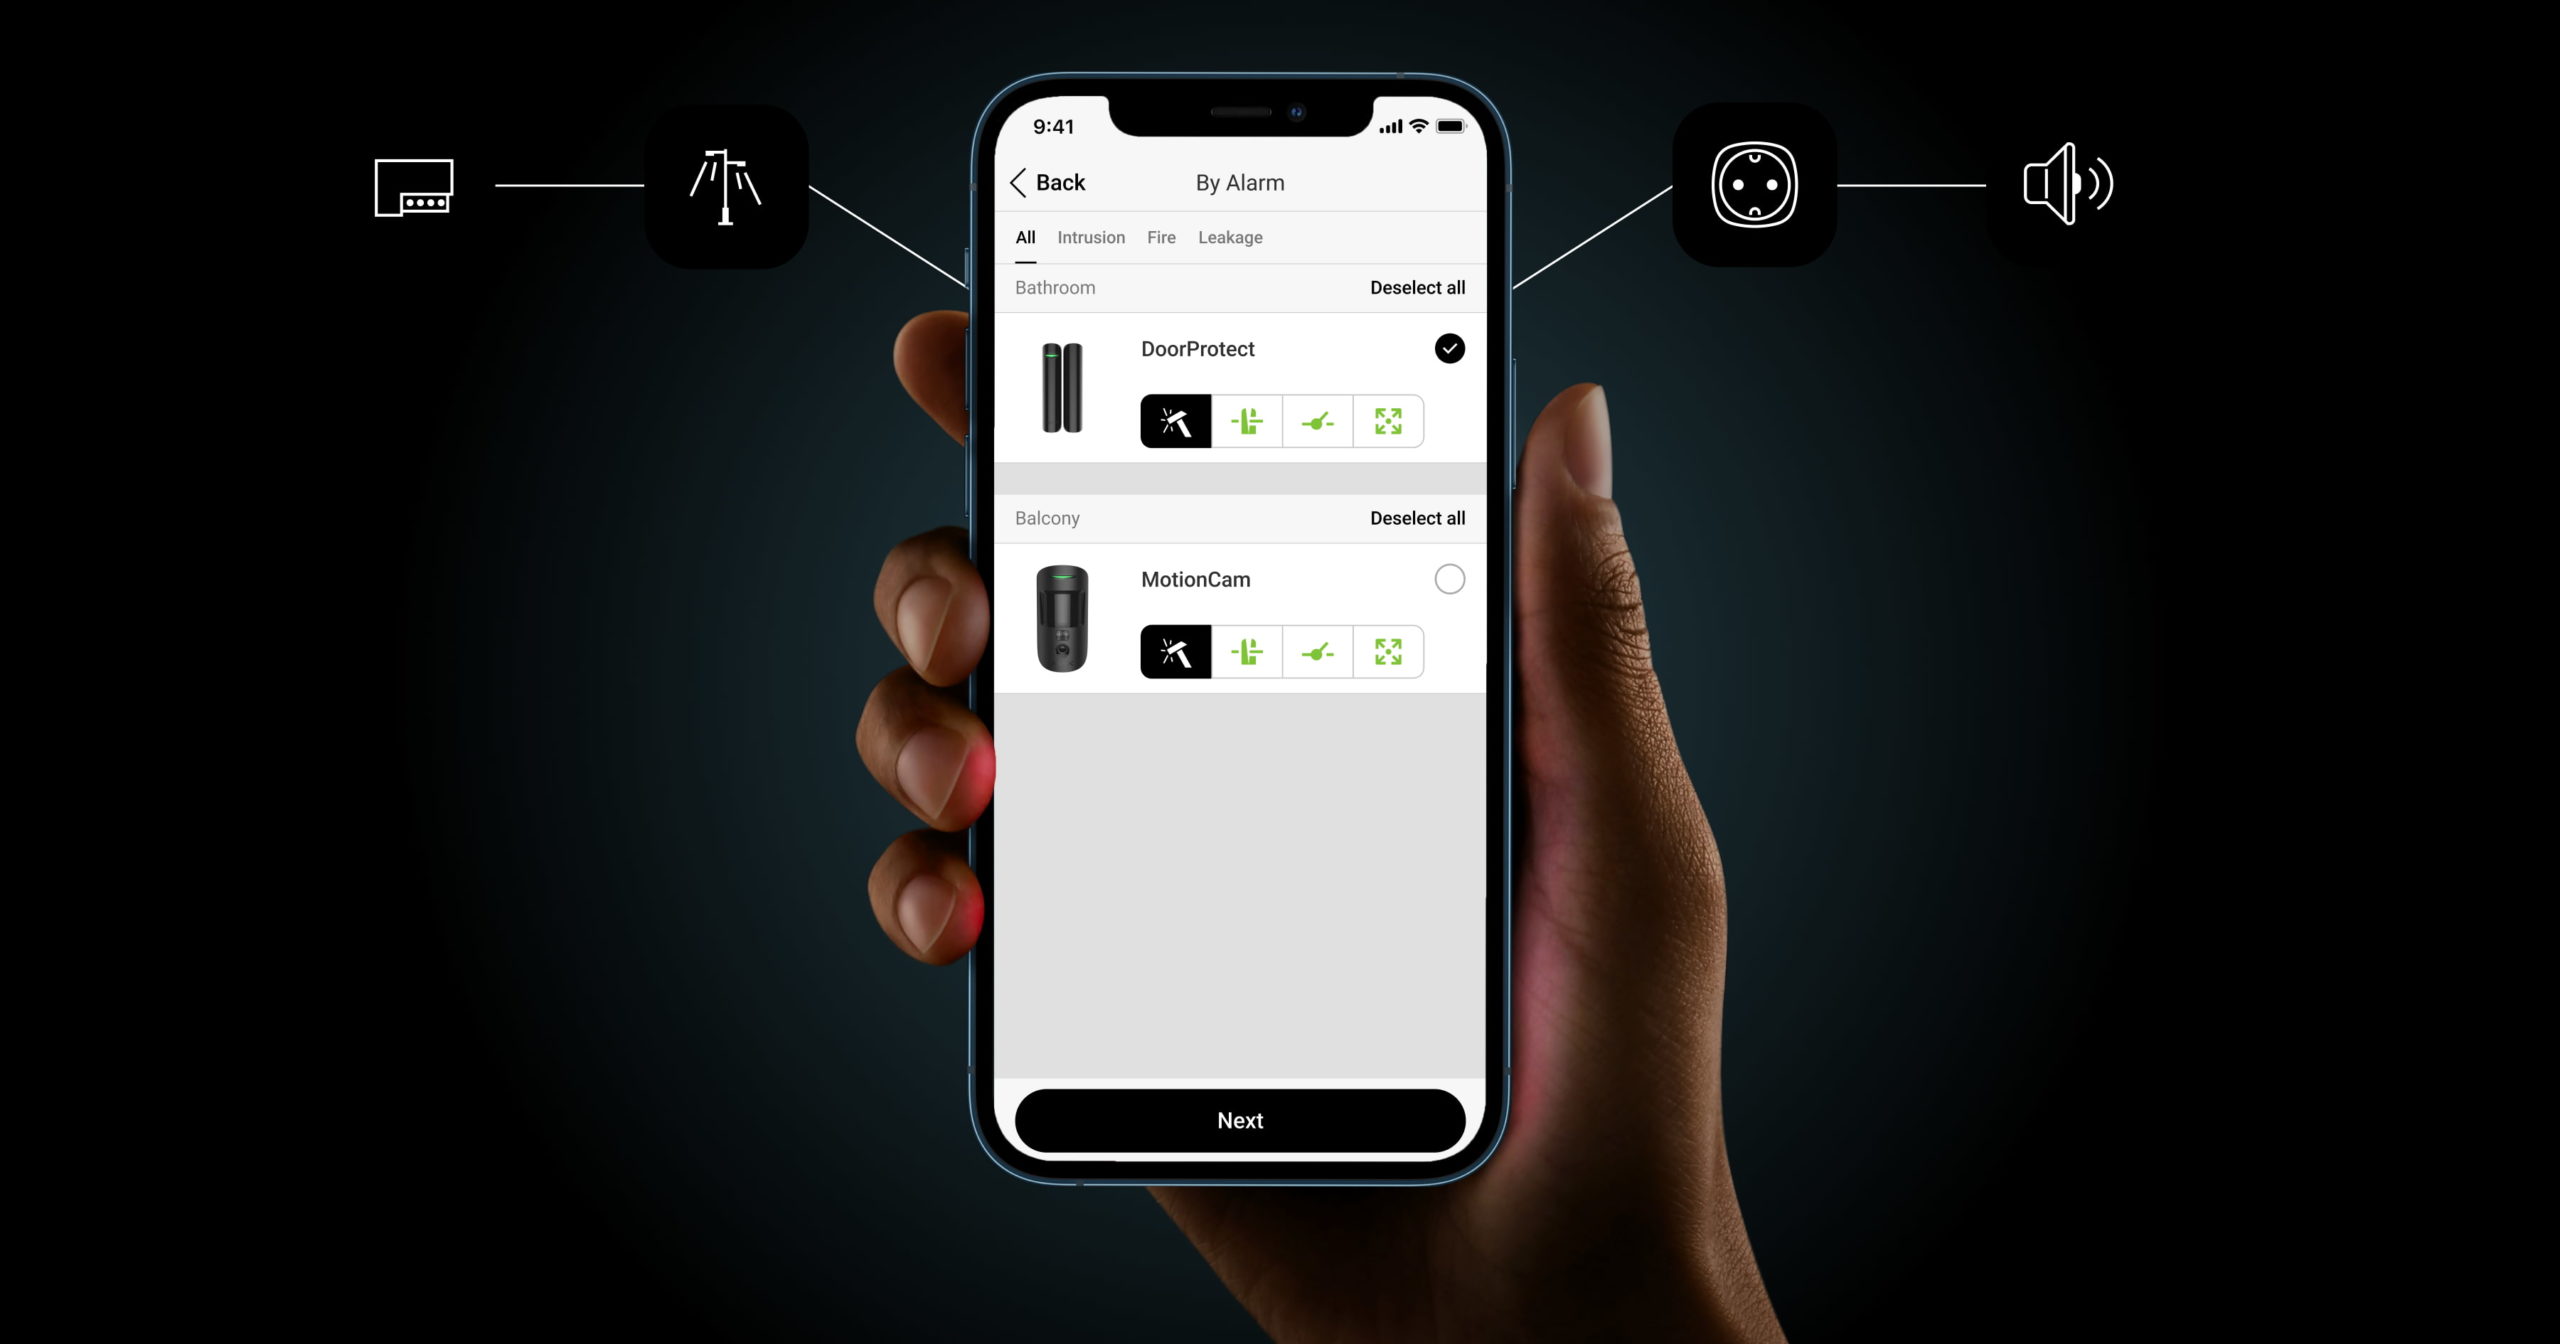
Device selection
The device selection menu displays all detectors connected to the Ajax security system. The list of detectors can be sorted by alarm type: all, intrusion, fire, and leakage.
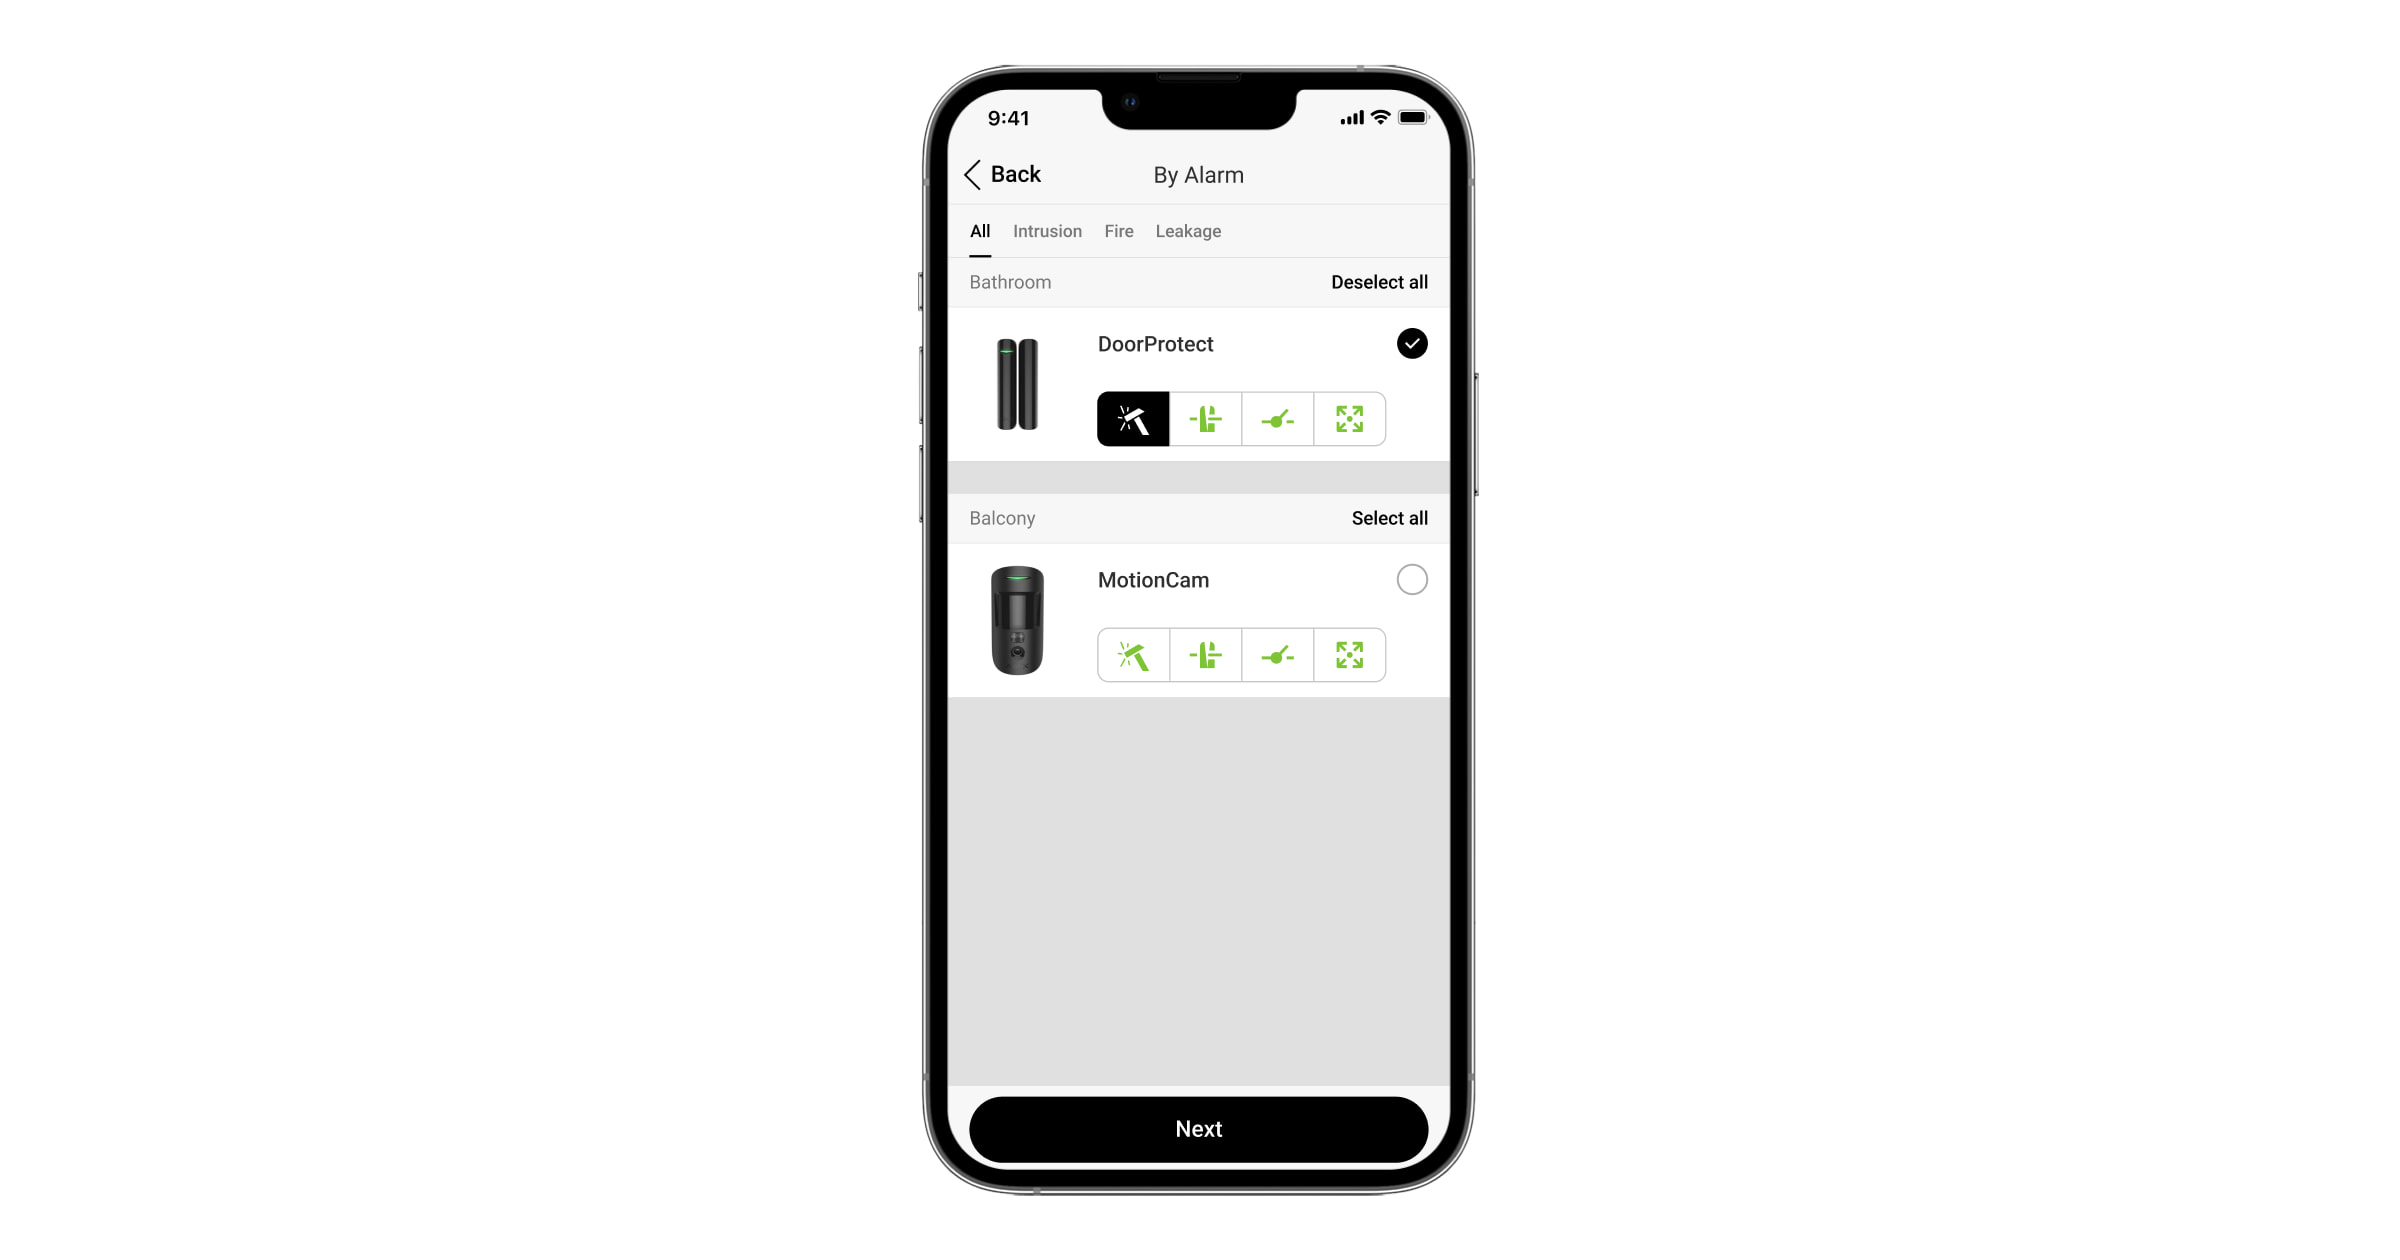
Select the device to choose all available alarms for it. In this case, the scenario will be triggered if at least one of the detector sensors is triggered. For example, an automation device will trigger when CombiProtect Jeweller detects movement or glass breaking.
Click on the alarm type icon to run the scenario when a specific detector sensor triggers.
![]() — motion detection with a motion detector.
— motion detection with a motion detector.
![]() — motion detection with the left side of DualCurtain Outdoor Jeweller.
— motion detection with the left side of DualCurtain Outdoor Jeweller.
![]() — motion detection with the right side of DualCurtain Outdoor Jeweller.
— motion detection with the right side of DualCurtain Outdoor Jeweller.
![]() — door/window opening detection.
— door/window opening detection.
![]() — glass break detection.
— glass break detection.
![]() — detection of a change in the tilt angle of DoorProtect Plus Jeweller or Superior DoorProtect Plus Fibra.
— detection of a change in the tilt angle of DoorProtect Plus Jeweller or Superior DoorProtect Plus Fibra.
![]() — shock detection with DoorProtect Plus Jeweller or Superior DoorProtect Plus Fibra.
— shock detection with DoorProtect Plus Jeweller or Superior DoorProtect Plus Fibra.
![]() — triggering of a third-party wired detector.
— triggering of a third-party wired detector.
A third-party wired device can be connected to DoorProtect Jeweller, DoorProtect Plus Jeweller, GlassProtect Jeweller, Superior DoorProtect Fibra and Superior DoorProtect Plus Fibra.
![]() — accelerometer alarm with Transmitter Jeweller;
— accelerometer alarm with Transmitter Jeweller;
![]() — wire breakage of the roller shutter detector connected to DoorProtect Plus Jeweller or Superior DoorProtect Plus Fibra.
— wire breakage of the roller shutter detector connected to DoorProtect Plus Jeweller or Superior DoorProtect Plus Fibra.
![]() — triggering of the roller shutter opening detector connected to DoorProtect Plus Jeweller or Superior DoorProtect Plus Fibra.
— triggering of the roller shutter opening detector connected to DoorProtect Plus Jeweller or Superior DoorProtect Plus Fibra.
![]() — pressing the panic button.
— pressing the panic button.
Running a scenario by pressing the panic button in the app is not provided.
![]() — detection of exceeding the threshold temperature with fire detectors.
— detection of exceeding the threshold temperature with fire detectors.
![]() — detection of temperature jumps with fire detectors.
— detection of temperature jumps with fire detectors.
![]() — smoke detection with fire detectors.
— smoke detection with fire detectors.
![]() — detection of a dangerous carbon monoxide (CO) concentration with fire detectors.
— detection of a dangerous carbon monoxide (CO) concentration with fire detectors.
![]() — water on the LeaksProtect Jeweller contacts.
— water on the LeaksProtect Jeweller contacts.
If any alarm types are not available for selection, check if the corresponding sensor is enabled in the detector settings.
After selecting the necessary devices and types of alarms, click Next to proceed to configure the scenario.
Scenario settings
To configure scenario by alarm:
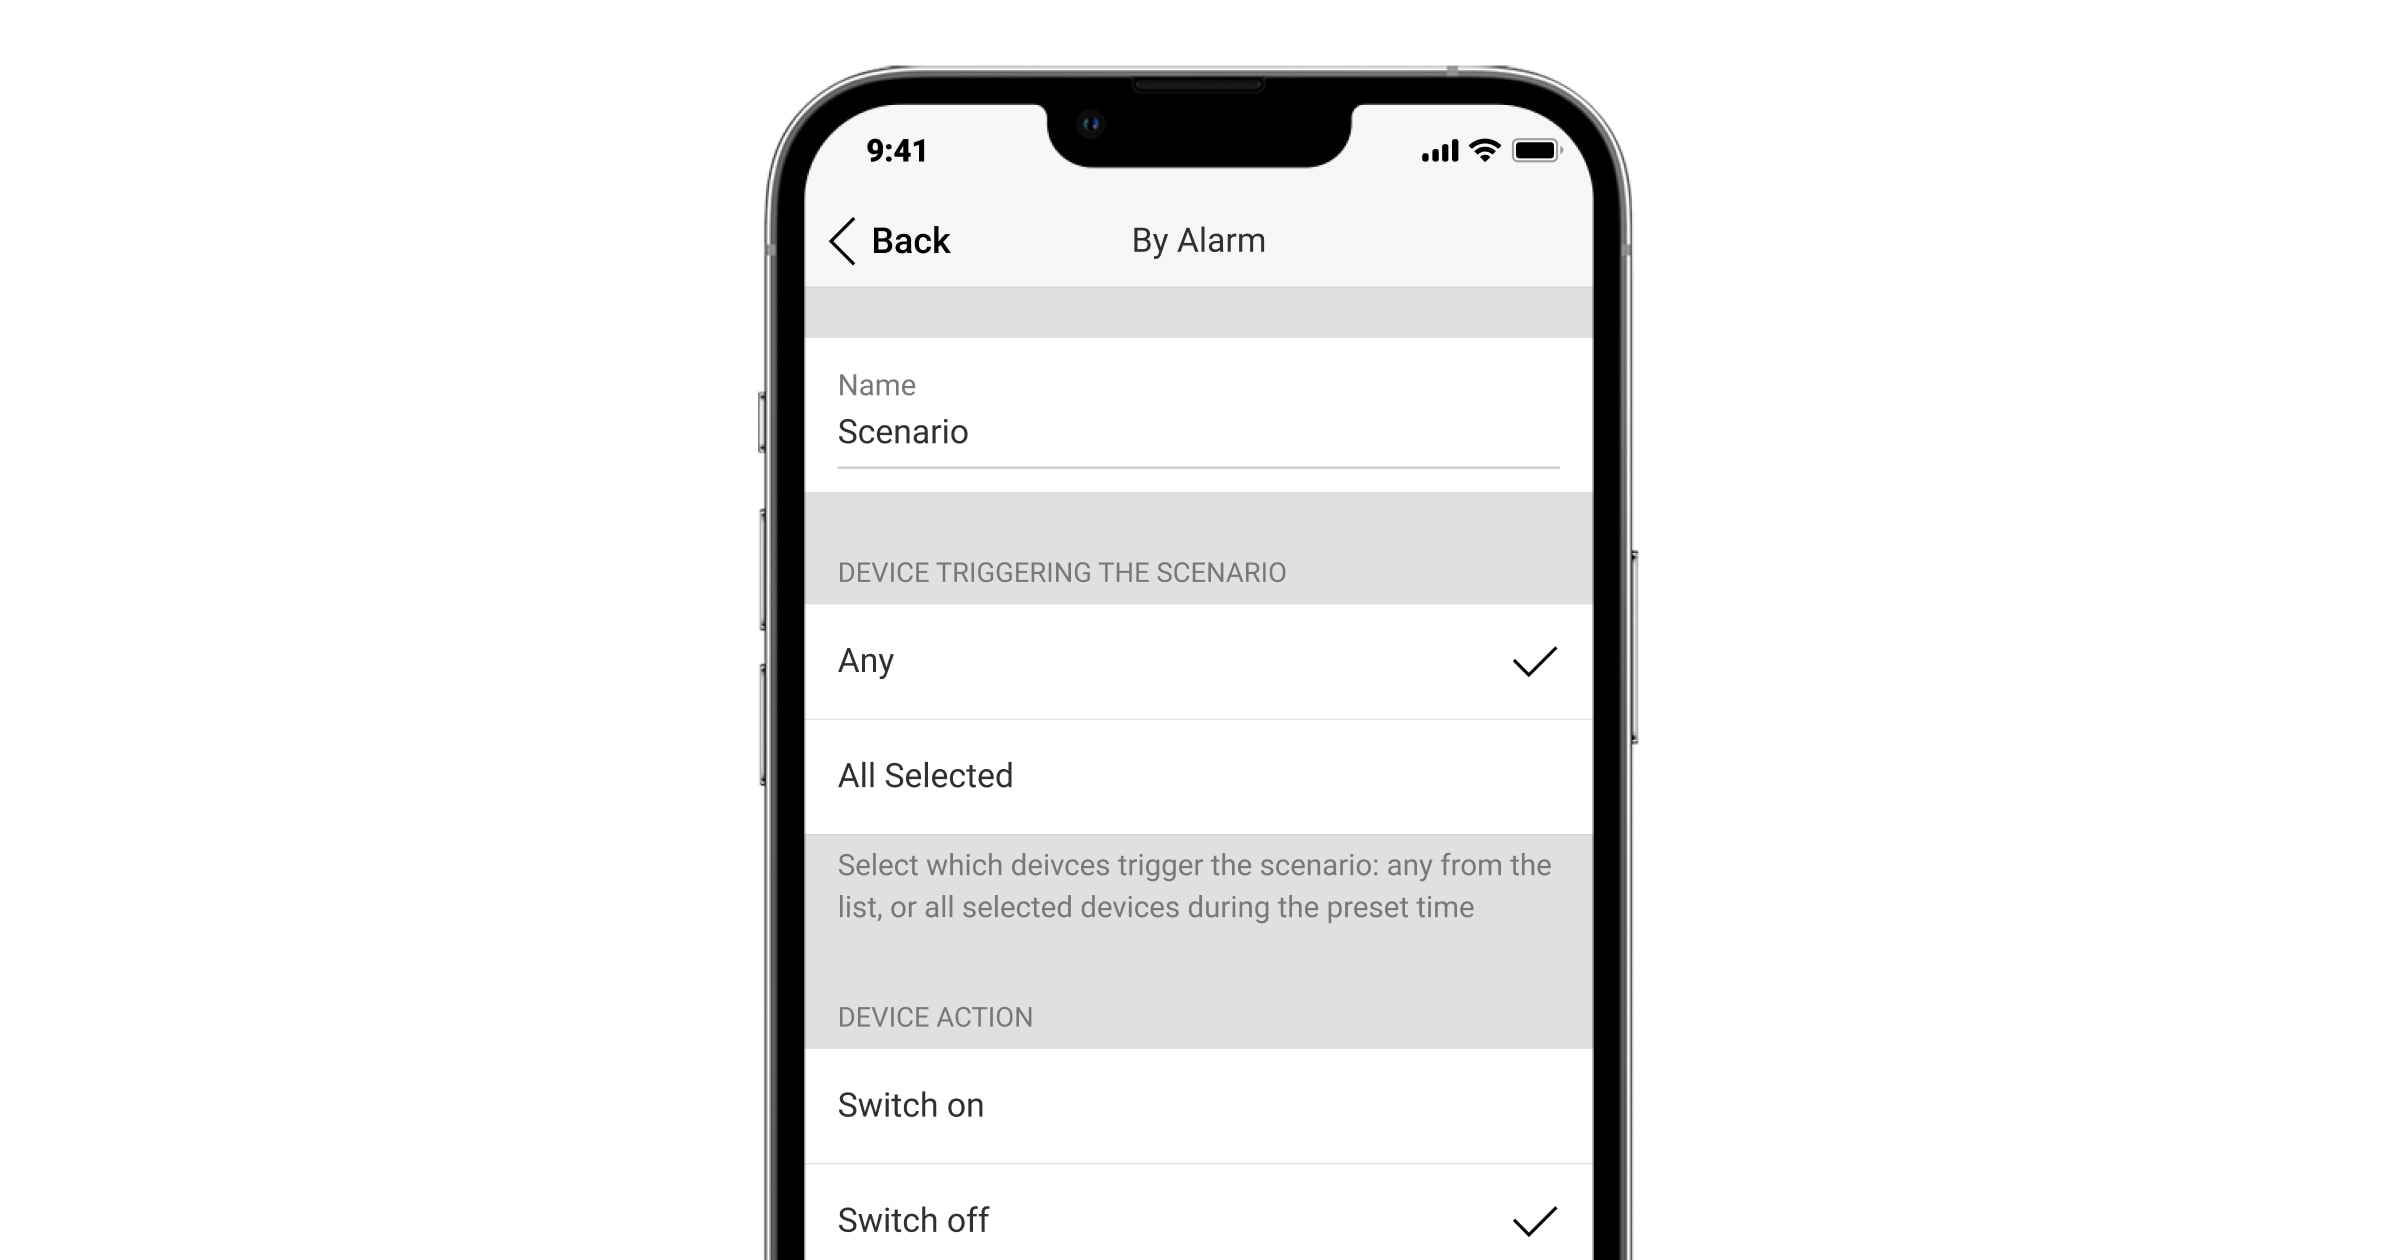
- Type the scenario name.
- Set the Devices triggering the scenario. If Any is selected, the scenario will run if at least one device triggers. If All selected is selected, the scenario will run only when all selected devices trigger.
- Set the Max actuating time for all selected devices: from 5 seconds to 59 minutes and 59 seconds. If the devices have not raised the alarm within the specified time, the timer is reset, and the scenario does not run.
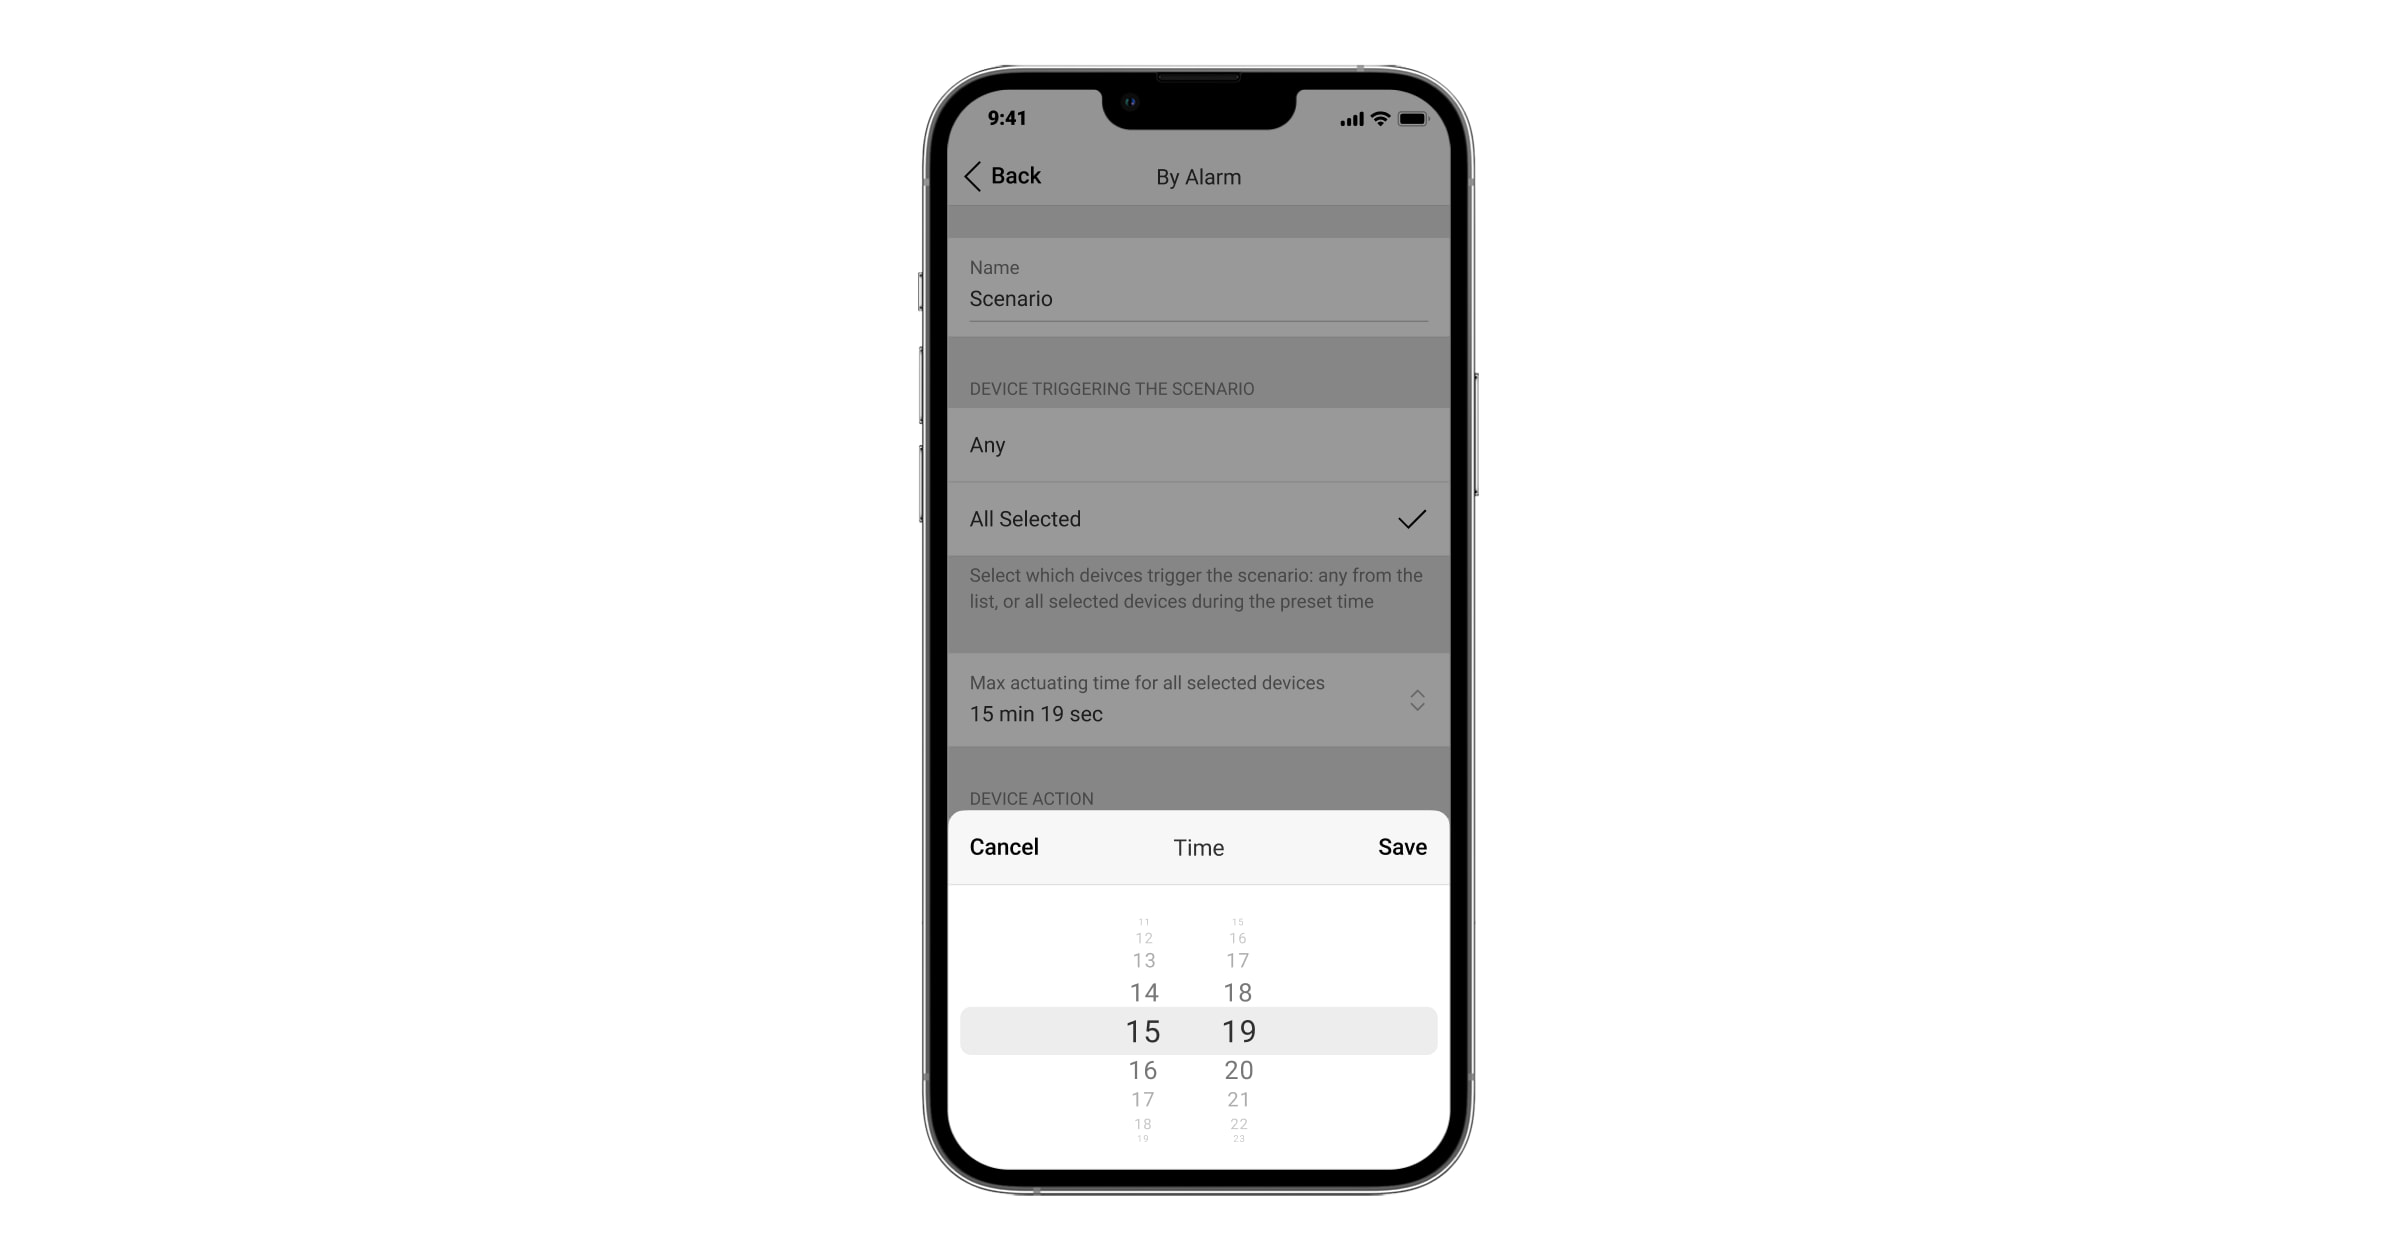

The parameter is available only if All selected is selected in the Devices triggering the scenario.
- Set the Device action. Set whether the automation device Switch on or Switch off when the scenario is run.
In pulse mode, the Pulse option will be displayed instead of Switch on and Switch off options. Switch the state mode is not available for Ajax WaterStop Jeweller.
- Click Save. The scenario will appear in the list of device scenarios.
To delete or edit a scenario, click on it in the list of scenarios. This type of scenario can be turned off, and its settings will be saved. To do this, use the toggle to the right of the scenario.
The scenario takes up the hub memory regardless of whether it is on or off.
Audio scenario
To create an audio scenario, add at least one SpeakerPhone Jeweller with firmware version 6.60.6.9 or later to an Ajax hub running OS Malevich 2.38 or later. The feature is available in the following Ajax app versions:
- Ajax Security System v3.42 and later;
- Ajax Desktop v5.42 and later;
- Ajax PRO: Tool for Engineers v2.42 and later;
- Ajax PRO Desktop v5.42 and later.
The audio scenario allows voice modules to play audio on schedule or when the system is triggered. Before creating an audio scenario, a PRO user must first upload an audio clip in Ajax PRO Desktop. To do this:
- Open the Company module.
- Go to the Audio clips menu.
- Click Add audio clip.
- Enter a name for the audio clip, upload it, and click Add.
You can add up to 10 audio clips in WAV or MP3 format, each up to 15 seconds long and 5 MB in size.
After this, you can create an audio scenario in Ajax apps. To do this:
- Select the required space.
- Go to the Devices tab.
- Select the hub.
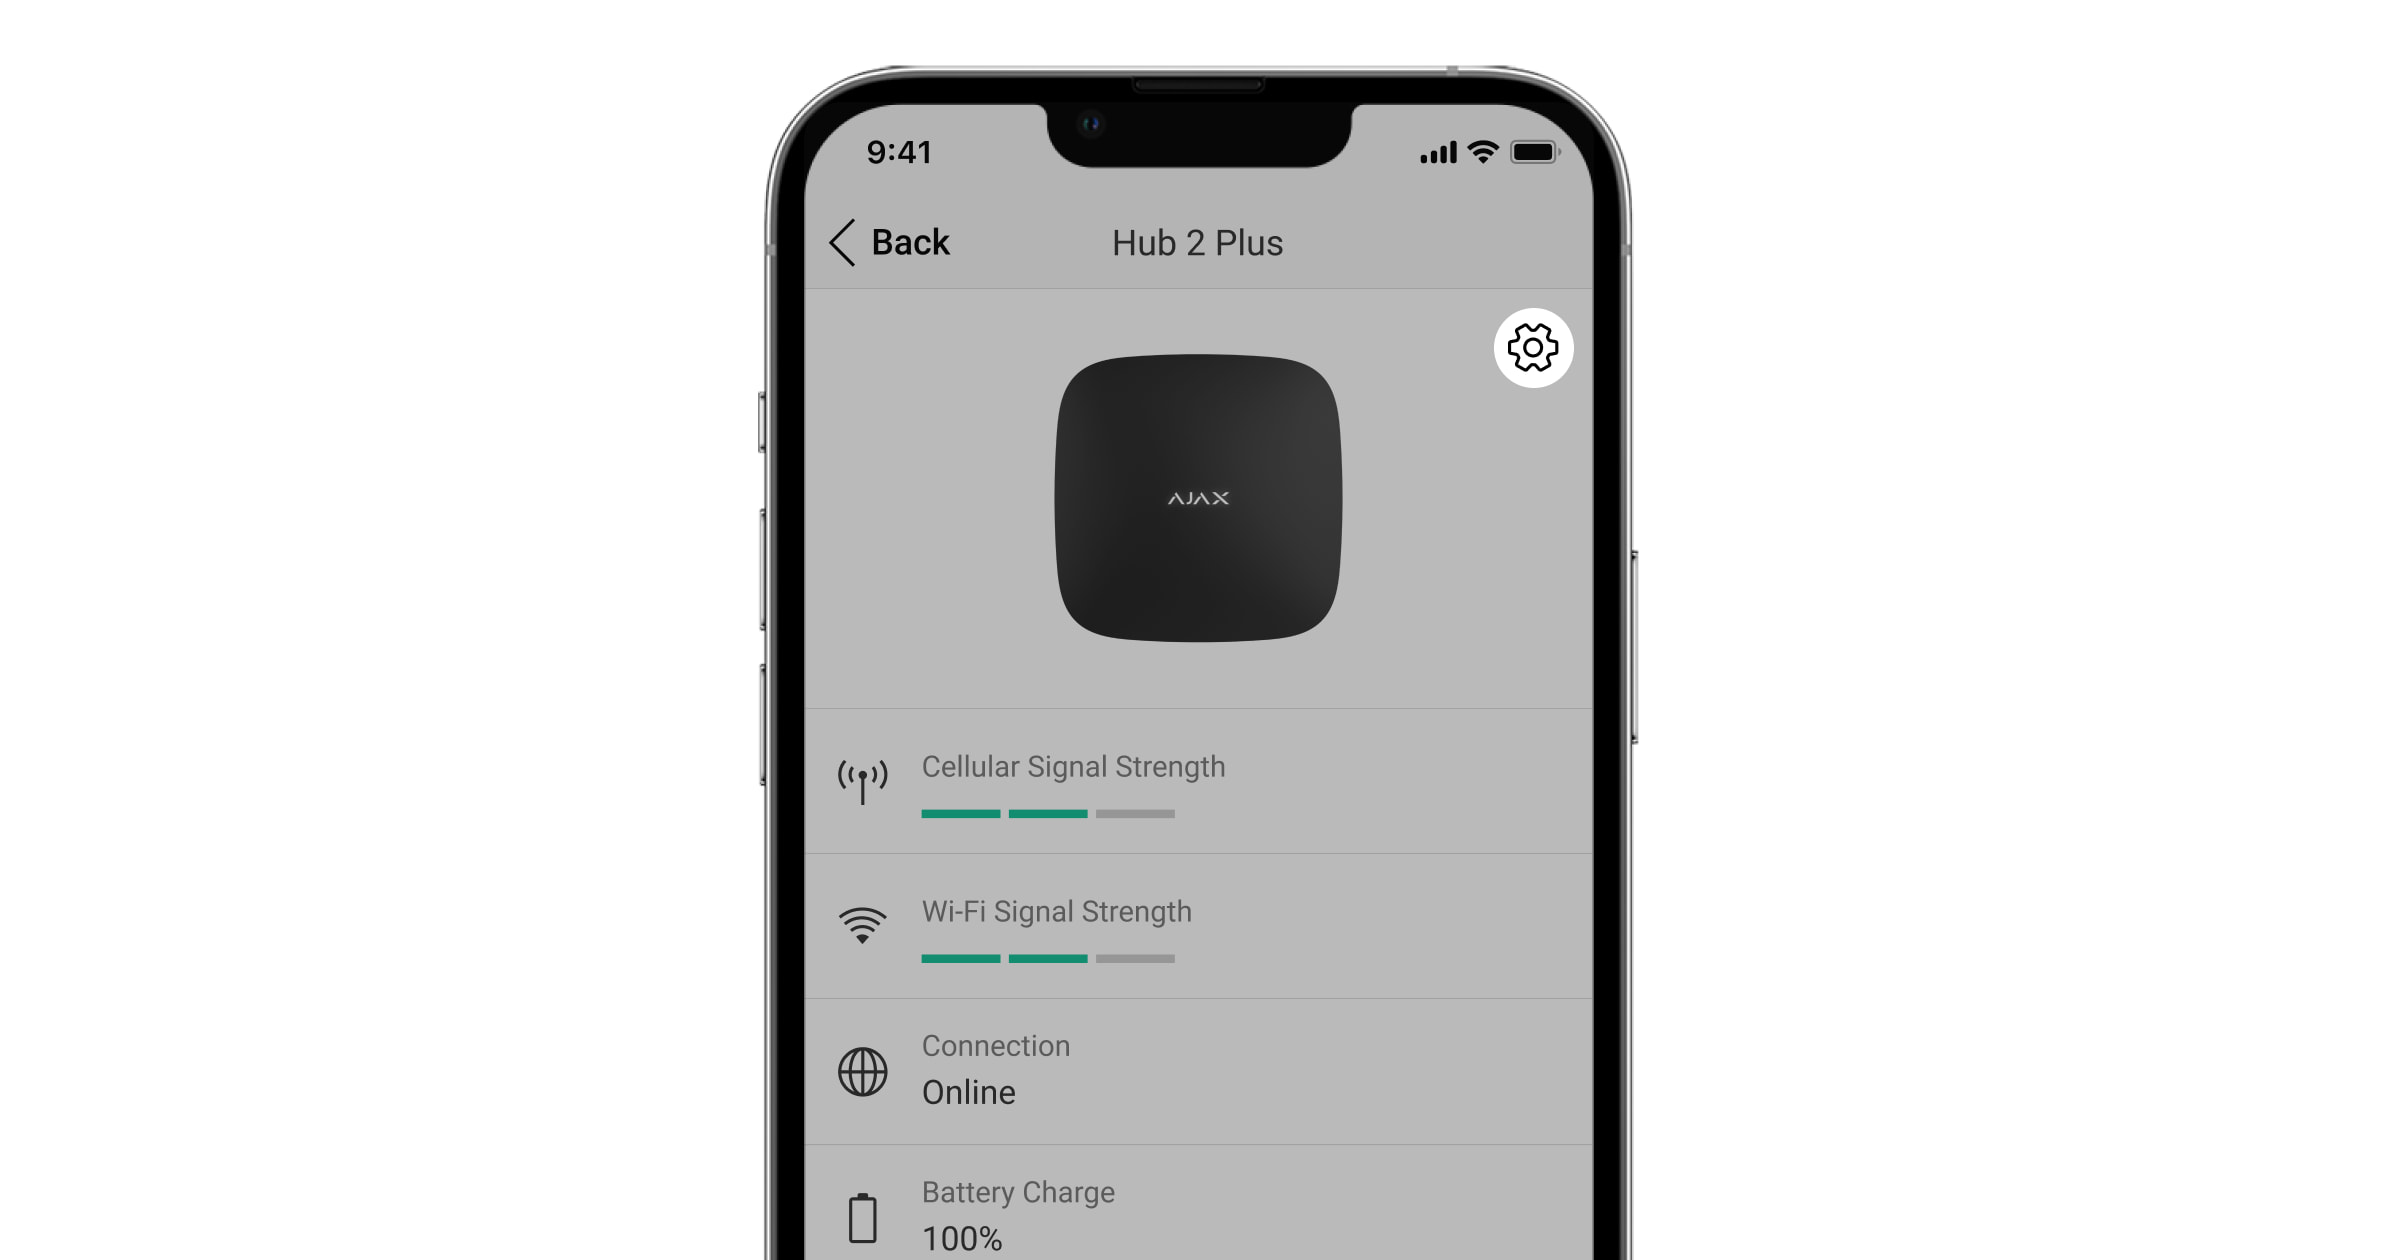
- Go to the hub’s settings by clicking the gear icon in the upper right corner.
- Go to the Scenarios and schedule menu.
- Click Create scenario if creating a scenario for the first time, or Add scenario if scenarios have already been created in the system.
- Click Audio scenario.
- Specify when the created scenario should run:
- Scenarios and schedule – when the security state changes.
- Scenarios and schedule – when selected devices detect an alarm.
- Scenarios and schedule – when an alarm is confirmed in a specific zone, if a cross zone is configured.
- Scenarios and schedule – at a specified time and on selected days.
- Fill in the scenario name and set the conditions that trigger it.
- Select the devices that will play the audio and choose their volume level.
- Select the audio clip. You can test it by clicking Test audio on devices.
- Choose whether the audio should repeat.
- Click Save.
Scenario by alarm confirmation
The Ajax system allows you to activate a scenario when an alarm is confirmed in a specified zone. This prevents the scenario from triggering a costly or risky means of detaining or deterring intruders (for example, a fog generator) in the event of a false alarm. You can configure the scenario for one automation device or several.
You can create and configure the scenario by an alarm confirmation in the automation device settings (if it is the only one in the scenario) and the hub settings.
To create and configure an alarm confirmation scenario in the automation device settings:
- Open Ajax PRO app.
- Select the required space.
- Go to the Devices tab.
- Select the automation device you need if you have more than one added to the system.
- Go to the device settings by tapping the gear icon in the upper right corner.
- Go to the Scenarios menu → Add scenario.
- Select scenario type By alarm confirmation.
- Select the zone (or create a new one) that will activate the alarm confirmation scenario and tap Next.
- Type a scenario name and select an action for the selected device.
- Tap Save. The scenario will appear in the list of device scenarios.
To create and configure an alarm confirmation scenario in the hub settings:
- Open Ajax PRO app.
- Select the required space.
- Go to the Devices tab.
- Select the hub.
- Go to the hub’s settings by tapping the gear icon in the upper right corner.
- Go to the Service menu.
- Go to the Alarm confirmation menu.
- Select the zone (or create a new one) that will activate the alarm confirmation scenario and tap Next.
- Go to the Scenarios menu → Add scenario.
- Select automation devices from the list and tap Next.
- Type a scenario name and select an action for the selected devices.
- Tap Save. The scenario will appear in the list of device scenarios.
Scenario by schedule
You can set a scheduled action for automation devices. The scenario can also be executed for a security group or the entire security system: the facility can arm/disarm by schedule. This type of scenario uses the time zone specified in the space settings. Therefore, before creating a scheduled scenario, set the correct time zone in the space settings — the Time zone menu.
Scheduled arming/disarming
To create and configure an arming/disarming scenario:
- Open the Ajax app.
- Select the required space.
- Go to the Devices tab.
- Select a hub from the list.
- Go to Settings by clicking on the gear icon .
- Select Scenarios and schedule.
You can also configure a scheduled scenario from the space settings:
Control
 tab → space settings
  → Scenarios and schedule.
 - Click Create scenario if you are creating a scenario for the first time, or Add scenario if scenarios have already been created in the security system.
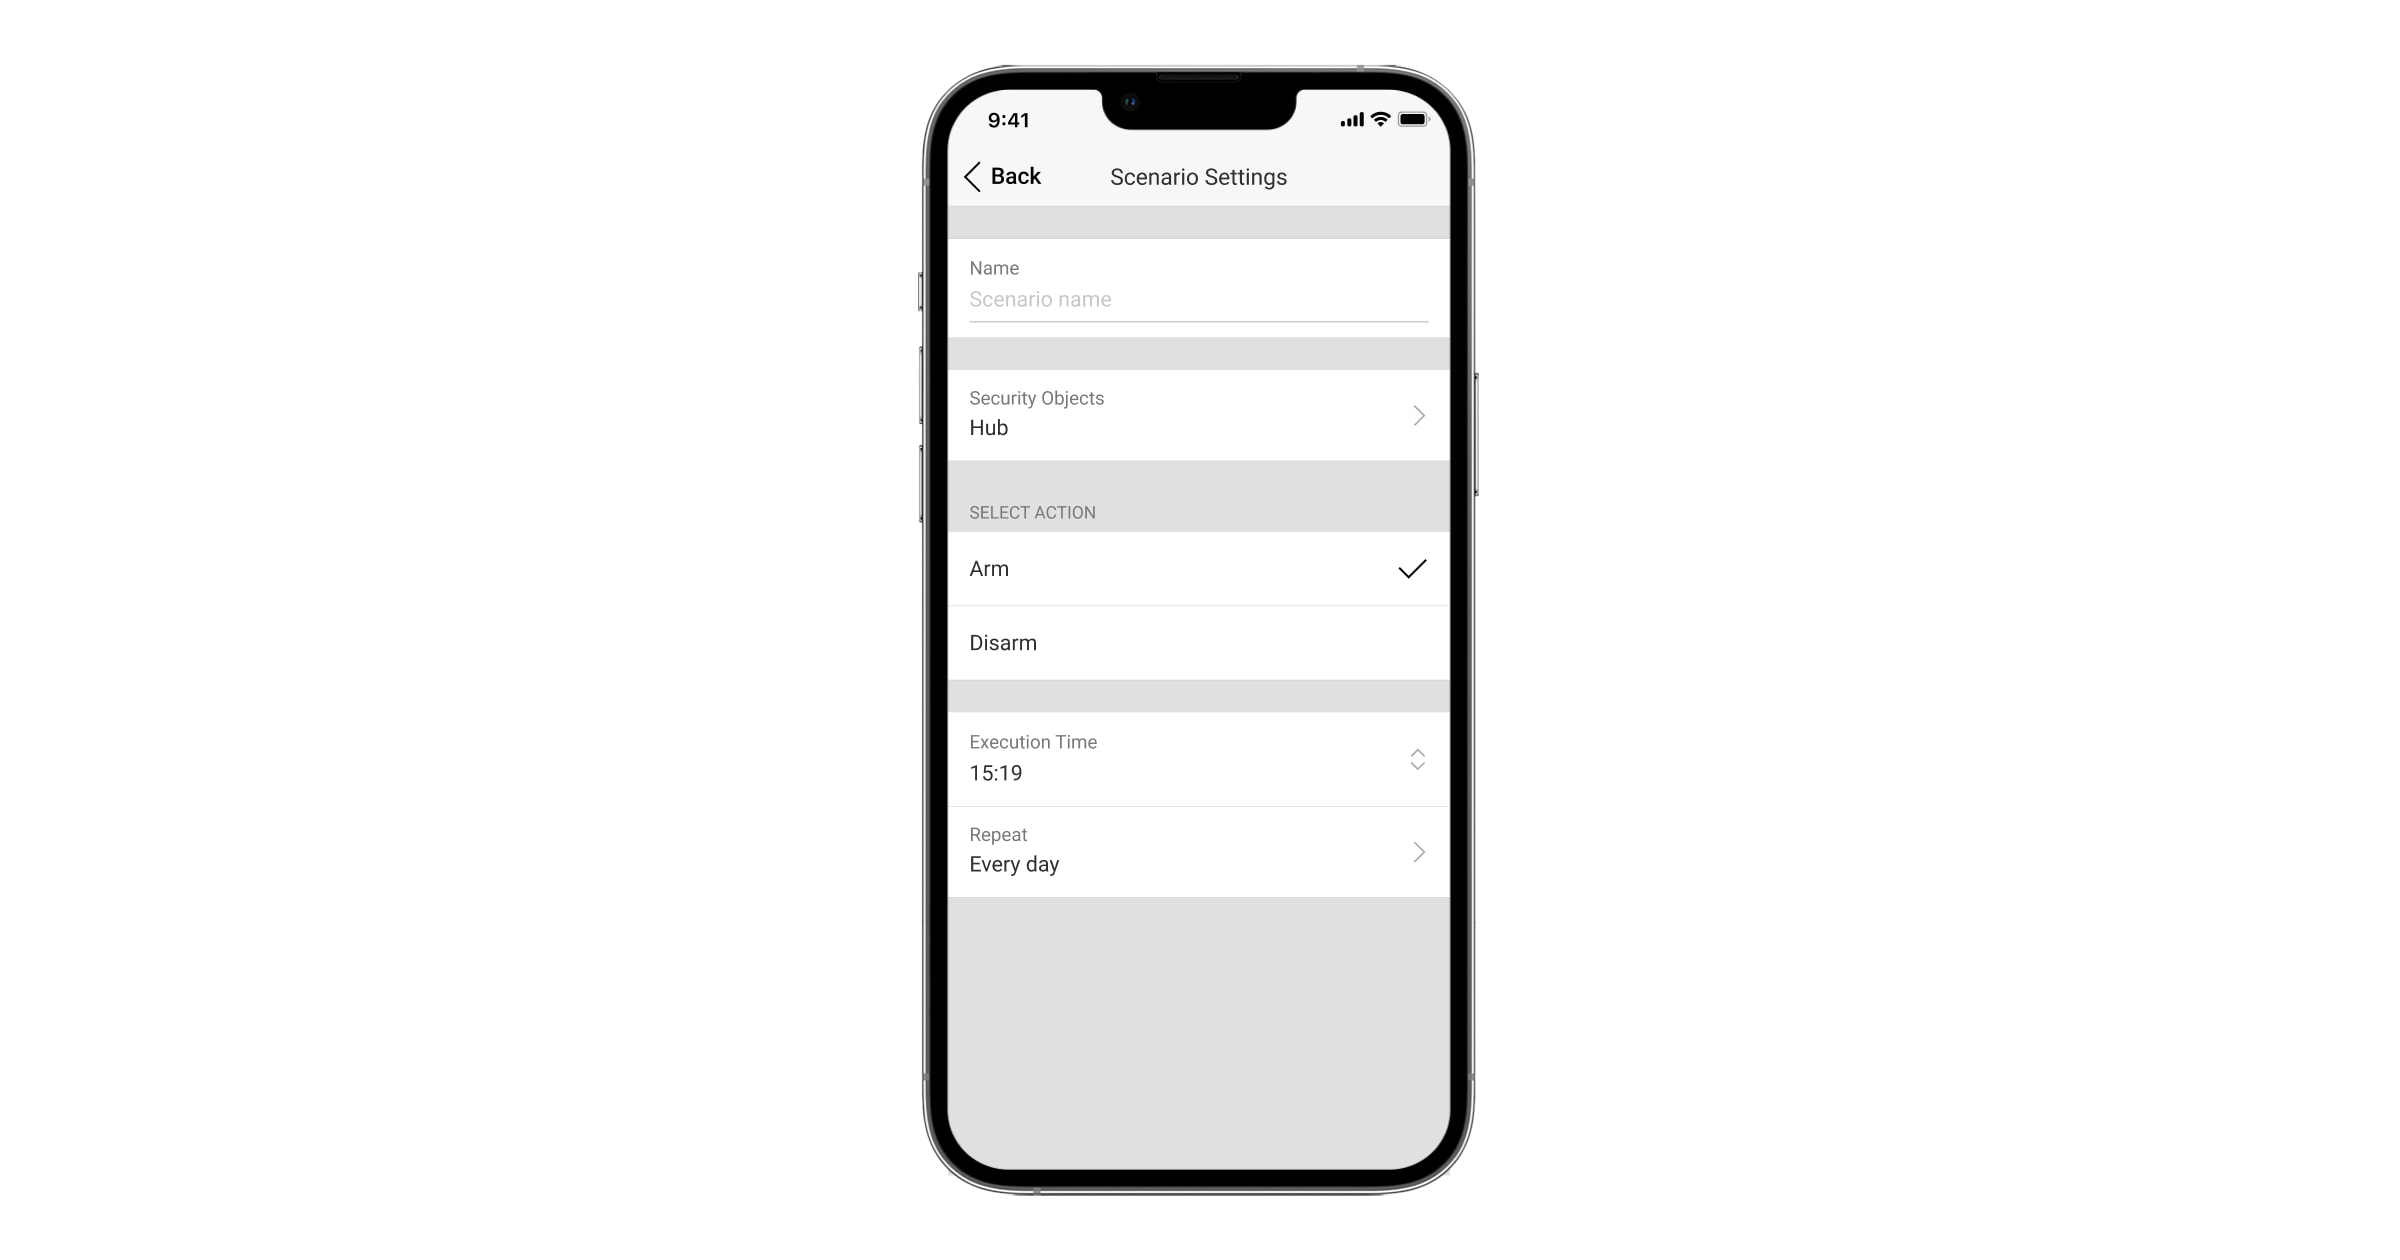
- Select Security schedule.
- Type the Scenario name.
- Select Security objects. Mark the groups associated with the selected action. If the group mode is activated on the hub, specific groups or all groups at once can be selected. If the group mode is not activated, only the entire facility or Night mode can be selected.
- Select the action. Set the system to arm or disarm at a specified time.
- Set the Execution time.
- Set the frequency of the scenario execution in the Repeat section by marking the days of the week. If Never is specified, the scenario will be executed once. To do this, uncheck Every day of the week.
- Click Save. The scenario will appear in the list of scenarios.
The Ajax system also provides the ability to grant temporary access to the premises on specific days and times using the Scheduled access feature.
Scheduled action of an automation device
The scheduled scenario allows you to control automation devices.
To create a scheduled scenario:
- Open the Ajax app.
- Select the required space.
- Go to the Devices tab.
- Select the automation device.
- Go to Settings by clicking on the gear icon .
- Go to the Scenarios menu. Click Create scenario if you are creating a scenario for the first time, or Add scenario if scenarios have already been created in the security system.
- Select By schedule.
- Type the scenario name.
- Set the Device action. Set whether the automation device turns on or off when the scenario is run.
In pulse mode, the Pulse option will be displayed instead of Switch on and Switch off options.
Switch the state mode is not available for Ajax WaterStop Jeweller.
- Set the Execution time.
- Set the frequency of the scenario execution in the Repeat section by marking the days of the week. If Never is specified, the scenario will be executed once. To do this, uncheck Every day of the week.
- Click Save. The scenario will appear in the list of device scenarios.
To delete or edit a scenario, click on it in the list of scenarios. This type of scenario can be turned off, and its settings will be saved. To do this, use the toggle to the right of the scenario.
The scenario takes up the hub memory regardless of whether it is on or off.
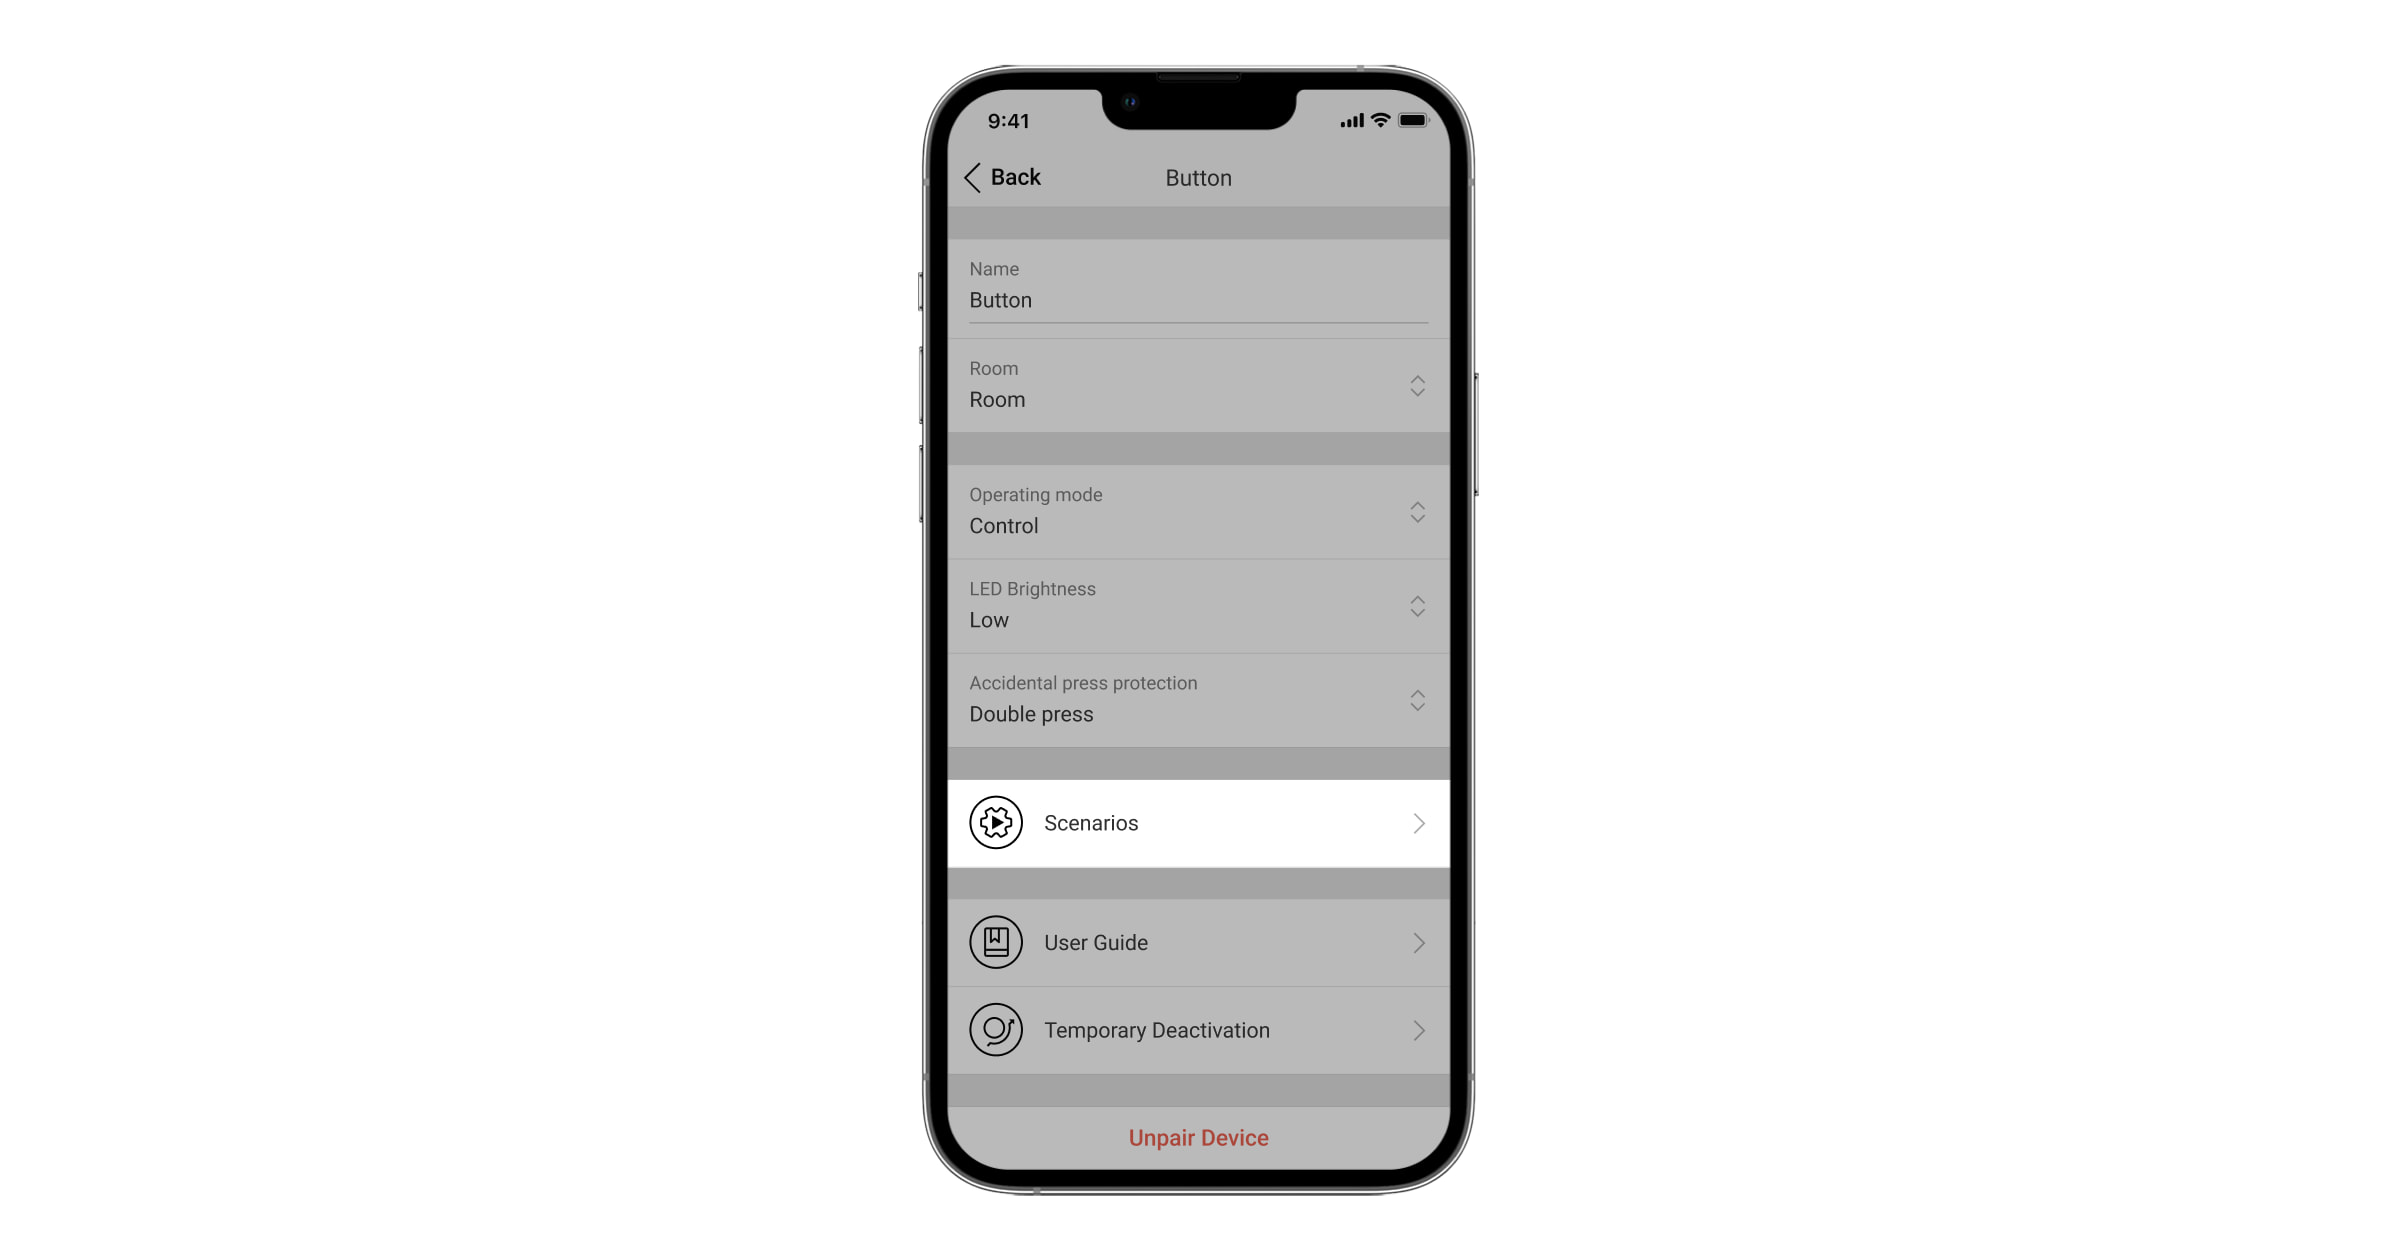
Response to Button Jeweller press
In the Control mode, Button Jeweller has two pressing options: short and long (the button is pressed for more than 3 seconds). These pressings can trigger the execution of an action by one or more automation devices.
In the panic button mode, Button Jeweller does not have long or short pressing options. However, it can be engaged in the alarm scenario.
To bind an automation device action to a long or short press of Button Jeweller:
- Open the Ajax app.
- Select the required space.
- Go to the Devices tab.
- Select Button Jeweller in the list.
- Go to Settings by clicking on the gear icon .
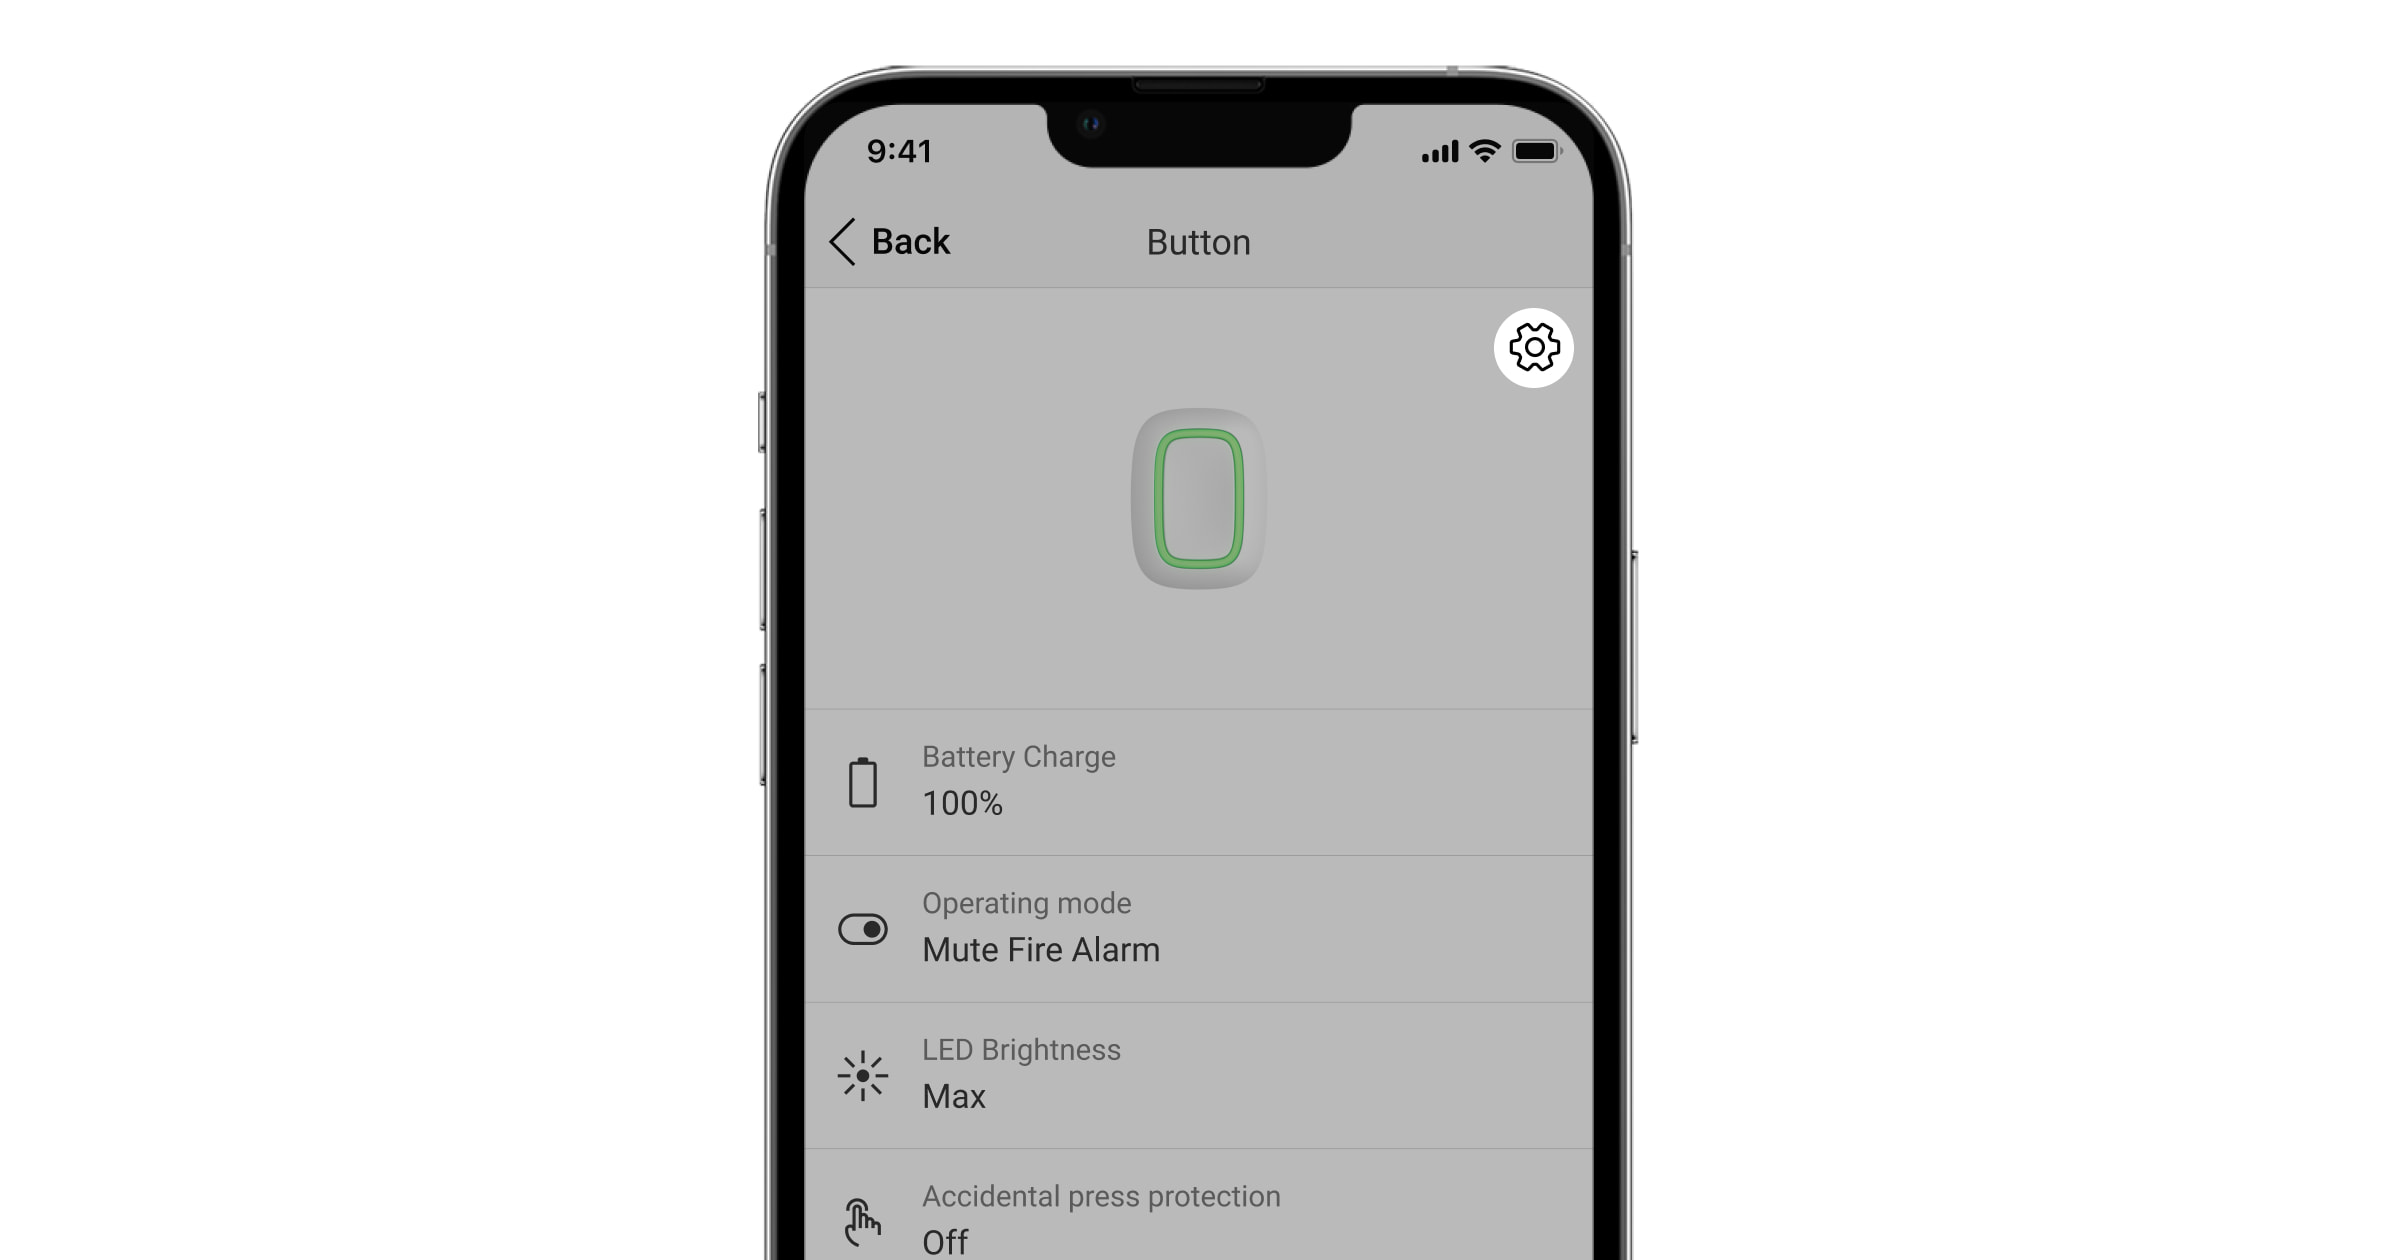
- Select the Control mode in the Operating mode section.
- Click Back to save the settings.
- Go to the Scenarios menu. Click Create scenario if creating a scenario for the first time, or Add scenario if scenarios have already been created in the system.
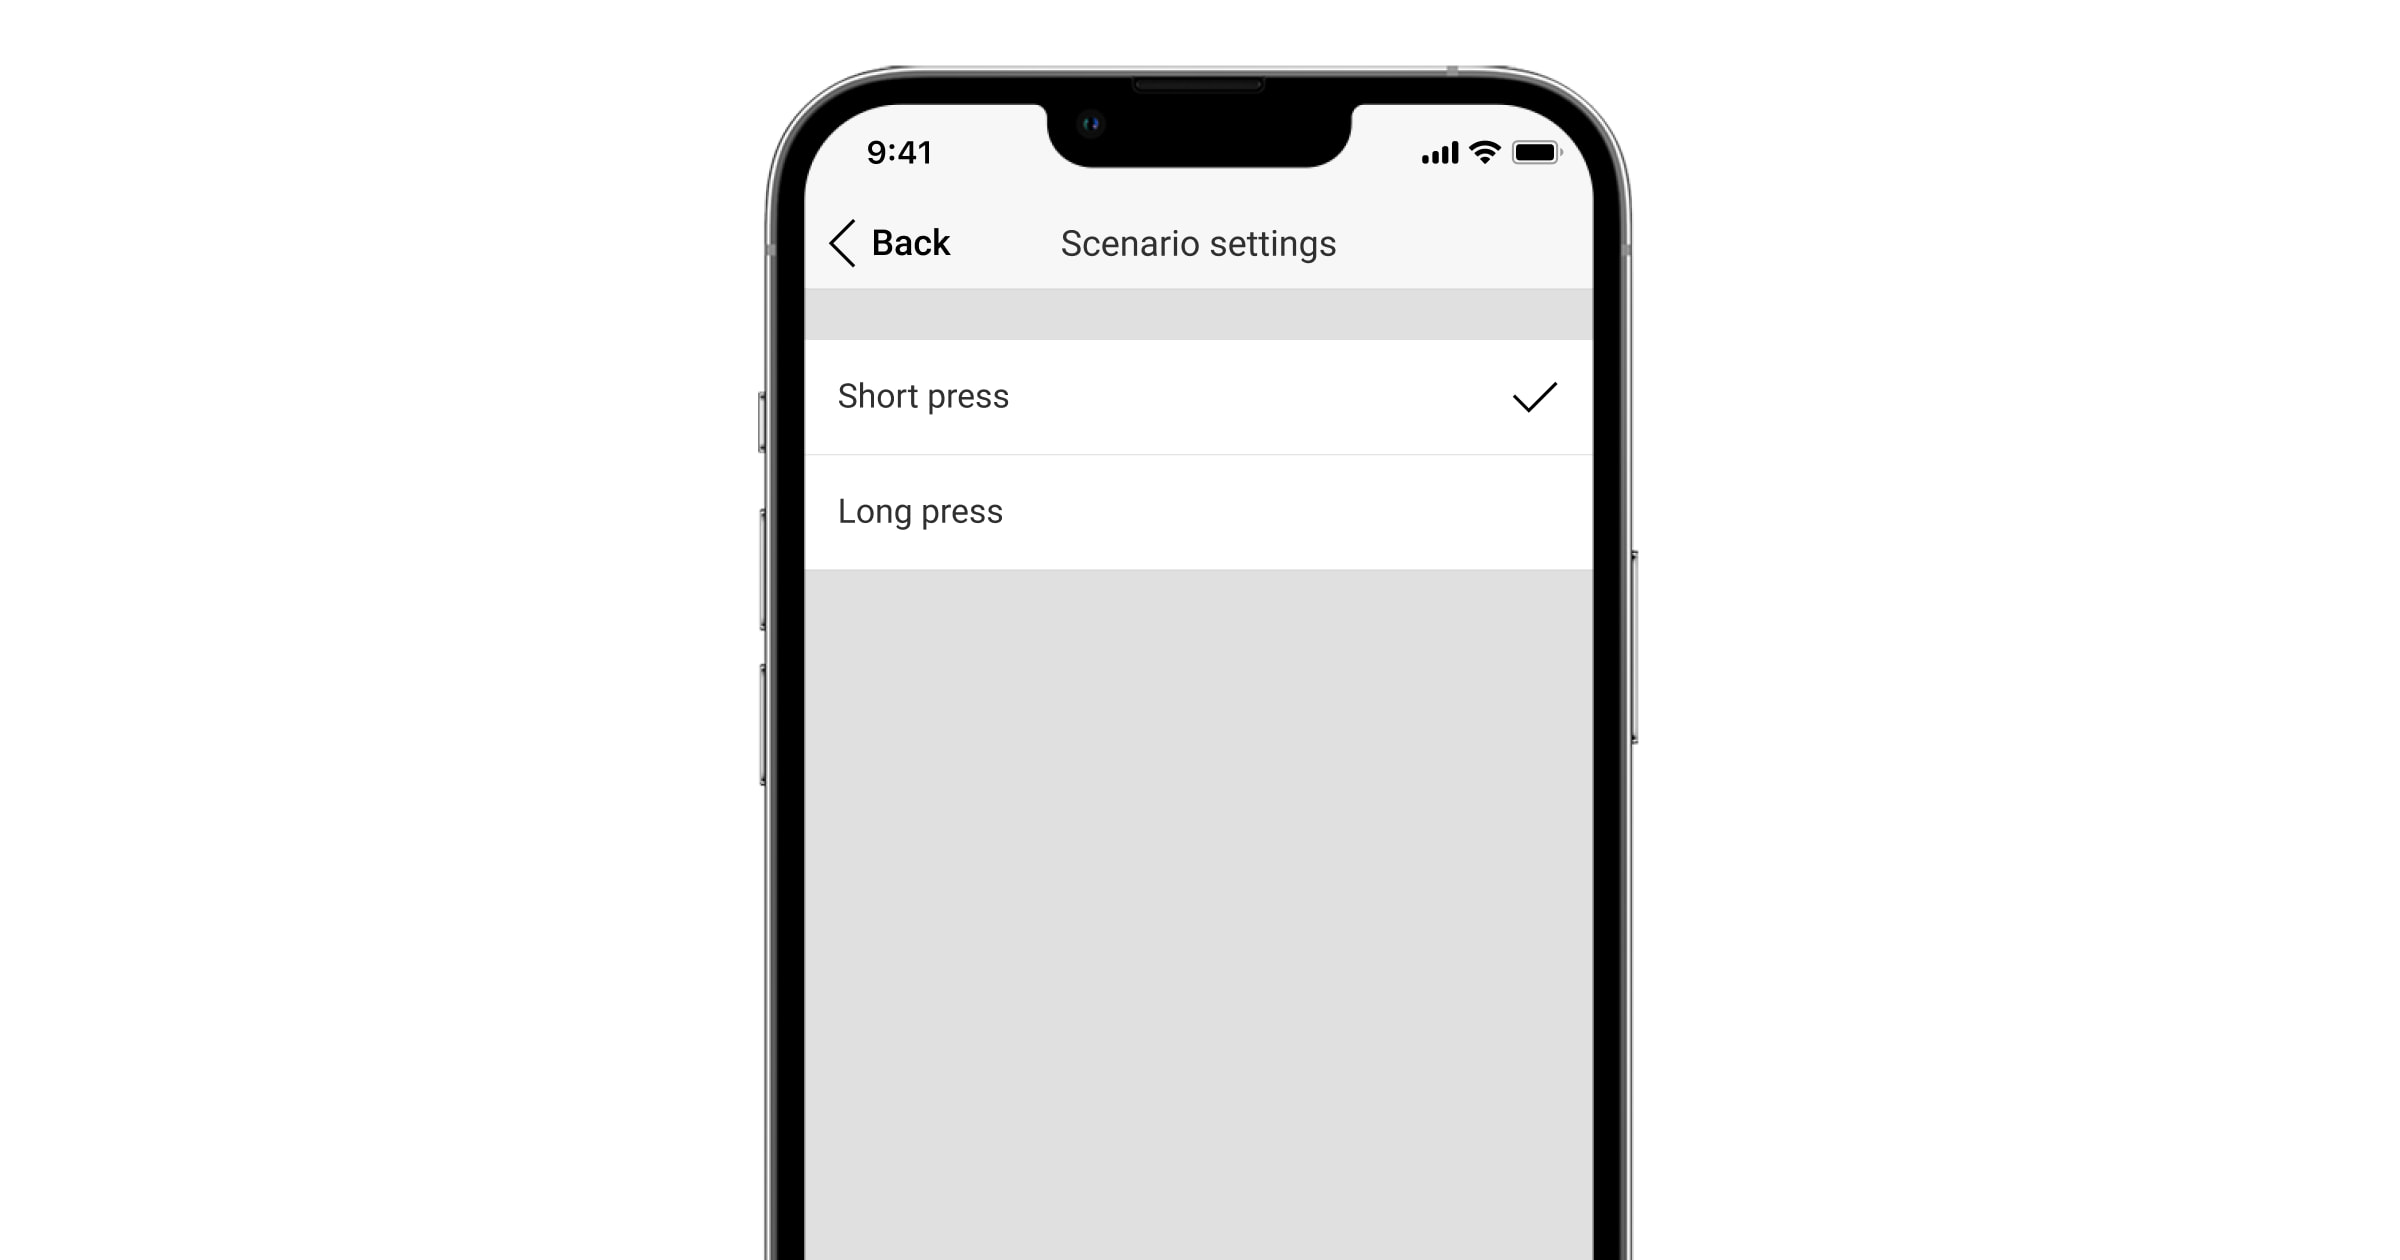
- Select a pressing option to run the scenario: Short press or Long press.
- Select the automation device to execute the action.

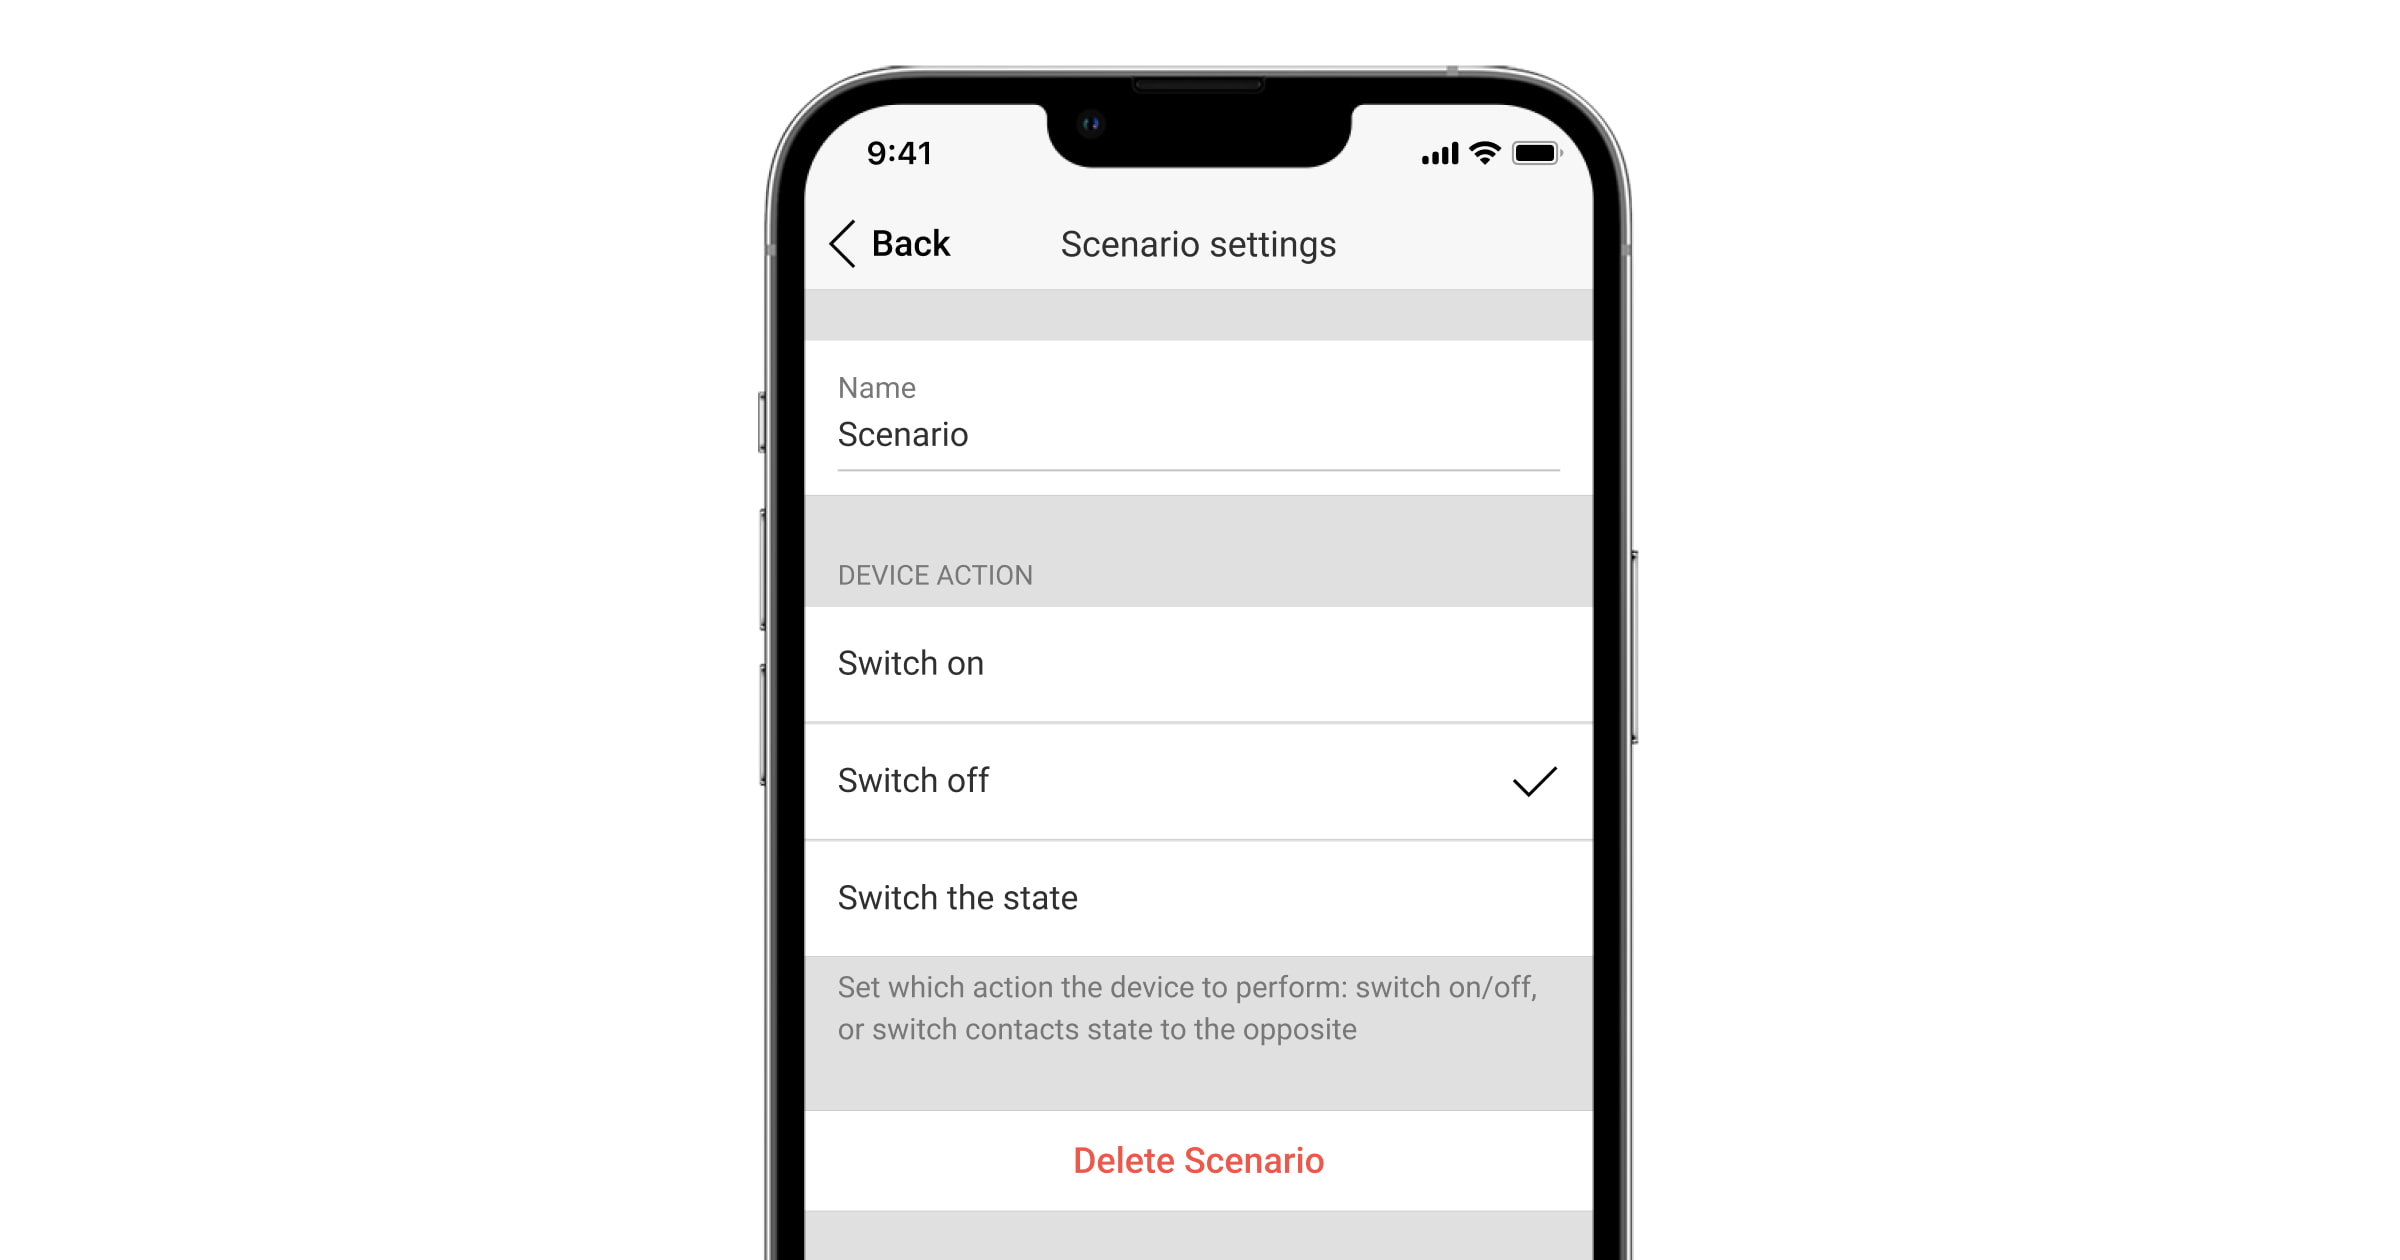
- Type the scenario name and specify the Device action to be executed by pressing Button Jeweller:
- Switch on.
- Switch off.
- Switch the state.
In pulse mode, the Pulse option will be displayed instead of Switch on and Switch off options.
Switch the state mode is not available for Ajax WaterStop Jeweller.
- Click Save. The scenario will appear in the list of device scenarios.
To delete or edit a scenario, click on it in the list of scenarios. This type of scenario can be turned off, and its settings will be saved. To do this, use the toggle to the right of the scenario.
The scenario takes up the hub memory regardless of whether it is on or off.
Scenario by temperature change
This type of scenario allows configuring how the automation device responds to temperature changes on one or several Ajax devices. The scenario can be used, for example, to turn on the heating if the temperature in the room is lower than 68 °F.
LifeQuality Jeweller temperature scenarios are created in the LifeQuality Jeweller settings.
How to set up scenarios:
- Open the Ajax app.
- Select the required space.
- Go to the Devices tab.
- Select the automation device.
- Go to Settings by clicking on the gear icon .
- Go to the Scenarios menu. Click Create scenario if you are creating a scenario for the first time, or Add scenario if scenarios have already been created in the security system.
- Select By temperature.
- Select the devices triggering the scenario. Click Next.
Note that each device selected as a trigger counts as one scenario from the hub’s overall limit of scenarios (e.g., if you select four detectors for one scenario by temperature, the system counts that as four scenarios).
The temperature scenario can only be initiated by the device that displays the temperature in the Ajax app.
- Select the temperature of the execution of the scenario. Also select whether it should be Higher than or Lower than the specified value. Click Next.
- Type the scenario name.
- If several devices are selected, choose which devices run the scenario: Any or All selected.
- Select the Device action: Switch on, Switch off, or Switch the state of the automation device while executing the scenario.
In pulse mode, the Pulse option will be displayed instead of Switch on and Switch off options. Switch the state mode is not available for Ajax WaterStop Jeweller.
- Click Save. The scenario will appear in the list of device scenarios.
LifeQuality scenarios: by temperature, humidity, CO2 concentration
How to set up scenarios:
- Open the Ajax app.
- Select the required space.
- Go to the Devices tab.
- Select LifeQuality from the list.
- Go to Settings by clicking on the gear icon .
- Go to the Scenarios menu.
- Choose one of the indicators:
- Temperature.
- Humidity.
- CO2.
- Specify the value of the parameters:
- Higher than or Lower than to define the event that runs the scenario.
To create a scenario for both options, you should create two different scenarios, one for Higher than and another for Lower than.
- The value upon which the scenario is triggered.
Values set as comfort limits in the LifeQuality settings are selected by default. You can change them for the scenario. It will not affect the notification settings upon exceeding the comfort limits.
- Higher than or Lower than to define the event that runs the scenario.
- Click Next.
- Select the necessary automation devices that should trigger when the measurements go beyond the limit specified in the scenario.
- Specify:
- Name of the scenario.
- Action of the automation device.
- Click Save.
Scenarios by LightSwitch pressing
This type of scenarios allows you to set the action of automation devices by pressing the LightSwitch touch button. For example, it allows you to turn off all smart sockets when the lights are switched off.
How to set up scenarios:
- Open the Ajax app.
- Select the required space.
- Go to the Devices tab.
- Select LightSwitch in the list.
- Go to Settings by clicking on the gear icon .
- Go to the Scenarios menu. Click Create scenario if you are creating a scenario for the first time, or Add scenario if scenarios have already been created in the security system.
- Select By switch actuating.
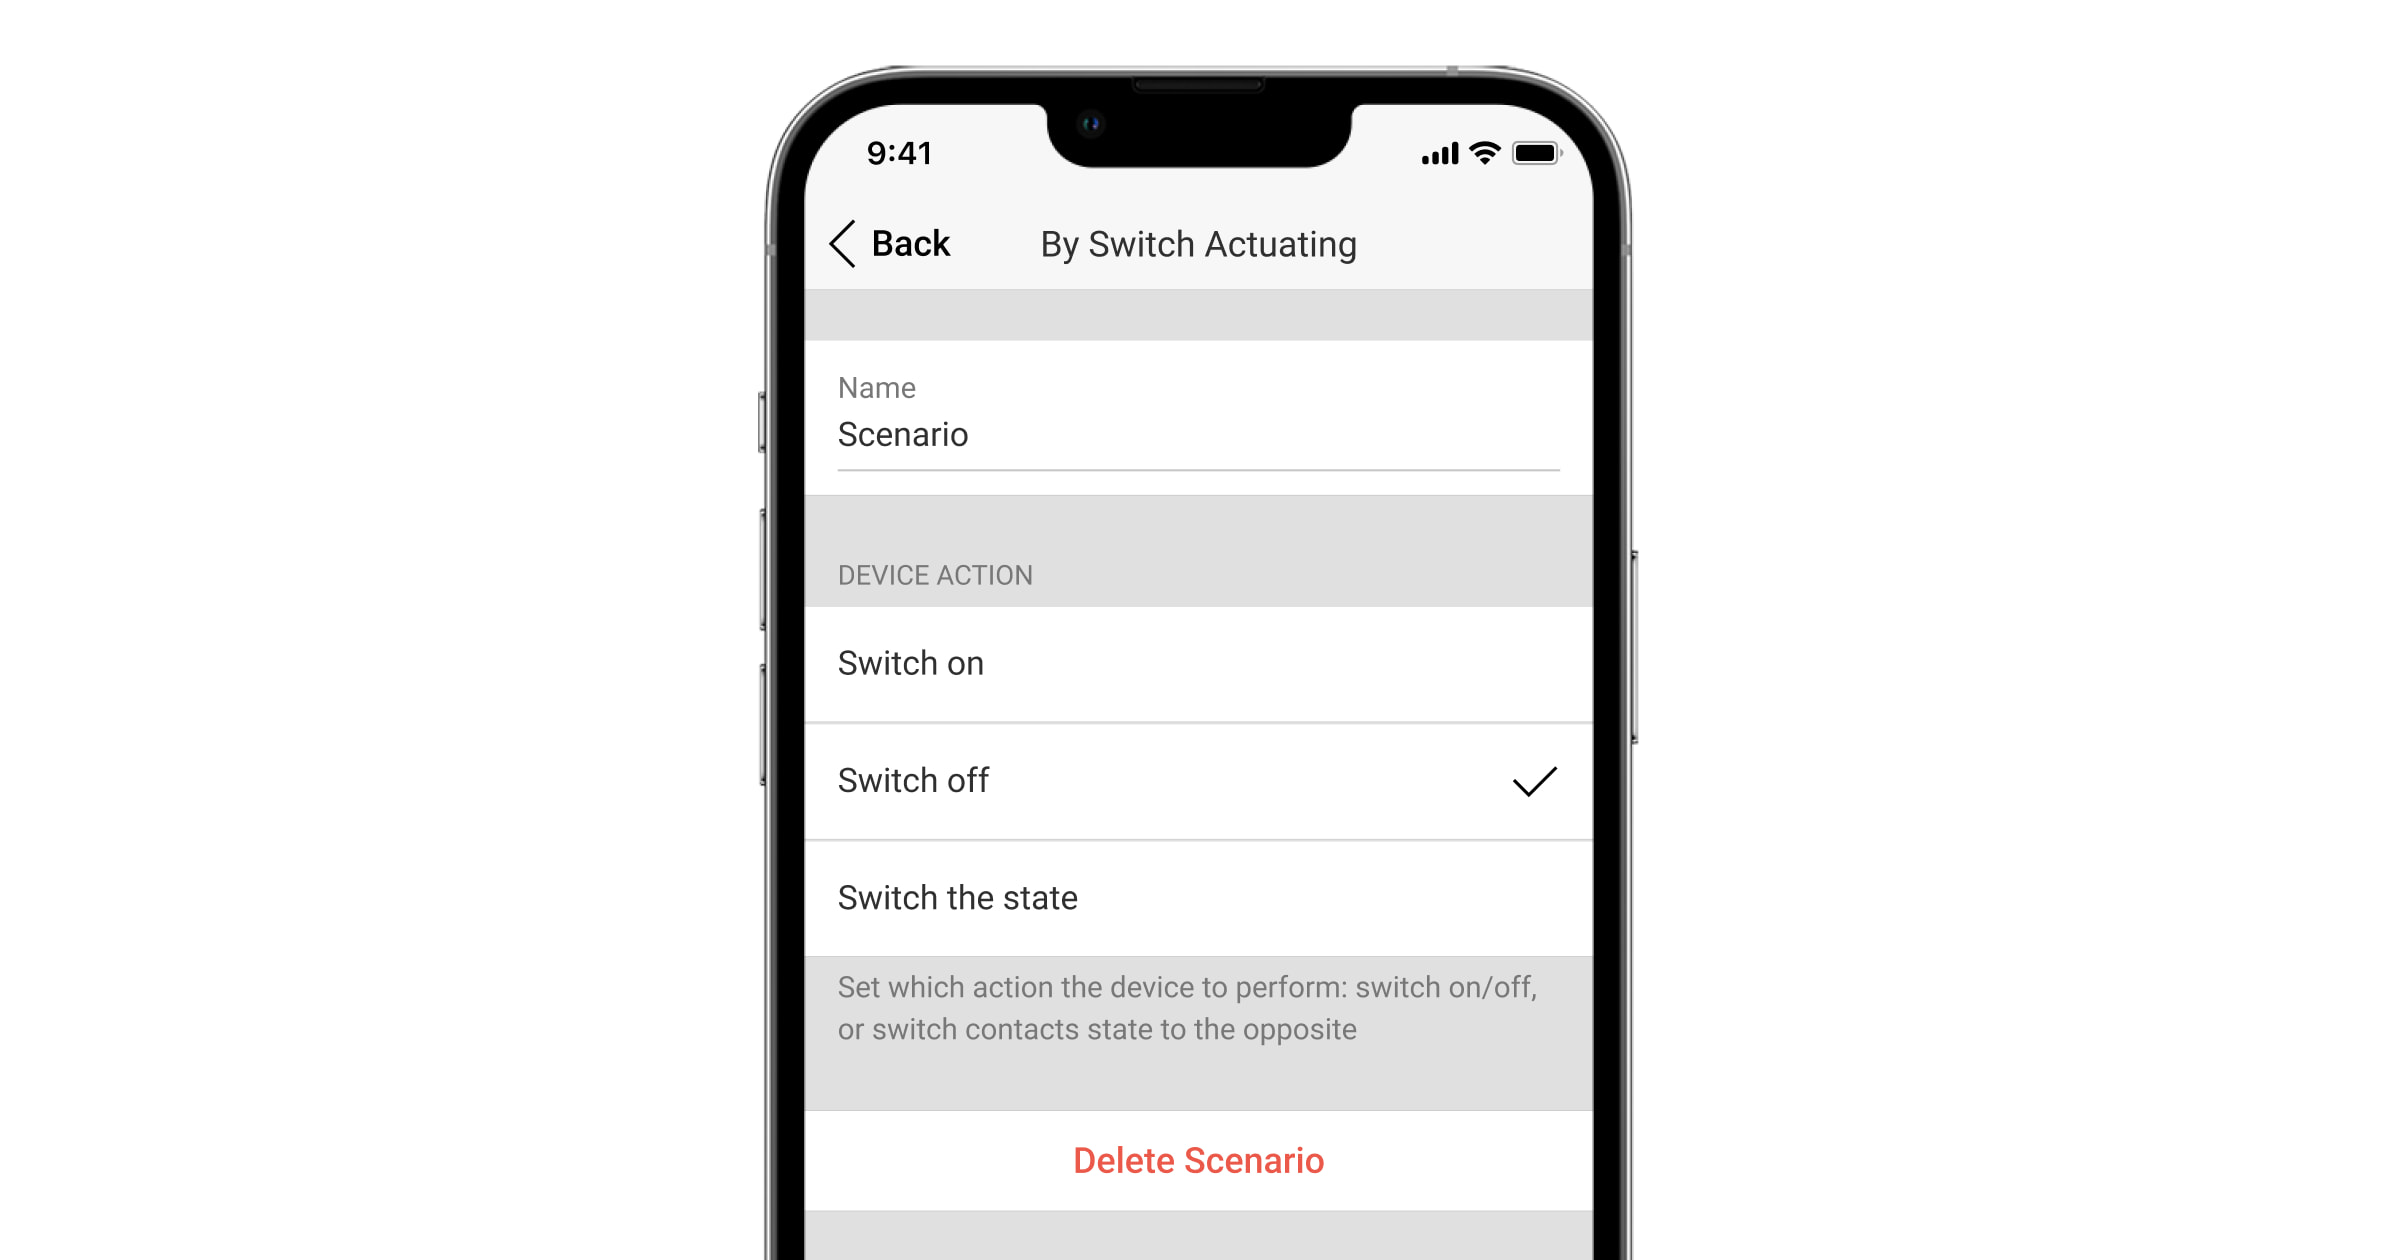
- Select which action of the switch will activate the scenario: when it is turned on or when it is turned off. If you use a two-gang switch, you should select the switch button first and only then set the action.
- Select the automation devices which should execute the scenario.
- Type the scenario name.
- Set how the automation devices act: Switch on, Switch off, or Switch the state.
- Click Save. The scenario will appear in the list of device scenarios.
Please do not create identical scenarios for two-way switches controlling one device, as they may block each other.
Ajax WaterStop Jeweller scenarios
Setting up Ajax WaterStop Jeweller scenarios has no differences from setting up scenarios for other automation devices. The only difference is that the Switch the state mode is not available for this device. To configure a LeaksProtect Jeweller flood detector alarm water shutoff, go to Scenario by alarm.
Managing scenarios with the keypad
KeyPad TouchScreen scenario management
KeyPad TouchScreen Jeweller and KeyPad TouchScreen Fibra allow users to create up to six scenarios of two types. The On preset action scenario type enables control of one or more automation devices. The On switching the state scenario type allows users to switch the state of a single automation device from the keypad’s Scenarios tab.
On switching the state scenario type does not count towards the hub’s limit on the number of automation scenarios.
- Open an Ajax app. Select the space with at least one KeyPad TouchScreen and automation device. Add one if necessary.
- Go to the Devices tab.
- Select KeyPad TouchScreen from the list and go to the Settings menu.
- Go to the Automation Scenarios menu. Enable the Scenarios Management toggle.
- Open the Keypad Scenarios menu.
- Press Add Scenario.
- Select the On preset action scenario type.
- Select one or more automation devices. Press Next.
- Enter the scenario name in the Name field.
- Select the preferred device action during scenario execution.
- Press Save.
- Press Back to return to the Automation Scenarios menu.
- If necessary, activate the Pre-authorization toggle.
Created scenarios are displayed in the app: KeyPad TouchScreen → Settings ![]() → Automation Scenarios → Keypad Scenarios. You can turn them off, adjust settings, or delete them at any time.
→ Automation Scenarios → Keypad Scenarios. You can turn them off, adjust settings, or delete them at any time.
To remove a scenario:
- Go to the Settings of KeyPad TouchScreen.
- Open Automation Scenarios → Keypad Scenarios menu.
- Select the scenario you want to remove.
- Press Next.
- Press Delete Scenario.
The user can see and manage automation scenarios after authentication when the Pre-authorization feature is enabled. Go to the Scenarios ![]() tab, enter the code or present a personal access device to the keypad.
tab, enter the code or present a personal access device to the keypad.
To perform a scenario, press an appropriate button in the Scenarios ![]() tab.
tab.
The KeyPad TouchScreen display shows only activated scenarios in the keypad settings.
Additionally it is possible to trigger scenario by switching arming mode from the KeyPad TouchScreen.
KeyPad Outdoor scenario management
Superior KeyPad Outdoor Fibra and KeyPad Outdoor Jeweller have the Manage automation devices feature, which allows users to control one or multiple automation devices. For example, a user can open garage doors or turn off all smart light switches at the site.
When the keypad controls one automation device, it shows the device’s state with LED indication of the OK button. When the OK button is green, an automation device is active; when it is red, an automation device is inactive.
When the keypad controls a scenario with multiple automation devices, the keypad cannot show the state of the device or scenario. Instead, it indicates whether the set action is completed or not.
KeyPad Outdoor can manage only one scenario.
Managing automation devices is available only after authorization on the keypad.
On switching the state scenario type does not count towards the hub’s limit on the number of automation scenarios.
- Open an Ajax app. Select the space with at least one KeyPad Outdoor and automation device. Add one if necessary.
- Go to the Devices tab.
- Select KeyPad Outdoor from the list and go to the Settings menu.
- Go to the operating mode for which Manage automation devices is selected.
- Open the Automation scenarios menu.
- Press Create scenario.
- Select the On preset action scenario type.
- Select one or more automation devices. Press Next.
- Enter the scenario name in the Name field.
- Select the preferred device action during scenario execution.
- Press Save.
- Press Back to return to the operating mode menu.
Additionally it is possible to trigger scenario by switching arming mode from the KeyPad Outdoor.
Additional possibilities
The Ajax system also provides the ability to automatically lock/unlock the premises when switching arming mode according to the unavoidability principle.
Read also:
