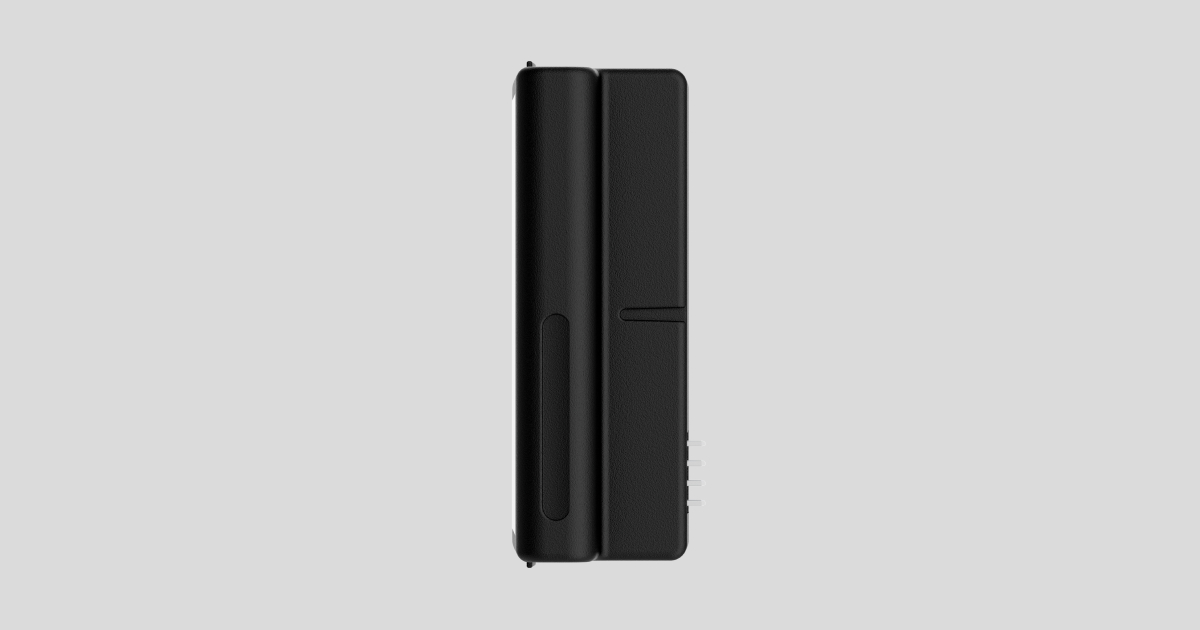
LockBridge (D) Jeweller is a wireless module used to integrate compatible Yale Doorman smart locks (V2N/Classic and L3/L3S) into an Ajax system. The device is compatible with the following locks:
- Yale Doorman L3/L3S,
- Yale Doorman V2N / Yale Doorman Classic.
LockBridge (D) Jeweller is not compatible with Yale Linus smart locks. However, an Ajax system already supports integration with Yale smart locks that feature Wi-Fi connectivity.
The integration module is installed inside the Yale Doorman smart lock. Before installing LockBridge (D) Jeweller, read the user manual for the corresponding Yale smart lock model.
LockBridge (D) Jeweller communicates with the hub via two secure protocols. The module uses Jeweller to transmit alarms and events, and Wings to update the firmware. The communication range in an open space is up to 4,550 ft.
Functional elements
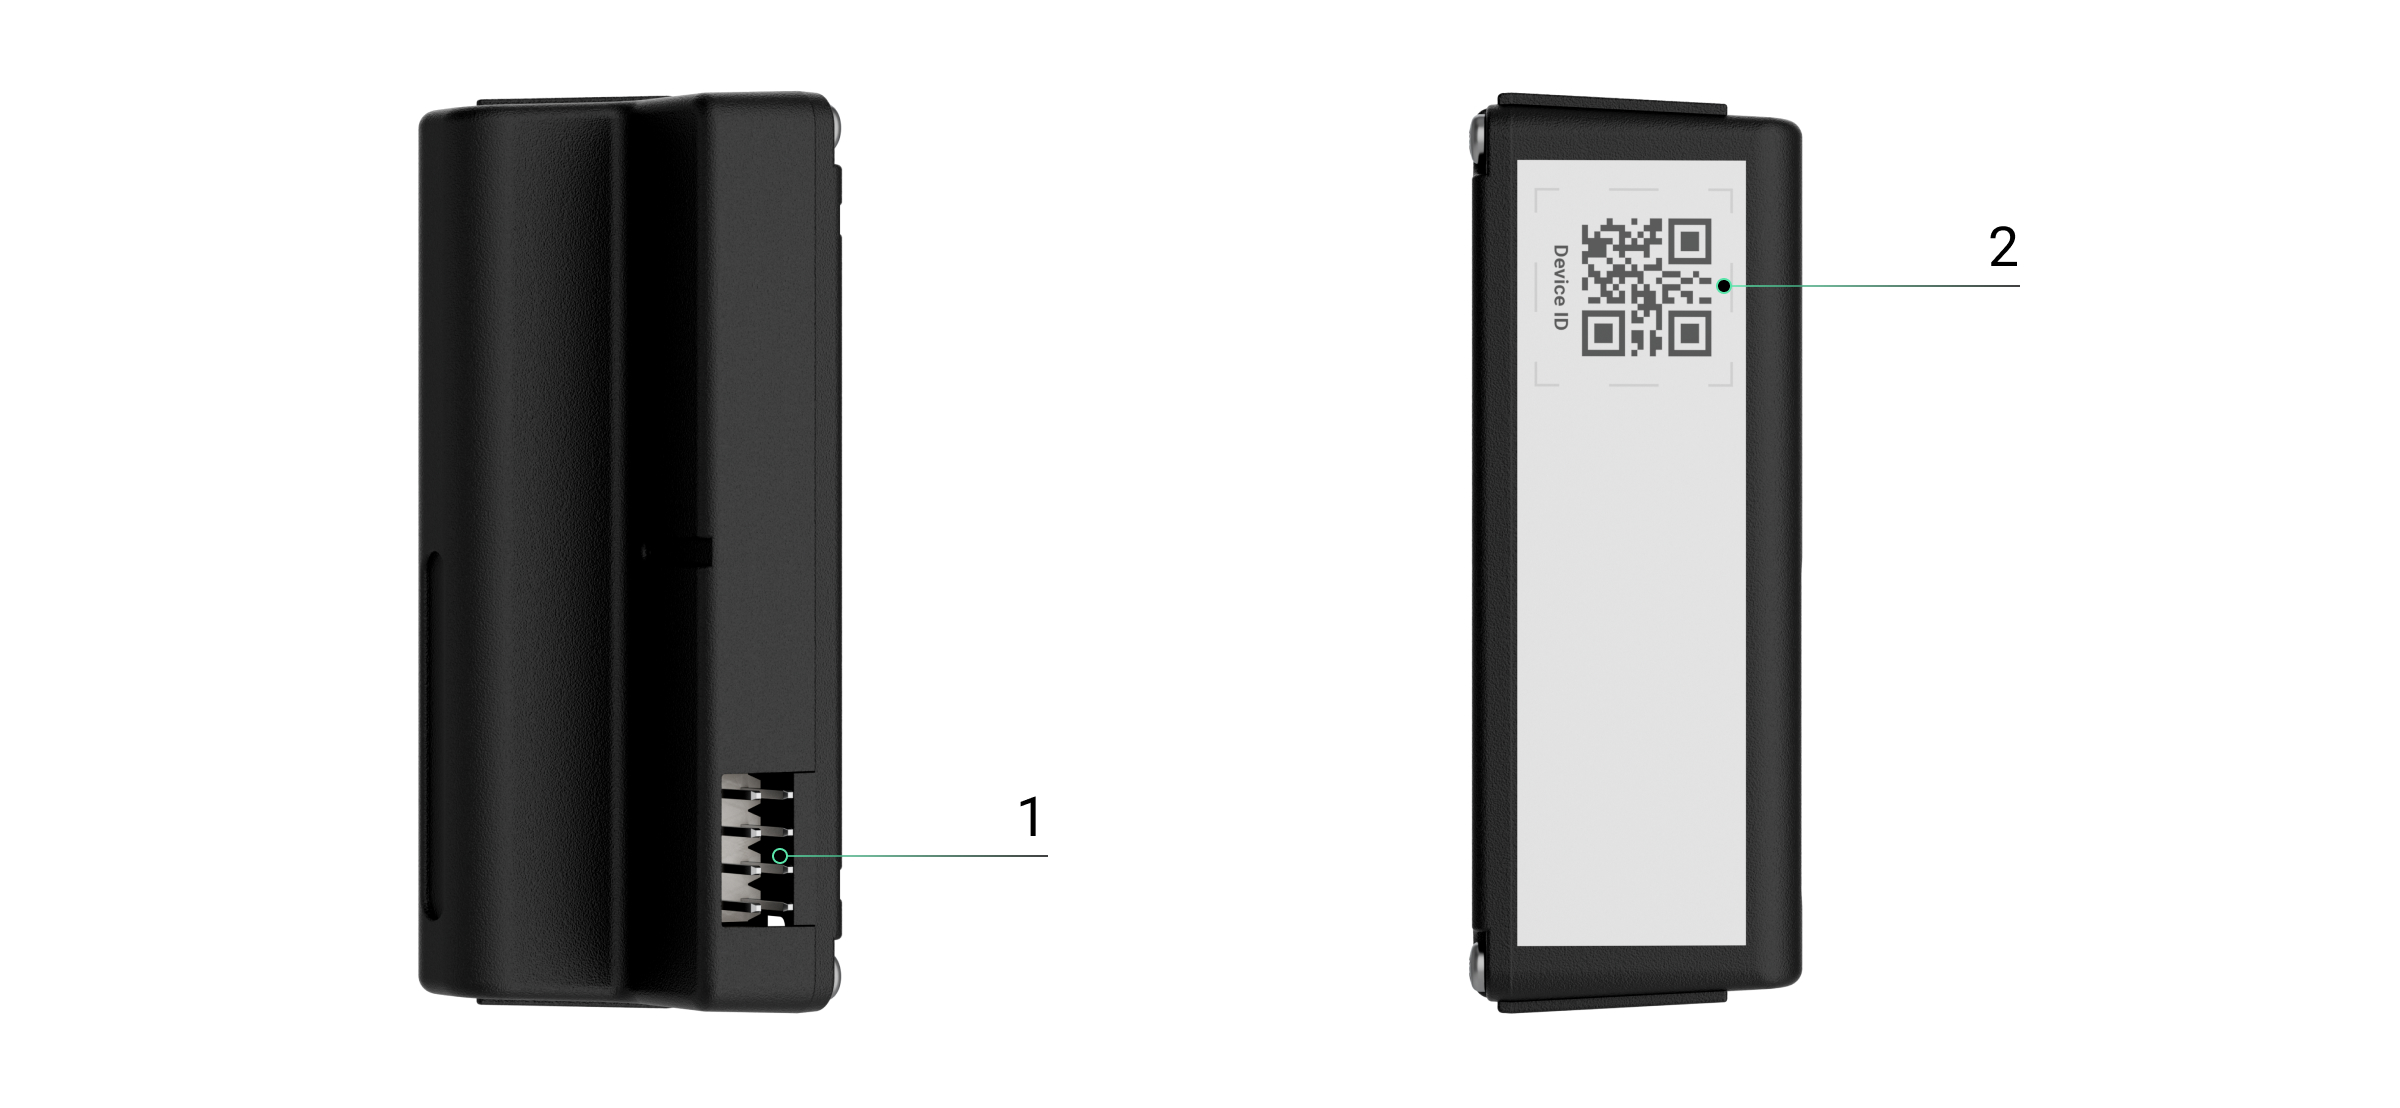
- Connector for attaching LockBridge (D) Jeweller to the Yale Doorman smart lock.
- QR code with the device ID. It is used to add the device to the hub.
Compatible hubs and range extenders
The device requires an Ajax hub with OS Malevich 2.35 and later versions.
Operating principle
LockBridge (D) Jeweller is a wireless module used to integrate a Yale Doorman smart lock into an Ajax system. The module is installed inside the Yale Doorman smart lock.
With this module, the lock integrates directly with the hub and communicates via a secure radio channel. This ensures stable lock operation even if there is no internet connection at the site.
The lock can be locked or unlocked manually on site, remotely via the app, or automatically according to automation scenarios. The security mode of an Ajax system can also change depending on the lock state.
The Yale smart lock can be controlled in Ajax apps. The system sends notifications to users to inform them that the lock state has been changed. The notifications include:
- device name;
- virtual room;
- activation time;
- user who changed the smart lock state.
You can control the lock via the Devices ![]() and Control
and Control ![]() tabs.
tabs.
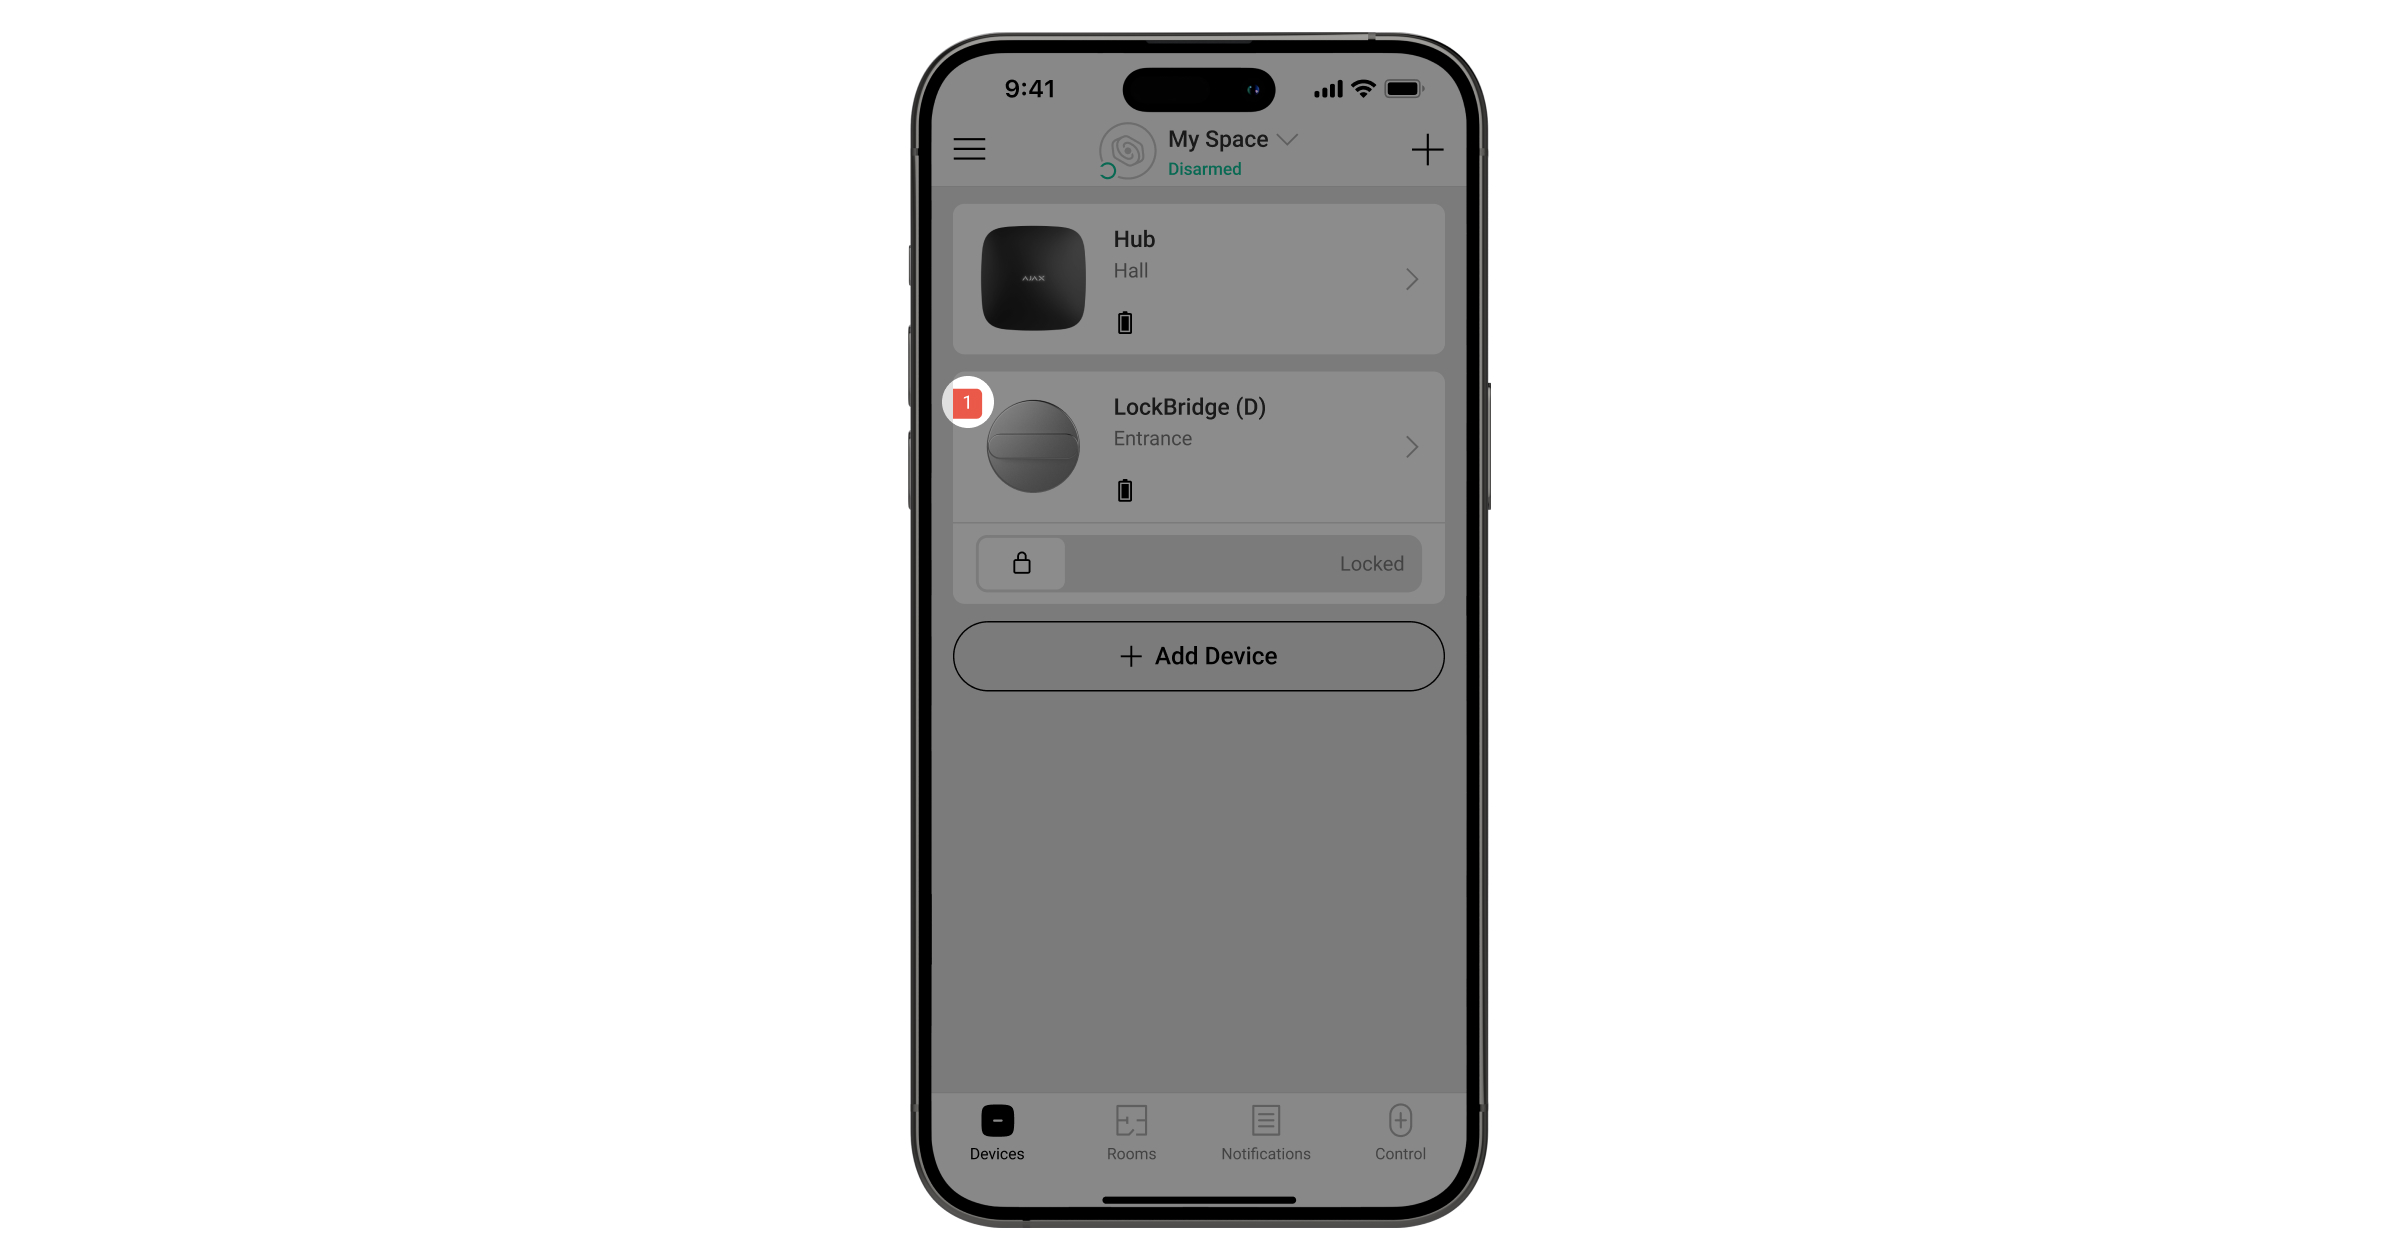
Controlling the lock via Devices tab
To change the lock state, in an Ajax app:
- Select a space.
- Go to the Devices
 tab.
tab. - Find the Yale smart lock in the device list.
- Slide
 to unlock or
  to lock the device.
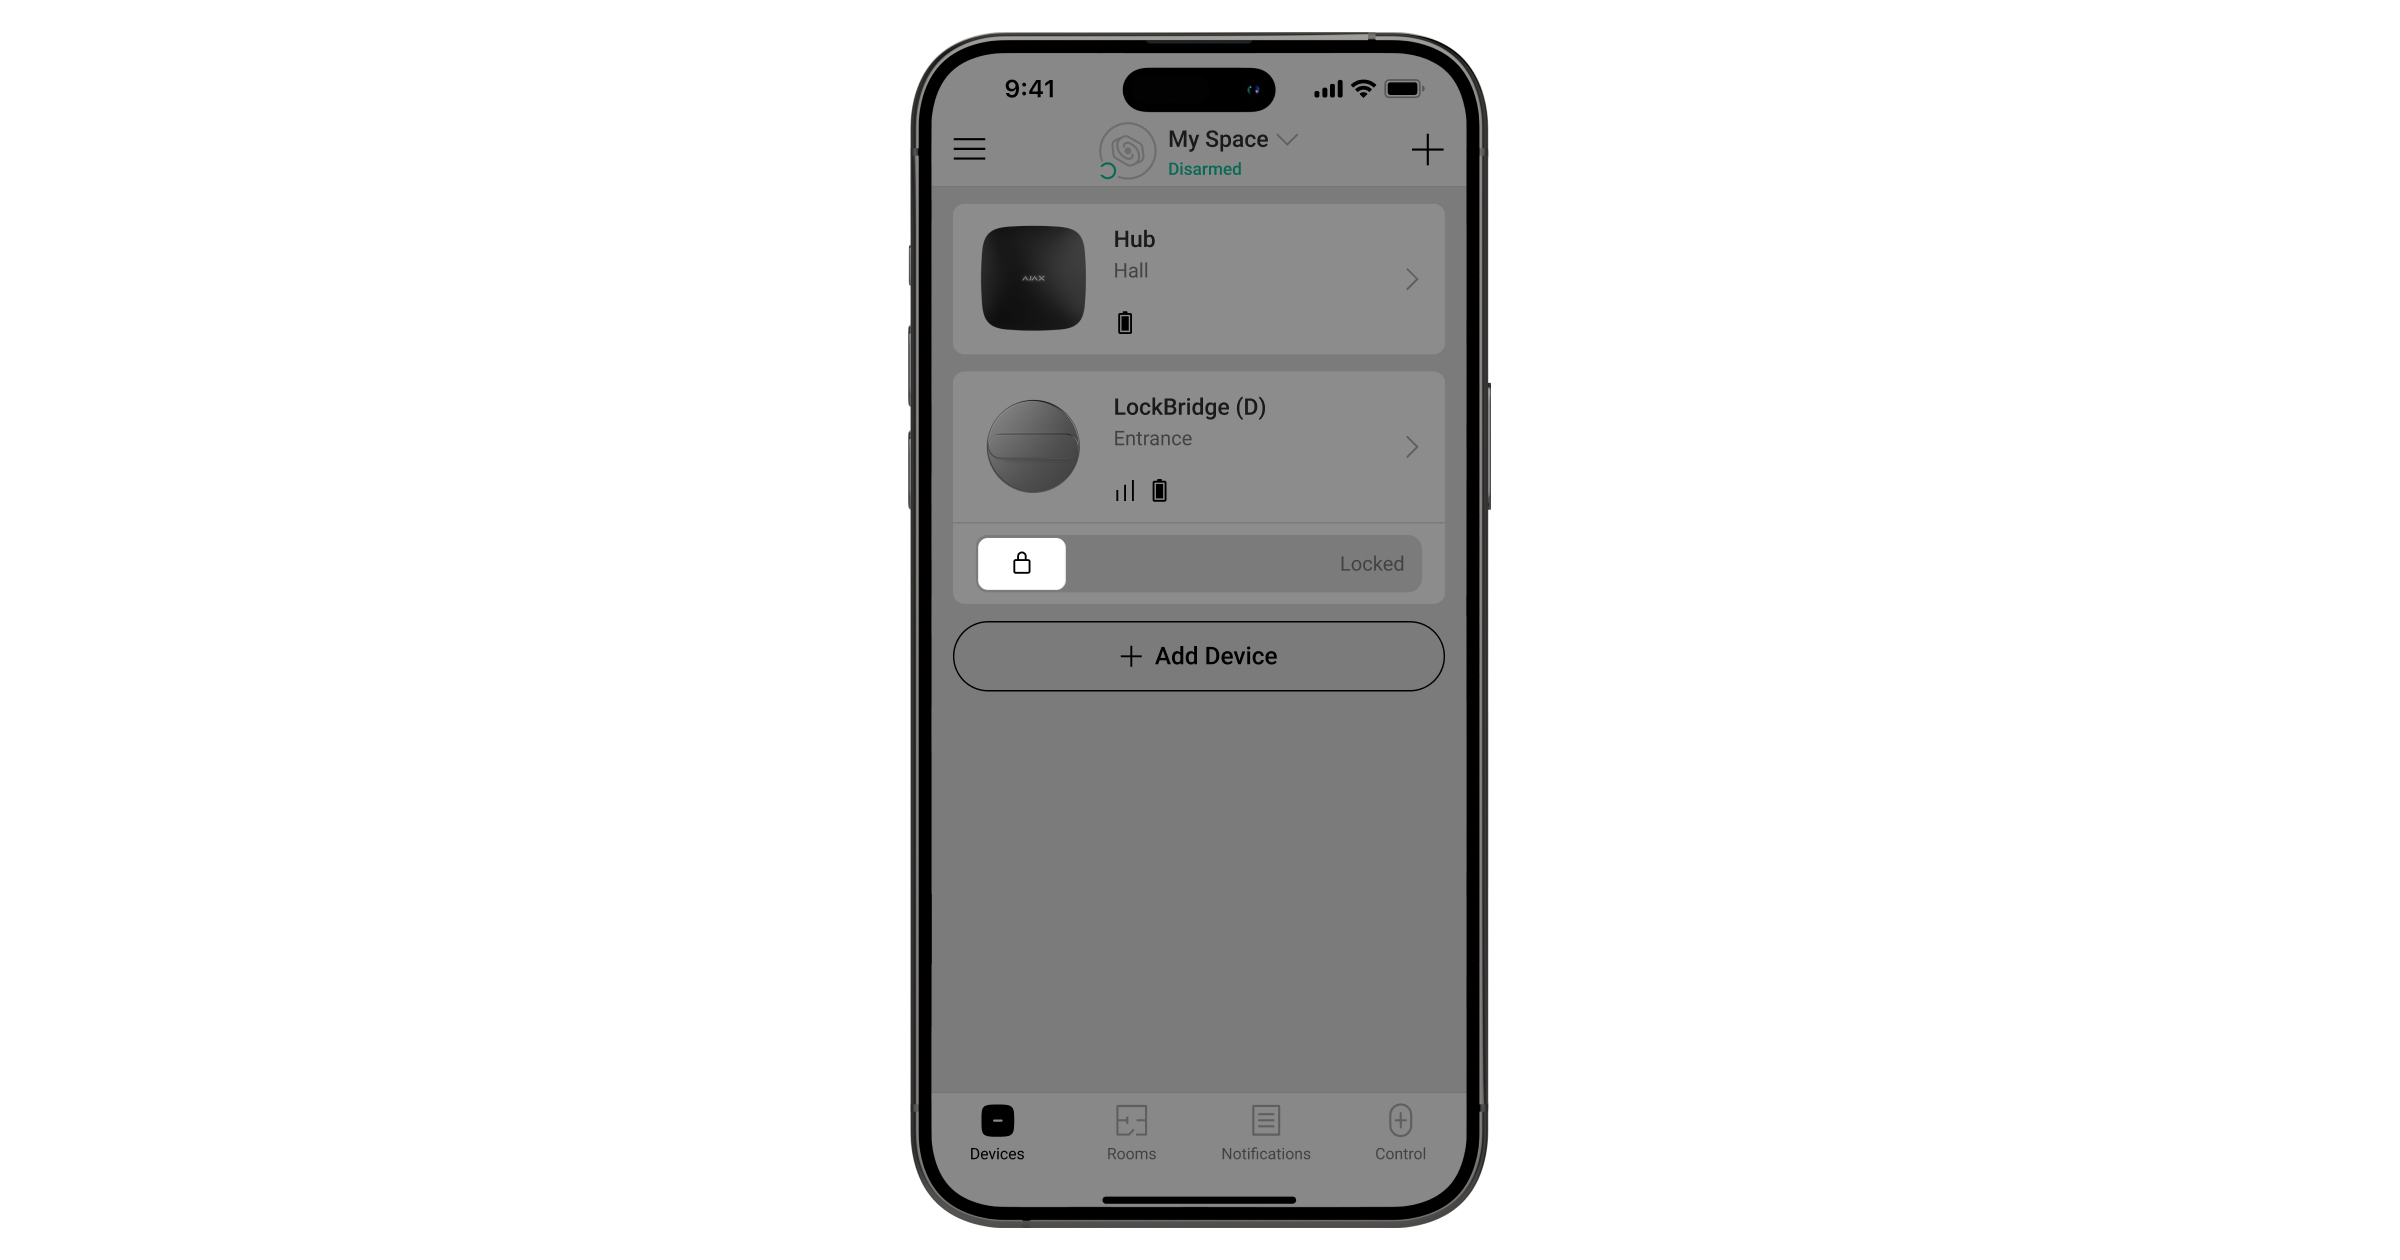
- Enter a passcode if the In-app passcode functionality is enabled.
Controlling the lock via Control tab
To change the lock state, in an Ajax app:
- Select a space.
- Go to the Control
 tab.
tab. - Swipe up to open the list of space automation devices.
- Tap the Yale smart lock tile to lock or unlock the device.
- Tap and hold for more than 0.5 seconds to open the control tab.
- To change the lock state, switch the toggle / .
- Enter a passcode if the In-app passcode functionality is enabled.
All device events are recorded in the event feed in Ajax apps.
Jeweller and Wings data transfer protocols
Jeweller and Wings are wireless data transfer protocols that provide fast and reliable two-way communication between the hub and devices. The module uses Jeweller to transmit alarms and events and Wings to update the firmware.
Sending events to the monitoring station
An Ajax system can transmit alarms to the Ajax PRO Desktop monitoring app and the central monitoring station (CMS) in the formats of SurGard (Contact ID), SIA (DC-09), ADEMCO 685, and other protocols.
LockBridge (D) Jeweller can transmit the following events:
- Adding and deleting the device in the system.
- Low battery alarm/recovery.
- Loss and restoration of connection with the hub.
When an alarm is received, a CMS operator knows what happened and precisely where to dispatch a rapid response unit. The addressability of Ajax devices allows sending events to Ajax PRO Desktop or the CMS with the type of the device, its name, security group, and virtual room specified. The list of transmitted parameters may vary depending on the CMS type and the selected communication protocol.
You can find the device ID, loop (zone) number, and line number in the device states.
Selecting the installation site
When choosing a location for installing LockBridge (D) Jeweller, consider Jeweller and Wings signal strength that affect its operation.
You must consider the placement recommendations when designing the system for the facility. Only specialists can design and install an Ajax system. A list of recommended partners is available here.
Signal strength
The signal strength is determined by the number of undelivered or corrupted data packages over a certain period. The ![]() icon in the Devices
icon in the Devices ![]() tab in Ajax apps indicates the signal strength:
tab in Ajax apps indicates the signal strength:
- three bars — excellent signal strength;
- two bars — good signal strength;
- one bar — low signal strength; stable operation is not guaranteed;
- crossed-out icon — no signal.
Run the Jeweller and Wings signal strength tests before final installation. The test checks the signal strength at the device’s maximum transmission power. If the test shows the signal strength of one or zero bars, we do not guarantee the device will operate stably. Consider relocating it, as adjusting its position even by 8 inches or rotating it relative to the hub can significantly improve the signal strength. If the signal remains poor or unstable after relocation, consider using a radio signal range extender.
Refer to the Functionality testing section to learn how to run Jeweller and Wings signal strength tests.
Where not to install the device
- Outdoors. This can lead to false alarms and device failure.
- In premises with temperature and humidity beyond the permissible limits. This can damage the device.
- In places with low or unstable Jeweller or Wings signal strength.
- Closer than 3 ft to the hub or radio signal range extender.
Installation
To install LockBridge (D) Jeweller in the Yale Doorman smart lock:
- Remove the Yale Doorman smart lock cover, following the instructions in the lock user manual.
- Remove the lock batteries before inserting the integration module.
- Install LockBridge (D) Jeweller in the corresponding place, following the instructions in the lock user manual.
- Install the lock batteries and replace the lock cover.
- Add LockBridge (D) Jeweller to the system.
- Run the functionality test. With a signal strength of one or zero bars, we do not guarantee the device will operate stably. If the signal is poor or unstable, consider using a radio signal range extender.
When using Yale Doorman L3/L3S, avoid rapid jerks or turning of the thumbturn. This may cause the lock to remain in the Closed state even after the door has been opened.
If this happens, close the door and perform one full lock/unlock cycle to update the lock state.
Adding to the system
Check the device compatibility before adding the device to the system.
Before adding a device
- Install an Ajax app.
- Log in to an account or create a new one.
- Select a space or create a new one.
- Add at least one virtual room.
- Add a compatible hub to the space. Ensure the hub is switched on and has internet access via Ethernet, Wi-Fi, and/or mobile network.
- Check the states in the Ajax app to ensure the space is disarmed and the hub is not starting an update.
Adding to the hub
- Open an Ajax app. Select a space to which you want to add the device.
- Go to the Devices tab and tap Add device.
- Scan a QR code or enter the device ID manually. The QR code with the device ID is placed on the device enclosure. Also, it is duplicated on the device packaging.
- Select the Yale smart lock you want to add to an Ajax system.
- Follow the instructions in the Ajax app.
- Assign a name to the device.
- Select a virtual room and a security group (if Group mode is enabled).
- Set an entry code and tap Add device.
If the connection fails, try again in 5 seconds. If the maximum number of devices has already been added to the hub, you will receive an error notification when you try to add more.
Once added to the hub, the device will appear in the list of hub devices in the Ajax app. The update frequency for device states in the list depends on the Jeweller or Jeweller/Fibra settings and is 36 seconds by default.
LockBridge (D) Jeweller works with only one hub. When paired with a new hub, it stops sending events to the old one. Adding the device to a new hub does not automatically remove it from the device list of the old hub. This must be done through the Ajax app.
Functionality testing
An Ajax system offers several types of tests to help select the correct installation place for the devices. For LockBridge (D) Jeweller, you can perform the following tests:
- Jeweller signal strength test — to determine the signal strength and stability between the hub (or the radio signal range extender) and the device via the wireless Jeweller data transfer protocol at the device installation site.
- Wings signal strength test — to determine the signal strength and stability between the hub (or the radio signal range extender) and the device via the wireless Wings data transfer protocol at the device installation site.
Icons
Icons in an Ajax app display some of the Yale smart lock with LockBridge (D) Jeweller installed states. You can check the icons in the Devices ![]() tab.
tab.
| Icon | Meaning |
|
Jeweller signal strength. It displays the signal strength between the hub and the device. The recommended value is 2–3 bars. |
|
|
Battery charge level of the device. |
|
|
The device operates via the radio signal range extender. |
|
| Firmware update is available. Go to the device states or settings to find the description and launch an update. | |
| Firmware update is in progress: downloading/installing the latest version. | |
| The new firmware installation has failed. | |
|
The smart lock is locked. |
|
| The smart lock is unlocked. | |
| The door is open. | |
| The lock is in Secure mode. | |
|
The device is malfunctioning. The lock codes are temporarily disabled due to multiple unsuccessful attempts to enter the code. The lock cannot be managed via the app. |
|
|
The device is automatically disabled because the number of alarms has been exceeded. |
|
|
The device is permanently deactivated. |
|
|
The device is deactivated until the system is disarmed for the first time. |
|
| The device has lost connection with the hub, or the hub has lost connection with the Ajax Cloud server. | |
|
The device has not been transferred to the new hub. |
States
The states include information about the device and its operating parameters. The states of the Yale smart lock with LockBridge (D) Jeweller installed can be found in Ajax apps:
- Go to the Devices tab.
- Select the Yale smart lock in the list.
| Parameter | Meaning |
| Data import | Displays the error when the data is being transferred to the new hub:
|
| Malfunction |
Tapping on The field is only displayed if a malfunction is detected. |
| New firmware version available |
Tapping on The field is displayed if a new firmware version is available. |
| Jeweller signal strength |
Jeweller signal strength between the device and the hub (or the radio signal range extender). The recommended value is 2–3 bars. Jeweller is a protocol for transmitting LockBridge (D) Jeweller events and alarms. |
| Connection via Jeweller | Connection status on the Jeweller channel between the device and the hub (or the range extender):
|
| Wings signal strength |
Wings signal strength between the device and the hub (or the range extender). The recommended value is 2–3 bars. Wings is a protocol for updating the LockBridge (D) Jeweller firmware. |
| Connection via Wings | Connection status on the Wings channel between the hub (or the range extender) and the device:
|
| <Range extender name> | Status of device connection to the radio signal range extender:
The field is displayed if the device operates via the radio signal range extender. |
| Battery charge | Battery charge level of the device. Two states are available:
|
| Current door state | The door state:
|
| Current lock state | The Yale smart lock state:
|
| Secure mode | Indicates whether Secure mode is currently enabled on the smart lock.
The Secure mode is controlled directly on the smart lock. |
| Lock control available to |
Displays the number of Ajax system users who have access to the smart lock settings. Tapping on The state is not available in Ajax PRO apps. |
| Permanent deactivation | The state of the device’s permanent deactivation setting:
|
| One-time deactivation | Shows the state of the device’s one-time deactivation setting:
|
| LockBridge (D) Jeweller firmware |
The LockBridge (D) Jeweller firmware version. The firmware version is updated over the air. |
| Yale lock firmware | The Yale smart lock firmware version. |
| Yale lock hardware | The Yale smart lock hardware version. |
| Device ID | Device ID. |
| Device No. | Device loop (zone) number. |
Settings
To change the settings of the Yale smart lock with LockBridge (D) Jeweller installed, in an Ajax app:
- Go to the Devices tab.
- Select the Yale smart lock in the list.
- Go to Settings
 .
. - Set the required settings.
- Tap Back to save the new settings.
| Setting | Meaning |
| Name |
Device name. It is displayed in the list of hub devices, text of SMS and notifications in the events feed. To change the device name, tap on the text field. The name can contain up to 24 Latin characters or up to 12 Cyrillic characters. |
| Room |
Selecting the virtual room to which LockBridge (D) Jeweller is assigned. The room name is displayed in the text of SMS and notifications in the events feed. |
| Notifications | |
| When door open/closed | If the option is enabled, you will receive notifications when the door is opened or closed. |
| When locked/unlocked | If the option is enabled, you will receive notifications when the Yale smart lock state is changed. |
| When scenario executed | If the option is enabled, you will receive notifications when a scenario involving the smart lock is activated. |
| When the door is open longer than the set time | If the option is enabled, you will receive notifications when the door remains open for longer than the specified time. The timer starts when the door is opened. The delay time can be configured in the lock settings in an Ajax app. |
| Lock sounds volume | Allows a user to select the volume of the lock sound when the door is locked or unlocked:
|
| Auto-lock | Allows a user to configure automatic door locking:
|
| Chimes |
Allows a user to select when sirens added to the hub should emit a special sound. |
| Voice language | Allows a user to select the language of the lock’s voice prompts. |
| In-app passcode | Allows a user to select whether a passcode is required to change the lock state via Ajax apps. When the Ask for passcode option is enabled, the mobile app will ask for the passcode every time a user with access rights locks or unlocks the door. |
| Codes in Secure mode | Select whether to block entry codes in Secure mode:
If codes are blocked and the lock is in Secure mode, the door can only be unlocked via the app or using a Yale key tag. The lock sends an alarm notification if the door is opened from the inside. This setting is not available when LockBridge (D) Jeweller is installed in Yale Doorman V2N. |
| Scenarios |
Opens the menu to create and configure the automation scenarios. |
| Firmware update | Switches the device to the firmware update mode if a new version is available. |
| Jeweller signal strength test |
Switches the device to the Jeweller signal strength test mode. The recommended value is 2–3 bars. |
| Wings signal strength test |
Switches the device to the Wings signal strength test mode. The recommended value is 2–3 bars. |
| User manual | Opens the LockBridge (D) Jeweller user manual in an Ajax app. |
| Permanent deactivation |
Allows a user to disable device events without removing the device from the system. Three options are available:
The system can also automatically deactivate devices when the set number of alarms is exceeded. |
| One-time deactivation |
Allows a user to disable events of the device until the system is disarmed for the first time. Three options are available:
|
| Delete device | Unpairs the device, disconnects it from the hub, and deletes its settings. |
Smart lock access settings
The Smart lock access menu allows a user with rights to manage privacy settings configuring entry codes, Yale contactless keys, and permissions on who has access to manage the smart lock states and create scenarios with it.
Permission settings
To configure the lock access in the Ajax app, go to:
Control ![]() tab → Settings
tab → Settings ![]() → Smart lock access
→ Smart lock access
Select Users, Installers, and Companies who can manage a smart lock. A PRO with access to the smart lock can manage its states in the Ajax PRO app.
Security companies can be granted access to manage the lock permanently or only after an alarm has been activated. If the After alarm only option is selected, the company can manage the smart lock state during the specified time in the settings after the alarm in the system.
If the security company has access to the smart lock, only the company owner can specify permissions for different employee roles in the PRO Desktop app.
Entry code settings
To set up codes for locking/unlocking doors via the smart lock keypad, in the Smart lock access menu:
- Tap Entry codes.
- Select a smart lock in the list to manage its access codes.
- Select an existing code to edit it, or tap Add code to create a new one.
- Enter or edit the name and the access code (enter it twice). Tap Save.
Entry codes can be disabled without deletion, enabled, or deleted. Note that you cannot delete the last entry code — at least one must remain on the lock.
Yale contactless key settings
Use only Yale key tags and cards.
To set up Yale contactless keys for locking/unlocking doors, in the Smart lock access menu:
- Tap Contactless keys.
- Select a smart lock in the list to manage its contactless keys.
- Select an existing contactless key to edit it, or tap Add contactless key to add a new one.
- Enter a title of the contactless key and (optionally) enter a PIN code twice. Tap Save.
- Bring the key tag or card close to the lock’s reader while the timer is counting down.
Setting up Chime
Chime is an audio signal that informs about the triggering of the smart locks when the system is disarmed. The feature is used, for example, in stores to notify employees that someone has entered the premises.
The notifications are configured in two stages: setting up the sirens and setting up LockBridge (D) Jeweller.
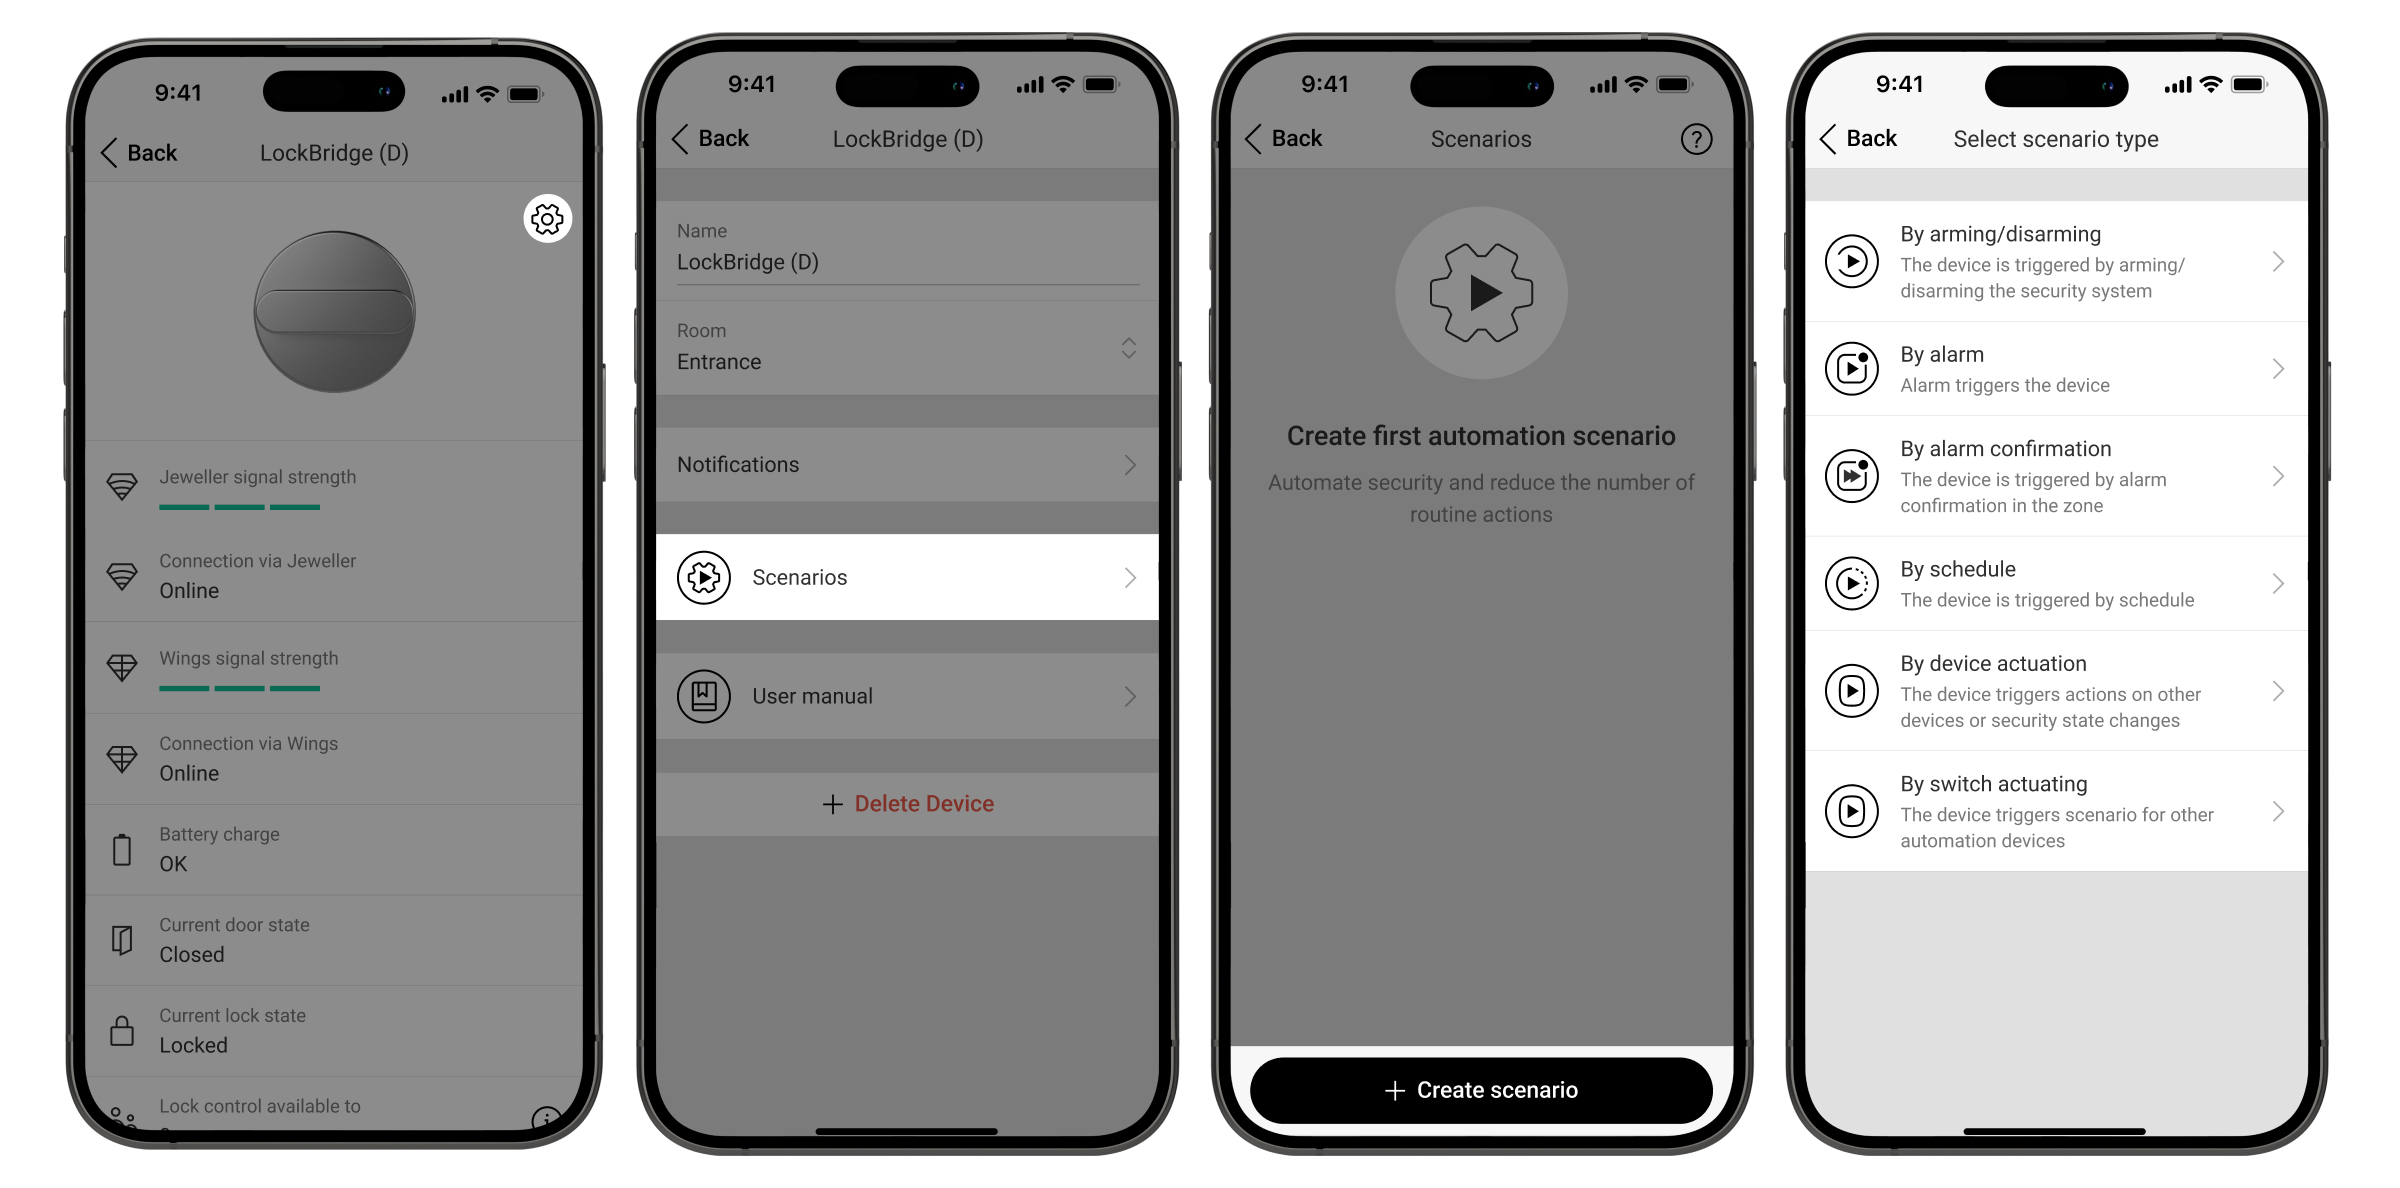
Scenarios settings
Scenarios help to automate security and minimize routine actions. For example, you can disarm space when the lock is open. An admin or a PRO with rights to configure the system can create scenarios for the Yale smart lock in its settings.
The Yale smart lock supports the following scenario types:
- By arming/disarming. For example, lock the door when arming a space.
- By device actuation. For example, arm the space when the door is locked.
- By alarm. For example, unlock the door if the panic button is pressed.
- By alarm confirmation. For example, unlock the door if the alarm is confirmed in the zone.
- By schedule. For example, unlock the door at 11:00 AM and lock it at 9:00 PM.
To create scenarios for the Yale smart lock, open its settings and choose the Scenarios menu.
Indication
LockBridge (D) Jeweller does not have a built-in LED indicator, while Yale smart locks feature LED and sound indication. For details, refer to the user manual for the corresponding lock.
Malfunction
When the device detects a malfunction (for example, there is no connection via the Jeweller protocol), a malfunction counter is displayed in an Ajax app in the upper left corner of the device icon.
All malfunctions are displayed in the device states. Fields with malfunctions are highlighted in red.
Malfunction is displayed if:
- The device temperature is beyond the permissible limits.
- There is no connection with the hub or radio signal range extender via Jeweller.
- There is no connection with the hub or radio signal range extender via Wings.
- The battery is low.
- The incorrect code was entered three times. To restore operation, wait 5 minutes until the lock’s keypad automatically unlocks, or unlock the door via the Ajax app — this will reset the lockout and restore normal operation.
- The lock is substituted.
After Yale Doorman V2N is rebooted, it locks the door regardless of its previous state. If the door was open and unlocked before the reboot, the module reports the Door state as Opened and the Current lock state as Unlocked, but the lock is locked.
To restore synchronization, unlock the door using the thumbturn or by entering the code on the lock. In this case, no Unlocked alarm is generated, as the state remains unchanged in the app.
Maintenance
Regularly check the functioning of the device. The optimal frequency of checks is once every three months. Clean the device enclosure from dust, cobwebs, and other contaminants as they emerge. Use soft, dry wipes suitable for equipment maintenance.
Do not use substances that contain alcohol, acetone, gasoline, and other active solvents to clean the device.
Technical specifications
Warranty
The warranty for the products of the “Ajax Systems Manufacturing” Limited Liability Company is valid for 2 years after purchase.
If the device does not operate properly, we recommend contacting support service first, as most technical issues can be resolved remotely.
Contact Technical Support:
Manufactured by “AS Manufacturing” LLC
