From now on, you can add, configure, and manage your Yale smart locks in the Ajax system. Status notifications, easy management, and automation scenarios are now available for all Yale smart locks connected to Wi-Fi.
Follow the steps below to add your Yale smart lock to the Ajax system.
Adding to the system
Before adding your Yale smart lock to the Ajax system, ensure you add it to the Yale app.
- Install the Ajax app.
- Create an account if you don’t have one yet.
- Select the space you want to add the smart lock to, or create the space if you don’t have one. Create at least one virtual room, and adjust the necessary settings.
- Ensure space is disarmed, and the Ajax app has an internet connection. You can check the status in the Ajax app.
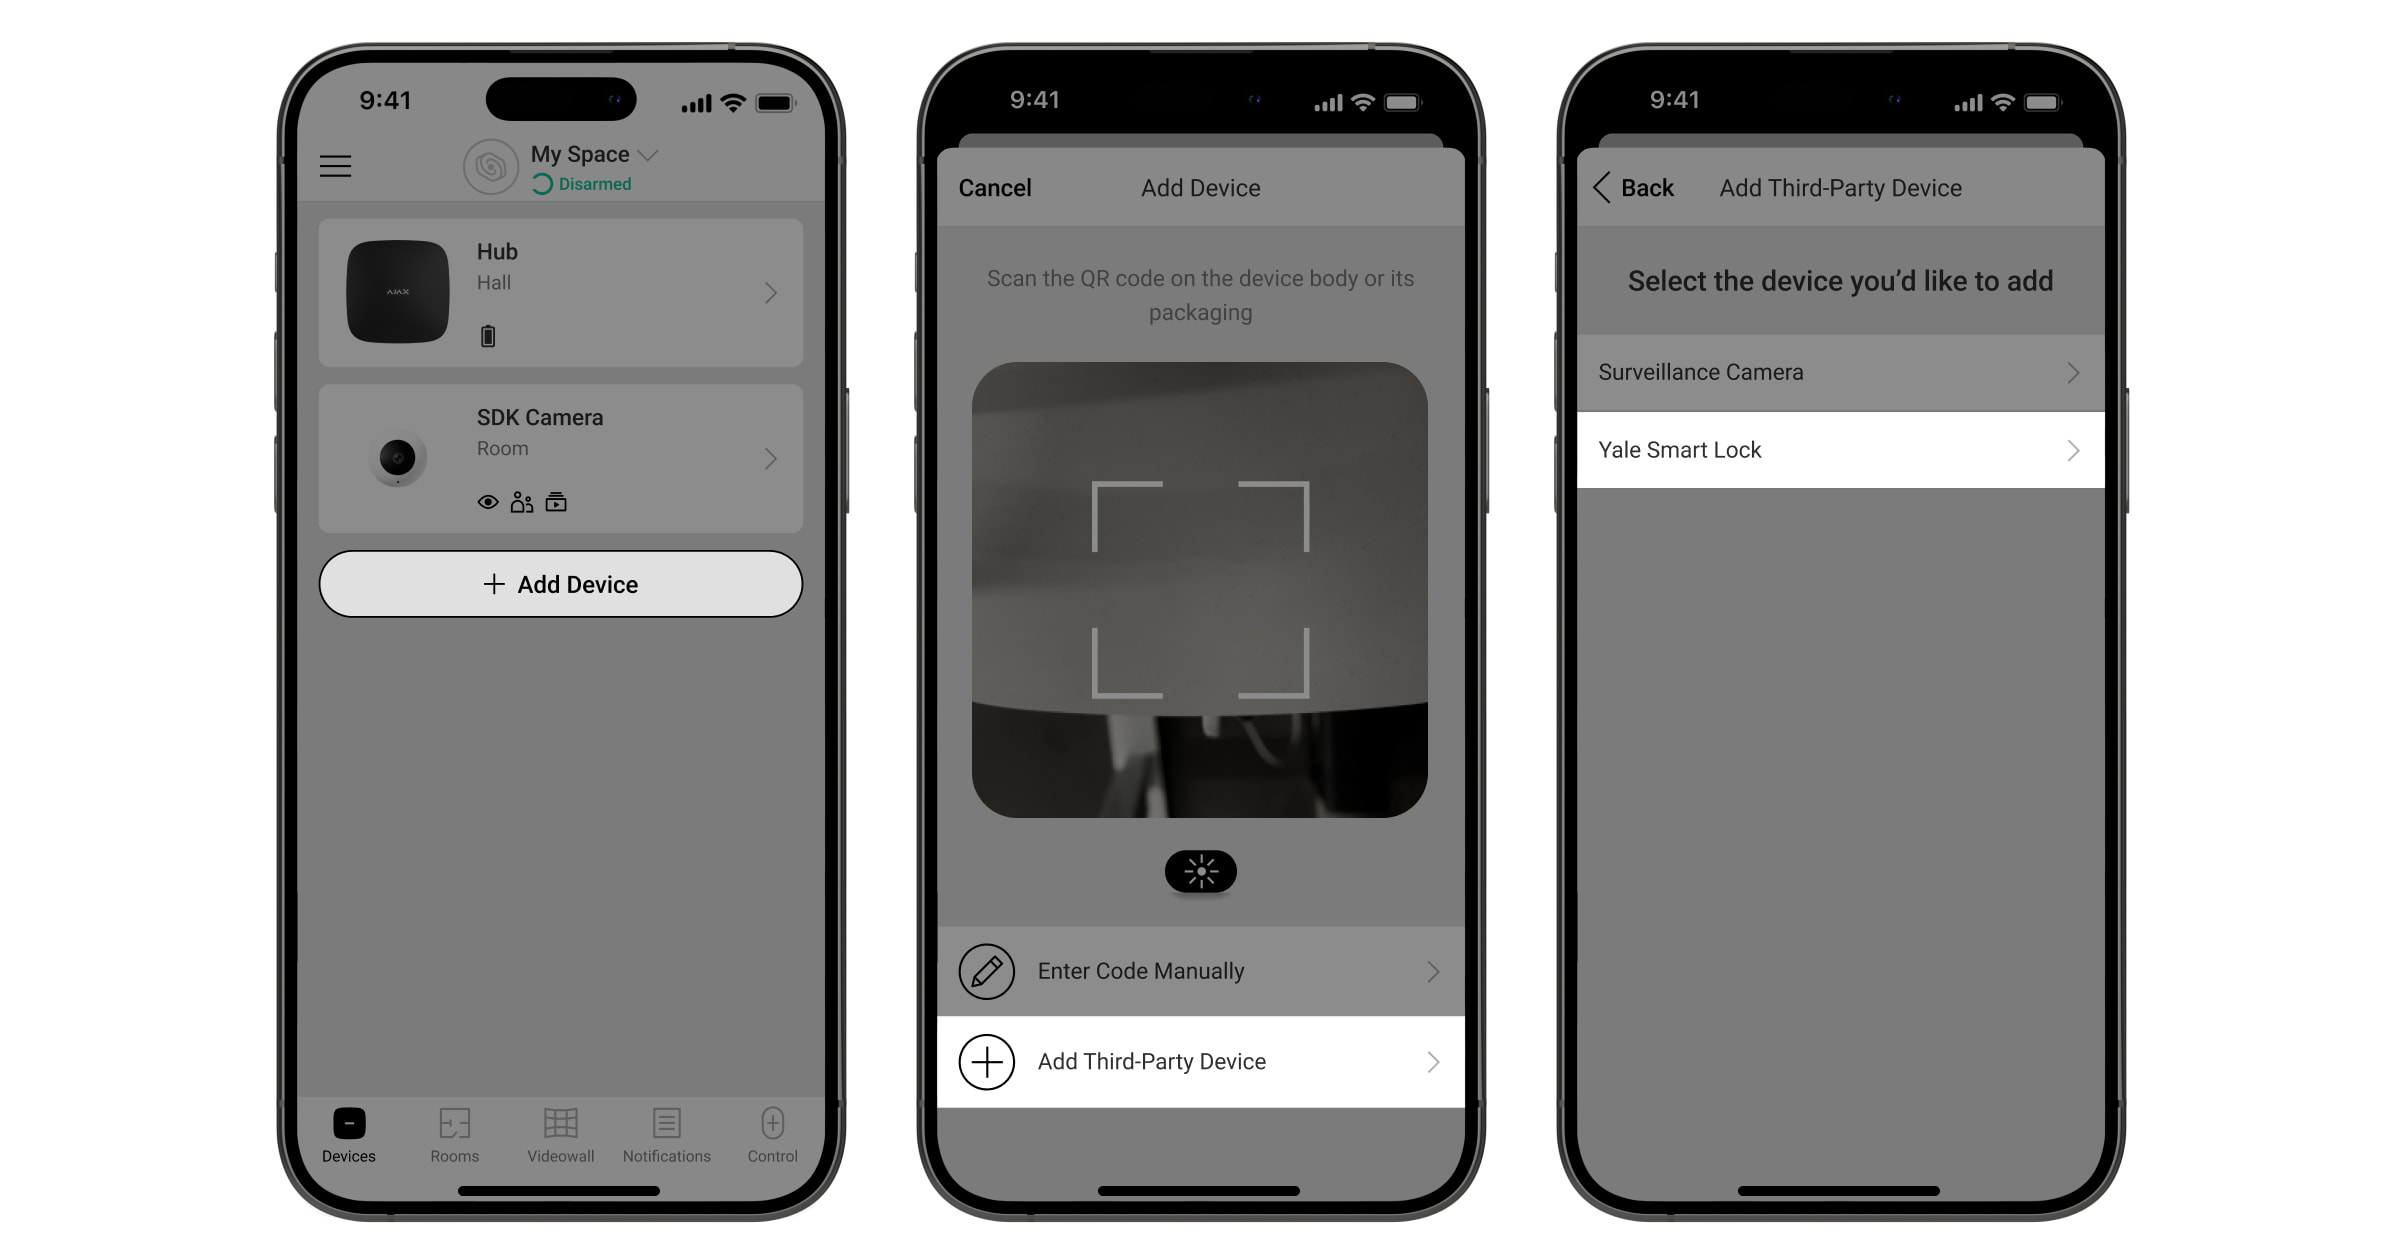
- Add a Yale smart lock to the Ajax system:
- Go to: Space → Add Device → Add Third-Party Device → Yale Smart Lock

Only an admin or a PRO with rights to configure the system can add a Yale smart lock to the Ajax system.
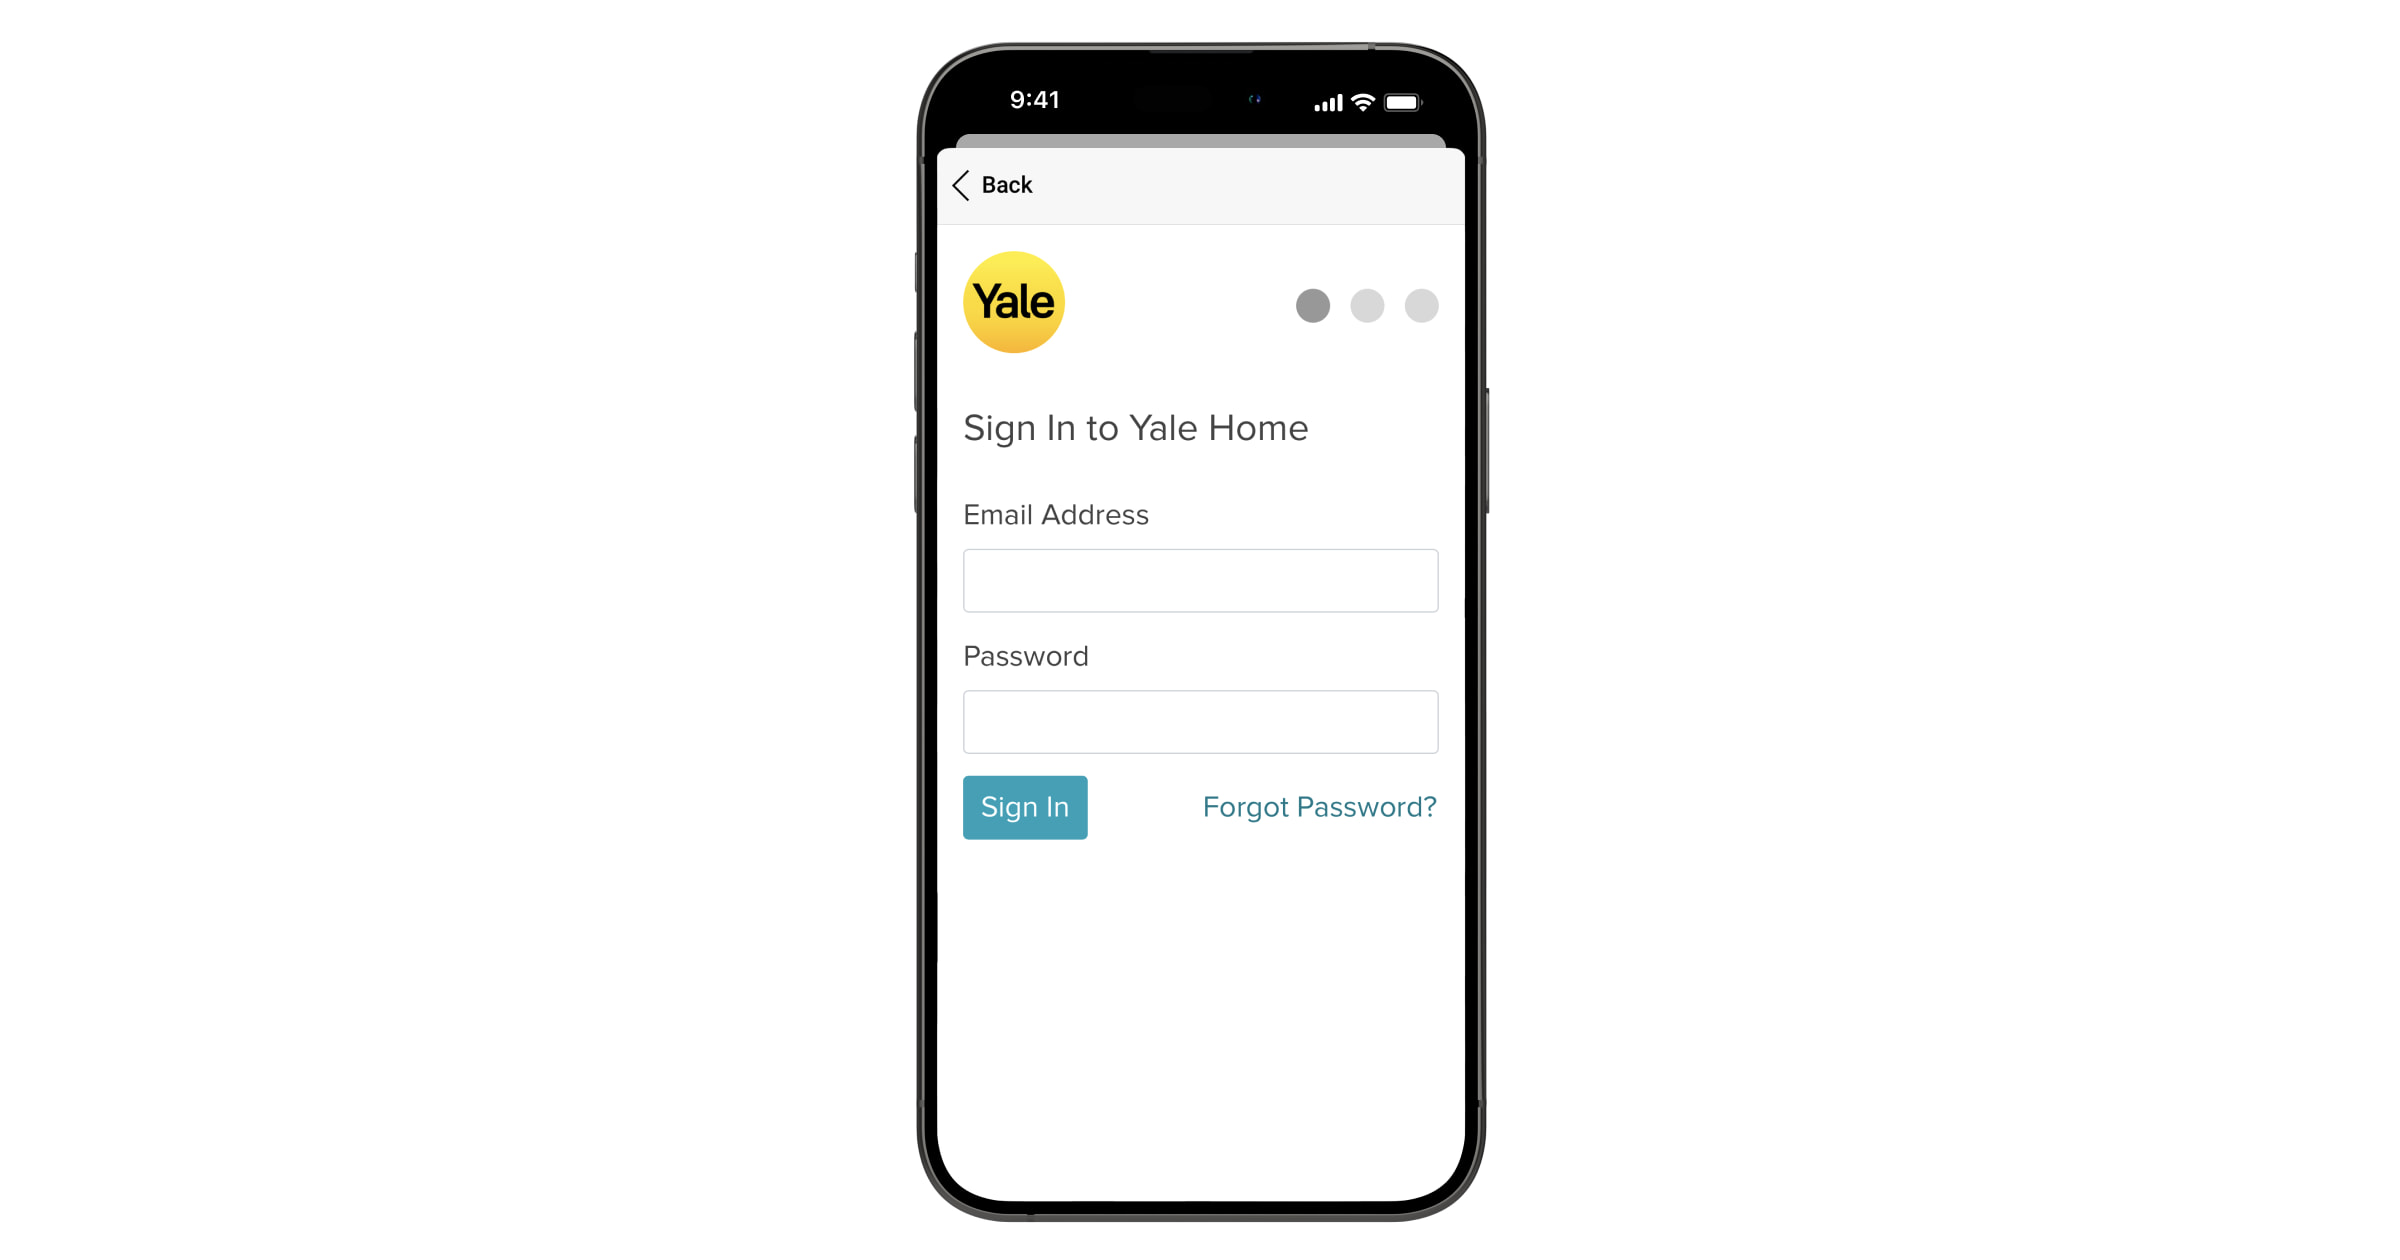
- Sign in to your Yale account.
To add the smart lock to your space, you must be an Owner user in your Yale account, and at least one compatible Yale lock should be added to it.
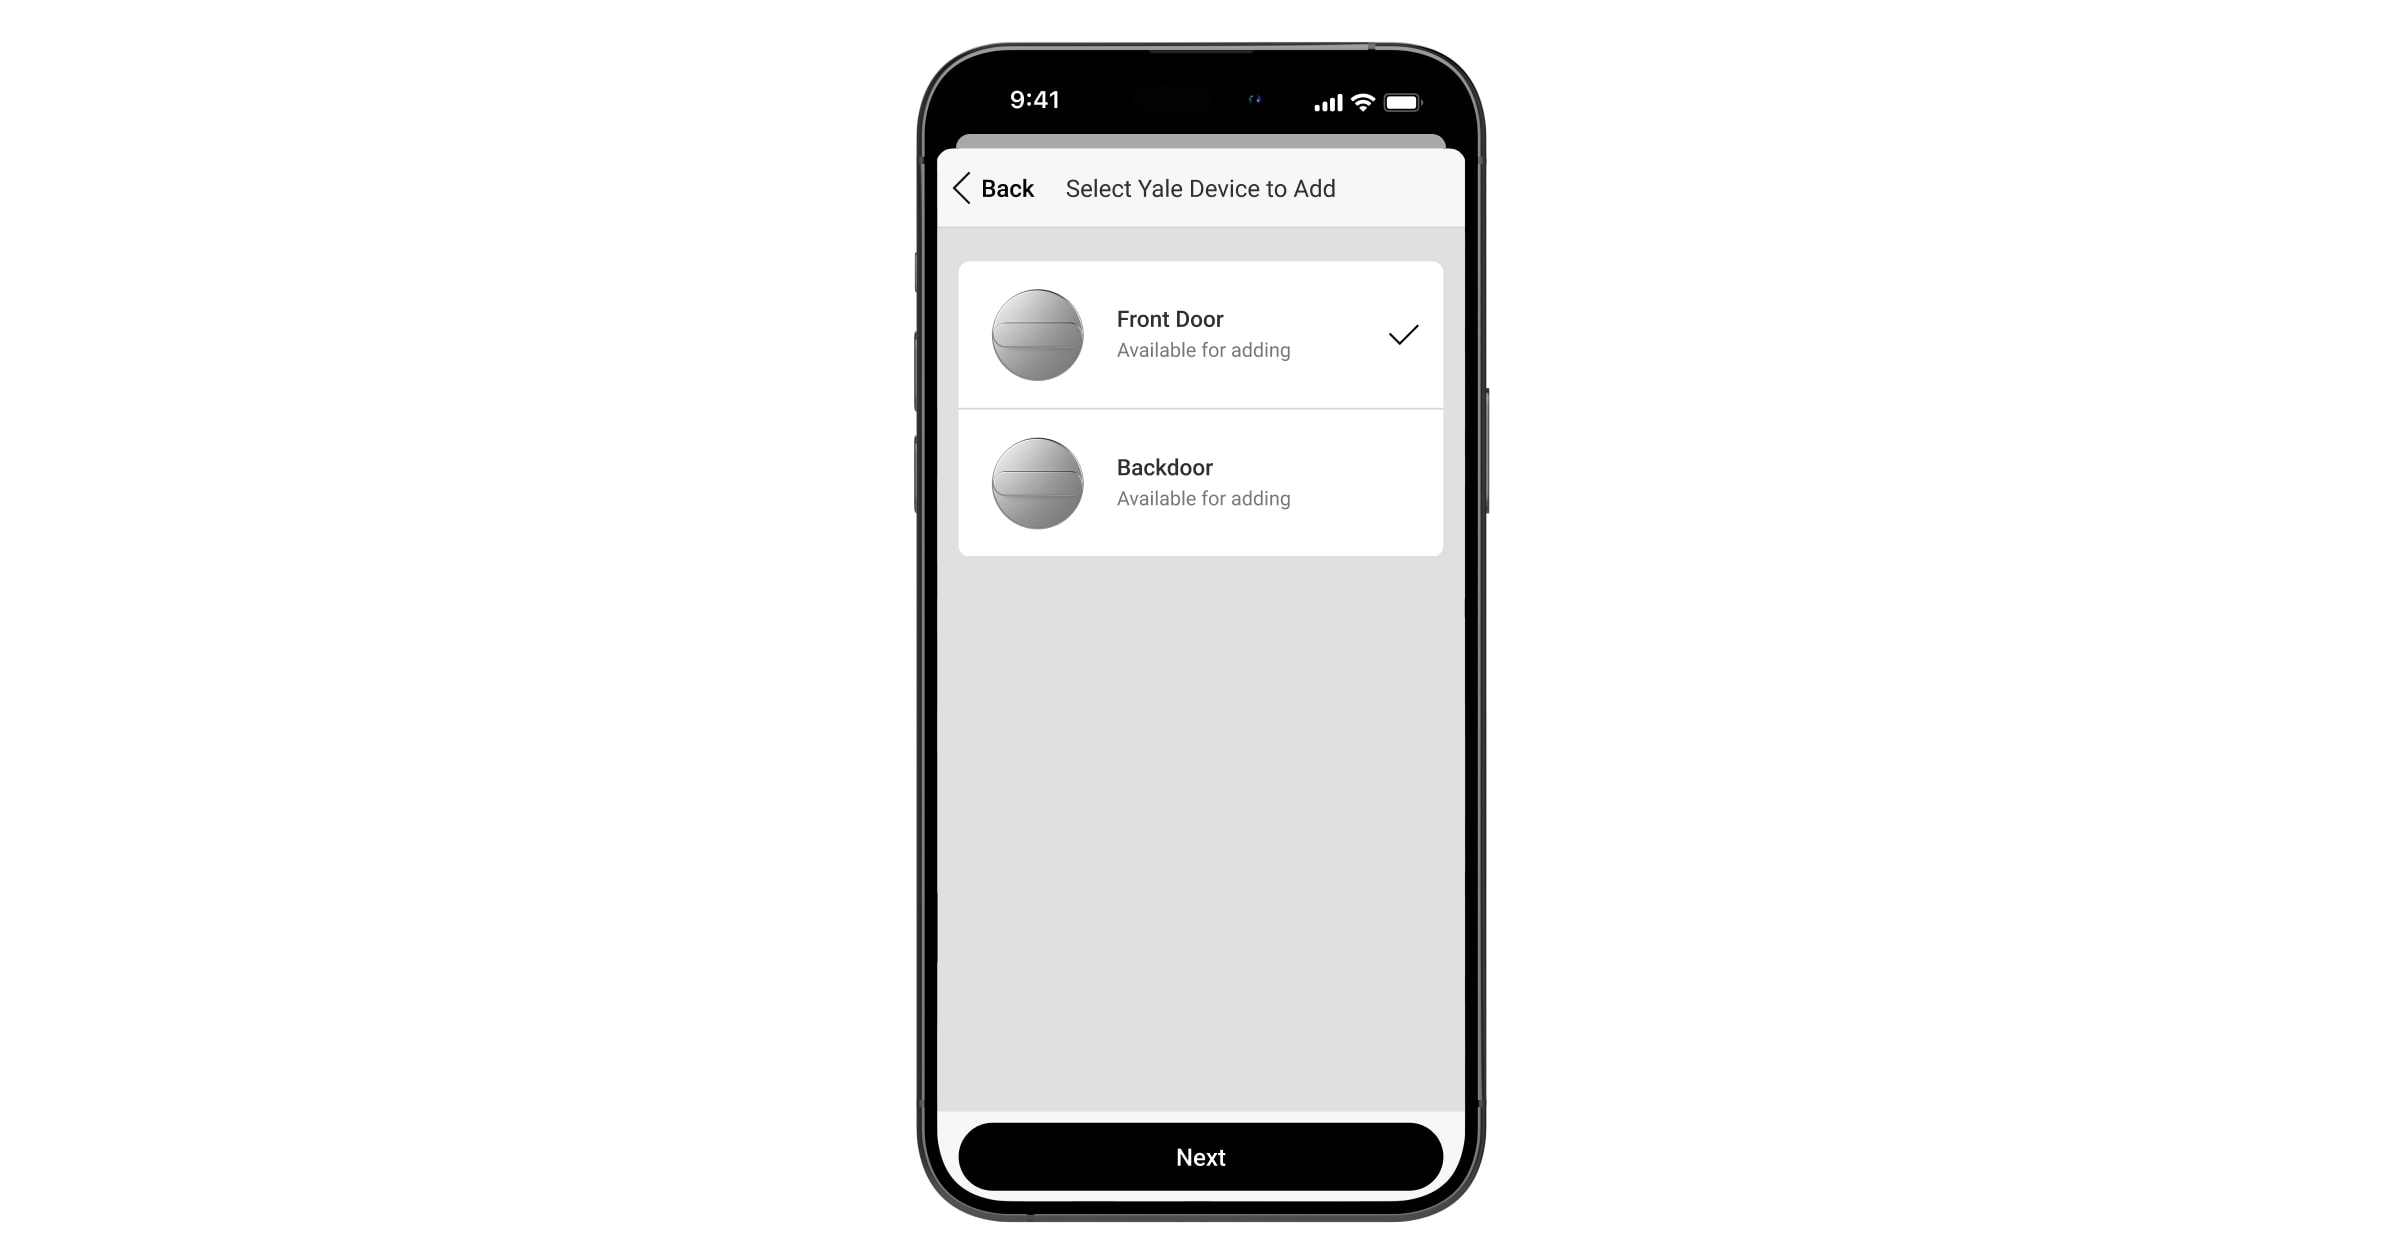
- Select the Yale smart lock you want to add to the Ajax system and press Next.
- Go to: Space → Add Device → Add Third-Party Device → Yale Smart Lock
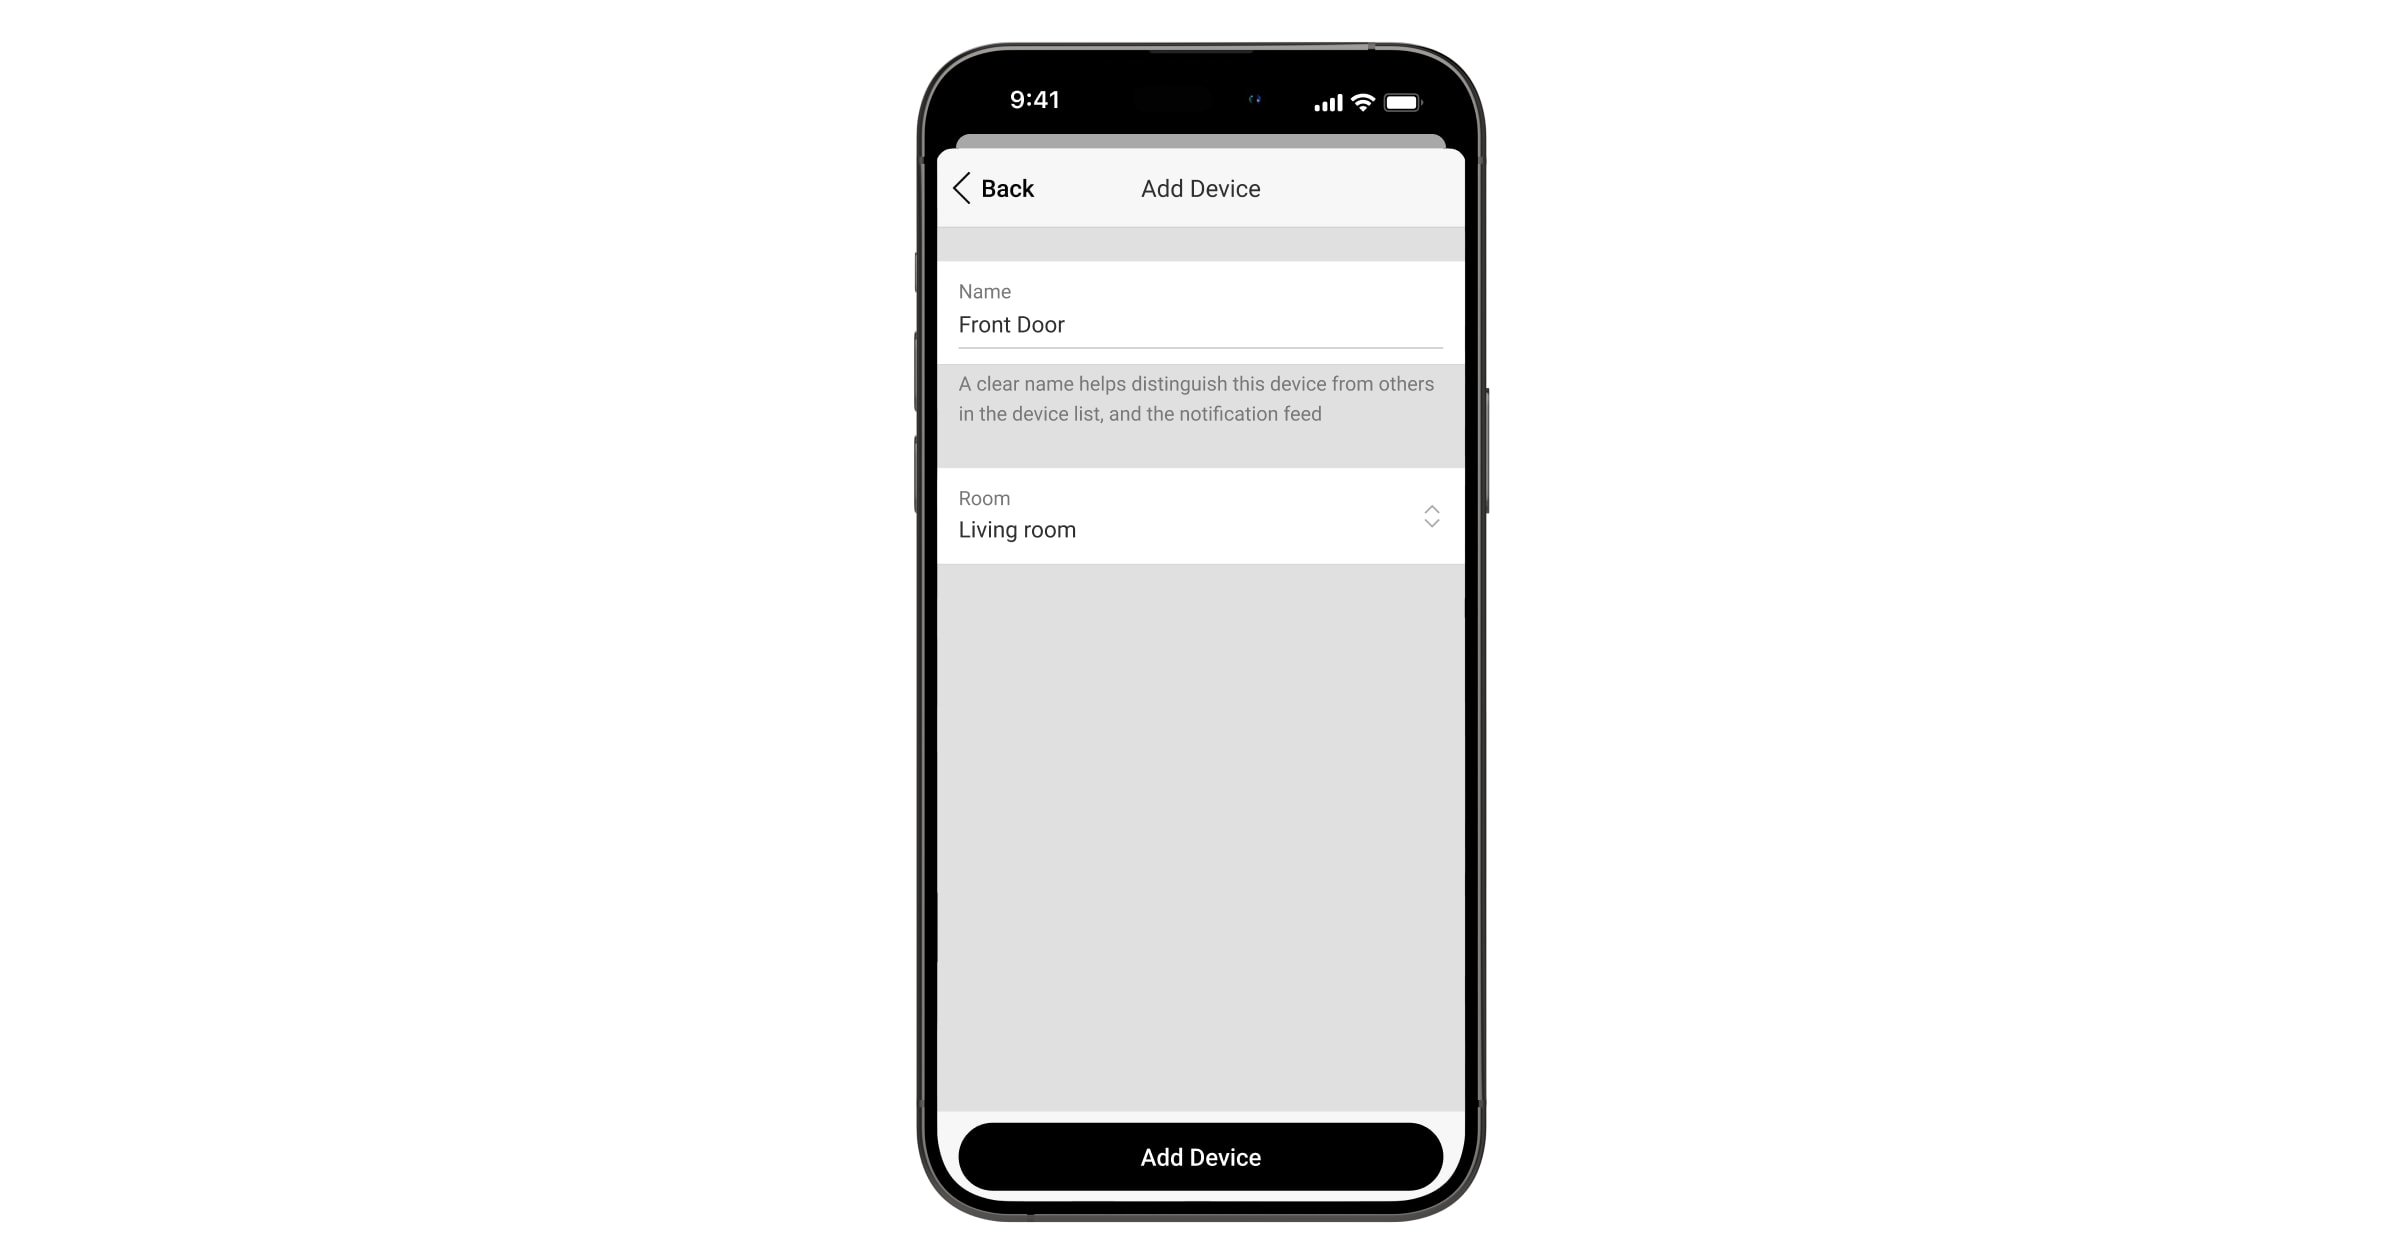
- Name the device, select a room and a group (if Group Mode is enabled). Press Add Device.
The smart lock name migrates from the Yale app but is limited to 48 characters in the Ajax app. Changing the device name in one app changes it in the other as well.
- Repeat steps from 5 to 8 to add another Yale smart lock.
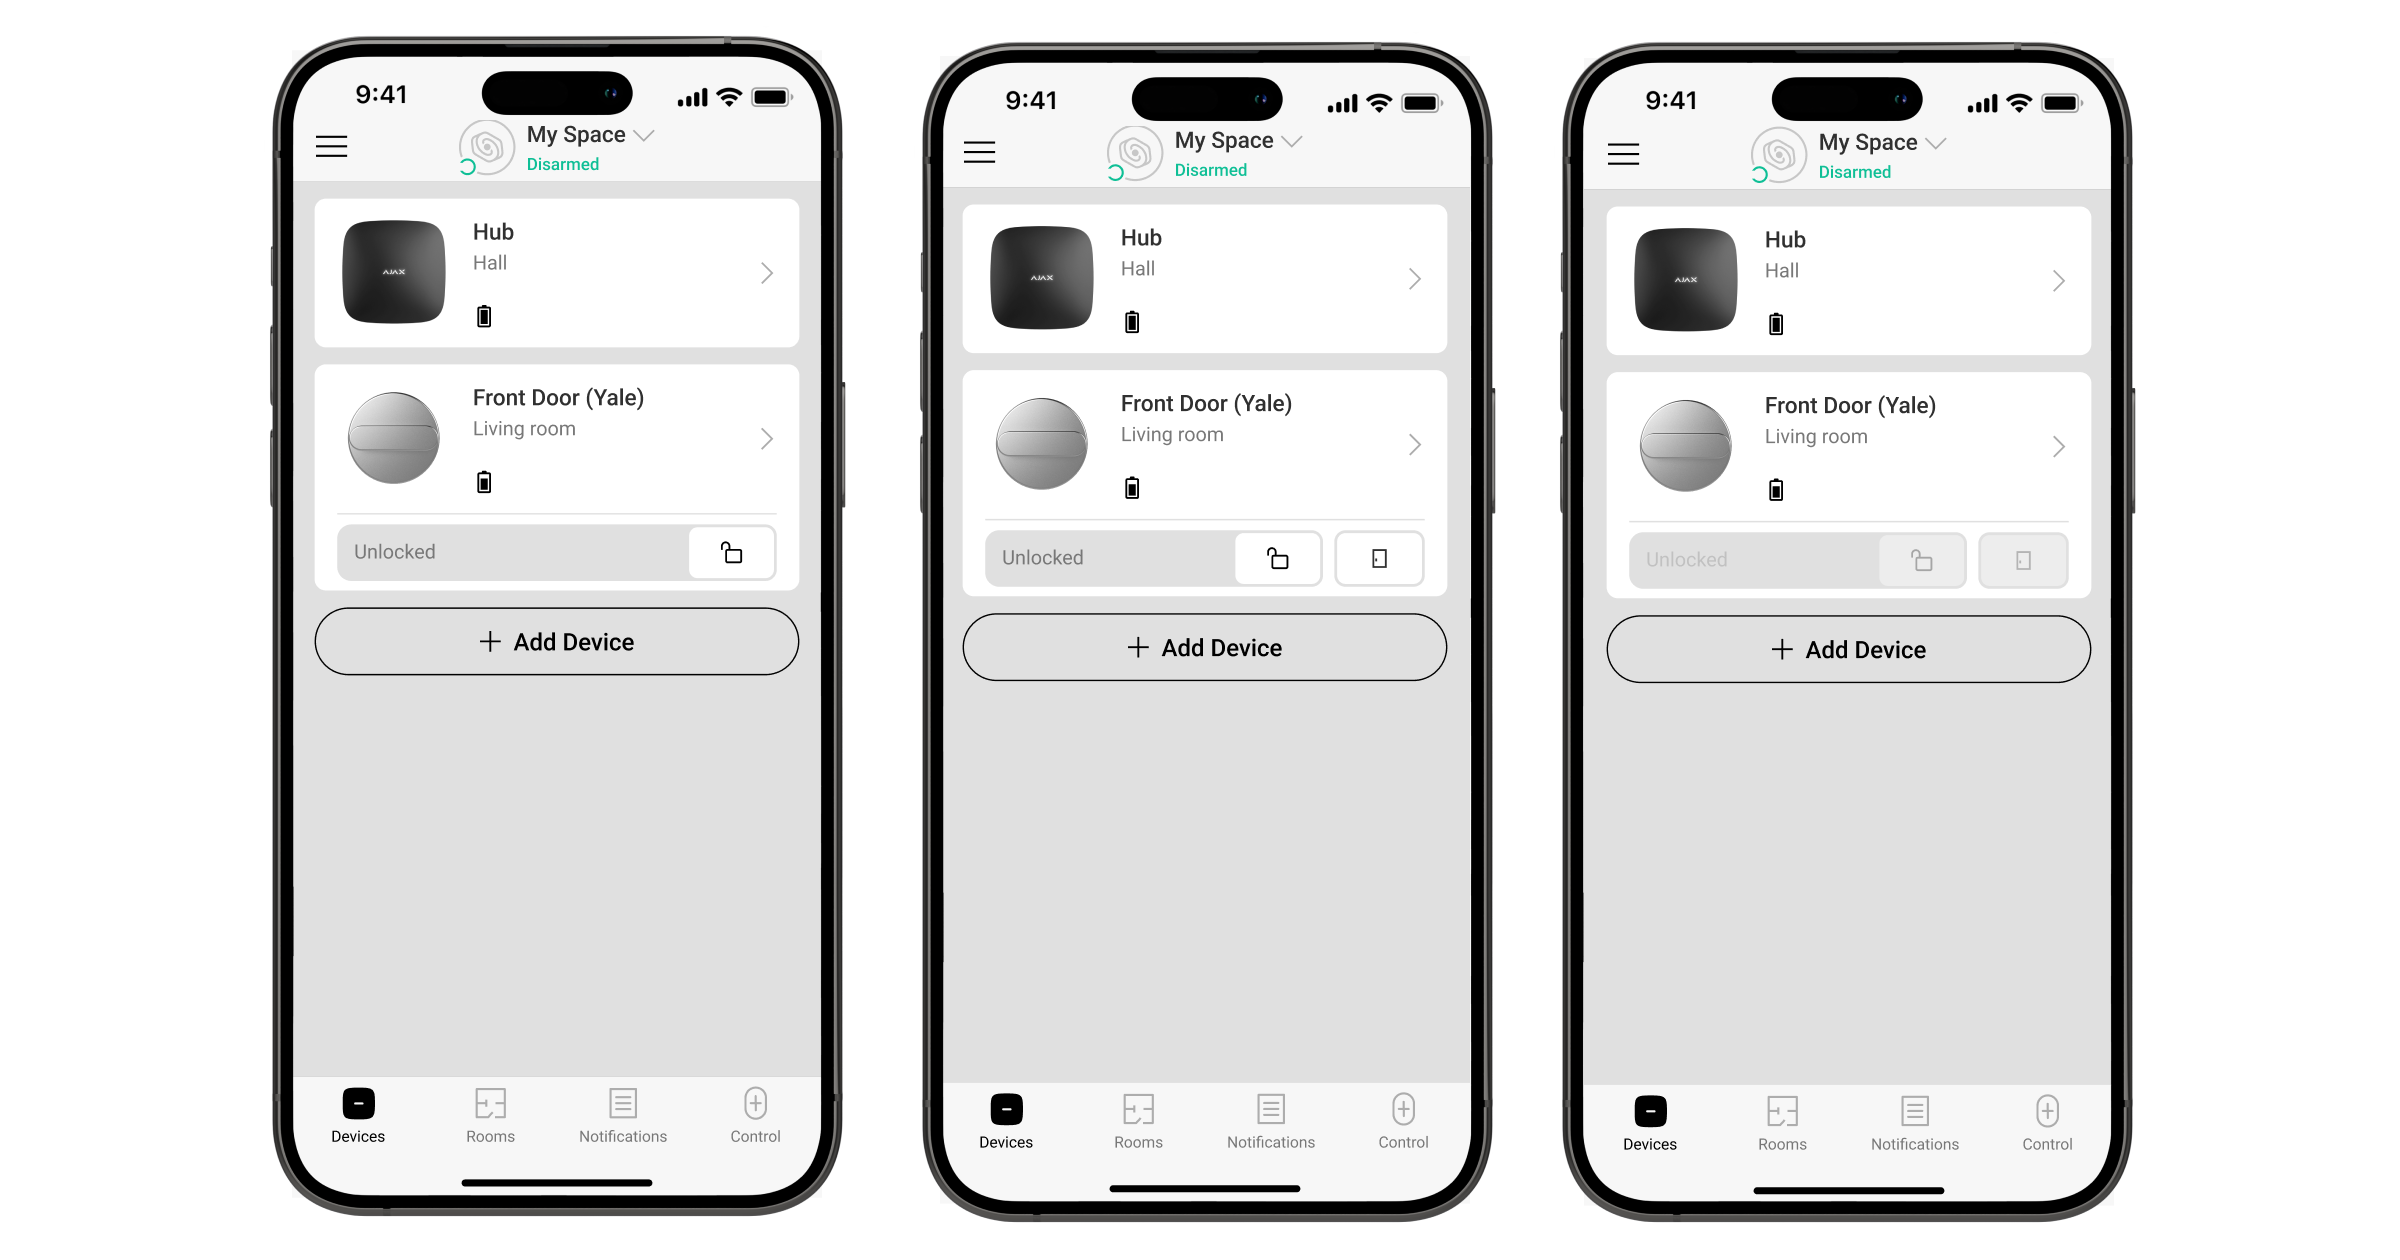
Once added to space, the smart lock will appear in the list of devices in the Ajax app.
A Yale smart lock works only with one space. To add a smart lock to a new space, delete it from the previous one in the Ajax app first.
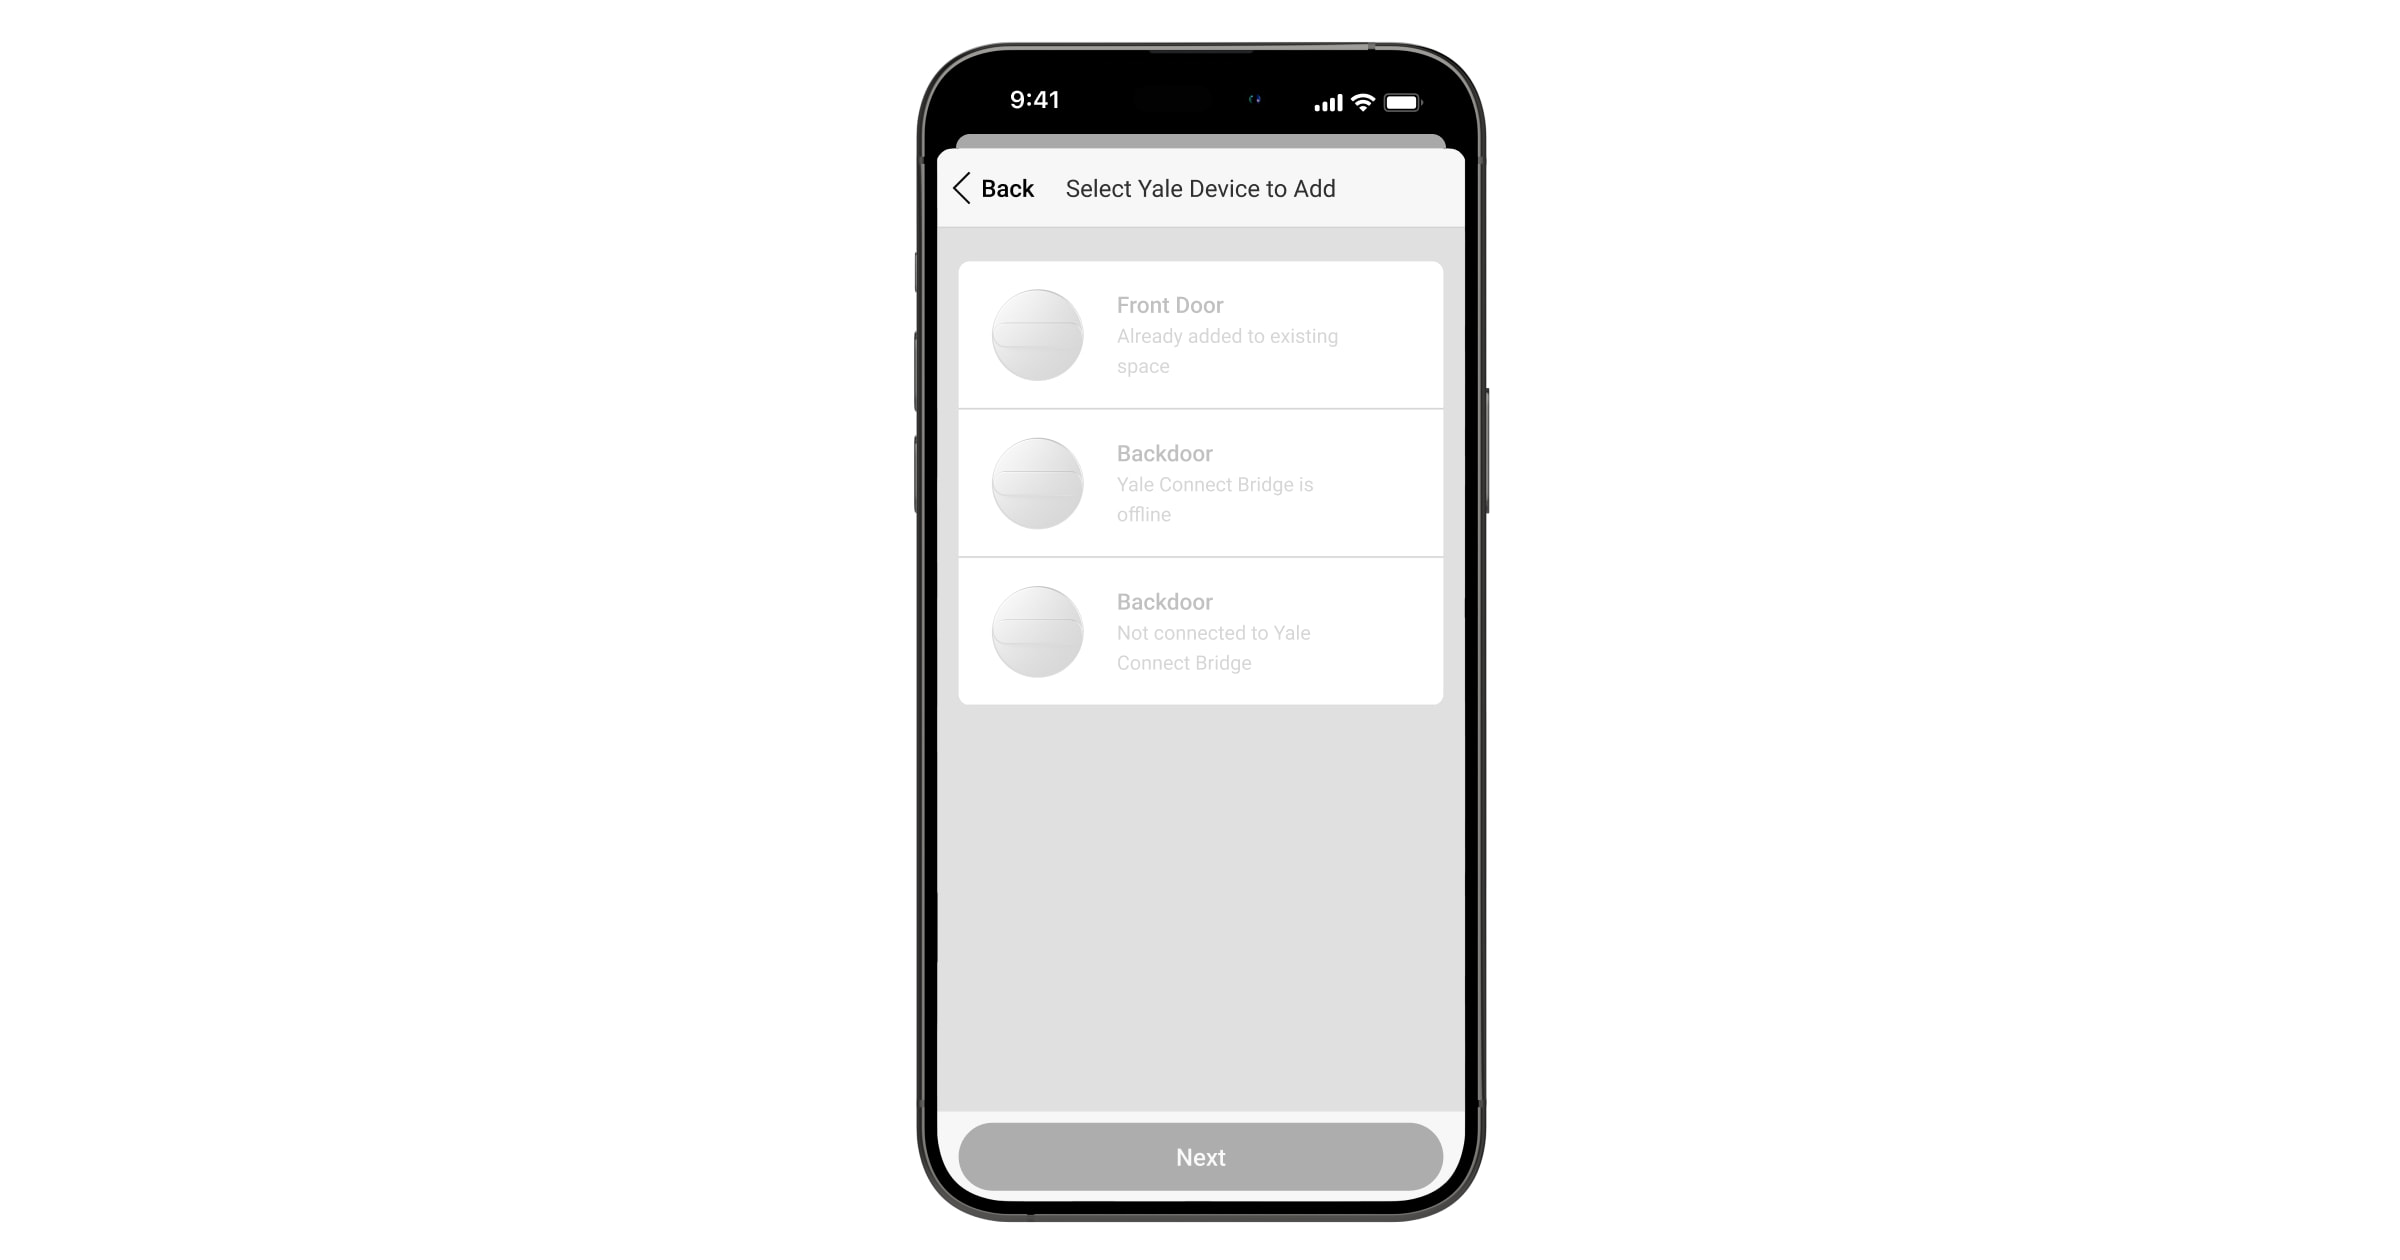
You won’t be able to add a Yale smart lock to your space if it is:
- Already added to an existing space.
- Offline.
- Not added to the Yale Connect Bridge. This applies only to Yale smart lock models that require Yale Connect Bridge for connection.
Icons
The icons in the app display some states of the Yale smart lock. To access them:
| Icon | Value |
|
Battery charge level. |
|
|
Smart lock is locked. |
|
| Smart lock is unlocked. |
States

The states include information about the device and its operating parameters. You can find the states of the Yale smart lock in the Ajax app:
- Sign in to the Ajax app.
- Select space.
- Go to the Devices tab.
- Select the Yale smart lock from the list.
| Parameter | Value |
| Battery Charge | Battery charge level of the device. Two states are available:
|
| Current Lock State | The Yale smart lock state:
|
| Lock Control Available to | The number of the Ajax system users who have access to the smart lock settings. |
| Serial No. | Serial number of the device. |
Settings
To change the Yale smart lock settings, in the Ajax app:
- Go to the Devices tab.
- Select the Yale smart lock from the list.
- Go to Settings by clicking on the icon.
- Set the required parameters.
- Click Back to save the new settings.
| Parameter | Value | |
| Name | Name of the device. Can be changed. | |
| Room | Allows a user to select the virtual room to which the smart lock is assigned. | |
| Scenarios | Opens the menu to create and configure the automation scenarios. | |
| User Guide | Opens the smart lock user manual in the Ajax app. | |
| Unpair Device | Unpairs the device, disconnects it from the hub, and deletes its settings. | |
| Notifications | ||
| When locked/unlocked | If enabled, you will receive notifications about changes of the Yale smart lock state. | |
| When scenario executed | If enabled, you will receive notifications about scenario execution where the smart lock is involved. | |
| When doorbell button pressed | If enabled, you will receive notifications when the doorbell on the Yale smart lock is pressed. | |
Permission settings
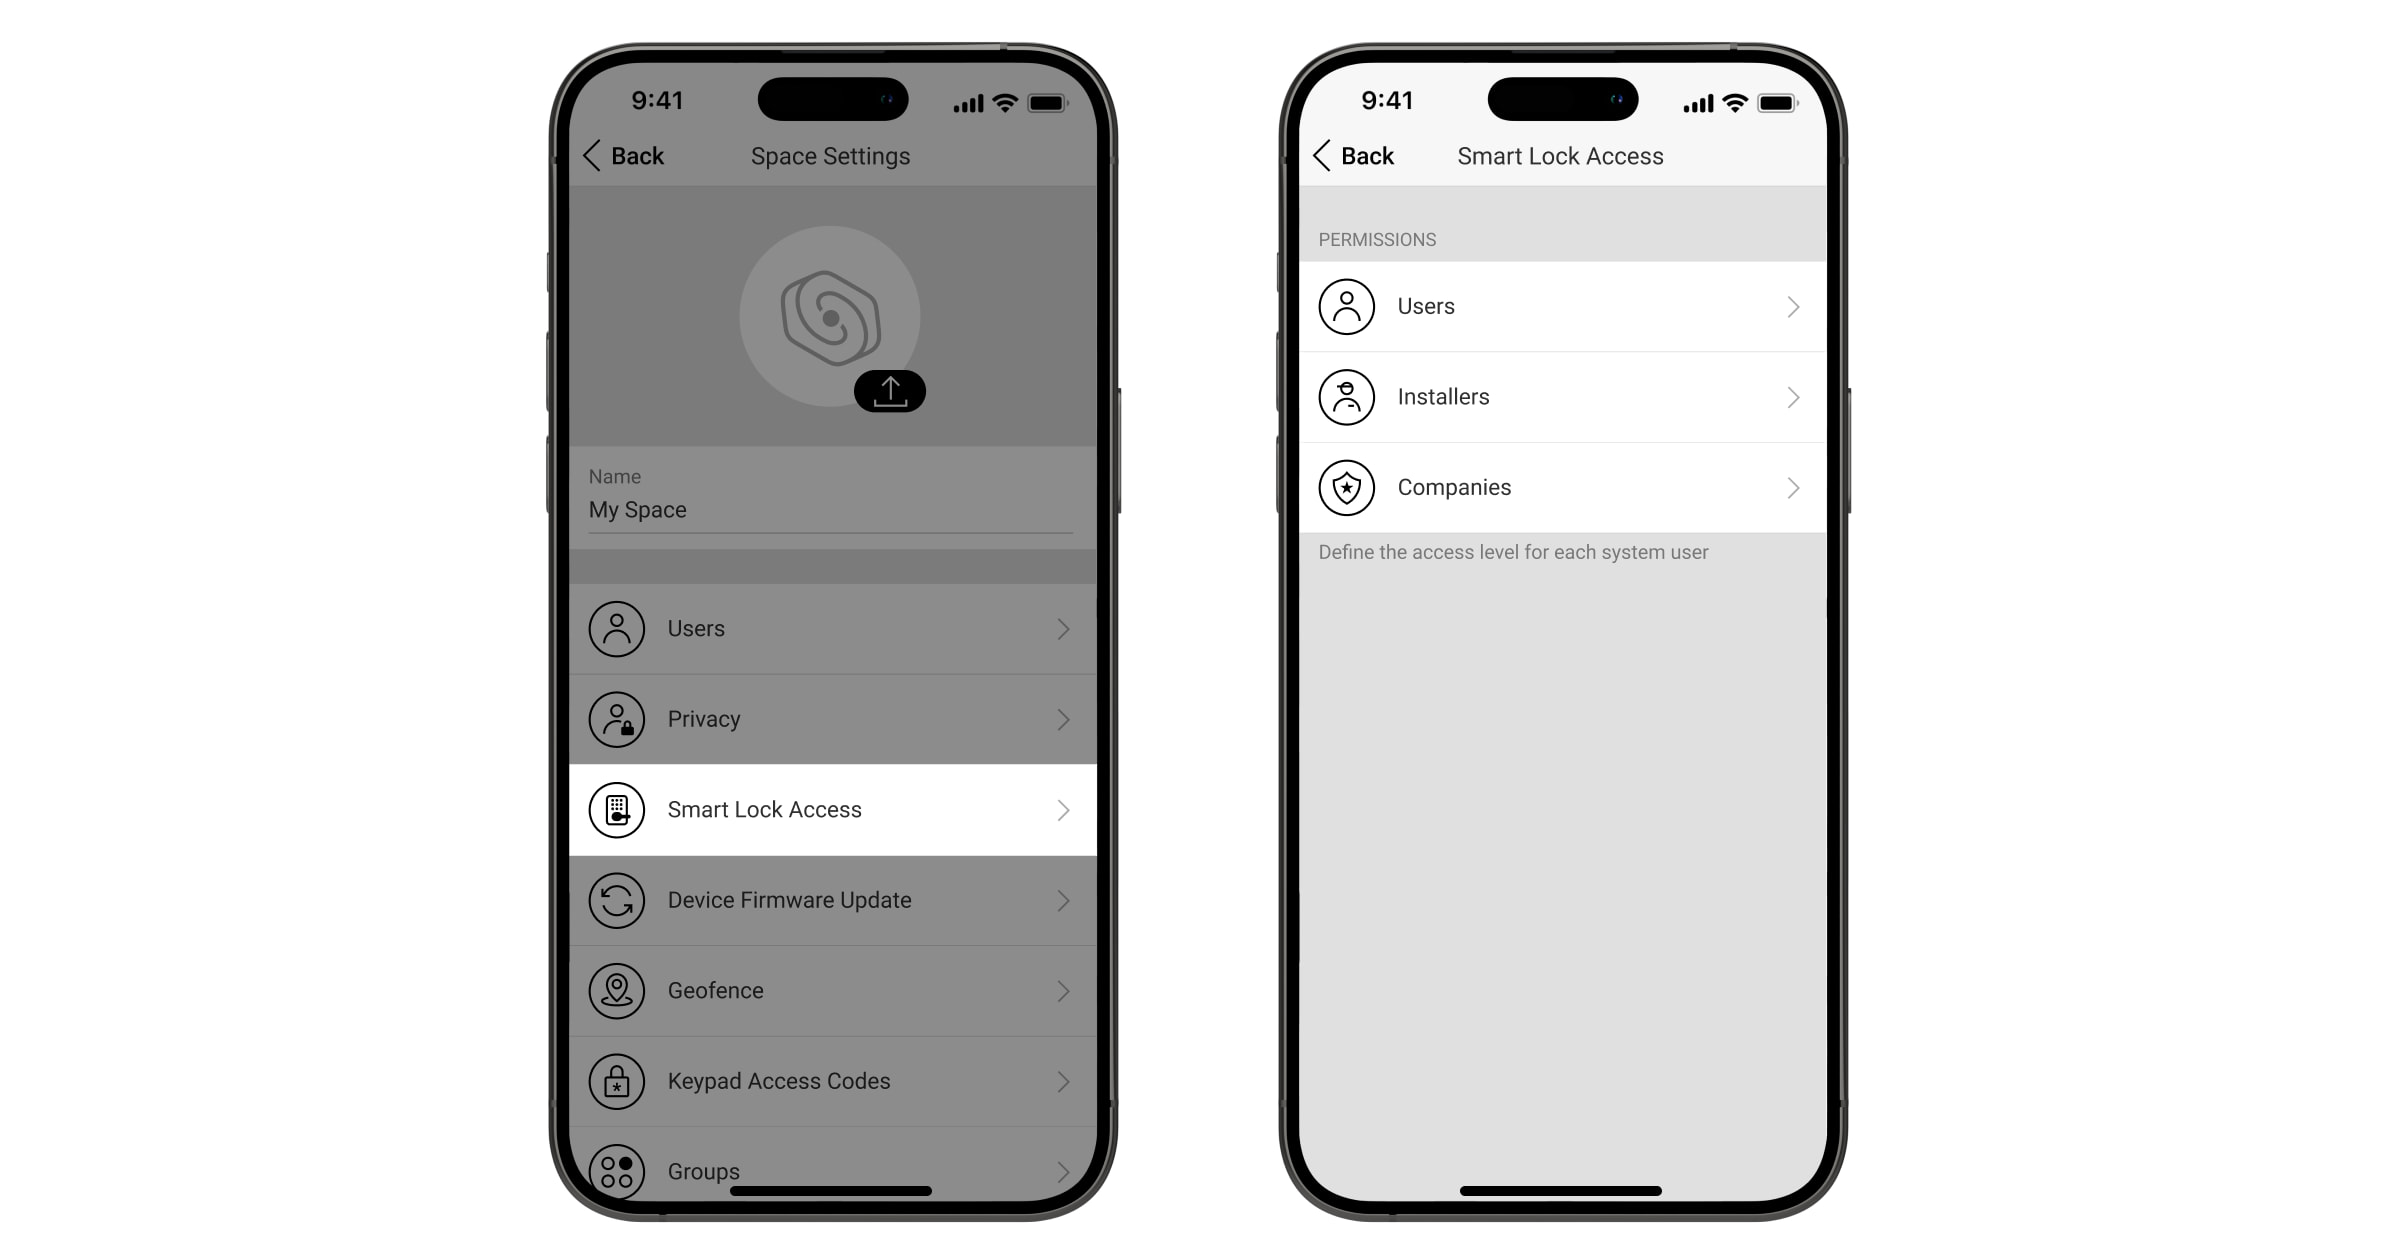
A user with rights to manage privacy settings can enable and configure permissions on who has access to manage the smart lock states and create scenarios with it. The way to configurations in the Ajax app:
Control ![]() tab → Settings
tab → Settings ![]() → Smart Lock Access
→ Smart Lock Access
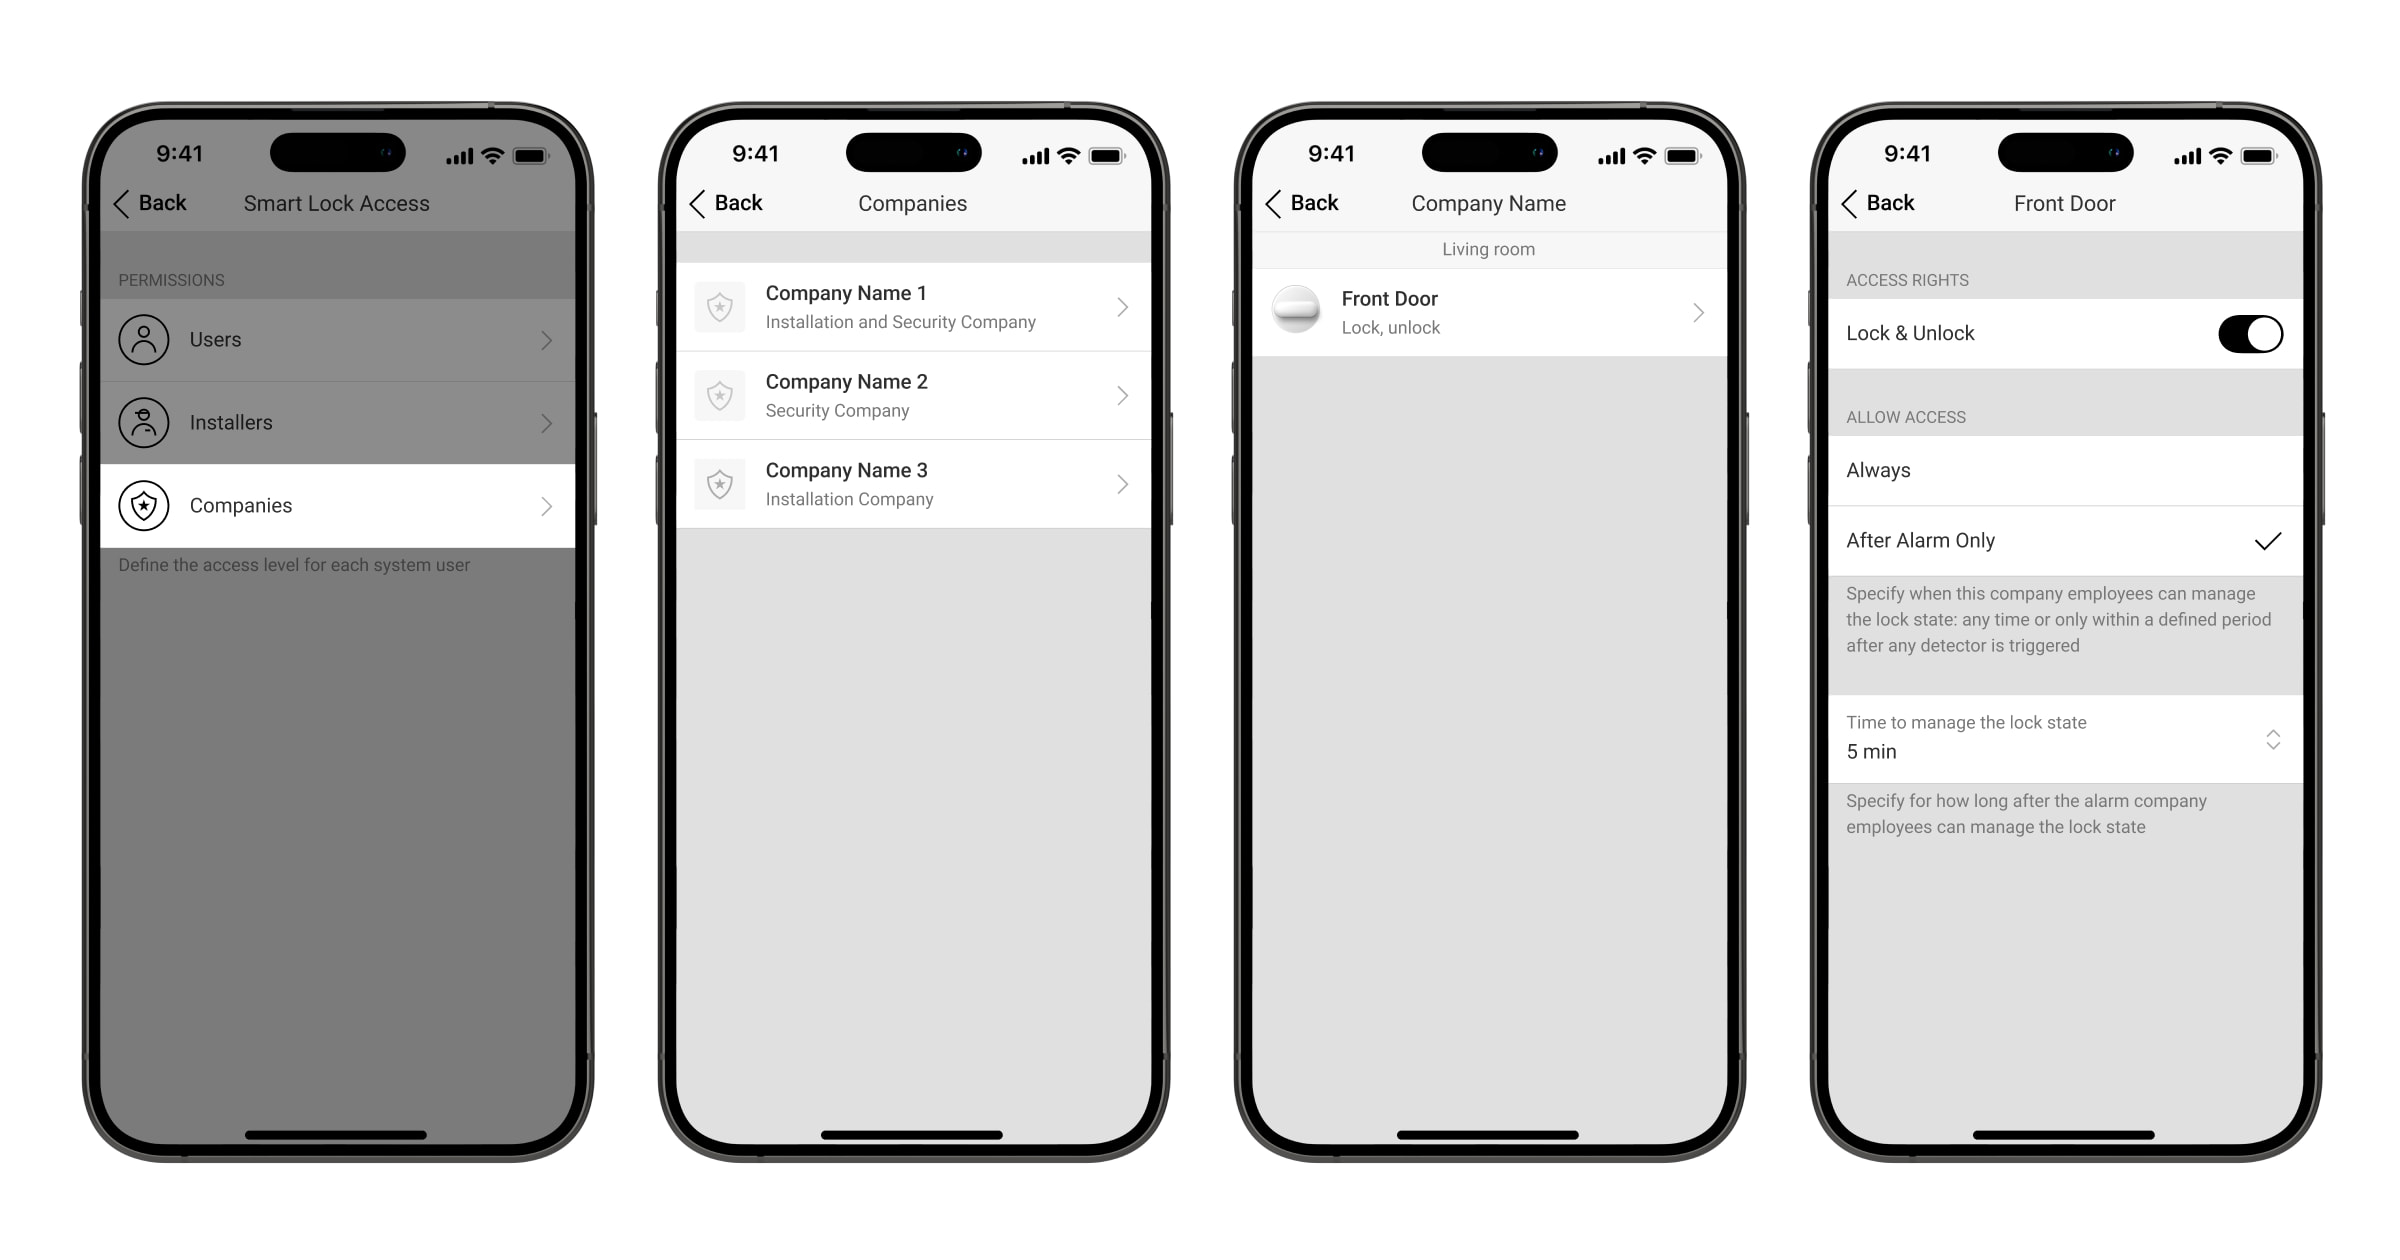
Select Users, Installers, and Companies who can manage a smart lock. A PRO with access to the smart lock can manage its states in the Ajax PRO app.
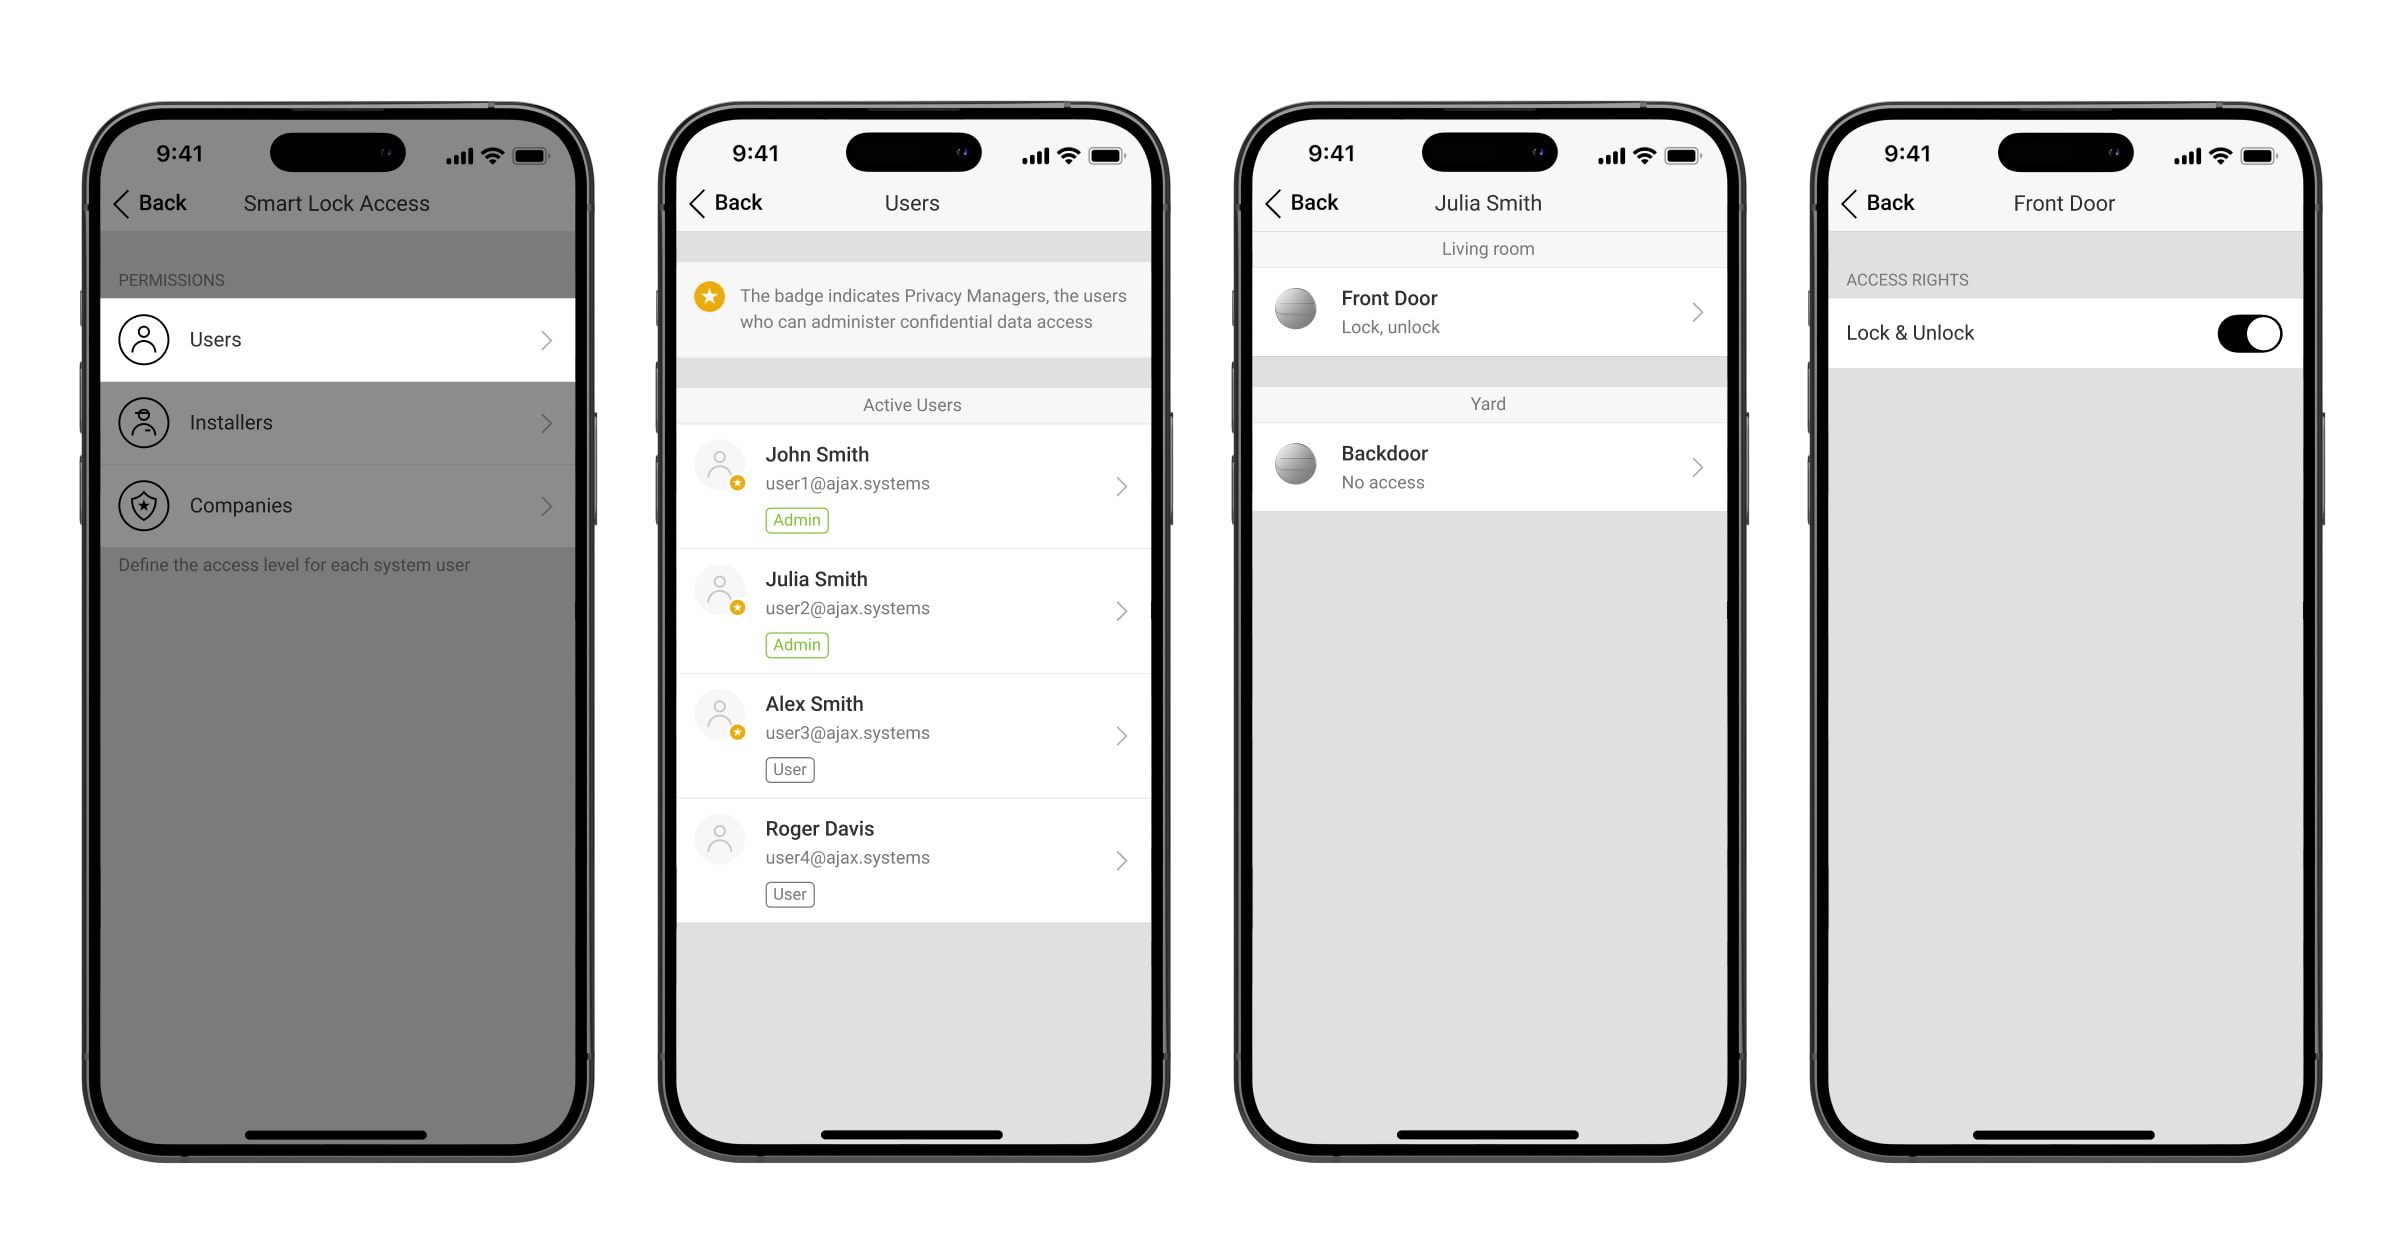
Security companies can be granted permanent access to manage the lock or only after the alarm. If the After Alarm Only option is selected, the company can manage the smart lock state during the specified time in the settings after the alarm in the system.
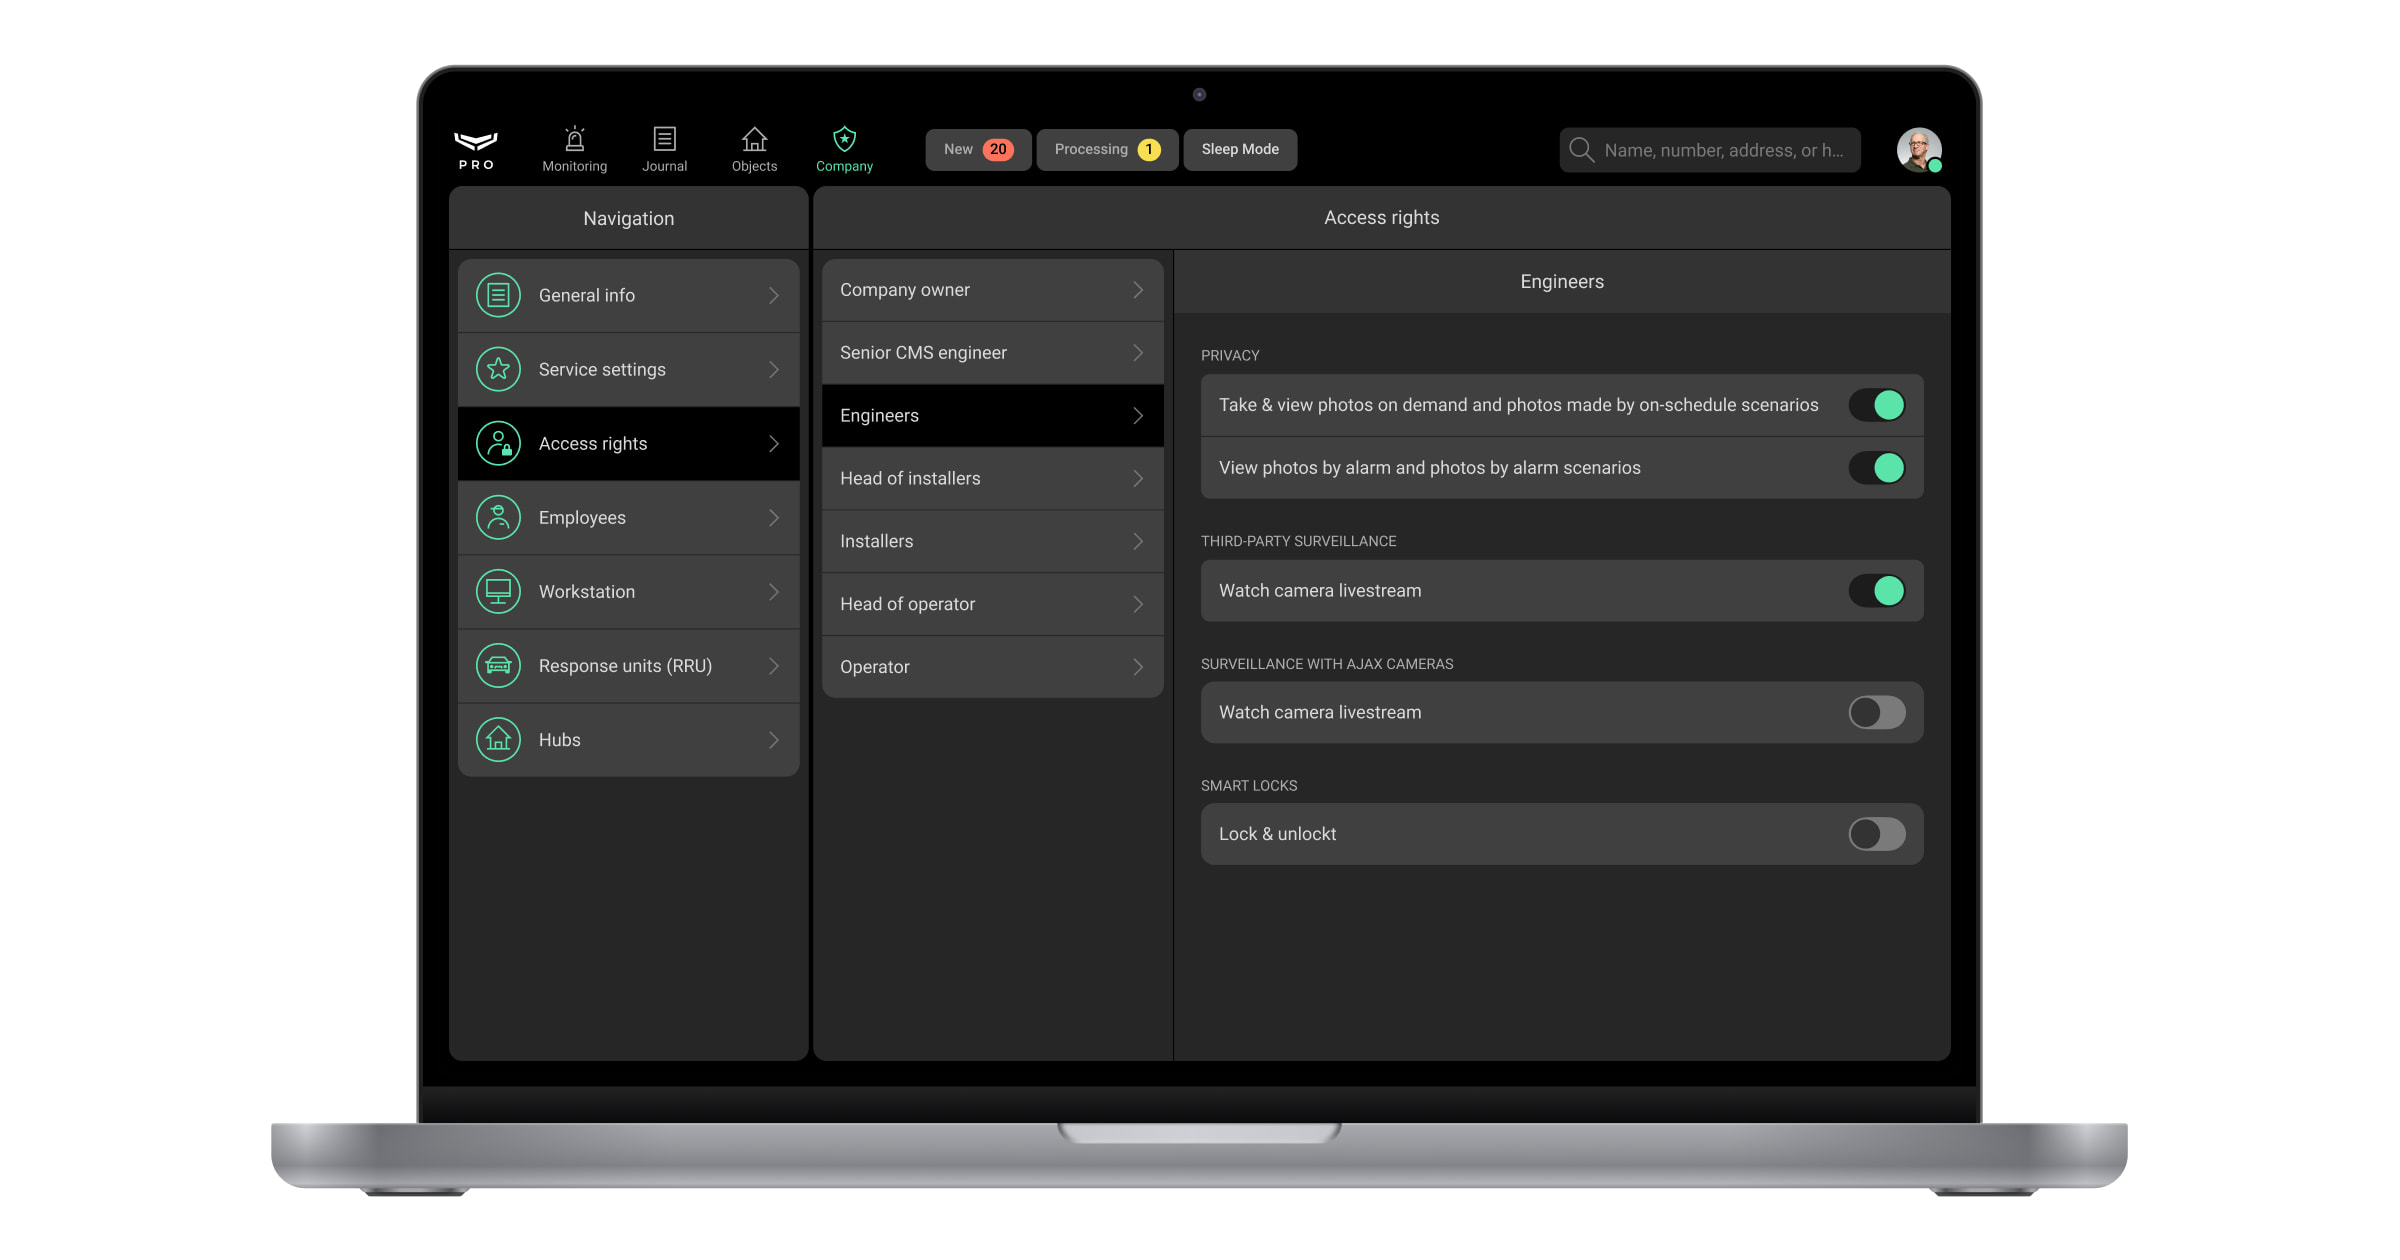
If the security company has access to the smart lock, only the company owner can specify permissions for different employee roles in the PRO Desktop app.
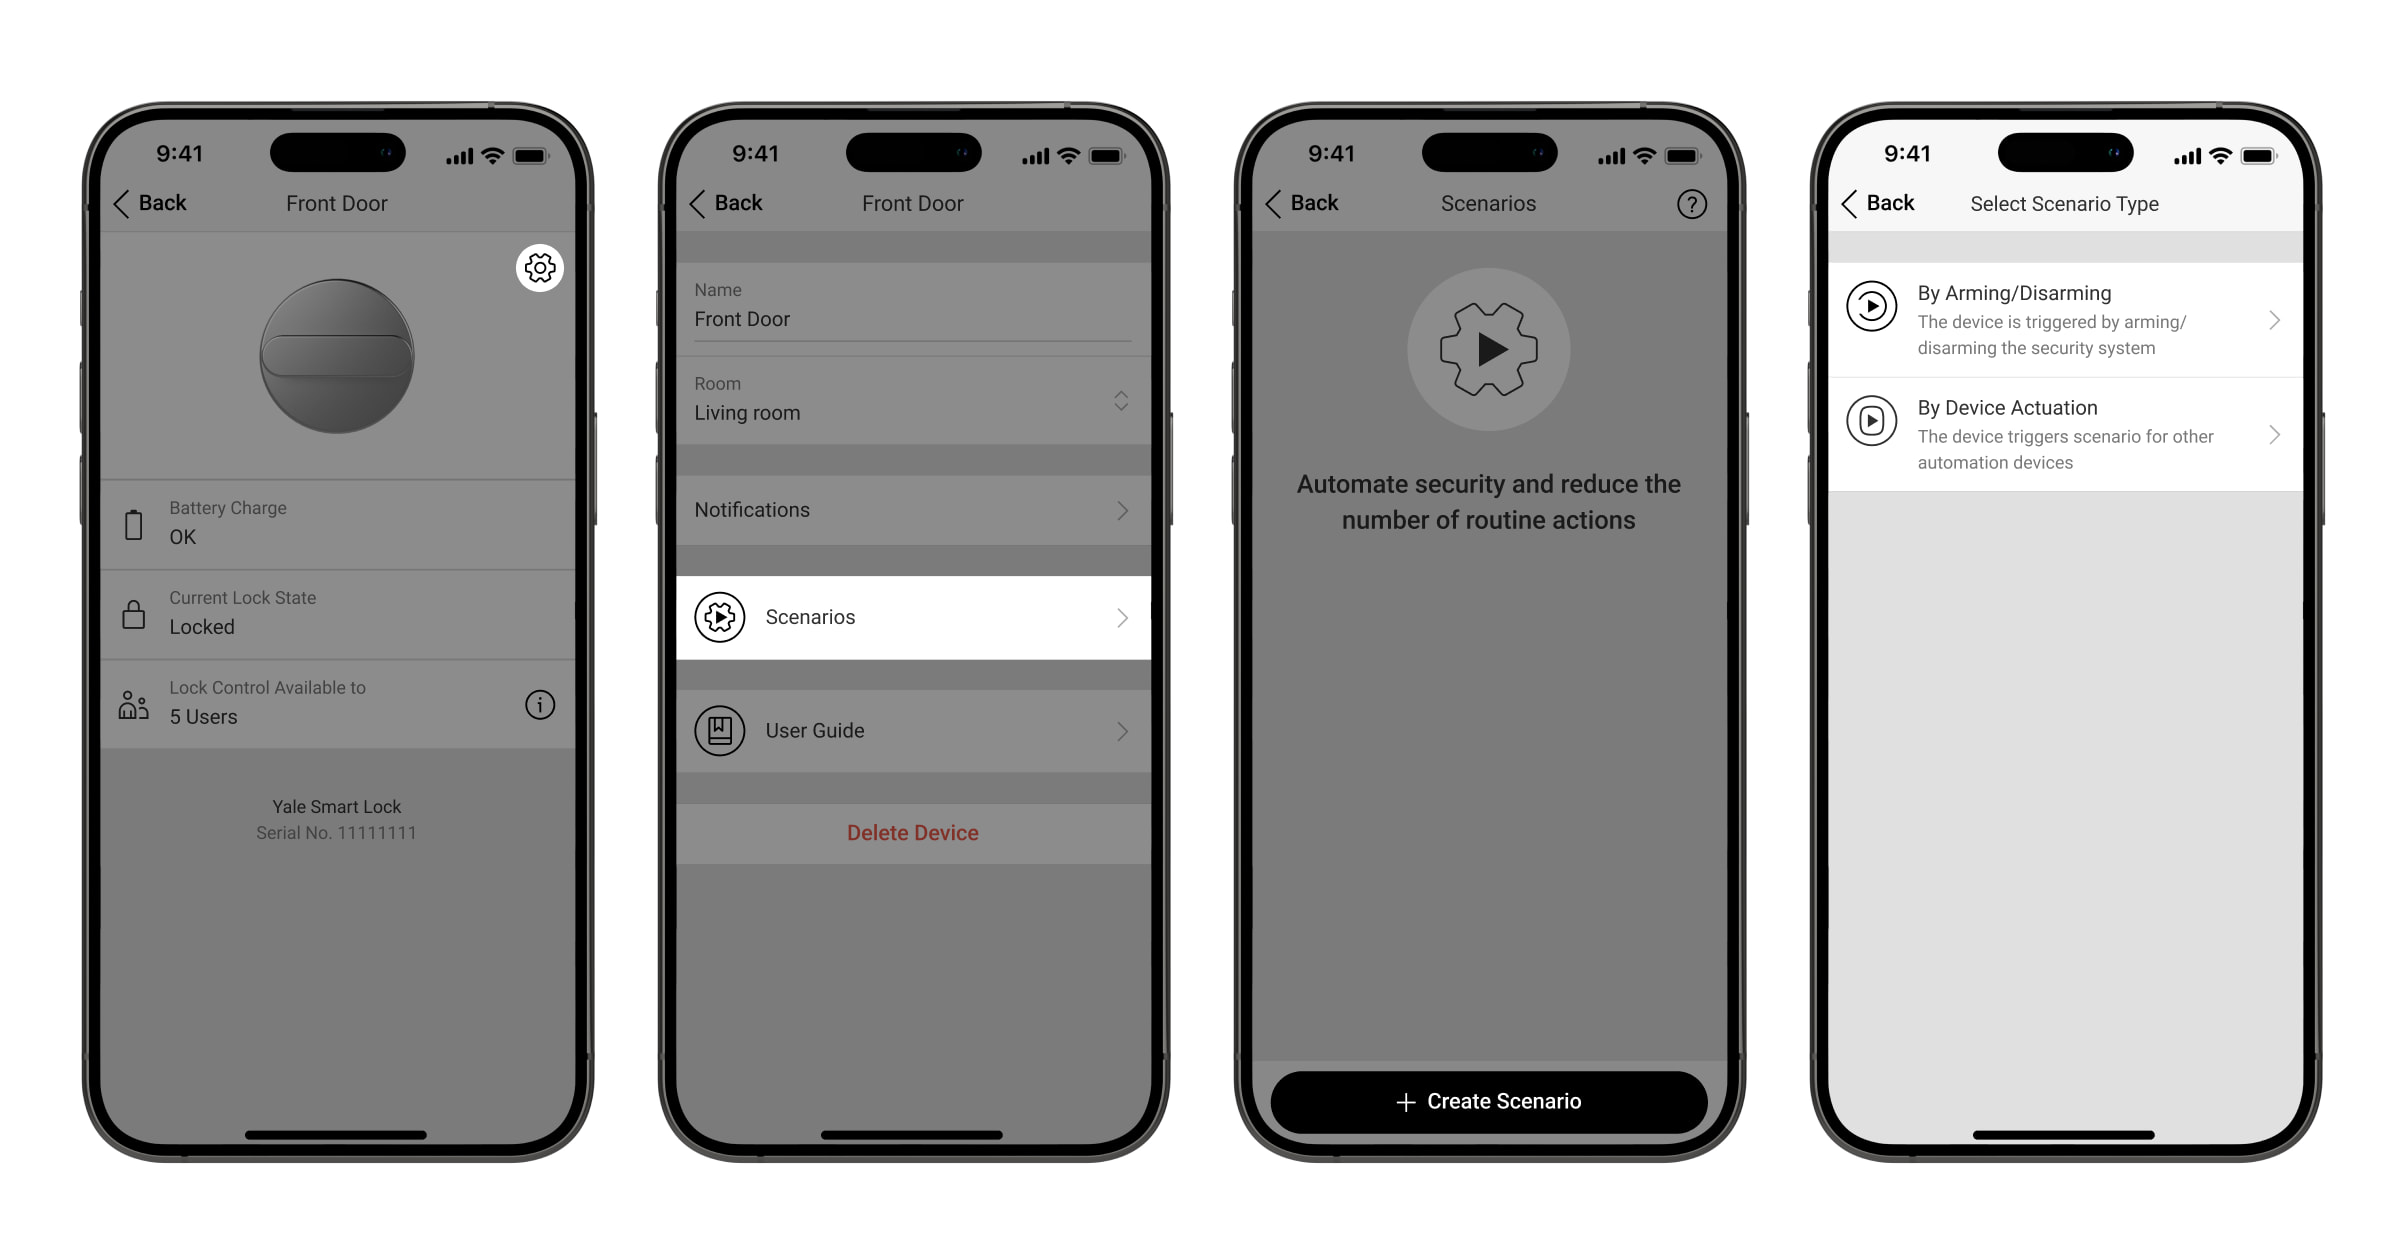
Scenarios settings
Scenarios help to automate security and minimize routine actions. For example, you can disarm space when the lock is open. An admin or a PRO with rights to configure the system can create scenarios for the Yale smart lock in its settings.
The Yale smart lock supports the following scenario types:
- Security mode change reactions. For example, lock the door when arming space.
- By Device Actuation. For example, arm the system if the door is locked.
To create scenarios for the Yale smart lock, open its settings and choose the Scenarios menu.
Removing from the system
- Select space in the Ajax app.
- Go to the Devices tab.
- Select the Yale smart lock from the list.
- Go to Settings by clicking on the icon.
- Click Delete device and confirm your action.
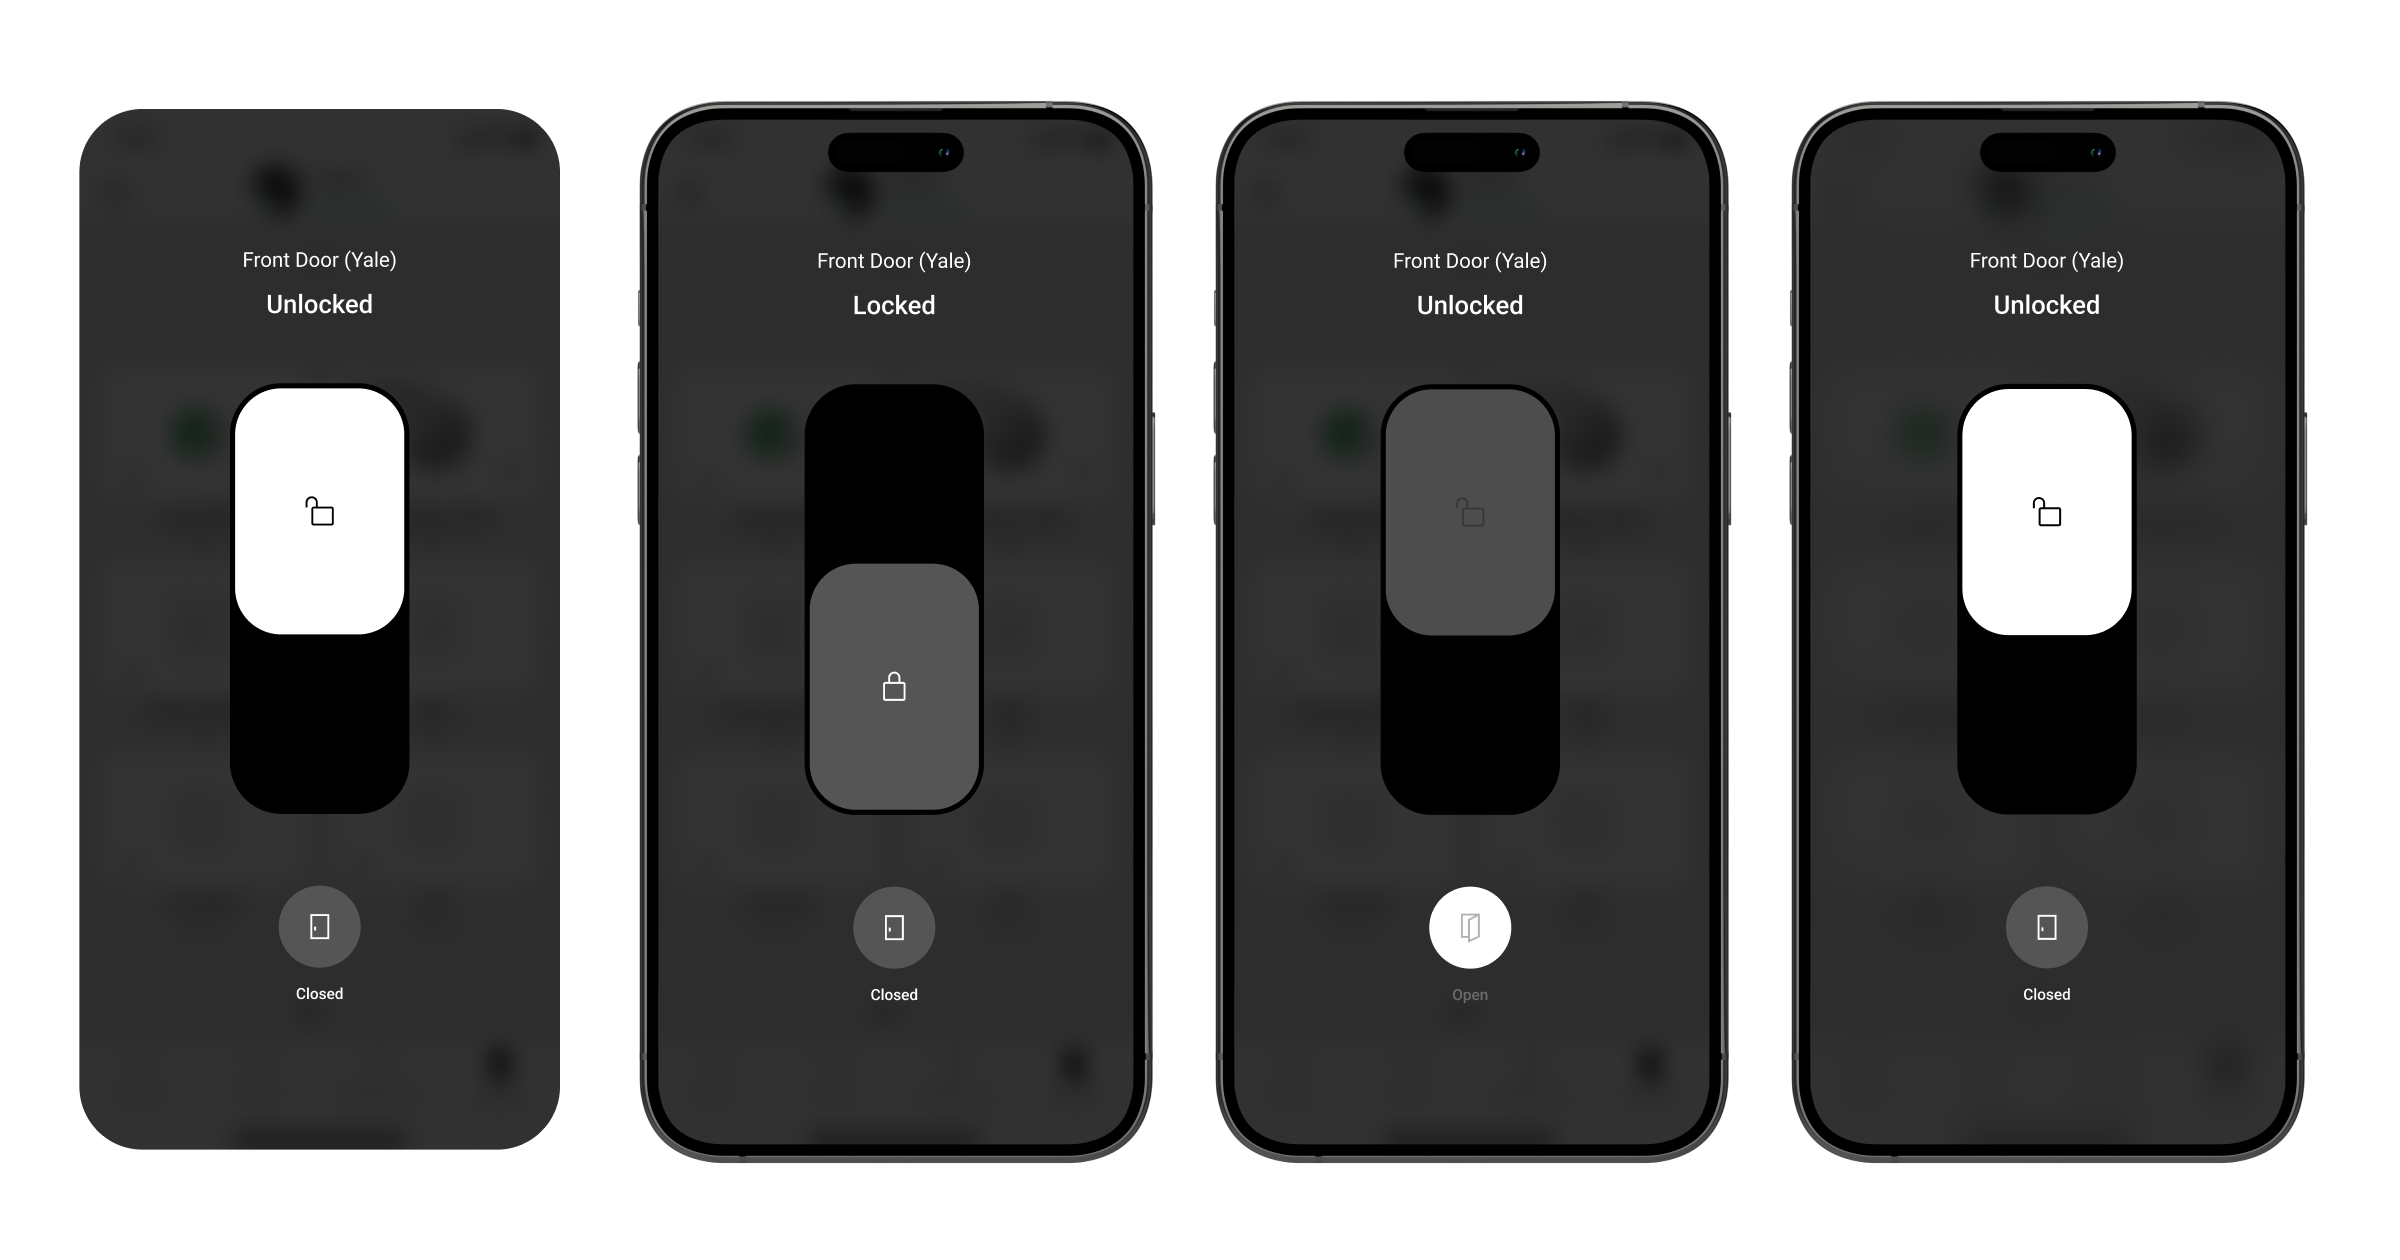
Controlling the smart lock
The Yale smart lock can be controlled in Ajax apps. Notifications in the events feed include:
- Device’s name.
- Virtual room.
- Activation time.
- User who changed the smart lock state.
You can control the lock via the Devices ![]() and Control
and Control ![]() tabs.
tabs.
Controlling the lock via Devices tab
To change the state of a lock installed with a door handle, in the Ajax app:
- Select space in the Ajax app.
- Go to the Devices tab.
- Find the Yale smart lock in the device list.
- Slide to unlock or to lock the device.
To change the lock state without a door handle, in the Ajax app:
- Select space in the Ajax app.
- Go to the Devices tab.
- Find the Yale smart lock in the device list.
- Tap to retract the latch (for the time set in the Yale app settings).
- To pull the latch back, tap .
Control of the latch ![]() in Ajax apps is available for certain Yale lock models upon their corresponding installation and configuration in the Yale app.
in Ajax apps is available for certain Yale lock models upon their corresponding installation and configuration in the Yale app.
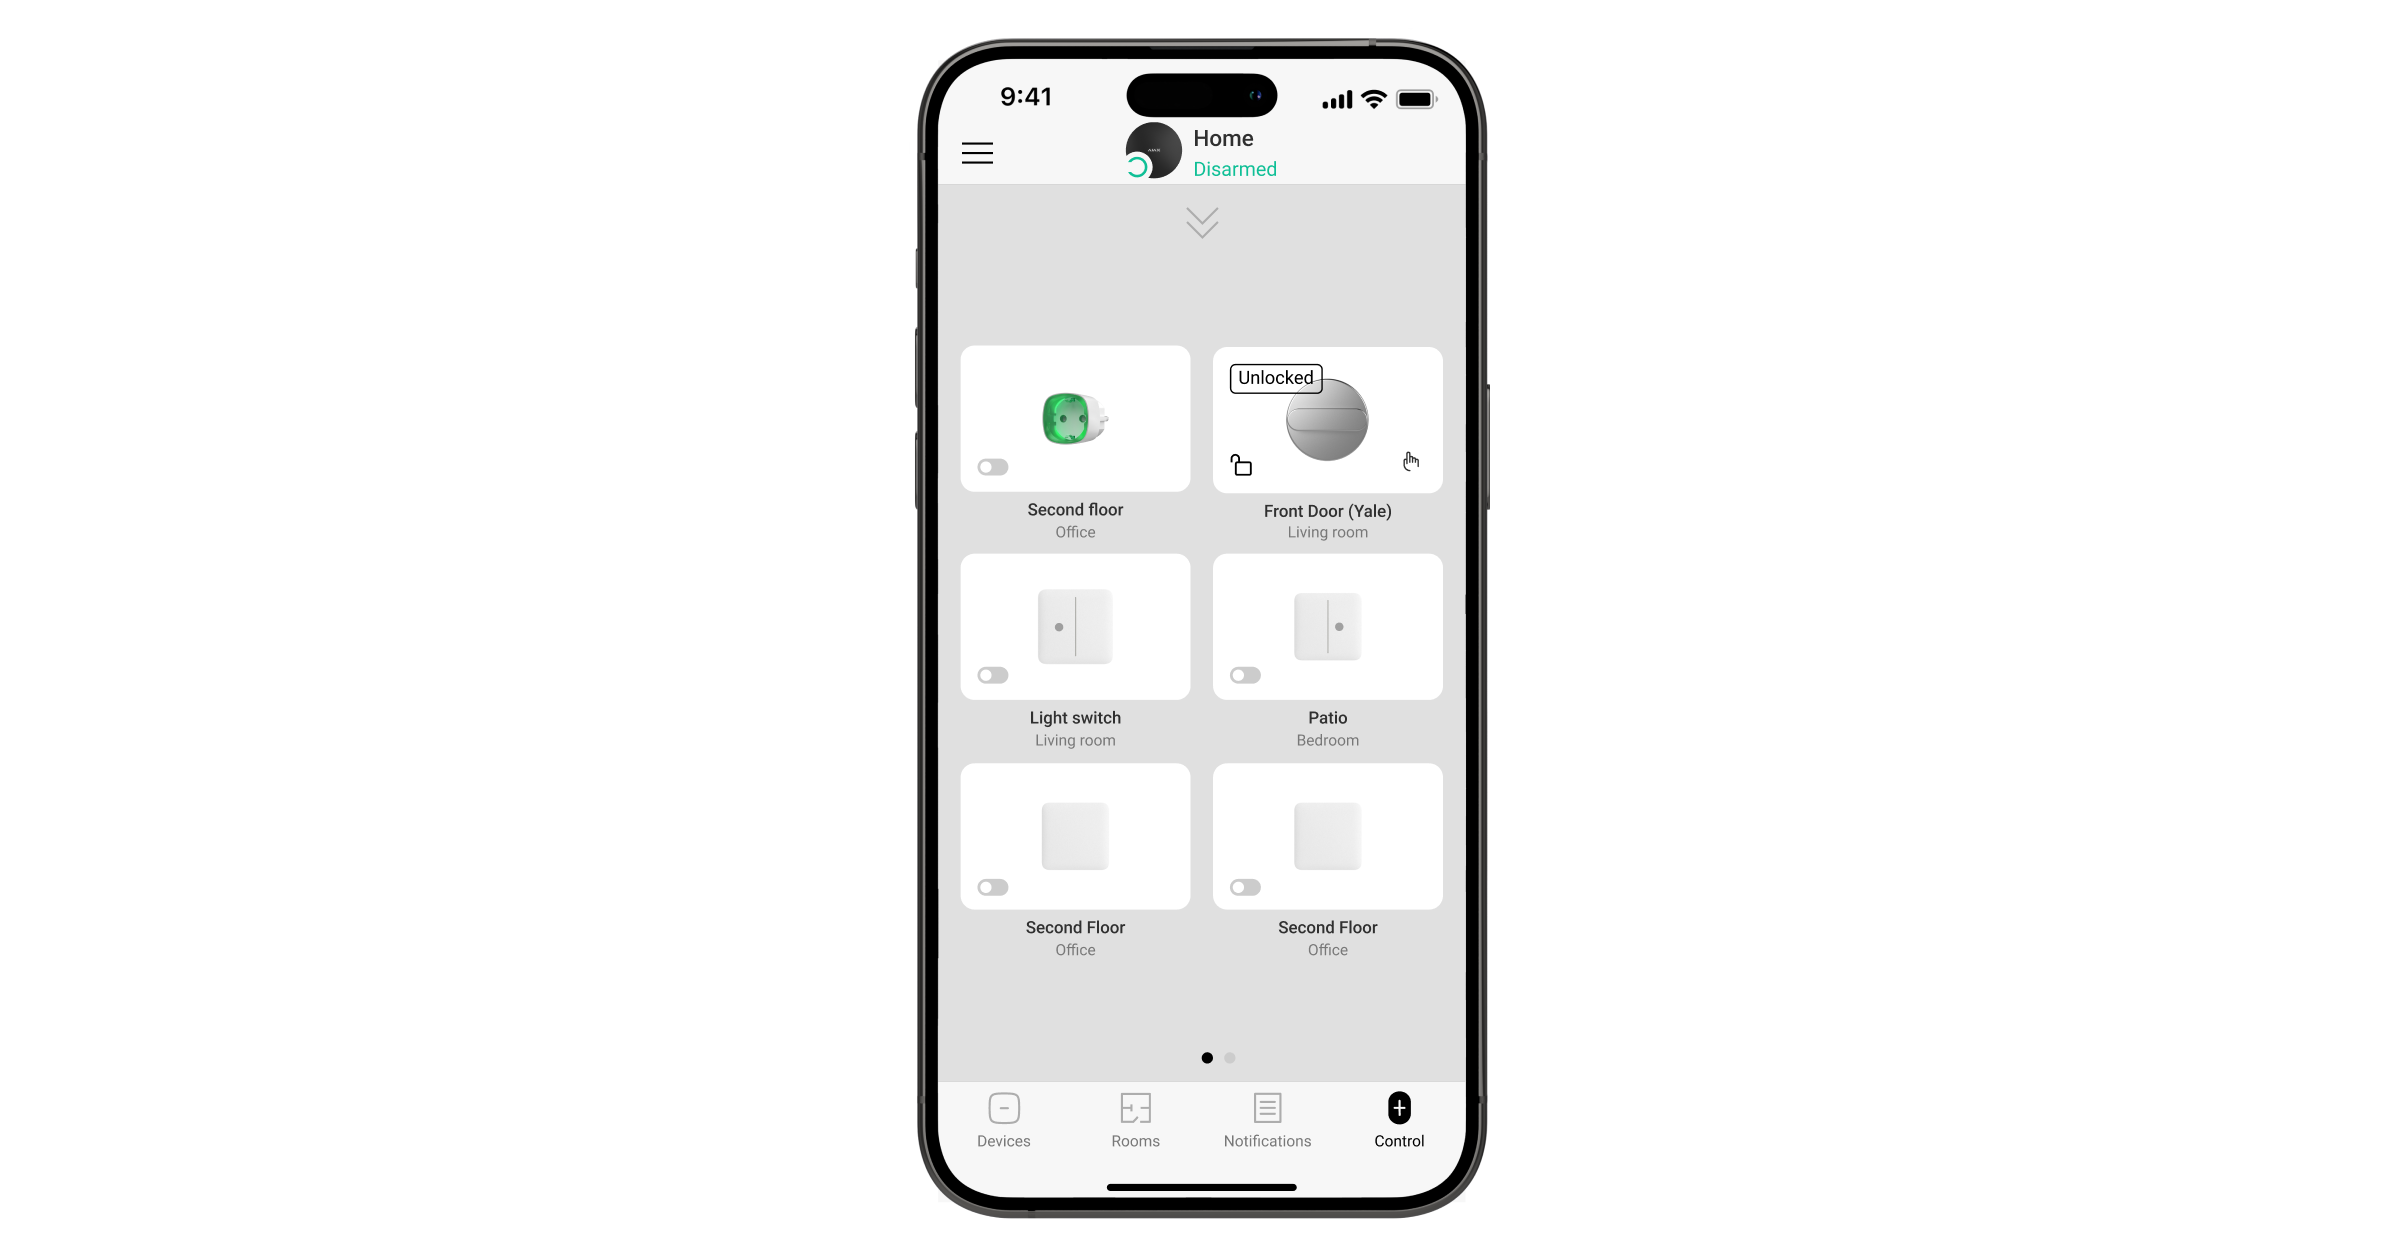
Controlling the lock via Control tab
To change the state of a lock installed with a door handle, in the Ajax app:
- Select space in the Ajax app.
- Go to Control tab.
- Swipe up to open the list of space automation devices.
- Tap on the Yale smart lock tile to lock or unlock the device.
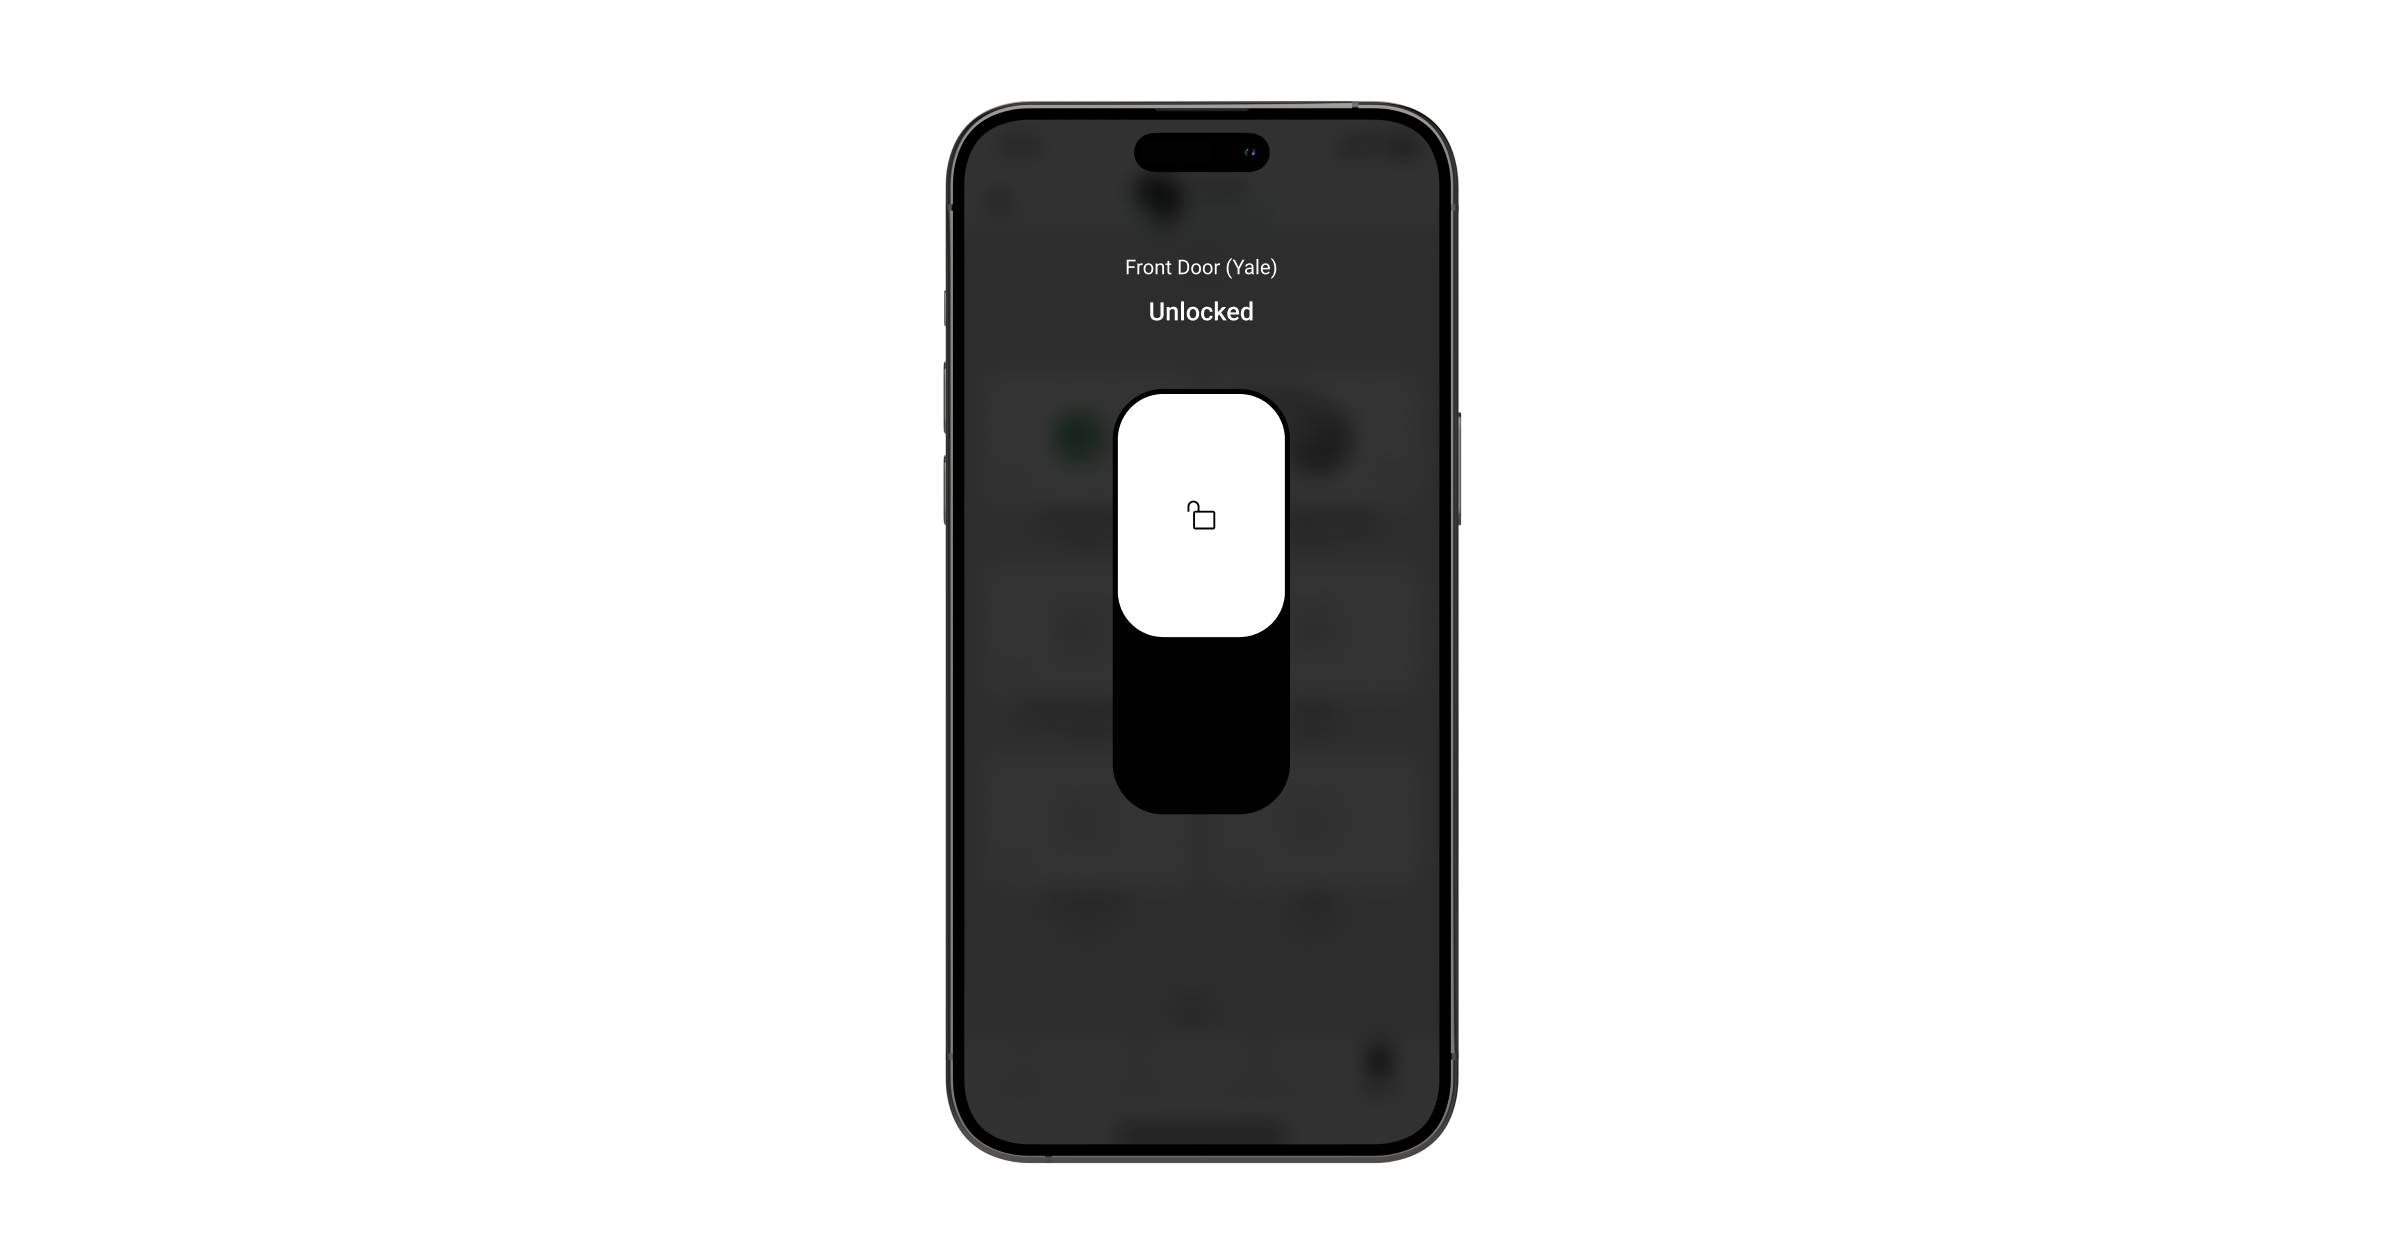
- Tap and hold for more than 0.5 seconds to open the control tab.
- To change the lock state, switch the toggle /.
To change the lock state without a door handle, in the Ajax app:
- Select space in the Ajax app.
- Go to Control tab.
- Swipe up to open the list of space automation devices.
- Find the Yale smart lock tile.
- Tap and hold for more than 0.5 seconds to open the control tab.
- Tap to retract the latch (for the time set in the Yale app settings).
- To pull back the latch, tap .
- To change the lock state, switch the toggle /.