Dzięki kamerom do monitoringu wideo możesz w każdej chwili ocenić sytuację w domu, biurze, magazynie lub sklepie. Ajax pozwala nie tylko podłączyć kamery monitoringu, ale także kontrolować ich działanie i blokować ewentualne zagrożenia prywatności. Zagrożenia obejmują hakowanie, szpiegowanie i niezaszyfrowane dane. Złodzieje, hakerzy, szantażyści mogą uzyskać dostęp do twoich kamer.
Ajax znacznie redukuje to ryzyko. Użytkownik decyduje, kiedy pomieszczenie wymaga monitoringu wideo i bezpieczeństwa, i dezaktywuje kamery we właściwym czasie za pomocą urządzeń automatyzacji. Użytkownik może również zastosować scenariusze automatyczne.
Przeczytaj tę instrukcję, aby skonfigurować monitoring wideo, który nie stanowi zagrożenia dla Twojej prywatności.
Przed rozpoczęciem korzystania z kamer do monitoringu wideo należy zapoznać się z przepisami regulującymi tę kwestię w danym regionie.
Podłączanie kamer do Ajax: jak to działa i na co pozwala aplikacja
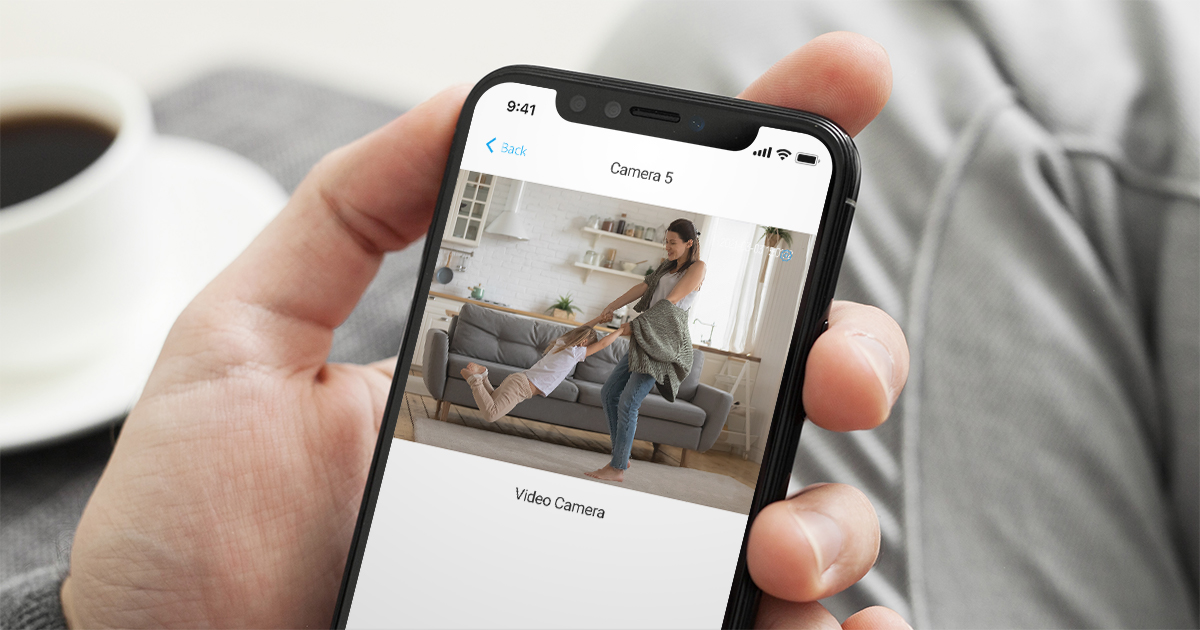
Do jednego systemu alarmowego Ajax można podłączyć do 100 kamer lub rejestratorów DVR (z dowolną liczbą transmisji wideo). Liczba podłączonych kamer zależy od modelu huba.
| Hub 2 (2G) | Hub 2 (4G) | Hub 2 Plus | Hub | Hub Plus | Superior Hub Hybrid (2G) | Superior Hub Hybrid (4G) |
| 25 | 25 | 100 | 10 | 50 | 25 | 25 |
Kalkulator urządzeń wideo służy do definiowania liczby urządzeń wideo każdego typu, które można dodać do przestrzeni.
W aplikacji Ajax można oglądać transmisje transmisji z dźwiękiem w czasie rzeczywistym i zapisywać wybrane urywki na smartfonie.
Kamery i rejestratory DVR pięciu marek można podłączyć do systemu alarmowego Ajax bez dodatkowych ustawień. Wybierz markę kamery i dowiedz się, jak ją podłączyć: EZVIZ, Hikvision, Safire, Dahua, Uniview.
Dzięki obsłudze protokołu RTSP w aplikacji Ajax można podłączyć kamery i rejestratory innych marek. Większość producentów urządzeń do monitoringu wideo korzysta z tego protokołu.
Jak skonfigurować dostęp użytkownika do transmisji z kamer i archiwów
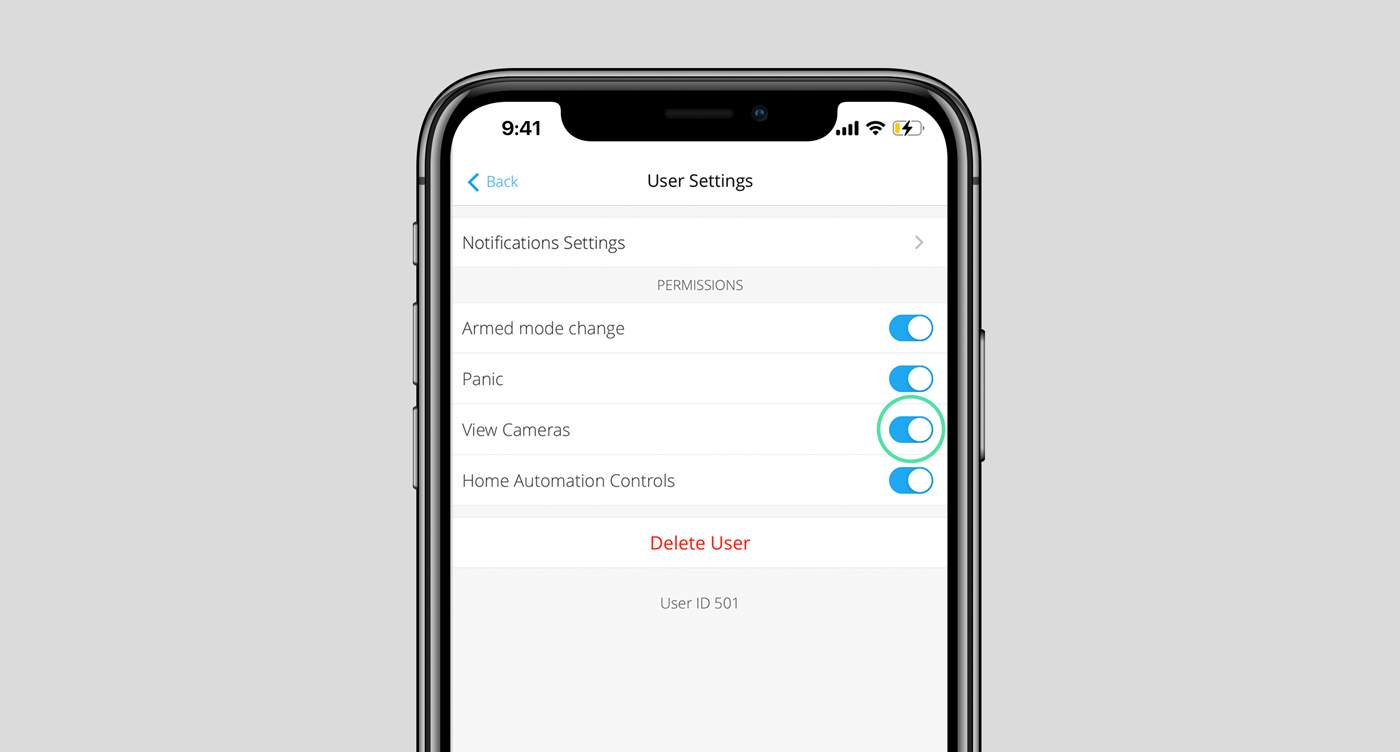
Aplikacja Ajax pozwala skonfigurować, którzy użytkownicy mogą uzyskać dostęp do transmisji wideo. Ustawienia prywatności mogą być zarządzane przez:
- Użytkownik systemu z uprawnieniami administratora (domyślnie).
- Użytkownik systemu bez uprawnień administratora, jeśli takie uprawnienia zostały mu przyznane.
Użytkownicy aplikacji PRO nie mogą zarządzać ustawieniami prywatności, ale mogą określić typ dostępu dla innych użytkowników.
Aby skonfigurować dostęp użytkownika do kamer, w aplikacji Ajax:
- Zaloguj się do aplikacji Ajax Security System lub Ajax Desktop.
- Naciśnij ikonę koła zębatego
, aby przejść do ustawień przestrzeni.
W aplikacji Ajax Security System najpierw przejdź do zakładki Sterowanie
, a następnie otwórz ustawienia przestrzeni.
- Przejdź do ustawień Prywatności.
- Wybierz kategorię użytkowników: Użytkownicy, Instalatorzy i Firmy.
- Wybierz użytkownika systemu.
- Wybierz kategorię urządzenia, jeśli w kroku 4 wybrano Firmy.
- Wybierz kamerę.
- Włącz lub wyłącz przełącznik Oglądaj transmisję na żywo z kamery.
- Skonfiguruj inne prawa dostępu, jeśli przełącznik Oglądaj transmisję na żywo z kamery jest włączony:
- Wyświetl archiwum kamery.
- Pobieranie wideo z archiwum (dostępne po włączeniu przełącznika Wyświetl archiwum kamery).
- Obejrzyj z dźwiękiem.
- Korzystanie z funkcji pan-tilt-zoom (PTZ).
- Ustaw Czas dostępu — przedział czasowy, przez który chcesz przyznać dostęp (1, 2, 4 lub 8 godzin).
- Określ, kiedy użytkownik ma dostęp do możliwości kamery: w dowolnym momencie lub gdy urządzenie jest w trybie uzbrojenia.
Istnieje również możliwość przyznania tymczasowego dostępu do urządzeń monitoringu wideo tylko po alarmie dla pracowników firmy.
- Naciśnij Powrót / kliknij Zapisz, aby zastosować zmiany.
- Powtórz kroki 4–13 dla pozostałych użytkowników i kamer, do których musisz zapewnić dostęp.
Jak włączyć/wyłączyć zasilanie kamer w systemie Ajax
Podłączając zasilanie kamer za pomocą przekaźnika niskoprądowego Relay lub przekaźnika zasilania WallSwitch, możesz wyłączać urządzenia monitoringu wideo, gdy nie są potrzebne, oraz włączać je na żądanie użytkownika. Na przykład monitoring wideo jest aktywny, gdy system jest uzbrojony i dezaktywowany, gdy użytkownik jest w domu i chce zachować prywatność.
Wyłączanie zasilania za pomocą Relay lub WallSwitch nie działa z kamerami zasilanymi z baterii.
Możesz włączać i wyłączać zasilanie kamery:
- Za pośrednictwem aplikacji Ajax — z dowolnego miejsca na świecie;
- Przez Button — w odległości 1300 metrów od huba lub podwajacza zasięgu ReX;
- Według scenariusza — podczas zmiany trybu bezpieczeństwa, gdy alarm jest aktywowany, lub według harmonogramu.
Tylko wykwalifikowany elektryk może zainstalować WallSwitch lub Relay! Niezależnie od rodzaju obwodu elektrycznego, w którym znajduje się urządzenie.
Schemat połączeń zasilania kamer za pośrednictwem przekaźnika Relay
Nie podłączaj Relay do zasilania o napięciu większym niż 36 V ani do obwodów AC. Grozi to ryzykiem pożaru i uszkodzeniem urządzenia.
Relay może kontrolować zasilanie dla kamer monitoringu wideo, które działają na prąd stały 12/24 V. Jeśli kamera korzysta z sieci 110-230 V, wymagany jest przekaźnik zasilania WallSwitch.
Należy pamiętać, że Relay wymaga zewnętrznego zasilania do działania. Podłączenie zgodnie z poniższym schematem wymaga zasilania 12/24 V.
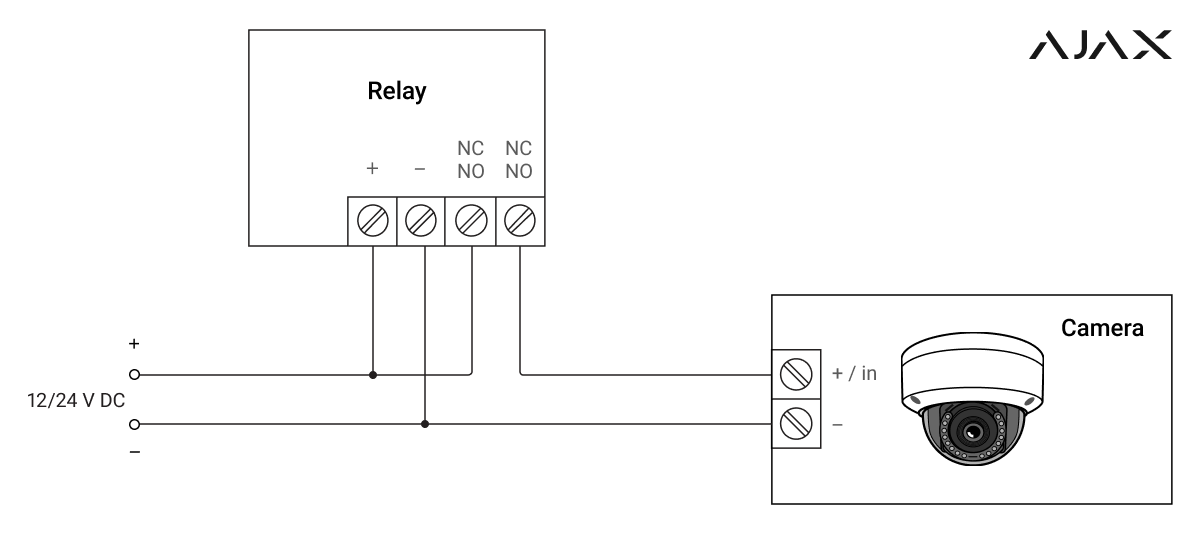
- Podłącz źródło zasilania do zacisków zasilania przekaźnika.
- Podłącz „+” źródła zasilania do jednego z zacisków przekaźnika.
- Podłącz „+” zasilania kamery do drugiego zacisku styków przekaźnika.
- Podłącz kontakt „-” kamery do „-” źródła zasilania.
Ustawienie przekaźnika Relay
W aplikacji Ajax:
- Otwórz menu Urządzenia
odpowiedniego huba.
- Wybierz odpowiedni Relay i przejdź do jego Ustawień
.
- Ustaw parametry:
- Tryb pracy przekaźnika: impulsowy lub bistabilny.
Tryb pracy impulsowy dla przekaźnika może być używany do tymczasowej aktywacji kamery. Na przykład, aby włączyć urządzenie monitoringu wideo na 60 sekund po alarmie. Po wygaśnięciu timera przekaźnik automatycznie wyłączy zasilanie kamery.
- Czas trwania impulsu (jeśli wybrano tryb impulsowy, zakres wynosi od 0,5 do 255 sekund).
- Stan styku: normalnie zamknięty lub normalnie otwarty.
- Tryb pracy przekaźnika: impulsowy lub bistabilny.
Utwórz scenariusz, jeśli chcesz, aby kamera włączała się zgodnie z harmonogramem, po naciśnięciu przycisku, po aktywacji alarmu przez czujniki lub po zmianie trybu bezpieczeństwa,
Należy pamiętać, że transmisja z kamery nie będzie dostępna natychmiast, ale po krótkim czasie od włączenia. Wynika to ze specyfiki algorytmu działania kamery.
Schemat połączeń zasilania kamer przez przełącznik WallSwitch
Nie należy podłączać WallSwitch do obwodów prądu stałego lub zasilaczy o napięciu wykraczającym poza zakres. Grozi to ryzykiem pożaru i uszkodzeniem urządzenia.
WallSwitch może sterować zasilaniem kamer monitoringu wideo, które działają na prąd zmienny 110/230 V. Jeśli kamera zasilana jest napięciem 12-24 V, należy użyć przekaźnika niskoprądowego Relay.
Należy pamiętać, że WallSwitch wymaga sieci 110/230 V. Dlatego może być podłączony do krajowej sieci elektrycznej. Do podłączenia zgodnie z poniższym schematem nie jest wymagane dodatkowe zasilanie zewnętrzne.
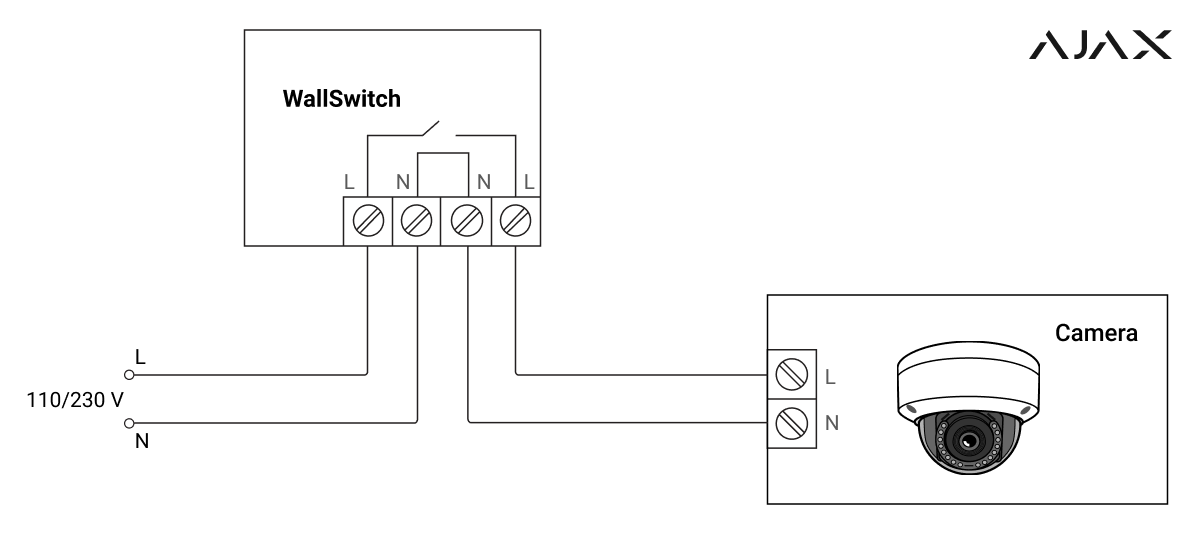
- Podłącz źródło zasilania do zacisków zasilania przekaźnika.
- Podłącz zaciski styków przekaźnika do zacisków zasilania kamery.
Konfiguracja WallSwitch
W aplikacji Ajax:
- Otwórz menu Urządzenia
odpowiedniego huba.
- Wybierz odpowiedni WallSwitch i przejdź do jego Ustawień
.
- Ustaw parametry:
- Tryb pracy przekaźnika: impulsowy lub bistabilny.
Tryb pracy impulsowy dla przekaźnika może być używany do tymczasowej aktywacji kamery. Na przykład, aby włączyć urządzenie monitoringu wideo na 60 sekund po alarmie. Po wygaśnięciu timera przekaźnik automatycznie wyłączy zasilanie kamery.
- Czas trwania impulsu (jeśli wybrano tryb impulsowy, zakres wynosi od 0,5 do 255 sekund).
- Stan styku: normalnie zamknięty lub normalnie otwarty.
- Tryb pracy przekaźnika: impulsowy lub bistabilny.
Utwórz scenariusz, jeśli chcesz, aby kamera włączała się zgodnie z harmonogramem, po naciśnięciu przycisku Button, po aktywacji alarmu przez czujniki lub po zmianie trybu bezpieczeństwa,
Należy pamiętać, że transmisja z kamery nie będzie dostępna natychmiast, ale po krótkim czasie od włączenia. Wynika to ze specyfiki algorytmu pracy kamery.
Jak kontrolować zasilanie kamer monitoringu wideo w aplikacji Ajax
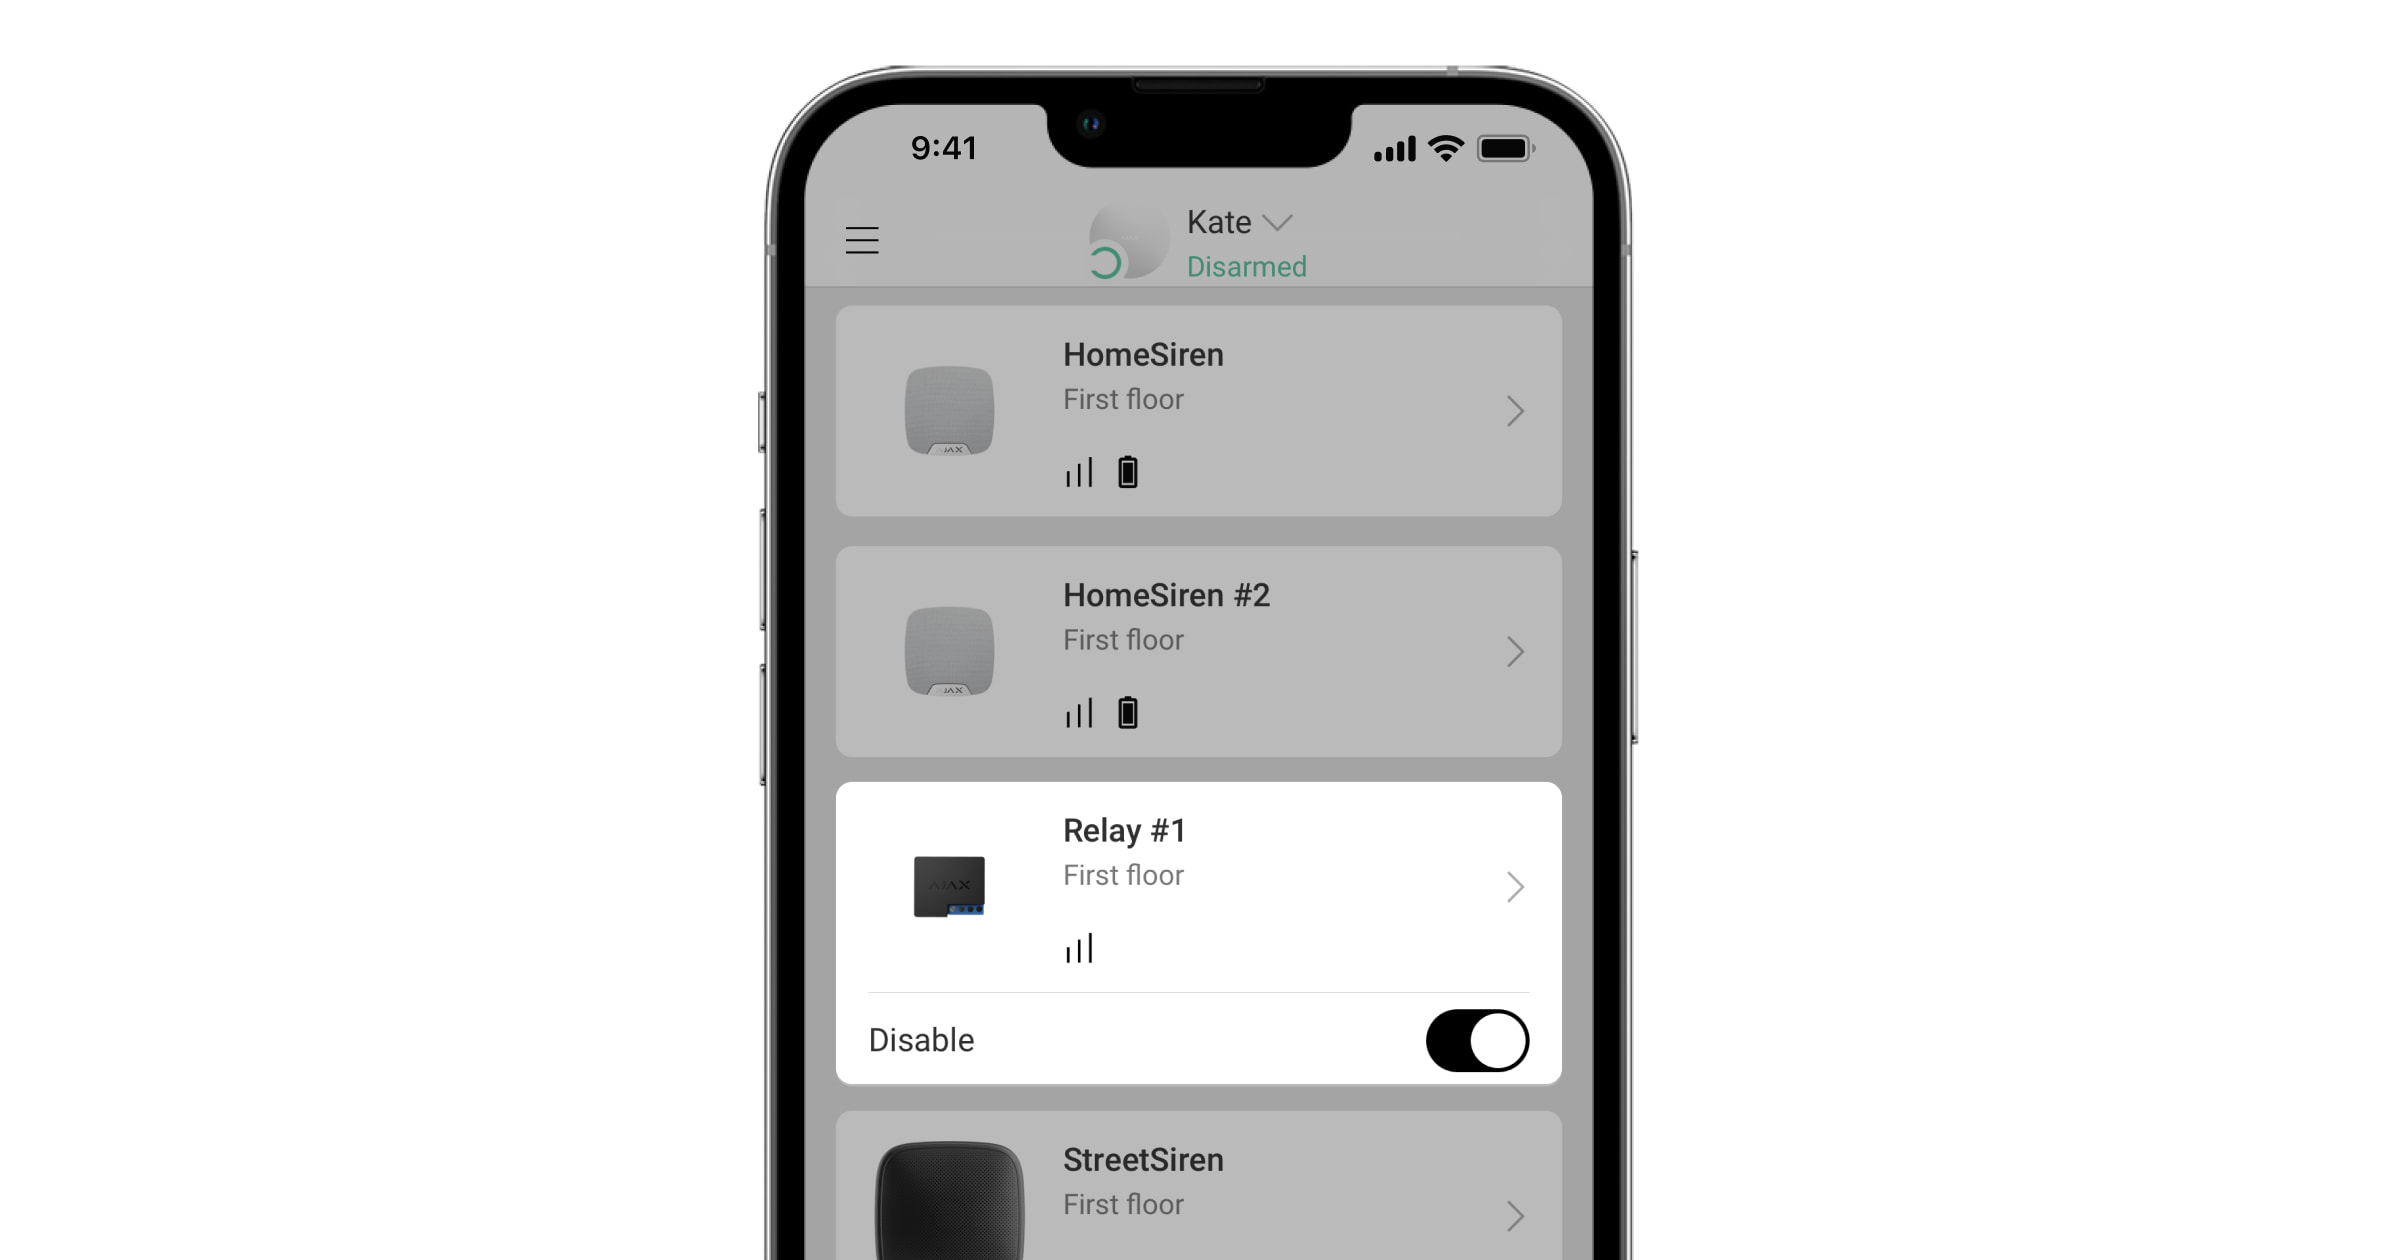
Kliknij przełącznik w polu Relay lub WallSwitch, a stan styków zmieni się na przeciwny. Po aktywacji kamera zostanie włączona. Naciśnij ponownie, aby wyłączyć kamerę.
Jak kontrolować zasilanie kamer monitoringu wideo za pomocą przycisku Button
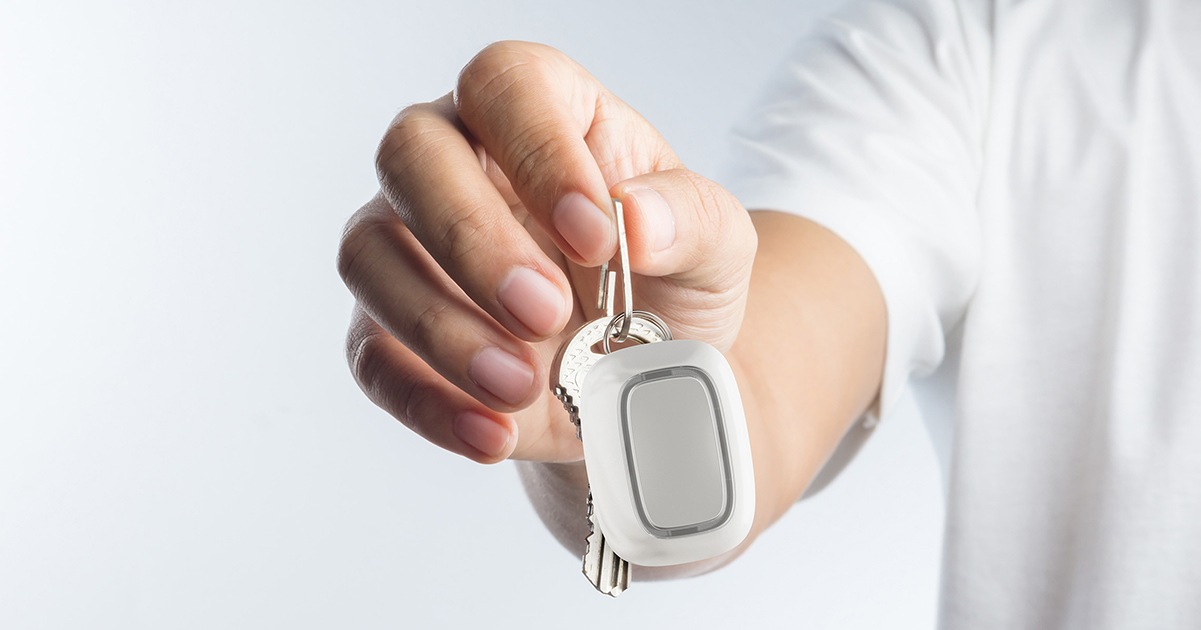
System alarmowy Ajax umożliwia skonfigurowanie różnych działań po naciśnięciu przycisku Button.
Na przykład włączenie kamer monitoringu wideo jednym naciśnięciem i wyłączenie ich podwójnym naciśnięciem. Można również skonfigurować włączanie kamer jednym naciśnięciem i wyłączanie ich przez ponowne naciśnięcie.
Aby sterować zasilaniem kamery za pomocą przycisku, skonfiguruj odpowiednie scenariusze w aplikacji Ajax → Żądany hub → Urządzenia → Button → Ustawienia
→ Scenariusze.
Jak kontrolować zasilanie kamer monitoringu wideo za pomocą scenariusza
Scenariusze Ajax umożliwiają włączanie i wyłączanie kamer nadzoru wideo podczas zmiany trybu zabezpieczeń, gdy Tryb nocny jest włączony/wyłączony, gdy aktywowany jest alarm lub zgodnie z harmonogramem.
Aby utworzyć scenariusze do sterowania zasilaniem kamer, przejdź do aplikacji Ajax → Urządzenia → Relay lub WallSwitch → Ustawienia
→ Scenariusze.
