With video surveillance cameras, you can at any time assess the situation at home and in your office, warehouse, or store. Ajax allows you not only to connect video surveillance cameras but also to control their operation and block possible privacy threats. Threats include hacking, spying, and unencrypted data. Thieves, hackers, blackmailers can gain access to your cameras.
Ajax significantly reduces risks. The user decides when the room needs video surveillance and security, and deactivates the cameras at the right time using automation devices. Also the user may apply automated scenarios.
Read this manual to set up the video surveillance that poses no threats to your privacy.
Before you start using video surveillance cameras, study the regulations that govern this issue in your region.
Connecting cameras to Ajax: how it works and what the app allows
Up to 100 cameras or DVRs (with any number of video streams) can be connected to one Ajax security system. The number of connected cameras depends on the hub model.
Use the video device calculator to define the number of video devices of each type that can be added to a space.
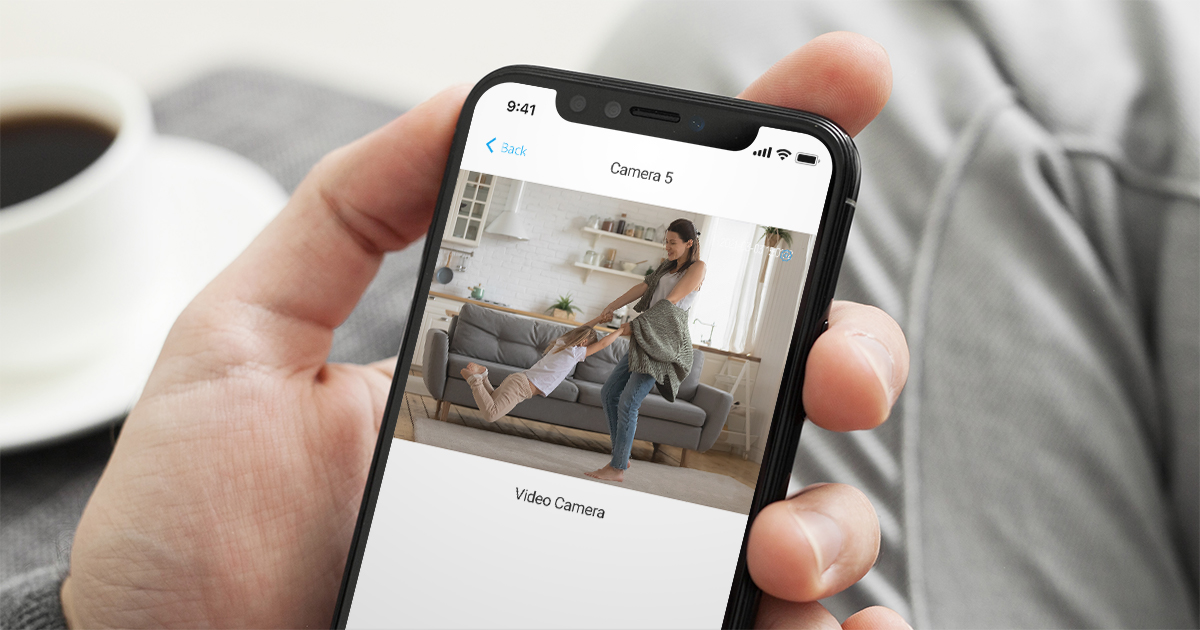
In the Ajax app, you can watch streaming with sound in real-time and save snapshots to your smartphone.
Cameras and DVRs of five brands can be connected to the Ajax security system without additional settings. Choose the camera brand and learn how to connect it: EZVIZ, Hikvision, Safire, Dahua, Uniview.
You can connect cameras and DVRs of other brands due to the support of the RTSP protocol in the Ajax app. The majority of manufacturers of video surveillance devices use this protocol.
How to configure user access to camera streams and archives
The Ajax app allows you to configure which users can access the video stream. Privacy settings can be managed by:
- System user with admin rights (by default).
- System user with no admin rights, if they were granted such a right.
The users of the PRO apps cannot manage the privacy settings but can determine access type for other users.
To configure user access to cameras, in the Ajax app:
- Log in to Ajax Security System or Ajax Desktop app.
- Tap on the gear
 icon to go to the space settings.

In Ajax Security System app, go to the Control
 tab first, and then open the space settings.
 - Go to the Privacy settings.
- Select the user category: Users, Installers and Companies.
- Select the system user.
- Choose the device category, if you selected Companies in the step 4.
- Select the camera.
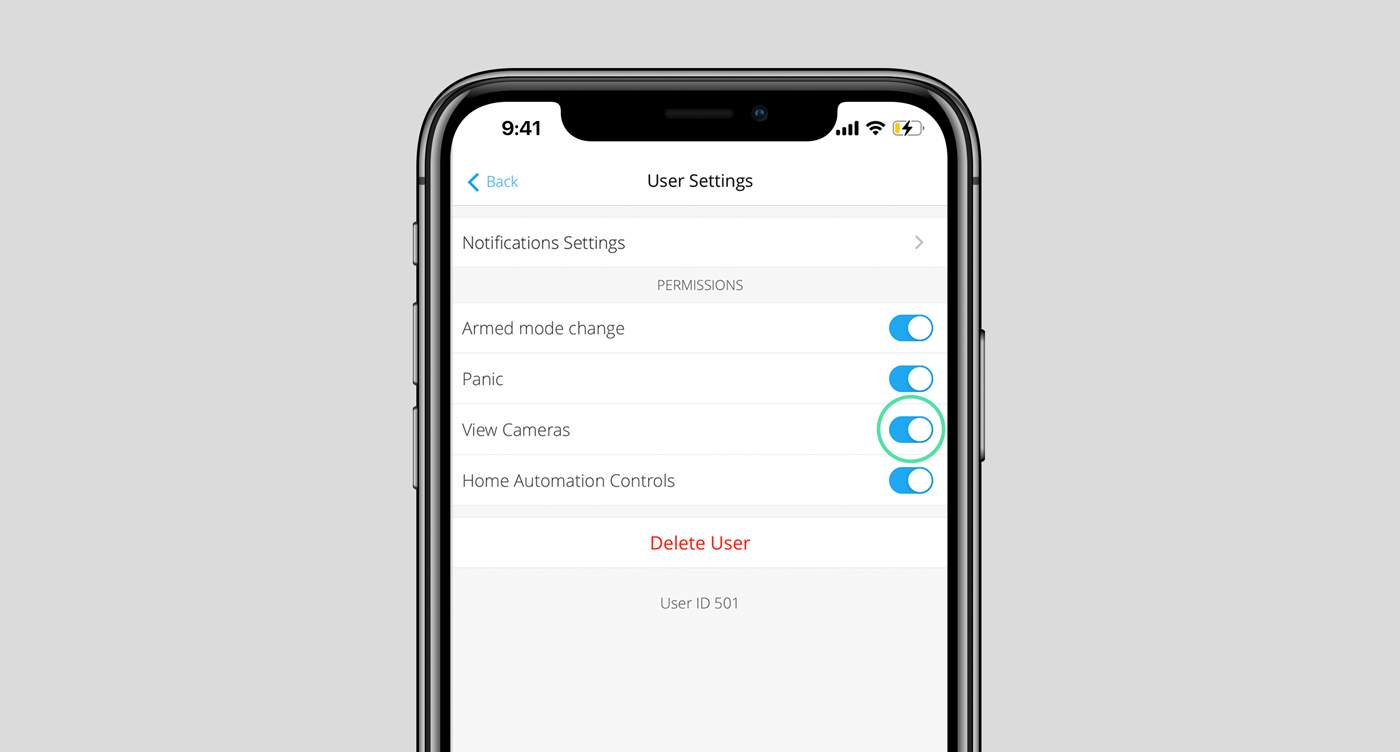
- Enable or disable the toggle Watch camera livestream.
- Configure other access rights if the Watch camera livestream toggle is enabled:
- View camera archive.
- Download video from archive (available after enabling the View camera archive toggle).
- Watch with sound.
- Use pan-tilt-zoom (PTZ) feature.
- Set Access time — time you want to grant an access (1, 2, 4, or 8 hours).
- Specify when the user has access to the camera possibilities: at any time or when the device is in the armed mode.
It is also available to grant temporary access to video surveillance devices only after an alarm for company employees.
- Tap Back / click Save to apply changes.
- Repeat steps 4–13 for other users and cameras to which you need to provide access.
How to turn on/off the power of cameras in the Ajax system
By connecting power to the cameras using a low-current Relay relay or WallSwitch power relay, you can disable video surveillance devices when they are not needed, and enable them at the user’s request. For example, video surveillance is active when the system is armed and deactivated when the user is at home and wants privacy.
Power off via Relay or WallSwitch does not work with cameras powered by batteries.
You can turn on and off the power of the cameras:
- Via the Ajax app — from anywhere in the world;
- By Button — at the distance of 1,300 meters from the hub or ReX range extender;
- By scenario — when changing a security mode, when an alarm is activated, or according to a schedule.
Only a qualified electrician can install WallSwitch or Relay! Regardless of the type of electrical circuit that accommodates the device.
Connection diagram for power supply of cameras via Relay
Do not connect Relay to a power supply with a voltage of more than 36 V or to AC circuits. This poses a fire hazard and will damage the device.
Relay can control the power supply for video surveillance cameras that operate on 12/24 V direct current. If camera uses a 110-230 V grid, WallSwitch power relay is needed.
Please note that Relay requires an external power supply to operate. Connection per the diagram below requires a 12/24 V power supply.
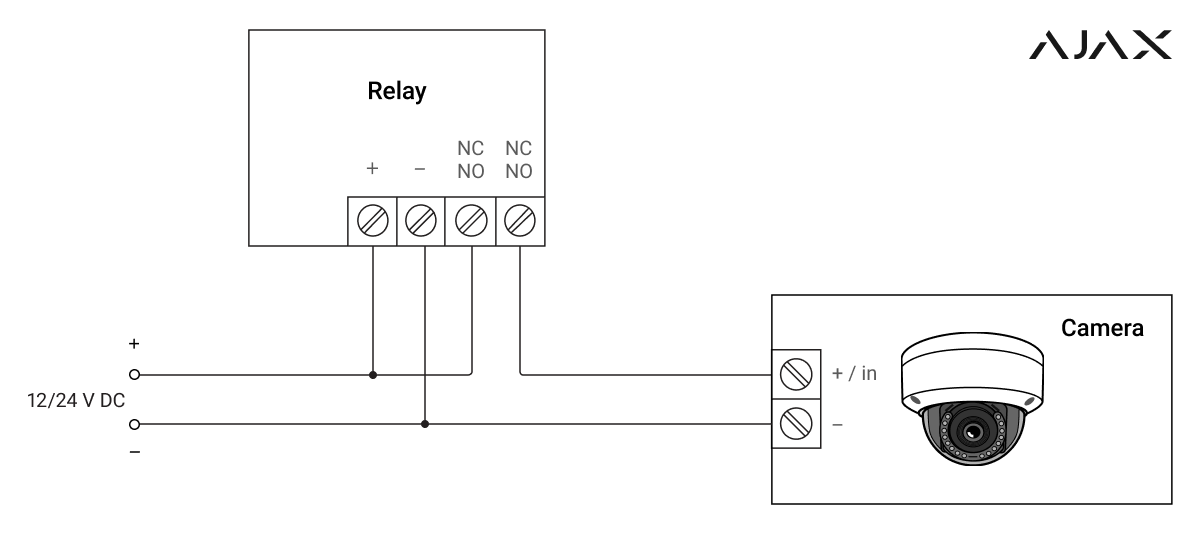
- Connect the power supply source to the power terminals of the relay.
- Connect “+” of the power supply to one of the terminals of relay contacts.
- Connect “+” of the camera power supply to the other terminal of the relay contacts.
- Connect the “-” contact of the camera to the “-” of the power supply.
Relay setting up
In the Ajax app:
- Open the Devices
 menu of the proper hub.
 - Select the proper Relay and go to its Settings .
- Set the parameters:
- Relay operating mode: pulse or bistable.
The pulse operation mode of the relay can be used for temporarily activating the camera. For example, to enable a video surveillance device for 60 seconds after an alarm. After the timer expires, the relay will automatically turn off the camera power.
- Pulse duration (if pulse mode is selected, the range is 0.5 to 255 seconds).
- Contact state: normally closed or normally opened.
- Relay operating mode: pulse or bistable.
Create a scenario if you want the camera to switch on by schedule, by pressing Button, or when the detectors activate an alarm, or when the security mode is changed.
Note that the camera stream will not be available instantly, but after a short time after switching on. This is due to the specifics of the camera operation algorithm.
Connection diagram for power supply of cameras via WallSwitch
Do not connect WallSwitch to DC circuits or power supplies with out-of-range voltage. This poses a fire hazard and will damage the device.
WallSwitch can control the power supply for video surveillance cameras that operate on 110/230 V alternating current. If the camera operates on 12-24 V, use a low current Relay.
Note that the WallSwitch relay needs a 110/230 V grid. Therefore, it can be connected to a domestic electrical network. No additional external power supply is required for connection according to the diagram below.
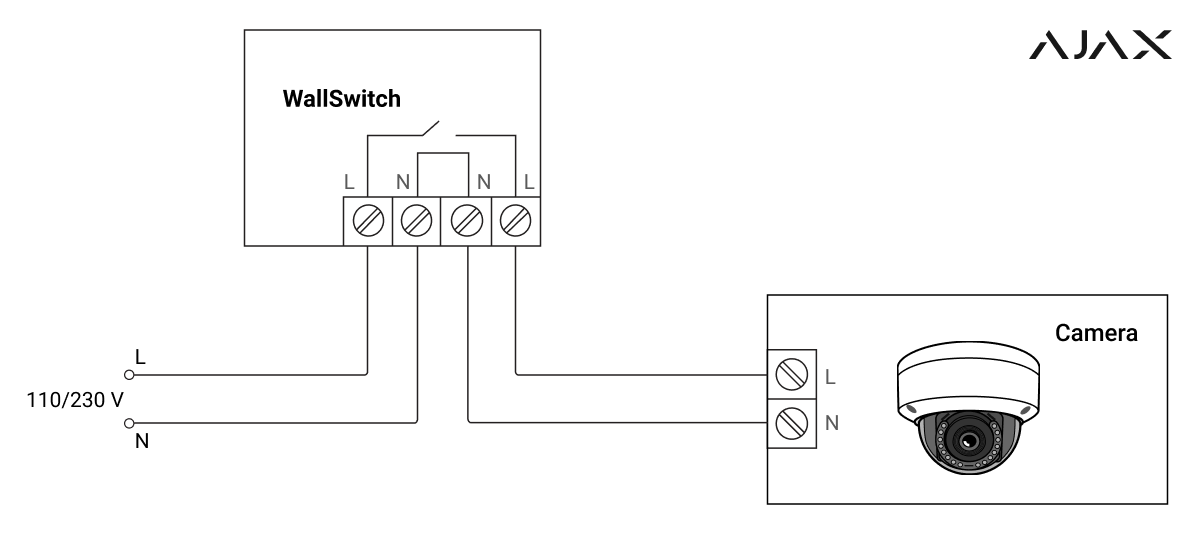
- Connect the power supply source to the power terminals of the relay.
- Connect the terminals of relay contacts to the camera power supply terminals.
WallSwitch setting up
In the Ajax app:
- Open the Devices menu of the proper hub.
- Select the proper WallSwitch and go to its Settings .
- Set the parameters:
- Relay operating mode: pulse or bistable.
The pulse operation mode of the relay can be used for temporarily activating the camera. For example, to enable a video surveillance device for 60 seconds after an alarm. After the timer expires, the relay will automatically turn off the camera power.
- Pulse duration (if pulse mode is selected, the range is 0.5 to 255 seconds).
- Contact state: normally closed or normally opened.
- Relay operating mode: pulse or bistable.
Create a scenario if you want the camera to switch on by schedule, by pressing Button, or when the detectors activate an alarm, or when the security mode is changed.
Note that the camera stream will not be available instantly, but after a short time after switching on. This is due to the specifics of the camera operation algorithm.
How to control the power supply of video surveillance cameras in the Ajax app
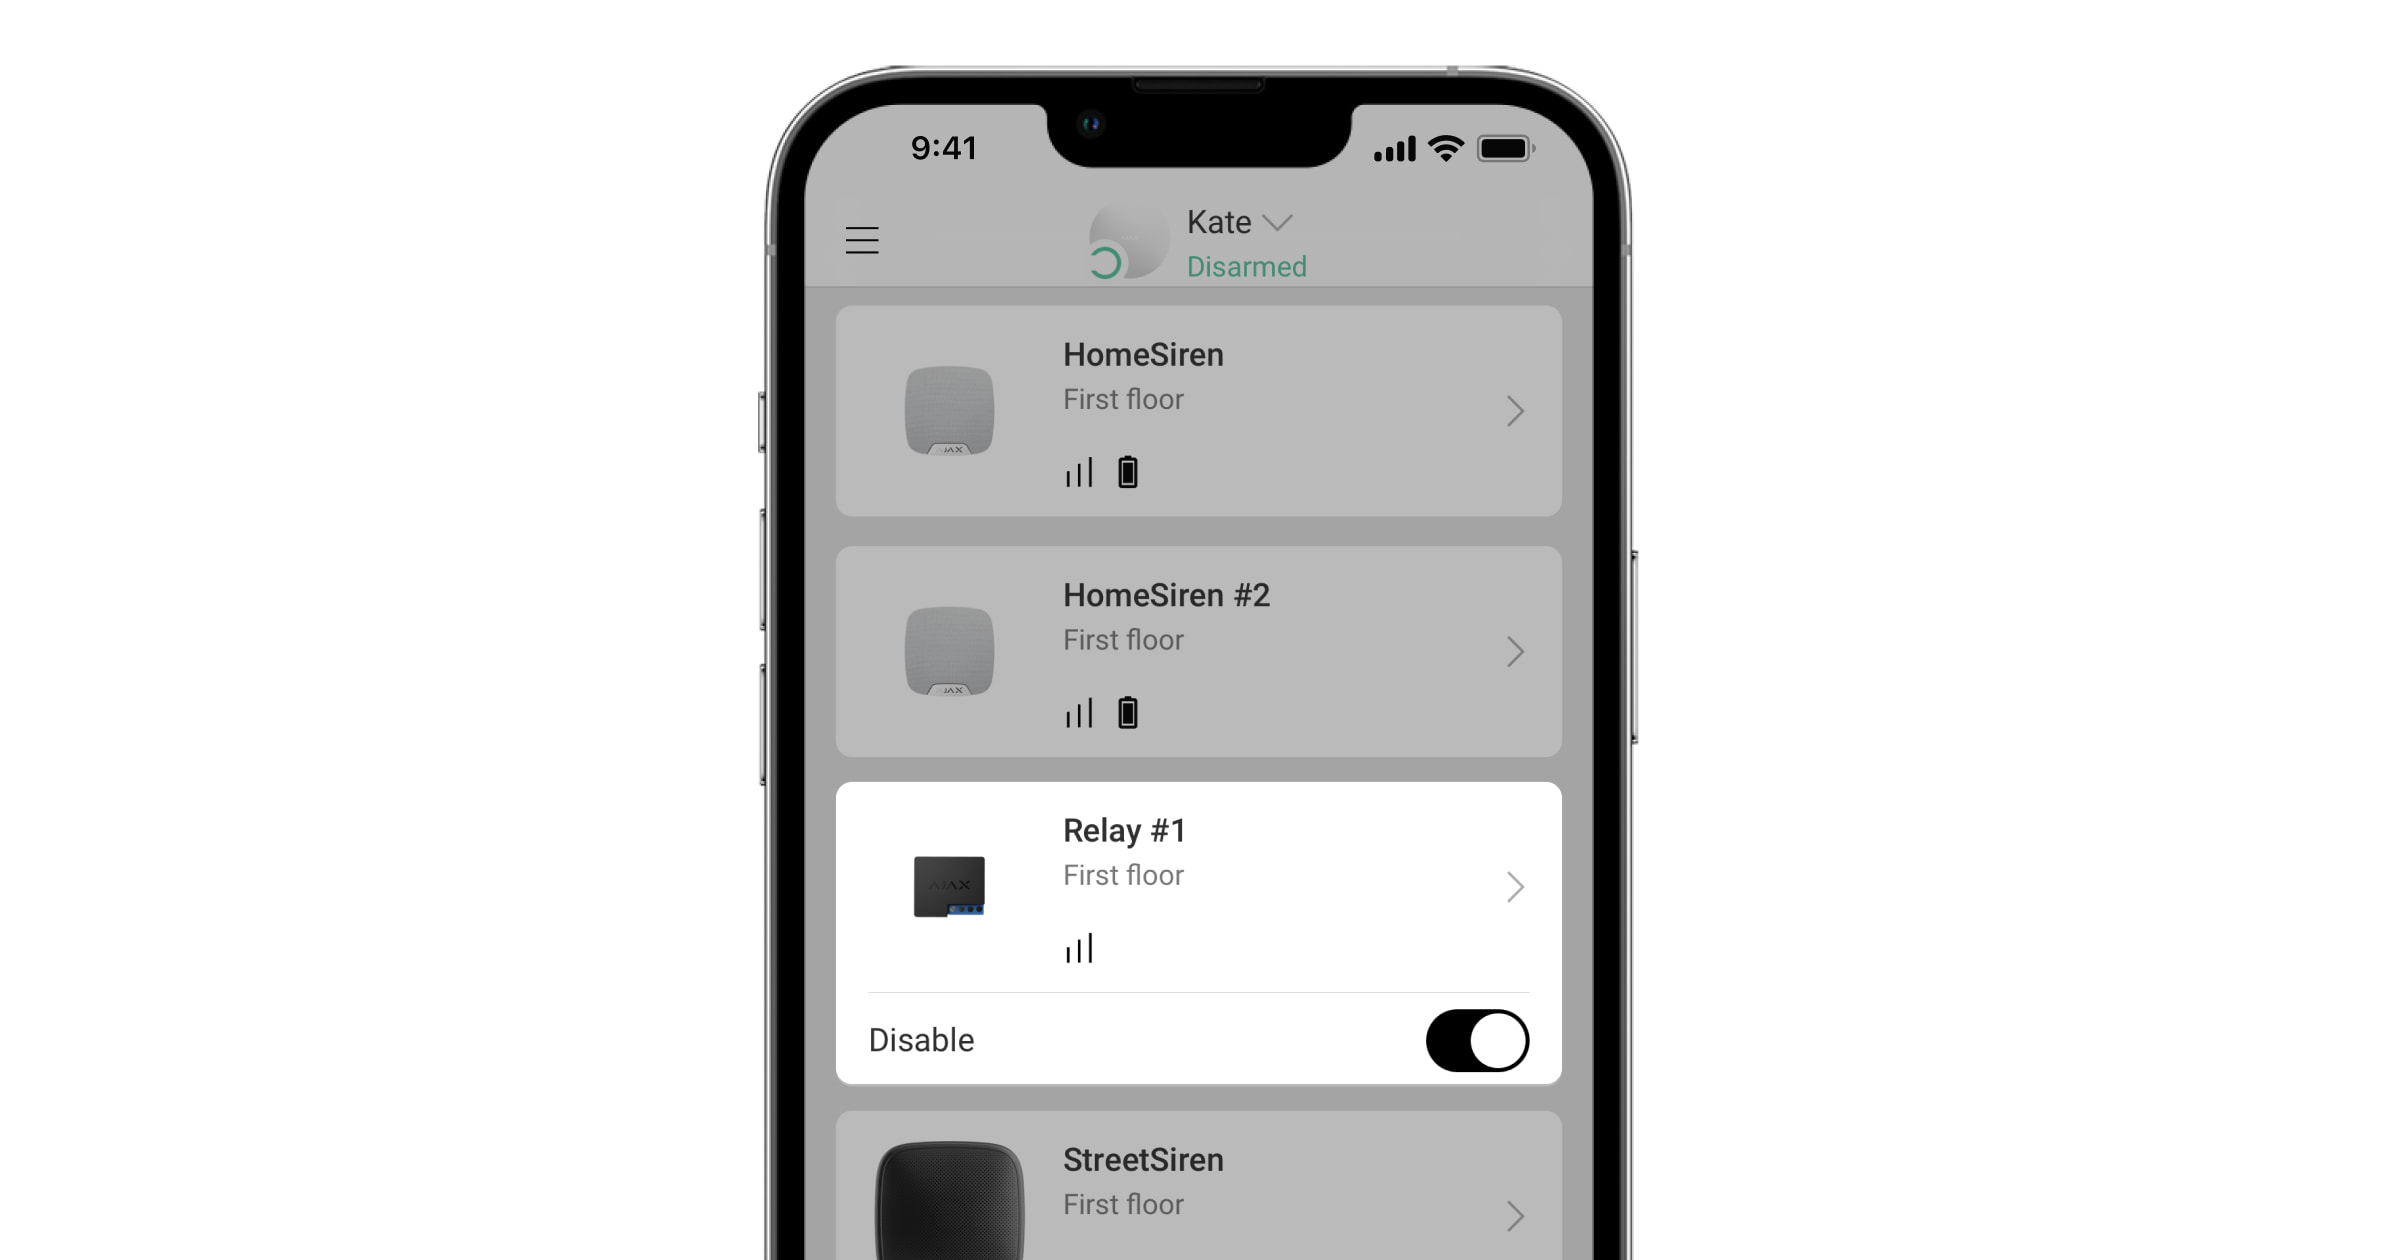
Click on the switch in the Relay or WallSwitch field, and the state of the contacts will change to the opposite. After the activation, the camera will be enabled. Press again to disable the camera.
How to control the power supply of video surveillance cameras using Button
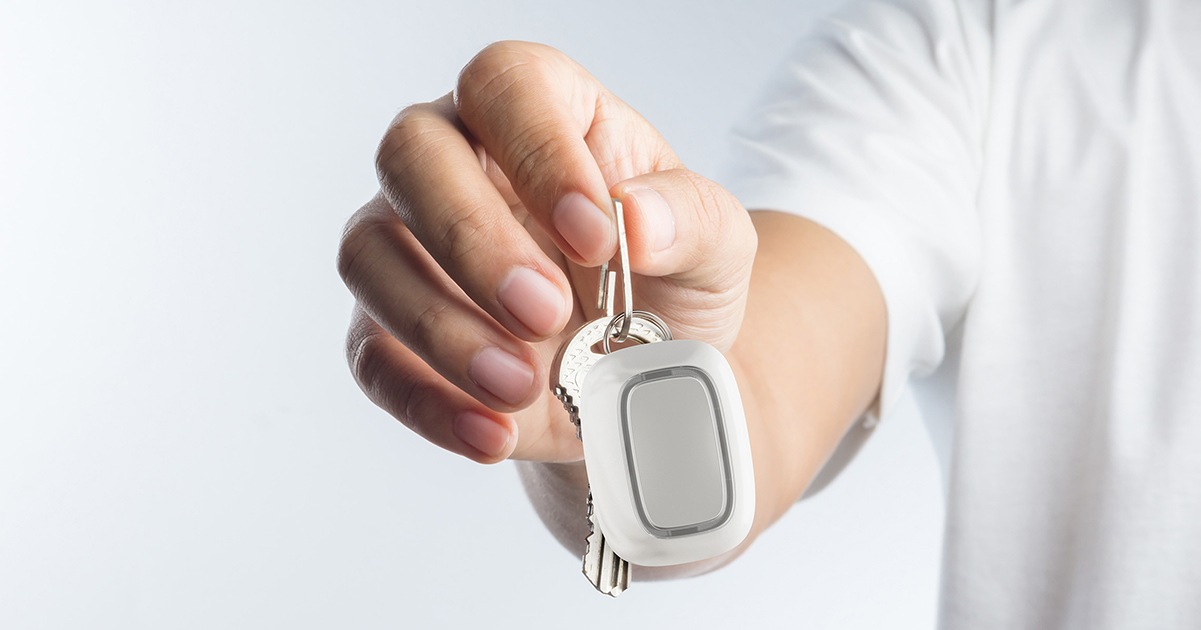
The Ajax security system allows you to configure different actions when Button is pressed.
For example, enable the video surveillance cameras with a single pressing and disable them by double pressing. Also, you can configure enabling the cameras with a single pressing and disabling them by pressing again.
To control the camera power supply using Button, configure the appropriate scenarios in Ajax App → Desired hub → Devices ![]() → Button → Settings
→ Button → Settings ![]() → Scenarios.
→ Scenarios.
How to control the power supply of video surveillance cameras by scenario
Ajax scenarios allow you to enable and disable video surveillance cameras when changing a security mode, when Night Mode is on/off, when an alarm is activated or according to the schedule.
To create scenarios to control power supply of the cameras, go to Ajax App → Devices ![]() → Relay or WallSwitch → Settings
→ Relay or WallSwitch → Settings ![]() → Scenarios.
→ Scenarios.