Groups combine system devices regardless of their physical location and make their management more convenient and flexible.
What is the difference between groups and rooms
Rooms are needed to arrange devices. Room names are displayed in push notifications and SMS. Rooms do not control the security modes or allow arming certain groups of devices.
Without rooms, you cannot bind devices to the Ajax system.
Groups allow arming individual devices or rooms: manually or according to a schedule, as well as binding:
- Sirens — so that they react to alarms of certain devices.
- Key fobs and keypads — so that they control the security mode of certain devices and not the entire system.
- Automation devices— so that they react to changes in the security mode of their own group.
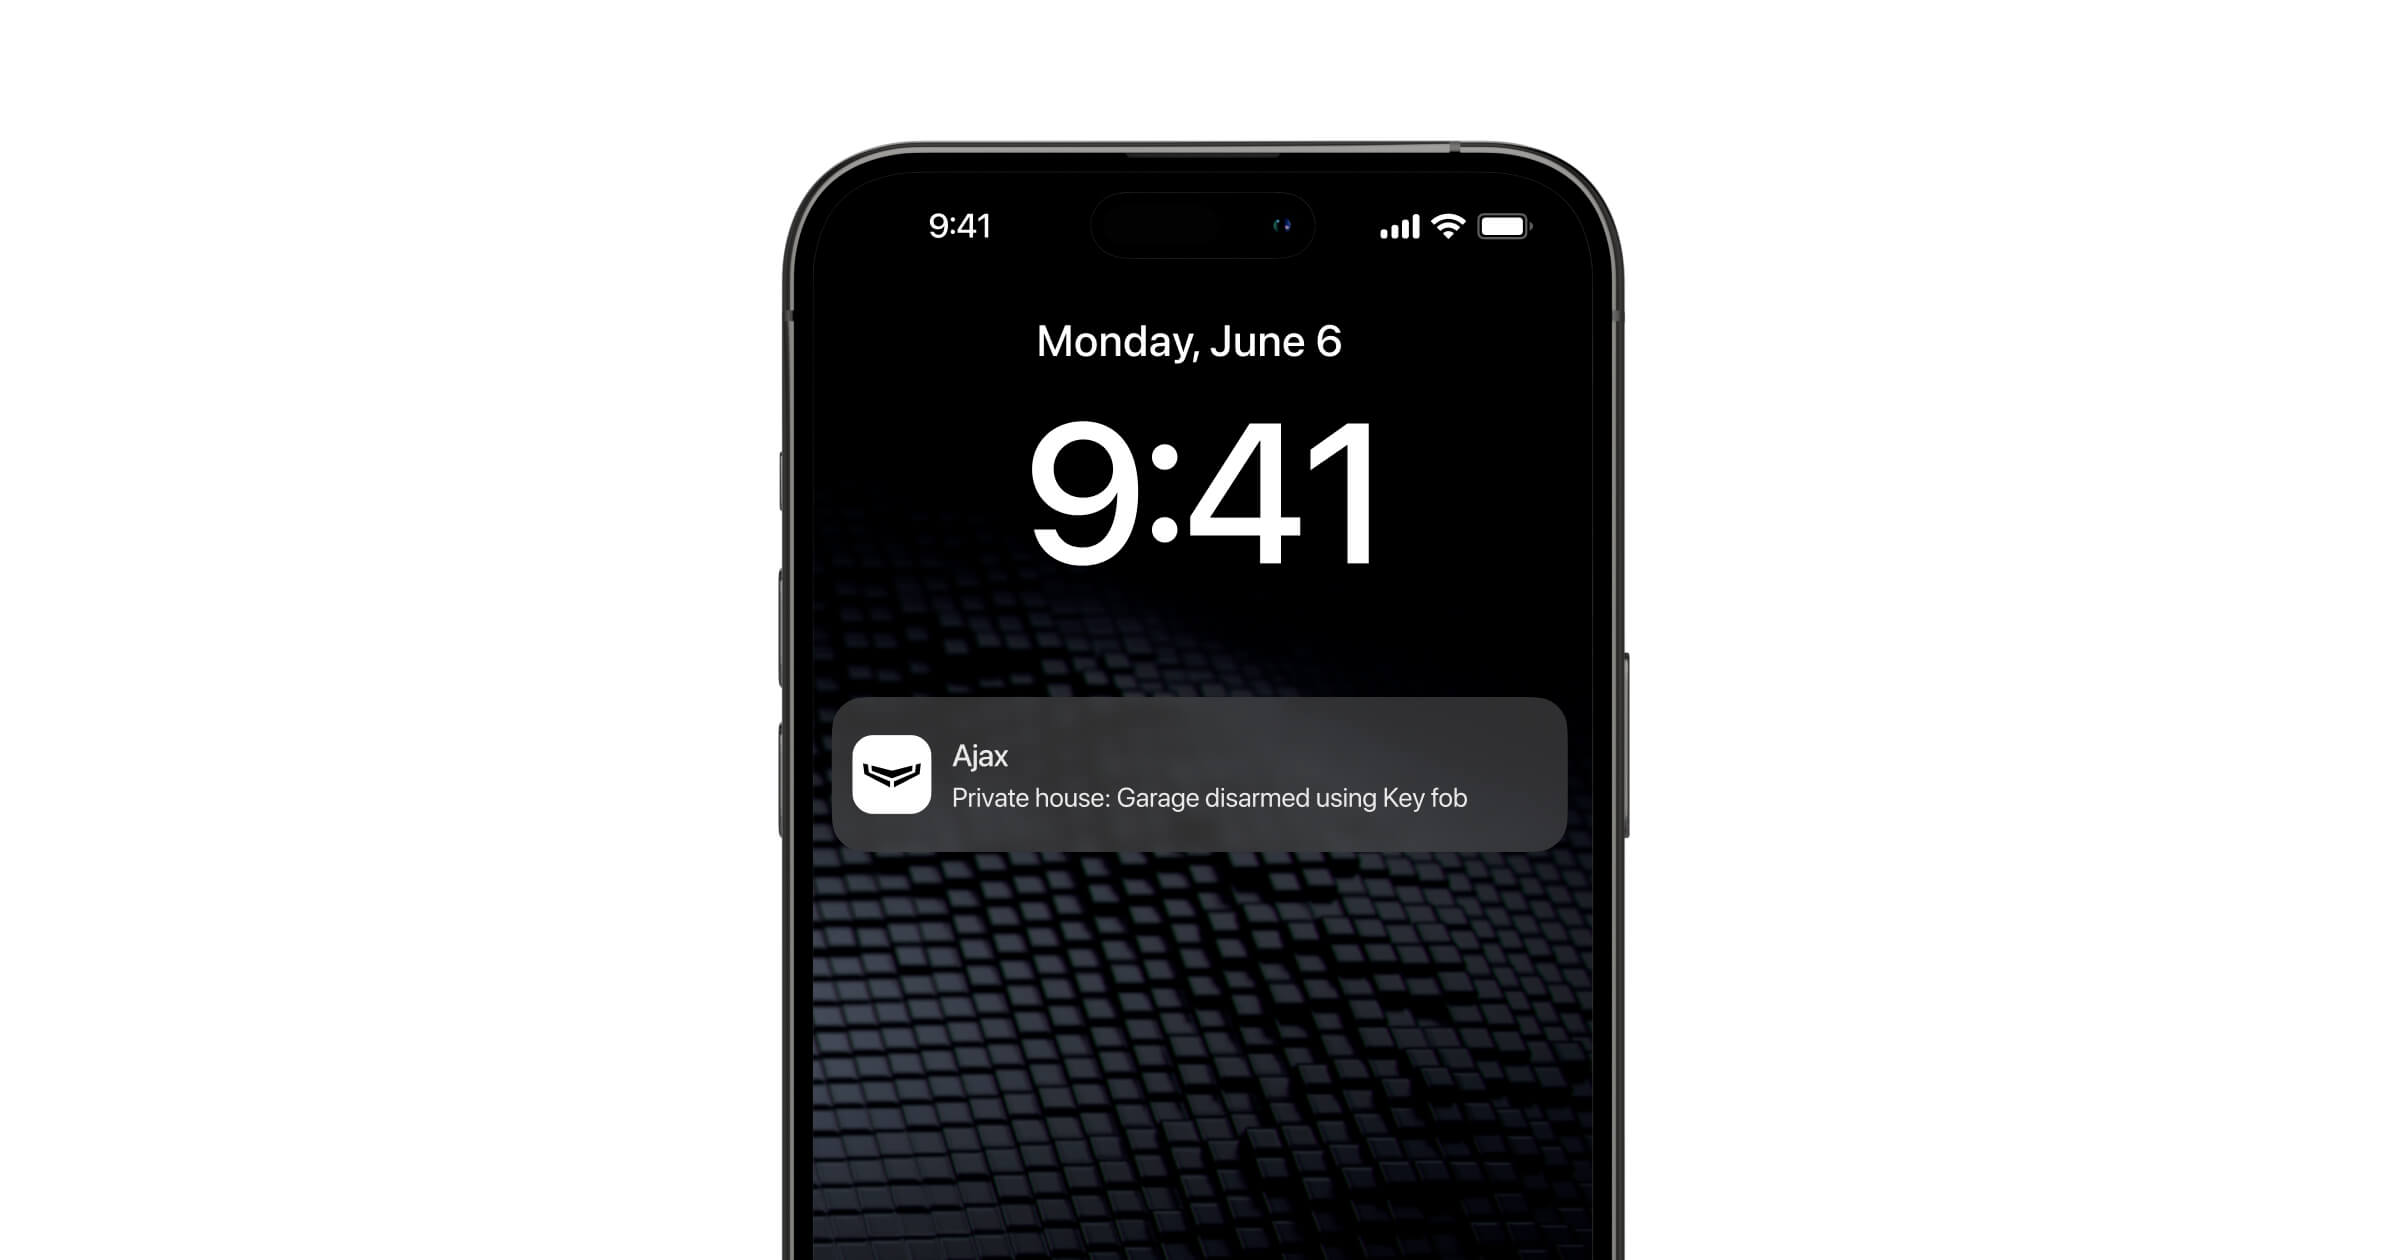
Devices in the group can either coincide with that of the rooms or differ from it. The names of the groups are displayed in the text of notifications upon changing the arming mode of the group.
Configuring and activating group mode
The group mode can be activated and configured by a user or PRO with administrator rights in the Ajax app. The maximum number of groups depends on the hub model.
| Hub model | Number of groups |
| Hub (2G) Jeweller and Hub (4G) Jeweller | 9 |
| Hub Plus Jeweller | 25 |
| Hub 2 (2G) Jeweller and Hub 2 (4G) Jeweller | 9 |
| Hub 2 Plus Jeweller | 25 |
| Hub BP Jeweller | 9 |
| Superior Hub Hybrid (2G) and Superior Hub Hybrid (4G) | 9 |
How to create a group
- Open an Ajax app, select a space, and go to:
- Control
 → Settings
  → Groups
- Control
- Tap Add group.
- Enter the name of the group. Upload a photo if you like.
- Tap Add to apply the changes.
The group name can contain up to 12 Cyrillic characters or up to 24 Latin characters.
How to add or move devices to a group
- Open an Ajax app, select a space, and go to:
- Control → Settings → Groups
- Control
- Select the group to which you want to add or move the devices.
- Go to Devices.
- Tap Edit.
- Select the required devices.

Please note that a device can only be in one group. When a device is added to another group, it is automatically moved.
- Tap Save to apply the changes.
Devices that work through radio signal range extenders, as well as wired devices that connected to integration modules, can be assigned to different groups. Always active devices (leakage detectors, and panic buttons) will work regardless of the security mode of the group. The fire detectors operation algorithm depends on whether the Residential fire alarm system is on or off.
How to activate or deactivate group mode
- Open an Ajax app, select a space, and go to:
- Control → Settings → Groups
- Control
- Ensure all devices are distributed between groups.
- Switch the Group mode toggle to activate or deactivate the group mode.
- Tap Back to save the settings.
How to configure user group access rights
- Open an Ajax app, select a space, and go to:
- Control → Settings → Groups
- Control
- Select the required group.
- Go to Users.
- Tap Edit.
- Select users to give them the access rights to the group. Users with no rights can not see the group on the Control tab and control its security modes.
Access to groups can be restricted if the user does not have administrator rights. Users with administrator rights always have access to all groups.
- Tap Save to apply the changes.
How to define arming and disarming rules for a group
- Open an Ajax app, select a space, and go to:
- Control → Settings → Groups
- Control
- Select the required group.
- Tap Edit.
- Configure the following parameters:
- Arm if system armed — the group will be armed when the entire system is armed. If the option is disabled, the group should be armed manually.
- Disarm if system disarmed — the group will always be disarmed when the entire system is disarmed. If the option is disabled, the group should be disarmed manually.
- Followed groups — allows configuring dependencies of the security mode change between the groups. Refer to this article for more information.
- Tap Save to apply the changes.
How to delete a group or change its settings
- Open an Ajax app, select a space, and go to:
- Control → Settings → Groups
- Control
- Select the required group.
- Tap Edit.
- In the opened menu, you can change the group name, adjust its settings, upload a new photo, or tap Delete group to delete it.
Before deleting a group, be sure to transfer your devices to another group. The last group can only be deleted after disabling the group mode.
Operation of the app with group mode activated
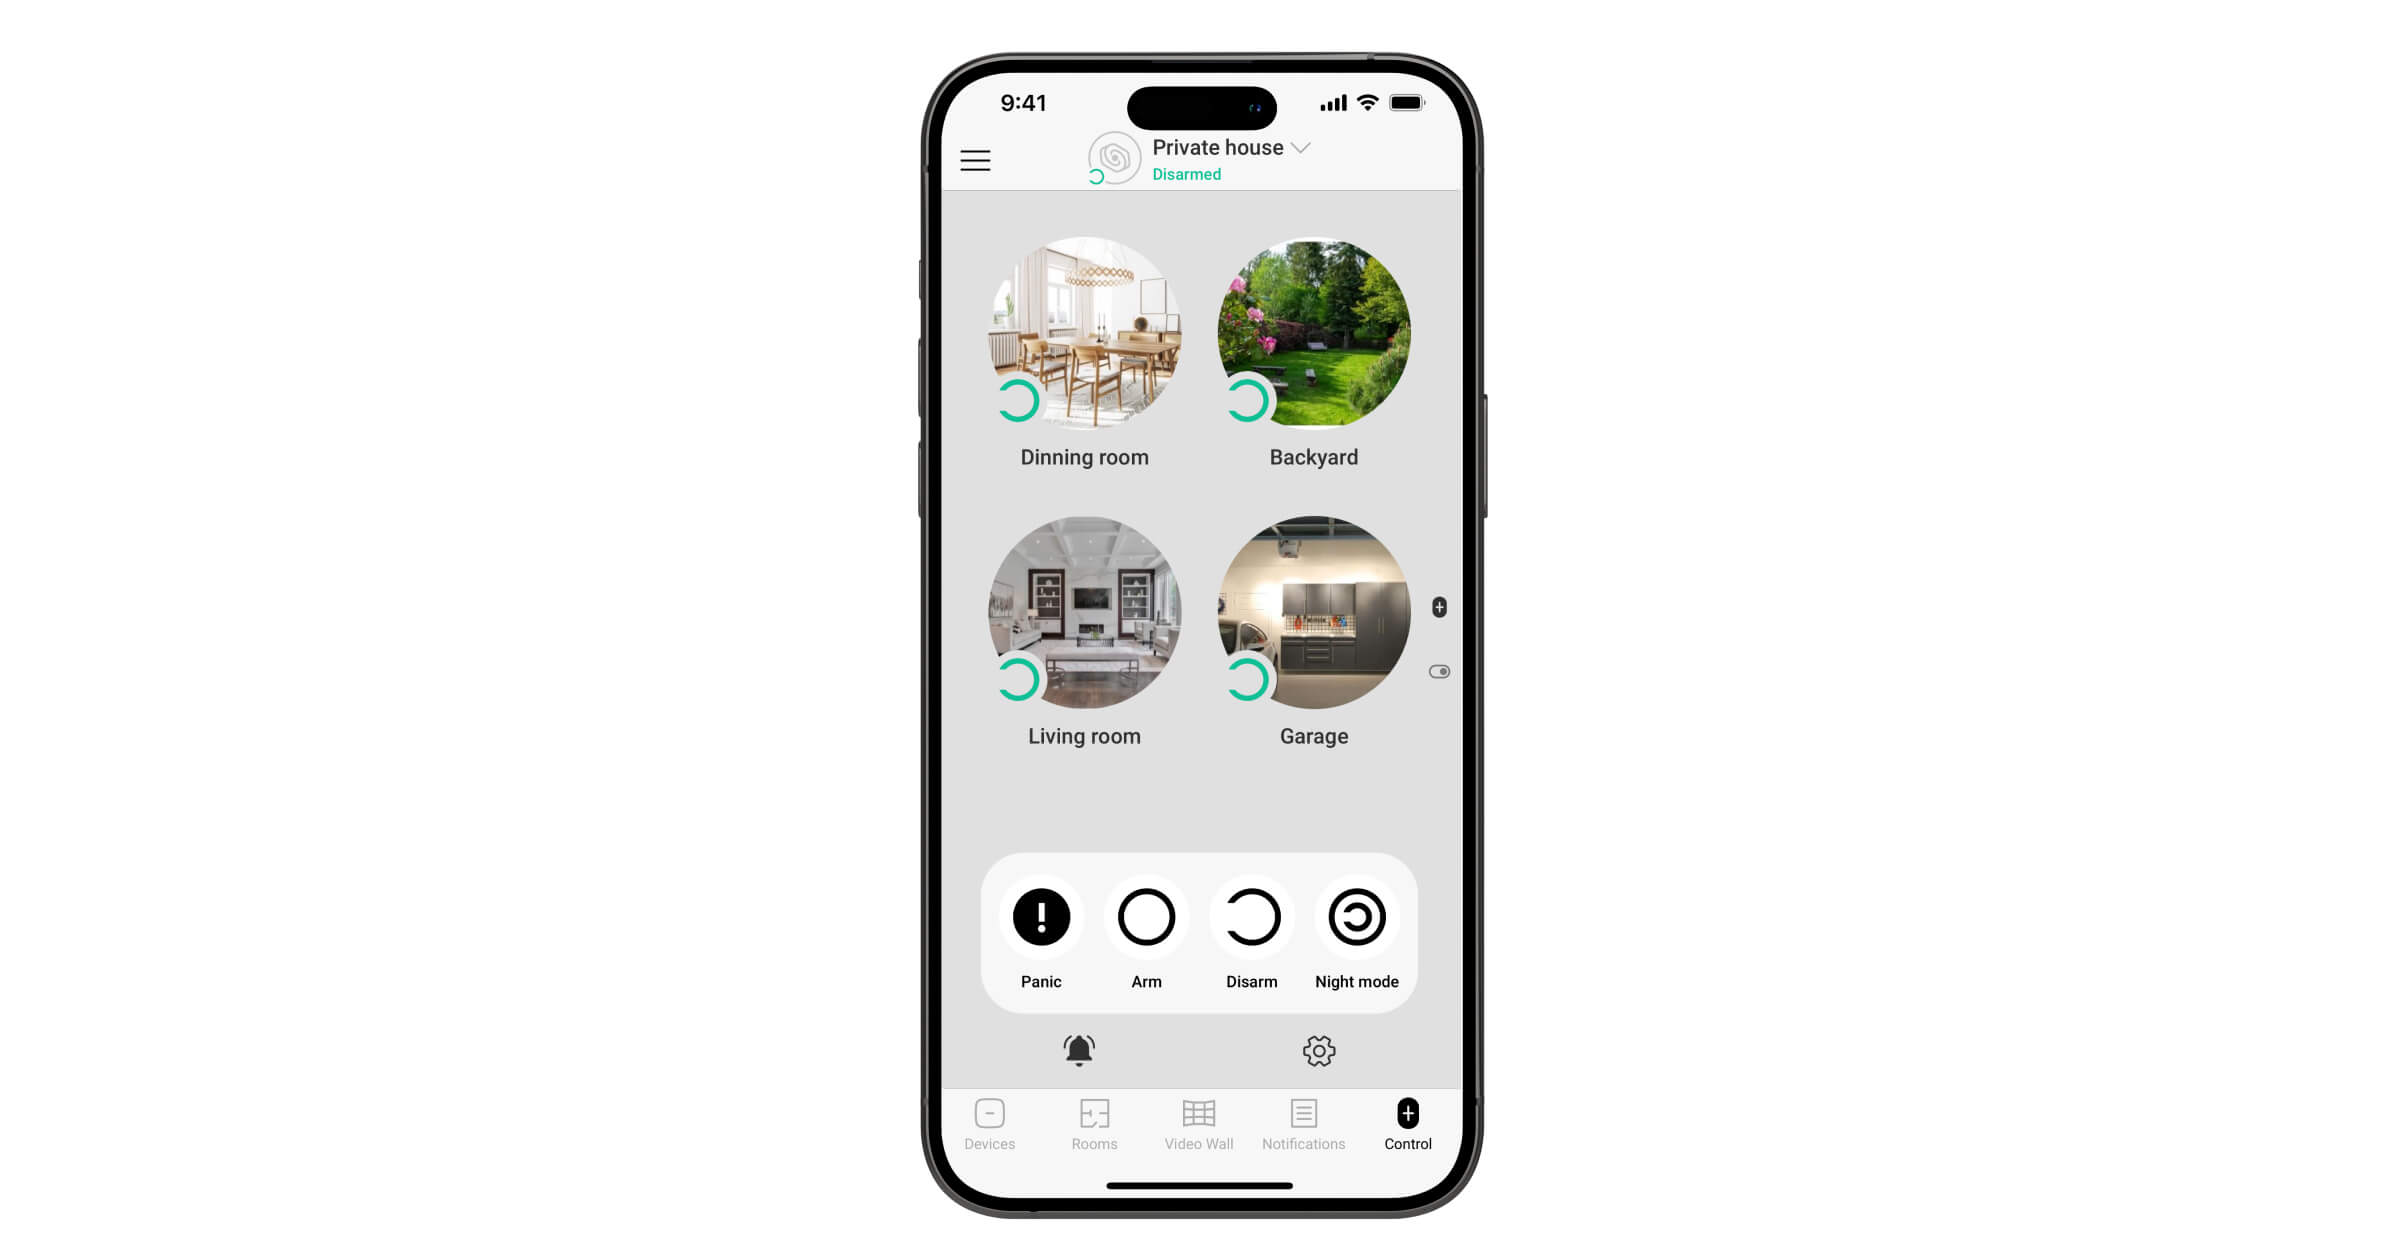
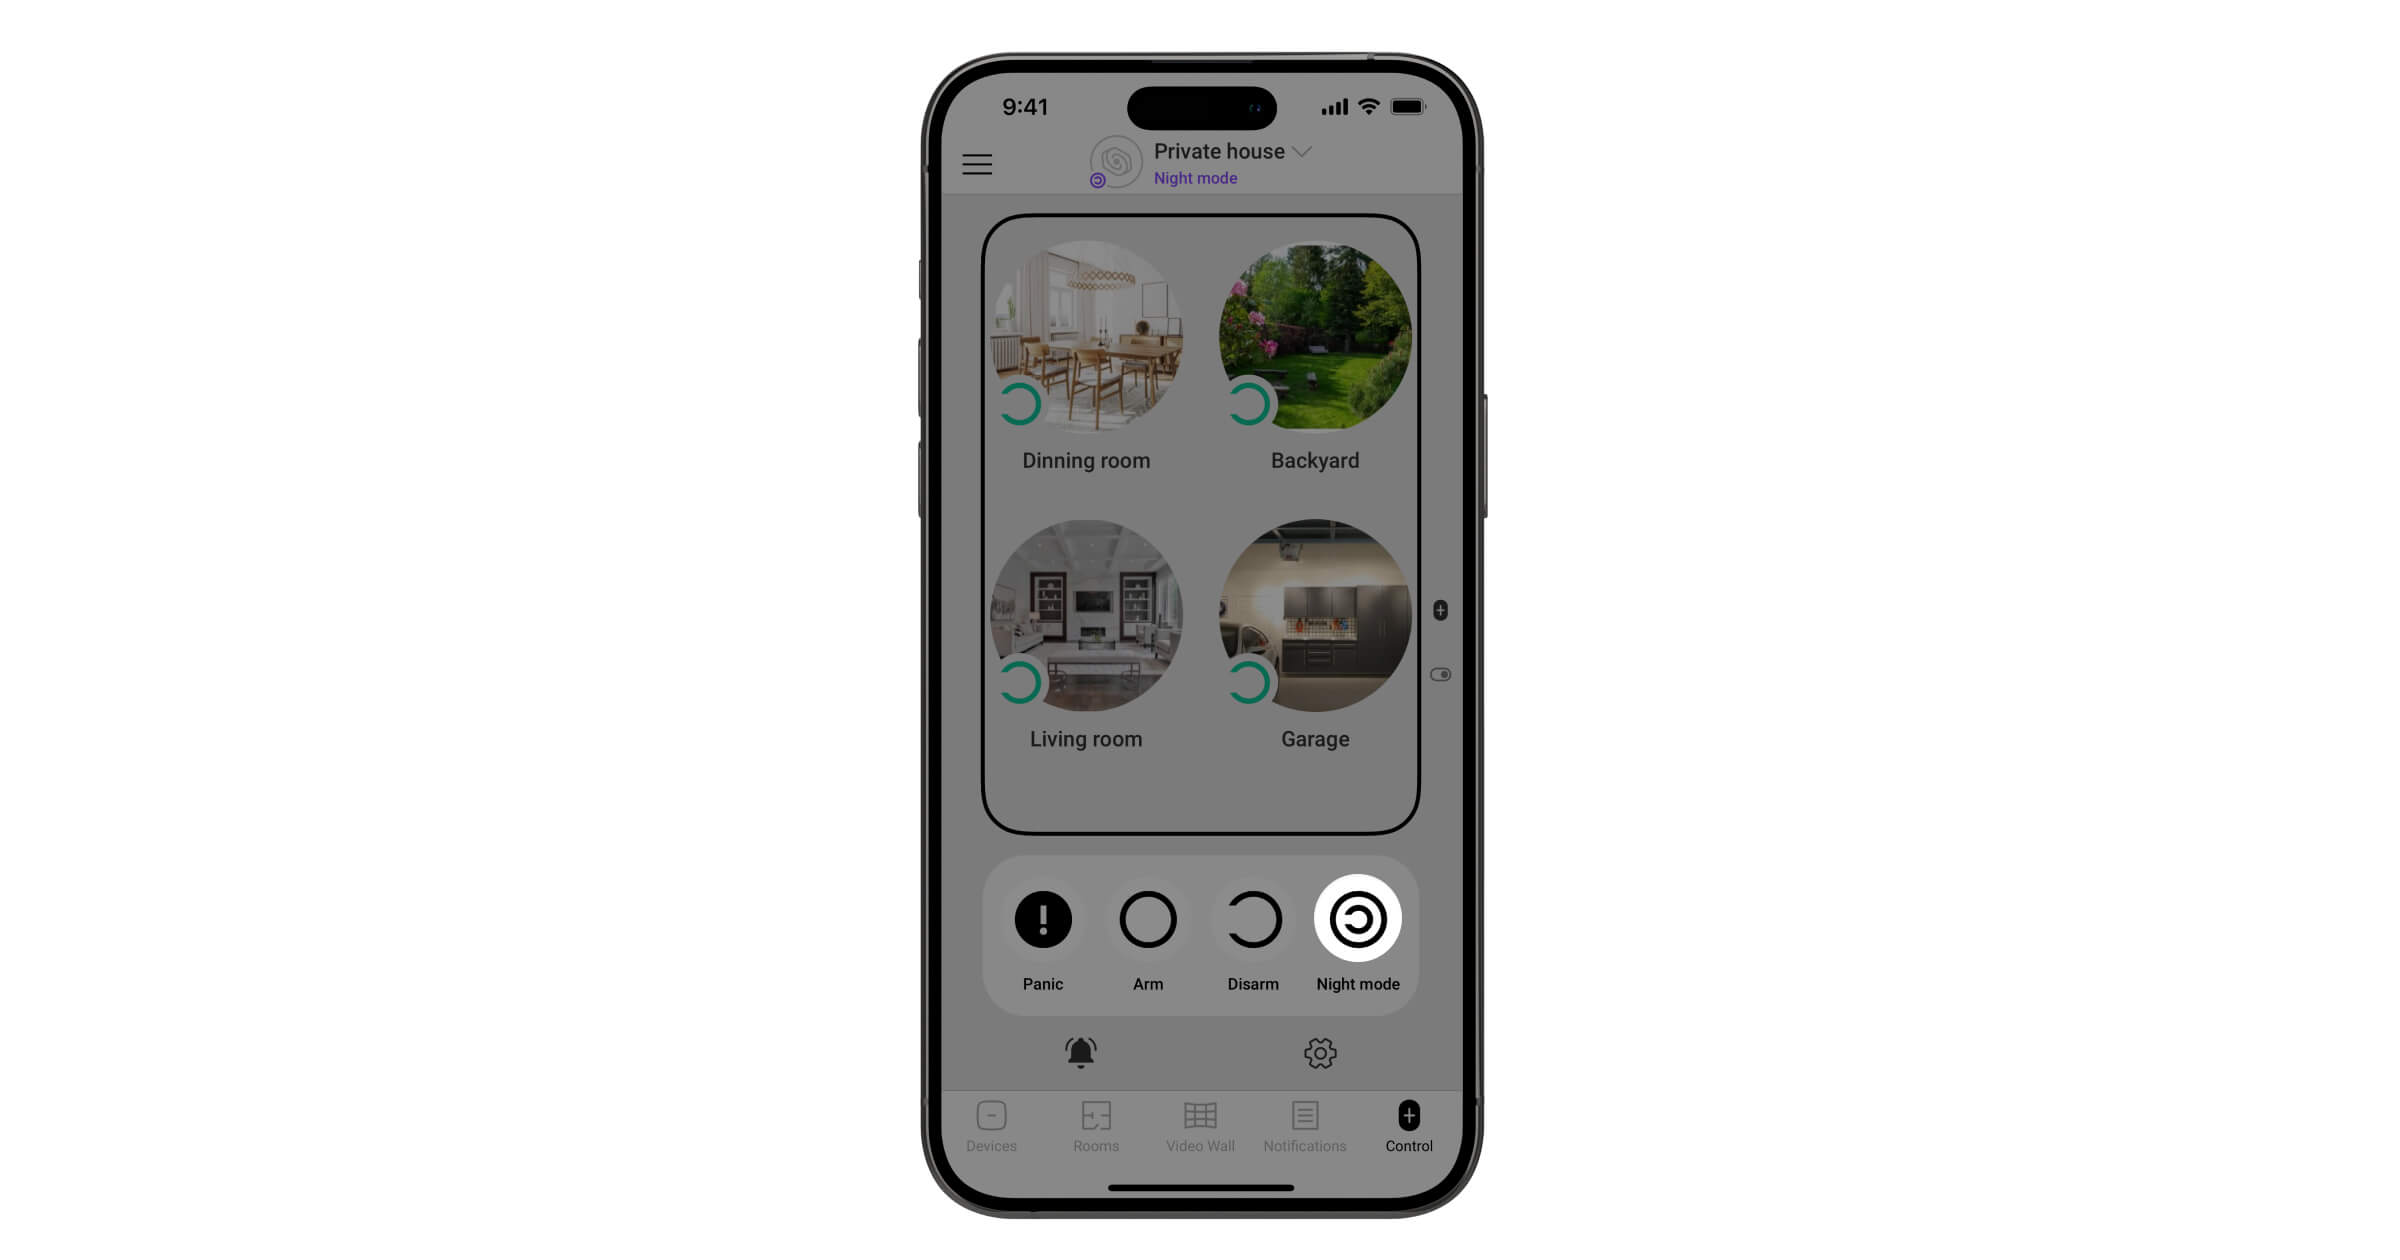
After the group mode is enabled in the Ajax app, the control screen changes — icons of the groups to which the user has access are displayed, as well as buttons for security management of the entire facility.
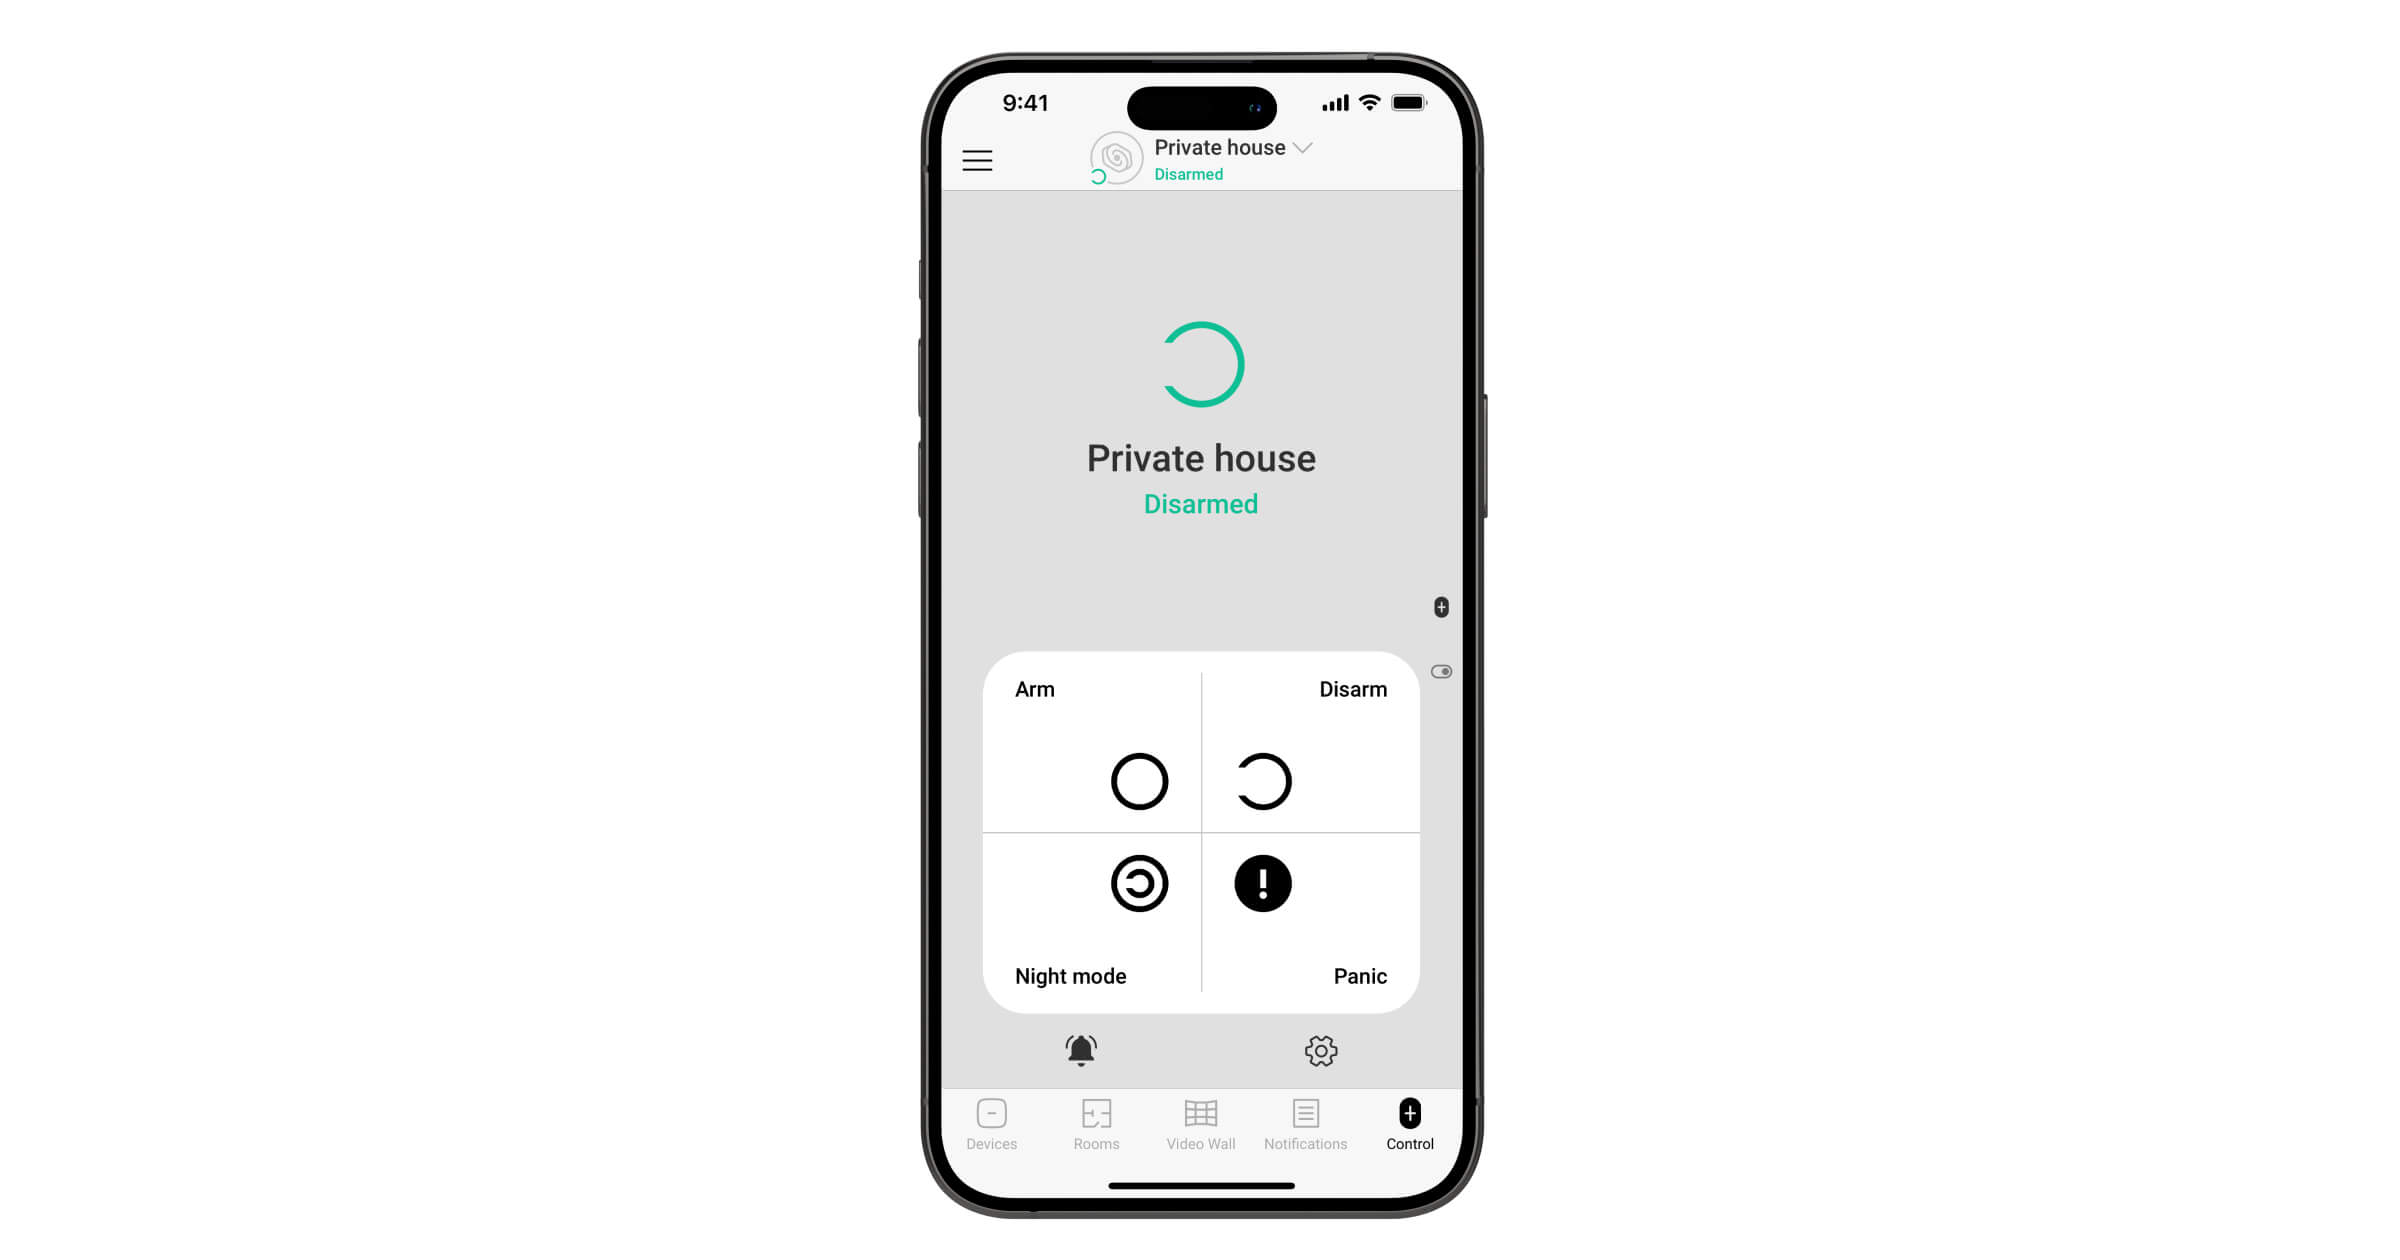
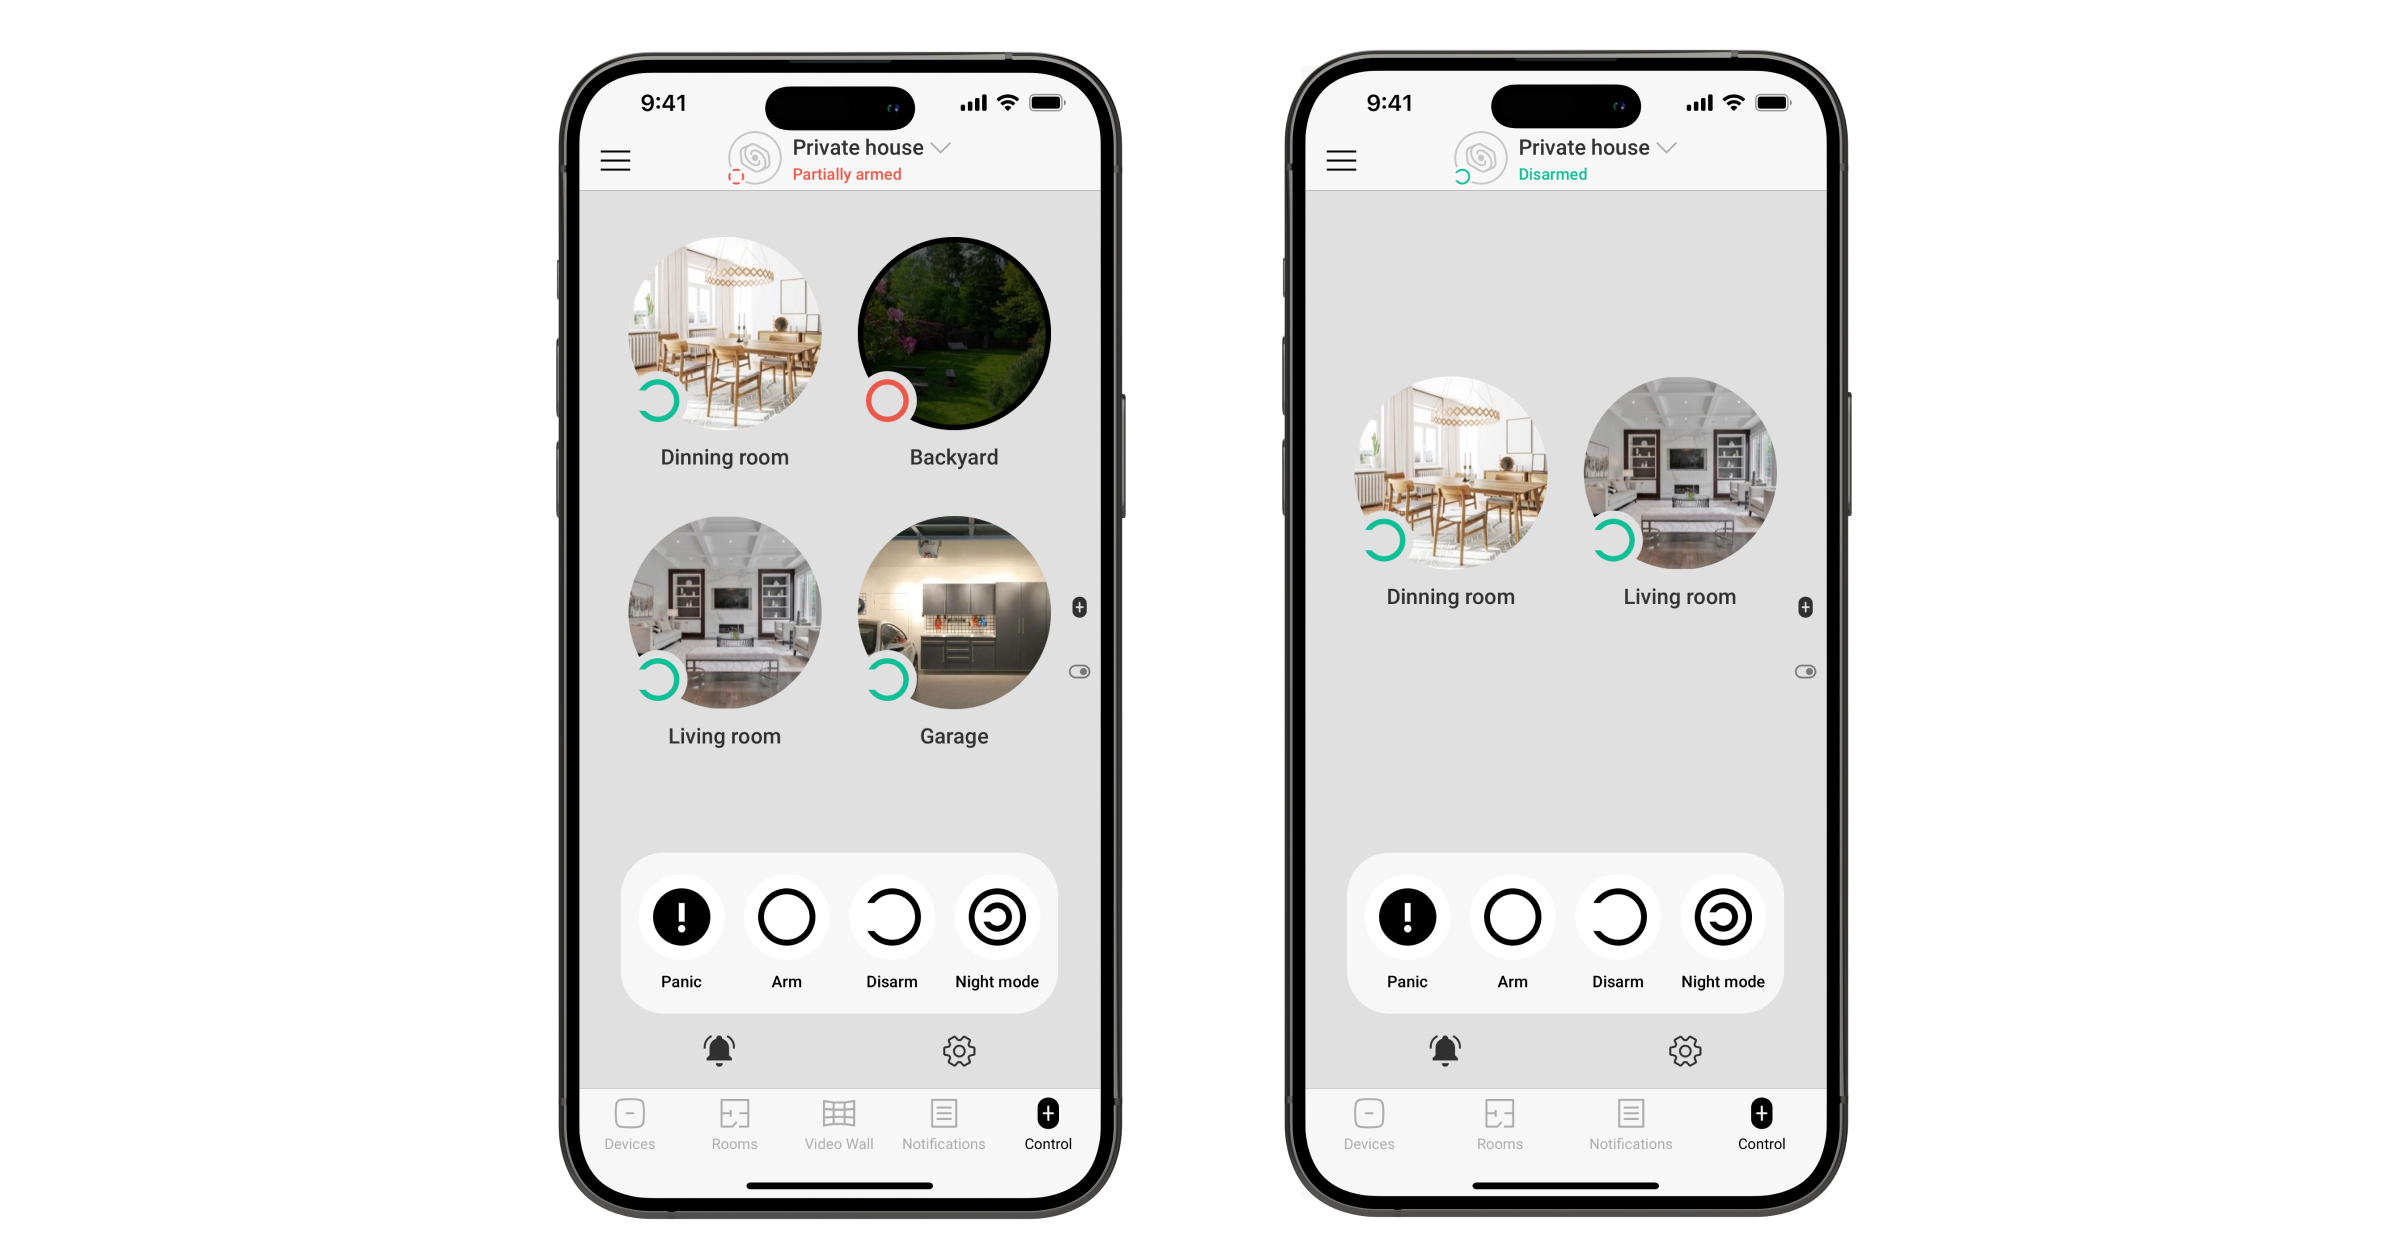
App without groups
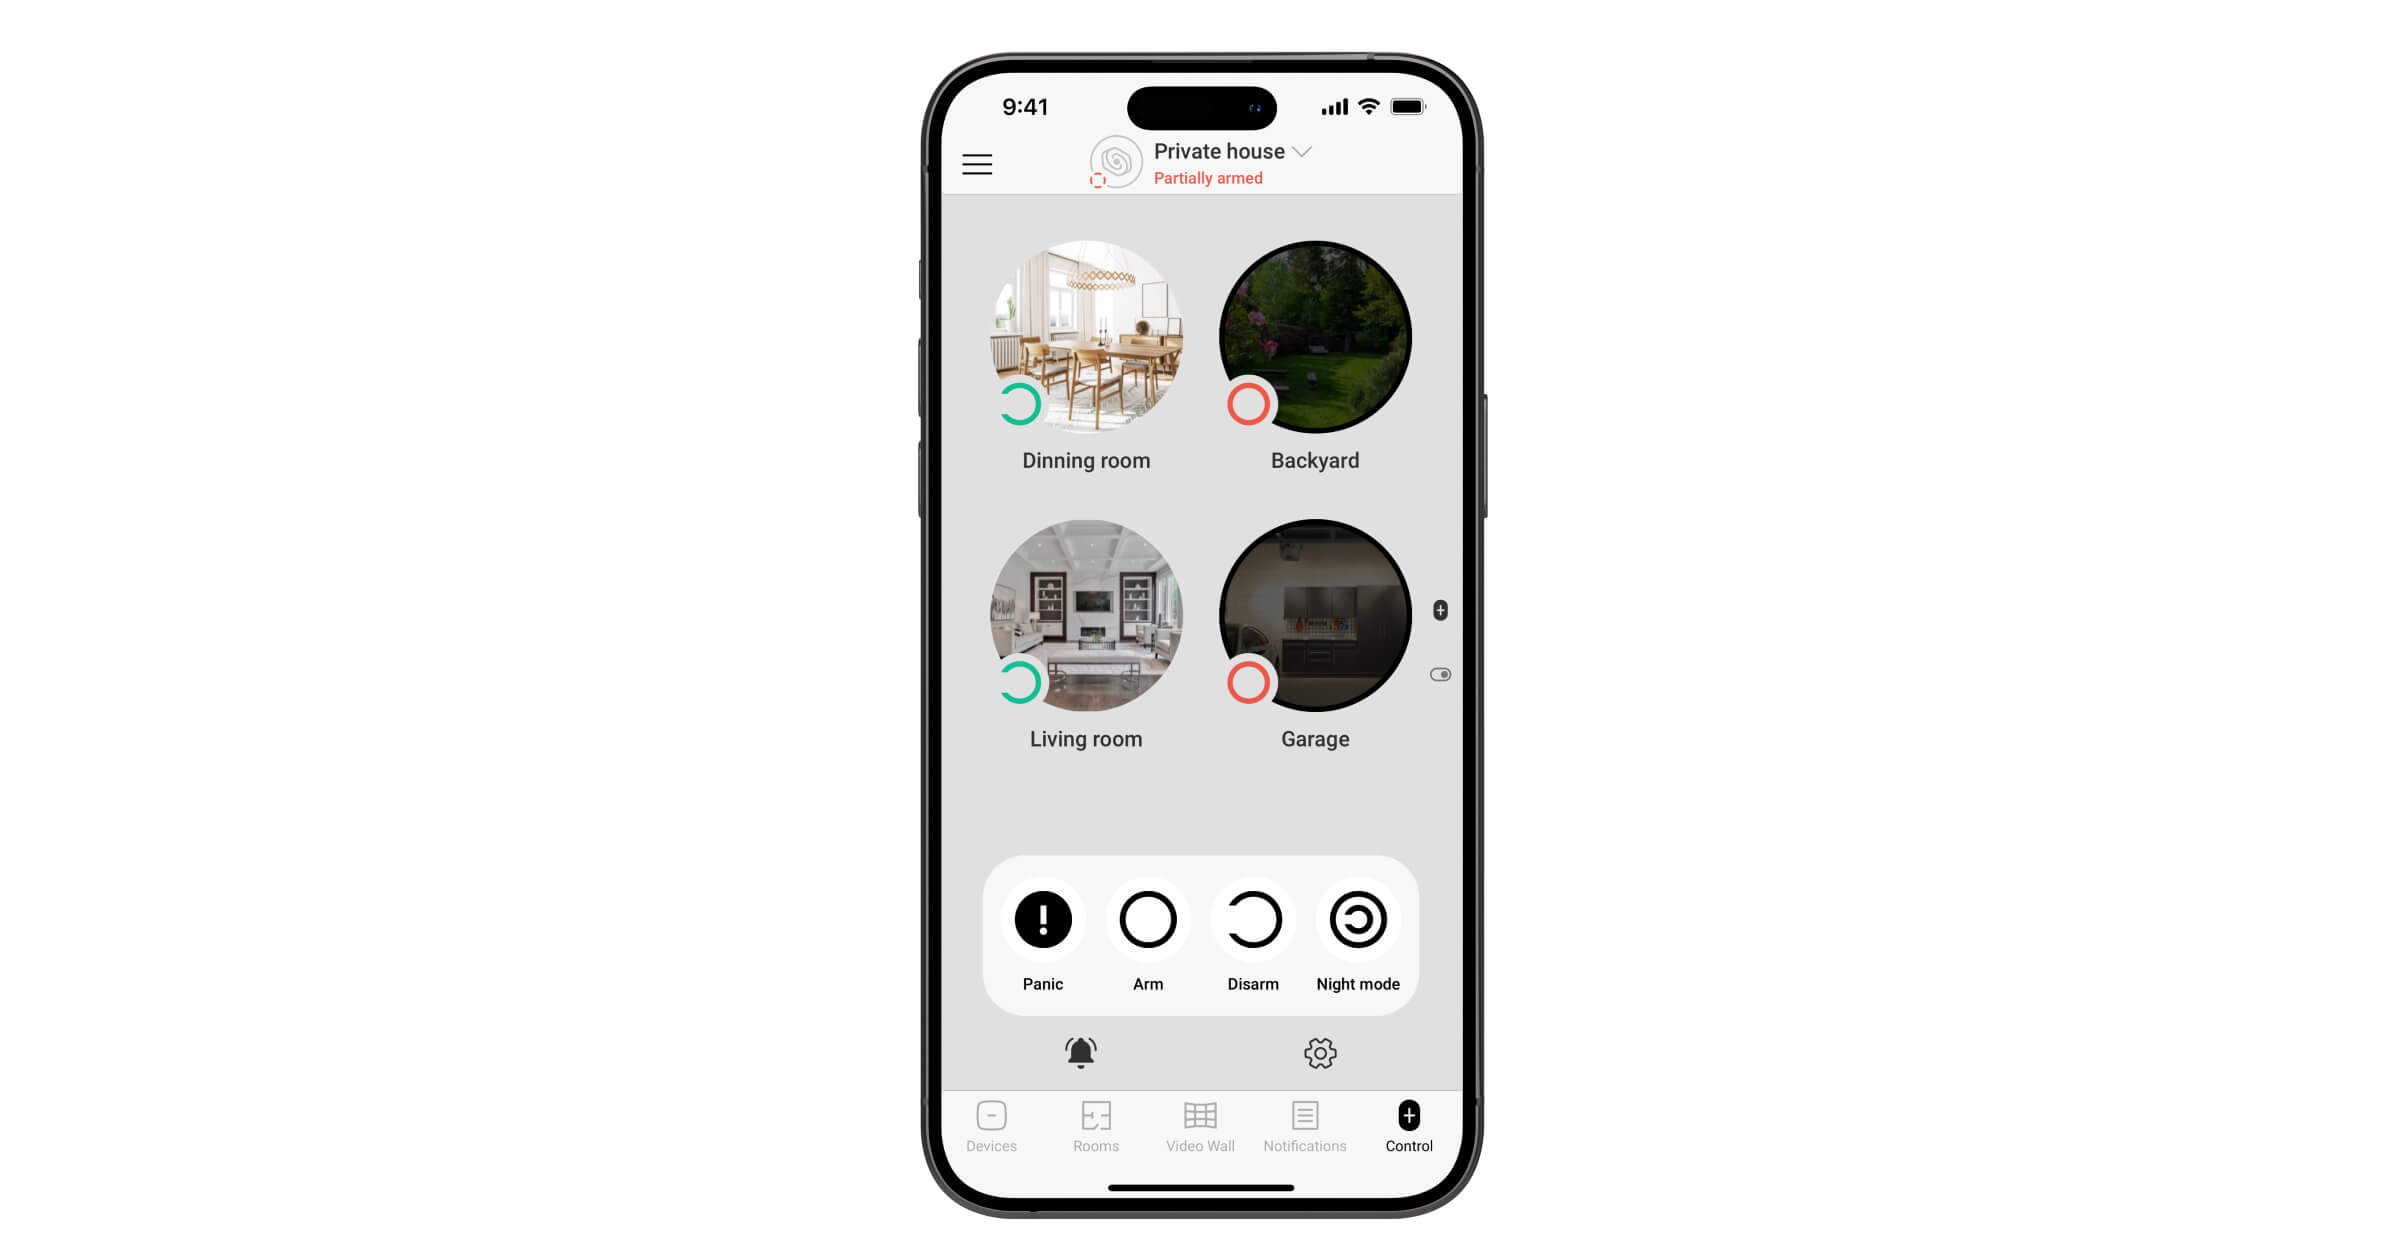
App with groups
Security management when group mode is activated
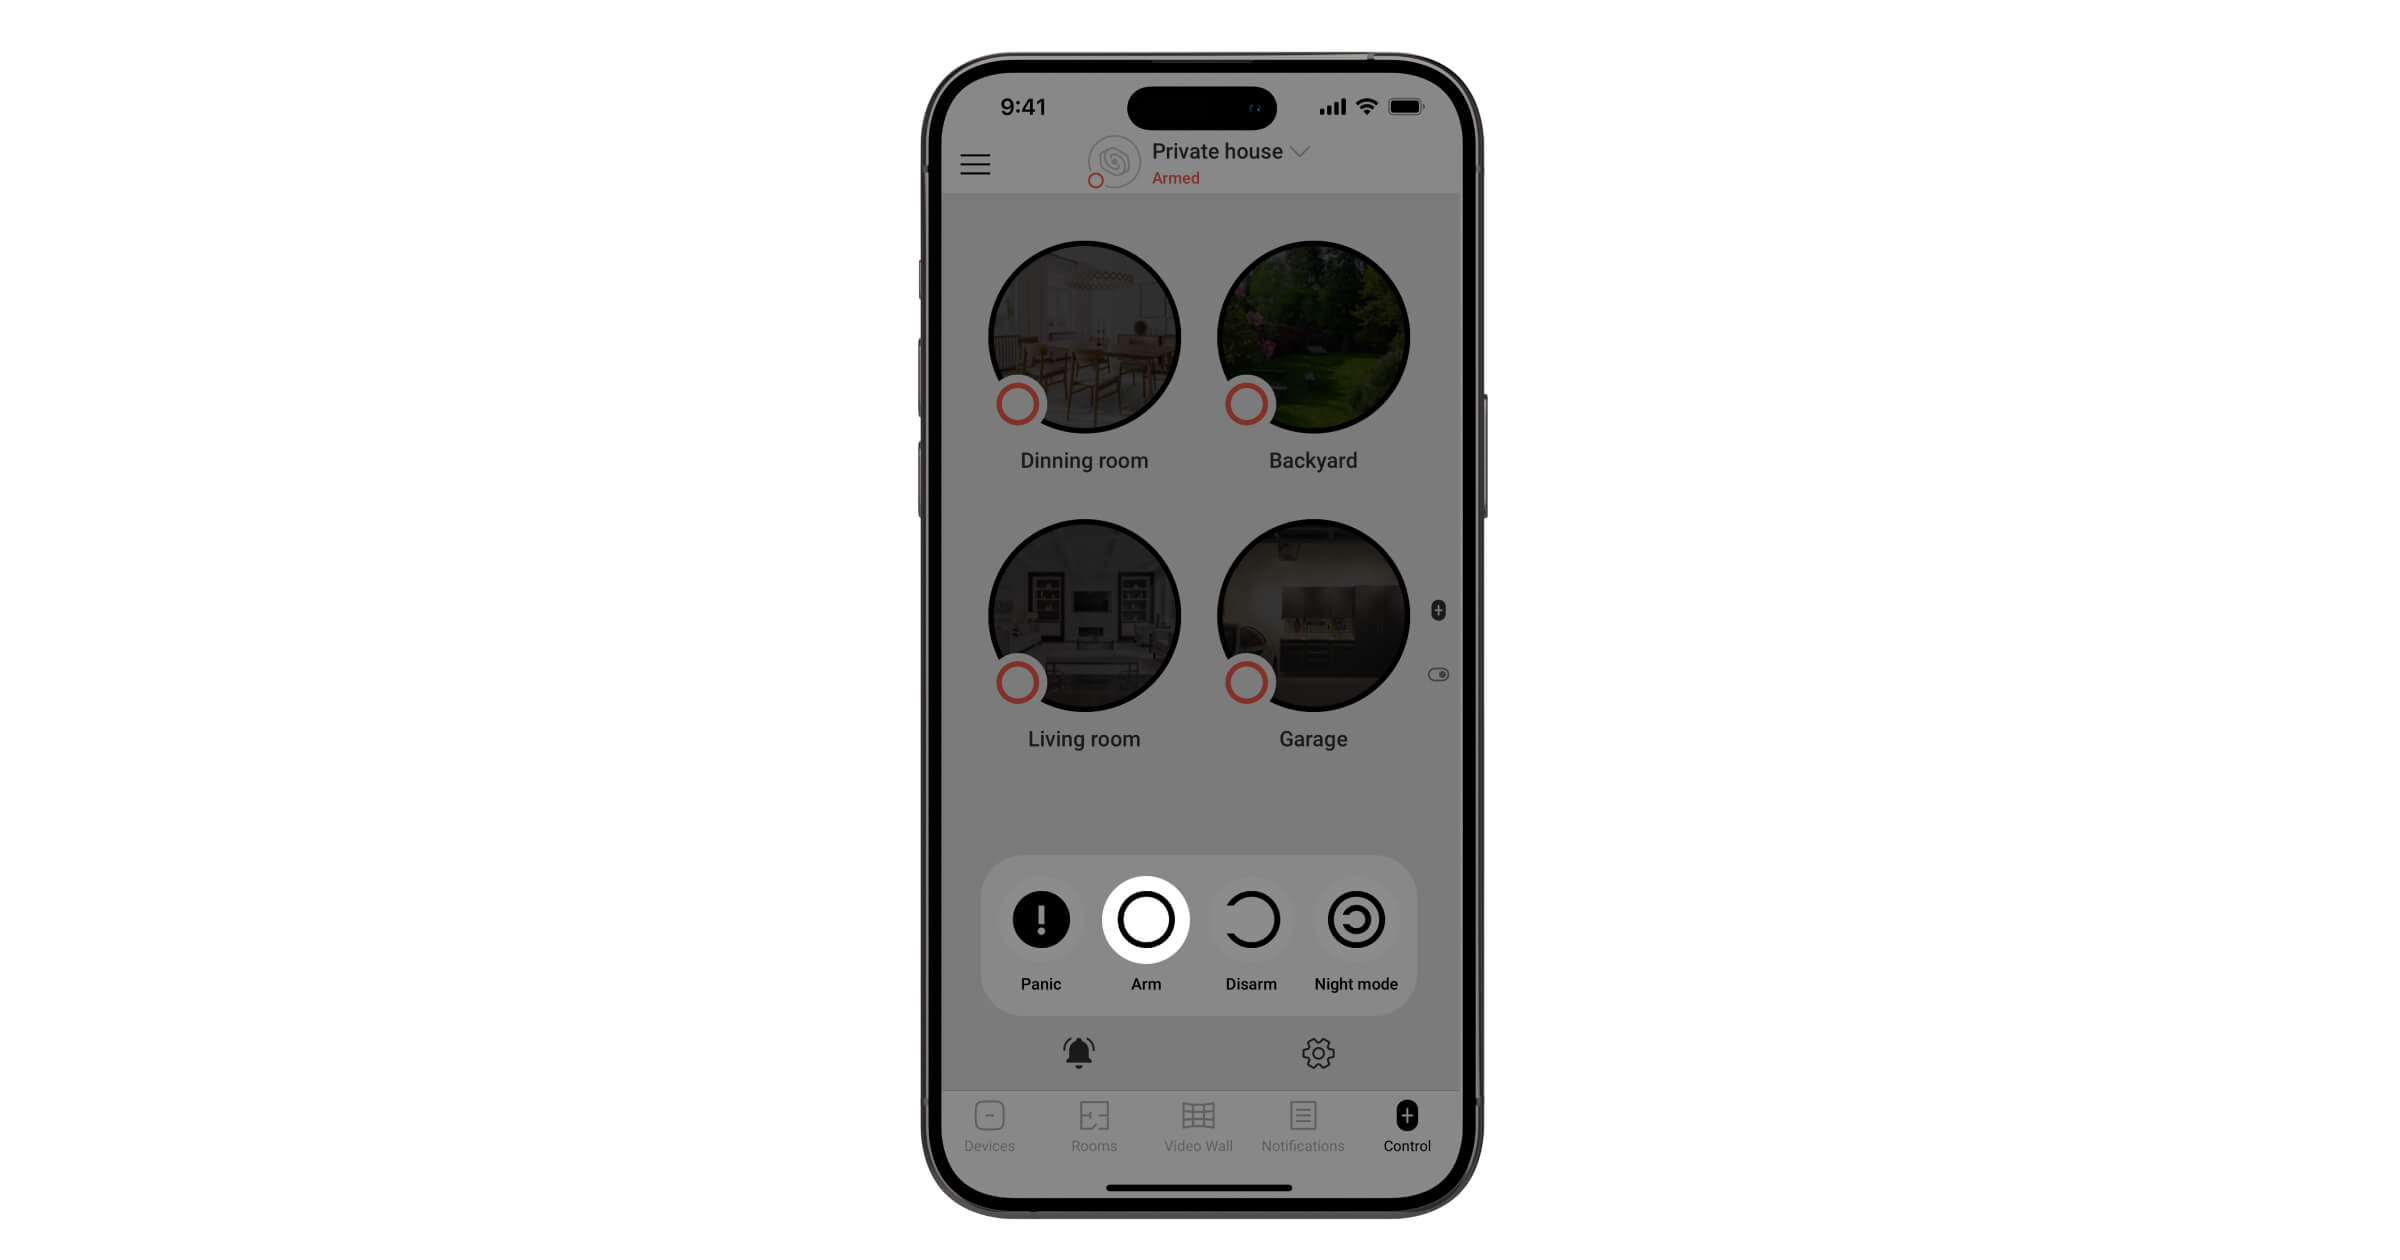
- To arm the entire system, tap Arm
 . After that, all groups for which the Arm if system armed option is enabled will be armed.
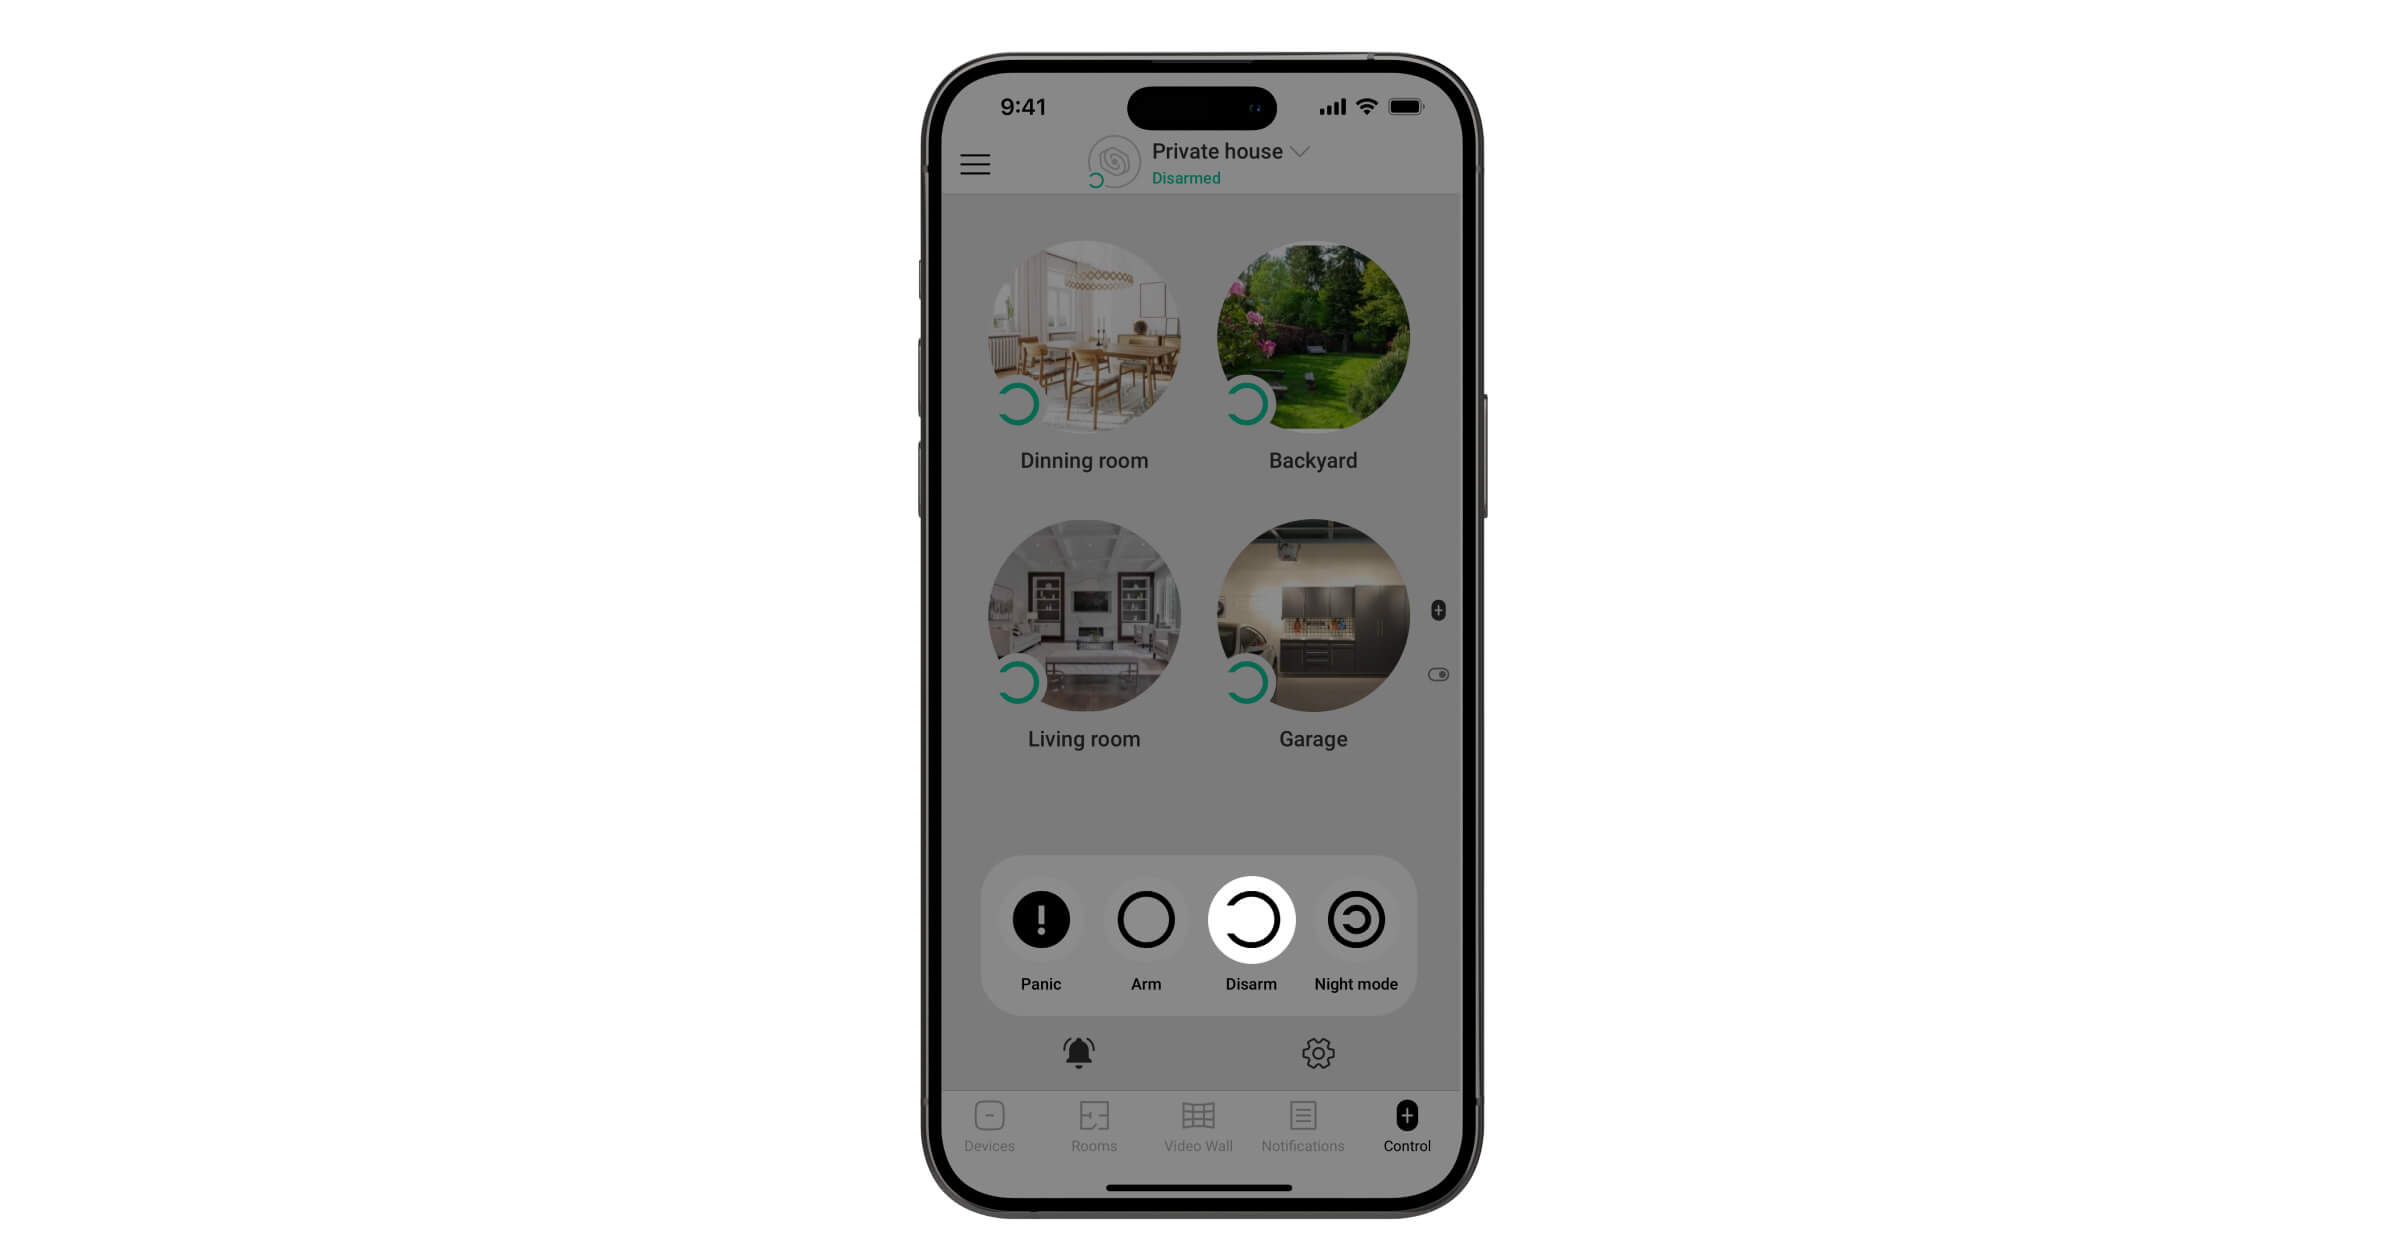
- To disarm the entire system, tap Disarm
 . After that, the system will be disarmed for all groups with the Disarm if system disarmed option enabled.
- To activate night mode, press Night mode
 . After the night mode is enabled, the groups will be highlighted by a frame.
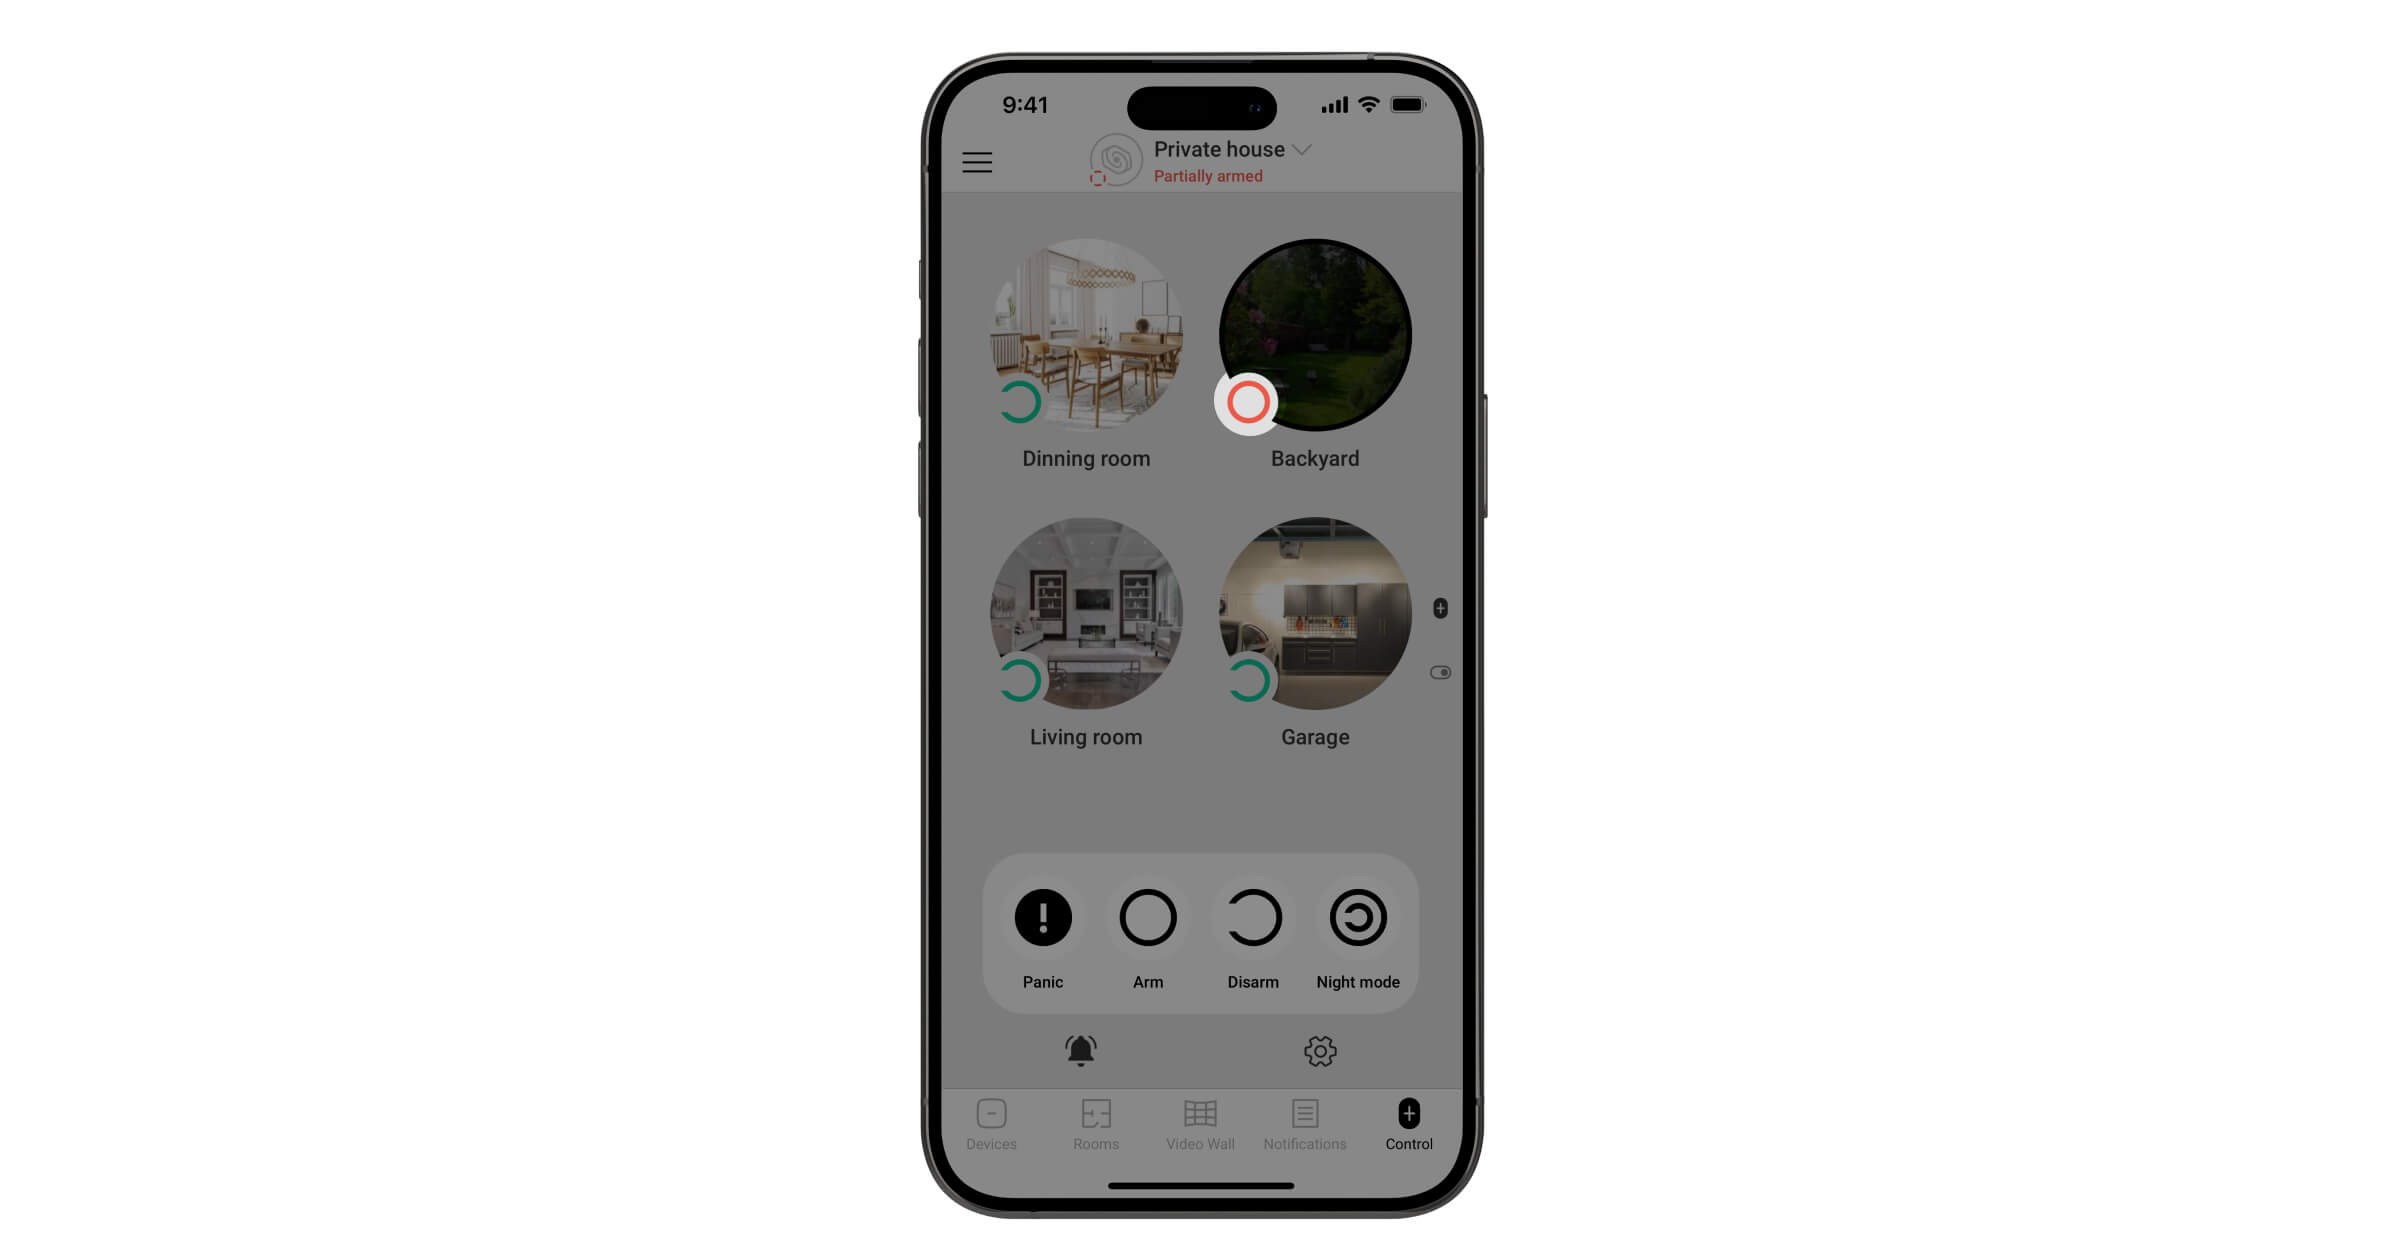
- To arm a group, tap on it. As soon as the group is armed, the pictograph in the lower left corner of the group changes to .
- To disarm a group, tap on it. As soon as the group is disarmed, the pictograph in the lower left corner of the group changes to .
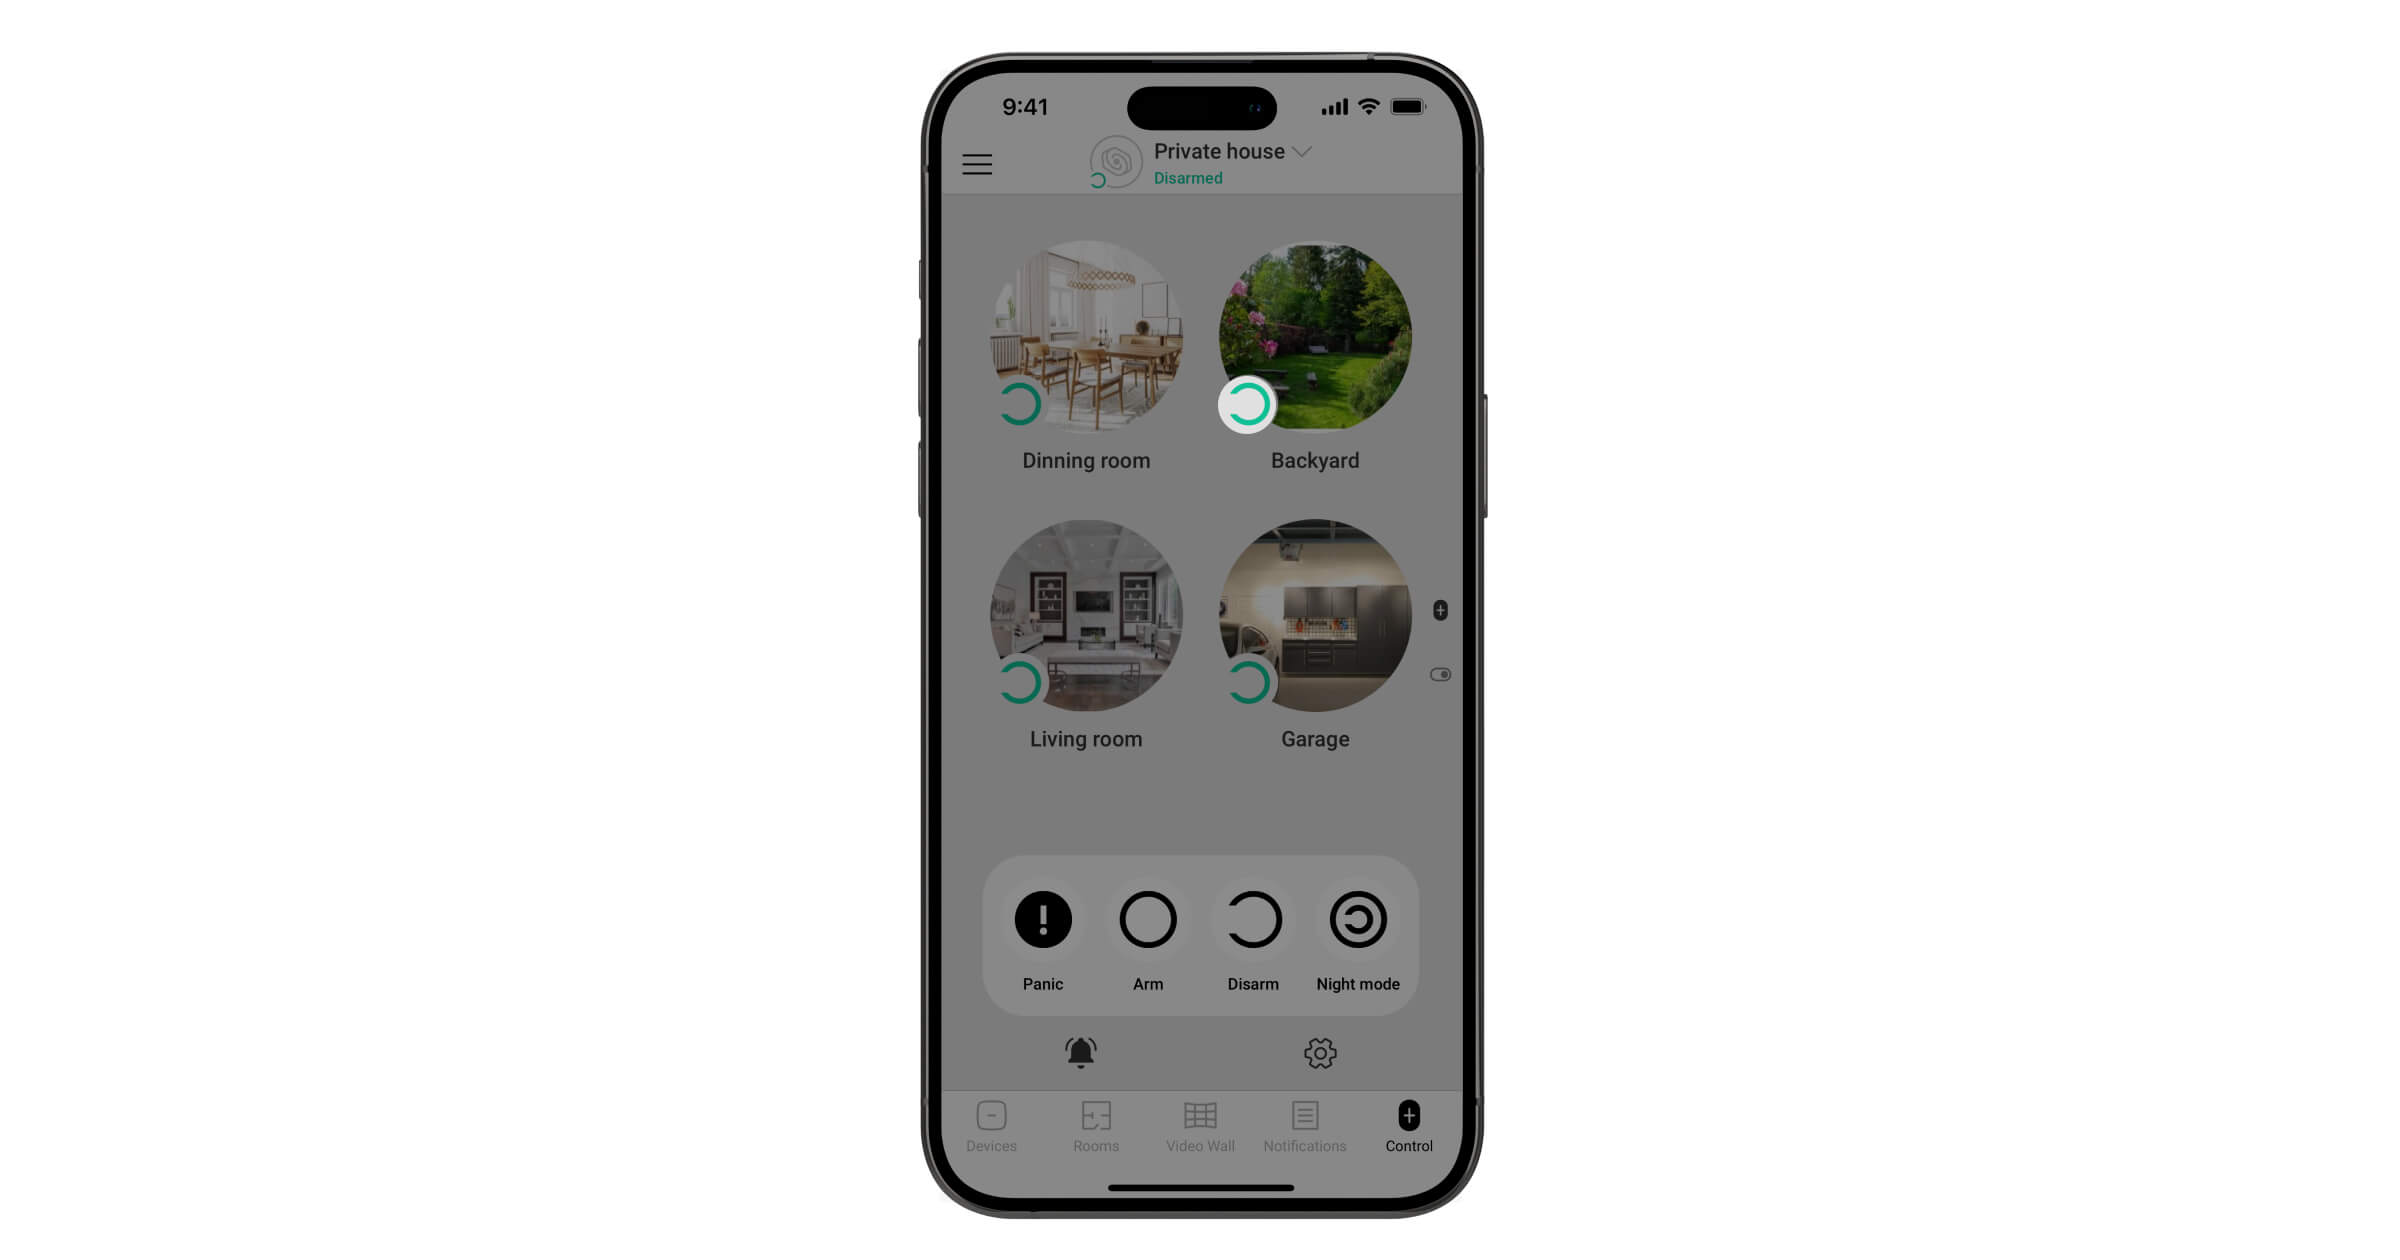
Space states with group mode enabled
The space selection menu displays the current security status.

- If all groups are armed, Armed is displayed.
- If at least one group is armed, Partially armed is displayed.
- If at least one group is armed and Night mode is activated, Partially armed is displayed.
- If only Night mode is enabled, Night mode is displayed.
- If the system is completely disarmed, Disarmed is displayed.
Adding new devices to the space
After the group mode is enabled, the process of adding devices remains the same. The only change is that when adding a new device, you need to specify the Group. Sirens, key fobs, and keypads are automatically added to the first created group and work with the entire system.
Key fob operation when group mode is activated
When the group mode is activated, key fobs can operate in four modes:
- By default — the key fob controls the security modes of the entire facility. It is not bound to a user or group. The name of the key fob is displayed in notifications about changing the security mode.
- Group-bound — the key fob controls the arming modes of its own group only. The name of the key fob is displayed in notifications about changing the security mode. Note that a key fob can only be bound to one group.
- User-bound — the key fob controls the arming modes of all groups to which the user has access. For example, if a user has access to only two out of three groups, the key fob will control their security modes only. The username is displayed in the notifications of changes in the security mode.
- User- and group-bound — the key fob controls the security mode of the specified group only. The username is displayed in the notifications of changes in the security mode. Note that a key fob can only be bound to one group.
To bind a key fob to a group, in the Ajax app:
- Go to the Devices
 tab.
tab. - Select the key fob.
- Go to its Settings .
- Go to Group management and select the required group.
- Tap Back to save the settings.
To unbind the key fob from the group, select All groups in the Group management field in its settings.
To bind a key fob to a user, in the Ajax app:
- Go to the Devices tab.
- Select the key fob.
- Go to its Settings .
- Go to User and select the required user.
- Tap Back to save the settings.
Night mode control using a key fob
The ability to control Night mode using a key fob depends on the device settings:
- Key fob is not group- or user-bound — the key fob can control Night mode. The name of the key fob is displayed in notifications about changing the security mode.
- Key fob is group-bound only — the key fob cannot control Night mode.
- Key fob is user-bound only — the key fob can control Night mode if the user has the appropriate rights. The username is displayed in the notifications of changes in the security mode.
- Key fob is group- and user-bound — the key fob can control Night mode if the user has the appropriate rights. The username is displayed in the notifications of changes in the security mode.
Operation of keypads with group mode enabled
After activating the group mode, the keypads can control the security of the entire facility, individual groups, as well as the Night mode. You can manage security modes with a common and personal password, as well as contactless Pass and Tag.
A keypad can be bound to a specific group. In this case, it only controls the security modes of the specified group. Note that the keypad cannot be bound to a user. To receive notifications about arming or disarming on behalf of the user, use personal passwords.
Refer to the user manual of the corresponding keypad to learn how to assign it to the group or configure group management. User manuals can be found on the Ajax Support page.
Night mode control using the keypad
The ability to control Night mode using the keypad depends on the device settings and the arming method:
- Keypad is not group-bound, common password is used — the keypad can control the Night mode. The name of the keypad is displayed in notifications about changing the security mode.
- Keypad is group-bound, common password is used — the keypad cannot control the Night mode.
- Keypad is not group-bound, personal password is used — the keypad can control the Night mode if the user has the appropriate rights. The username is displayed in the notifications of changes in the security mode.
- Keypad is group-bound, personal password is used — the keypad can control the Night mode if the user has the appropriate rights. The username is displayed in the notifications of changes in the security mode.
Operation of sirens with group mode enabled
After activating the group mode, the sirens operate with the entire system: they signal about delays and respond to alarms of all detectors as well as inform about changes in the security mode of a system or any of the groups.
The siren can be bound to a specific group. In this case, the siren will react to changes in the security mode and alarms in its group.
To bind a siren to a group, in the Ajax app:
- Go to the Devices tab.
- Select the siren.
- Go to its Settings .
- Go to the Alarms in Group mode field and select the required group.
- Tap Back to save the settings.
To unbind the siren from a group, select All groups in the Alarms in Group mode field in its settings.
Siren response to Night mode alarms
The siren informs about delays as well as reacts to alarms of the Night mode, regardless of binding to the group.
Operation of automation devices after group mode activation
After enabling the group mode, automation devices are automatically bound to the group defined by the administrator.
This means that the scenarios for arming and disarming will be executed after arming/disarming the group to which the automation device is bound. The scenario is also triggered when arming and disarming the entire facility if the corresponding options are enabled in the settings of the group to which the automation device is bound (Arm if system armed and/or Disarm if system disarmed).
Alarm and scheduled scenarios operate regardless of the group mode.
React of automation devices to Night mode
Automation devices react to enabling and disabling the Night mode if the React to Night mode toggle is turned on in the By arming/disarming scenario settings.
Alarm and scheduled scenarios operate regardless of the group mode or Night mode.