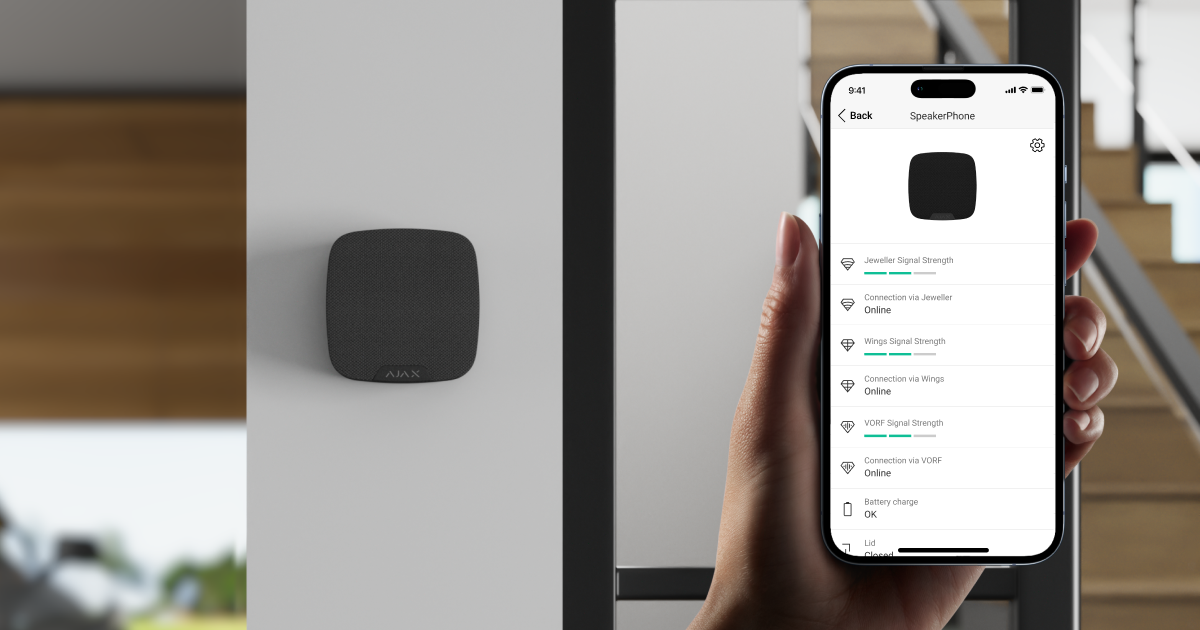
Telephony settings allow you to configure an Ajax hub to communicate with a central monitoring station (CMS) via SIP protocol.
The settings are available only in Ajax PRO apps. Also, only one security company can be connected to the hub to make calls via SpeakerPhone Jeweller.
Setting up telephony
- Open Ajax PRO app.
- Select the required space.
- Go to the Devices
 tab.
tab. - Select a hub to which the voice module is added from the list.
- Go to Settings by tapping on the gear icon
 .
. - Select the Telephony settings menu.
- Set the required parameters.
- Tap on Back to save the new settings.
| Setting | Value |
| Choose template |
Allows the user to apply a telephony settings template. The setting is displayed if at least one template is created. |
| Allow communication via voice module |
When the option is enabled, the system allows company–site communication via the voice module. Disabled by default. |
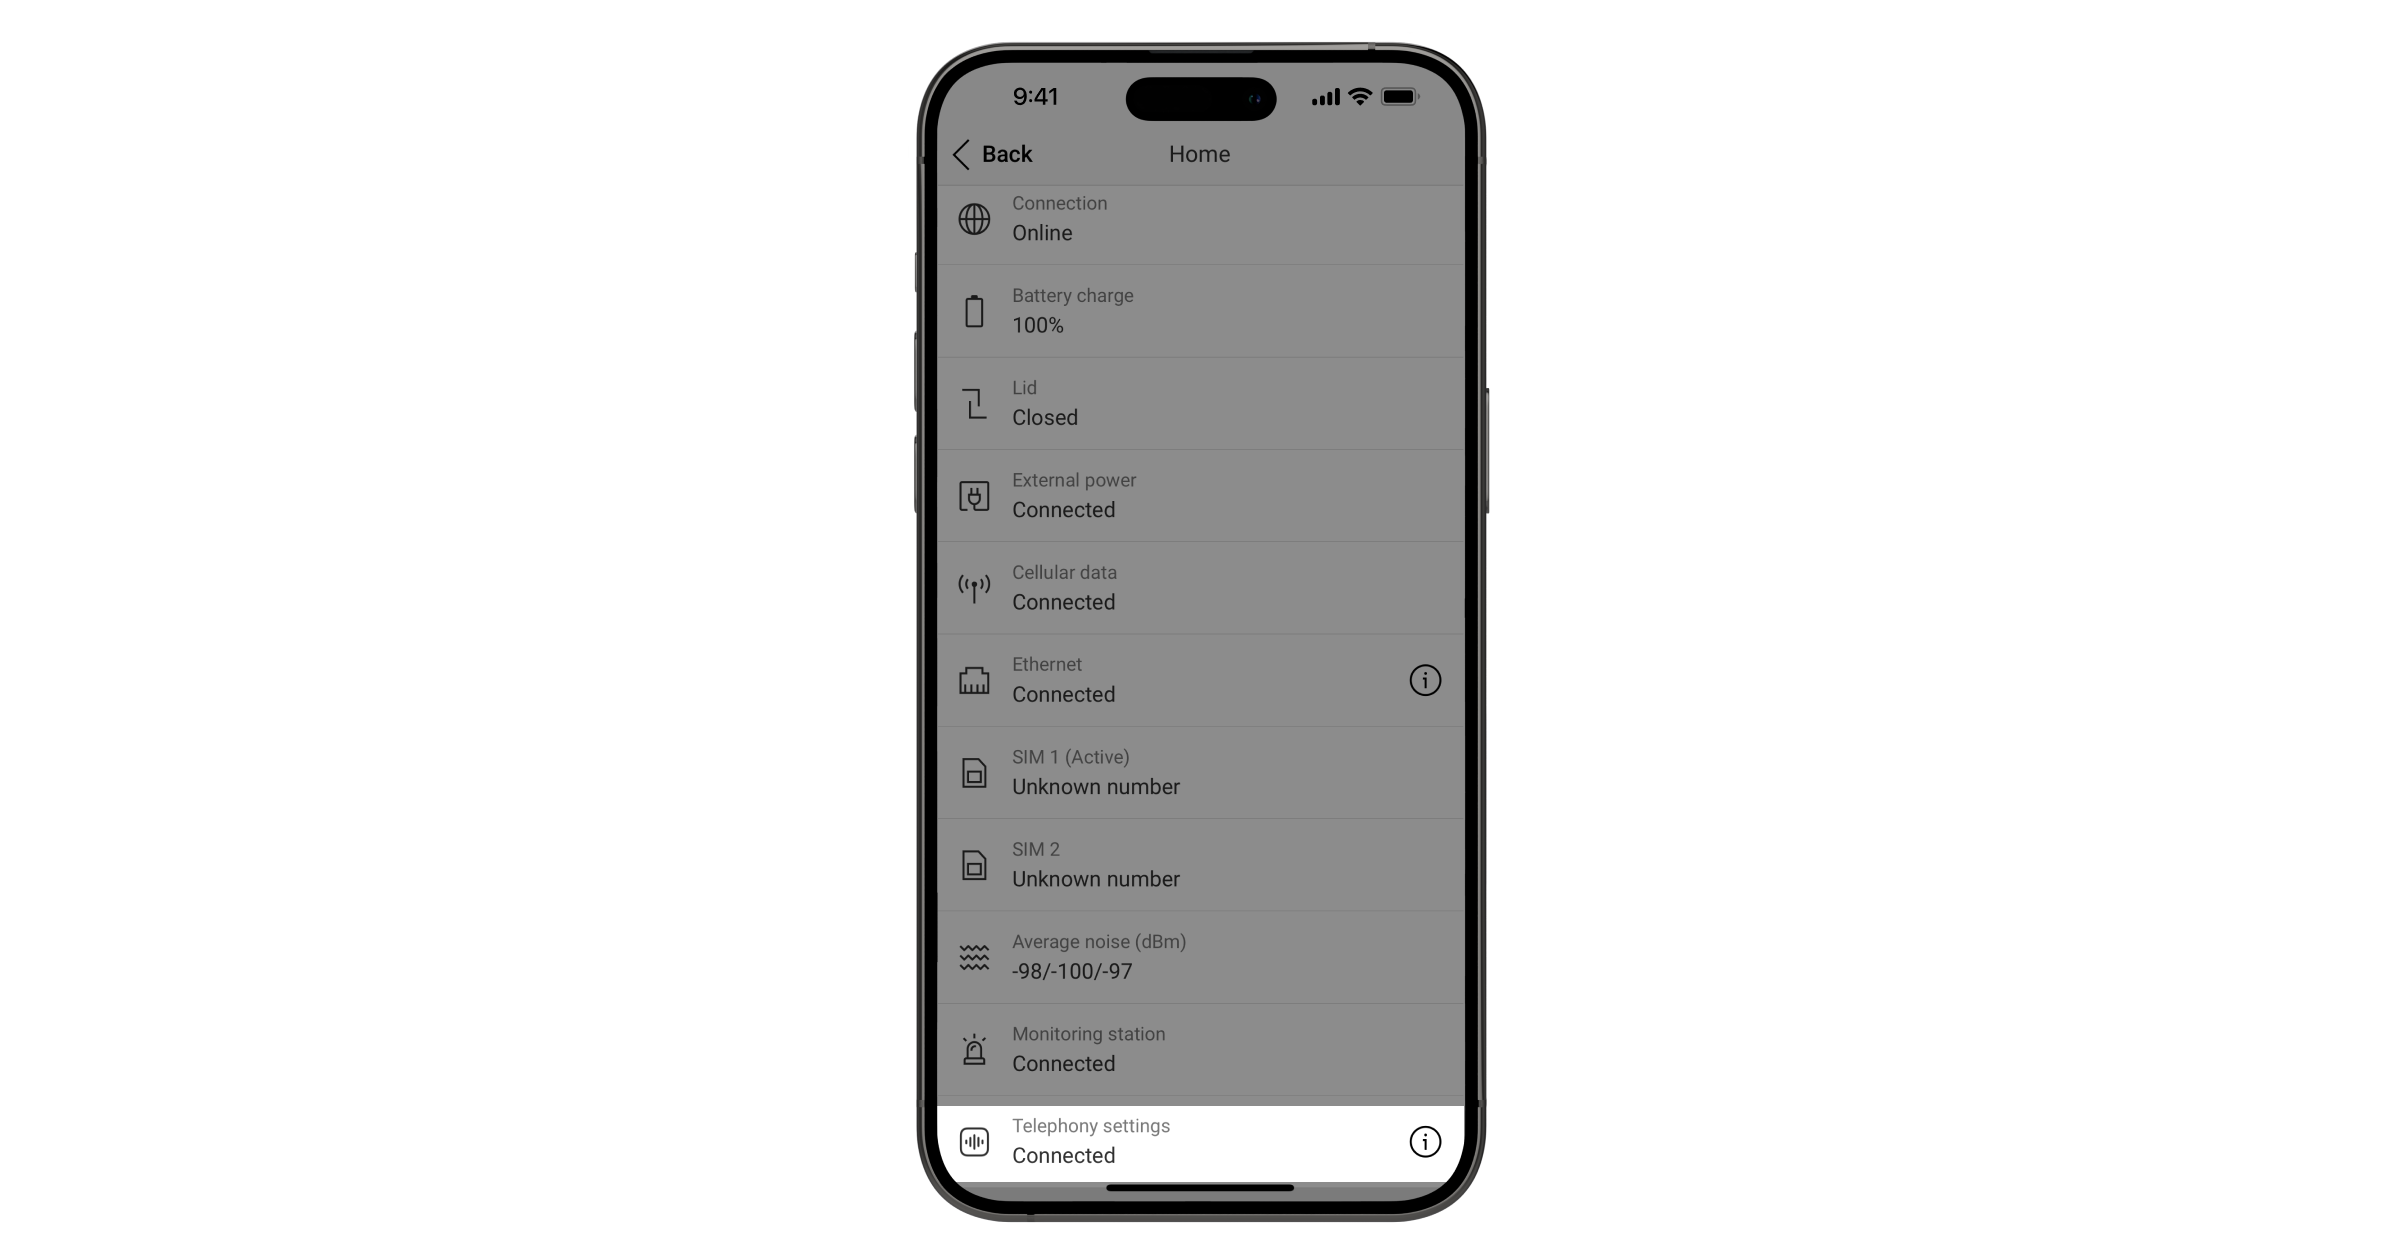
| Connection type | Specify which connection type to use for calls via voice modules:
|
| Connection | |
| Company settings | Allows the user to specify connection details:
|
| Object settings | Allows the user to specify site details:
Can contain up to 12 Cyrillic characters or up to 24 Latin characters. |
| Communication channel | Allows the user to select what channels to use for making calls:
Availability of Wi-Fi communication channel for calls depends on the hub model and firmware version of the Wi-Fi module. |
| Allowed call types | Allows the user to select call type:
|
| Call options |
Allows the user to specify call type. When the Call only when space is armed option is enabled, the call using the voice module can only be made when the system is armed. When the Call only after alarm option is enabled, the call using the voice module can only be made after alarm. Time to make call after alarm — the period during which CMS can call the site after an alarm is triggered. It can be set from 5 to 30 minutes. Call maximum duration can be set from 1 to 10 minutes. |
| Notify of connection state | When the option is enabled, the system notifies you if the connection with communication services is lost, and once it is restored. |
The CMS operator can not connect to voice modules added to the hub, which has switched to Saving mode (the Battery power saver feature should be enabled and configured in the hub settings).
In such cases, the CMS operator can connect and communicate via voice modules only during the hub Activity period when the hub stays connected to Ajax Cloud. The ongoing call can not prolong the hub activity period; therefore, the call will end automatically once the hub switches to Saving mode.
With settings templates, multiple telephony settings can be applied at once to save time when configuring several systems. This feature is available in PRO Desktop.
Updating the firmware of the hub’s Wi-Fi module
If your hub model has a Wi-Fi communication channel, and you want to use it for calls, check whether it supports this functionality. To do this:
- Open Ajax PRO app.
- Select space, where the voice module is added.
- Go to the Devices tab.
- Select a hub.
- Go to Settings by tapping on the gear icon .
- Select:
Telephony settings → Communication channel
If hub’s Wi-Fi module doesn’t support calls, but there is a new firmware for it, you will see the corresponding field to proceed an update.
- Select Check for new version and start an update.
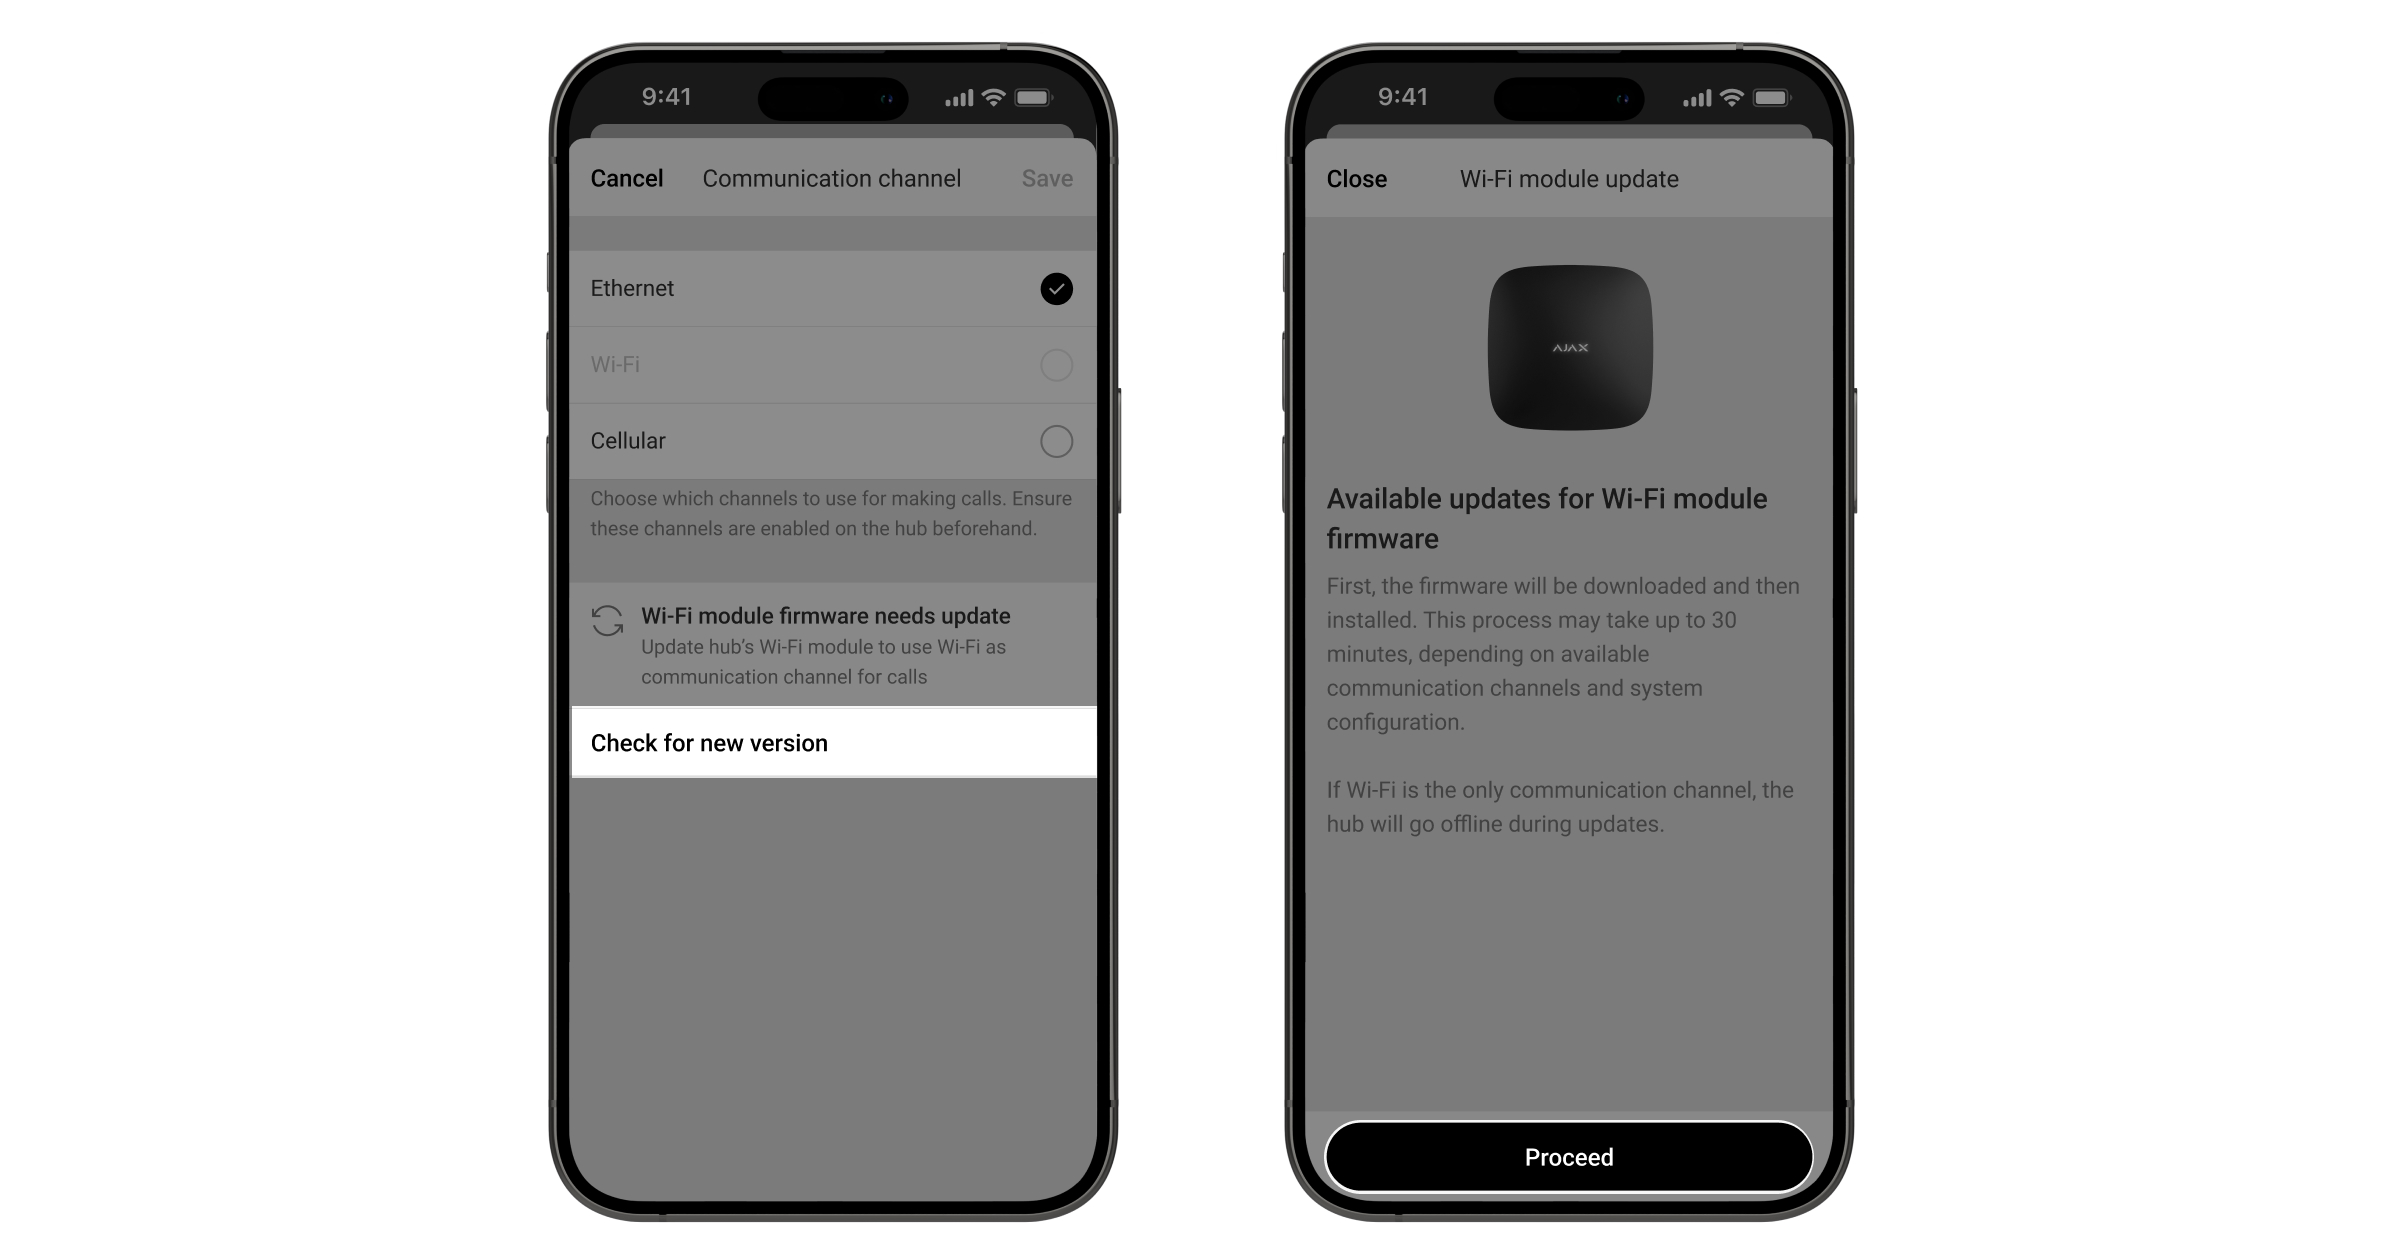
An update won’t start if:
- Wi-Fi communication channel is disabled. Open hub settings, select the Wi-Fi menu and enable the Wi-Fi toggle.
- Wi-Fi is the only hub’s communication channel. Enable additional channels in hub settings.
- Hub’s battery is low or external power is not connected to the hub. Fix the issue to run update.
After the successful firmware update, you can select Wi-Fi communication channel during telephony settings.