GlandBox is a wiring accessory for EN54 Fire Hub Jeweller — a wireless control and indicating equipment (CIE) for a fire alarm system, supporting intrusion protection devices. GlandBox is used for installing the CIE in cases where cables need to be routed from the side rather than through the wall.
The complete set includes all necessary mounting fasteners, except for cable glands. GlandBox is intended for indoor use only.
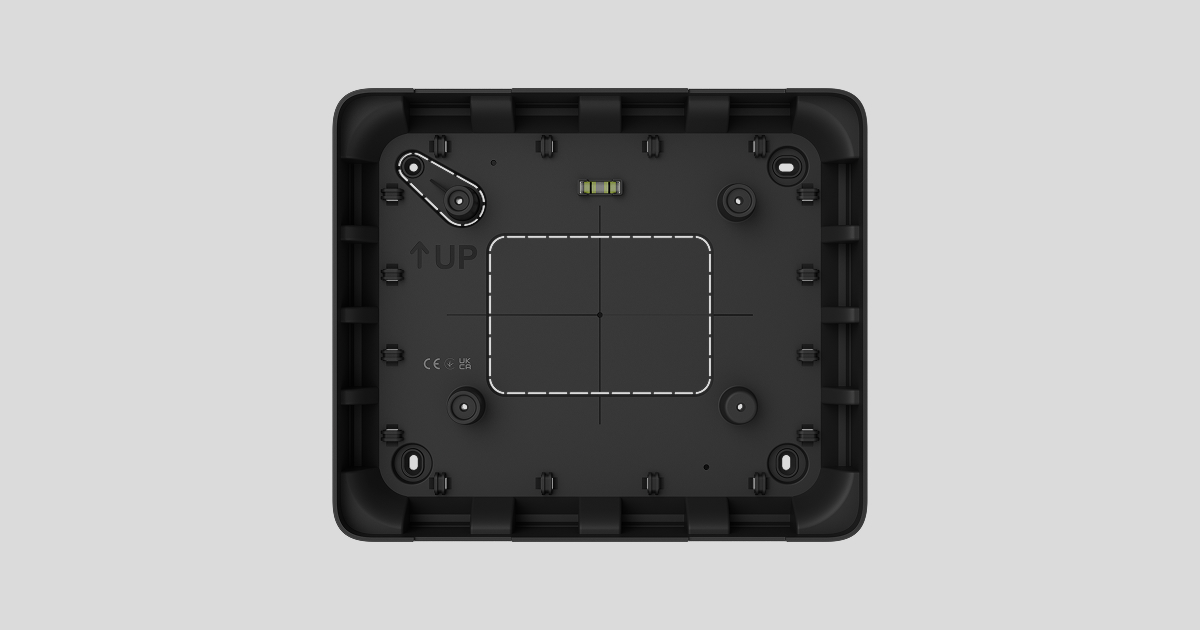
Functional elements
- Bubble level to check the inclination angle of the mount during installation.
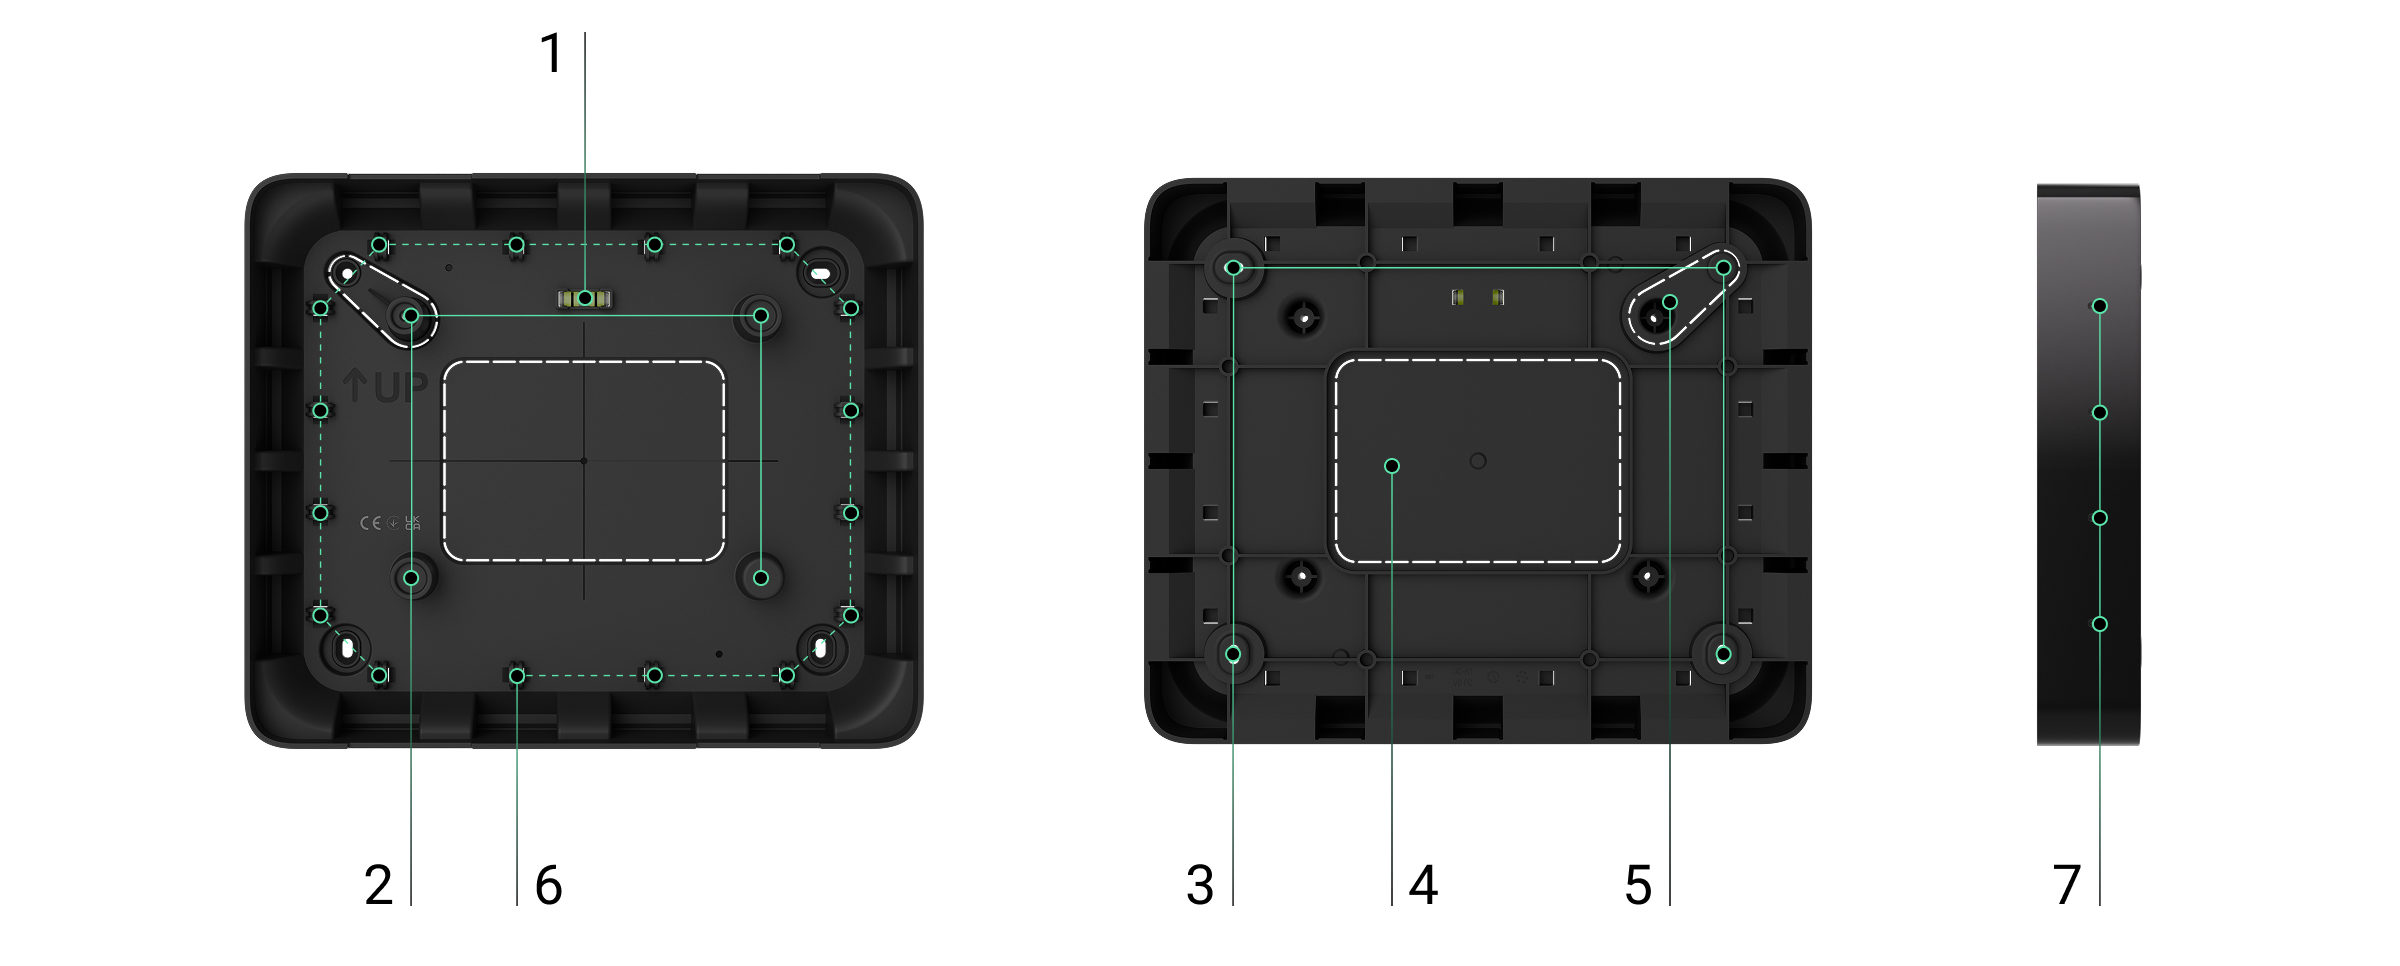
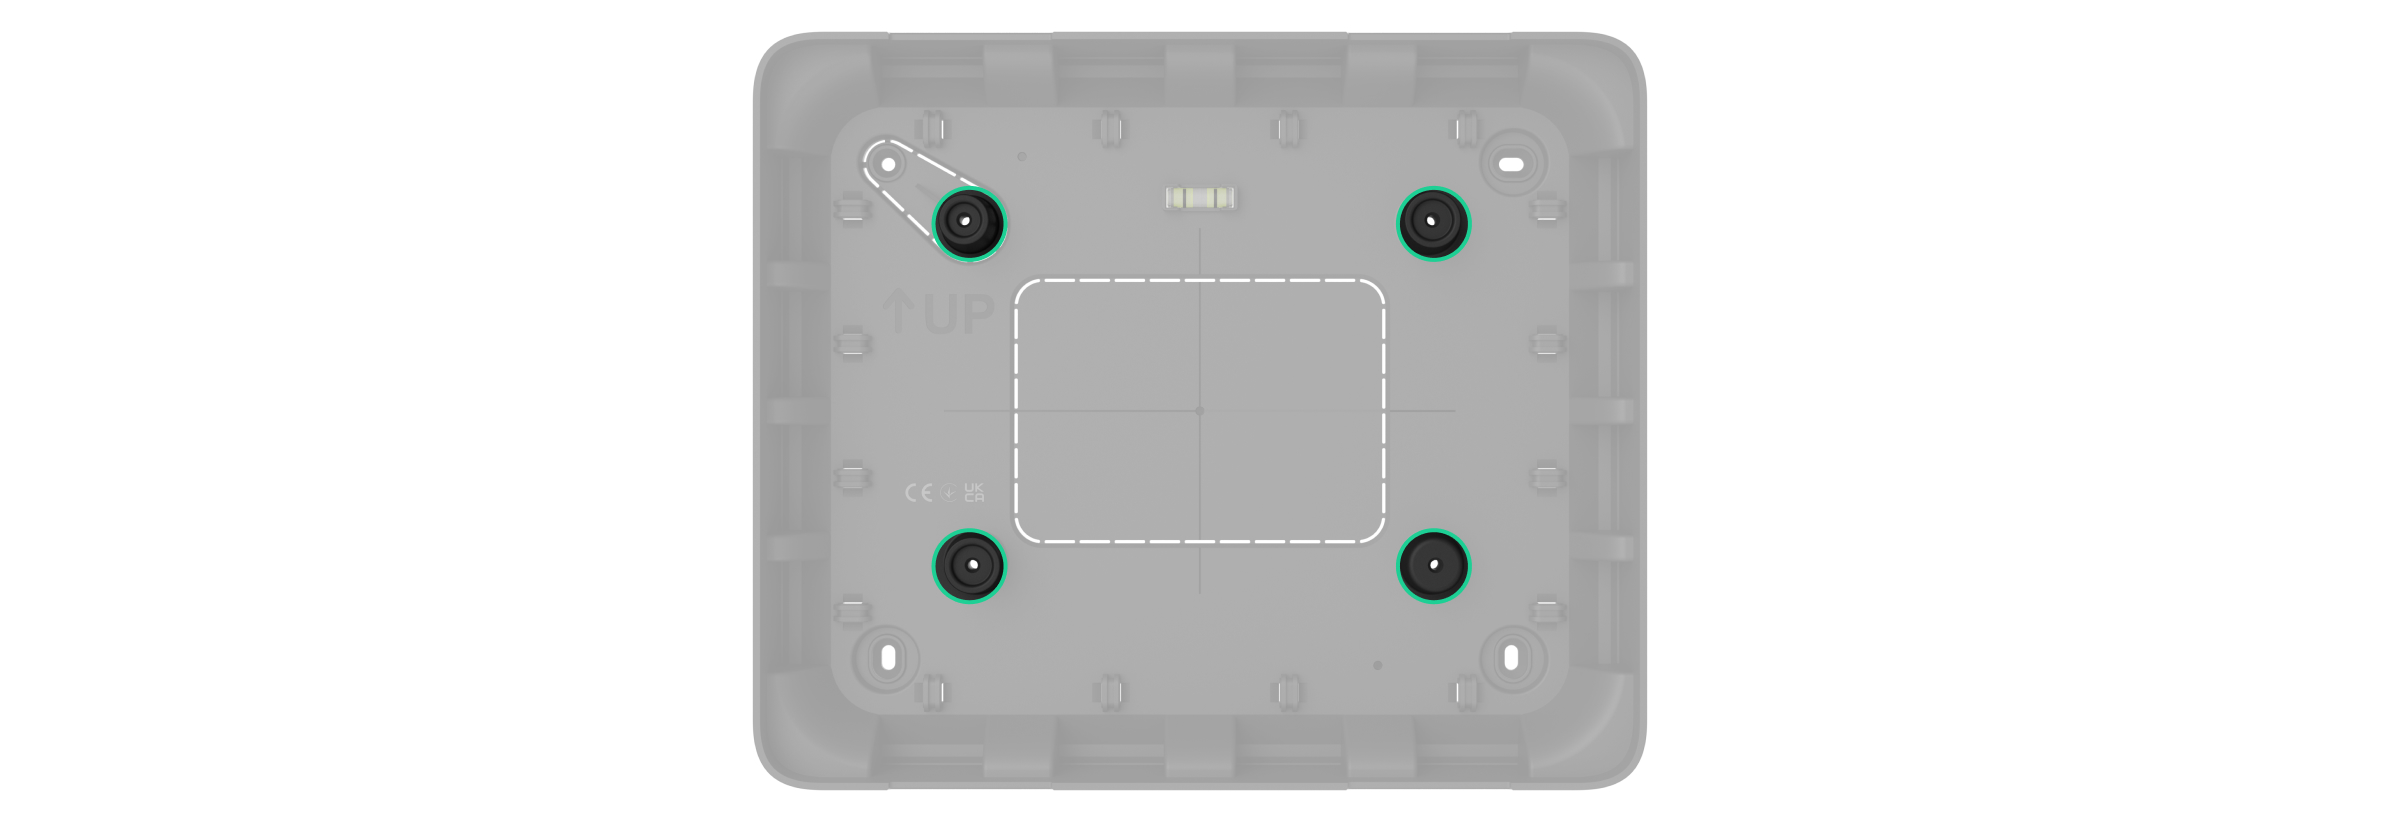
- Holes to attach the SmartBracket mounting panel of EN54 Fire Hub Jeweller.
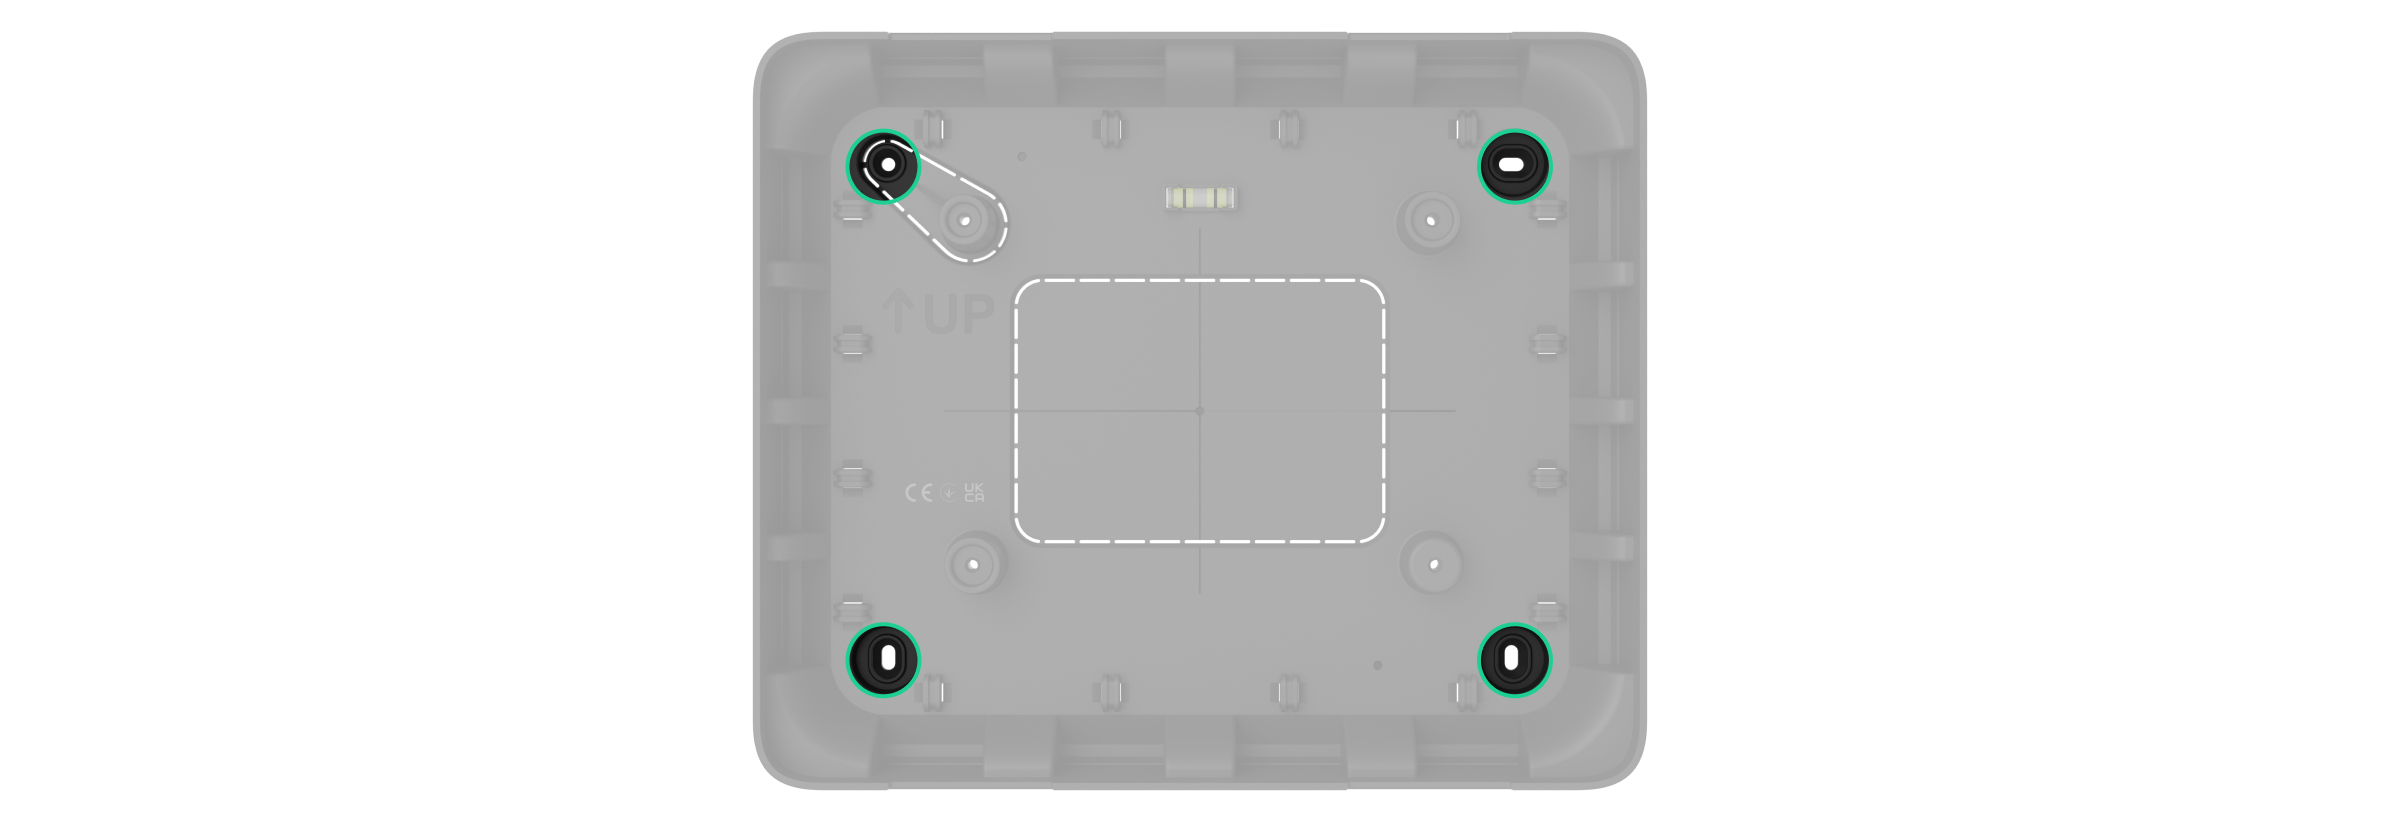
- Holes to attach GlandBox to the surface.
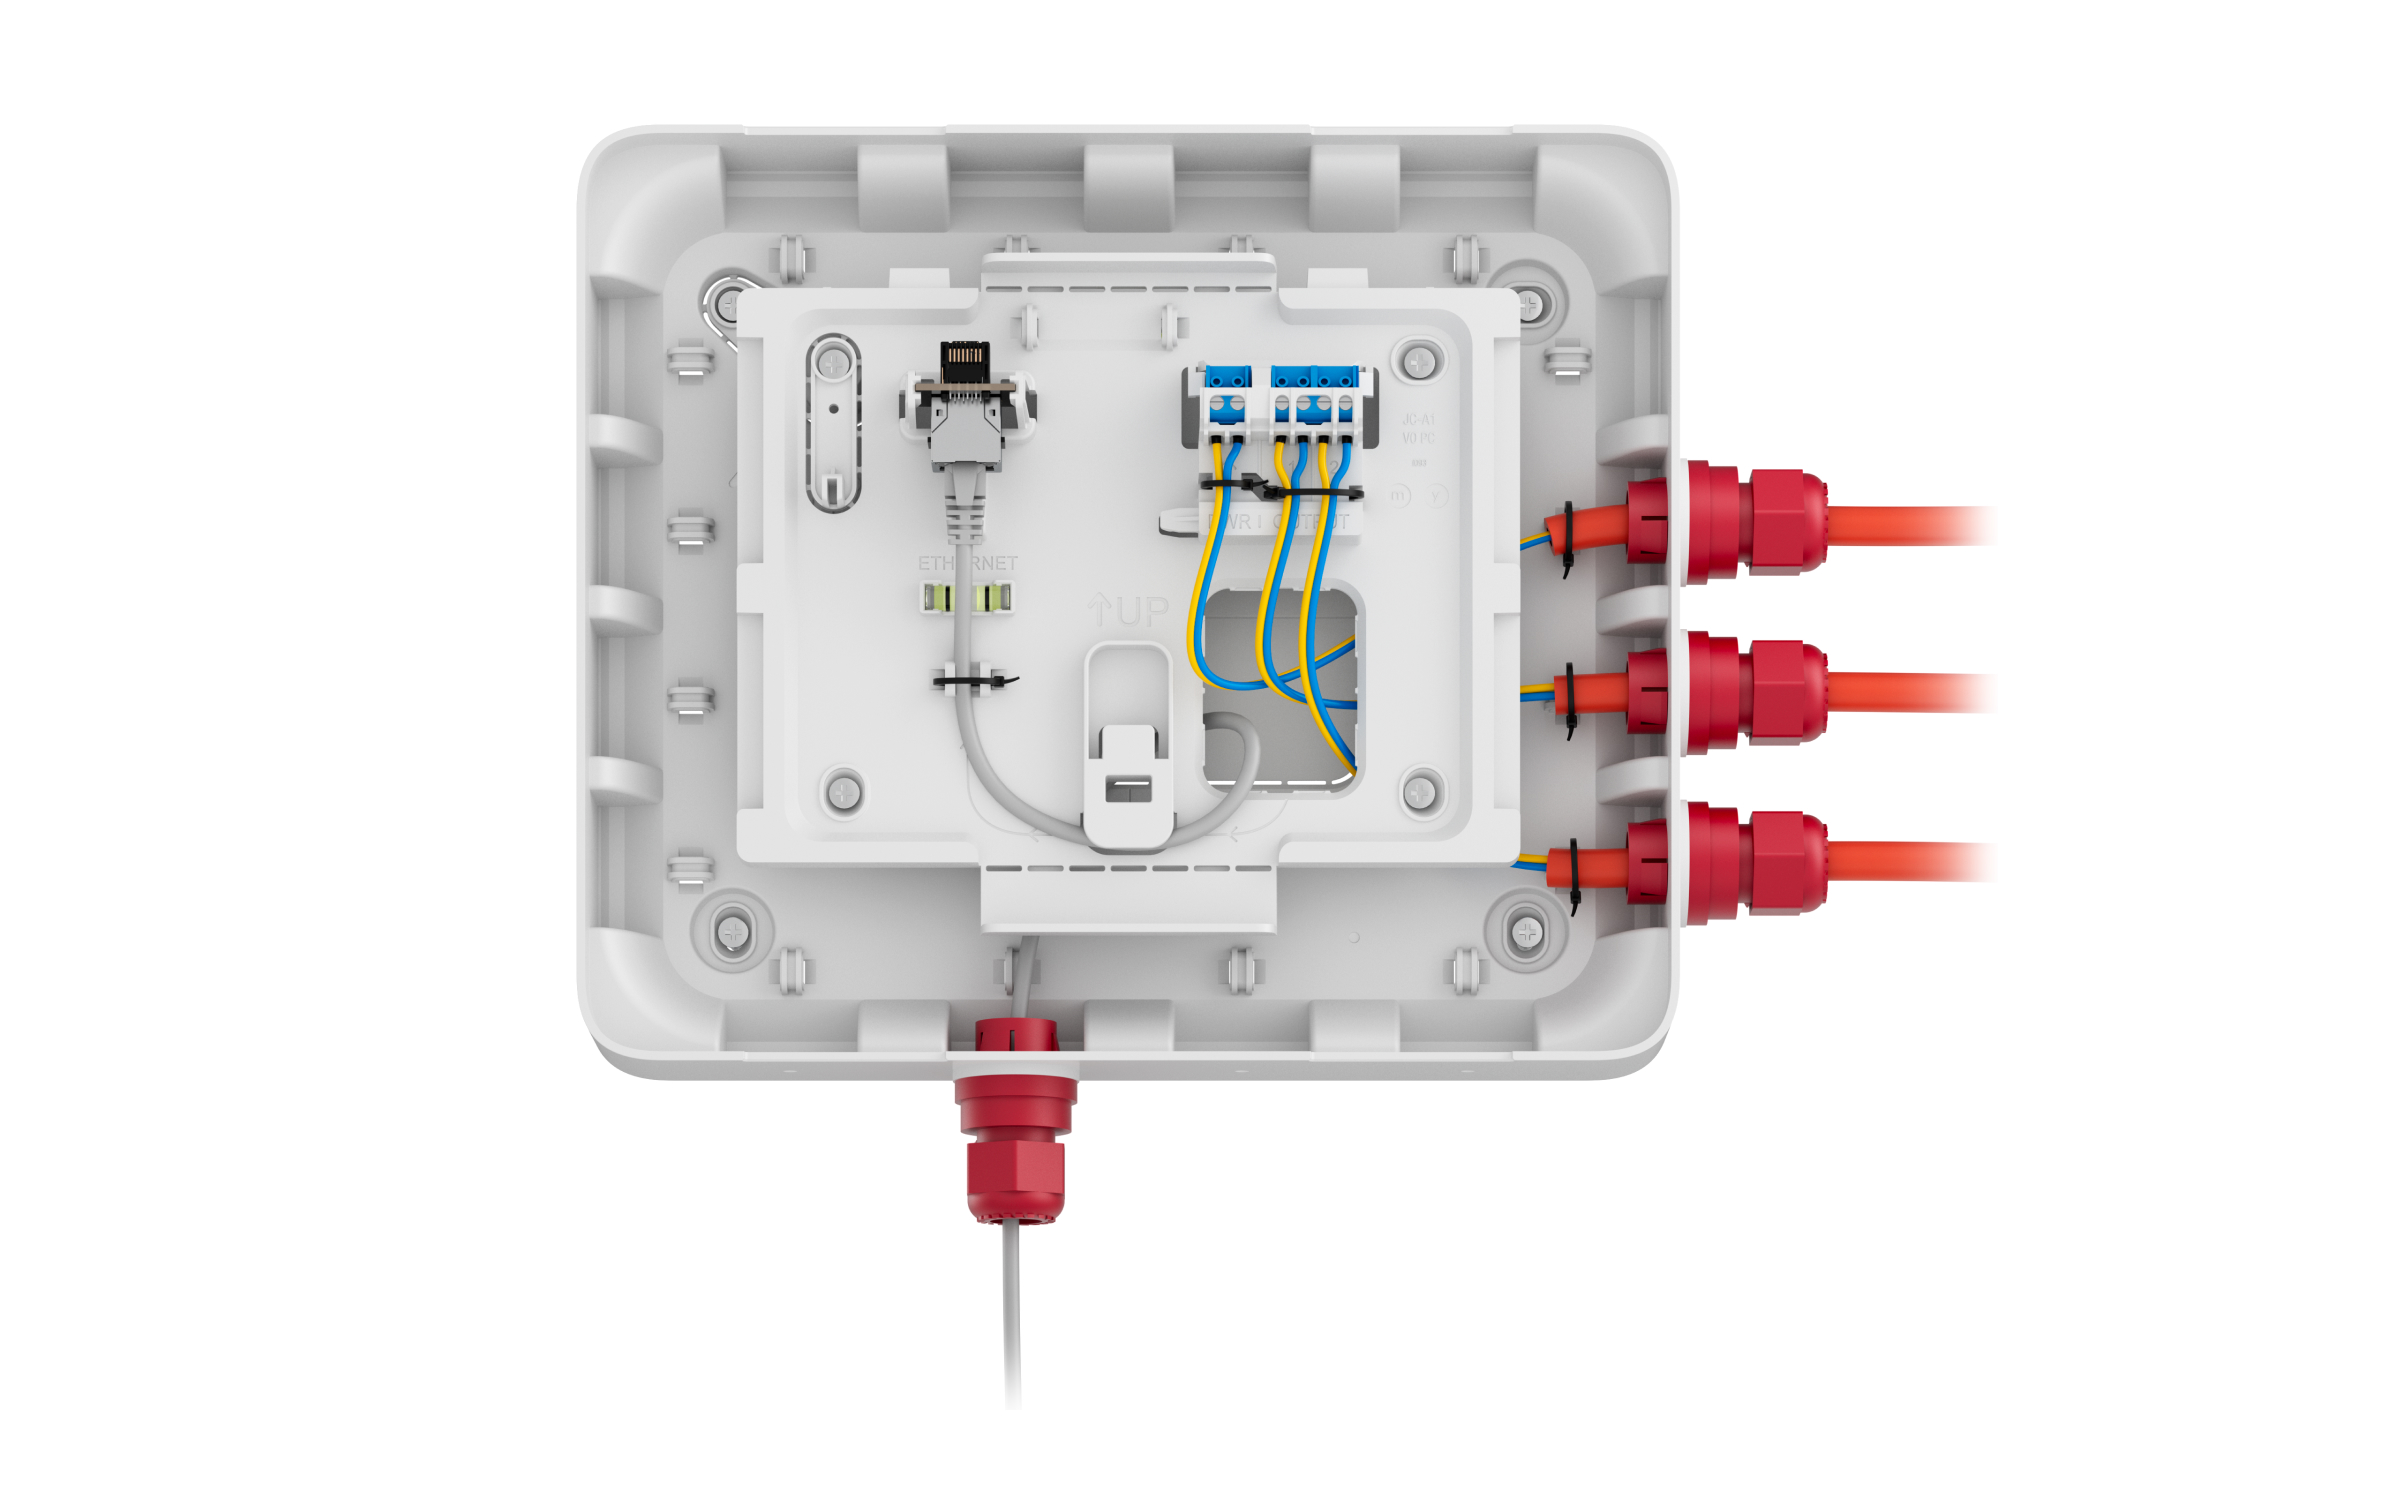
- Perforated part for routing cables through the wall.
- Perforated part for triggering the tamper button in case of an attempt to detach the GlandBox from the surface. Do not break it off.
- Fasteners to fix the cables with ties.
- Recesses for convenient drilling of holes for cable glands. Each side of the accessory has four recesses.
Compatible devices
GlandBox is designed exclusively for EN54 Fire Hub Jeweller. Device compatibility can be additionally confirmed via the link.
GlandBox is sold separately from EN54 Fire Hub Jeweller.
Key features
GlandBox is a plastic wiring accessory with an UL 94 V-0 flammability rating, designed for installing with EN54 Fire Hub Jeweller. It is used when fire alarm system cables are routed to the CIE externally instead of through the wall.
The accessory features 16 points for cable glands, with 4 on each side. This allows for convenient cable management regardless of the system layout.
GlandBox is equipped with a bubble level, UP key, and center markings for the CIE. These aids make the installation process more simple and precise.
Selecting the installation site
The GlandBox installation site must comply with the mounting recommendations for EN54 Fire Hub Jeweller. Detailed guidelines can be reviewed in the CIE user manual.
Follow these recommendations when designing your Ajax system. The system must be planned and installed by qualified specialists. A list of recommended Ajax partners is available via the link.
Where not to install GlandBox
Do not install GlandBox in environments where temperature or humidity levels fall outside the specified operating ranges of GlandBox and EN54 Fire Hub Jeweller. Doing so may damage the wiring accessory and the CIE.
Preparing to install
Cable arrangement
When preparing for cable routing, review the electrical and fire safety regulations in your region. Strictly follow these standards and regulations.
Cable routing
We recommend reading the Selecting the installation site section carefully before beginning installation. Avoid deviations from the system project. Failure to follow basic installation rules or the recommendations in this manual may result in improper operation or loss of connection with the CIE mounted on GlandBox.
Installation
Before installation, ensure the selected location for GlandBox and the CIE meets all requirements outlined in this manual.
How to install GlandBox
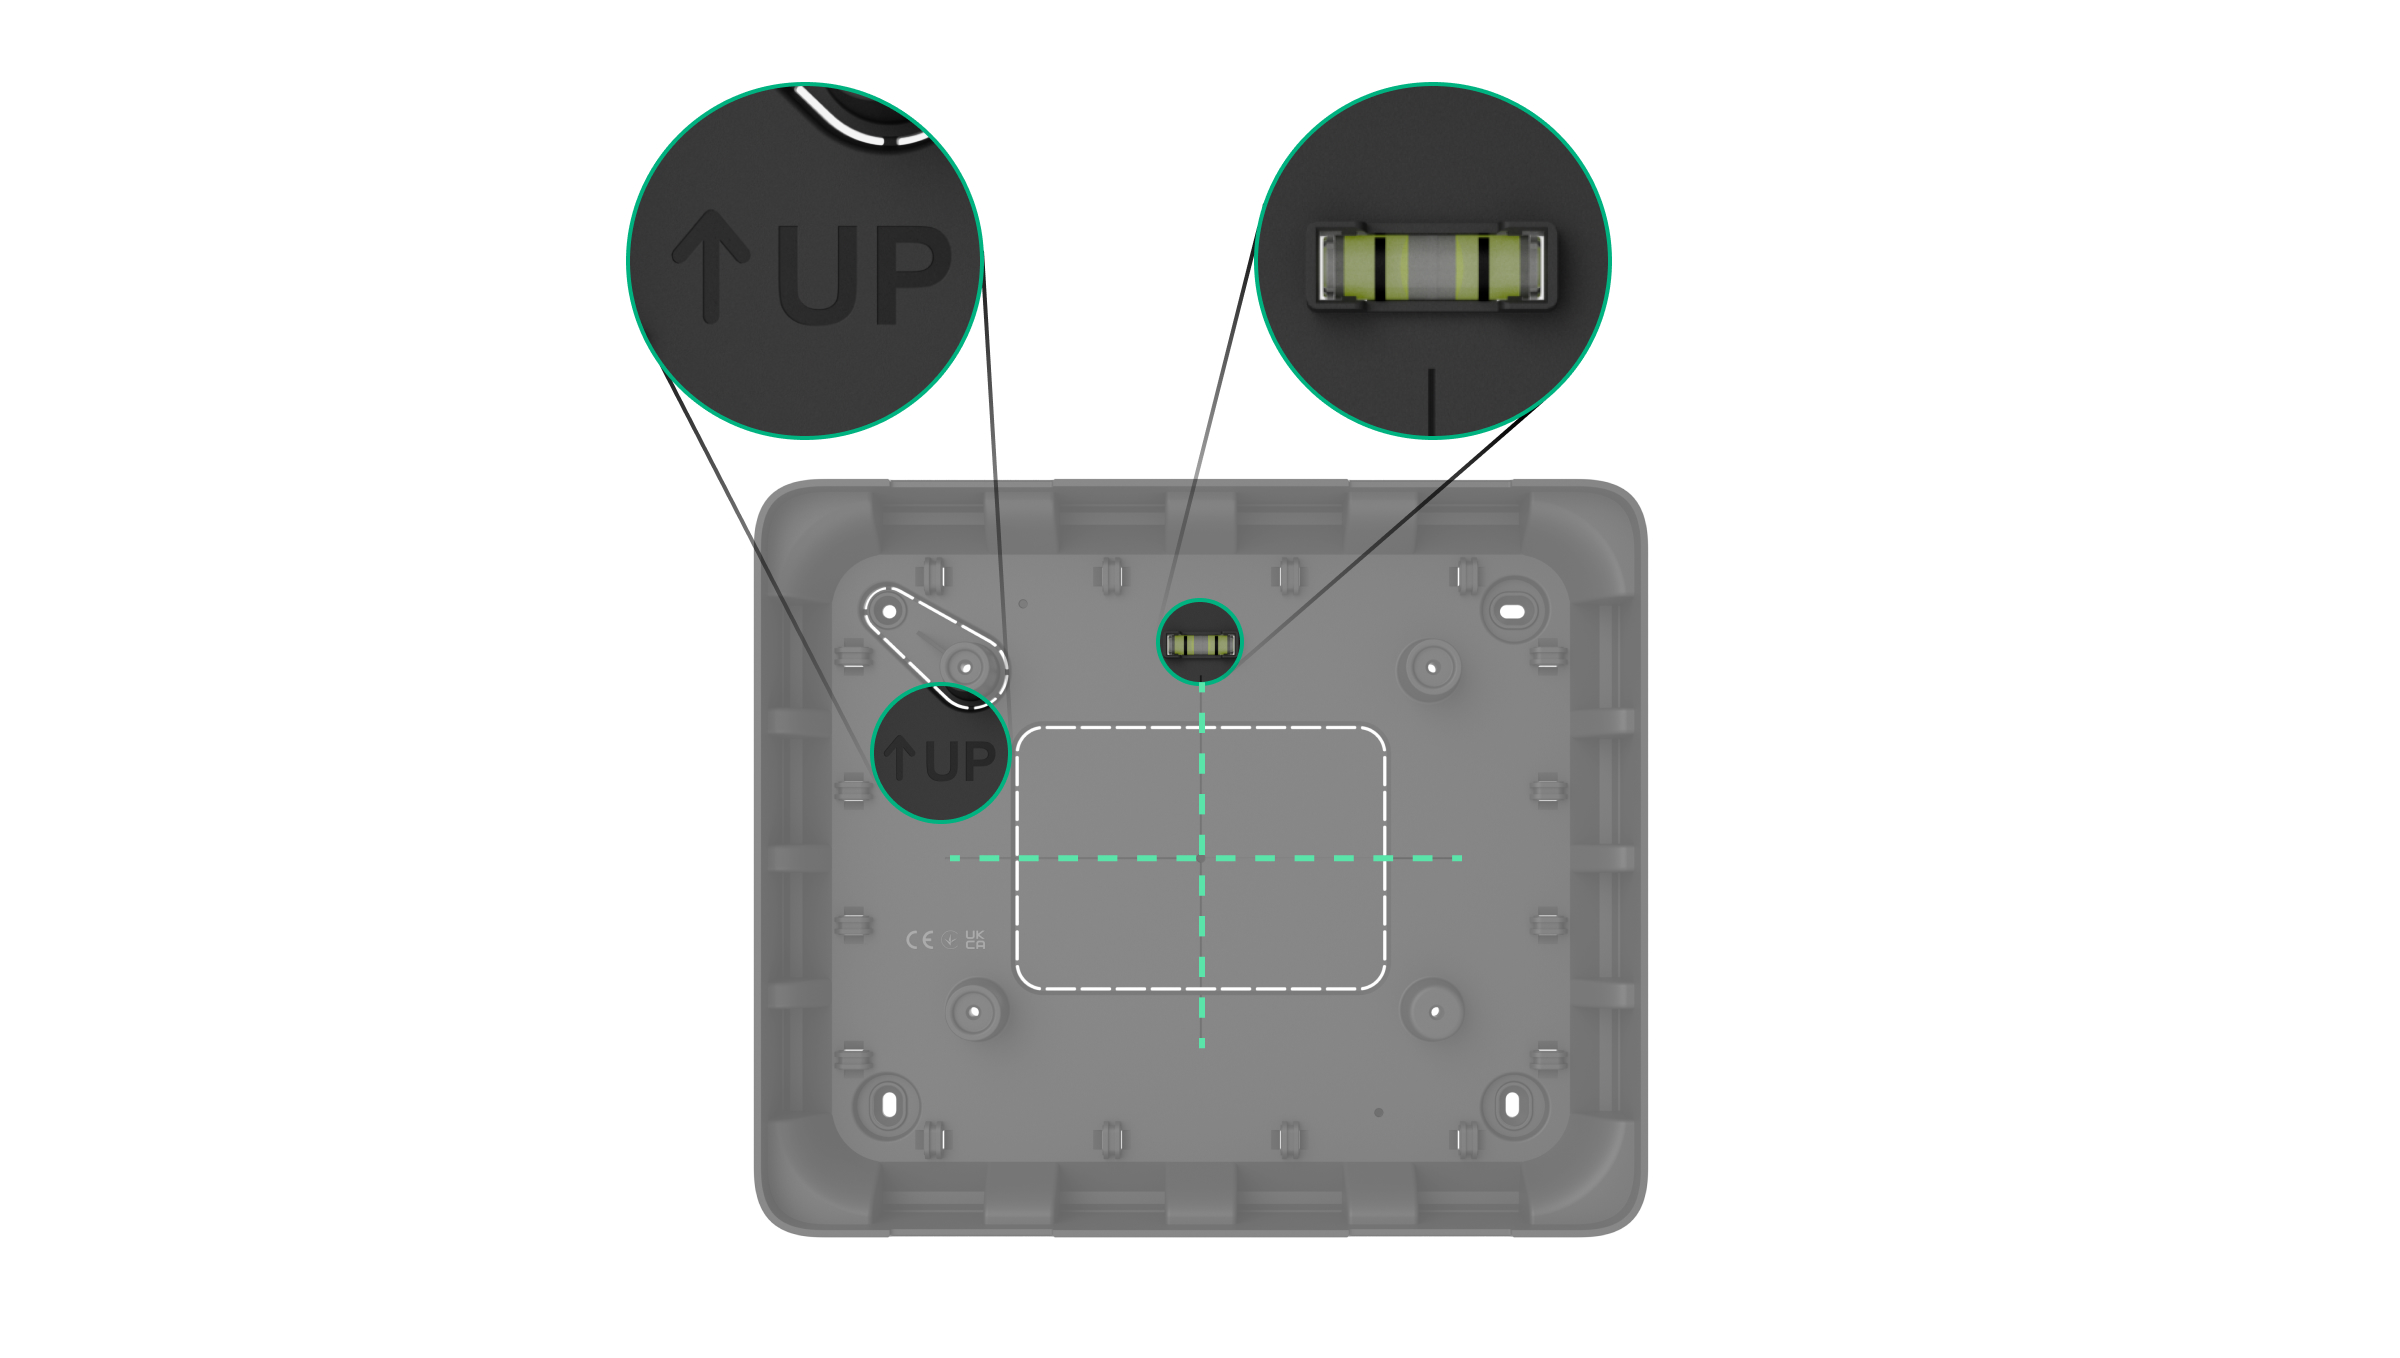
- Using the bubble level, UP key, and the CIE center markings to determine the drilling points on the surface where you plan to install GlandBox.
The UP key indicates the top of the CIE, while the intersection of the two lines shows its center. The bubble level helps ensure proper inclination angle during installation.
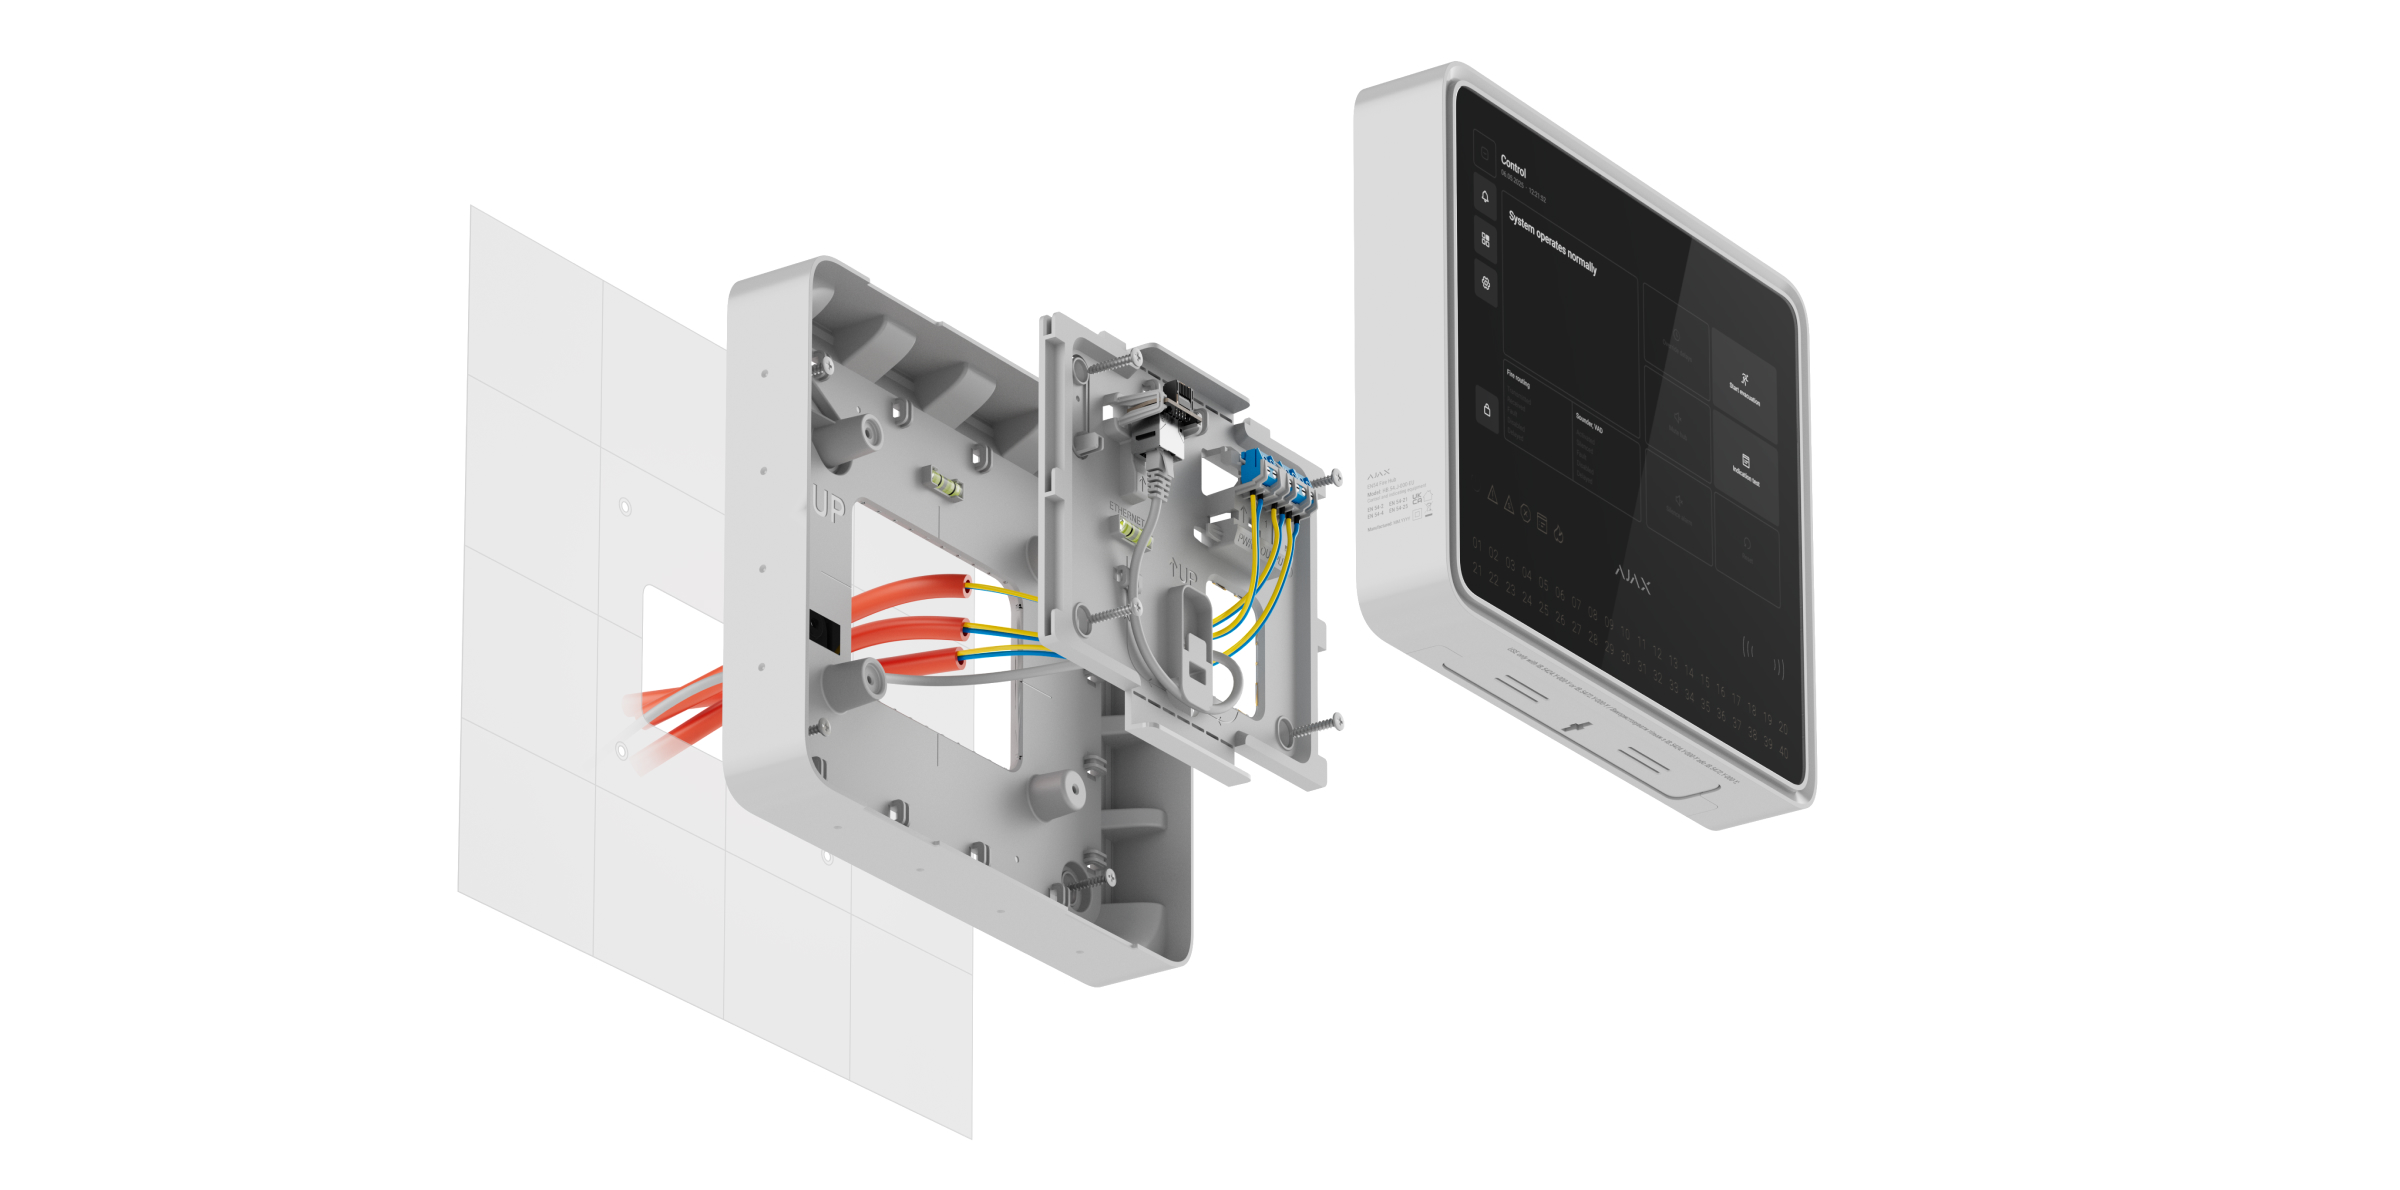
- Prepare cable entries in advance: drill holes for cable glands on the bottom, top, or sides of the casing, or break out the perforated part on the back of GlandBox. We recommend using a Ø20 mm hole saw for plastic.

- Run cables through the back of GlandBox, if necessary.
- Secure GlandBox on a vertical surface at the selected installation location using the bundled screws. Use all fixation points. One of them is located in the perforated part above the tamper button — this point is essential to ensure the EN54 Fire Hub Jeweller tamper button is triggered in case of an attempt to detach the device.
- Disassemble the required cable glands. Run the prepared cables through them.
- Assemble the cable glands. Screw them into the pre-drilled holes in GlandBox.
How to mount EN54 Fire Hub Jeweller on GlandBox

- Break out the necessary perforated parts of the CIE mounting panel. Run cables through them.
- Secure the SmartBracket mounting panel of the CIE on GlandBox using the bundled screws and all fixation points. One of them is located in the perforated part above the tamper button — this point is essential to ensure the EN54 Fire Hub Jeweller tamper button is triggered in case of an attempt to detach the device.
- Connect the Ethernet, power, and signal cables to the CIE terminals. Install SIM cards into the corresponding slots.
- Place the powered-on CIE onto the SmartBracket mounting panel.
Maintenance
GlandBox does not require maintenance.
Warranty
Warranty for the Limited Liability Company “Ajax Systems Manufacturing” products is valid for 2 years after the purchase.
If the device does not operate properly, we recommend contacting Ajax Technical Support first. In most cases, technical issues can be resolved remotely.
Contact Technical Support:
Manufactured by “AS Manufacturing” LLC
