The video wall widget is a special display in Ajax PRO Desktop and Ajax Desktop that allows using all the functionality of the video wall. The video wall is intended for simultaneous viewing of streams from several channels. Thus, a PRO or an end-user monitors the situation in dynamics and responds to possible incidents faster.
The video wall streams video from security cameras both live and from the archive (if the camera or an Ajax NVR has a memory device).
Widget compatibility
The video wall widget is available in Ajax PRO Desktop with version 4.2 and later, and in Ajax Desktop for all versions. To open the video wall widget, you need to add at least one channel to the space, namely a third-party camera added to an Ajax NVR or an Ajax camera. If there are no channels in the space, the video wall widget button is not available.
The video wall displays up to 100 channels. The widget is not available in Ajax PRO Desktop if the app is installed on a computer with an operating system older than Windows 10.
The video wall displays the following cameras:
- Ajax cameras;
- cameras with ONVIF (Profile S/T) support added to an Ajax NVR;
- cameras with RTSP support added to an Ajax NVR.
Along with the release of Ajax PRO Desktop v5.35 and Ajax Desktop v5.35 app versions, the multi-space video monitoring feature was added to the video wall, which allows adding cameras from different spaces to one video wall. The feature enables PROs and end-users to create layouts in the Video wall section that combine cameras from any spaces they have access to.
How to go to the widget
To open the video wall widget:
- Open the Ajax PRO Desktop or Ajax Desktop app and log in to your account.
- Click the Video wall button in the upper-right corner of the screen.
- If you have a single display, the video wall will open automatically in a new window.
- If you have two or more displays, enable the Open Video wall widget toggle to configure the video wall view. Then, select at least one display on which to show the video wall. The widget will open in a new window.
How to create a layout
Desktop Ajax apps allow you to create your own video wall layout.
To create a video wall layout:
- Click the Create layout button.
- Edit the title and select a grid for your layout. You can choose a pre-made grid or create a custom one. To create a custom grid select the number of rows and columns you want in your layout (both fields accept values from 1 to 10).
- Click the Create button.
What features are available in the video wall widget
The widget display is divided into two areas: tiles with camera streamings are on the left, and the list of available spaces is on the right. You can drag spaces or open a space and drag its channels from the list to the streaming tile and save the configuration. To collapse or expand the list, click the ![]() icon.
icon.
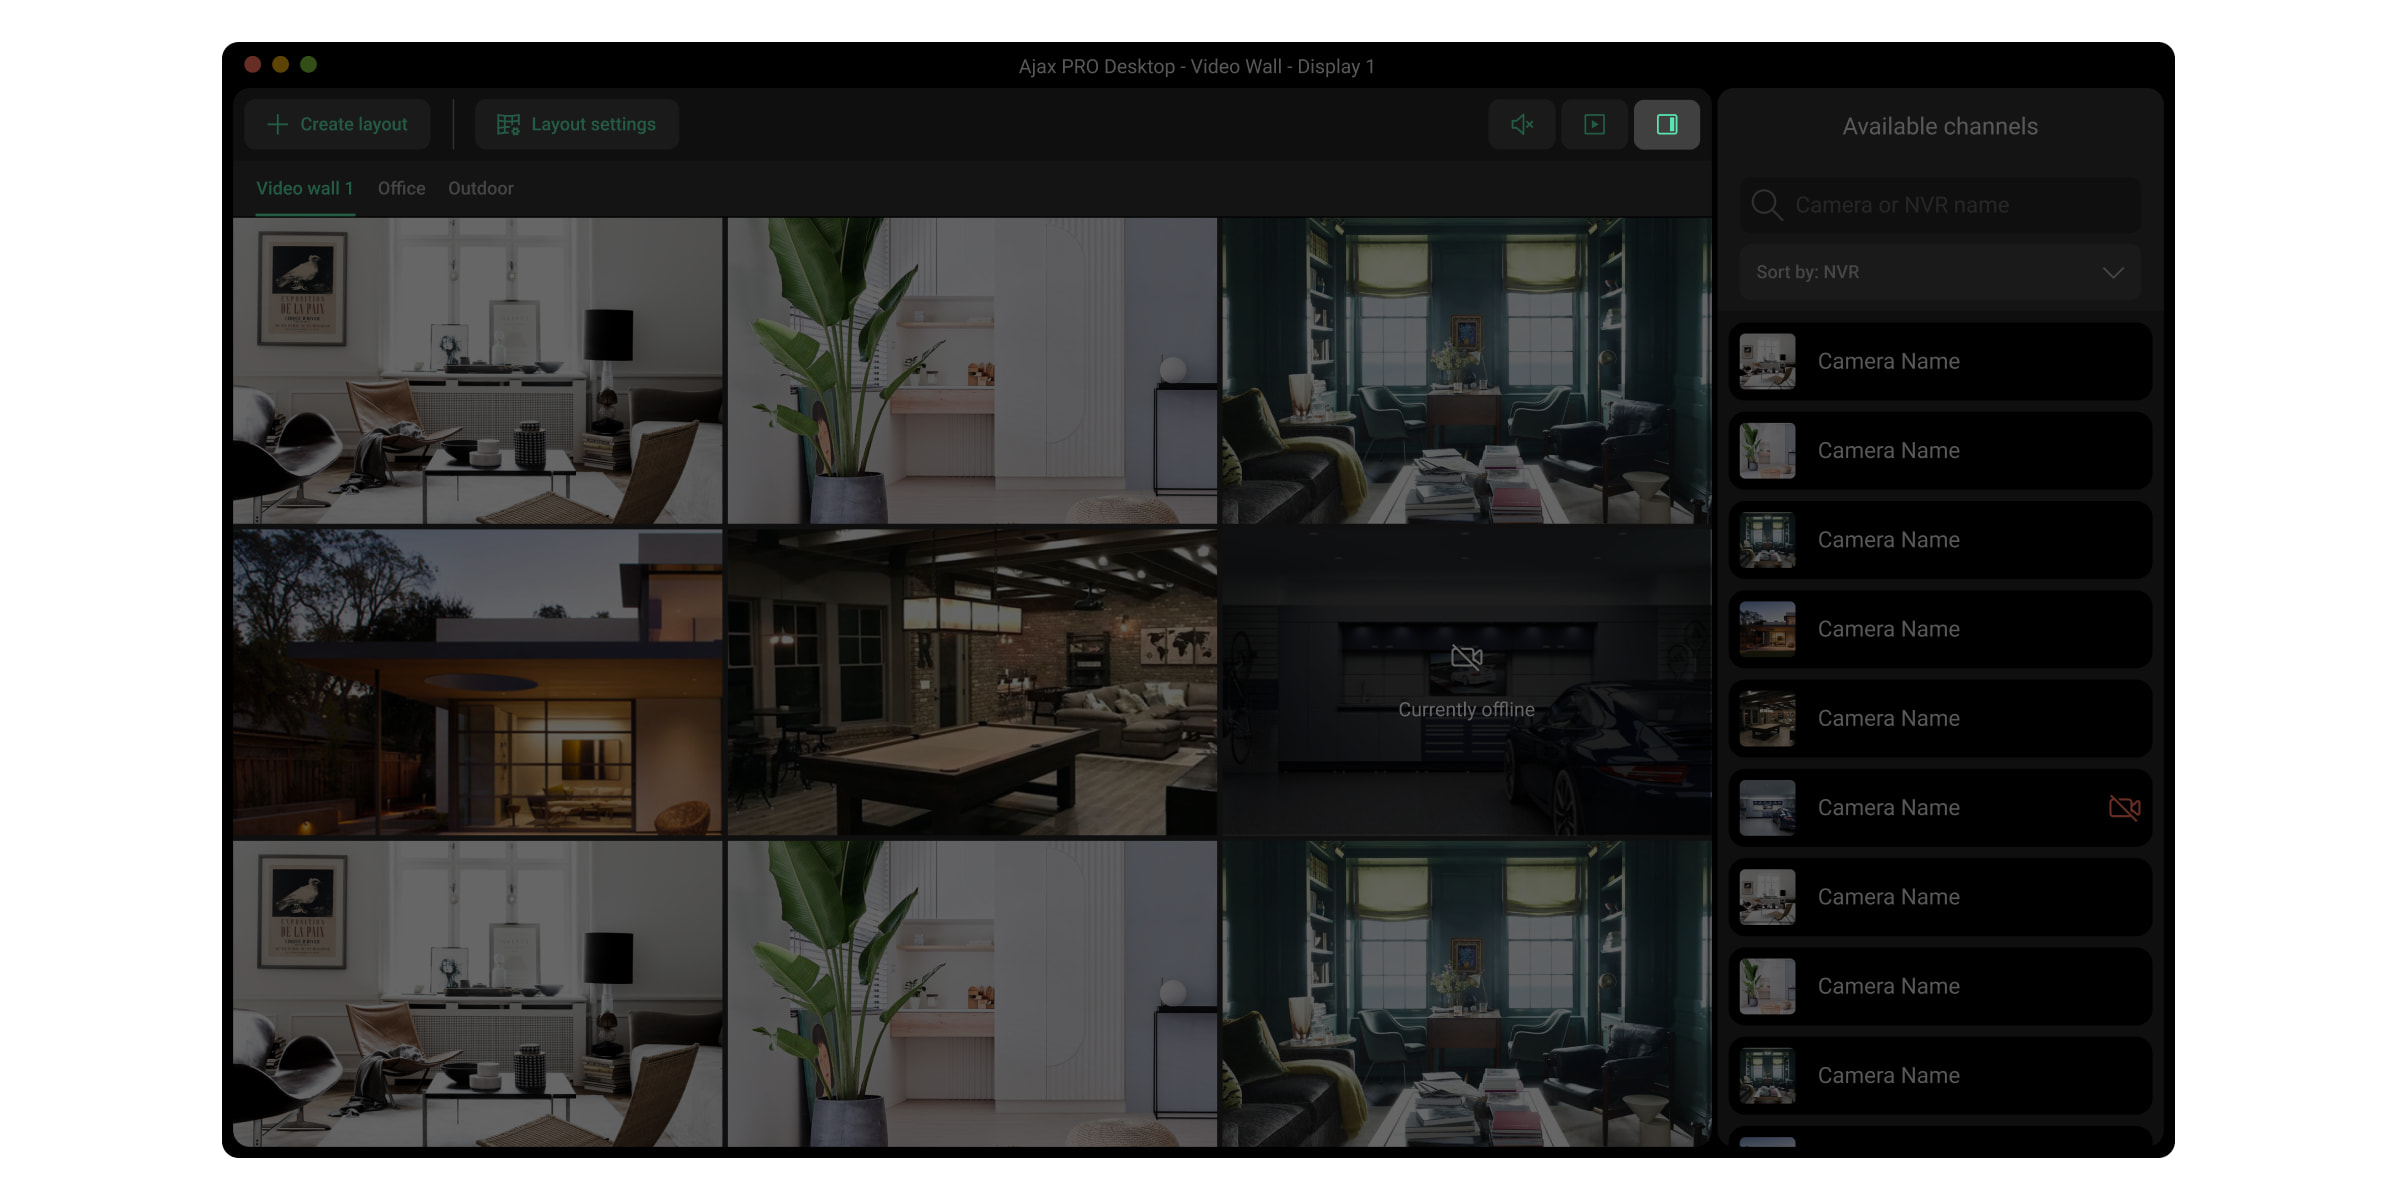
A user can:
- Search for the desired space by name or ID.
- Select a space and search for the desired channel by name or ID.
- Organize channels by room, NVR, or group.
- Preview the video when hovering over the channel in a list of Available channels.
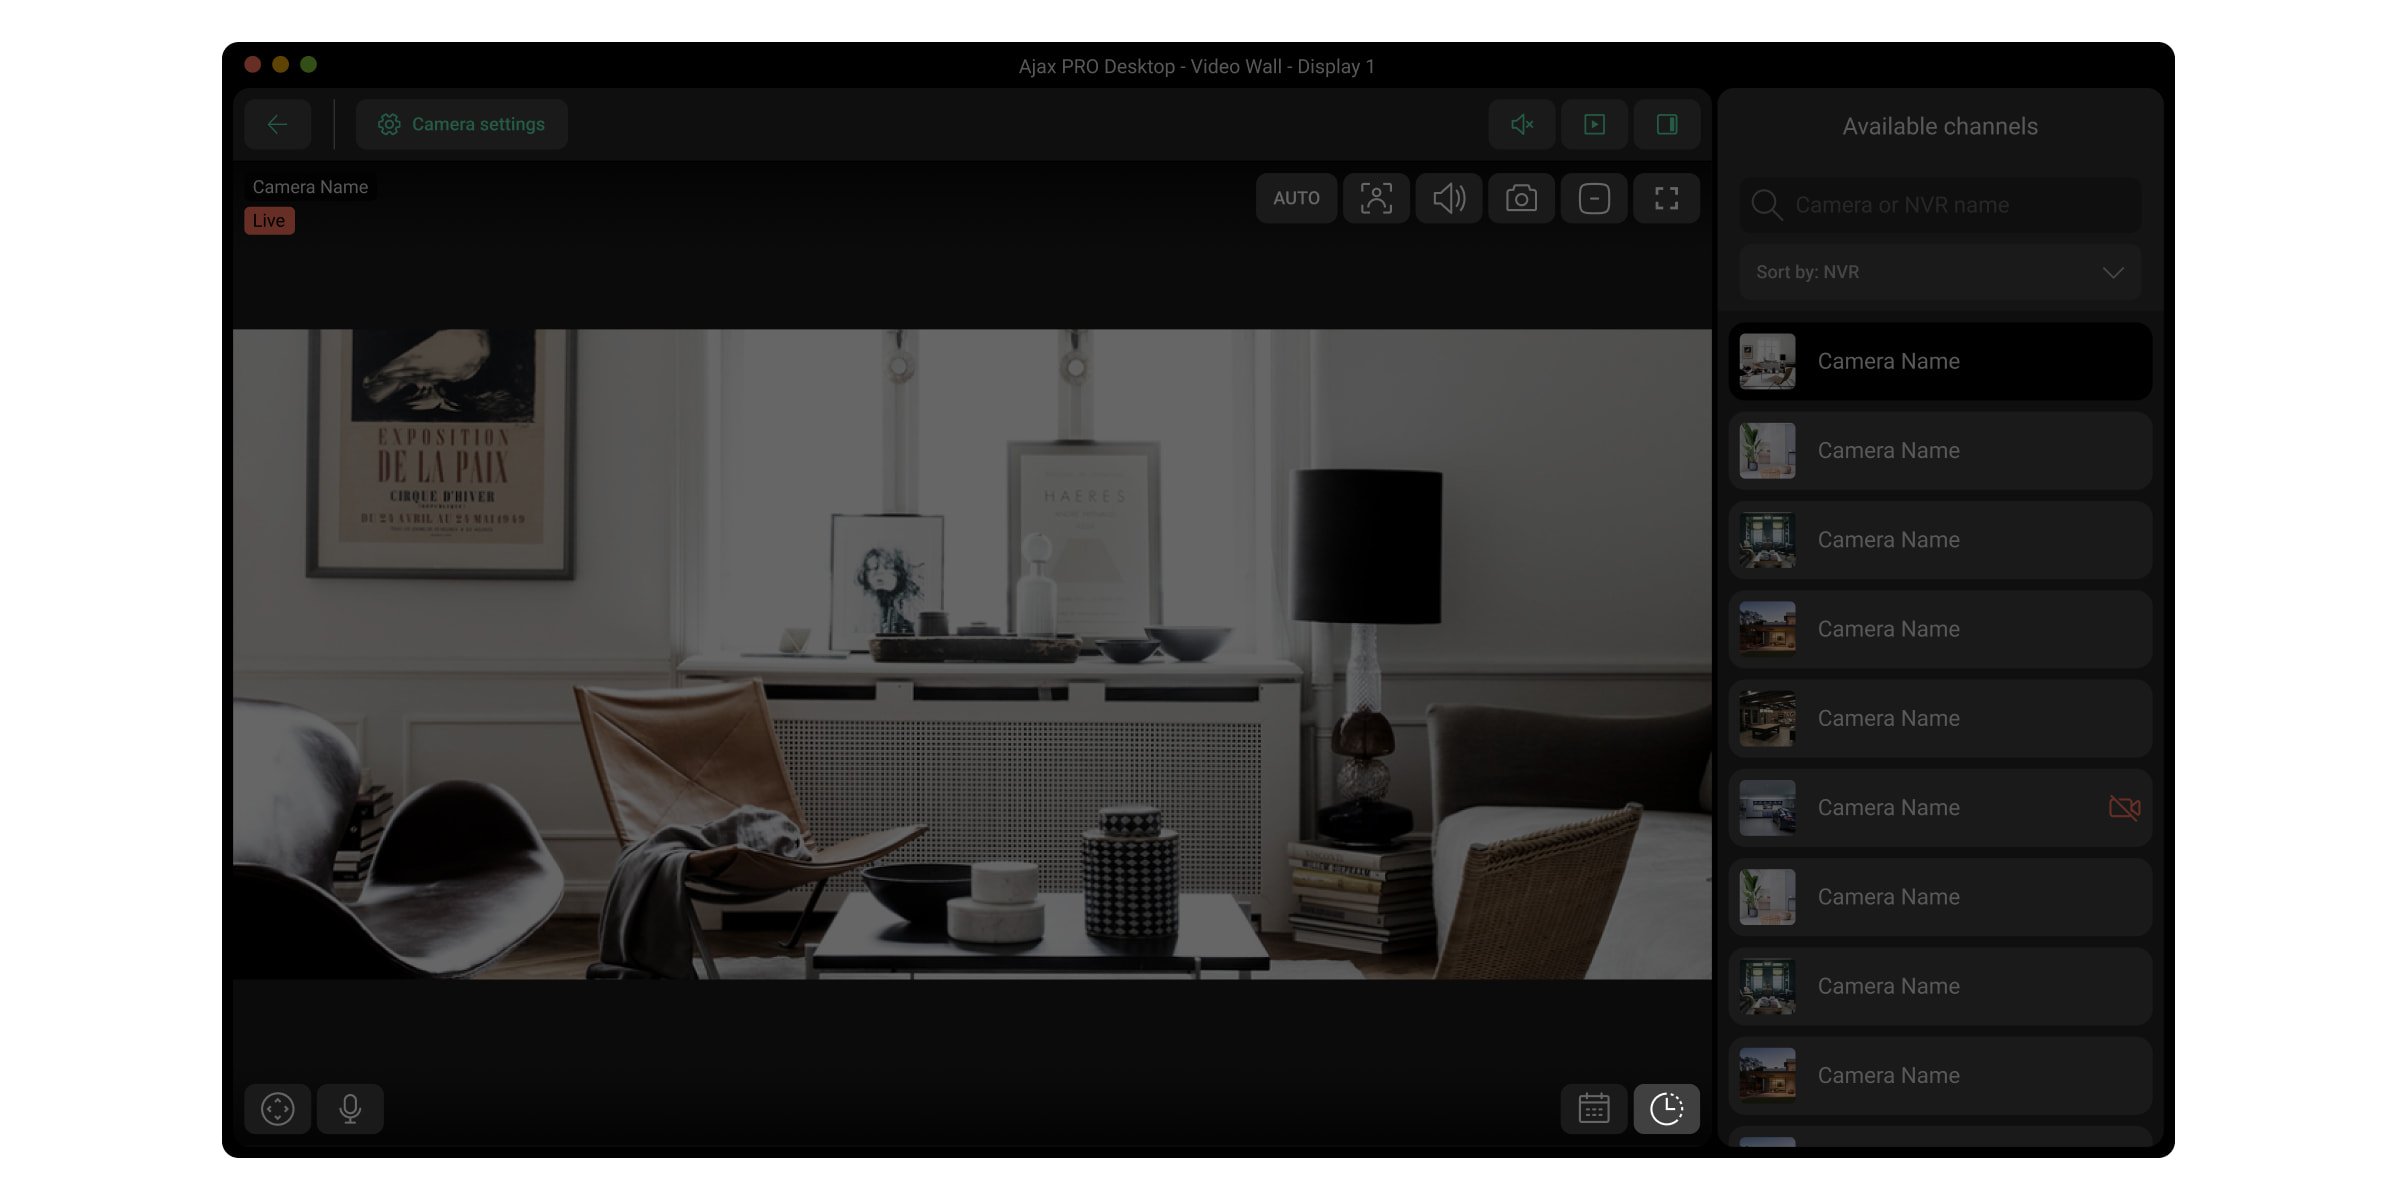
- Open a video view of a specific channel in fullscreen mode by clicking on the channel in a list of Available channels or by double-clicking on a video preview tile from a video wall layout.
- Manage a PTZ camera.
- Save customized layouts for displaying video from channels from one or multiple spaces.
- Rearrange the order of the layouts. To change the layout order, click and hold the layout name, then drag it to the desired position.
- Rearrange the order in which video from channels is displayed. To do this, drag the video preview tile from the desired channel to a new position.
- Create templates for displaying videos in a slide show.
- Listen to audio from video if the channel transmits it. To do this, either open a video from a specific channel as described in point 5 and click the
 icon, or select a video in a video wall layout by clicking on it.
From the video wall widget, you can go to the camera settings. To do this, double-click the video preview tile and then click Camera settings.
How to manage the archive
Desktop Ajax apps allow you to view and download an archive of video recordings from the following storage sources:
- The HDD installed in Ajax NVR;
- The SD card installed in an Ajax camera;
- The Ajax Cloud Storage service if it is active.
You can view archives from multiple channels simultaneously using the video wall, or view the archive for a single camera directly from its video player.
To view the archive from the video wall:
- Open the video wall layout.
- Hover over the channel or channels whose archive you want to access.
- Click the
 icon to open the archive timeline.You can scroll through it and view the camera image from a selected point in time. If you have a video wall with multiple channels and have opened several timelines, scrolling one timeline synchronizes all others and displays archive images from them.
To view the archive from a video player of a selected camera in fullscreen mode:
- Select a channel from a list of Available channels. You can also double-click a video player of a specific channel in the video wall.
- Click the icon to view the archive timeline. It works the same way as on the video wall but displays the timeline of the selected channel only.
- Click the
 icon to select the date and time of the required recording from the calendar. Choose the options and click Apply.
A PRO and an end-user can select a required video segment and download the file with the corresponding video settings.
How to store the channel timestamp in an archive
Desktop Ajax apps allow you to fix the last timestamp (the point where you stopped seeking) for all cameras. Thus, you can easily find the desired event on different cameras.
When a user focuses on an appropriate timestamp, the system stores this position for 10 minutes and applies the stored timestamp to all channel archives a user opened during these 10 minutes.
The feature is available when cameras or Ajax NVR have a storage device and a user has appropriate privacy permission.
How to create a slide show
Desktop Ajax apps allow you to configure video looping from the required cameras. It helps you continuously monitor the situation at the site without manually switching the layouts or channels.
To create a slide show, in desktop Ajax apps:
- Go to the Video wall
 tab.
tab. - Enable the Open Video wall widget toggle.
- Select at least one display if you have more than one.
- Click the slide show icon
 .
. - Click the Create slideshow button.
- Edit a title and click the Add cameras button.
- Select a layout and required channels.
- Click Apply, then click Create.
The added slide shows will be available by clicking the corresponding icon ![]() . You can start, pause, and edit them.
. You can start, pause, and edit them.
What keyboard shortcuts are available in desktop Ajax apps
To quickly and simply navigate the video wall widget, keyboard shortcuts have been added to desktop Ajax apps. These shortcuts give you instant access to key features and help you work within the video wall.
| Action | Windows | MacOS |
| Move to next cell | Right arrow | Right arrow |
| Move to previous cell | Left arrow | Left arrow |
| Move to next line | Down arrow | Down arrow |
| Move to previous line | Up arrow | Up arrow |
| Hide focus | Esc | Esc |
| Create new tab | Ctrl + N | Command + N |
| Preferences | Ctrl + , | Command + , |
| Next tab | Alt + right arrow | Command + right arrow |
| Previous tab | Alt + left arrow | Command + left arrow |
| Undo | Ctrl + Z | Command + Z |
| Redo | Ctrl + Shift + Z | Command + Shift + Z |
| Save | Ctrl + S | Command + S |
| Save as | Ctrl + Shift + S | Command + Shift + S |
| Delete | Ctrl + D | Command + D |
| Action | Windows | MacOS |
| Play/pause in the archive | Space | Space |
| Switch live/archive | Tab | Tab |
| Action | Windows | MacOS |
| 0.5х playback speed | 1 | 1 |
| 1х playback speed (by default) | 2 | 2 |
| 1.5x playback speed | 3 | 3 |
| 2х playback speed | 4 | 4 |
| 4х playback speed (NVR only) | 5 | 5 |
| 8x playback speed (NVR only) | 6 | 6 |
| Action | Windows | MacOS |
| Open/close the archive | Tab | Tab |
| Play/pause the archive | Space | Space |
| Seek -5 seconds | Left arrow | Left arrow |
| Seek +5 seconds | Right arrow | Right arrow |
| Close fullscreen (Back to the video wall layout) | Esc | Esc |
| Zoom in | Ctrl + Scroll Up | Command + Scroll Up |
| Ctrl + Left Mouse Click | Command + Left Mouse Click | |
| Zoom out | Ctrl + Scroll Down | Command + Scroll Down |
| Ctrl + Right Mouse Click | Command + Right Mouse Click |