
To comply with security requirements set by Insurance & Pension Denmark (F&P) at levels 30 and 40, your system must have a dedicated bypass keypad at the entrance zone. Authorizing a user by entering a code on this keypad activates the Delay When Entering feature. During the specified time, intrusion devices such as DoorProtect are temporarily deactivated. This allows the user to enter a secured area without triggering an alarm and disarm the system using the main keypad (e.g., KeyPad TouchScreen).
This article provides information on connecting the Conlan CT2000 keypad to the Ajax system and configuring it as a bypass keypad.
System requirements
Use hubs (except Hub model) with OS Malevich 2.16 or higher for connecting the Conlan CT2000 as a bypass keypad to the Ajax system. Also, you’ll need MultiTransmitter Jeweller with firmware version 2.13.0 or higher (with 3EOL support) or Superior MultiTransmitter Fibra integration modules.
Connection diagram
Before installation, be sure to read the user manuals for each device. Follow general recommendations when connecting a keypad to MultiTransmitter.

- Route the keypad’s Red, Yellow, Black, White, and Green cables into the casing of the integration module.
- Connect the Red cable to the +12V terminal.
- Connect the Green and Yellow cables to the MultiTransmitter zone terminals.
- Connect the White cable through the EOL resistor, and the Black cable directly to the MultiTransmitter COM terminals.
- Install the EOL resistor between the Yellow and Black cables.
Keypad configuration
An admin, a PRO, or an installation company employee with the rights to configure the system can add the device to MultiTransmitter and configure its settings in the Ajax apps.
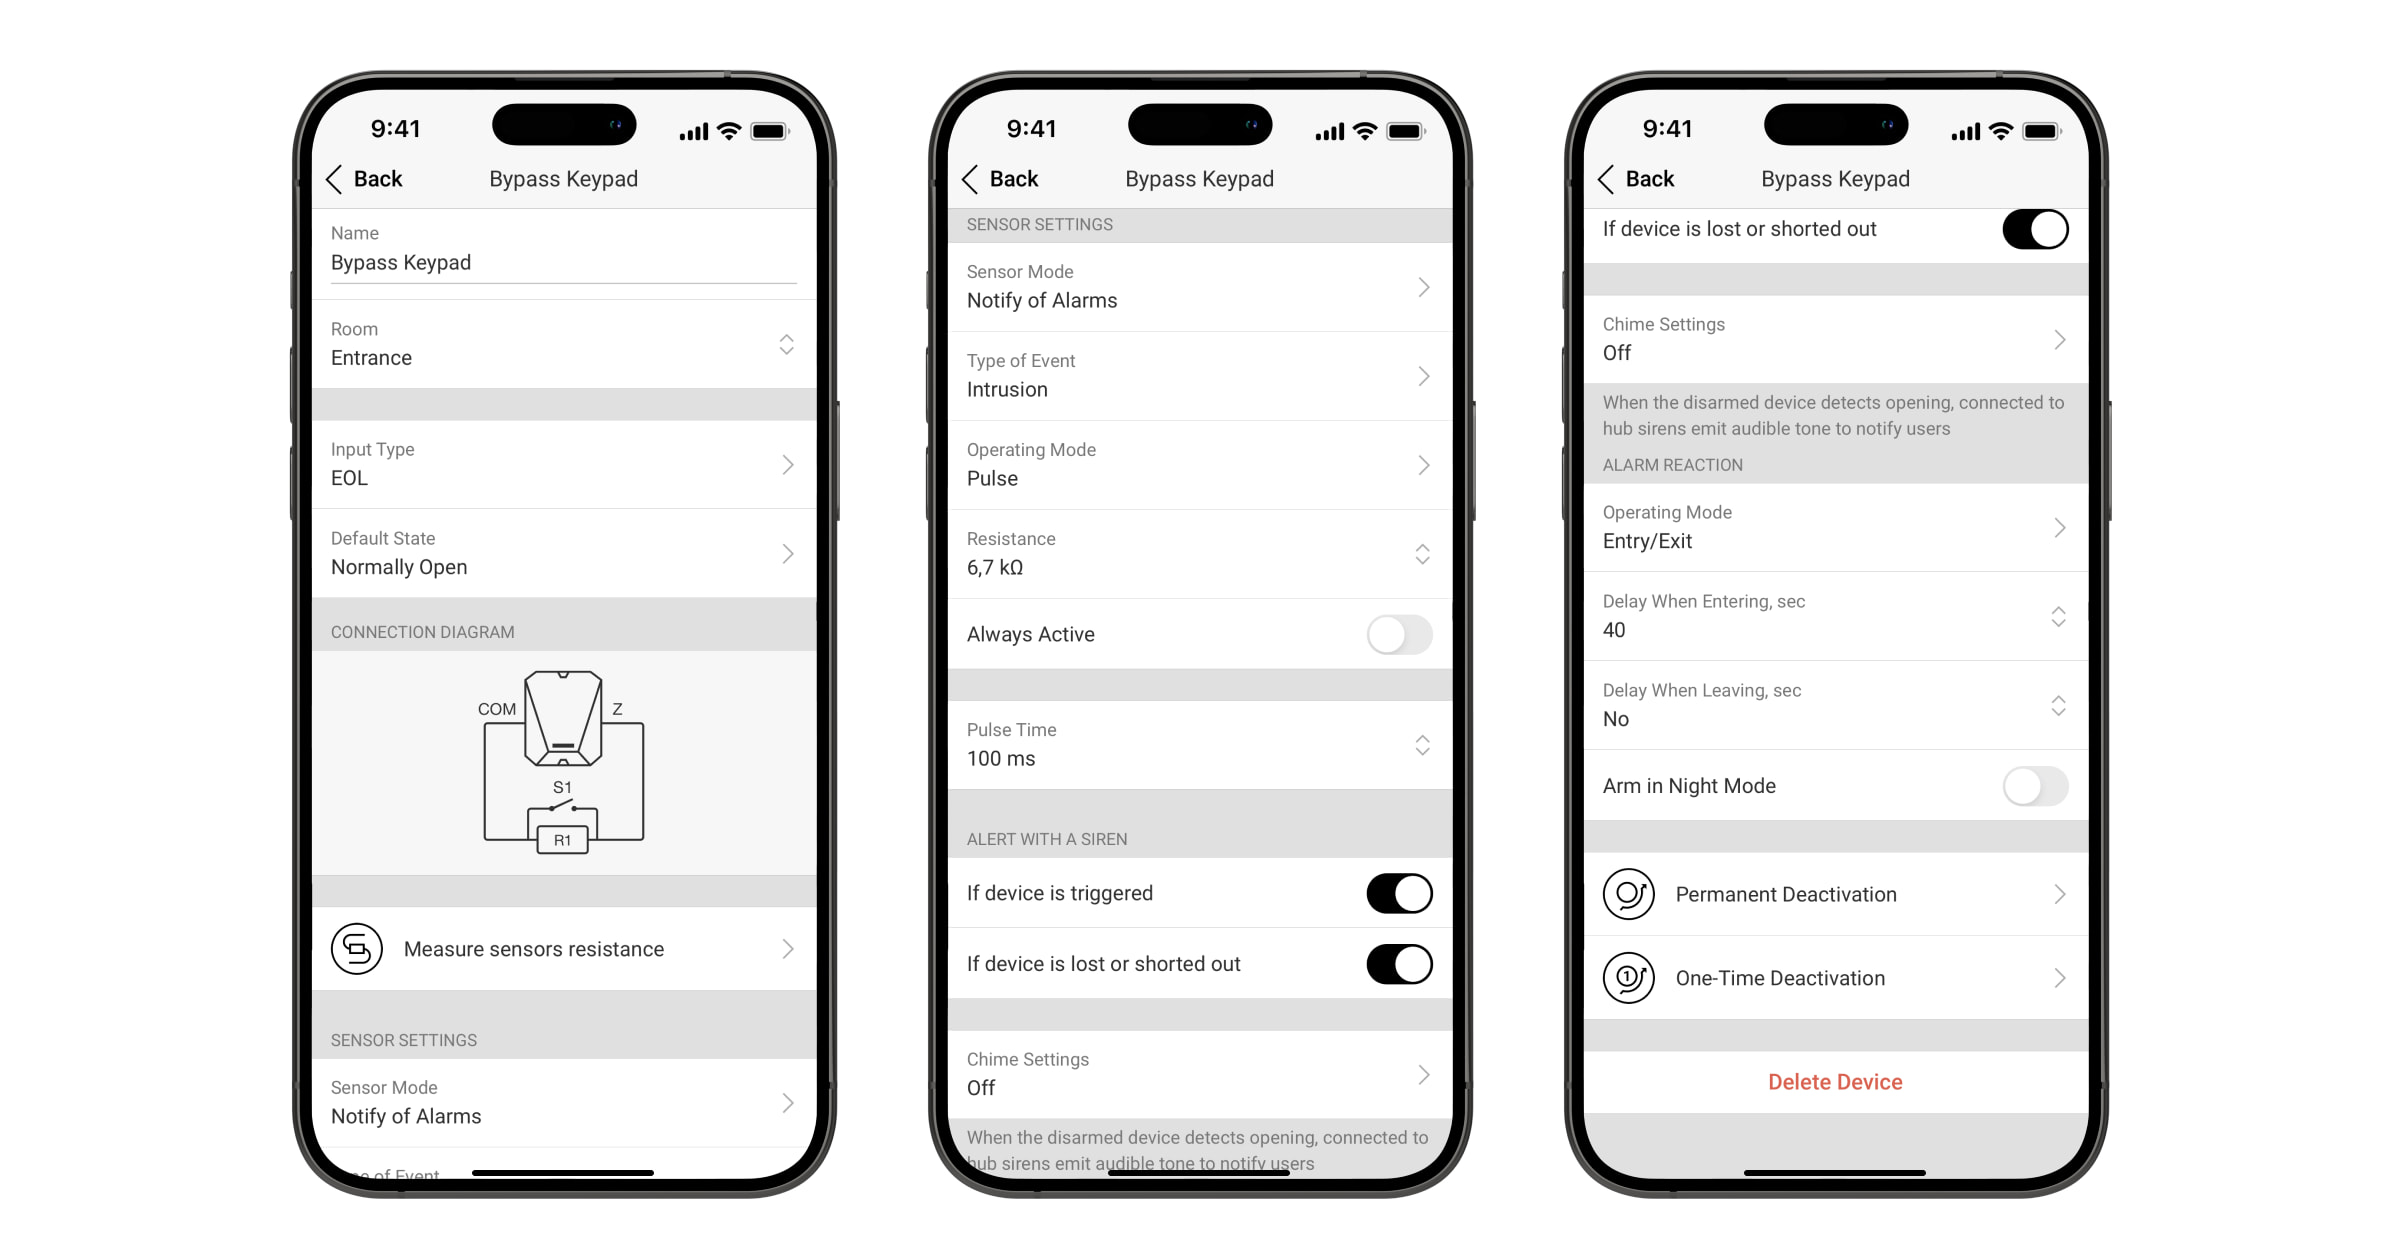
Once you’ve connected the CT2000 to MultiTransmitter, add the keypad to the system as two separate devices: Bypass Keypad (control input, Yellow cable) and Bypass Tamper (tamper input, Green cable). Configure their settings.

Control input configuration:
- Select MultiTransmitter from the list in the Devices
 tab.
tab. - Click Devices under the MultiTransmitter icon.
- Select Bypass Keypad from the list.
- Go to the Settings menu.
- Select EOL in the Input Type setting.
- Define the default contact state as Normally Open.
- Select the Notify of Alarms option in the Sensor Mode menu.
- Set the Intrusion type of event.
- Select the Pulse operating mode.
- Choose the resistance of the EOL resistor. Optionally, you can use the Measure sensor resistance feature.
- Set the required Pulse Time.
- Select the Entry/Exit option in the Operating Mode menu.
- Specify the Delay When Entering duration at 40 seconds.
- Click Back to save the settings.
Tamper input configuration:
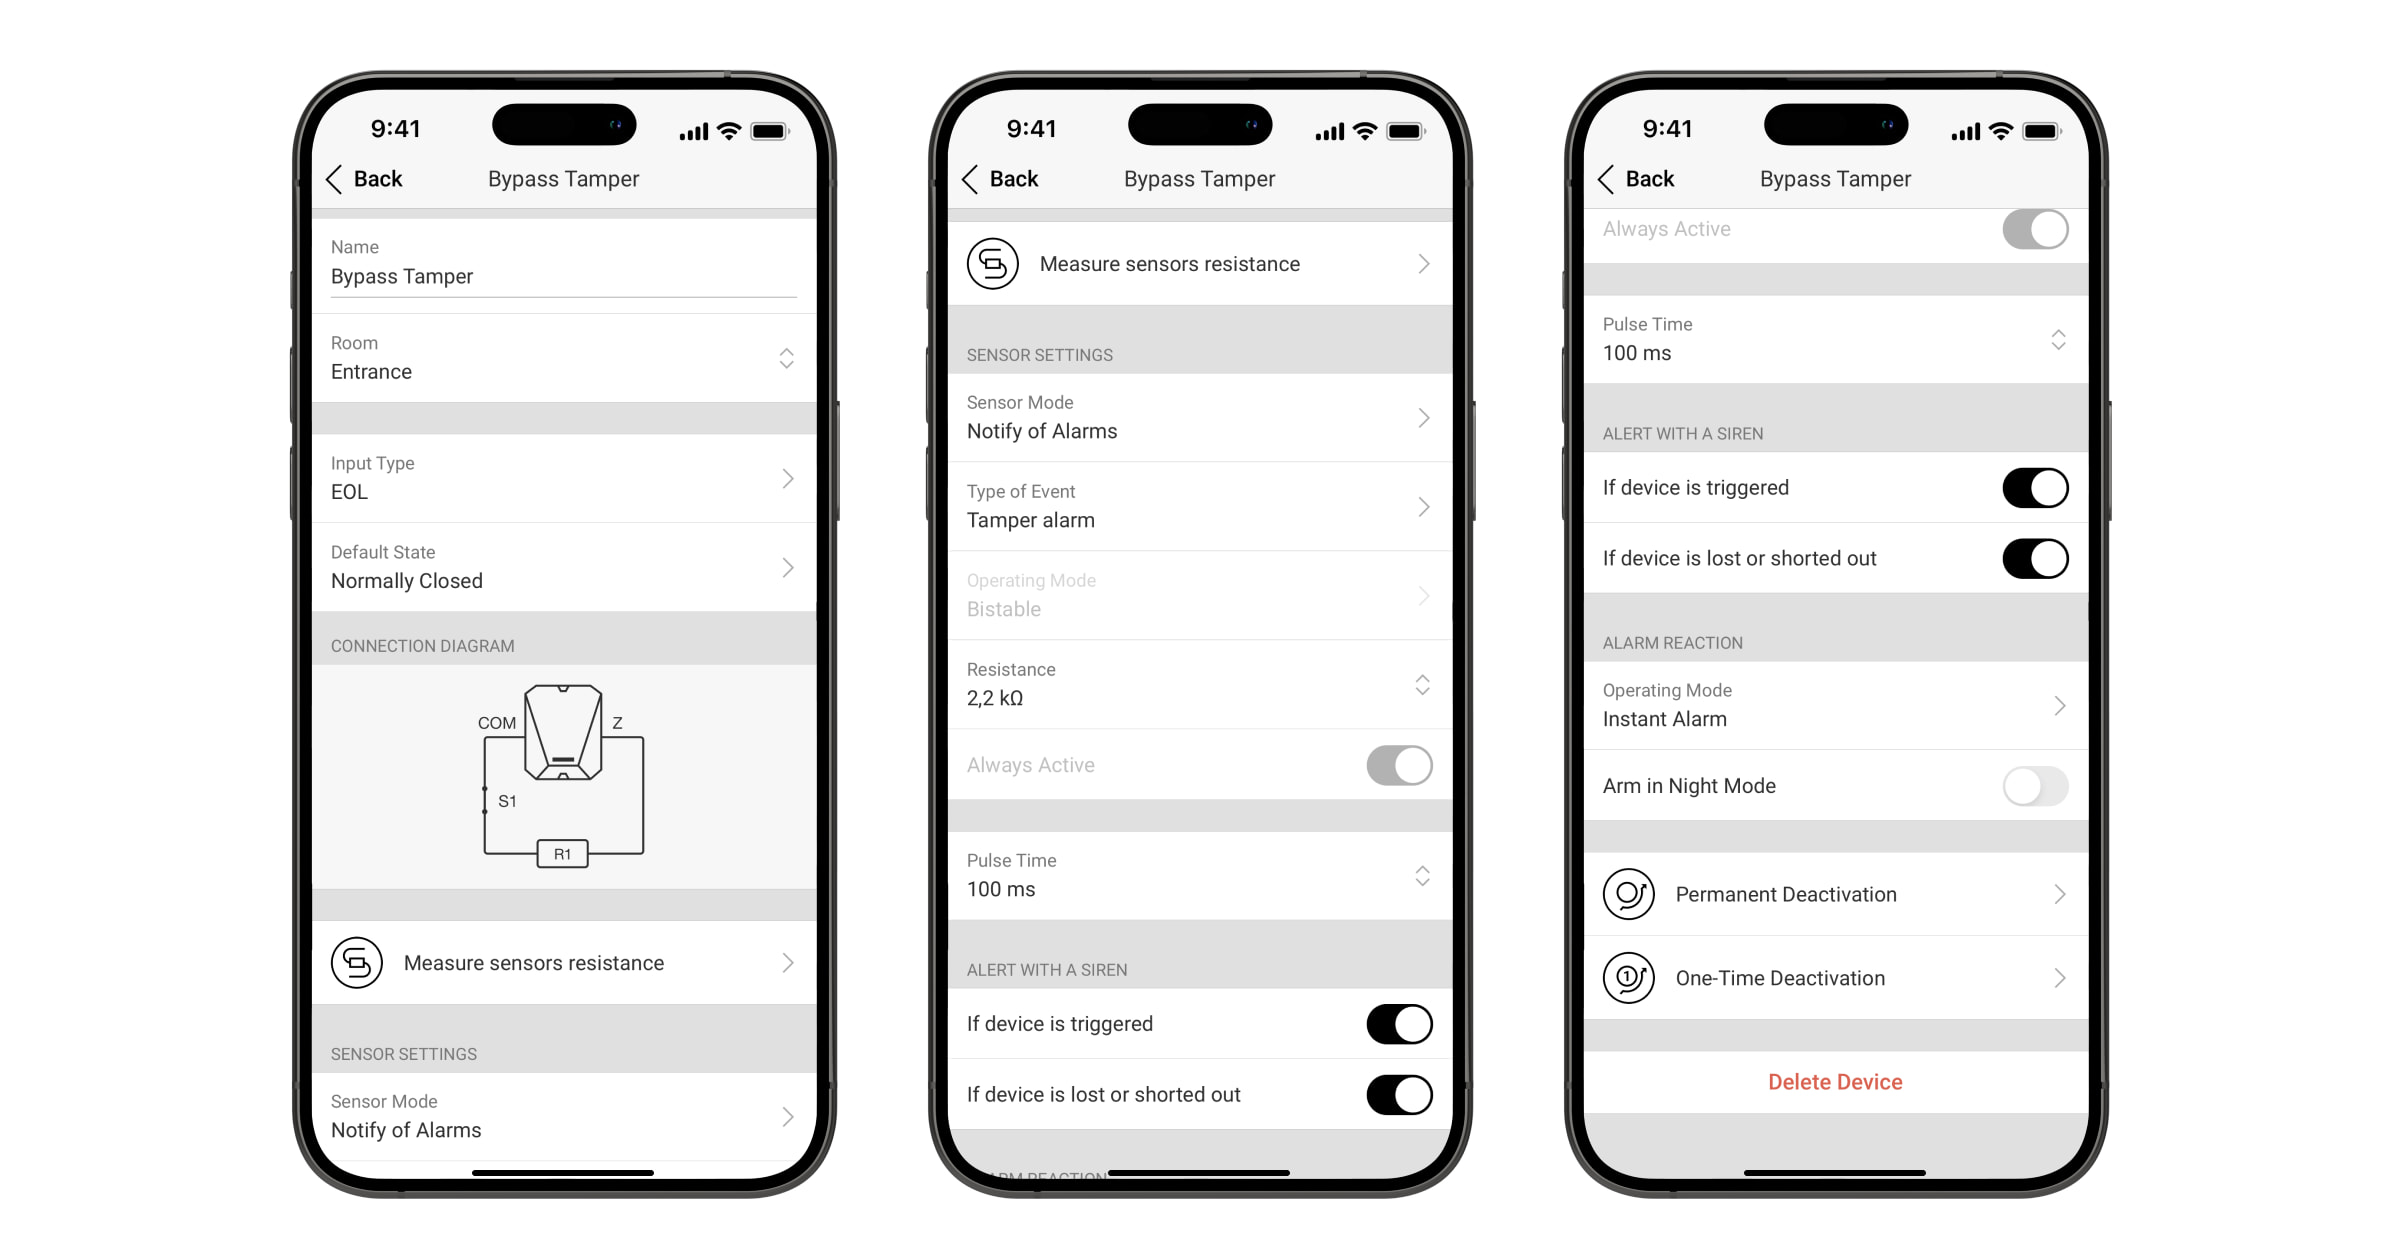
- Select Bypass Tamper from the list of MultiTransmitter devices.
- Go to the Settings menu.
- Select EOL in the Input Type setting.
- Define the default contact state as Normally Closed.
- Select the Notify of Alarms option in the Sensor Mode menu.
- Set the Tamper alarm type of event.
- Choose the resistance of the EOL resistor. Optionally, you can use the Measure sensor resistance feature.
- Set the required Pulse Time.
- Select the Instant Alarm option in the Operating Mode menu.
- Click Back to save the settings.
Configure the Follower mode for the intrusion devices on the user’s way from the bypass keypad to the main one.