When replacing a rechargeable battery and using a range extender, follow the general electrical safety rules for the use of electrical appliances and the requirements of electrical safety laws and regulations.
It is strictly forbidden to disassemble the device connected to the power supply!
To replace a rechargeable backup battery:
- Unscrew the fastening screws from the SmartBracket mounting panel.
- Remove the range extender from the SmartBracket mounting panel.
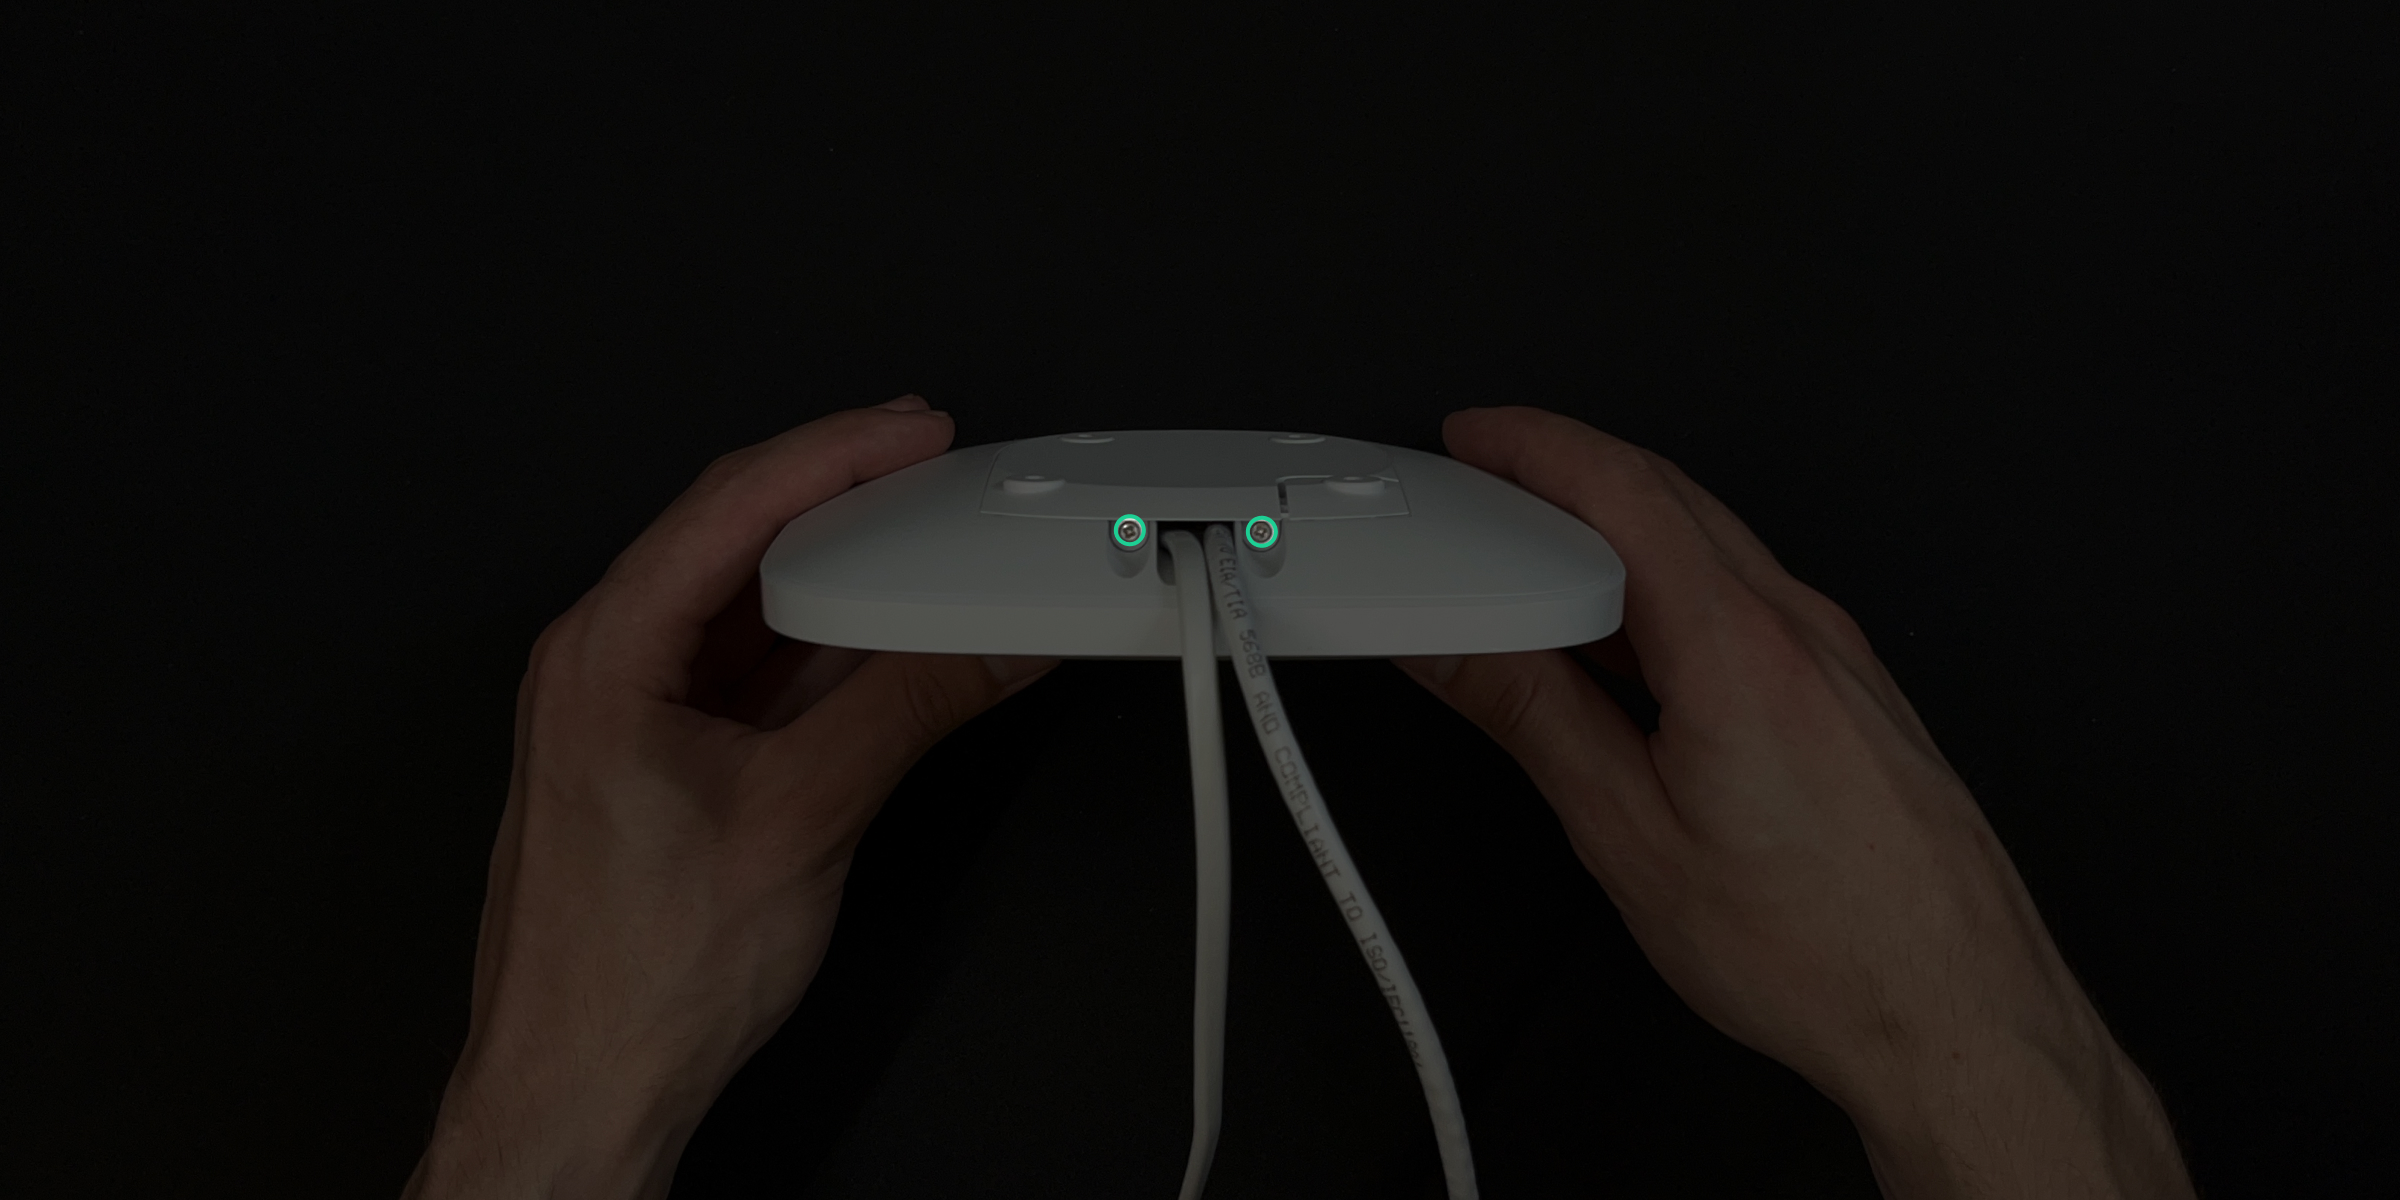
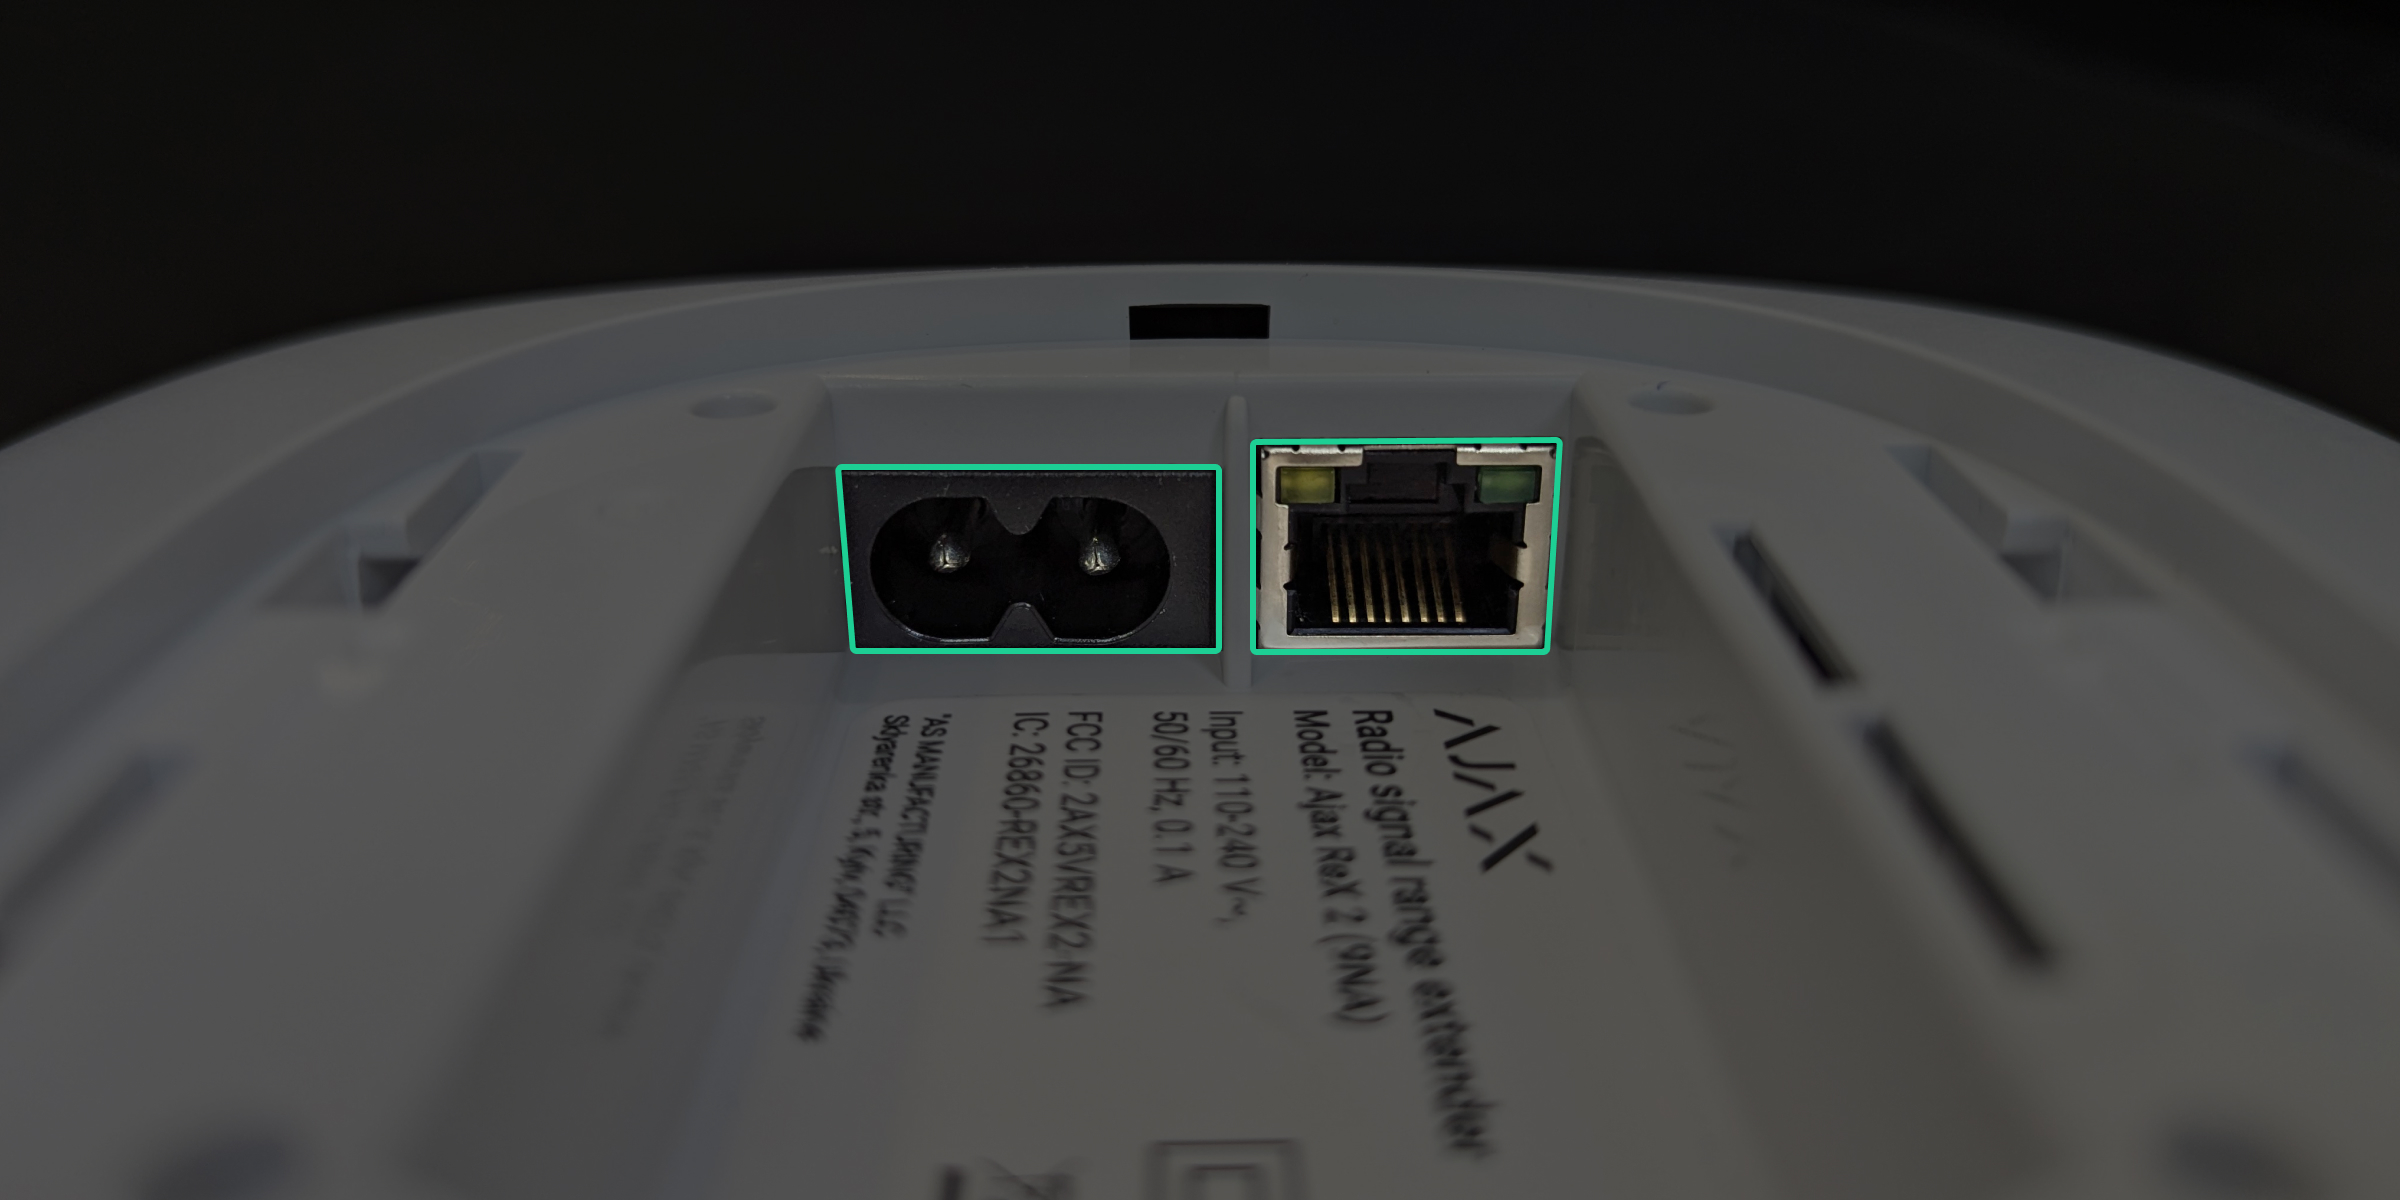
- Disconnect the power and Ethernet¹ cables, then turn off the range extender by pressing the power button for 3 seconds.

After turning off the range extender, wait five minutes to discharge the capacitors completely.
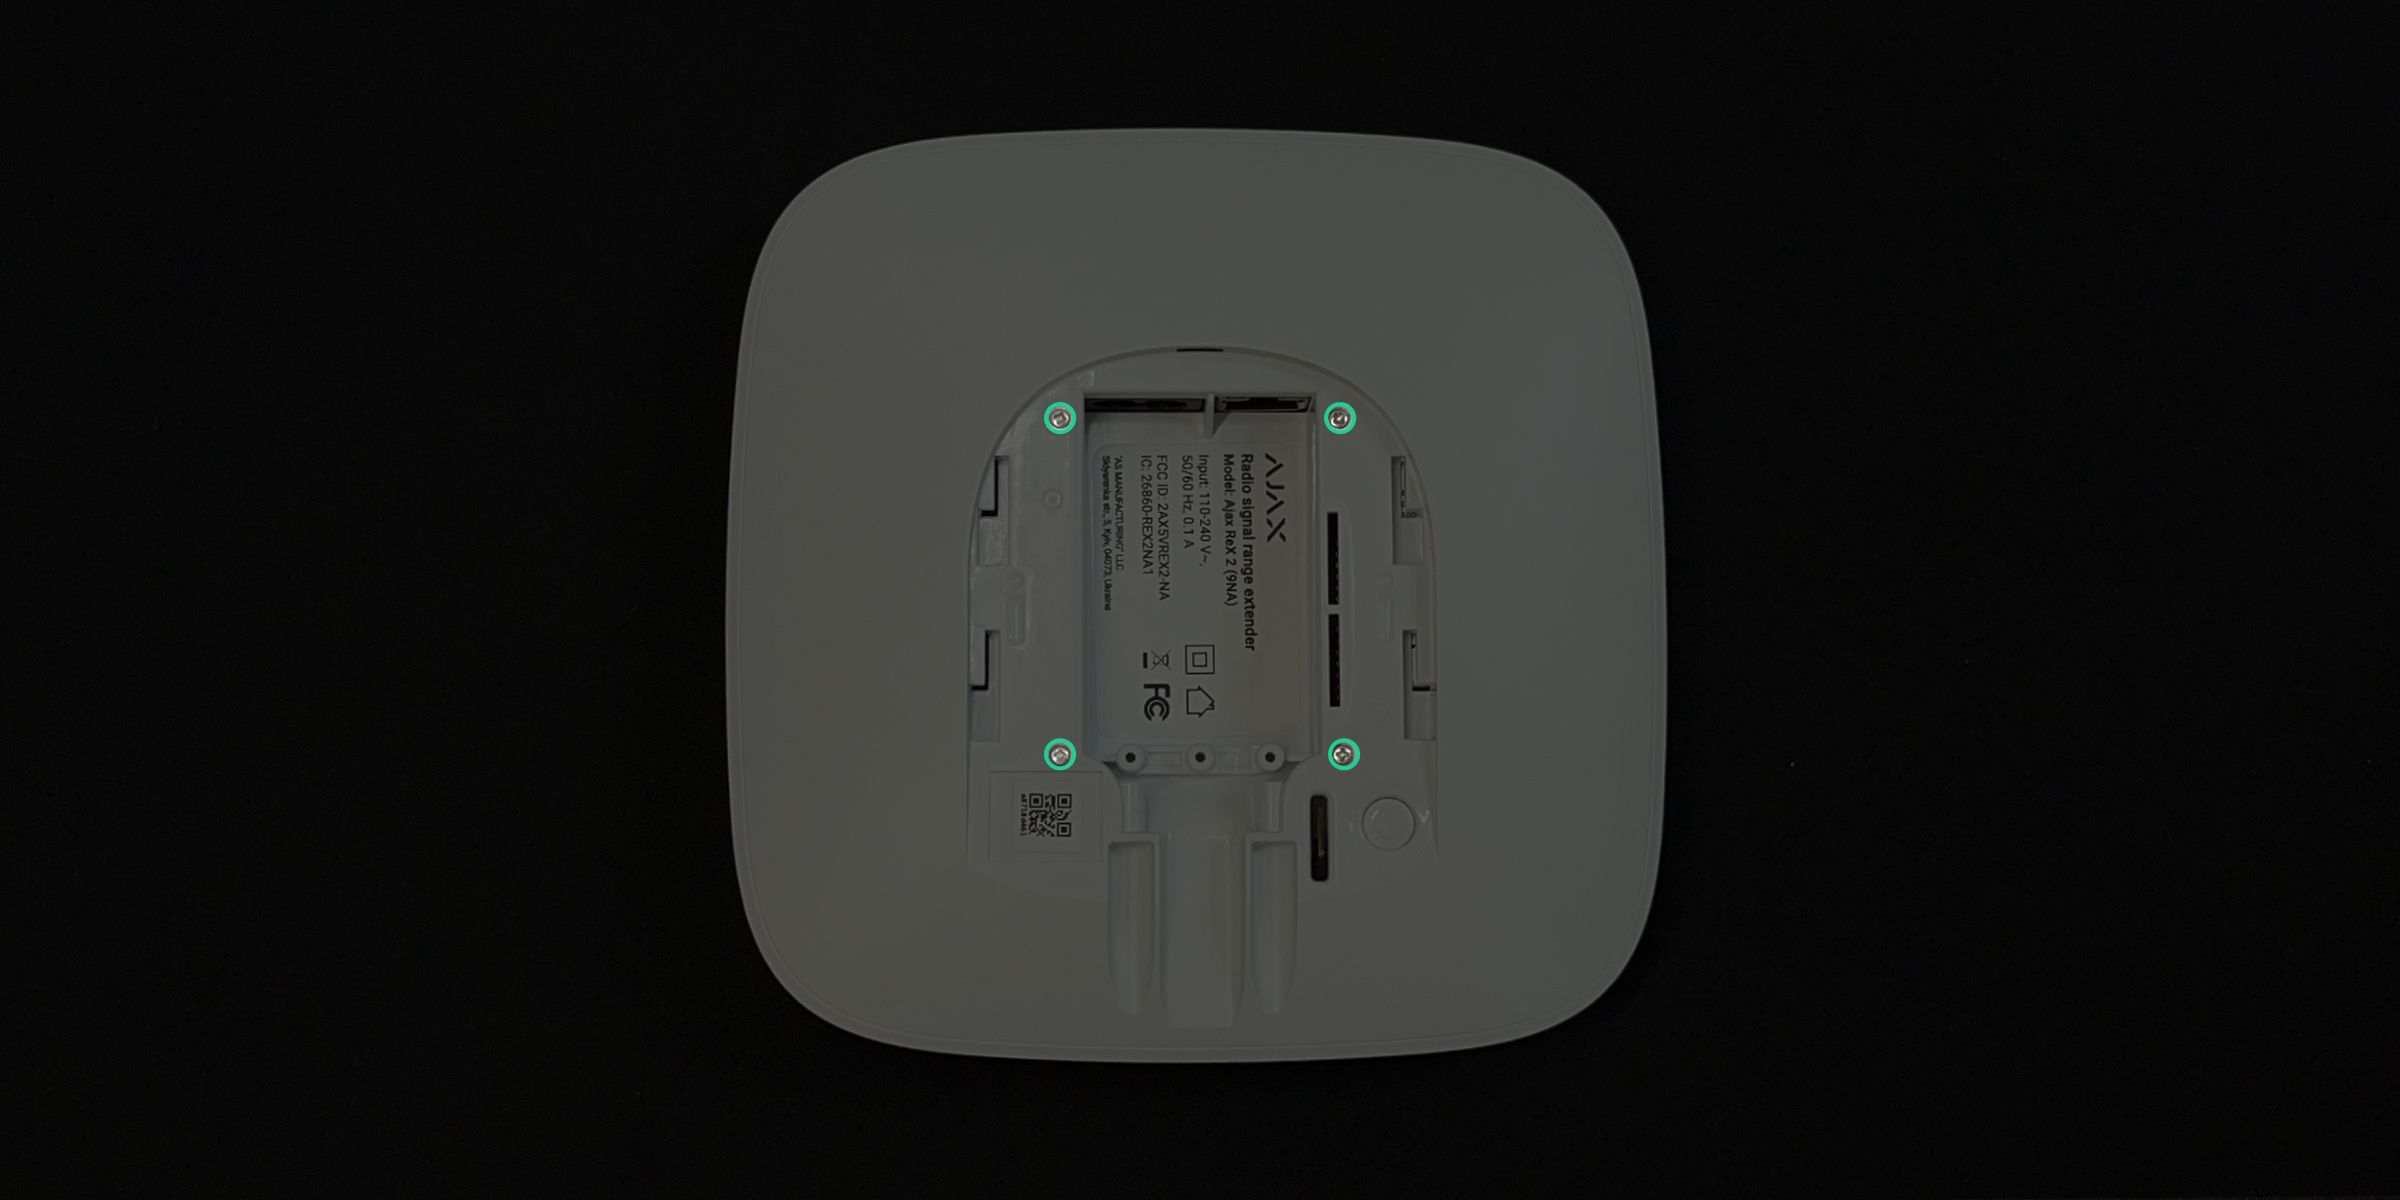
- Turn over the range extender and place it on a soft surface with the Ajax logo down so as not to scratch the enclosure when dismantling. Remove four screws with a cross screwdriver (PH1).
- Remove the range extender lid by holding the power and Ethernet¹ connectors with your fingers. Set the lid with the Ajax logo aside.
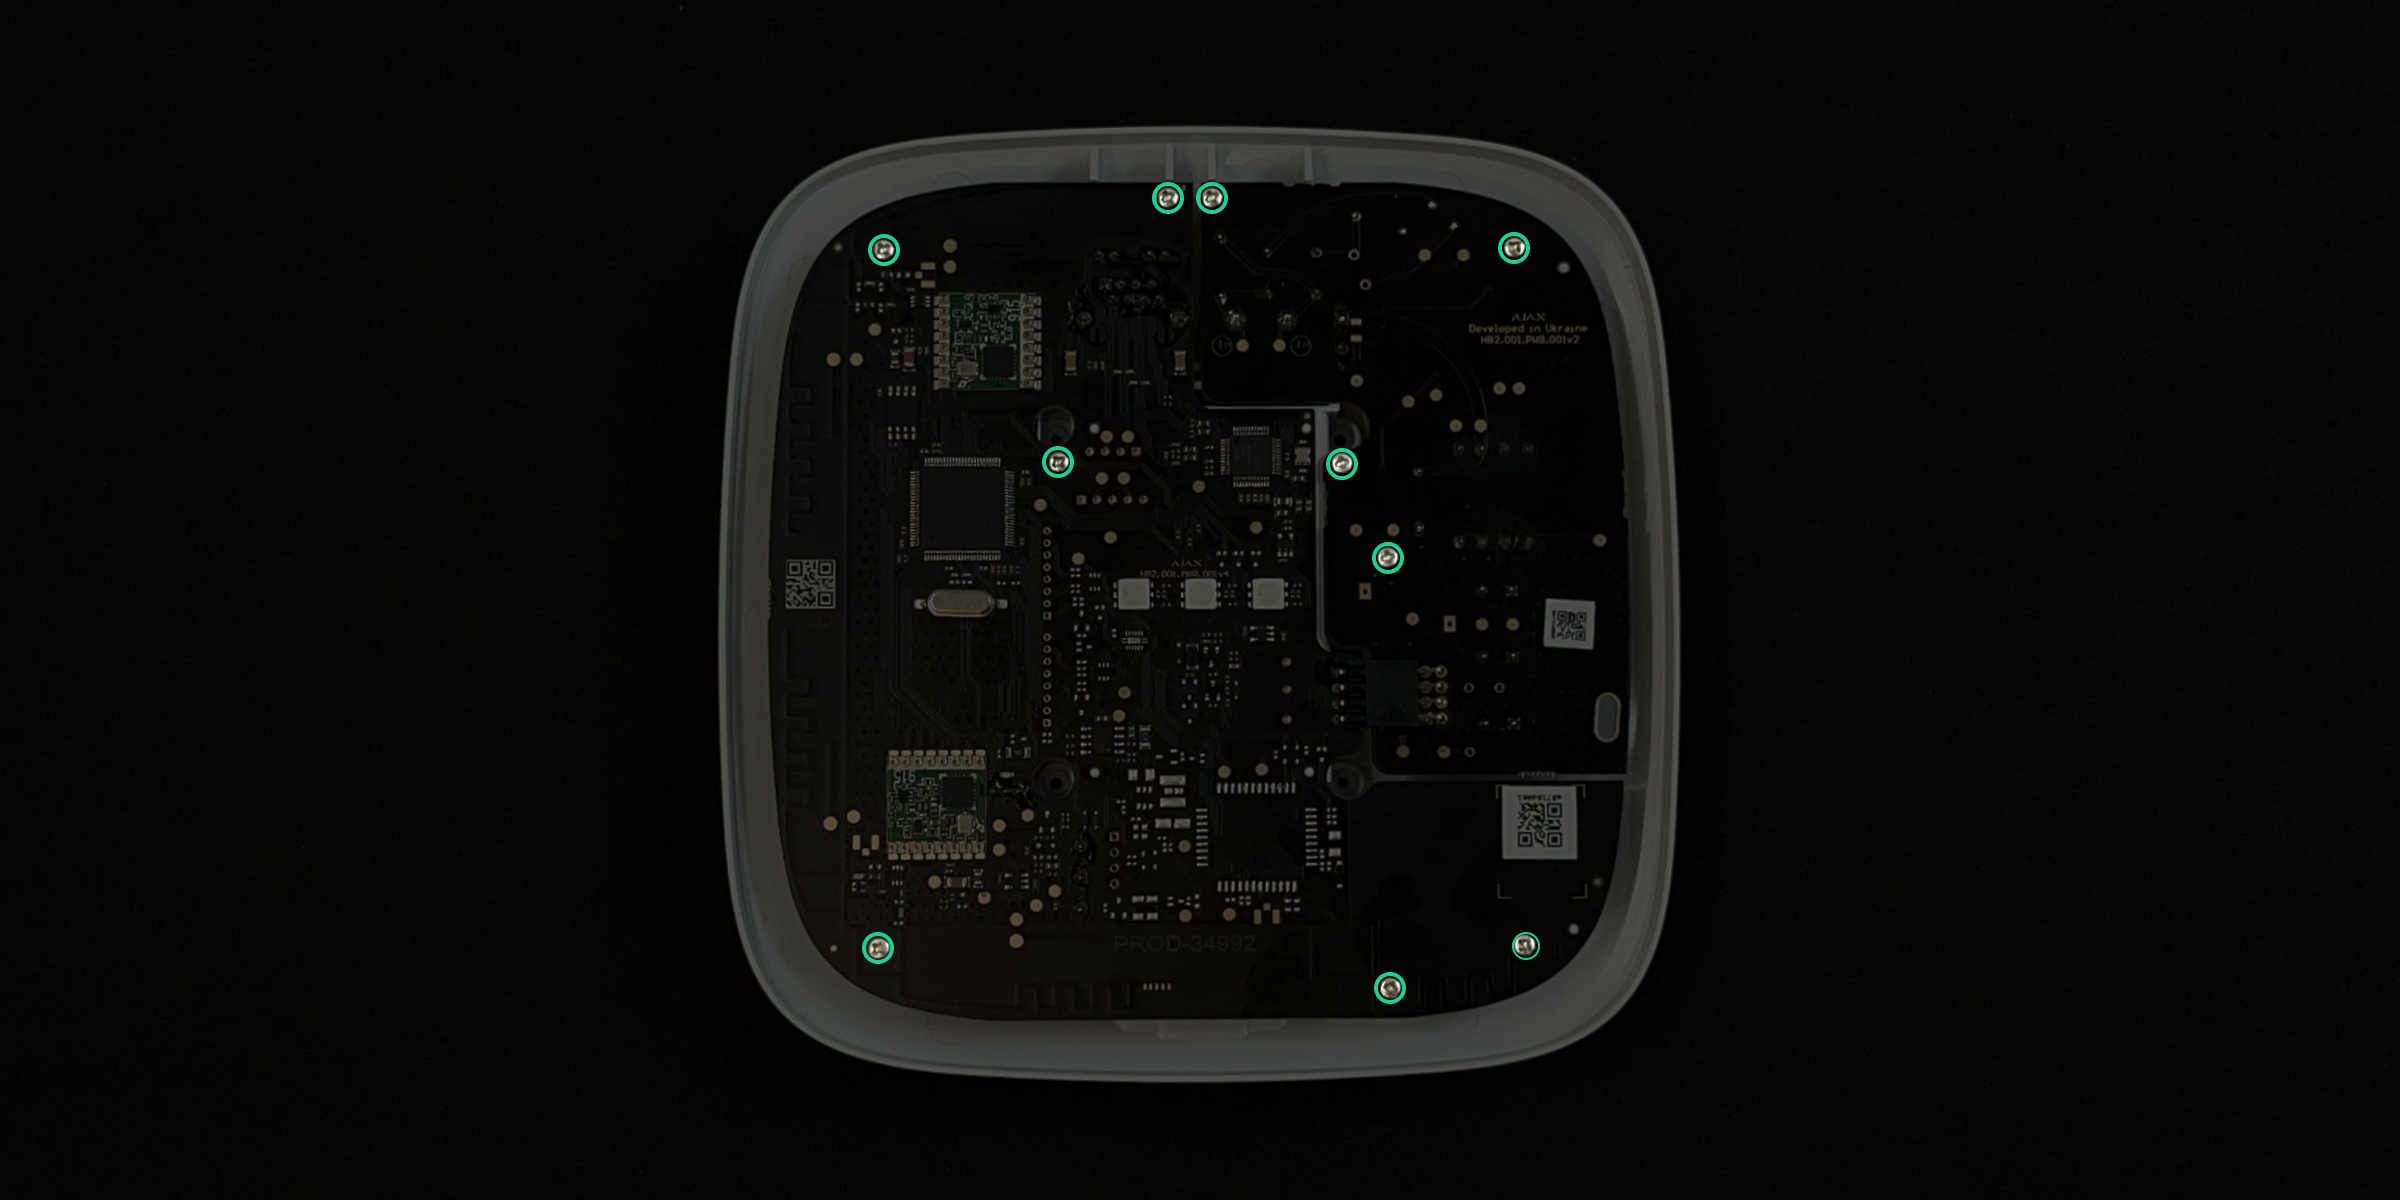
- Unscrew ten screws that fix the range extender boards.
- Remove the boards from the range extender enclosure by lifting them evenly from both sides. The boards are interconnected and must be removed together.

If you removed the plastic power button when disassembling the range extender, install it together with a gasket into the range extender enclosure. The gasket is placed in the center of the plastic button. When properly installed, the button is fully seated, and its edges fit the grooves.
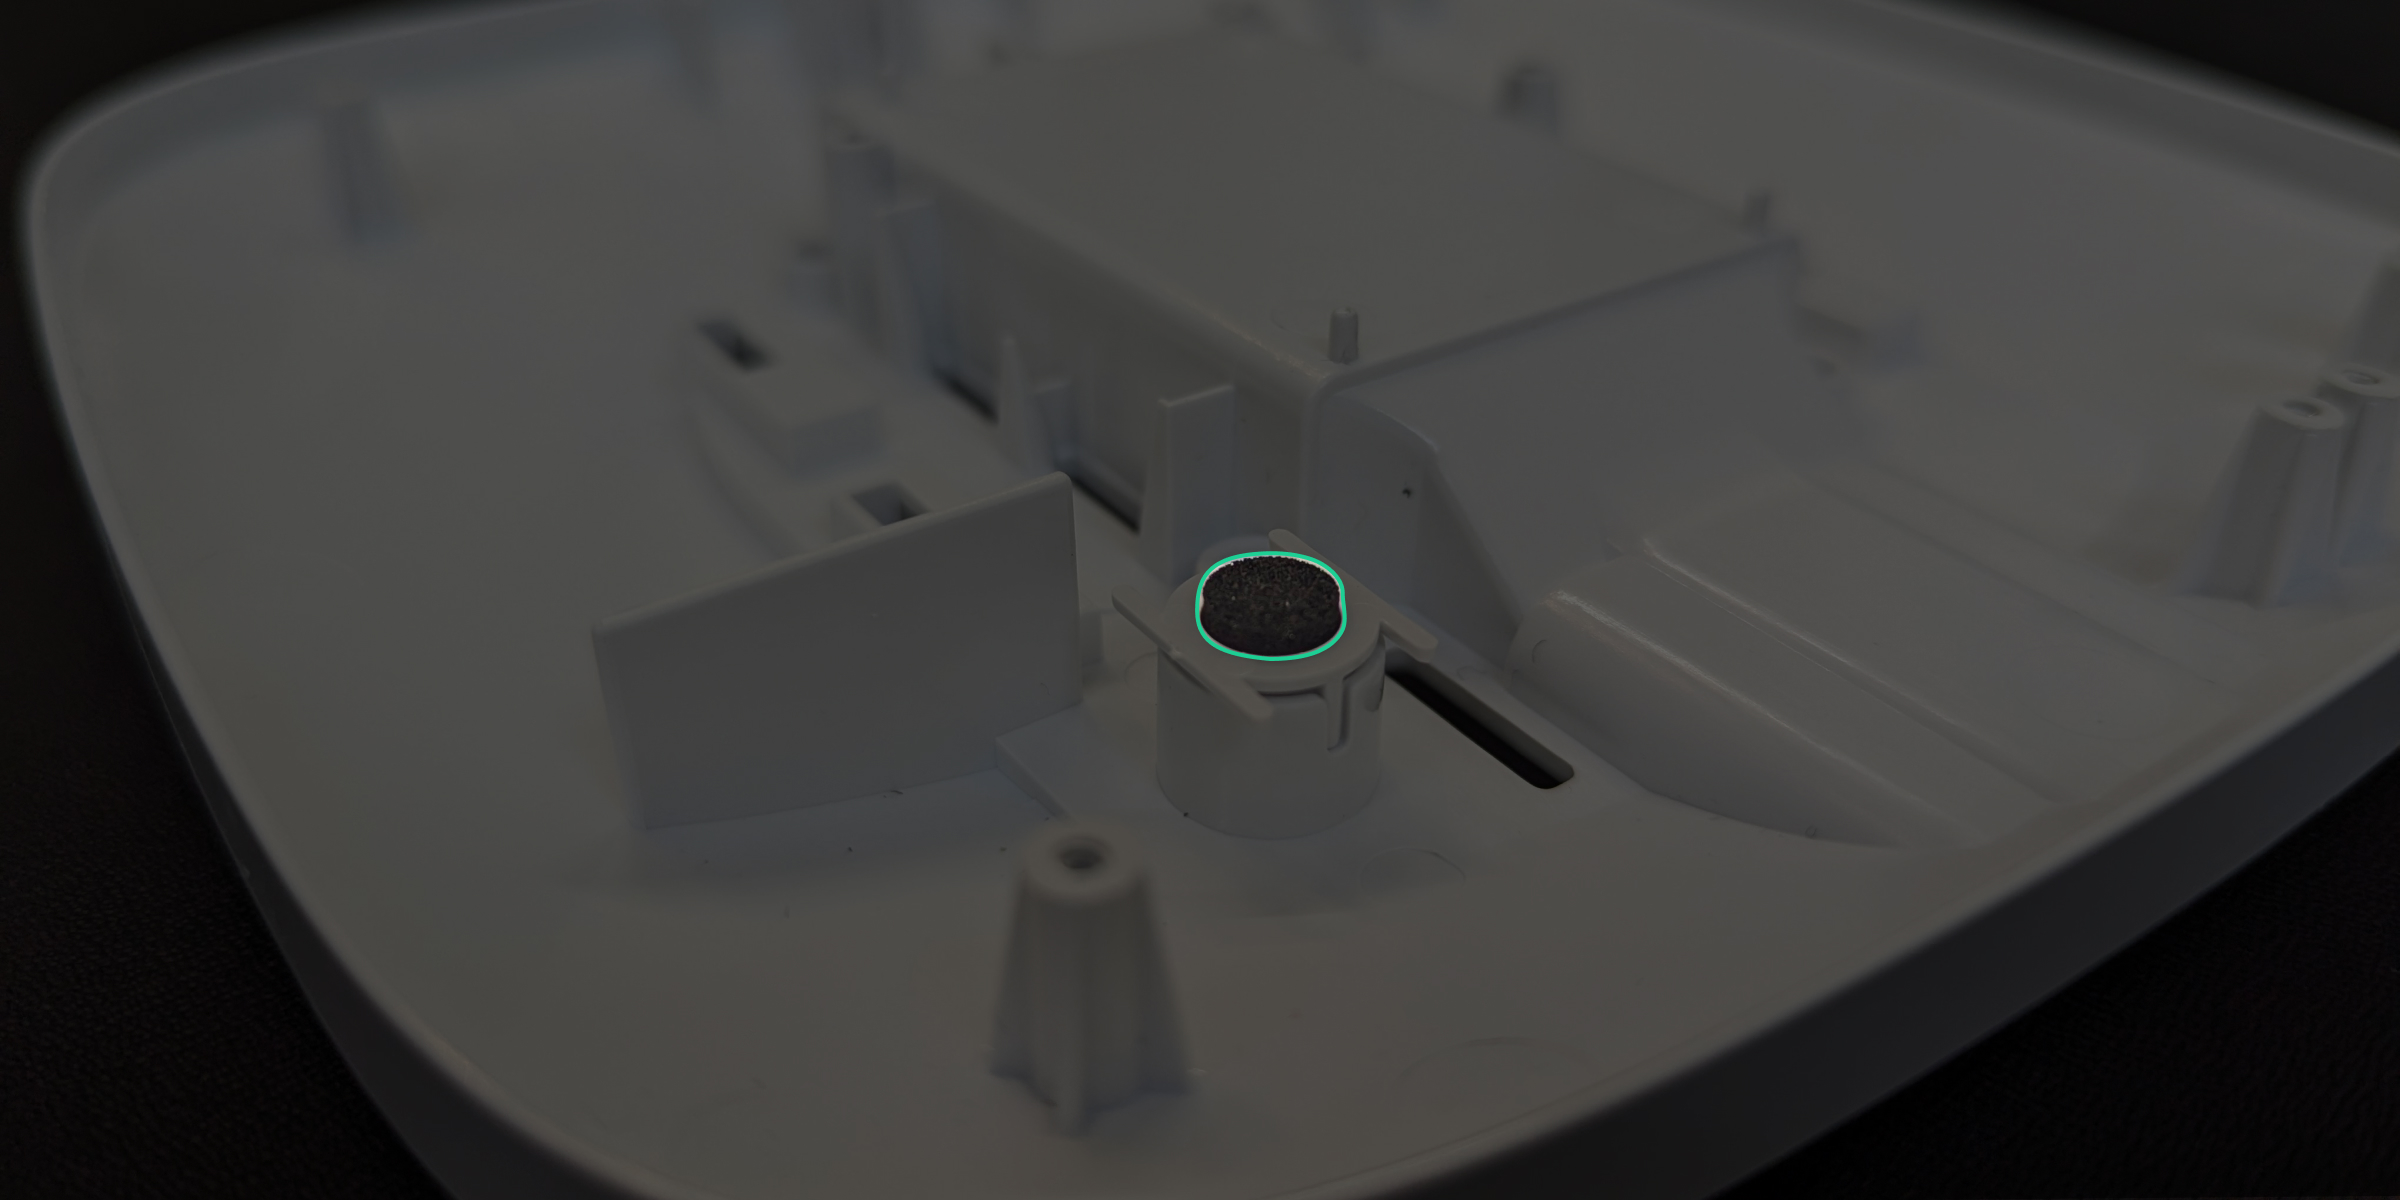
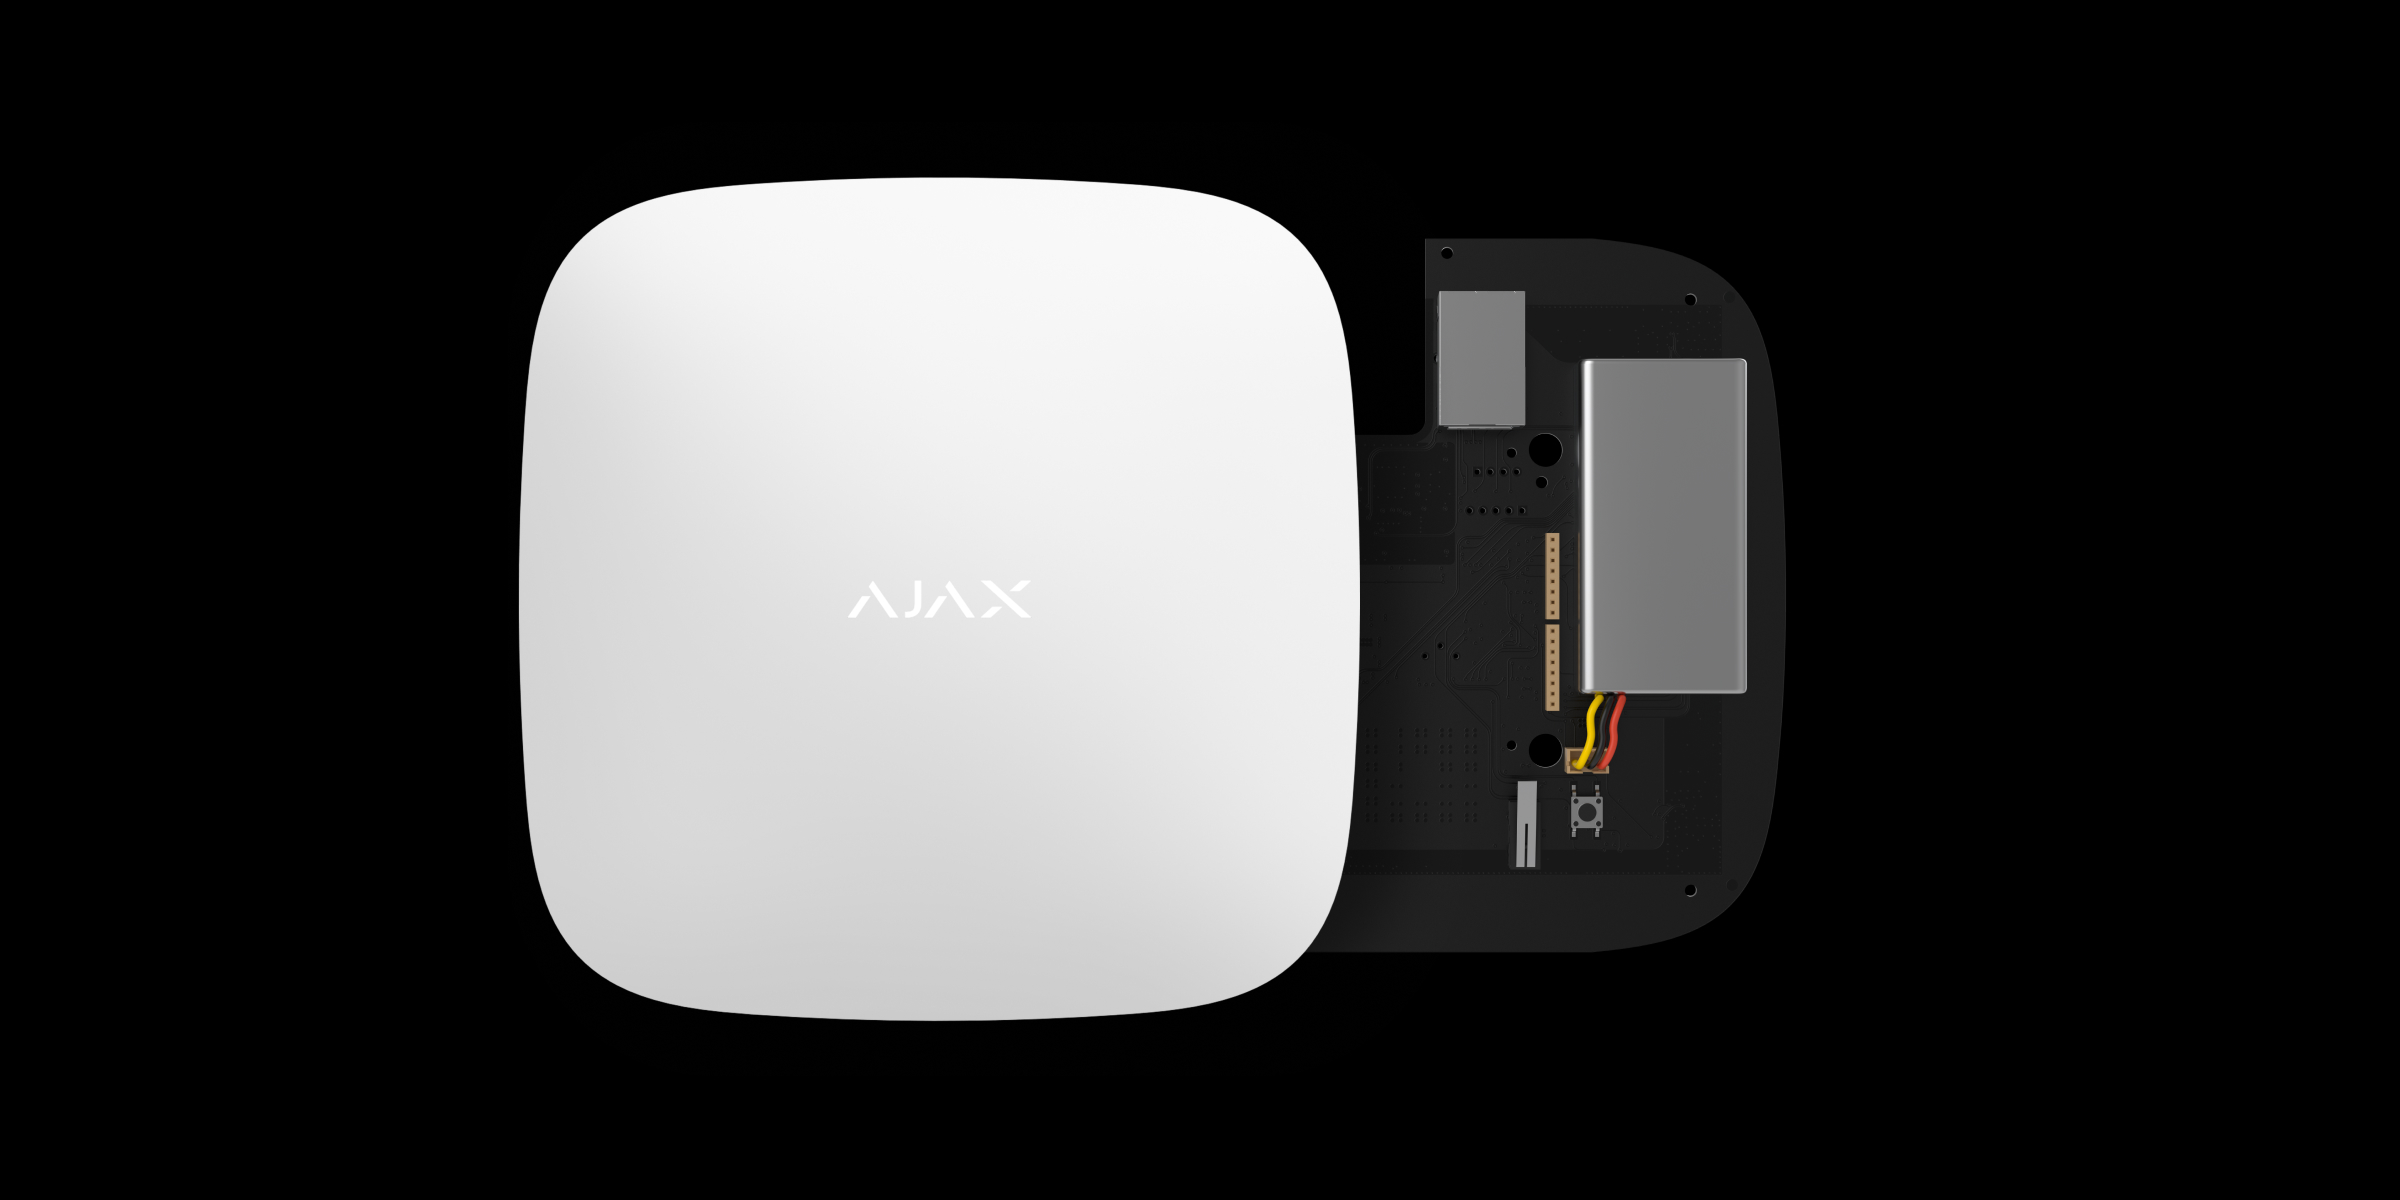
- Disengage the boards and set the smaller one aside.
- Turn the large board with the rechargeable battery facing you and disconnect the battery’s terminal from the board.
- Detach the rechargeable battery from the board. The battery can be fixed in two ways: with tape (sticker) or double-sided adhesive tape.
- If the range extender rechargeable battery is fixed with tape (sticker), pull it up with a slight effort.
- If the range extender rechargeable battery is fixed with two strips of double-sided adhesive tape, use a plastic card:
- Push through the first strip of double-sided adhesive tape without applying excessive effort.
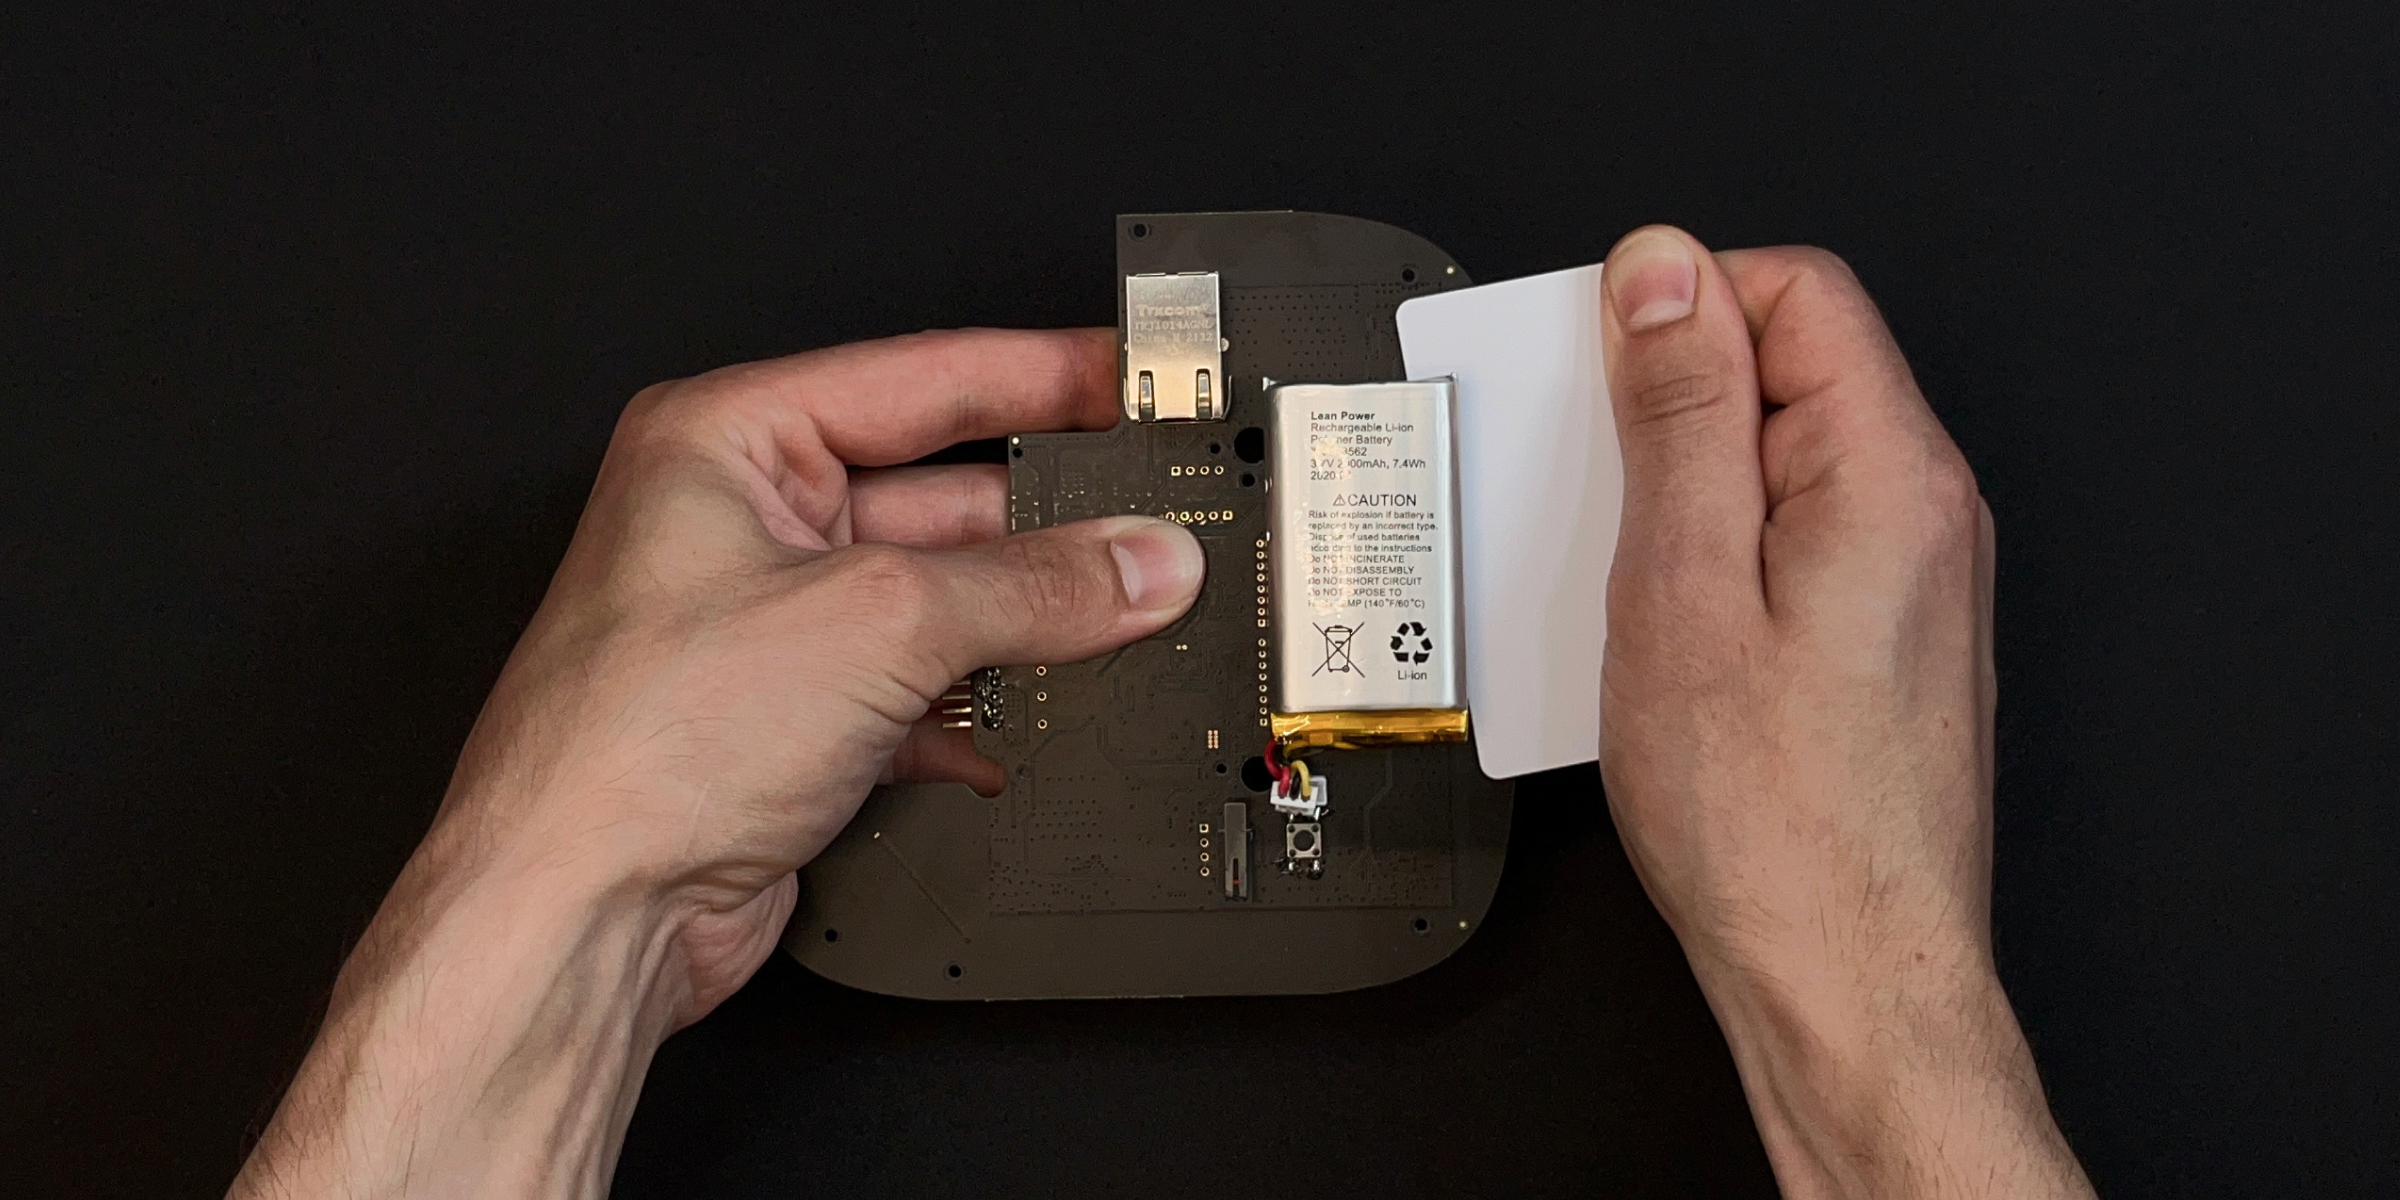
- Place a sheet of paper between double-sided adhesive tape and the rechargeable battery to prevent the battery from sticking to the board.
- Do the same with the second strip of double-sided adhesive tape.
- Carefully remove the remaining double-sided adhesive tape from the board.
- Push through the first strip of double-sided adhesive tape without applying excessive effort.
Never use sharp objects when removing the rechargeable battery! This may damage the battery and cause a fire.
- Connect the terminal of the new rechargeable battery to the range extender board. The table below provides compatible rechargeable battery types.
Range extender model Rechargeable battery type ReX Jeweller - 2 Ah, 2-pin battery for Hub/Hub 2/ReX/ReX 2
- 2 Ah, 3-pin battery for Hub/Hub 2/ReX/ReX 2
ReX Jeweller, manufactured after August 26, 2022, has a 3-pin battery. If the device was manufactured earlier, the battery can be a 2-pin or 3-pin one. To find out the rechargeable battery type, contact Ajax Technical Support or check it manually.
ReX 2 Jeweller - 2 Ah, 2-pin battery for Hub/Hub 2/ReX/ReX 2
- 2 Ah, 3-pin battery for Hub/Hub 2/ReX/ReX 2
ReX 2 Jeweller, manufactured after October 7, 2022, has a 3-pin battery. If the device was manufactured earlier, the battery can be a 2-pin or 3-pin one. To find out the rechargeable battery type, contact Ajax Technical Support or check it manually.
- Place the new rechargeable battery like the old one and secure it on the range extender board using the bundled 3M adhesive-backed tape. If installed incorrectly, remove the battery from the board and reinstall it. Lay the battery cables as shown in the figure. Otherwise, the cables may be pinched.
The old rechargeable battery must be recycled according to the regulations for the disposal of Li-ion batteries in your country.
- Connect the boards using the connector.
- Carefully install the boards into the range extender enclosure by aligning the Ethernet¹ and power connectors on the board with the corresponding openings in the enclosure.
Make sure that the rechargeable battery and its cables are not pinched. When installed correctly, the boards are tight on all supports and are not loose. While holding the boards with the range extender back lid, turn the range extender over. The power and Ethernet¹ connectors must be fully seated, and the power button must not sink in. Otherwise, remove the boards and reinstall them on the back lid.
- Fix the board inside the enclosure with screws.

- Cover the range extender with a lid, turn it over by holding the range extender on both sides, and fix the lid with screws.
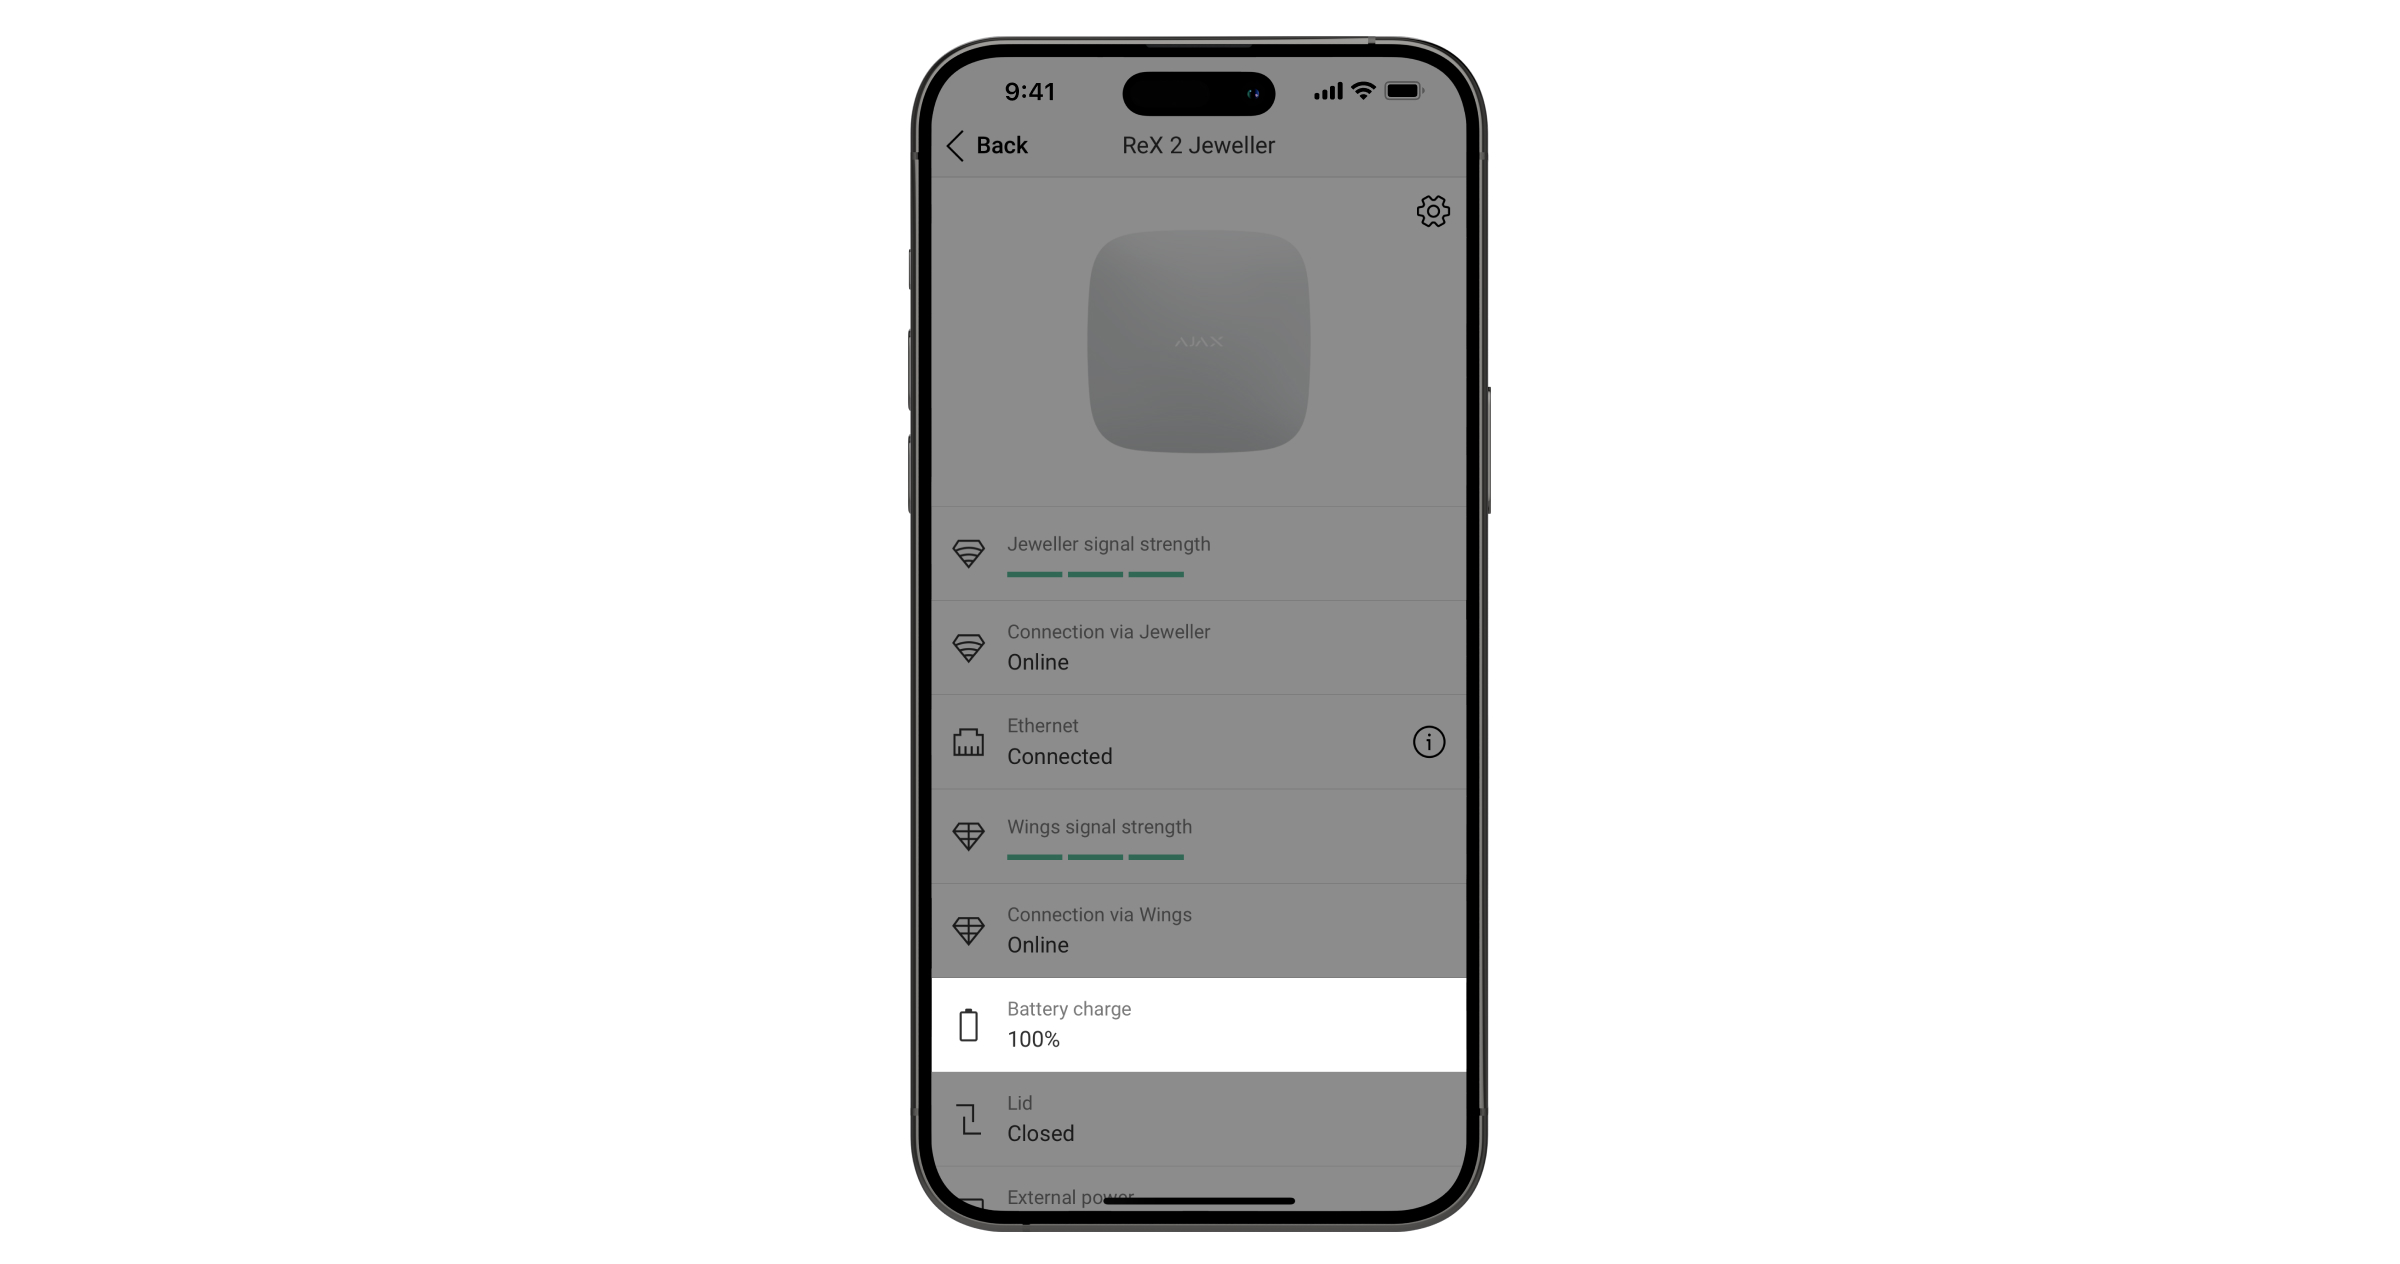
After replacing the rechargeable battery, it is necessary to check the range extender operation. Connect the range extender to the power supply and check in the Ajax app whether the battery level changes after 10 minutes.
In case of malfunction, we recommend contacting Ajax Technical Support or the place of purchase.
CAUTION!
There is a risk of explosion if the rechargeable battery is replaced with the wrong type. Batteries should not be disposed of as unsorted household waste. Please use the public collection system to return, recycle, or treat in compliance with local regulations.