An Ajax system allows users to independently export objects bound to Ajax Translator. This app generates a CSV file containing the hub ID and account number of active bindings. The file can then be uploaded to Ajax PRO Desktop to the selected Translator or Cloud signaling receiver. This article provides a step-by-step guide to the process.
Requirements
The migration feature is available in the following apps:
- Ajax Translator 1.14.10 or later;
- Ajax PRO Desktop 5.29 or later.
How to export a CSV file from Ajax Translator
To generate and export a CSV file, in the Ajax Translator app:
- Go to the Settings module.
- Go to the Objects menu.
- Click the CSV icon.
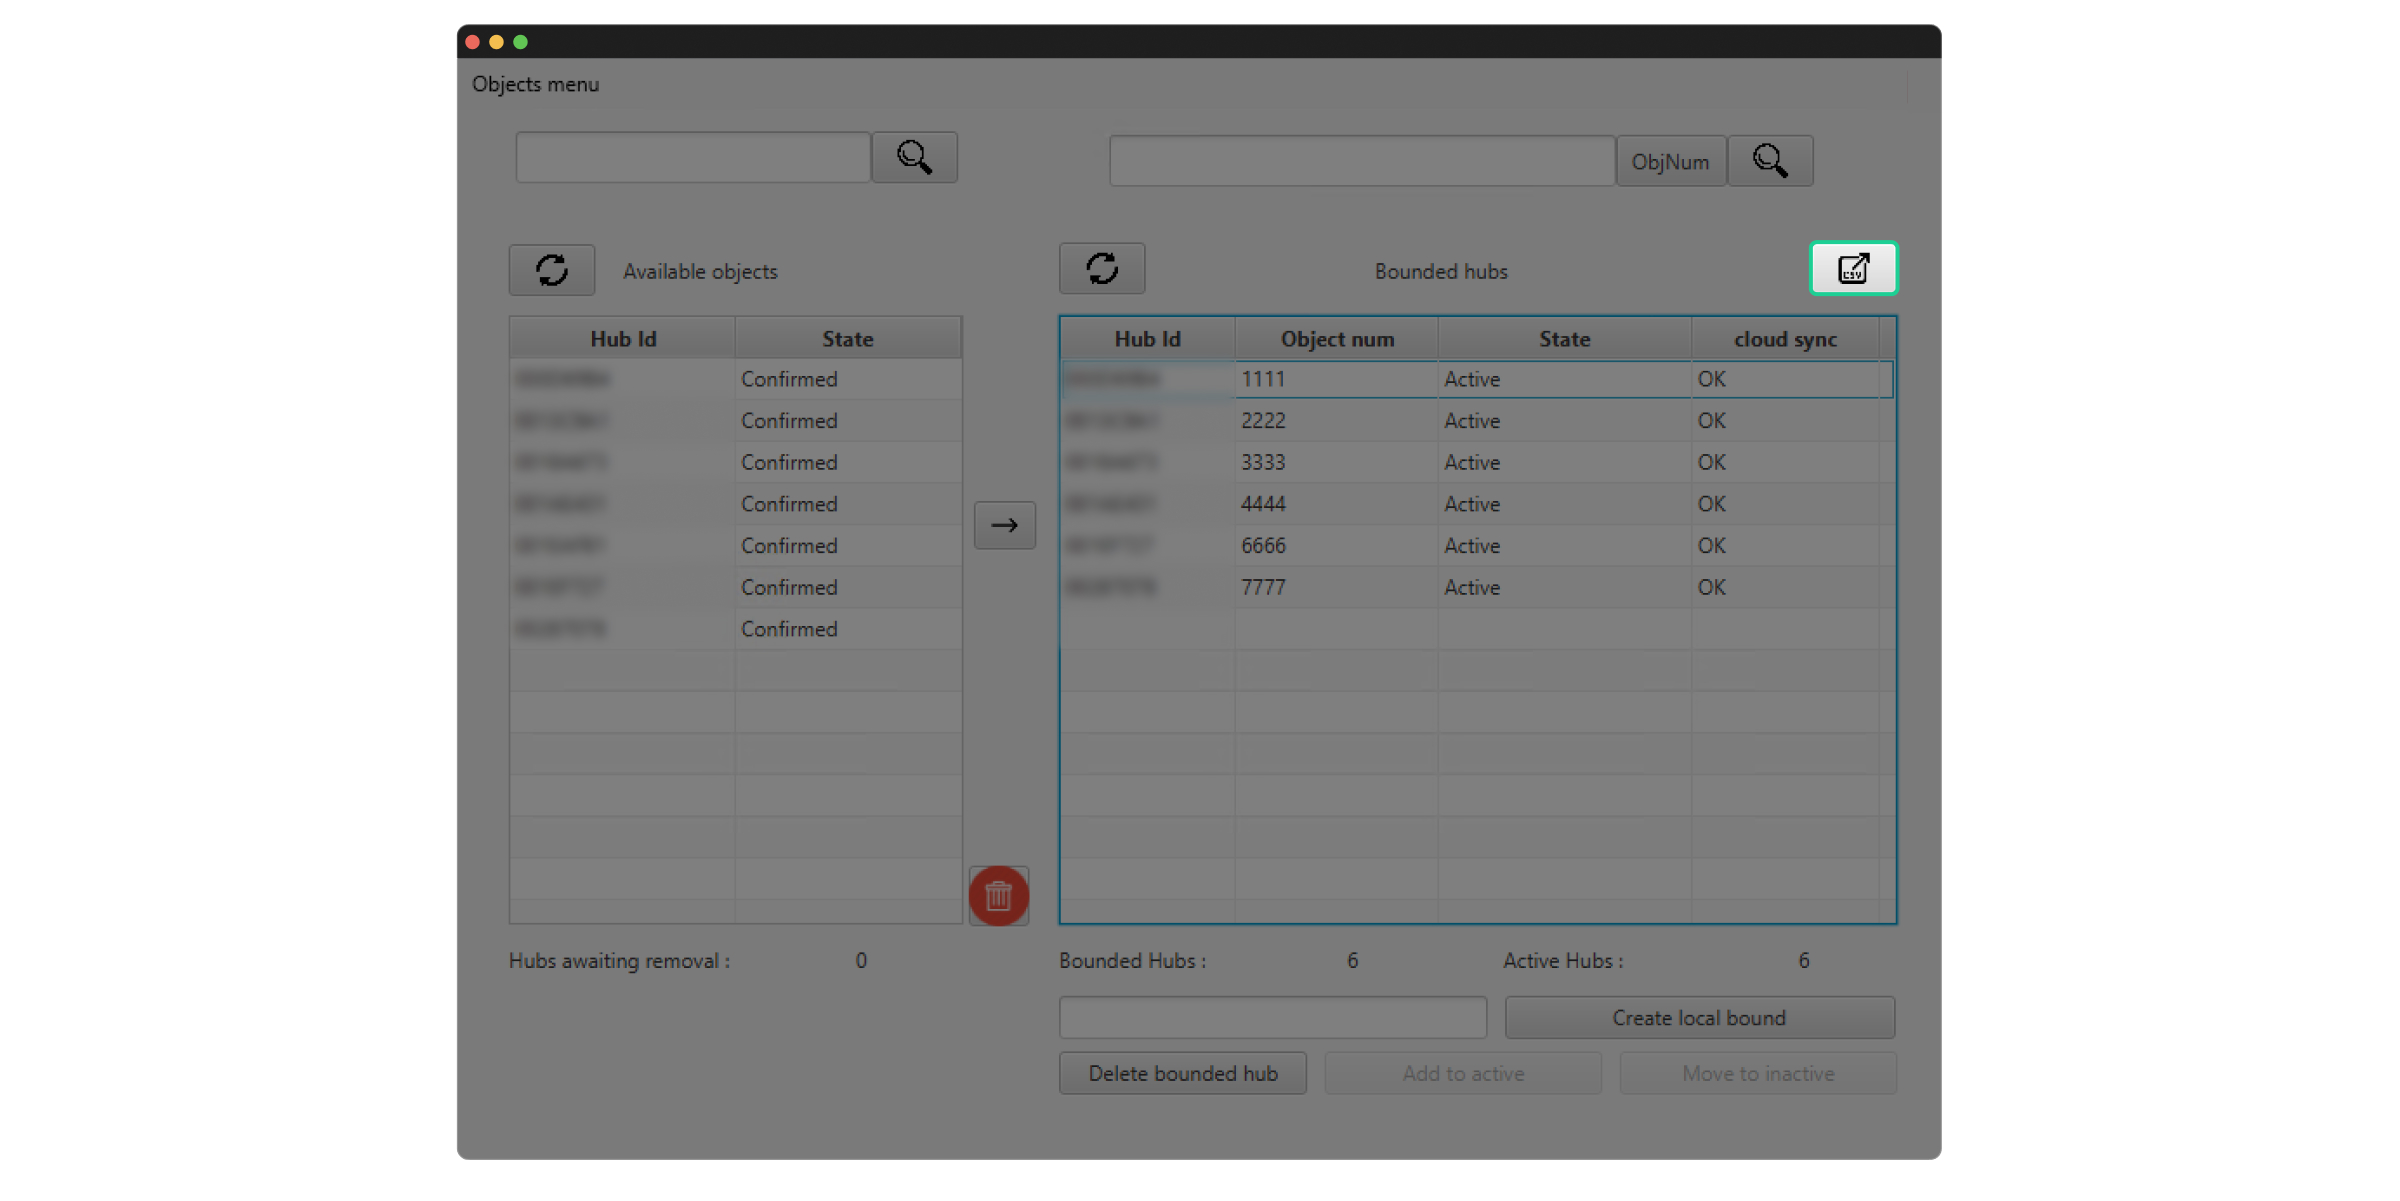
- Select the folder where the file will be saved. By default, the file is saved in the Ajax Translator installation folder. Click Save.
The CSV file containing hub IDs and corresponding account numbers will be created in the selected folder.
How to upload a CSV file to Ajax PRO Desktop
Only a Senior CMS Engineer can upload a CSV file to Ajax PRO Desktop.
You can bind the account to the Translator or Cloud signaling receiver. To upload the created file and migrate accounts, in Ajax PRO Desktop:
- Go to the Company module.
- Go to the CMS connection menu.
- Select the Ajax Translator or Cloud signaling tab.
- Select the required receiver and click the
 icon.
icon.
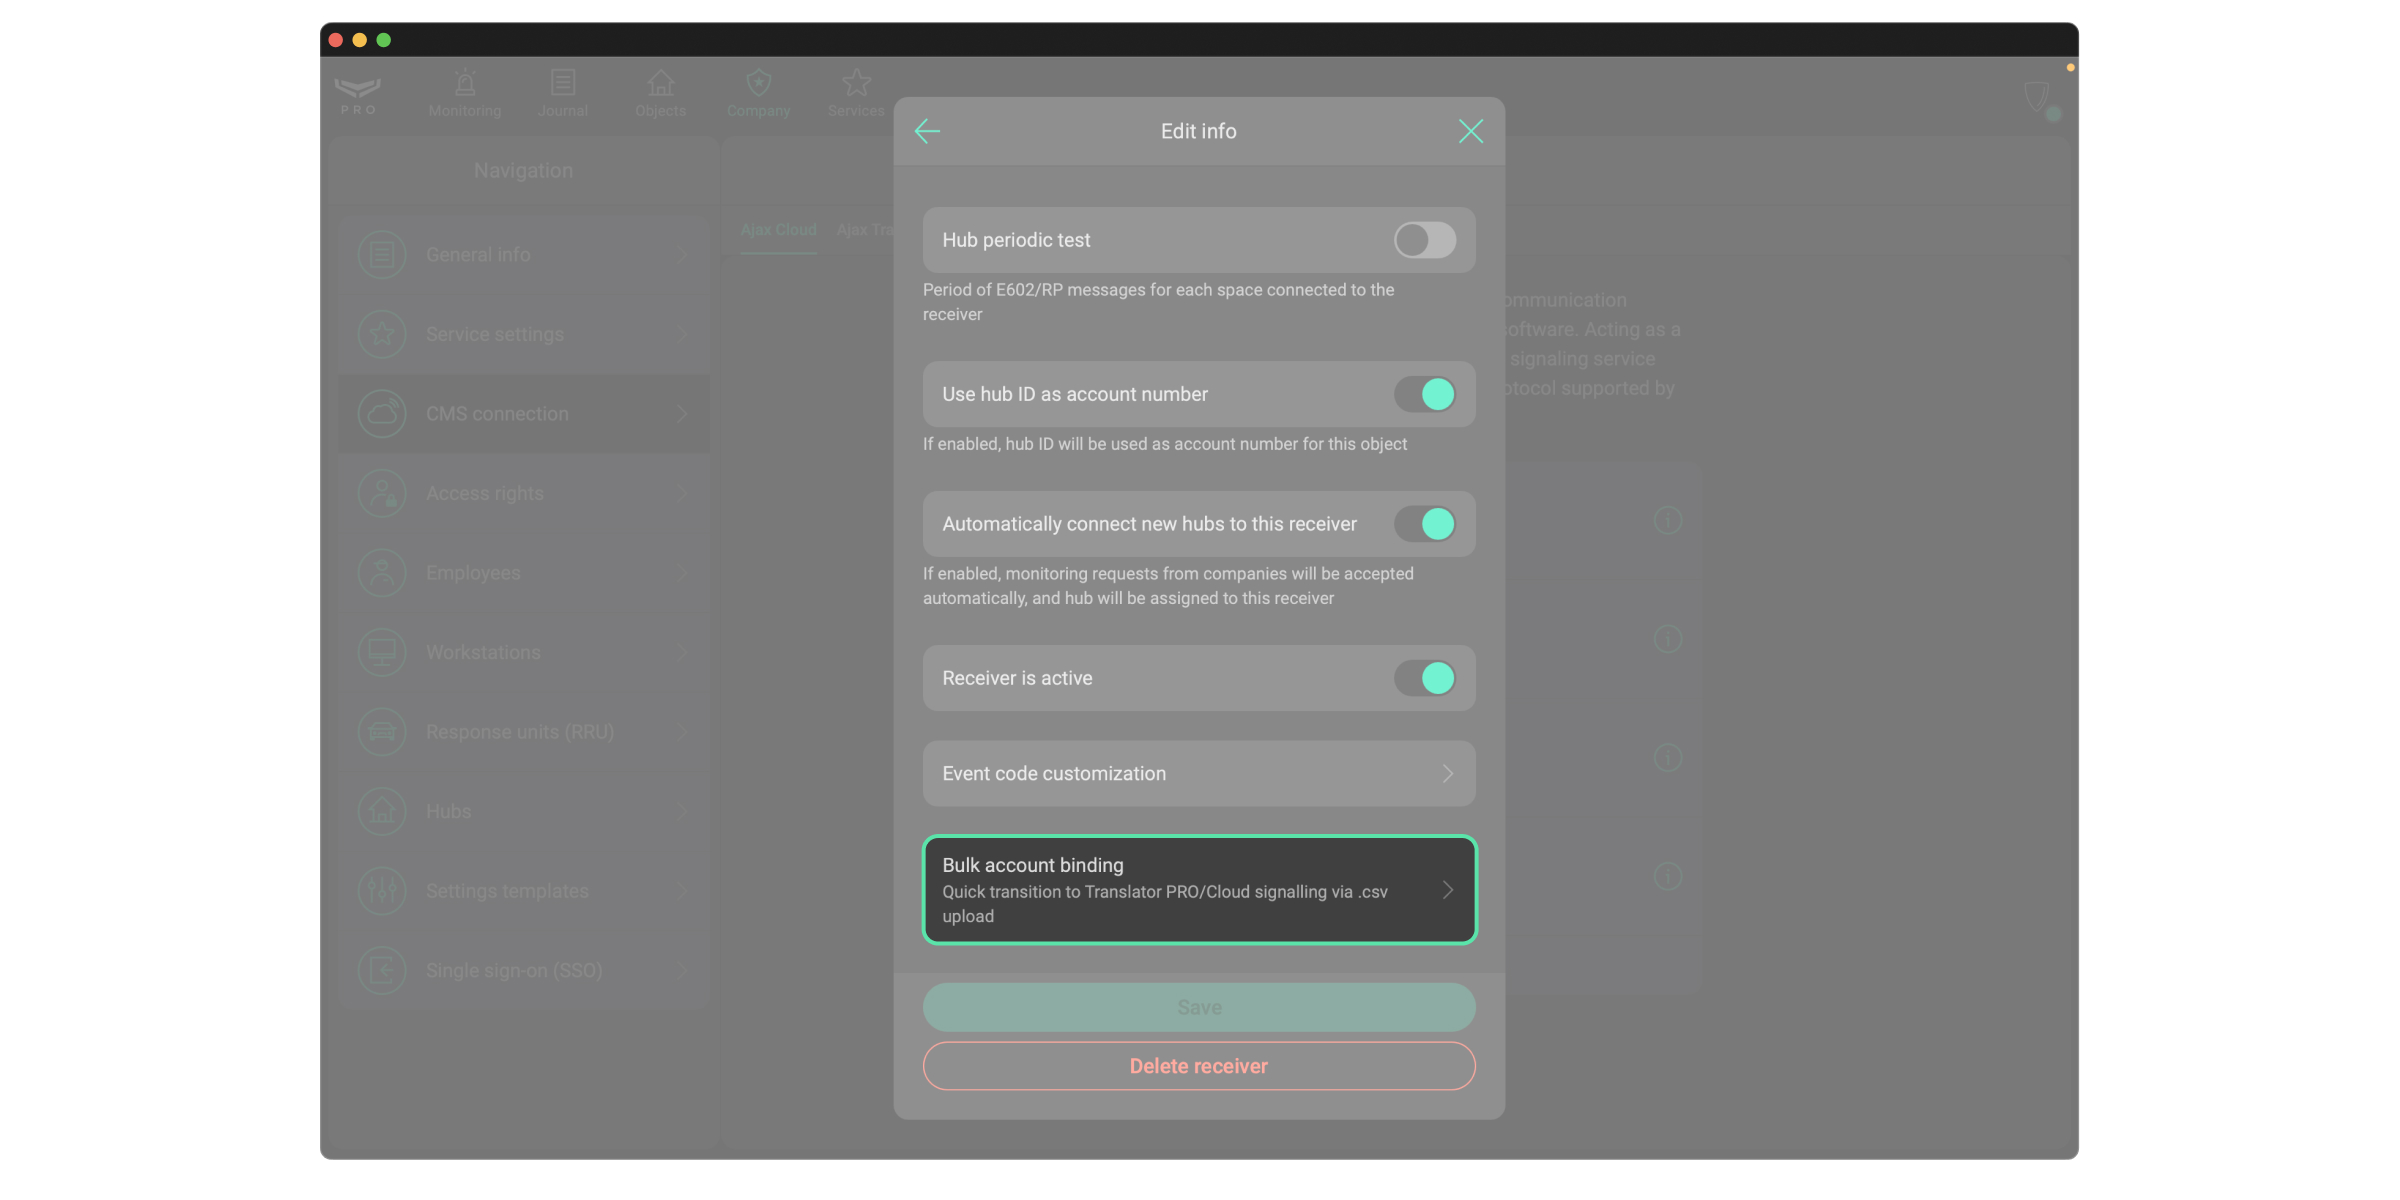
- Go to the Bulk account binding menu.
- Click the Upload .csv button.
- Select the CSV file exported from Ajax Translator.
- If necessary, enable the Bind video devices with hub account number option.
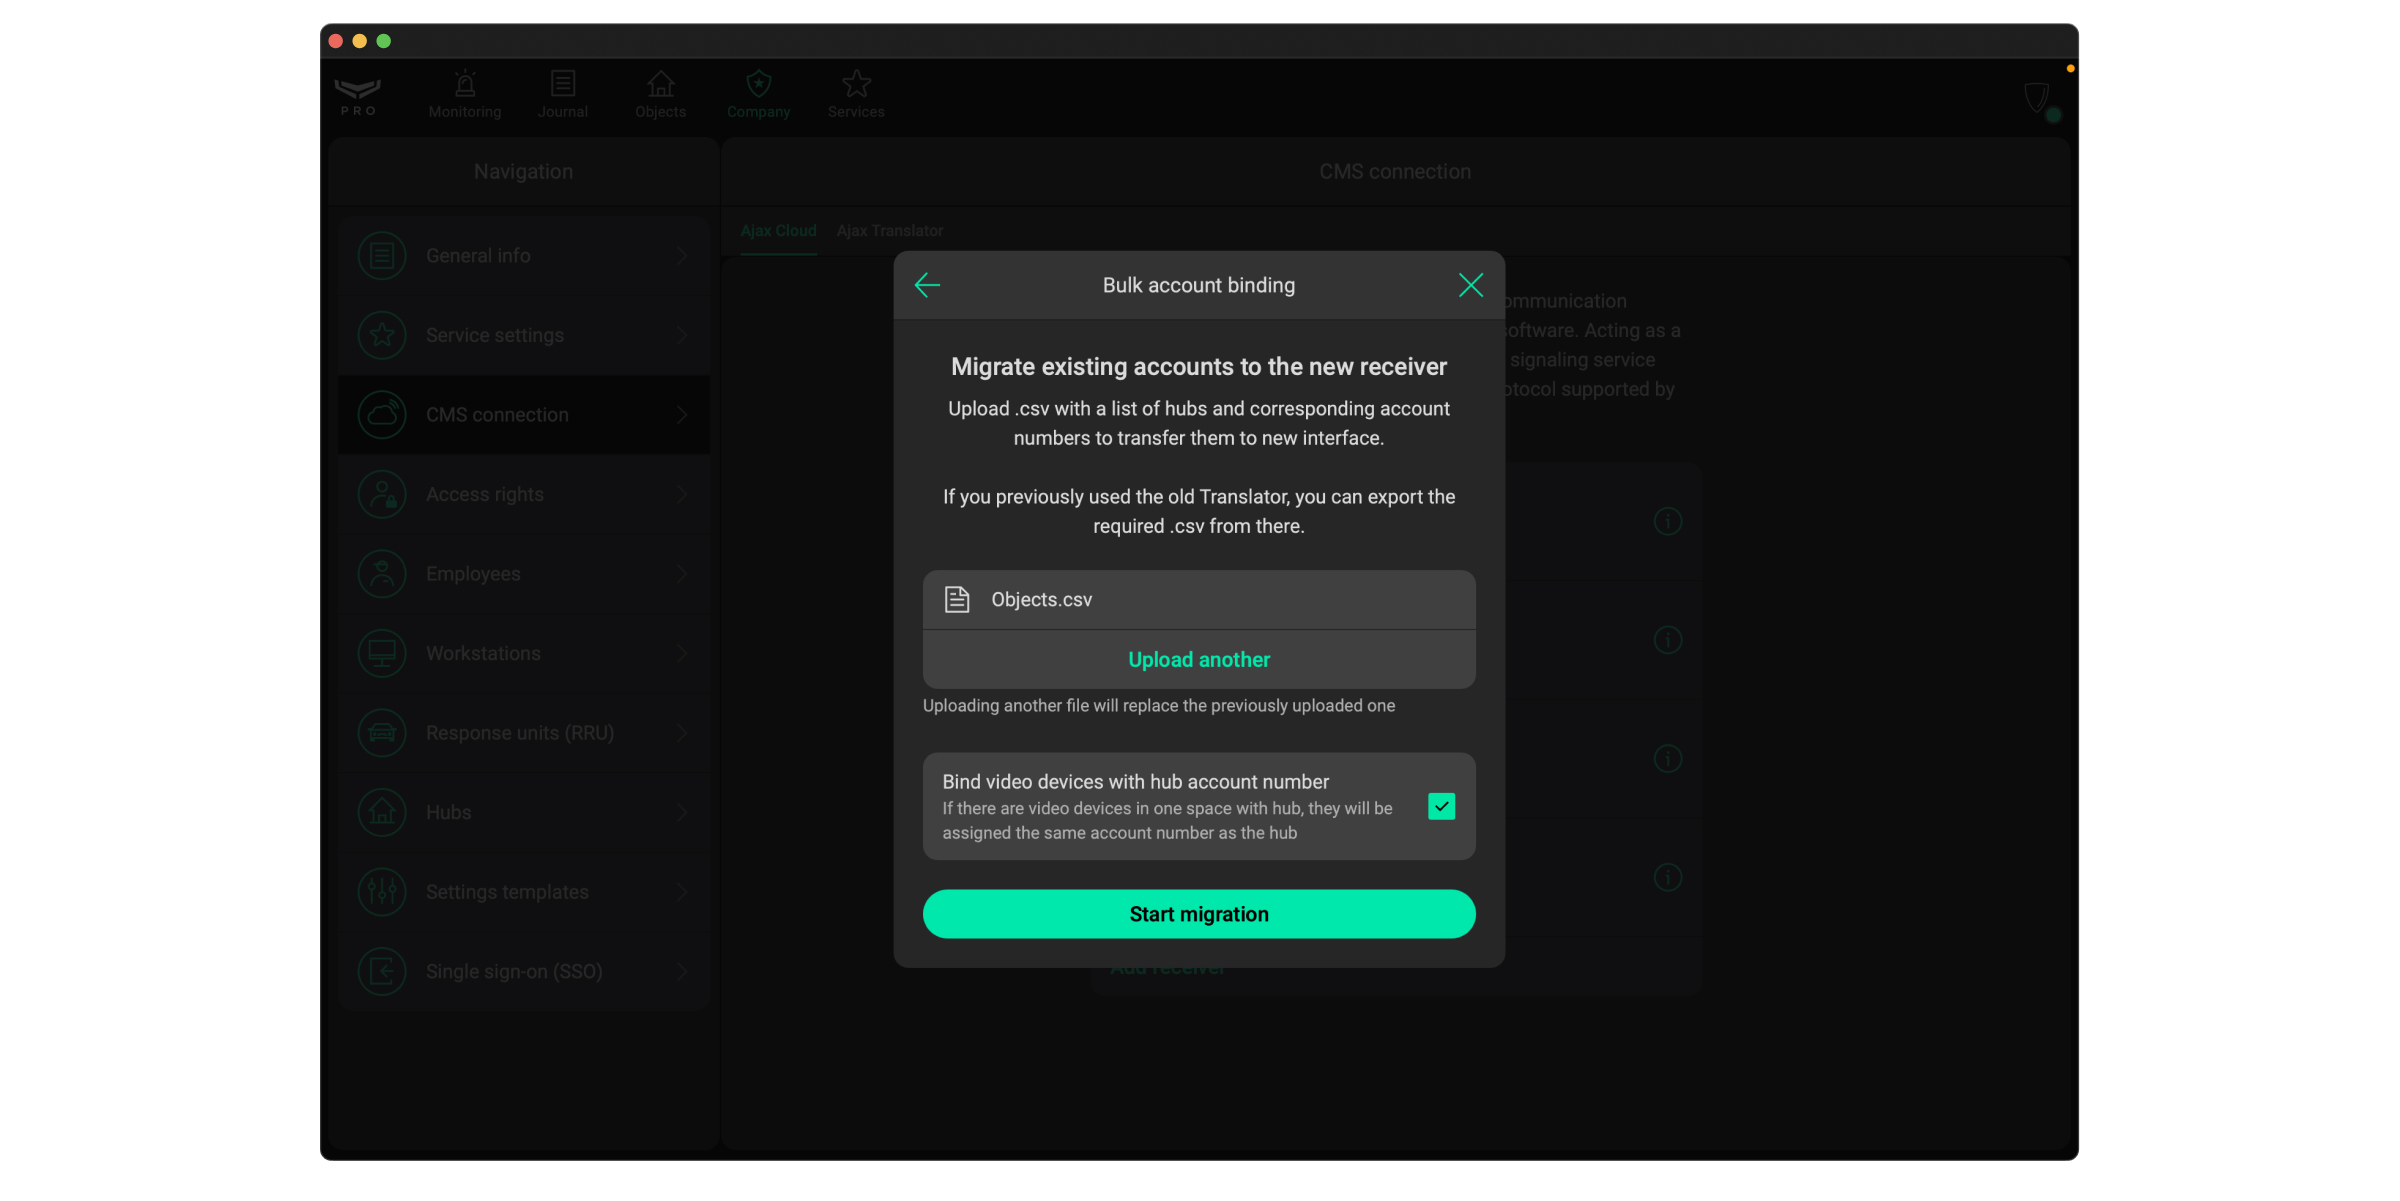
- Click the Start migration button.
If the migration is successful, the user will receive a notification with the number of bindings created.
If the file contains invalid data, an error notification will appear with the option to download a report listing the issues. The user can correct the data directly in the report and upload it again. The report includes only hubs with invalid data, while bindings for all other hubs were created successfully.