Case E (395) is the waterproof casing for a compatible Ajax hub with an internal battery. The complete set includes the tamper boards that protect the casing and devices inside from sabotage. Case E (395) is designed for both outdoor and indoor use.
Functional elements
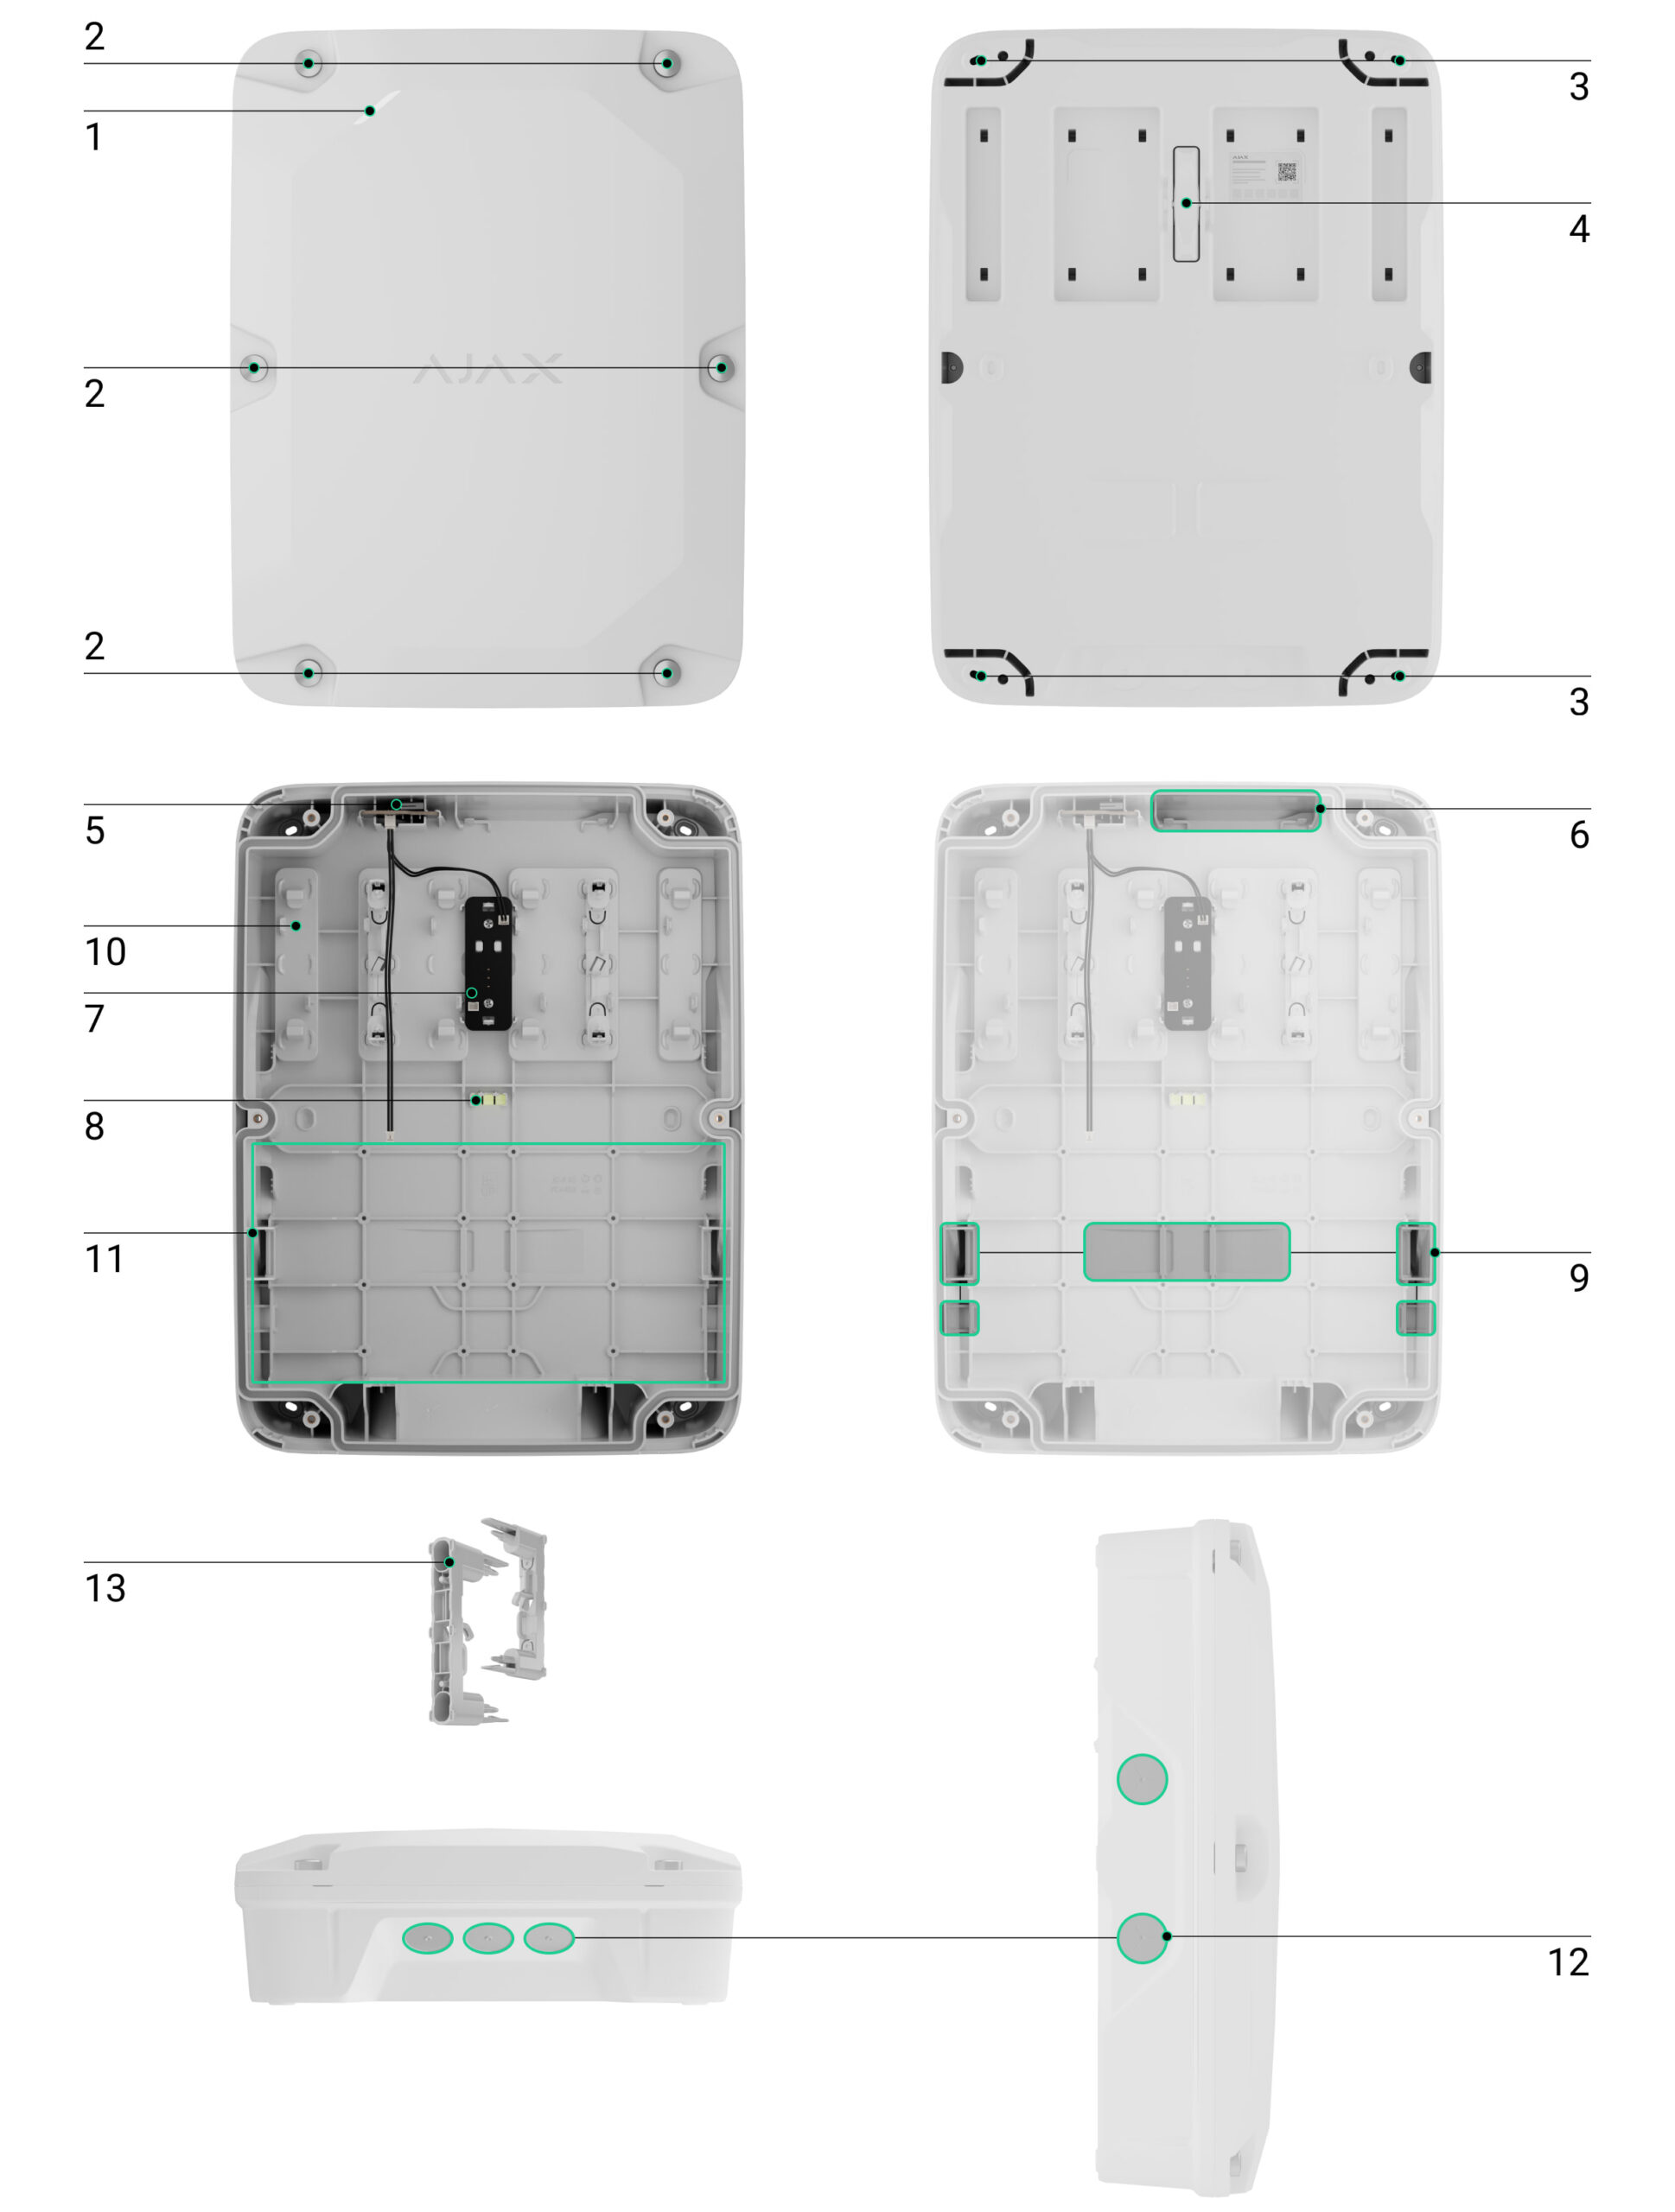
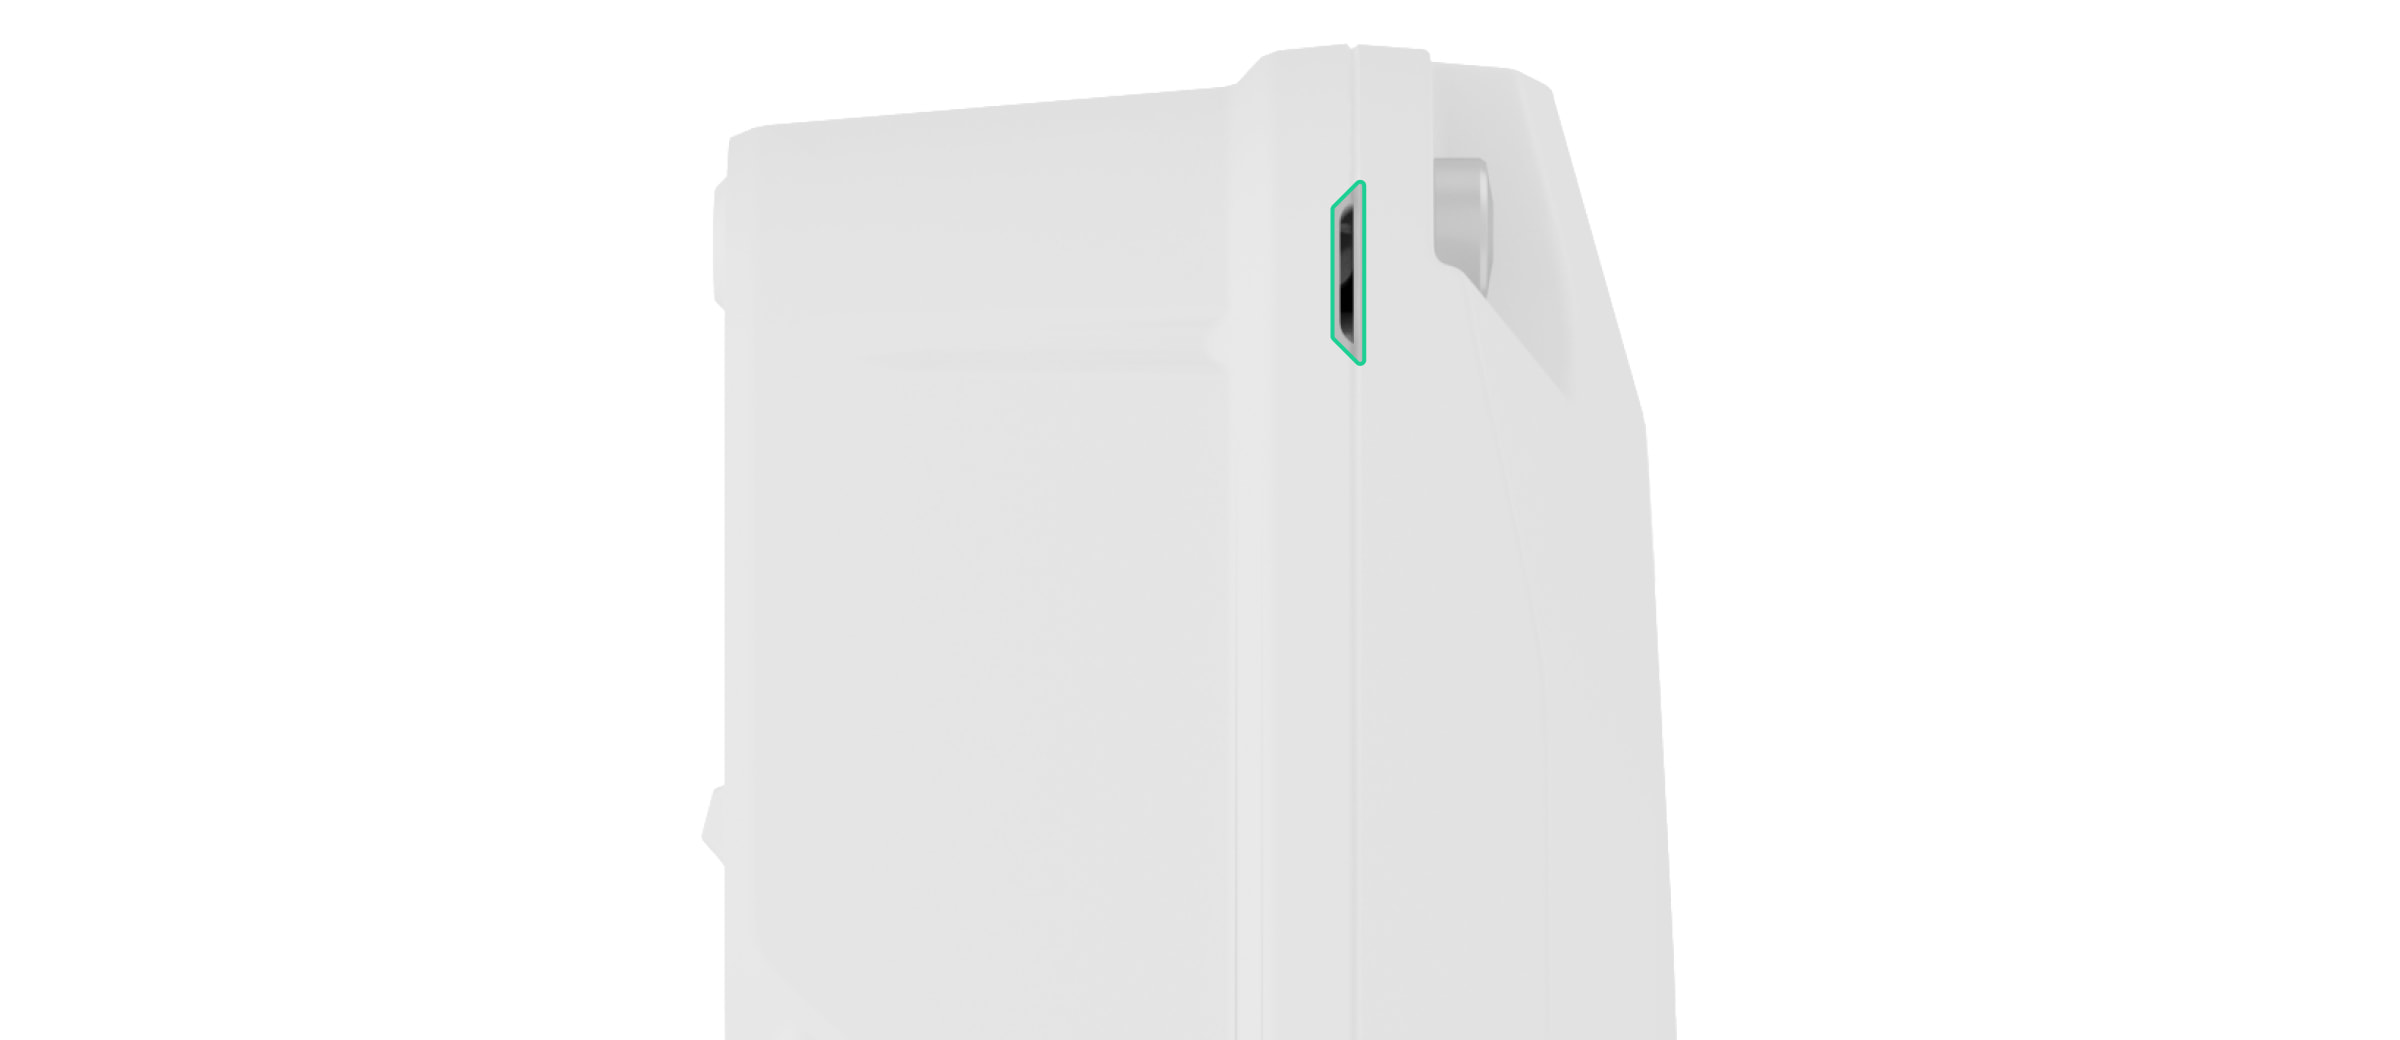
- Light guide to indicate the hub state.
- Captive screws to secure the casing lid. Use a bundled hexagon key (Ø 4 mm) to unscrew them.
- Holes to secure the casing to the surface.
- Rear tamper button. Used to trigger a tamper alarm in case of any attempt to detach the casing from the surface.
- The tamper board that detects attempts to remove the casing lid. Connected to both the hub and another tamper board with bundled cables.
- Slot to install a compatible Ajax module.
- The tamper board that detects attempts to detach the casing from the surface. Connected to another tamper board with a bundled cable.
- Bubble level to check the casing’s inclination angle during installation.
- Fasteners to secure the cables with ties and an internal battery with a hook-and-loop fastener strap.
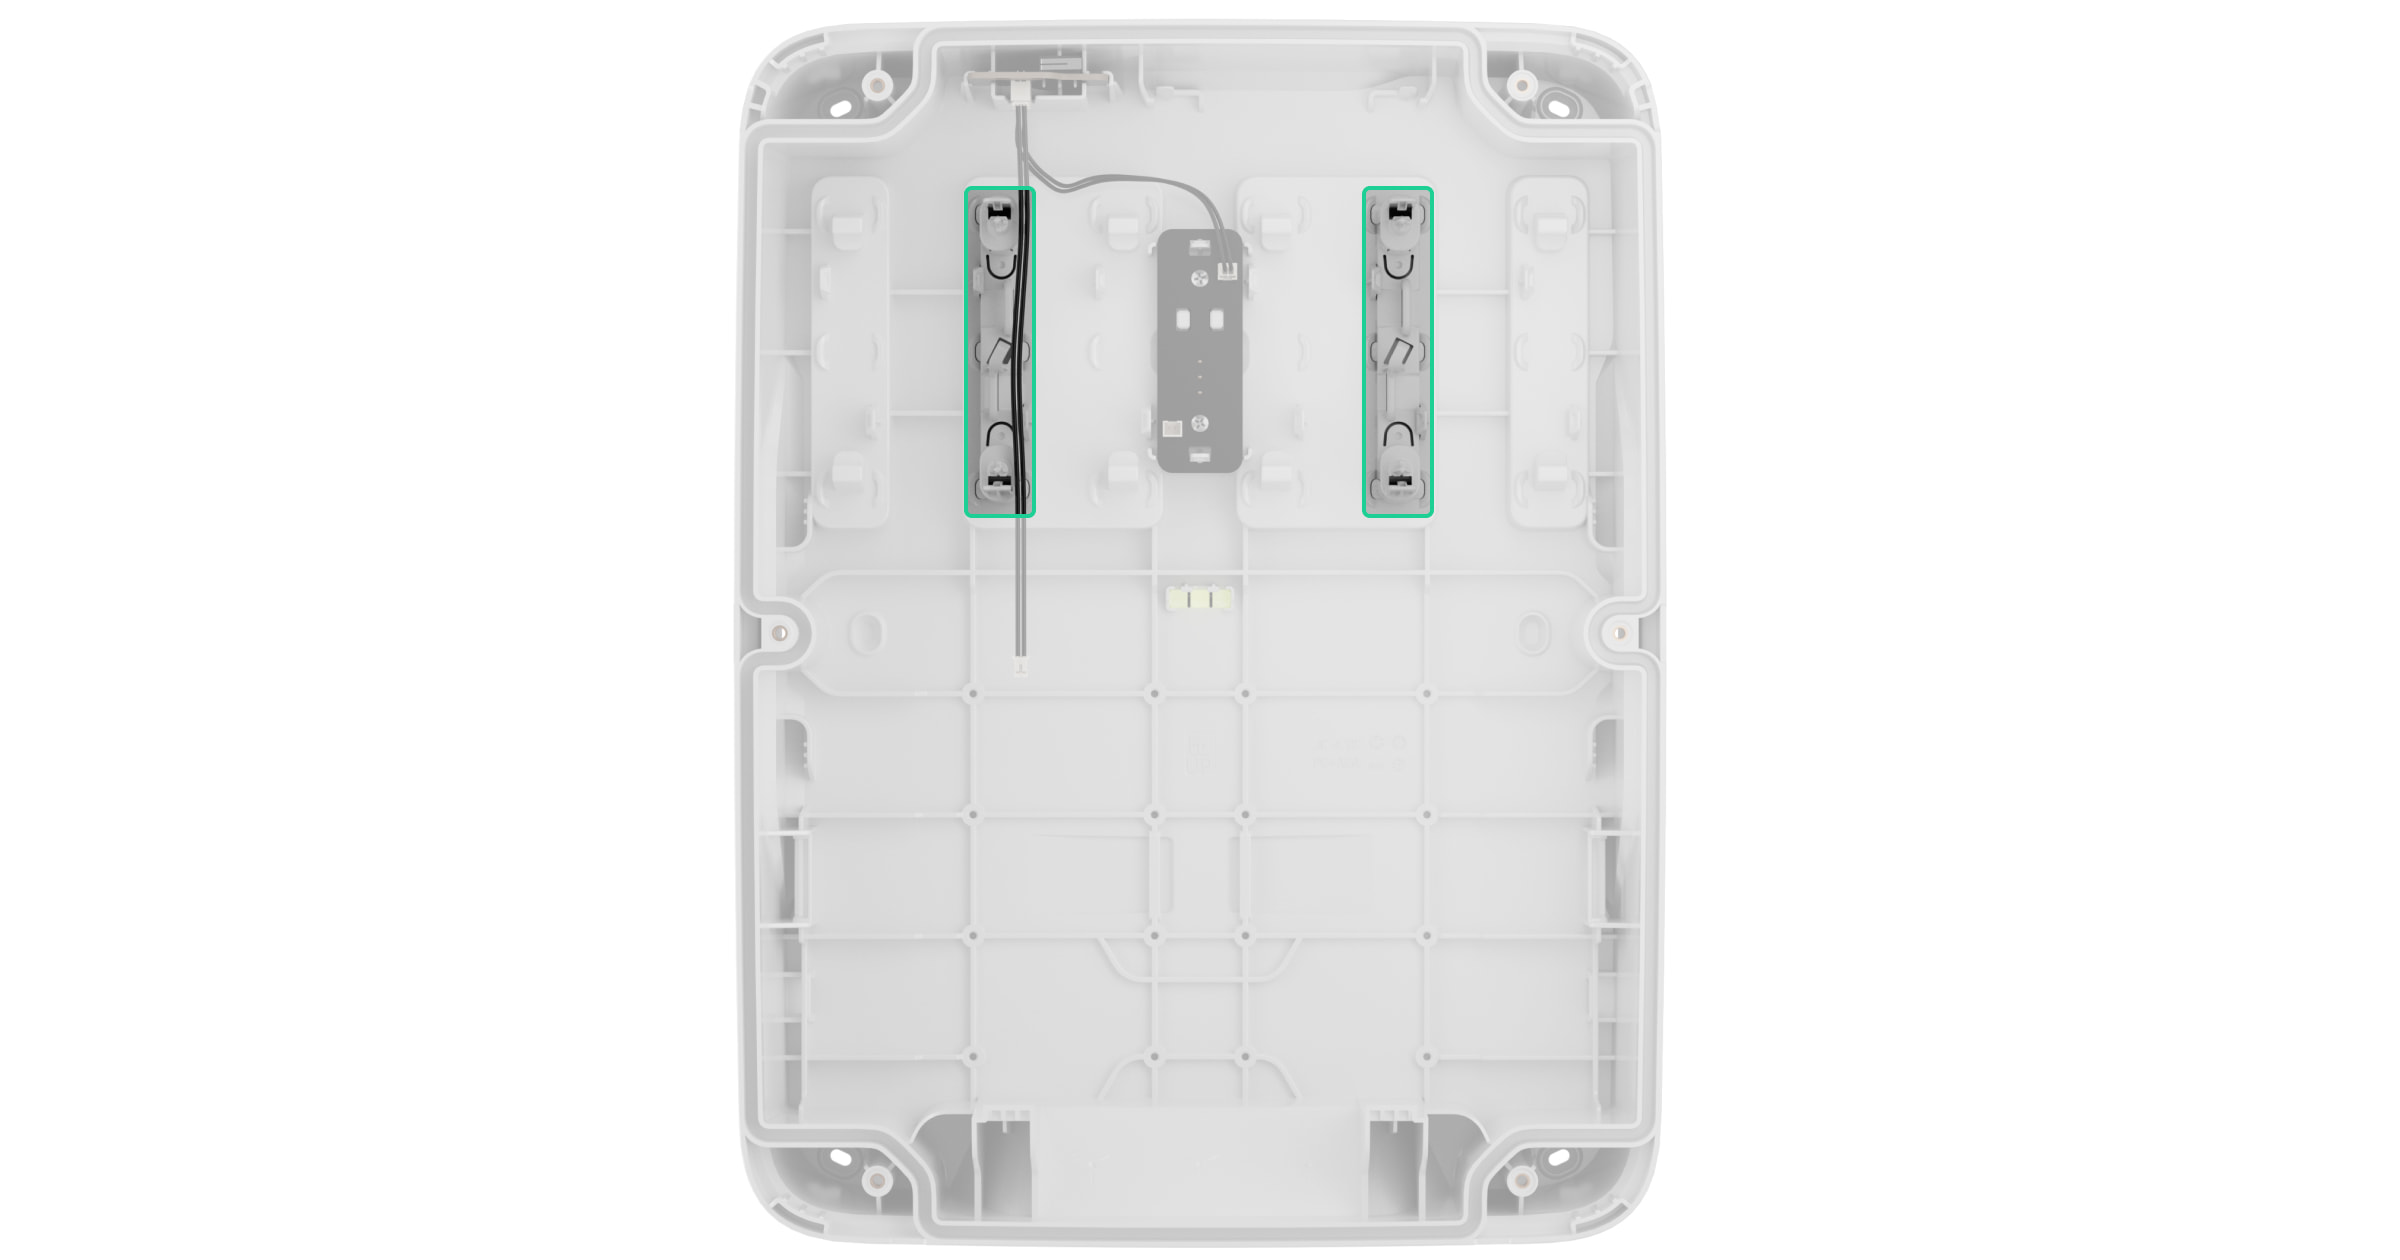
- Slots to install holders.
- Place to install an internal battery.
- Recesses for drilling holes to install cable glands and route cables from both sides and the bottom of the casing.
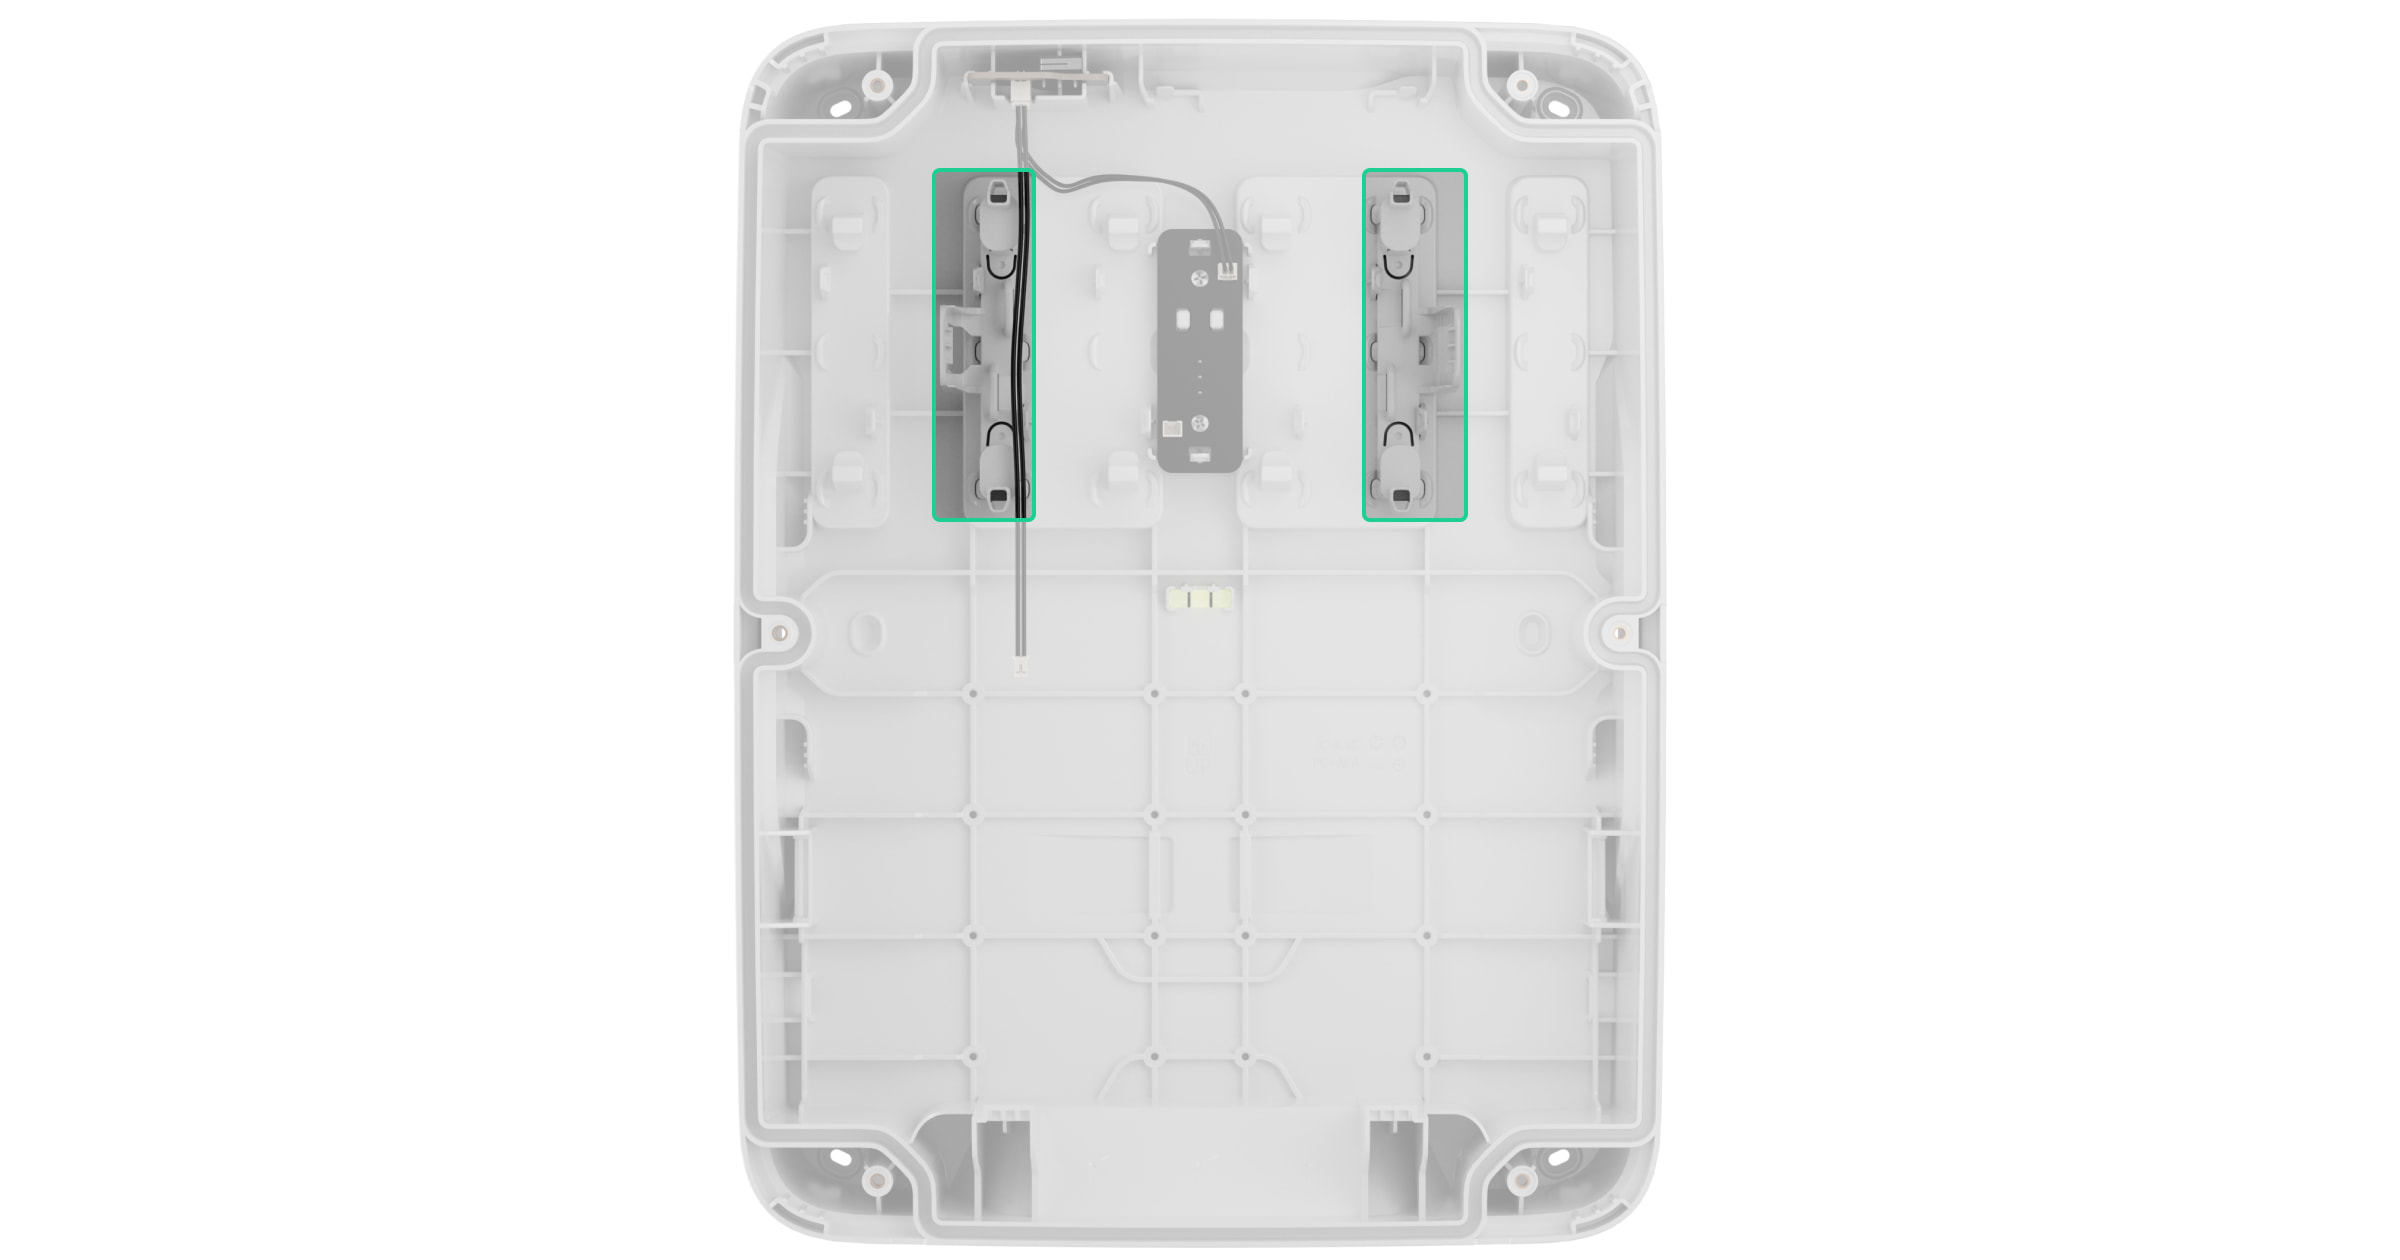
- Module Holder (type A) — 2 pcs. (included in the complete set).
Compatible devices
You can install one Ajax hub, one module, and one internal battery in Case E (395). The following devices are compatible:
- Ajax hubs:
- Modules:
- Batteries¹:
¹ Case E (395) supports the installation of third-party batteries. Verify the battery size before installation.
Key features
Case E (395) is designed for both outdoor and indoor installation and can accommodate an Ajax hub, a module, and an internal battery, providing sufficient protection against outdoor conditions and contaminants.
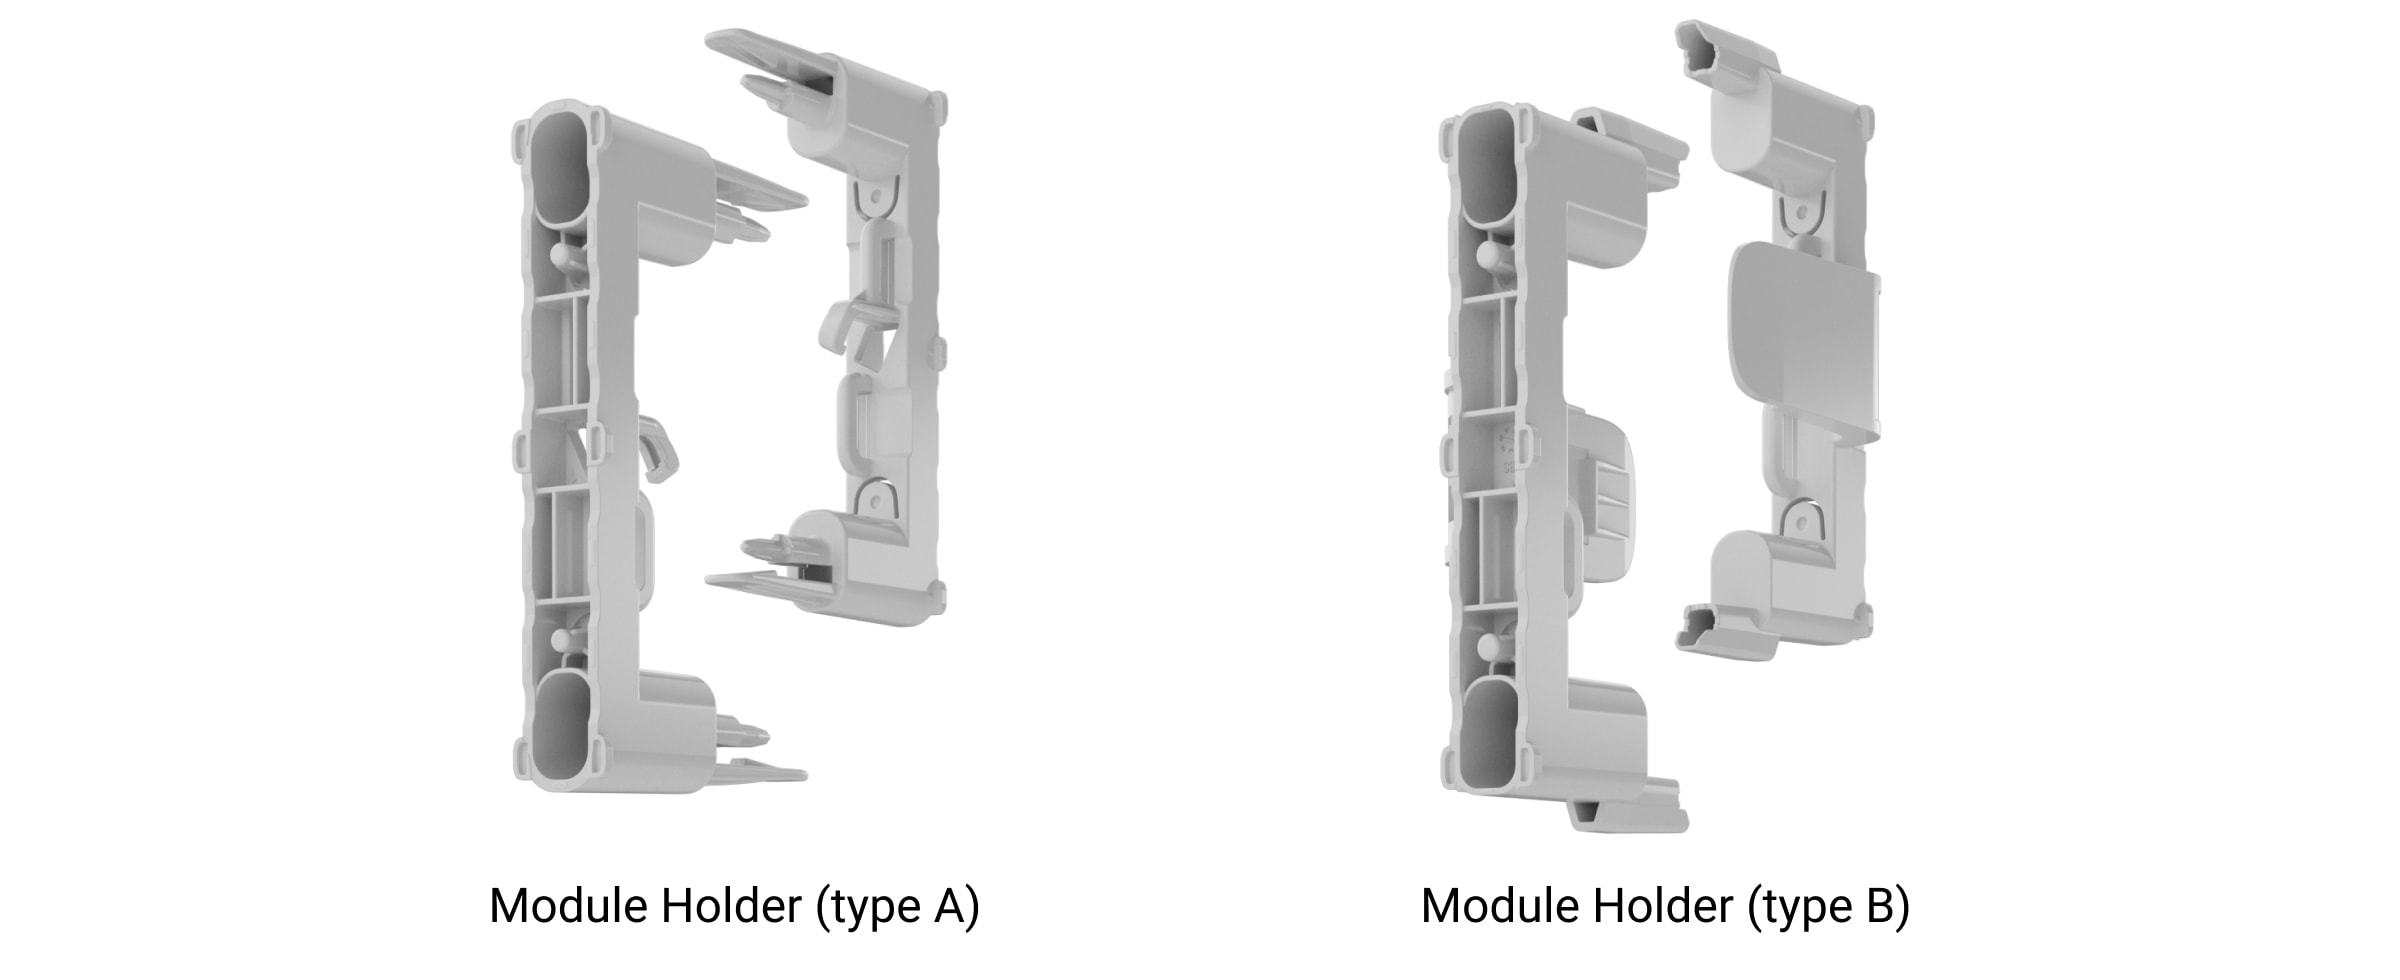
The casing has six slots for plastic holders to install the Ajax hub board. The holders are available in two versions:
- Module Holder (type A) is used to install Hub BP Jeweller (without casing) and Superior MegaHub (without casing);
- Module Holder (type B) is used to install Superior Hub Hybrid 2 (without casing) and Superior Hub Hybrid (4G) (without casing).
There are two Module Holder (type A) holders in the complete set. Additional holders can be purchased separately if required.
The casing has two tamper boards. The first board detects attempts to open the lid, and the second detects attempts to detach the casing from the surface. The first tamper board is connected to the second one and to the hub board with the cables included in the complete set. In the event of a sabotage attempt, users and the monitoring station will receive a notification that the tamper button has been triggered.
Case E (395) has fasteners to secure the cables with ties for convenient cable management inside the casing. The casing has recesses to place the drill if you need to drill holes and run the cables along the side or bottom.
The bubble level allows you to check the inclination angle of the mount during installation. Wide holes ensure the casing is correctly installed, even if mistakes are made.
Case E (395) has battery holders at the bottom of the casing to prevent accidental dislodgement. The complete set includes two hook-and-loop fasteners to secure the battery.
Selecting an installation site
It is recommended to choose an installation site where Case E (395) is hidden from prying eyes. This will help reduce the likelihood of system sabotage. Note that the casing is intended for both outdoor and indoor use.
Secure the casing to a flat vertical surface. Vertical installation is needed for the tamper button to respond if someone attempts to detach the casing.
Case E (395) installation site must comply with the recommendations for mounting devices installed in the casing.
Consider the placement recommendations when designing the system. Only specialists may design and install Ajax systems. A list of recommended partners is available here.
Where not to install the casing
- In locations where the temperature and humidity levels do not meet the specified operating parameters. This may damage the casing and the devices inside.
- In direct sunlight, if the casing is black. This may cause the devices inside the casing to overheat and damage their electrical components. Install in shaded places when possible.
- On uneven surfaces. The rear tamper button may not be triggered if an attempt is made to detach the casing from the surface. Choose flat vertical surfaces to install the casing.
Preparing for installation
Cable arrangement
When preparing to route cables, read the electrical and fire safety regulations in your area. Strictly follow these standards and regulations.
Cable routing
If you need to route cables into the casing (e.g., an external power supply, ExternalAntenna, Ethernet, Fibra lines, etc.), you can run the cables from the sides or bottom of the casing.
To route cables, drill holes following the recesses in the casing, considering the cable gland size. There are two recesses on each side of the casing and three at the bottom. We recommend using a Ø22.5 mm hole saw for plastic and PG16 waterproof cable glands.
The casing complete set includes different cable gland sealing rings with multiple holes. The sealing ring prevents water, dust, and other contaminants from entering the casing. Use the sealing ring that corresponds to the number and types of cables you use.
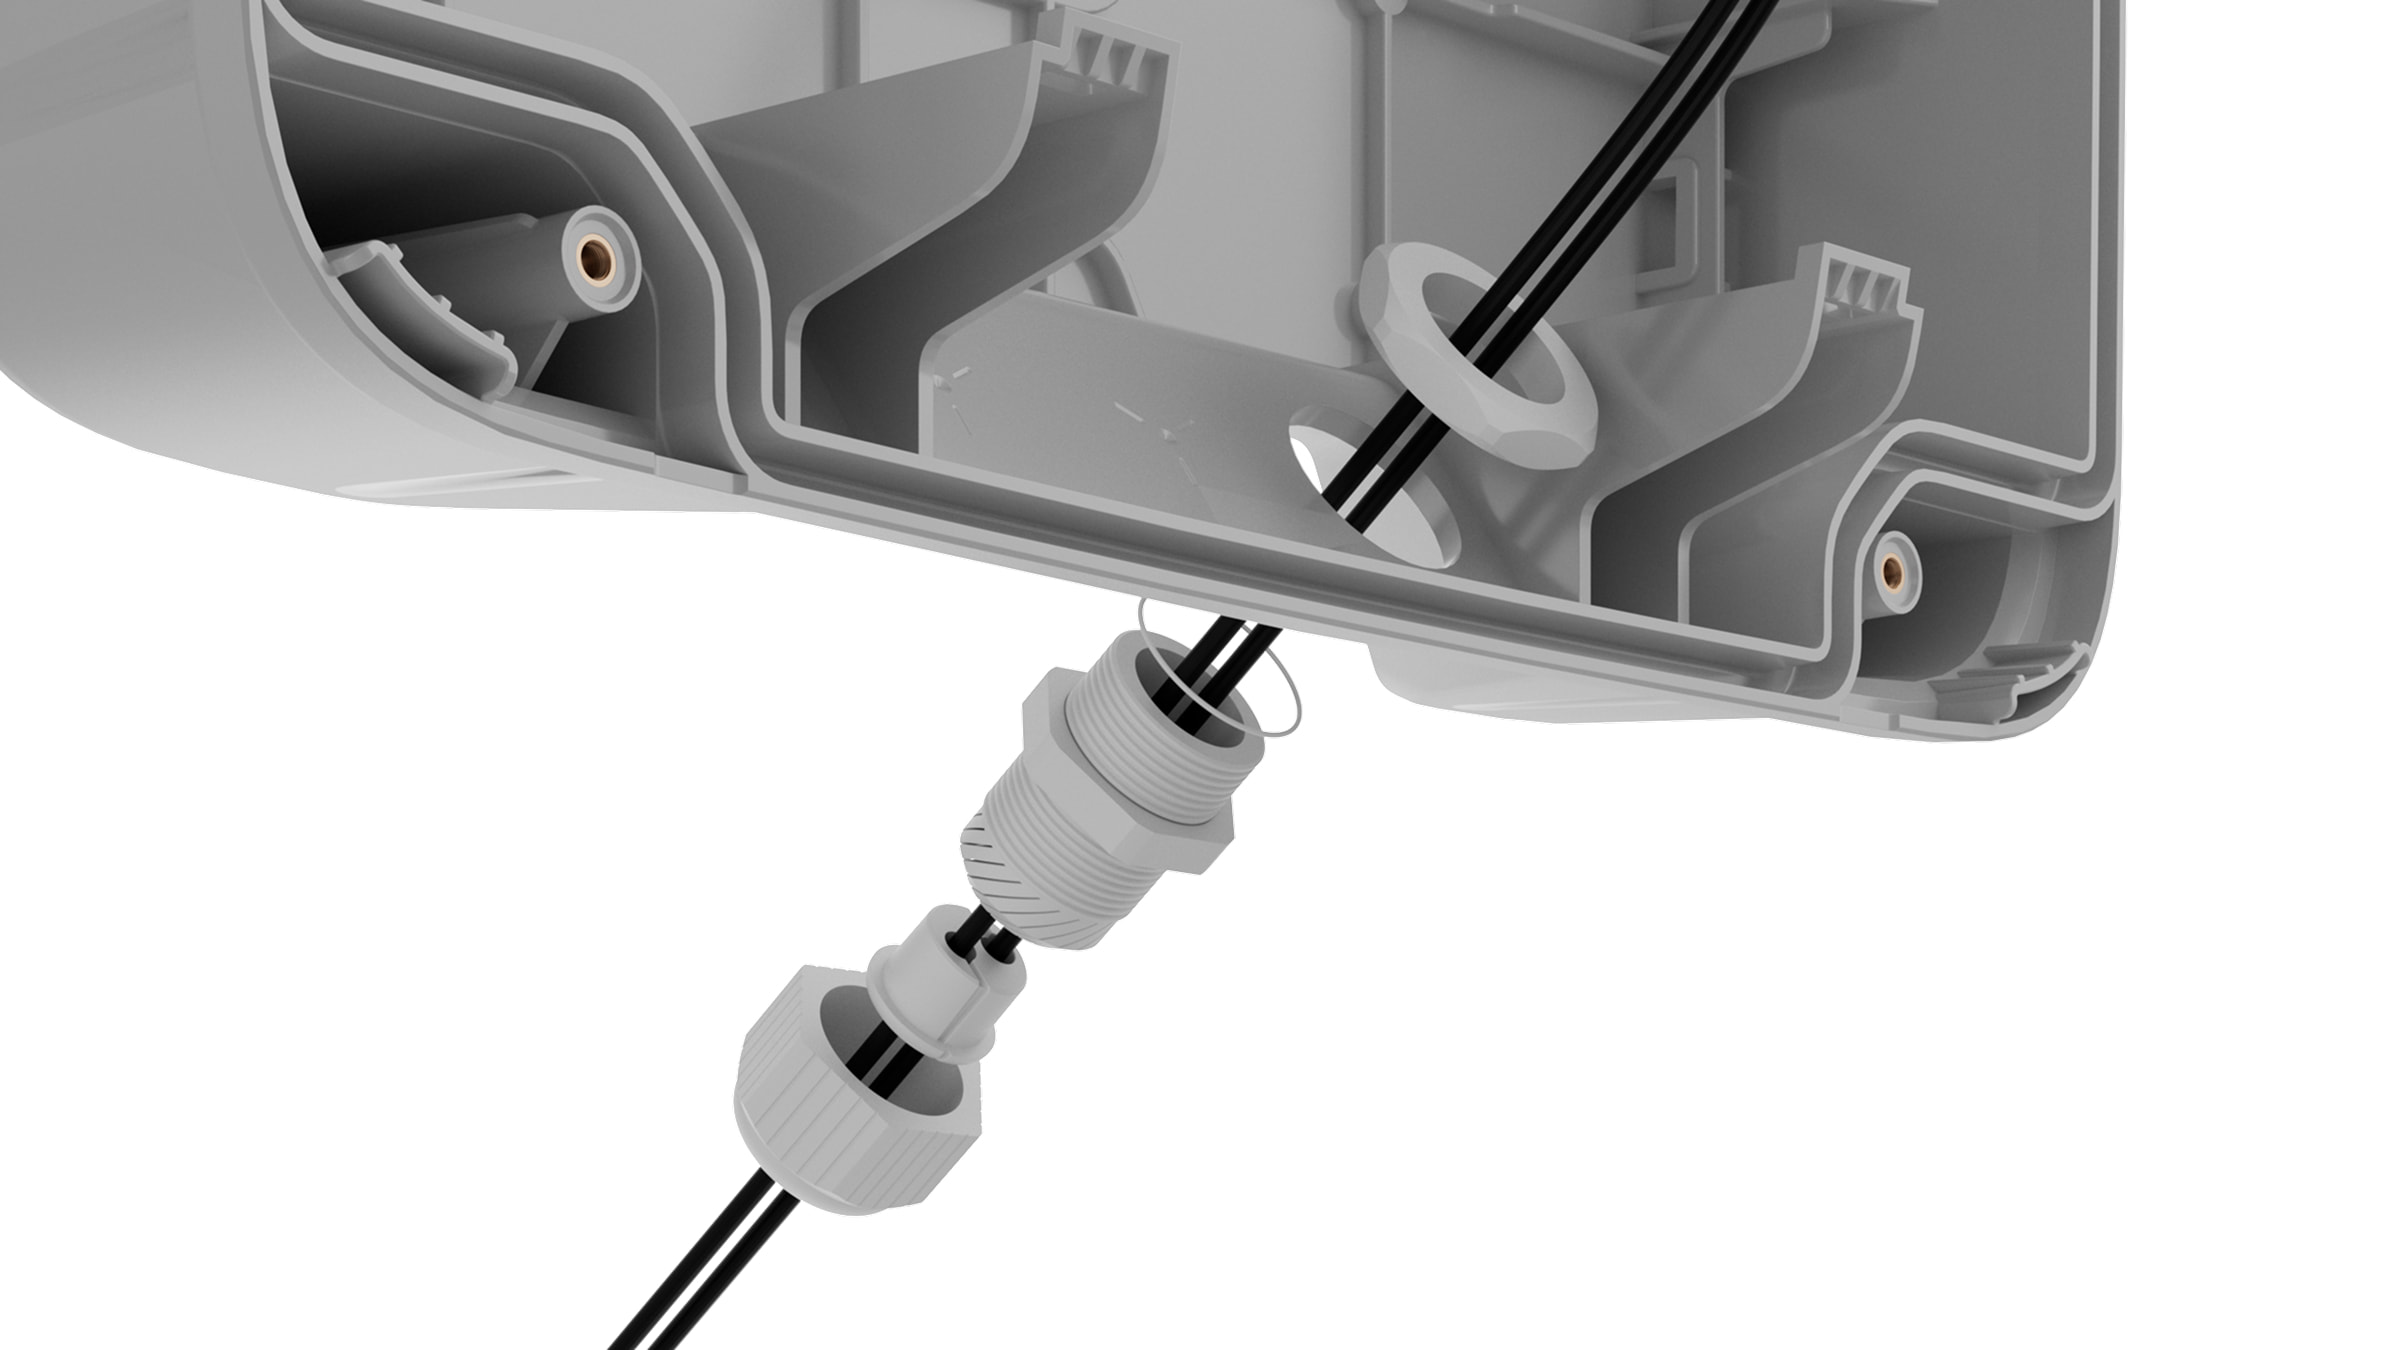
It is crucial to make a precise hole with a saw and install a cable gland correctly. Otherwise, the casing’s protection class cannot be guaranteed.
When routing cables into the casing, use waterproof cable glands with a protection class equal to or higher than the casing’s IP rating. If you use a cable gland with a lower protection class, the casing’s IP rating will be reduced to that class.
Preparing cables for connection
To check specific requirements for cable preparation, refer to the user manual of the device to be installed in Case E (395). Follow these requirements to ensure the device operates correctly.
User manuals for Ajax devices are available on the Ajax Support page.
Installation

Before installing Case E (395), ensure you have selected an optimal location that meets the requirements of this manual.
To install the casing:
- Unscrew the front lid of the casing. Insert a flathead screwdriver into the recess between the lid and the back of the casing to lever the lid out. There are two recesses in the upper-right and upper-left corners of the casing.
- If necessary, prepare the holes to route the cables into the casing. For more information, refer to the Cable routing section.
- Using all fixing points, secure the casing to the surface at the selected installation site with the bundled screws.
- Install the plastic holders into the slots inside the casing. Refer to the schemes below to learn how to position the holders for a specific hub board.
Module Holder (type A) — 2 pcs

Module Holder (type A) — 3 pcs
Module Holder (type B) — 2 pcs
Module Holder (type B) — 2 pcs
- Install the hub board on the holders in the casing.
- If necessary, install the module board in the casing.
- Connect the front lid tamper board to the hub board using the bundled cable.
- If necessary, connect other cables to the corresponding terminals or connectors on the hub and module board.
- Place the internal battery on the designated holders provided in the casing. Secure the battery with the hook-and-loop fastener.
- Connect the internal battery to the corresponding hub terminal. Observe the polarity and wiring order.
- Secure the cables with ties using fasteners.
- Install the front lid on the casing and fasten it with the bundled screws.
When installing the front lid, check the rectangular rubber sealing ring on the inner side of the lid:
- The sealing ring must be firmly installed in the corresponding slot along the lid perimeter.
- The sealing ring must be undamaged.
- Nothing must prevent the lid from closing.
Maintenance
The casing does not require maintenance.
Warranty
Warranty for the Limited Liability Company “Ajax Systems Manufacturing” products is valid for 2 years after the purchase.
If the device does not operate properly, we recommend contacting Ajax Technical Support first. In most cases, technical issues can be resolved remotely.
Contact Technical Support:
Manufactured by “AS Manufacturing” LLC
