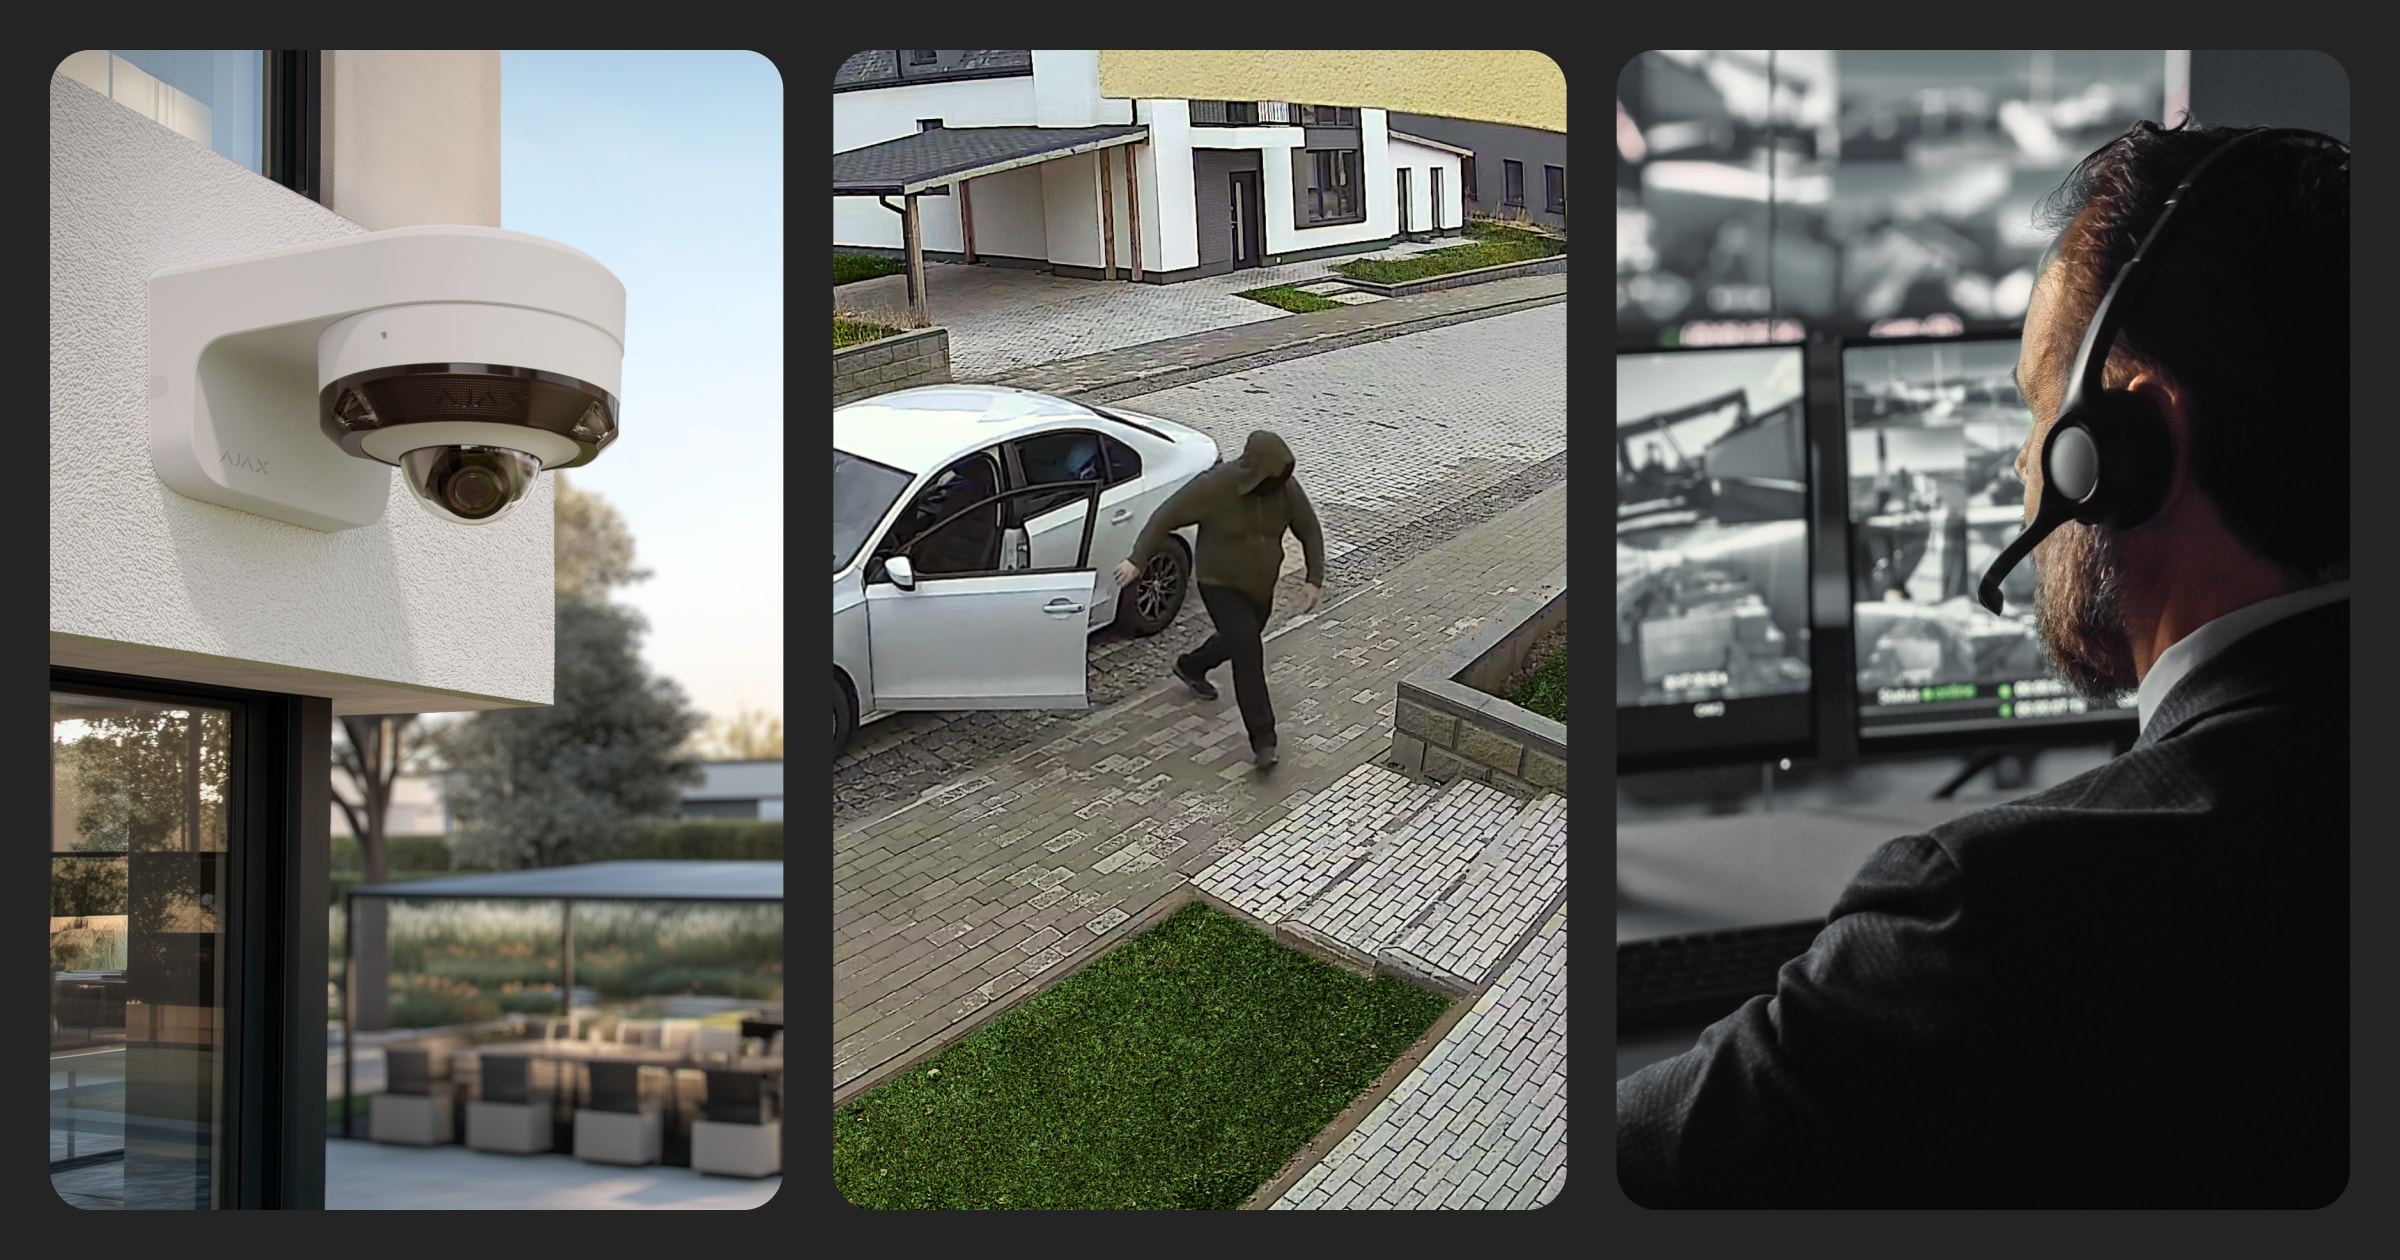
Ajax cameras support AI-powered object recognition to record only significant events and optimize storage usage. In addition to event recording, the cameras can send specific AI detection events to Ajax apps and monitoring stations.
Learn more about how to integrate Ajax video surveillance into monitoring software
This article describes how to configure the feature and enable event transmission. To set up AI event notifications and monitoring, follow the steps:
- Enabling AI event notifications for an Ajax camera.
- Activating camera monitoring.
- Adding the camera to monitoring.
- Enabling visual verification of camera detection events.
- Granting the monitoring company access to the camera.
Step 1. Enabling AI event notifications for an Ajax camera.
This setting is available to installers in the Ajax PRO Desktop and Ajax PRO mobile apps.
To do this:
- Select the space if you have more than one.
- Go to the Devices
 tab.
tab. - Select the required camera in the list. If the camera is connected to the video recorder, find the NVR, click Cameras, and select the required one.
- Go to the camera settings.
- Click Notifications from camera detectors.
- Select the type of object or motion that triggers a notification when detected. Note that the corresponding types of object or motion must be enabled in the Detection settings.
- Click Back to save the new settings.
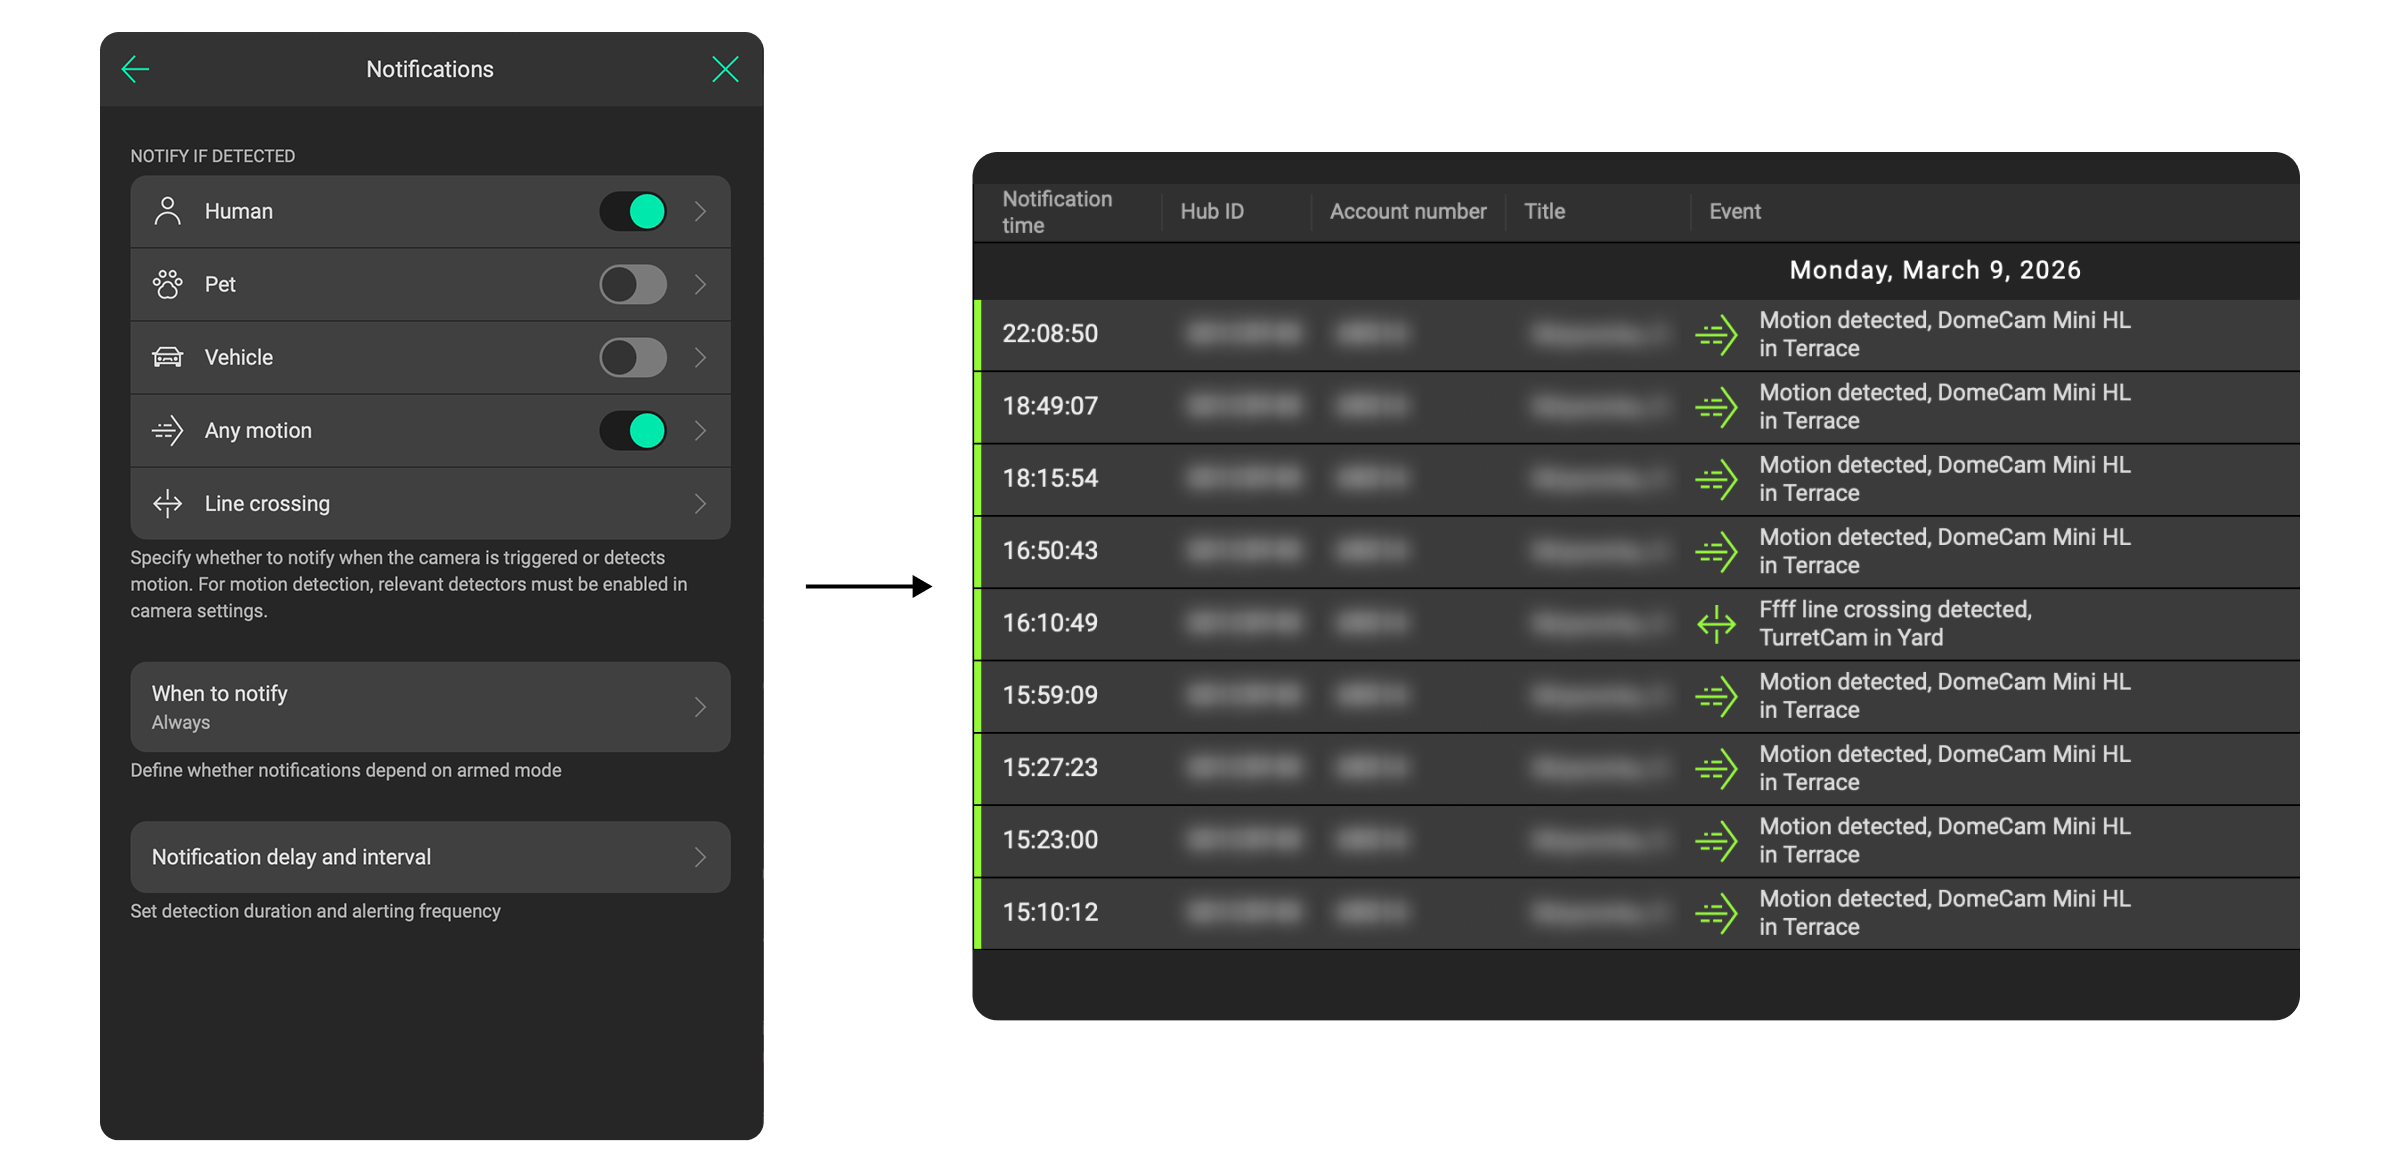
Result: AI event notifications are sent to all apps for end users and PROs.
Step 2. Activating camera monitoring.
This setting is available to installers in the Ajax PRO Desktop and Ajax PRO mobile apps.
To do this:
- Select the space if you have more than one.
- Go to the Devices tab.
- Select the required camera in the list. If the camera is connected to the video recorder, find the NVR, click Cameras, and select the required one.
- Go to the camera settings.
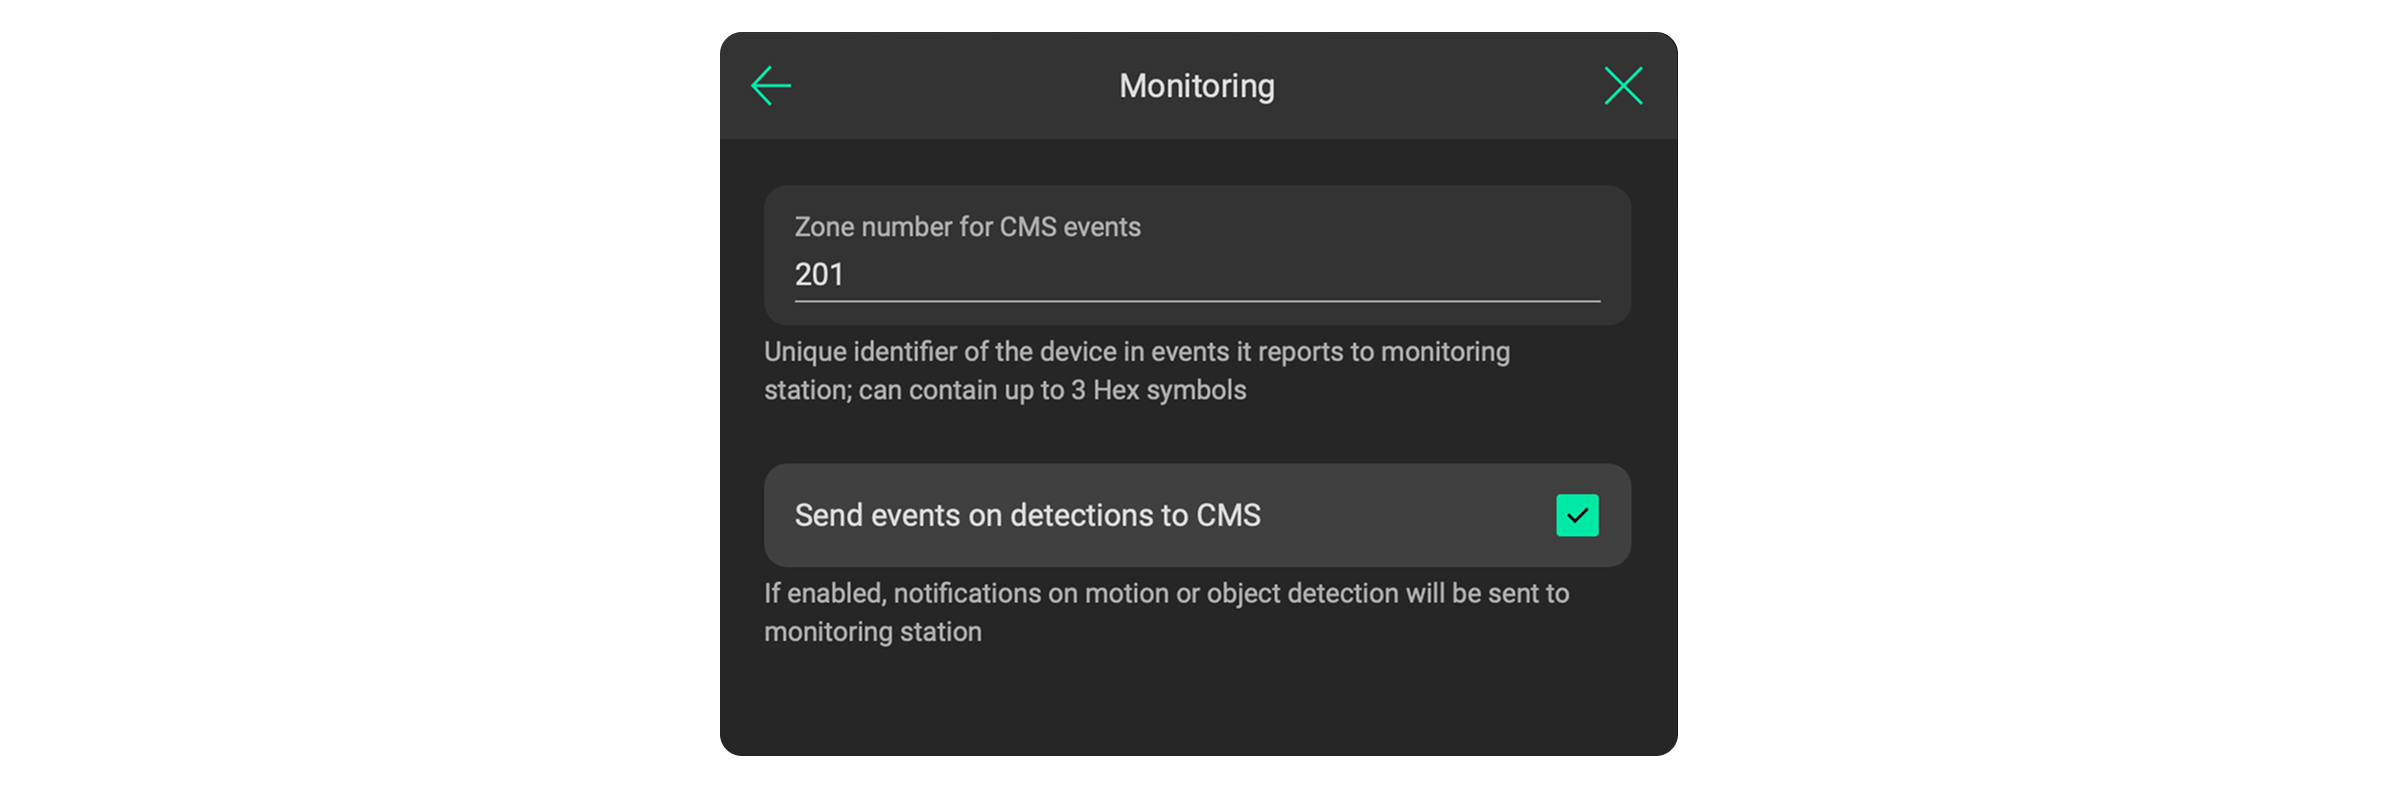
- Click Monitoring.
- Enable the Send events on detections to CMS option.

To avoid overlap with devices operating via the Jeweller or Fibra protocols (0–200), use zone numbers starting with 201.
- Click Back to save the new settings.
Step 3. Adding the camera to monitoring.
This setting is available to installers and Senior CMS engineers in the Ajax PRO Desktop app.
To do this:
- Go to the Objects module.
- Select the space if you have more than one.
- Go to the Maintenance tab.
- Specify the account number. It may match the hub’s account number or differ from it.

Result: AI detection events are transmitted to monitoring software with the corresponding reporting codes:
| Event | CID code | SIA code |
| MotionDetected | E760 | VM |
| HumanDetected | E761 | VH |
| PetDetected | E762 | VP |
| CarDetected | E763 | VC |
BF1A0053″ADM-CID”0005L0#1234[#1234|1761 00 070][IBalcony][RLiving Room]_07:54:58,04-08-2025
424C0055″SIA-DCS”0859L0#1234[#1234|Nri0/VH70^Balcony in Living Room^]_06:57:27,04-06-2025
Step 4. Enabling visual verification of camera detection events.
This setting is available to Senior CMS engineers in the Ajax PRO Desktop app.
To do this:
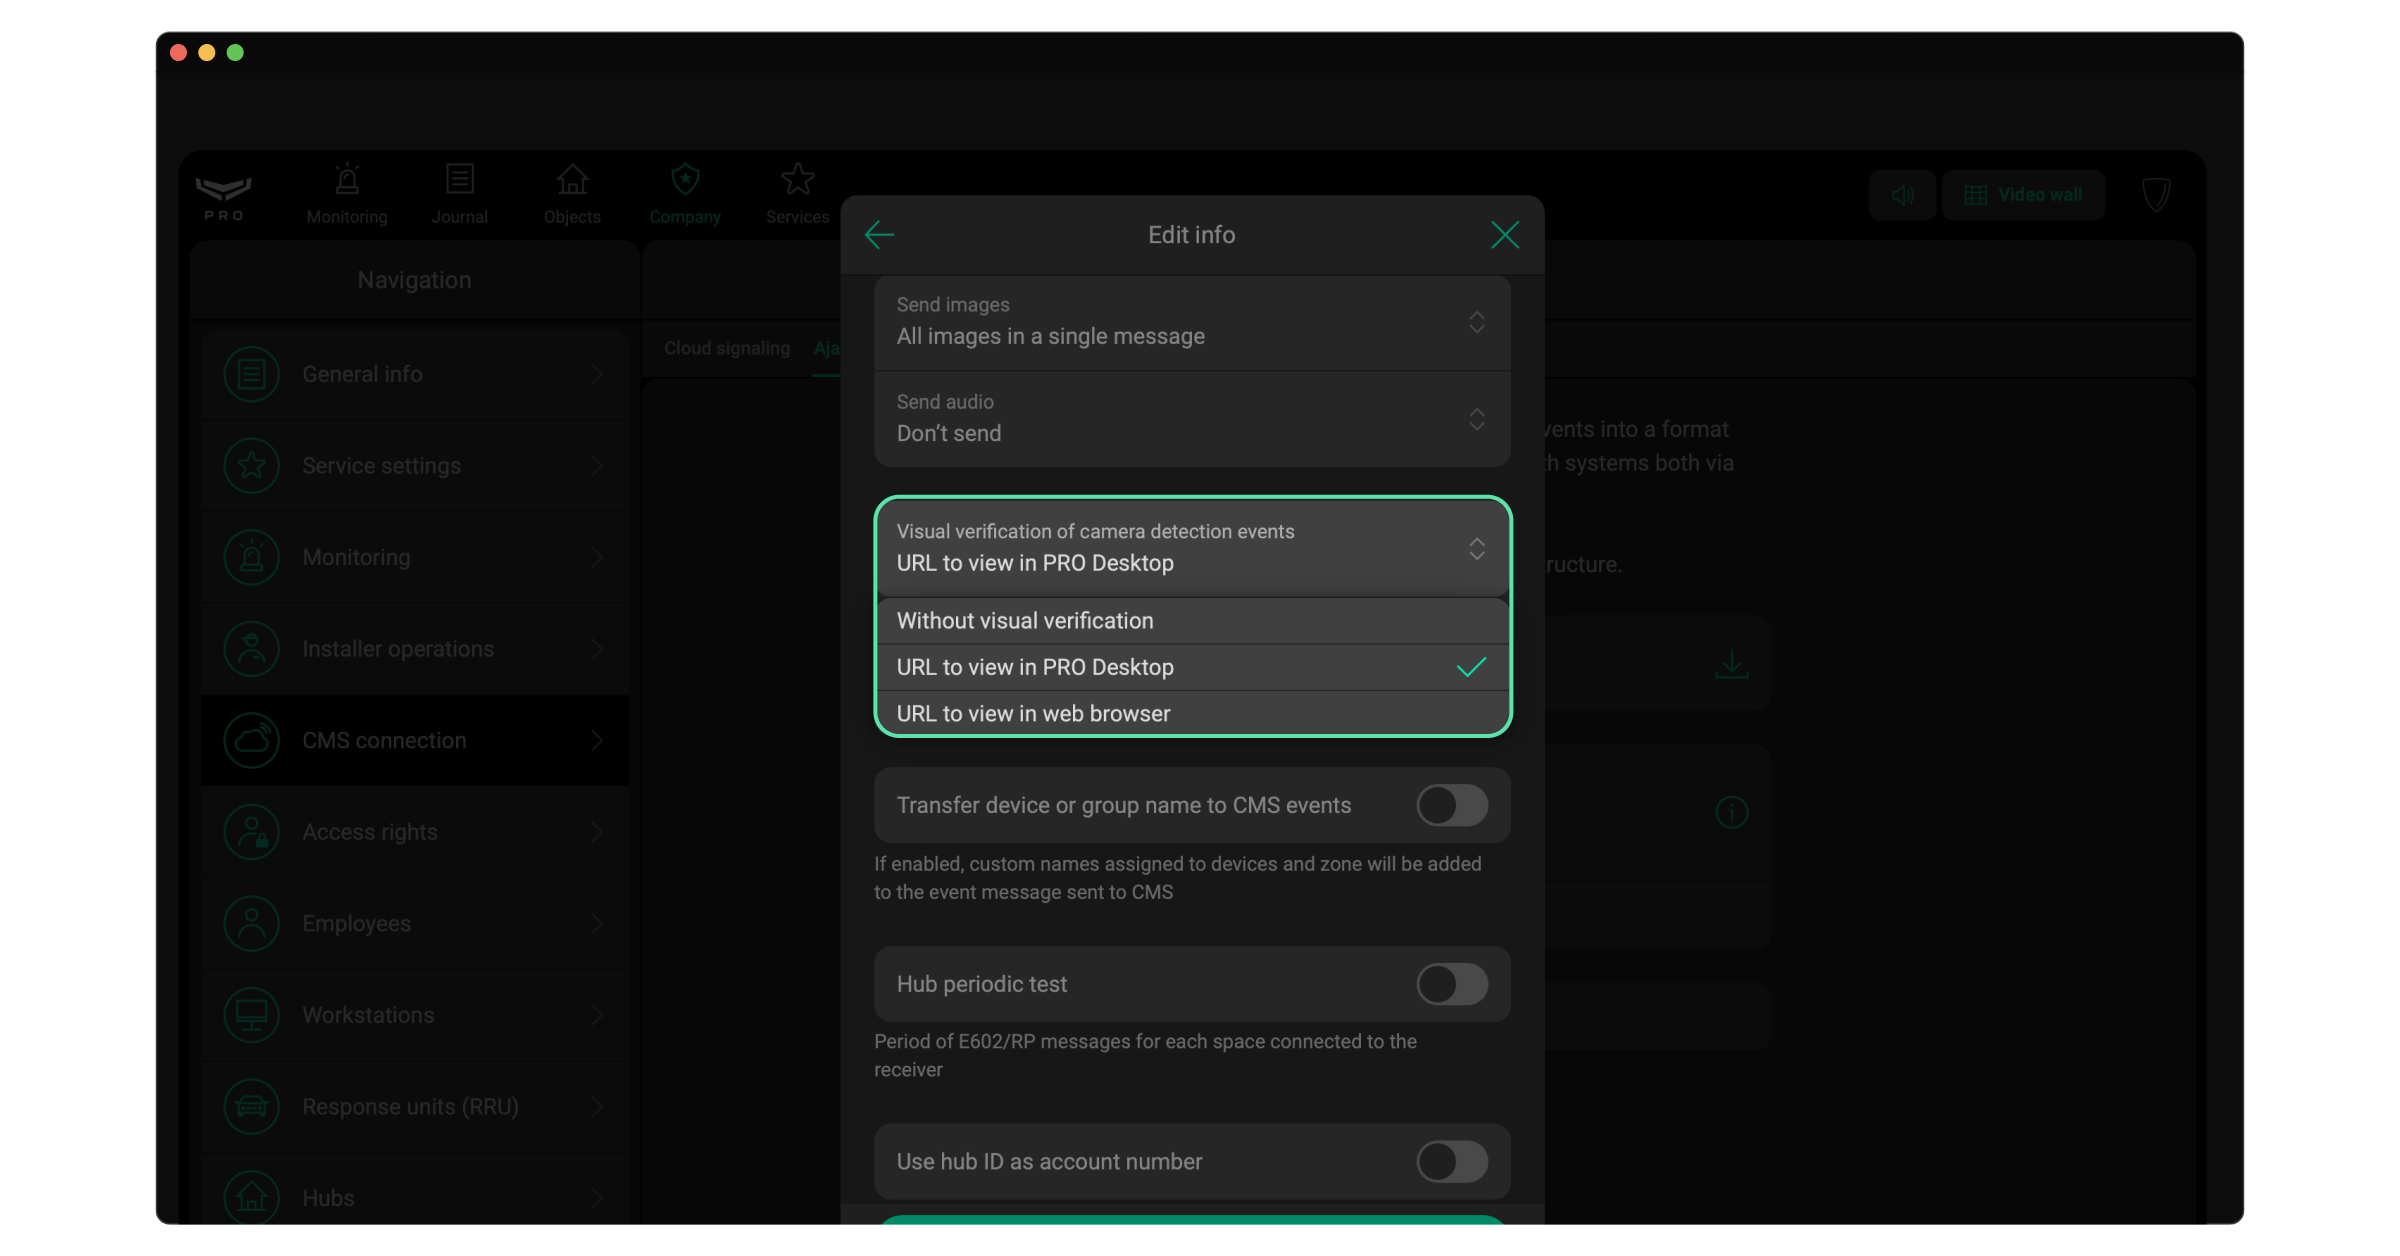
- Go to the Company module.
- Go to the CMS connection menu.
- Select the Ajax Translator or Cloud signaling tab.
- Select the required receiver and click the icon
 .
. - Click Edit.
- Specify the Visual verification of cameras detection events settings: URL to view in PRO Desktop or URL to view in web browser.
- Click Save.
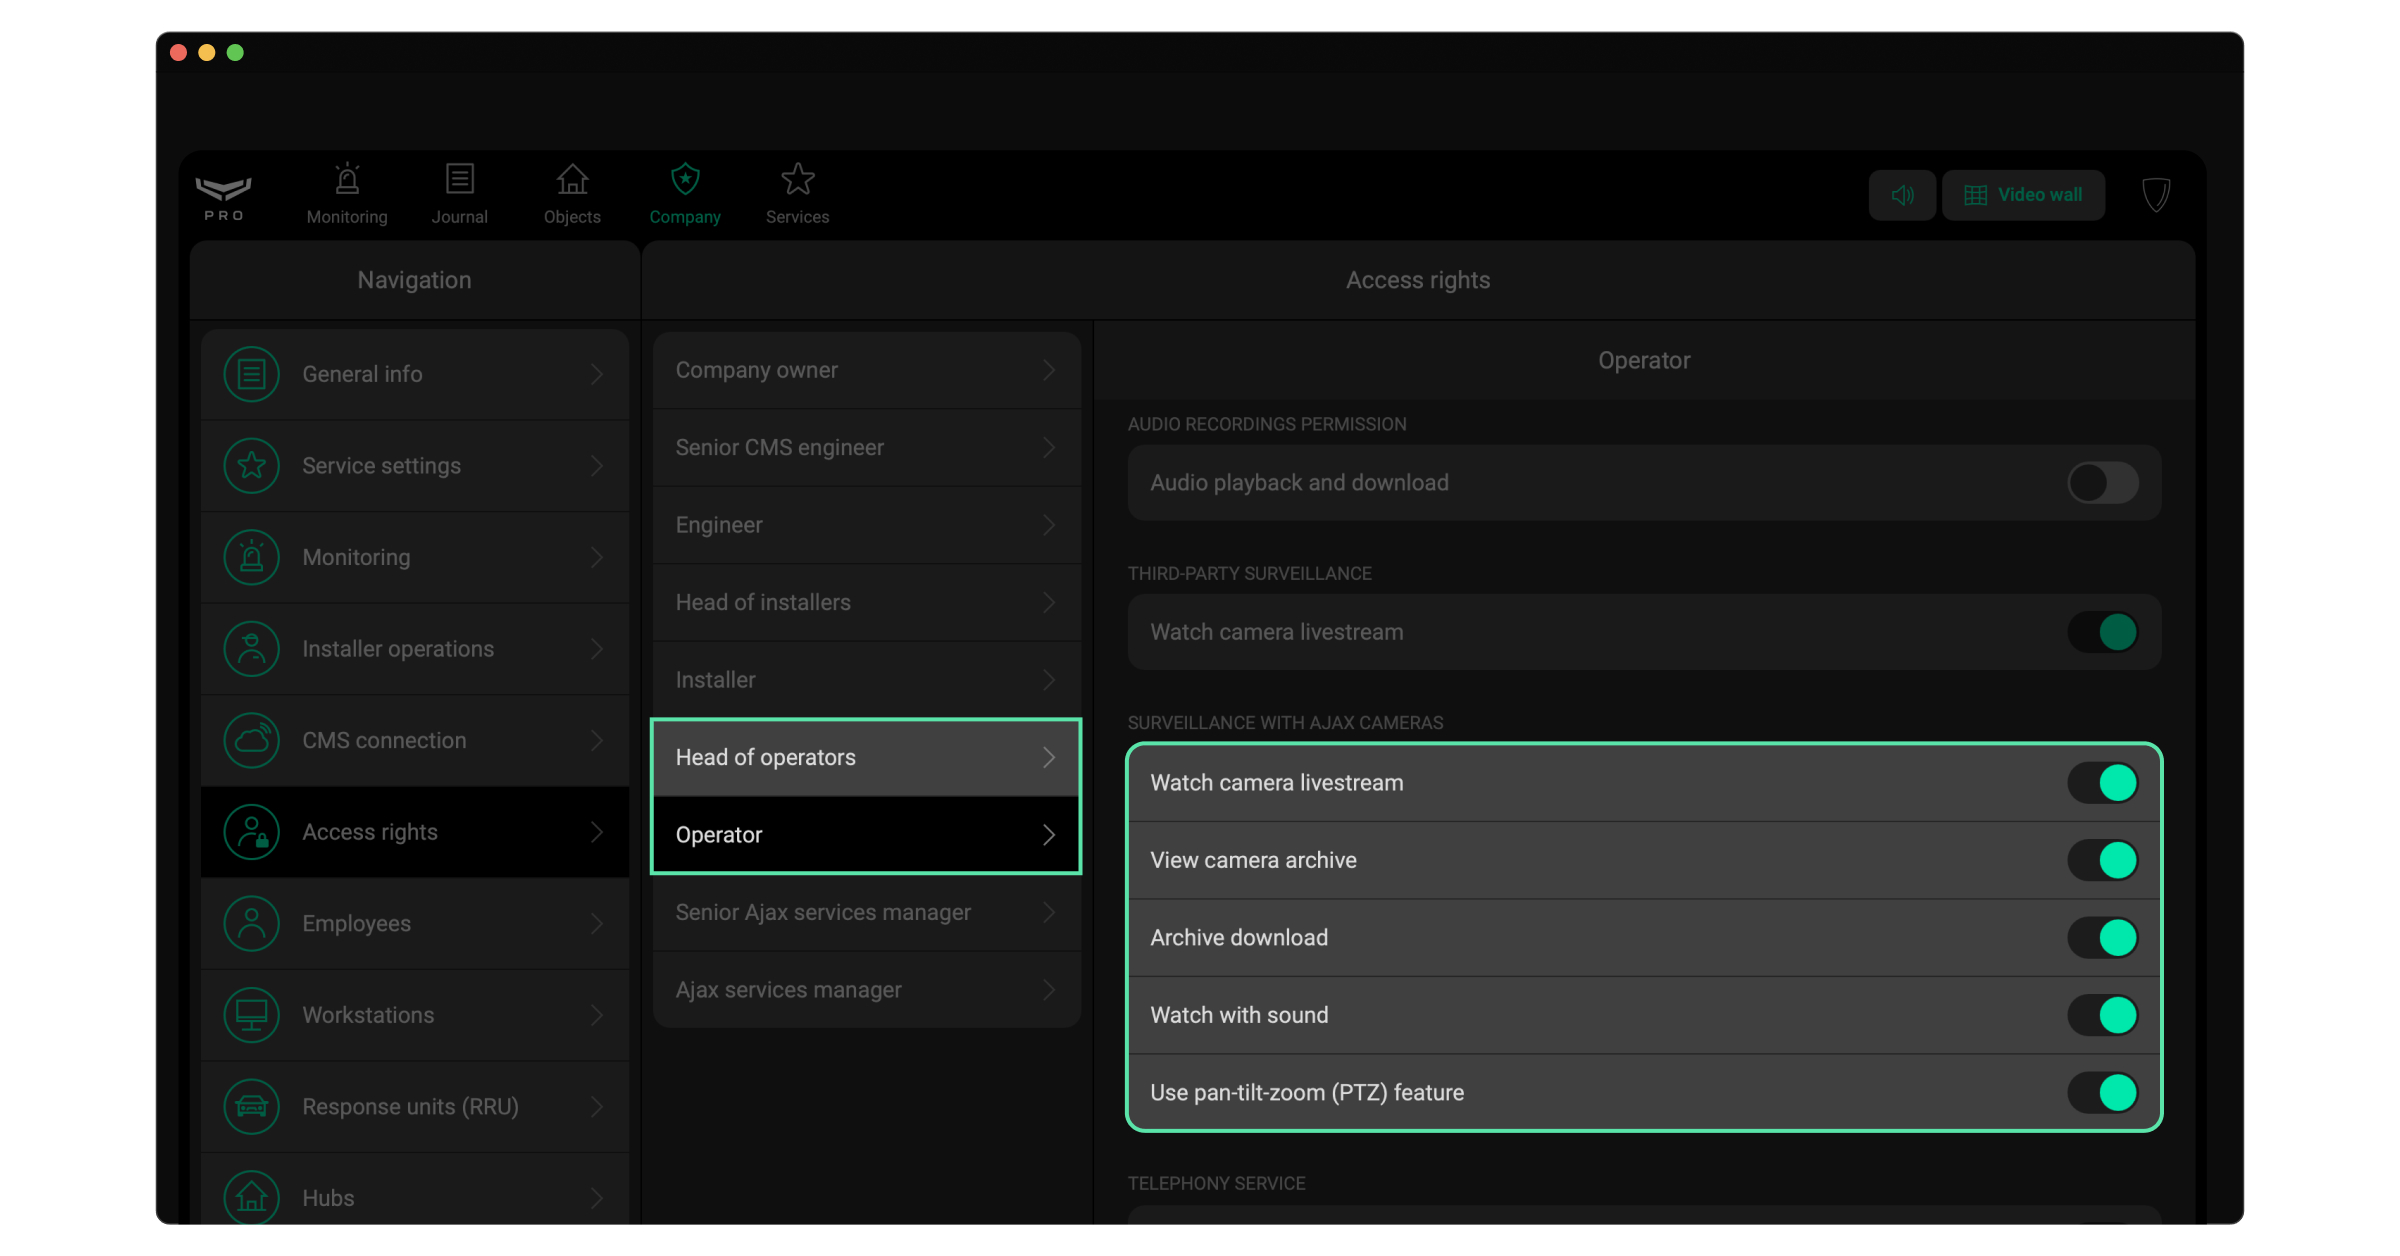
Ensure that operators have access to the livestream and archives if the URL to view in PRO Desktop option is selected. To do this:
- Go to the Company module.
- Go to the Access rights menu.
- Check the Head of operators and Operator access rights settings. Ensure that the options in the Surveillance with Ajax cameras block are enabled.
The web link is valid for 30 minutes because it does not require authentication. The Ajax PRO Desktop link is bound to a specific company. Access is restricted to employees with video permissions, so the link does not expire.
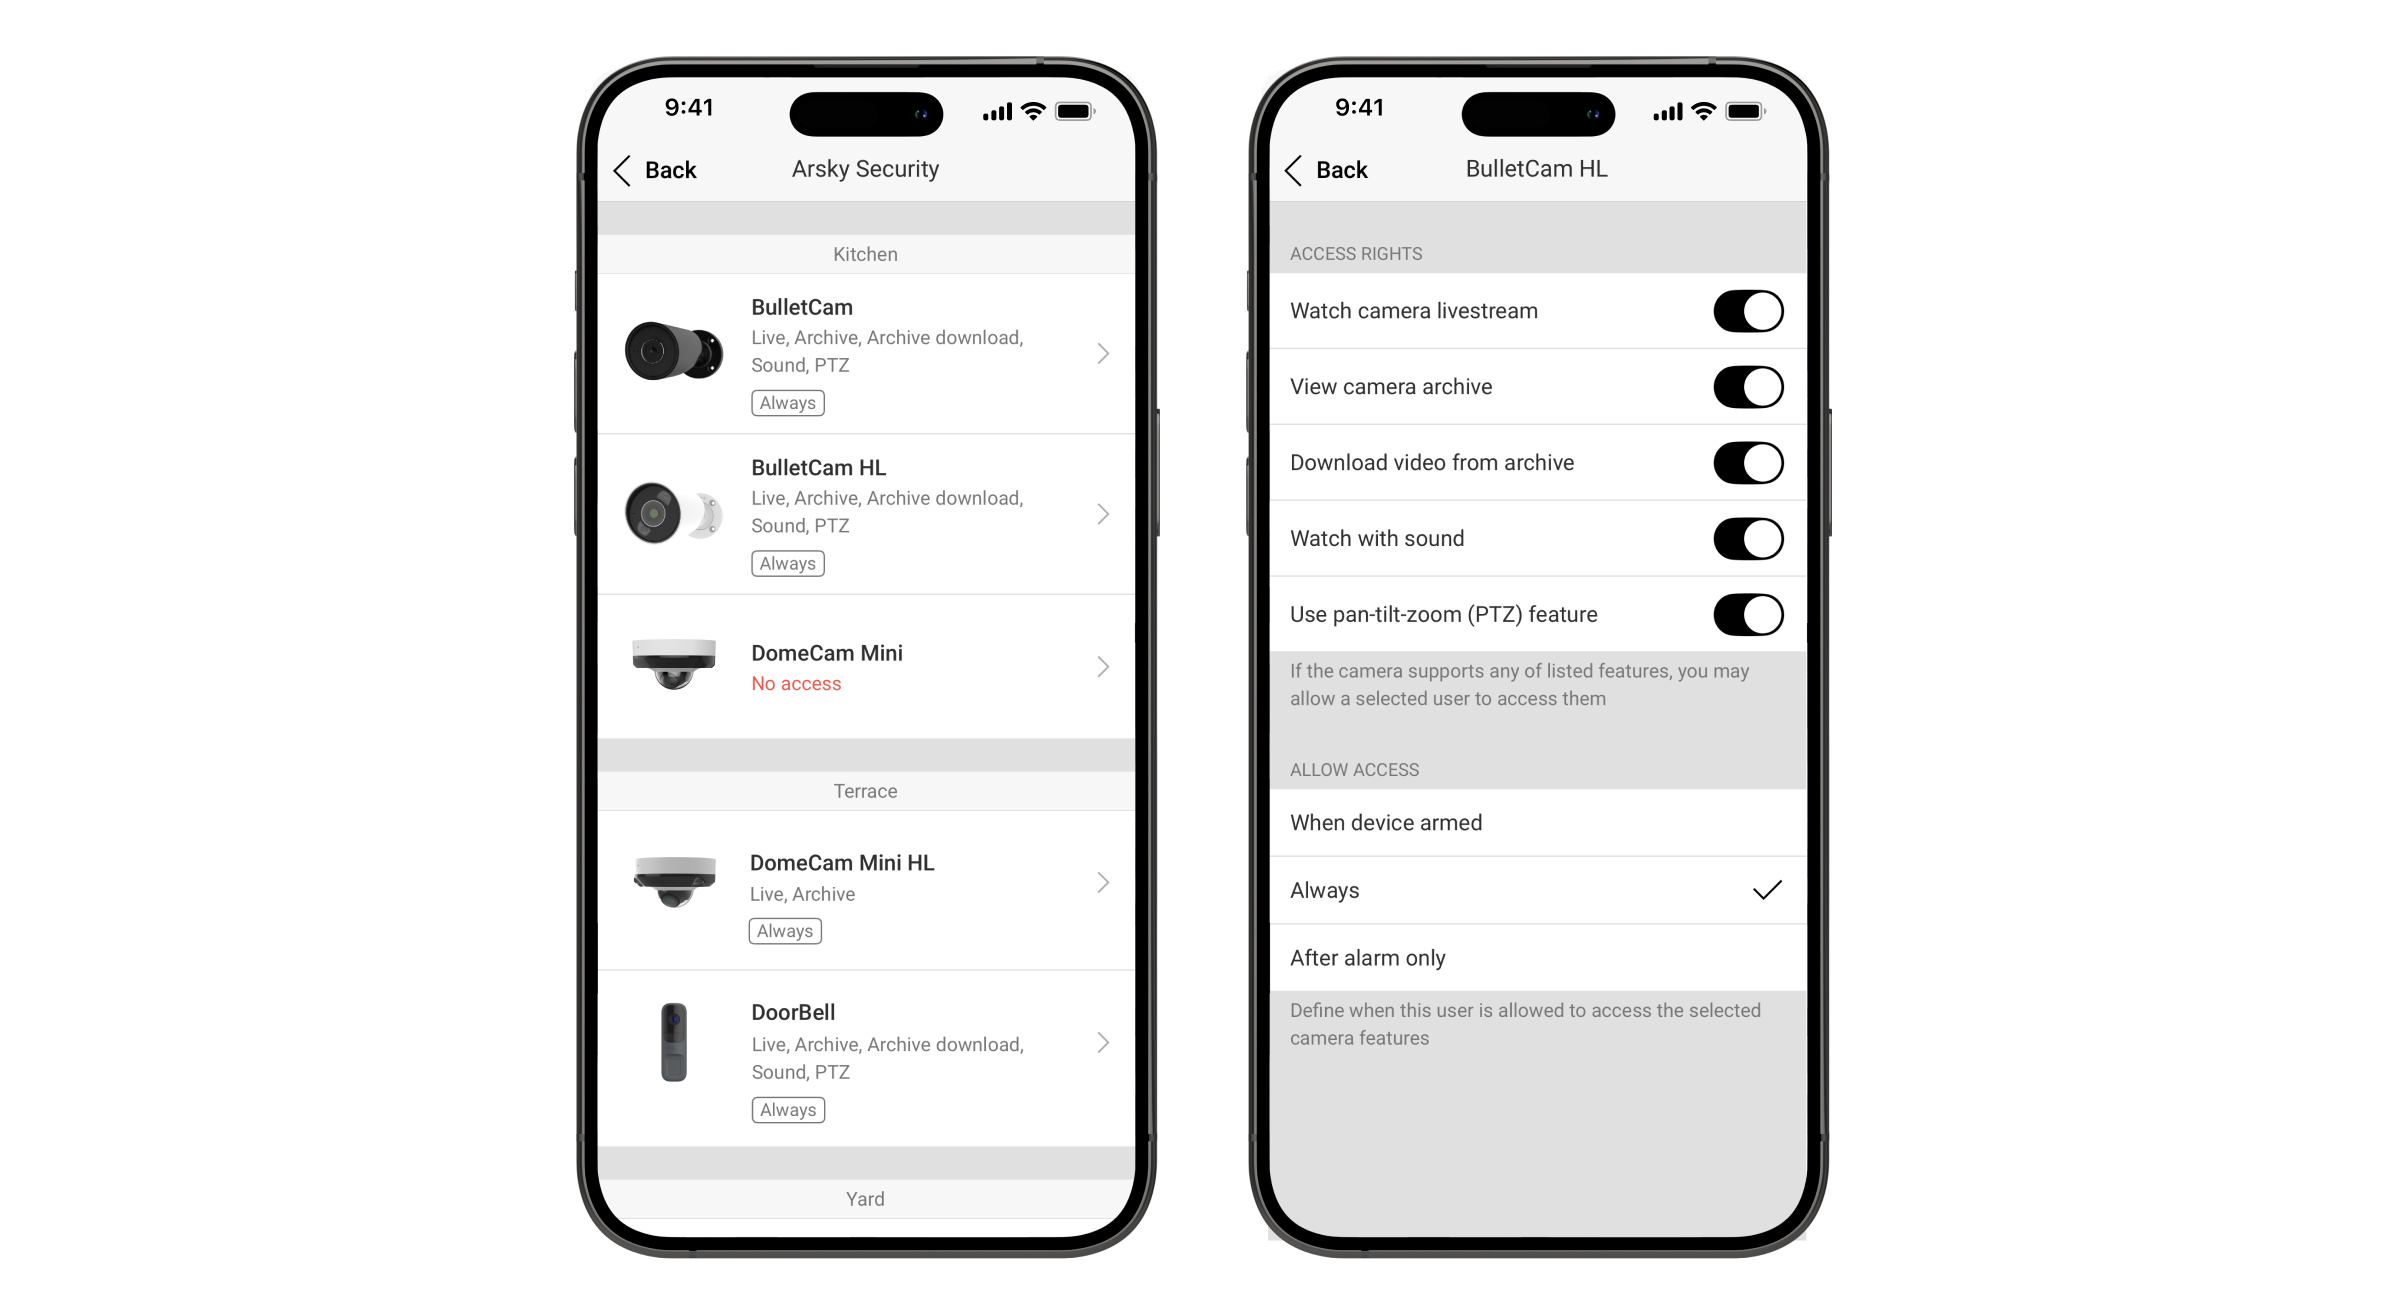
Step 5. Granting the monitoring company access to the camera.
This setting is available to privacy managers in the Ajax Desktop and Ajax mobile apps. Permissions can be granted or revoked at any time. This ensures full control over access to privacy-sensitive information.
To do this:
- Select the space if you have more than one.
- Go to the space settings by clicking the gear
 icon.
icon. - Go to the Privacy menu.
- Click Companies.
- Select the company.
- Go to the Native cameras & NVR channels menu and configure access for each camera.
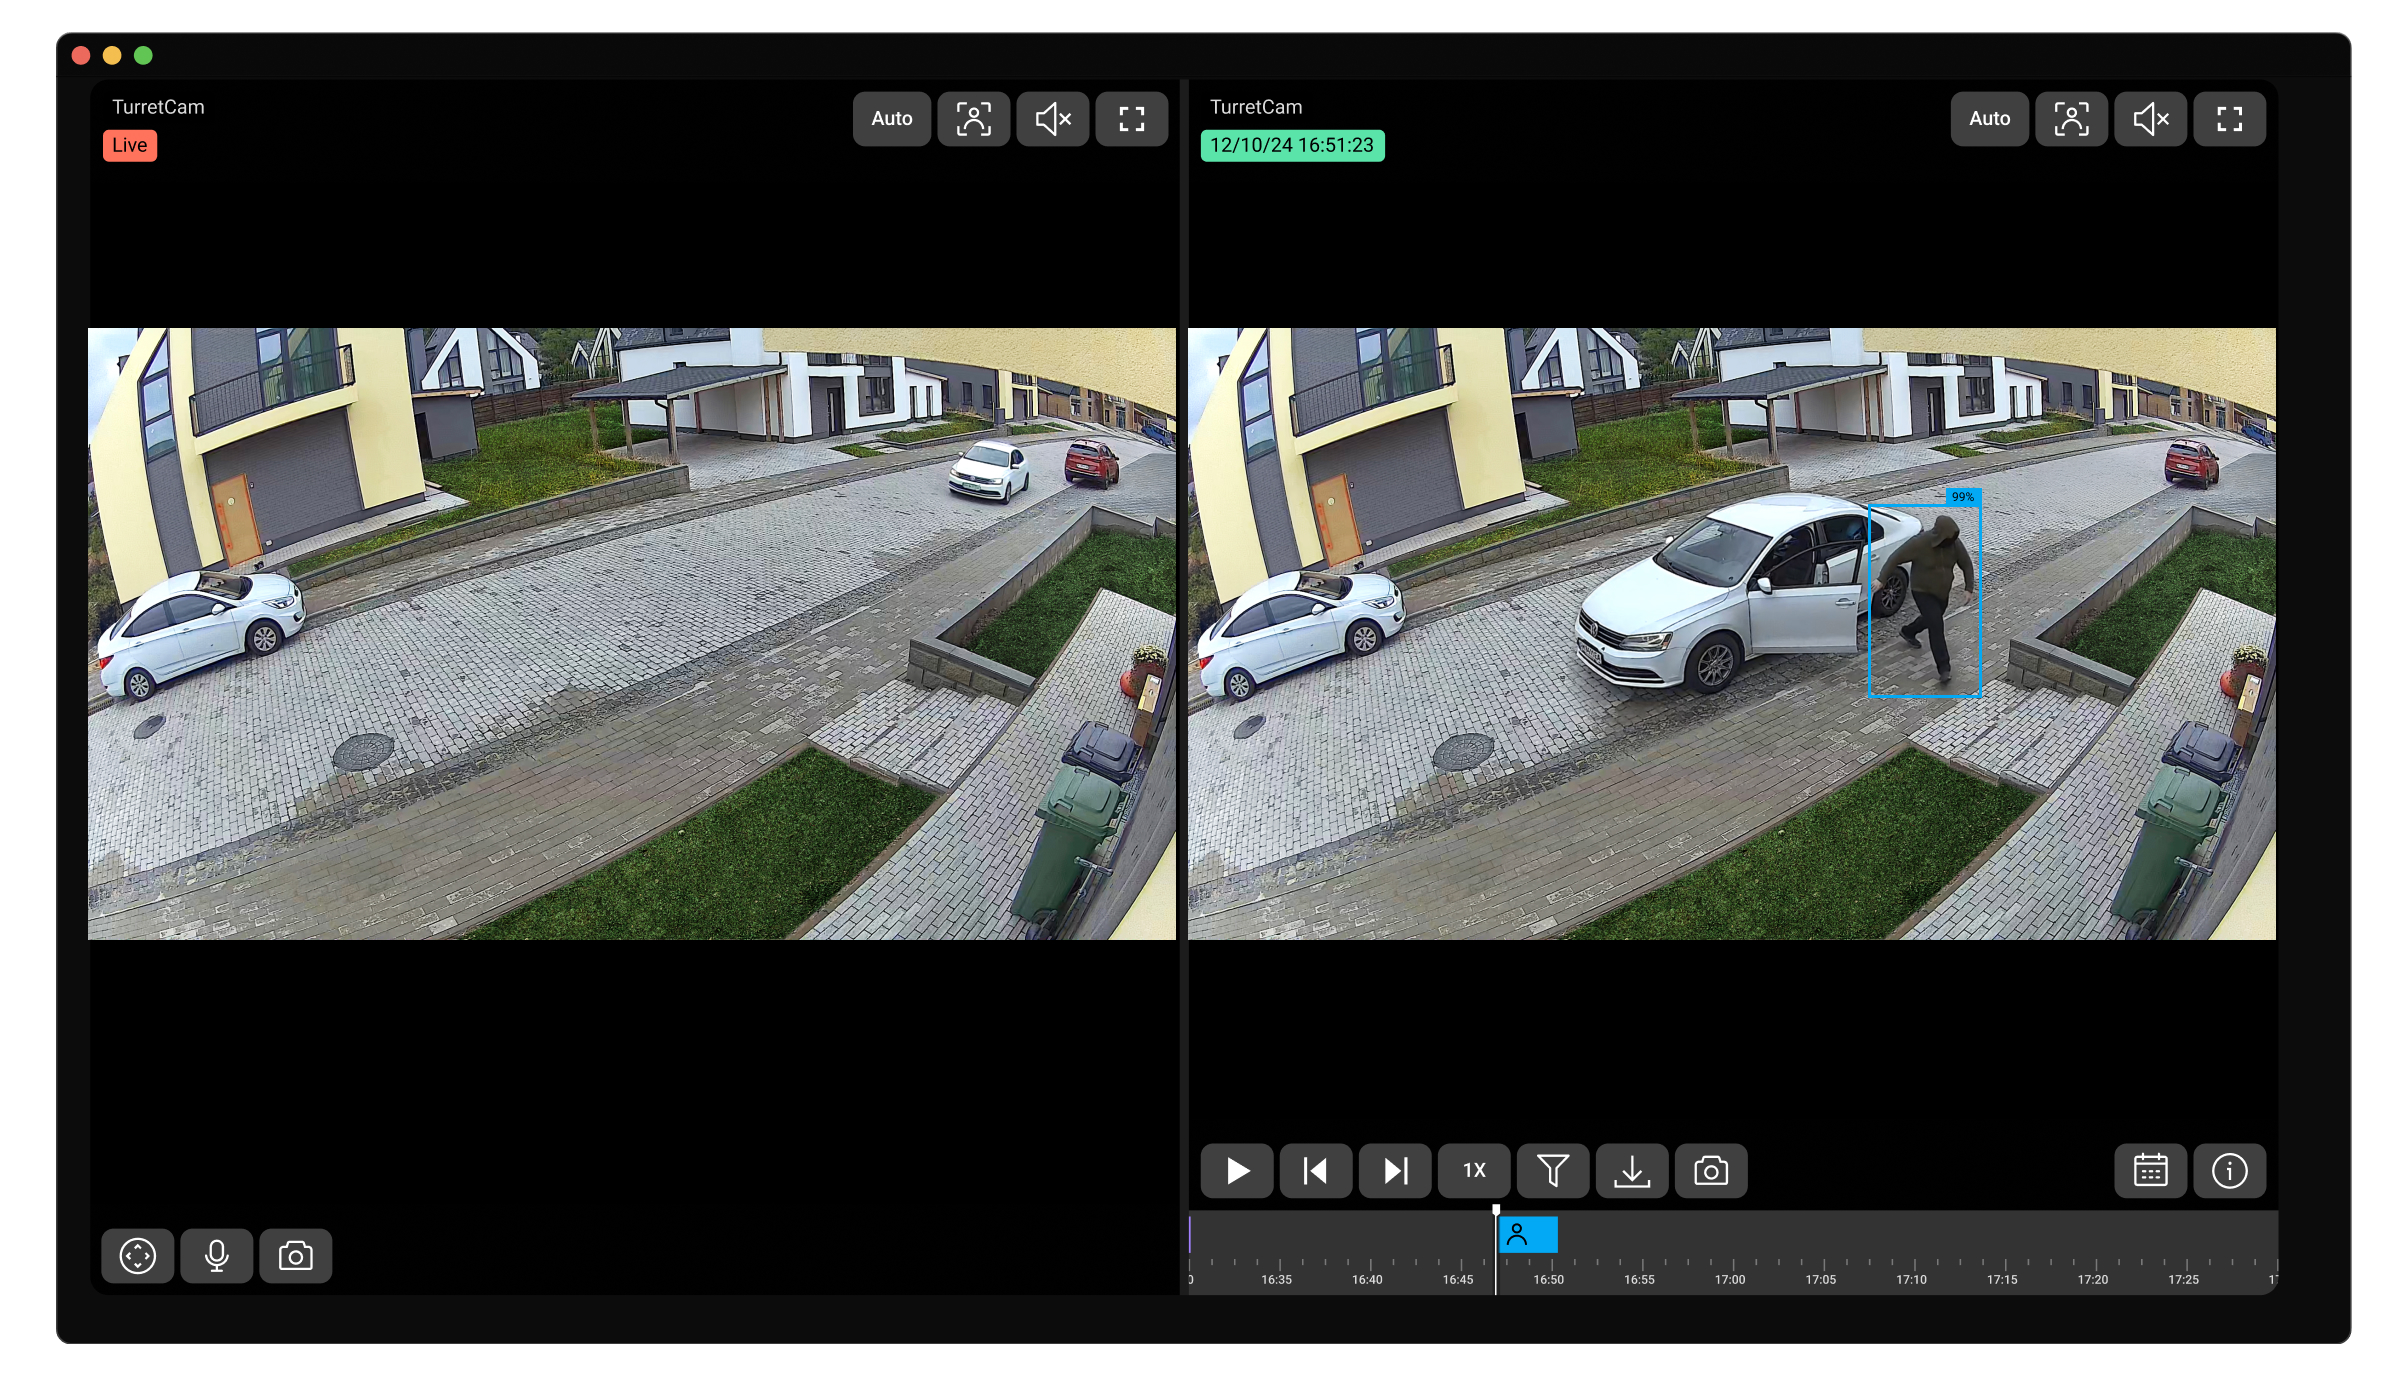
Result: AI events are transmitted to the monitoring station with a URL that opens a split-view window: livestream on the left and AI event recording (archive) on the right.
Examples
424C0055"SIA-DCS"0859L0#1234[#1234|Nri0/VH70^Balcony in Living Room^][V ajax-pro-desktop://ed?sp=6554a1688cfcda4b553ea1f5&ve=3037652E&ch=9c756e110455-0&et=1743923616468&tr=PetDetected.IMPULSE&c=AABBDA87]_06:57:27,04-06-2025
5F70011F"SIA-DCS"1215L0#001C988C[#001C988C|Nri1/VP70][Vhttps://web.ajax.systems?t=0000000eyJhbGciOiJIUzI1NiJ9.eyJzdWIiOiJDZ3hsVktGb2pQemFTMVUrb2ZVU0JLcTcyb2NZNlk2b29lc3lJQUVxQkFoSElnQ2lCZ1F3TjJVdSJ9.FyF8sYWptluAfVFtMXaG2ElddsouJmeeff5scqmIkkk][ILiving Room][L1][RLiving Room]_08:29:35,05-09-2025
663F00B6"ADM-CID"0004L0#001C988C[#001C988C|1761 04

201][Vhttps://i.ajax.systems/s/zvbUDpcbL6_dqwLGmL1FApd2ROYX8r2rYEfNvX6s0d00vz-VySpNUogjv][IIndoorCam][L4][RLiving Room]_10:45:21,12-13-2025