PRO Integration

On integrating Ajax devices with the third-party systems and integrations of the third-party devices into the Ajax security system

FAQ

PRO Desktop allows you to configure video looping from required cameras. It helps you continuously monitor the situation at the site without manually switching the layouts or channels.

To create a slide show, in PRO Desktop:

  1. Go to the Video wall tab.
  2. Enable the Open Video wall widget toggle.
  3. Select at least one display if you have more than one.
  4. Click the slide show icon .
  5. Click the Create slideshow button.
  6. Edit a title and click the Add cameras button.
  7. Select a layout and required channels.
  8. Click Apply, then click Create.

The added slide shows will be available by clicking the corresponding icon . You can start, pause, and edit them.

Copied

PRO Desktop allows you to fix the last timestamp (the point where you stopped seeking) for all cameras. Thus, you can easily find the desired event on different cameras.

When a user focuses on an appropriate timestamp, the system stores this position for 10 minutes and applies the stored timestamp to all channel archives a user opened during these 10 minutes.

The feature is available when cameras or Ajax NVR have a storage device and a user has appropriate privacy permission.

Copied

To quickly and simply navigate the video wall widget, keyboard shortcuts are added to PRO Desktop. These shortcuts give you instant access to key features and help you work within the video wall.

Keyboard shortcut Description
1 0.5x playback speed
2 1x playback speed (by default)
3 1.5x playback speed
4 2x playback speed
5 4x playback speed (for cameras connected via Ajax NVR only)
6 8x playback speed (for cameras connected via Ajax NVR only)
Space Play/pause
</> Previous/next frame
F Maximize window
Esc Minimize window
Tab Archive entry/exit
Keyboard shortcut Description
Left/right arrow Pan left/right
Up/down arrow Tilt up/down
+ (plus key) Zoom in
– (minus key) Zoom out
Shift + left arrow Focus near
Shift + right arrow Focus far
1–9 Go to PTZ presets from 1 to 9
H Go to PTZ default settings
Copied

You can use an empty space for 180 days from the date the space was created or from the date the last device was deleted. After this period, an empty space will be deleted.

To avoid space configuration loss, the system sends a notification after 173 days from the date the space was created or from the date the last device was deleted.

The system will delete the empty space even if it is armed. The user can delete the empty space only when the system is disarmed. When the space is deleted (automatically or manually), its events are also deleted.

Copied

You can create and use a limited number of empty spaces. Ajax space is empty when no Ajax hub, Ajax camera, Ajax NVR video recorder, or Yale smart lock is added.

You can create and use:

  • 100 empty spaces as a user,
  • 1000 empty spaces as a PRO or a company.

If a space is empty, you cannot arm it or use the panic button in Ajax apps.

You can still create and use an unlimited number of spaces with devices.

Copied

Yes, you can delete the offline hub from armed space. This can be helpful if the hub fails while the system is armed and there is no way to replace the hub using data transfer. If the hub is removed from the space, the user can continue to use Ajax cameras, Ajax NVR video recorder, and Yale smart lock added to the space.

Admin or Installer with system configuration rights can delete the offline hub from armed space.

To do this, in the Ajax apps:

  1. Select a space.
  2. Go to the Devices tab and select the hub you want to delete.
  3. Go to the hub settings by clicking on the gear icon .
  4. Tap Remove hub.

You can delete the offline hub from armed space if this hub is not connected to the monitoring station.

Copied

No, when the space is deleted (manually or automatically), its events are also deleted. You cannot restore it.

Copied
  1. Click on your account avatar in the upper right corner of the screen. Select Report a Problem.
  2. A window to describe the problem will open. Describe it in as much detail as possible. Specify the exact time or period when the problem occurred. The email and username associated with the account are automatically entered in the form. This email address will receive a response from our technical support service. Check the data, and correct it if needed.
  3. If you took a screenshot showing the problem, please attach it to your email.
  4. Click the Send button. A report with log files will be sent to the technical support service.

Our support team works 24/7/365. As soon as the request is received and processed, the technical support team will respond to the email from the form.

Copied

Intrusion confirmation

Two or more devices from the list (security detectors, sirens, panic buttons, control devices):

You can also select the following devices for intrusion confirmation (please note that the devices below cannot participate in alarm confirmation if you are configuring the system to comply with PD 6662):

The in-app panic button can also be a part of alarm confirmation.

Hold-up device alarm confirmation

After-alarm indication

Two-step arming

For two-step arming, multiple control devices or one control device + detector.

To indicate an incomplete arming:

Restore after alarm

Copied

Yes, you can. The keyfob is compatible with wired and wireless systems using Ajax ocBridge Plus or Ajax uartBridge.

Copied

Add a key fob to the receiver and assign buttons to the corresponding zones. The zones must be added to the 24-hour zones of the control panel.

Only one key fob button can be assigned to a single ocBridge Plus zone. When you select the type of zone “Arming/Disarming”, two buttons of the key fob are assigned to the zone at once (arming and disarming).

Copied

Yes, if the third-party system supports the UART data interface and the communication protocol can be configured or programmed. To configure uartBridge, use the uartBridge protocol.

Copied

If you have troubles with setting up a third-party security system with uartBridge, please, contact the manufacturer of this device.

Copied

uartBridge does not have dry contacts (NC/NO outputs), but there is a two-way data transfer protocol via the UART interface. With it, you can get information about each device (battery, alarm, sensor status) and connect up to 85 devices.

Copied

57600 bps (baud)

Copied

By default, ocBridge Plus response period is set to ping detectors every 36 seconds and to signal an alert after 40 undelivered passes. Under these settings, it will take about 24 minutes for the system to recognize a communication failure.

You can adjust these settings by opening the Ajax configuration settings and connecting to ocBridge Plus. Find the Service Events Control tab, then Lost Connection, and change Passes Number. You can change response period in the Radio Zone tab.

Copied

At the moment, such an opportunity is not provided, since the equipment of other manufacturers uses other frequencies and communication protocols with the control panels.

Copied

You can connect any third-party IP camera using RTSP to the Ajax security system. In total, you can connect up to 10 cameras to Hub, up to 25 cameras to Hub 2, Hub Hybrid, up to 50 cameras to Hub Plus, and up to 100 cameras to Hub 2 Plus.

Dahua cameras and video recorders can be added by scanning their QR codes (similarly to Ajax devices). And EZVIZ, Hikvision and Safire video surveillance systems can be added to the hub with a few clicks. So you don’t have to waste time on setting up network equipment.

Video recorders allow you to bypass the limit on the number of video surveillance devices that can be connected to the hub. The video recorder is a single device to which you can connect multiple video cameras. The video stream from each camera will be available in the Ajax app.

You can calculate the number of cameras and NVRs that can be added to the space using the video device calculator.

Copied

Featured articles

TLS update for Ajax Translator users

How to configure an Ajax system according to the INCERT requirements

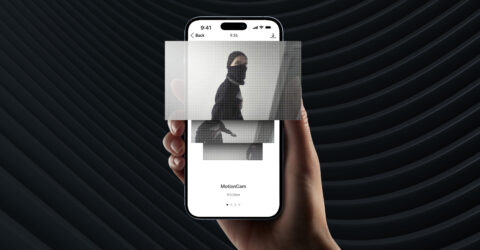
What is Photo on Demand and how it works

Spelling error report

The following text will be sent to our editors: