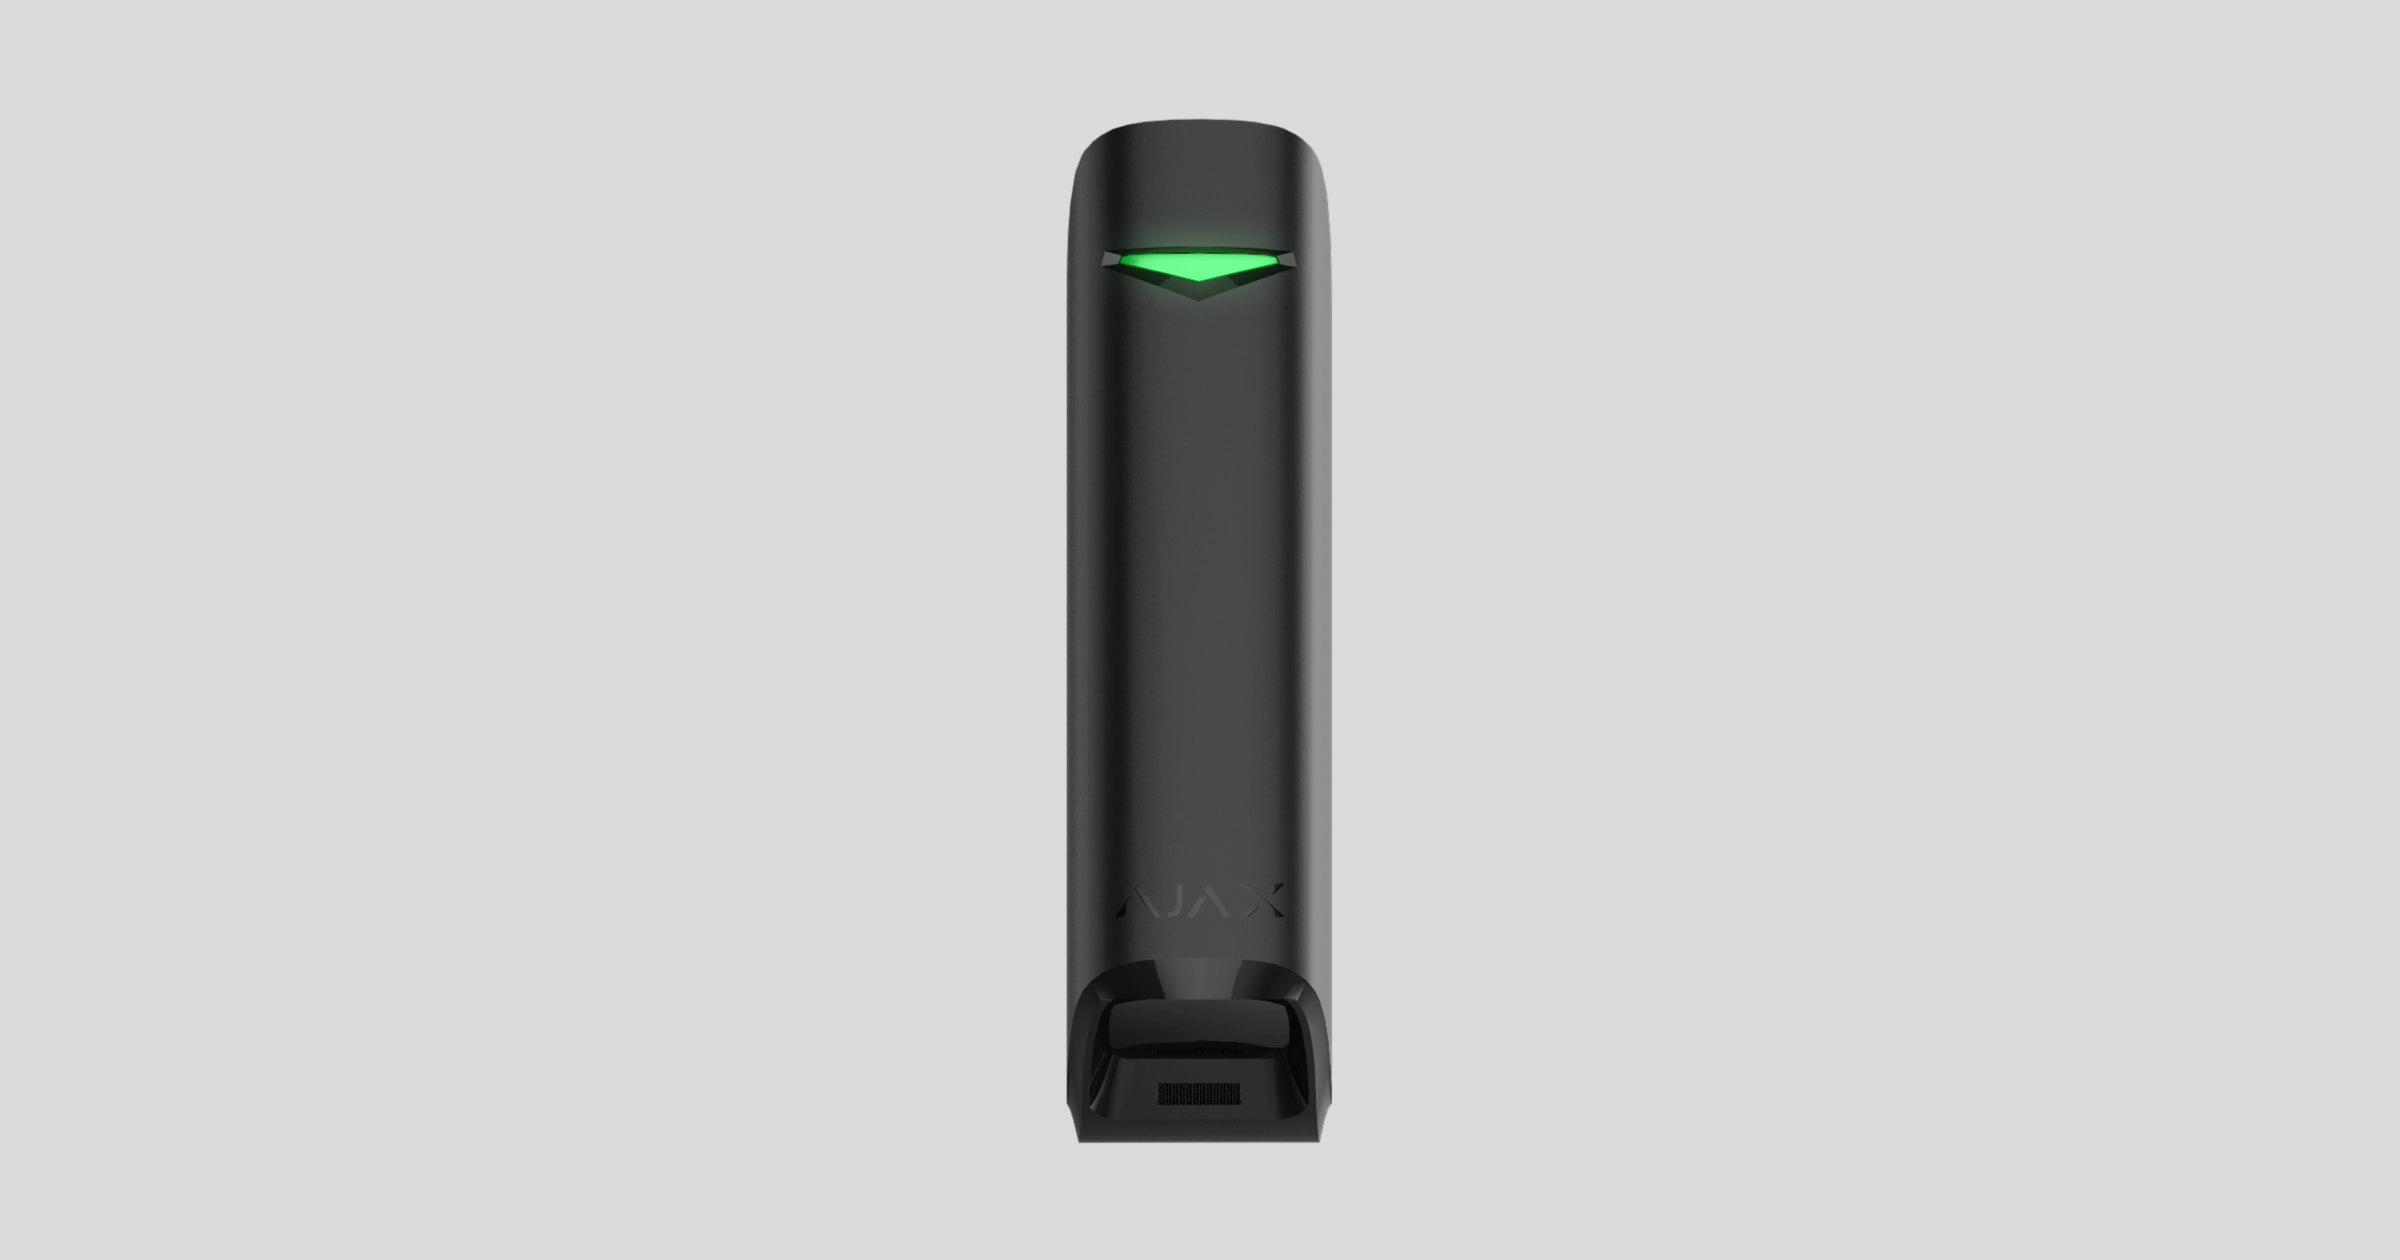
MotionProtect Curtain é um detetor de movimento sem fios do tipo cortina. O detetor tem um ângulo de deteção horizontal estreito e foi concebido para o controlo do perímetro interior: janelas, portas e outras entradas ou saídas da instalação vigiada. A distância máxima de deteção de movimento é 15 metros.
MotionProtect Curtain integra-se nos sistemas Ajax, ligando-se a um hub através do protocolo seguro Jeweller. A cobertura sem fios pode atingir até 1700 m de linha de visão. As baterias pré-instaladas garantem até 3 anos de funcionamento autónomo.
É utilizada uma app iOS ou Android para a configuração do detetor. Também notifica o utilizador sobre quaisquer eventos com notificações push, SMS ou chamadas (se ativadas).
Ajax pode ser ligada à central de controlo de uma empresa de segurança.
Não está prevista a ligação aos módulos de integração ocBridge Plus e uartBridge.
Elementos Funcionais
- Indicador LED.
- Lente de deteção de movimentos.
- Orifício para fixar o painel de instalação SmartBracket com o parafuso incluído.
- Código QR com o ID do dispositivo. Utilizado para conectar ao sistema Ajax.
- Botão para ligar/desligar o dispositivo.
- Botão de tamper. Aciona quando se tenta arrancar o detetor da superfície ou retirá-lo do suporte.
- Painel de instalação SmartBracket. Para remover o painel, deslize-o para baixo.
Princípio do Funcionamento
Os sensores IV do MotionProtect Curtain detetam a intrusão nas instalações através da deteção de objetos em movimento com uma temperatura próxima da do corpo humano.
Quando o sistema está armado, o detetor começa a consultar os seus dois sensores IV. Se for detetado um movimento, é imediatamente enviado um estado de alarme para o hub e o LED verde começa a piscar no dispositivo. Ao detetar um estado de alarme, o Hub dispara as sirenes e avisa o utilizador e a empresa de segurança.
Os alarmes de movimento são enviados de em 5 segundos
Para evitar falsos alarmes, o MotionProtect Curtain possui uma funcionalidade de Processamento de Sinais de Correlação que pode ser ativada nas definições do detetor. Quando está ativa, o detetor começa a enviar estados de alarme para o hub apenas se um sinal de movimento idêntico for registado por ambos os sensores IV. Se estiver desativada, MotionProtect Curtain envia um estado de alarme mesmo com um dos dois sensores IV acionados.
Emparelhamento do Detetor com um hub
O hub e o dispositivo que operam em diferentes radiofrequências são incompatíveis. O alcance da frequência de rádio do dispositivo pode variar consoante a região. Recomendamos comprar e utilizar dispositivos Ajax na mesma região. Pode contactar o Suporte Técnico da Ajax para verificar as bandas de frequência de rádio na sua região.
Antes de começar a emparelhar o detetor
- Ligue o seu hub e verifique a ligação à Internet (via Ethernet e/ou GSM).
- Instale a app Ajax no seu smartphone. Crie uma conta, adicione o hub à app e crie pelo menos uma sala.
- Verifique o estado do hub na app para se certificar de que está desarmado e não está a ser atualizado.
Tenha em atenção que apenas um utilizador com permissões de administrador pode adicionar dispositivos ao hub.
Emparelhamento do MotionProtect Curtain com um hub
- Na app móvel Ajax, toque em Adicionar dispositivo.
- Dê um nome ao dispositivo, leia o código QR ou introduza-o manualmente (colocado na parte de trás do corpo do detetor ou na embalagem), selecione a sala para colocação e toque em Adicionar. A contagem decrescente vai começar.
- Ligar o detetor, mantendo premido o botão de alimentação durante 3 segundos.
Para que a deteção e o emparelhamento ocorram, o dispositivo deve estar dentro da cobertura sem fios de um hub (na mesma instalação). O pedido de ligação só será enviado para o Hub quando o dispositivo se ligar.
Se o MotionProtect Curtain não conseguir ligar-se ao hub, desliga-se automaticamente no espaço de 6 segundos após ser ligado. Não é necessário desligar o dispositivo para tentar novamente.
Se o MotionProtect Curtain já tiver sido emparelhado com outro hub, desligue o detetor e, em seguida, siga o procedimento de emparelhamento padrão.
Após o emparelhamento, o detetor aparecerá na lista de dispositivos do hub da app. A frequência das atualizações do estado do dispositivo depende do intervalo de consulta indicado nas definições do hub (36 segundos por defeito).
Se o detetor detetar movimento antes de o sistema ser armado, ele será ativado apenas na próxima consulta do hub.
Estados
Os estados apresentam informações sobre o aparelho e os seus parâmetros de funcionamento. Os estados do MotionProtect Curtain estão disponíveis nas apps Ajax. Para visualizá-los:
- Inicie sessão na app Ajax.
- Selecione o hub se tiver vários ou se estiver a utilizar uma app PRO.
- Aceda ao separador Dispositivos
.
- Selecione o MotionProtect Curtain na lista.
| Parâmetro | Valor |
| Importação de dados | Apresenta o erro aquando da transferência de dados para o novo hub:
|
| Temperatura |
Temperatura do detetor. É medido no processador do detetor e muda gradualmente. O erro aceitável entre o valor na app e a temperatura ambiente é de 2°C. O valor é atualizado assim que o detetor identifica uma variação de temperatura de, pelo menos, 2°C. É possível configurar um cenário por temperatura para controlar dispositivos de automatização |
| Intensidade de Sinal Jeweller |
Intensidade do sinal entre o dispositivo e o hub (ou o repetidor) através do canal Jeweller. O valor recomendado é de 2–3 barras. O Jeweller é um protocolo para a transmissão de eventos e alarmes do MotionProtect Curtain. |
| Ligação através de Jeweller | Estado da ligação no canal Jeweller entre o detetor e o hub ou o repetidor:
|
| Potência do transmissor |
Apresenta a potência selecionada do transmissor. O parâmetro aparece quando a opção Máx ou Atenuação é selecionada no menu Teste de atenuação do sinal. |
| ReX | Apresenta o estado da utilização de um repetidor do sinal de rádio. |
| Carga da Bateria | Nível de carga da bateria do dispositivo:
As apps Ajax e a empresa de segurança receberão notificações adequadas quando as baterias estiverem fracas. Depois de enviar uma notificação de bateria fraca, o detetor pode funcionar até 2 meses. |
| Tampa | O estado de tamper do detetor que responde à separação do dispositivo da superfície ou à abertura do corpo:
|
| Sensibilidade | Nível de sensibilidade do detetor de movimentos:
A sensibilidade é selecionada com base nos resultados do teste da zona de deteção. |
| Processamento de sinal de correlação | Estado da funcionalidade de processamento da correlação de sinais |
| Sempre Ativo |
Quando esta opção está ativada, o detetor está sempre armado. Isto significa que o detetor responderá constantemente ao movimento e emitirá alarmes, independentemente do modo de ativação do sistema. |
| Desativação permanente | Mostra o estado da função de desativação permanente do dispositivo:
|
| Reações a Alarmes | |
| Modo de Funcionamento | Mostra como o detetor reage aos alarmes:
|
| Atraso ao Entrar, seg. |
Tempo de atraso na entrada: de 5 a 120 segundos. O atraso de entrada (atraso de ativação do alarme) é o tempo que o utilizador tem para desarmar o sistema de segurança depois de entrar na área protegida. |
| Atraso ao Sair, seg. |
Tempo de atraso na saída: de 5 a 120 segundos. Atraso à saída (atraso ao armar) é o tempo que o utilizador tem para abandonar a área protegida depois de o sistema de segurança se armar. |
| Firmware | Versão do firmware do detetor. |
| ID do dispositivo | Identificador do dispositivo. Também disponível no código QR na carcaça do dispositivo e na sua caixa de embalagem. |
| Número do Dispositivo | Número do bucle do dispositivo (zona). |
Configuração do detetor
Para alterar as definições do detetor na app Ajax:
- Selecione o hub se tiver vários ou se estiver a utilizar uma app PRO.
- Aceda ao separador Dispositivos
.
- Selecione MotionProtect Curtain na lista.
- Aceda as Definições clicando no ícone de engrenagem
.
- Defina os parâmetros necessários.
- Clique em Voltar para guardar as novas definições.
| Definição | Valor |
| Nome |
Nome do detetor. Apresentado na lista de dispositivos do hub, texto SMS e notificações no historial de eventos. Para alterar o nome do detetor, clique no campo de texto junto ao nome. O nome pode conter até 12 caracteres cirílicos ou até 24 caracteres latinos. |
| Sala |
Selecione a sala virtual à qual o MotionProtect Curtain está atribuído. O nome da sala é apresentado no texto de SMS e notificações no feed de eventos das apps Ajax. |
| Sensibilidade | O nível de sensibilidade do detetor de movimentos. A escolha depende do tipo de objeto, da presença de fontes prováveis de falsos alarmes e das especificidades da zona protegida:
Antes de selecionar o nível de sensibilidade, faça o teste da zona de deteção. Se, durante o teste, o detetor não reagir ao movimento em 5 casos em 5, a sensibilidade deve ser aumentada. |
| Processamento de sinal de correlação |
Quando esta opção está ativada e é detetado movimento, o MotionProtect Curtain analisa adicionalmente os sinais recebidos de dois sensores de infravermelhos para proteger contra falsos alarmes. |
| Sempre Ativo |
Quando esta opção está ativada, o detetor está permanentemente em modo armado. Isto significa que o detetor responderá constantemente ao movimento e emitirá alarmes, independentemente do modo de ativação do sistema. |
| Indicação LED de alarme |
Permite desativar a intermitência do indicador LED durante um alarme. Disponível para dispositivos com a versão de firmware 6.53.1.1 ou superior Como encontrar a versão do firmware ou o ID do detetor ou dispositivo |
| Alerta com uma sirene em caso de deteção de movimento | Se estiver ativo, as sirenes adicionadas ao sistema são ativadas se o movimento for detetado |
| Reações a Alarmes | |
| Modo de Funcionamento | Especifique como este dispositivo irá reagir aos alarmes:
|
| Atraso ao Entrar, seg. |
Tempo de atraso na entrada: de 5 a 120 segundos. O atraso de entrada (atraso de ativação do alarme) é o tempo que o utilizador tem para desarmar o sistema de segurança depois de entrar na área protegida. |
| Atraso ao Sair, seg. |
Tempo de atraso ao sair: de 5 a 120 segundos. Atraso à saída (atraso ao armar) é o tempo que o utilizador tem para abandonar a área protegida depois de o sistema de segurança se armar. |
| Armar no Modo Noturno | Se estiver ativo, o detetor fica armado quando o sistema entra no Modo Noturno. |
| Atraso ao Entrar no Modo Noturno, seg |
Tempo de atraso ao entrar no Modo noturno: de 5 a 120 segundos. O atraso ao entrar (atraso de ativação do alarme) é o tempo que o utilizador tem para desarmar o sistema de segurança depois de entrar nas instalações. |
| Atraso ao Sair no Modo Noturno, seg |
Tempo de atraso ao sair no Modo noturno: de 5 a 120 segundos. O atraso ao sair (atraso de armar) é o tempo que o utilizador tem para sair das instalações após o armar do sistema de segurança. |
| Teste de Intensidade de Sinal Jeweller |
Passa o detetor para o modo de teste de intensidade do sinal Jeweller. O teste permite-lhe verificar a intensidade do sinal entre o detetor e o hub ou o repetidor através do protocolo de transferência de dados sem fios Jeweller para determinar o local de instalação ideal para o dispositivo. O valor recomendado é de 2–3 barras. |
| Teste da Zona de Deteção |
Passa o detetor para o modo de teste da zona de deteção. O teste permite aos utilizadores verificar como o detetor reage ao movimento e determinar o local de instalação ideal. Se, durante o teste, o detetor não reagir ao movimento em 5 casos em 5, aumente a sensibilidade ou mude a localização do detetor. |
| Teste de Atenuação do Sinal |
Passa o dispositivo para o modo de teste de atenuação do sinal. Durante o teste, a potência do transmissor é diminuída ou aumentada para simular uma mudança no ambiente para testar a estabilidade da comunicação entre o detetor e o hub. Disponível em detetores com a versão de firmware 3.50 ou posterior. |
| Desativação permanente |
Permite ao utilizador desativar o dispositivo sem o retirar do sistema. Estão disponíveis três opções:
Mais informações sobre a desativação permanente O sistema também pode desativar automaticamente os dispositivos quando o número predefinido de alarmes é ultrapassado. |
| Guia do Utilizador | Abre o Manual do Utilizador do MotionProtect Curtain na app Ajax. |
| Desemparelhar Dispositivo | Desemparelha o detetor: desliga-o do hub e elimina as suas definições. |
Indicação do detetor
O LED indicador do MotionProtect Curtain pode ficar vermelho ou verde, consoante o estado do dispositivo.
Indicação ao premir o botão de alimentação
| Evento | Indicação |
| O botão de alimentação é premido (o detetor está ligado) | Acende-se a vermelho enquanto o botão é premido |
| Ligar | Acende-se a verde quando o dispositivo está a ser ligado |
| Desligar | Acende-se a vermelho e depois pisca três vezes |
Indicação de detetor ativado
| Evento | Indicação | Nota |
| Conexão do detetor ao hub | Acende-se a verde durante alguns segundos | |
| Erro de hardware | Pisca continuamente a vermelho | O detetor precisa de ser reparado, contacte a assistência |
| Alarme de movimento ou de tamper acionado | Acende-se a verde durante cerca de 1 segundo | |
| Necessidade de substituição da bateria | Acende-se suavemente a verde e apaga-se | Para o procedimento de substituição da bateria, consulte o manual de Substituição da bateria |
Teste de Integridade
Os sistemas Ajax podem efetuar testes para verificar a integridade dos dispositivos ligados.
Os testes iniciam-se instantaneamente, mas o mais tardar no prazo de 36 segundos, por defeito. A hora de início do teste depende da definição do intervalo de consulta do detetor (veja a secção Jeweller nas definições do Hub).
Colocação do Detetor
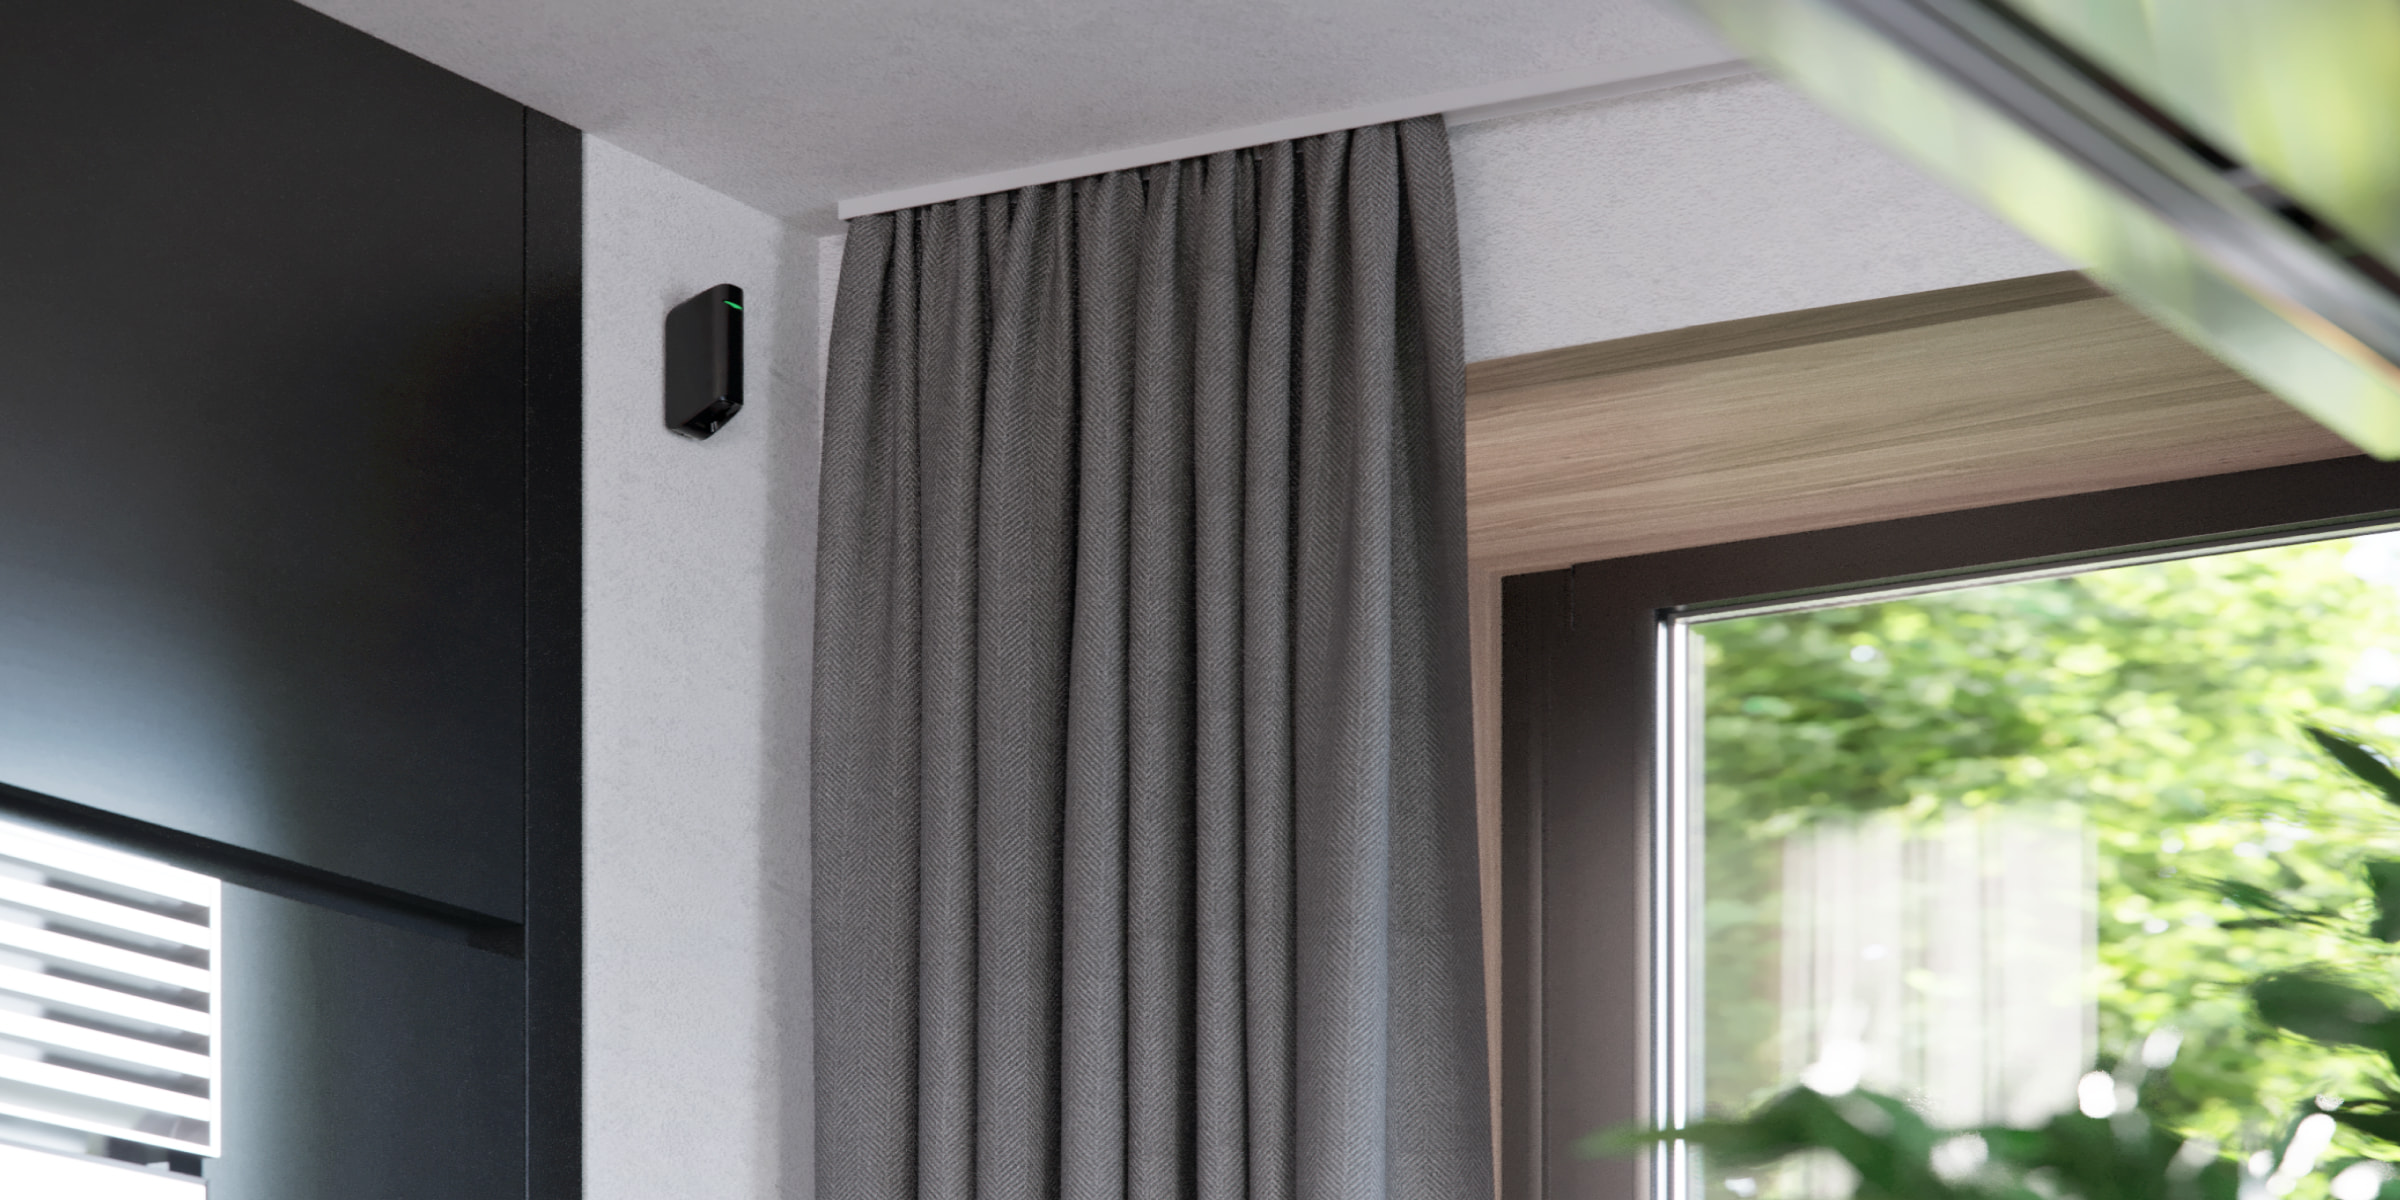
A eficácia do sistema de segurança depende da colocação dos detetores. Ao escolher um local para instalar o MotionProtect Curtain, tenha em consideração a direção do filtro de luz e os obstáculos que podem afetar o campo de visão do detetor e a transmissão do sinal de rádio.
Ao instalar o detetor, tenha em conta o alcance de deteção e a largura do feixe. A colocação incorreta do dispositivo pode dar origem a falsos alarmes ou a um funcionamento incorreto do dispositivo.
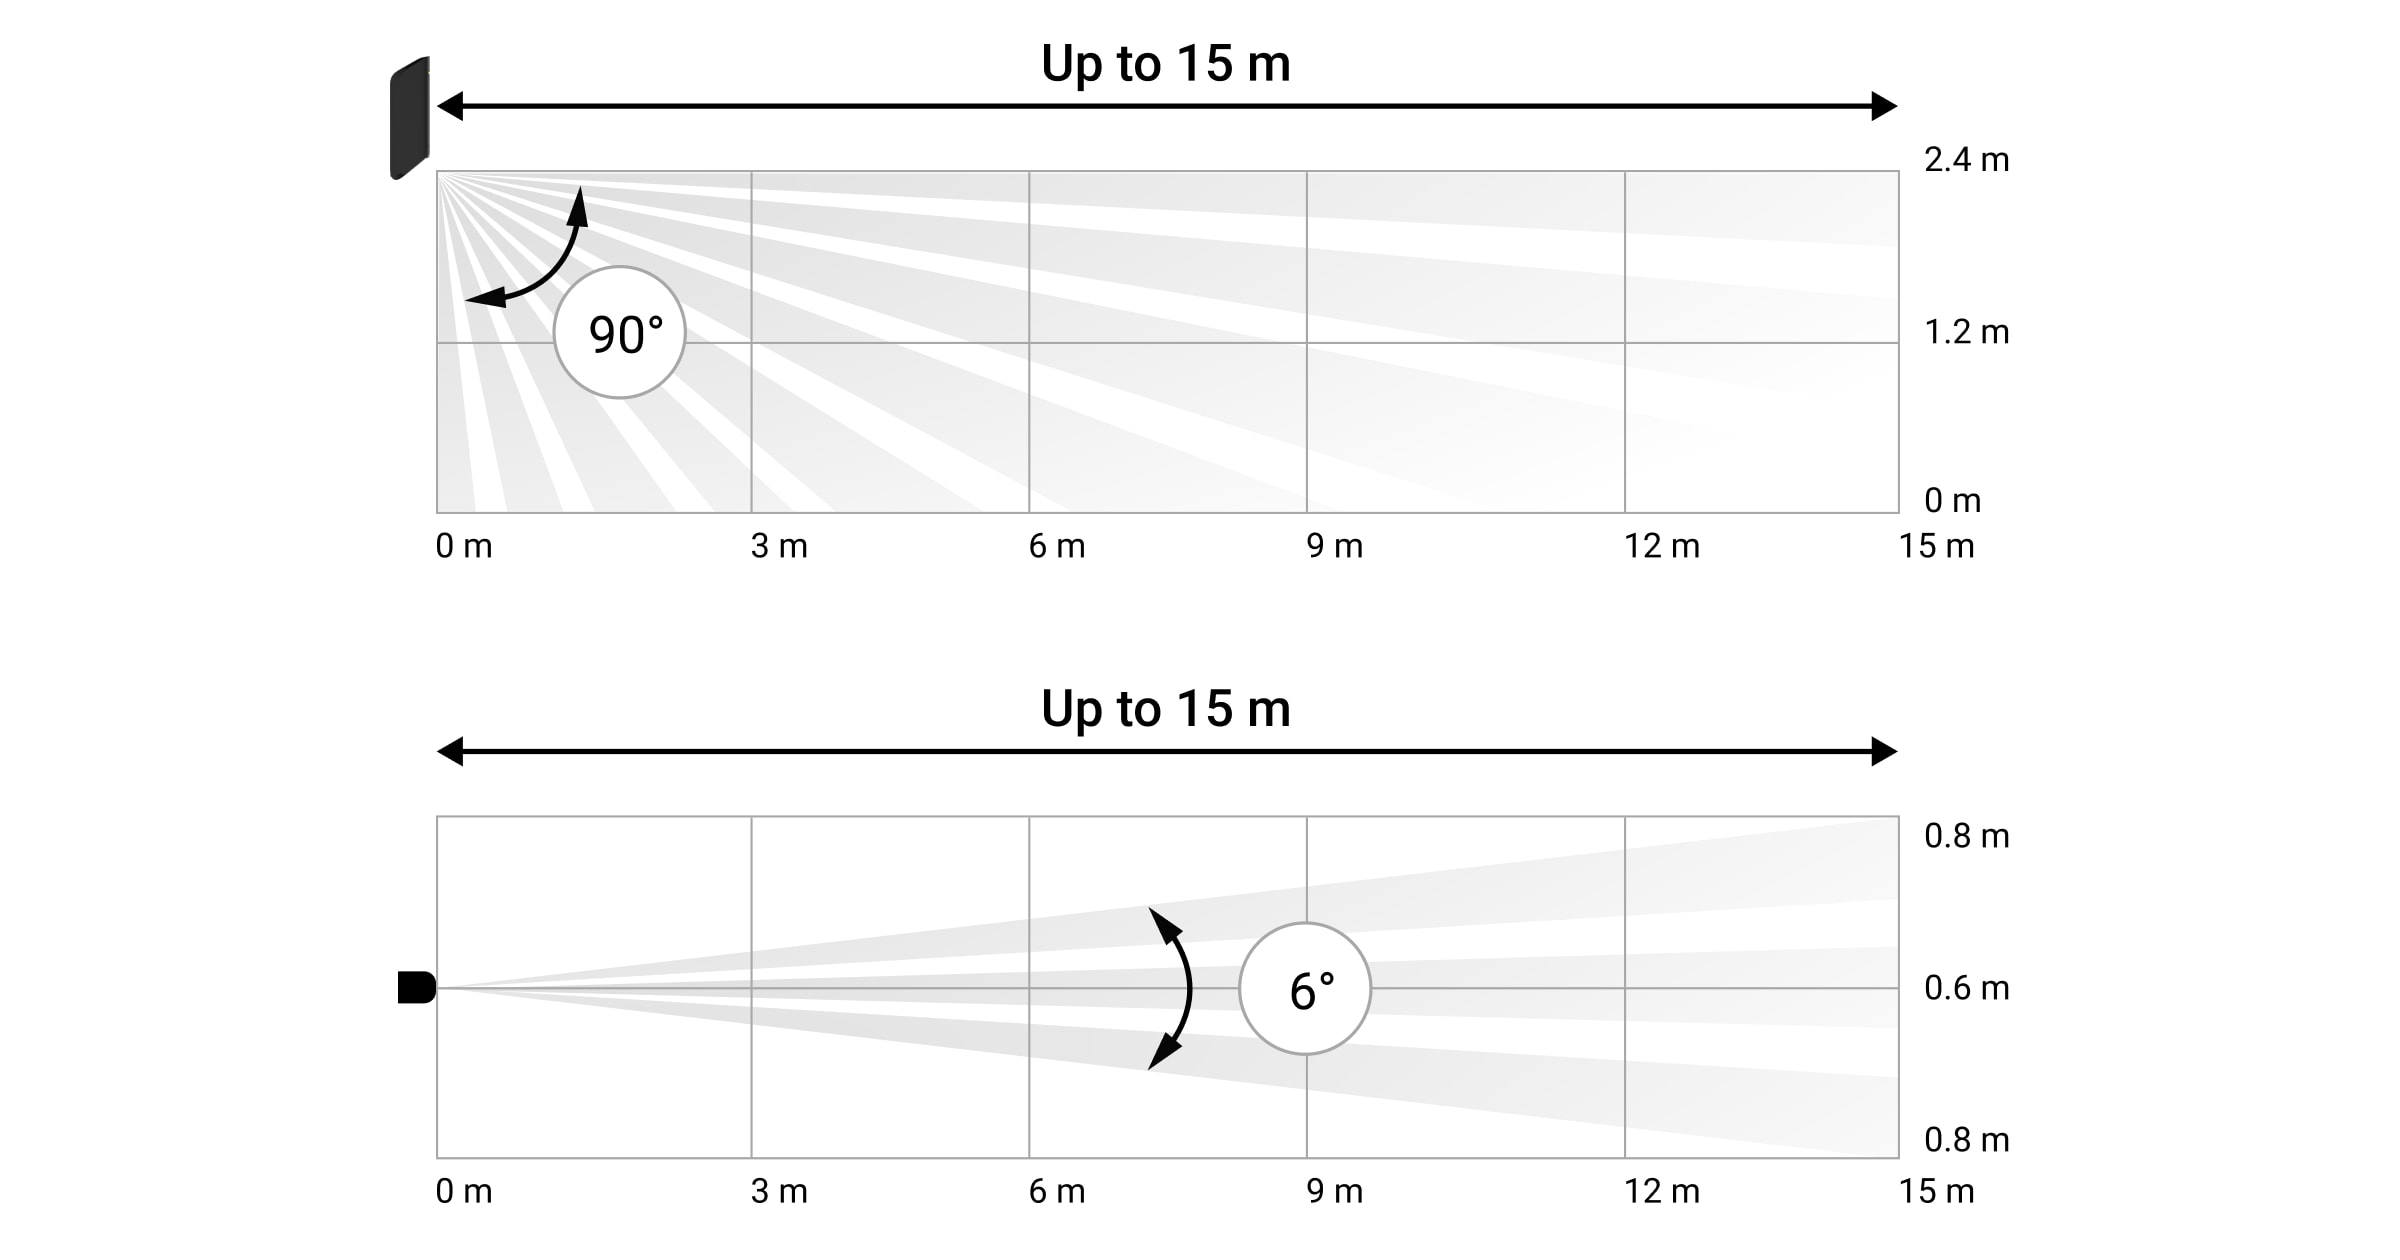
| Gama de deteção | Largura do feixe |
| 3 metros | 0,3 metros |
| 6 metros | 0,6 metros |
| 9 metros | 0,9 metros |
| 12 metros | 1,25 metros |
| 15 metros | 1,55 metros |
O dispositivo foi desenvolvido apenas para utilização em interiores.
Não instale o detetor:
- Fora das instalações (no exterior)
- Em frente às janelas, ao alcance da luz solar direta
- Oposto dos objetos que mudam rapidamente de temperatura (por exemplo, aquecedores elétricos e a gás)
- Oposto dos objetos em movimento com uma temperatura próxima da do corpo humano (cortinas a balançar por cima de um radiador de aquecimento)
- Em locais com rápida circulação de ar (perto de ventoinhas, janelas ou portas abertas)
- Perto de objetos metálicos e espelhos que provocam a atenuação ou interferem com os sinais de rádio
- Em qualquer local com temperatura e humidade acima do intervalo permitido
- Mais perto do que 1 m de um hub
Se o detetor continuar a reagir a interferências e a emitir falsos alarmes, mas for impossível instalá-lo noutro local, o Processamento de sinal de correlação pode ser ativado nas definições.
Tenha em atenção que, se o Processamento de sinal de correlação estiver ativado, o alcance da deteção de movimento é reduzido em função da sensibilidade do detetor escolhida.
| Sensibilidade | Gama de deteção de movimento com Processamento de Correlação de Sinais * | Gama de deteção de movimento sem Processamento de Correlação de Sinais * |
| Baixa | Até 6 m | Até 11 m |
| Normal | Até 7 m | Até 13 m |
| Elevada | Até 8 m | Até 15 m |
* a uma temperatura ambiente de 23°C
Se possível, evitar situações em que o detetor identifica o movimento a uma distância Superior à necessária. O melhor local para o instalar é num local fechado. Por exemplo, para detetar movimento num arco, instalar o detetor no mesmo. Desta forma, o detetor só será acionado por uma pessoa que entre nele.

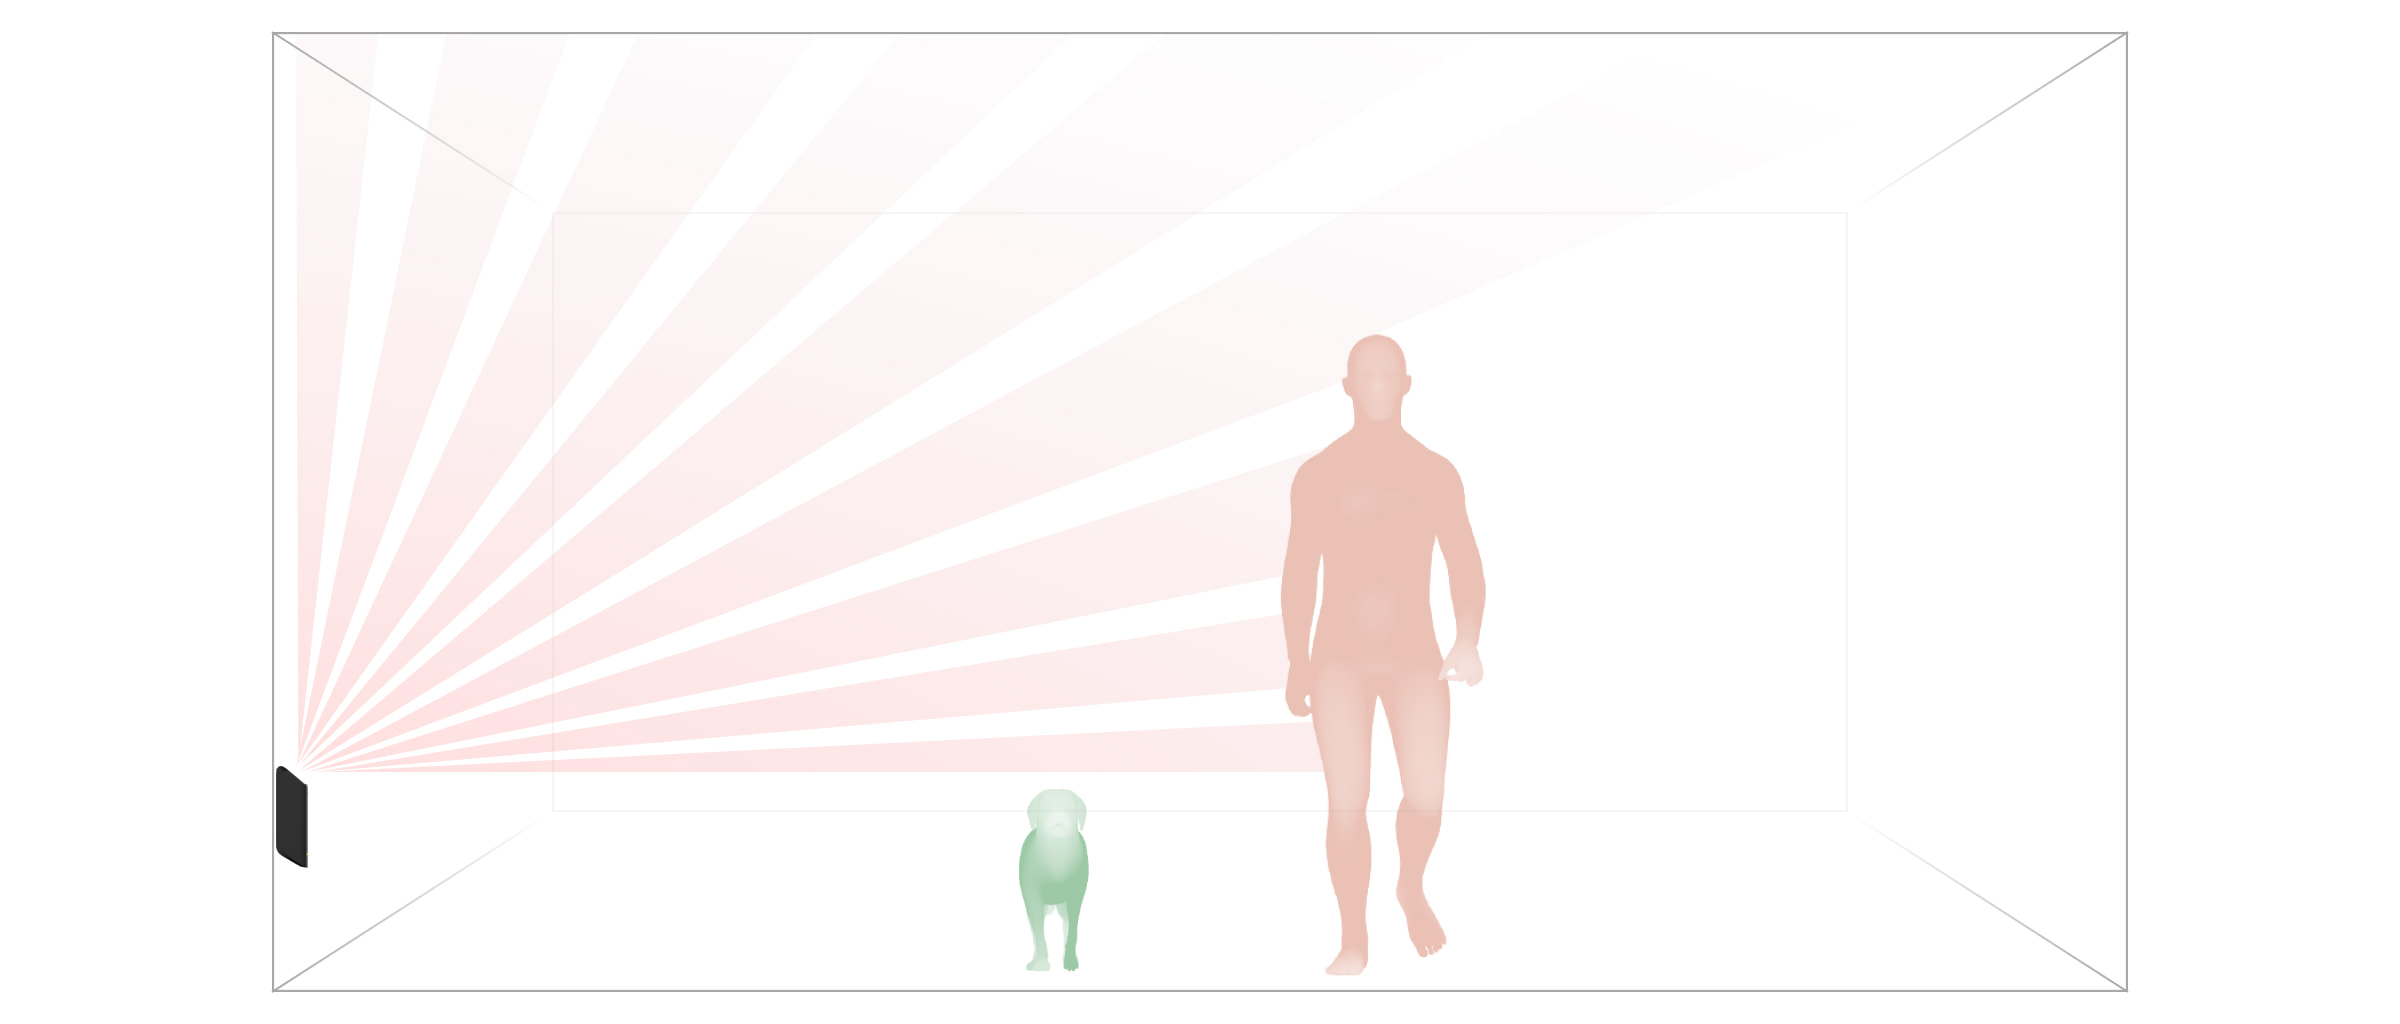
Para evitar que o detetor reaja a animais domésticos, instale-o de cabeça para baixo, deixando espaço para a livre circulação de animais abaixo da zona de deteção.
A colocação do MotionProtect Curtain também depende da distância a um hub e da existência de obstáculos entre os dispositivos que possam impedir o sinal de rádio, por exemplo, paredes, pavimento ou objetos grandes na divisão.
Verifique a intensidade do sinal no local de colocação. Se o nível de sinal for de uma barra, não há garantia de um funcionamento estável do sistema de segurança. Tome todas as precauções necessárias para garantir o nível máximo de sinal. Pelo menos tenta mover o dispositivo — até 20 cm podem fazer a diferença.
Se, após a deslocação, o dispositivo continuar a ter uma intensidade de sinal baixa ou instável, utilize um repetidor do sinal de rádio.
O filtro de luz do detetor deve ser direcionado perpendicularmente ao caminho de entrada previsto para a divisão!
Certifique-se de que nenhum móvel, planta de casa, vaso, estrutura decorativa ou de vidro está a bloquear o campo de visão do detetor.
Recomendamos a instalação do detetor a uma altura de 2,4 m
A instalação do detetor a qualquer outra altura reduzirá a zona de deteção, afetando a qualidade da deteção de movimento.
Tenha em atenção que o MotionProtect Curtain não deteta movimentos por detrás do vidro. Por isso, não instale o detetor em locais onde as estruturas de vidro possam bloquear o seu alcance de visão, por exemplo, em locais onde uma janela aberta possa obstruir o campo de visão do dispositivo.
Instalação do detetor
Antes de instalar o detetor, certifique-se de que escolheu um local adequado, tal como indicado neste manual.
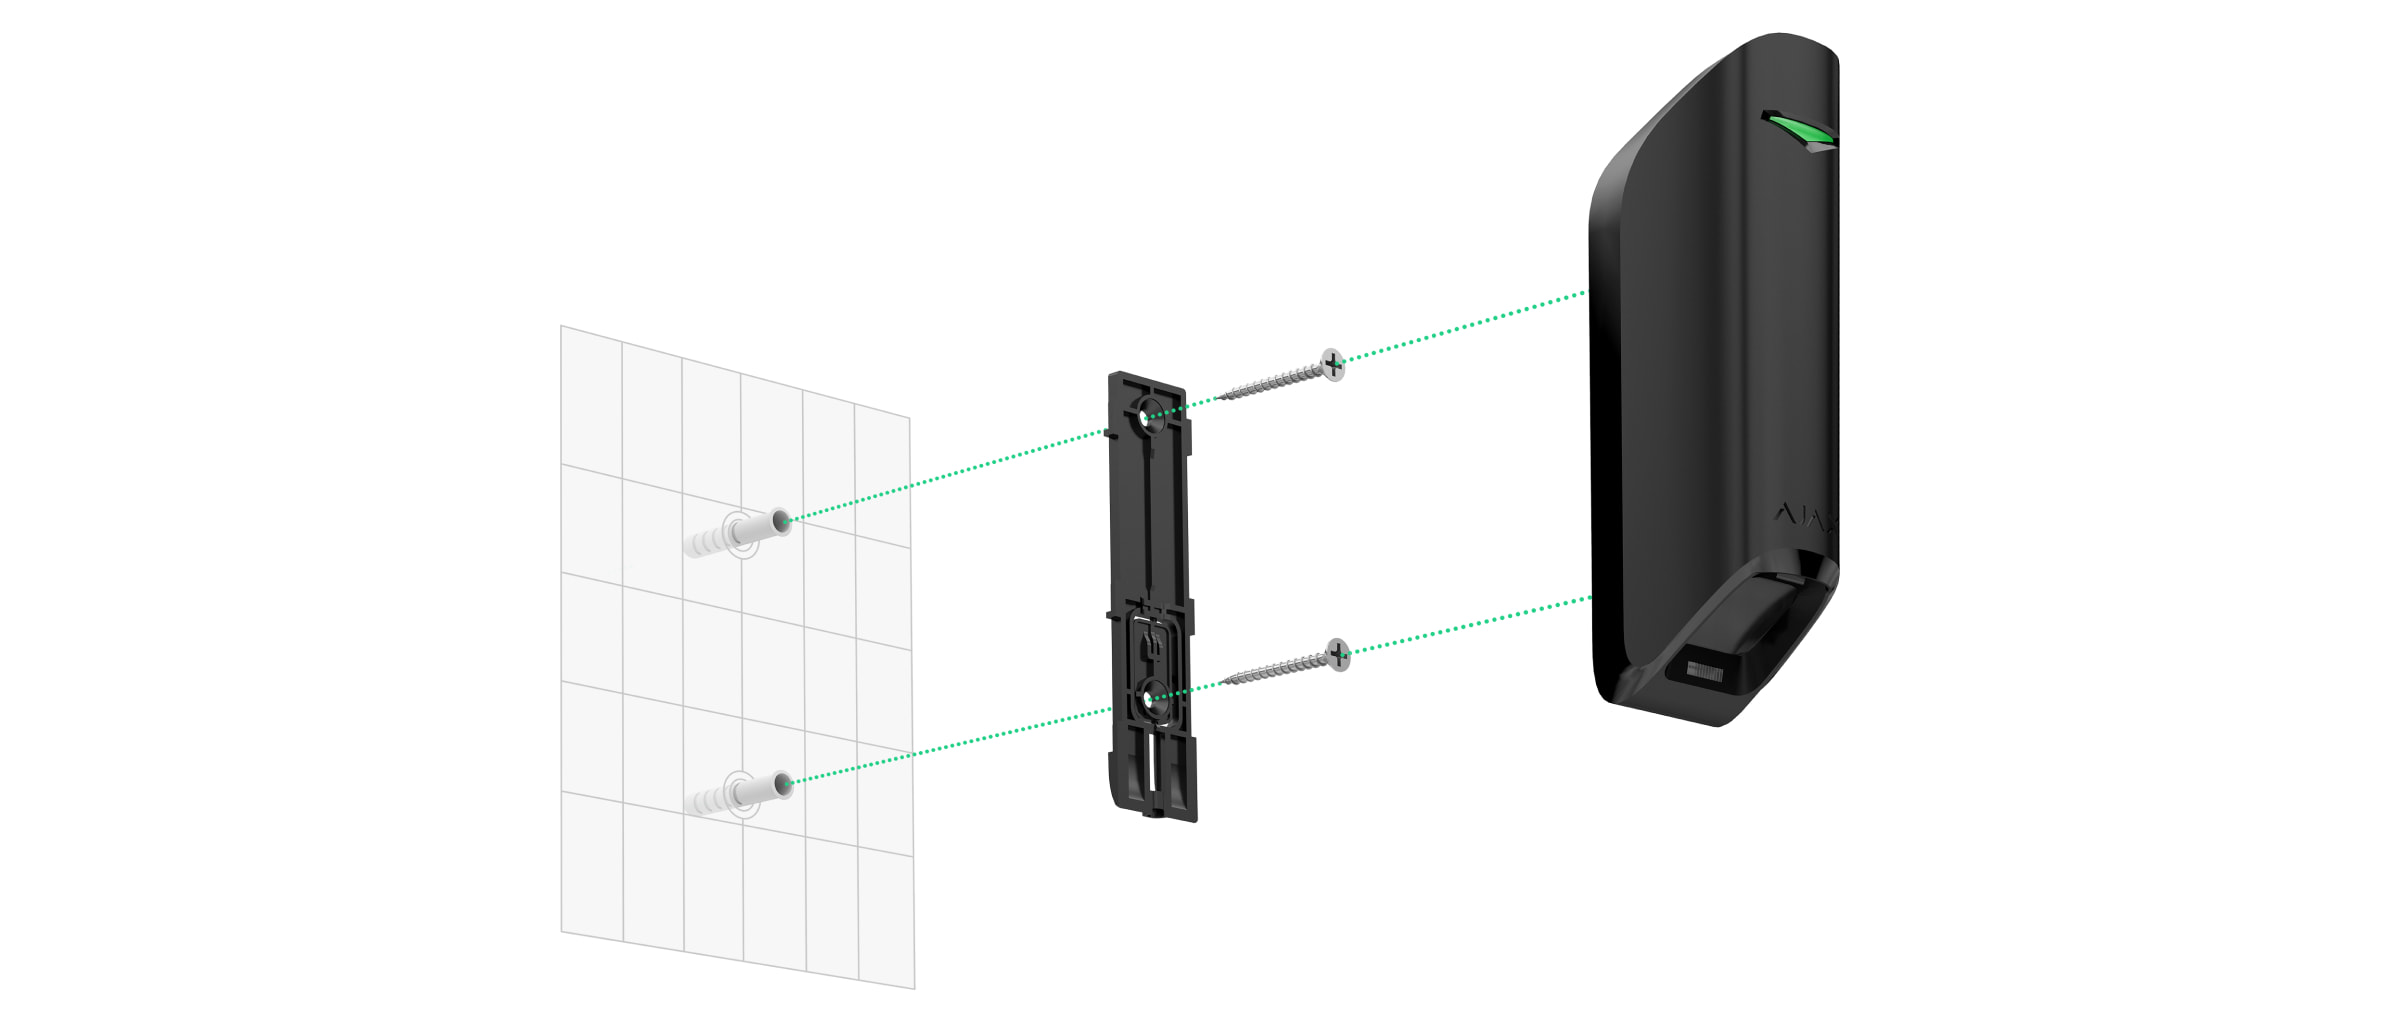
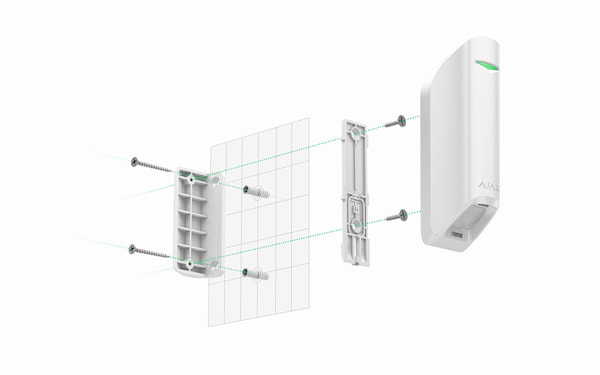
Existem duas opções para instalar o MotionProtect Curtain:
- diretamente numa superfície
- no suporte incluído
Procedimento de instalação:
- Fixe o painel SmartBracket ou um suporte à superfície com os parafusos incluídos, ou outros fixadores igualmente fiáveis. Aparafuse o painel SmartBracket no suporte incluído.
- Fixe o detetor ao painel SmartBracket.
- Monte o detetor no painel SmartBracket com um parafuso.
A fita adesiva de dupla face deve ser utilizada apenas para a instalação temporária do detetor. Acabará por secar, tornando-se incapaz de segurar o detetor de forma fiável e podendo causar falsos alarmes no sistema de segurança. A queda do dispositivo também pode provocar danos.
Se o LED do detetor não se acender depois de o dispositivo ser fixado no SmartBracket, verifique o estado de tamper na app Ajax e, em seguida, verifique se está bem encaixado no painel de fixação. Se tentar separar o detetor da superfície ou do painel, receberá uma notificação.
Depois de instalar o detetor, execute o teste da zona de deteção. Em caso de funcionamento incorreto, o detetor tem de ser recolocado.
Cuidados com o detetor e substituição da bateria
Verifique regularmente a integridade do detetor MotionProtect Curtain. Limpe o detetor de pó, teias de aranha e outros contaminantes à medida que vão aparecendo. Utilize um pano seco e macio adequado para a manutenção do equipamento.
Não limpe o detetor com quaisquer substâncias que contenham álcool, acetona, gasolina ou qualquer outro solvente ativo. Limpe a lente com cuidado e delicadeza — quaisquer riscos no plástico podem reduzir a sensibilidade do detetor.
A bateria pré-instalada garante até 3 anos de funcionamento autónomo (com um Intervalo de consulta de 3 min). Se a bateria do detetor estiver quase descarregada, o sistema de segurança enviará uma notificação e o LED acender-se-á e apagar-se-á suavemente quando o detetor detetar qualquer movimento ou se o tamper for ativado.
Características técnicas
Garantia
A garantia dos produtos da empresa de responsabilidade limitada “Ajax Systems Manufacturing” é válida por 2 anos após a compra e não se aplica à bateria pré-instalada.
Se o dispositivo não funcionar corretamente, contacte primeiro o nosso serviço de apoio ao cliente — em 50% dos casos, os problemas técnicos podem ser resolvidos à distância!
Contactar o Suporte Técnico:
