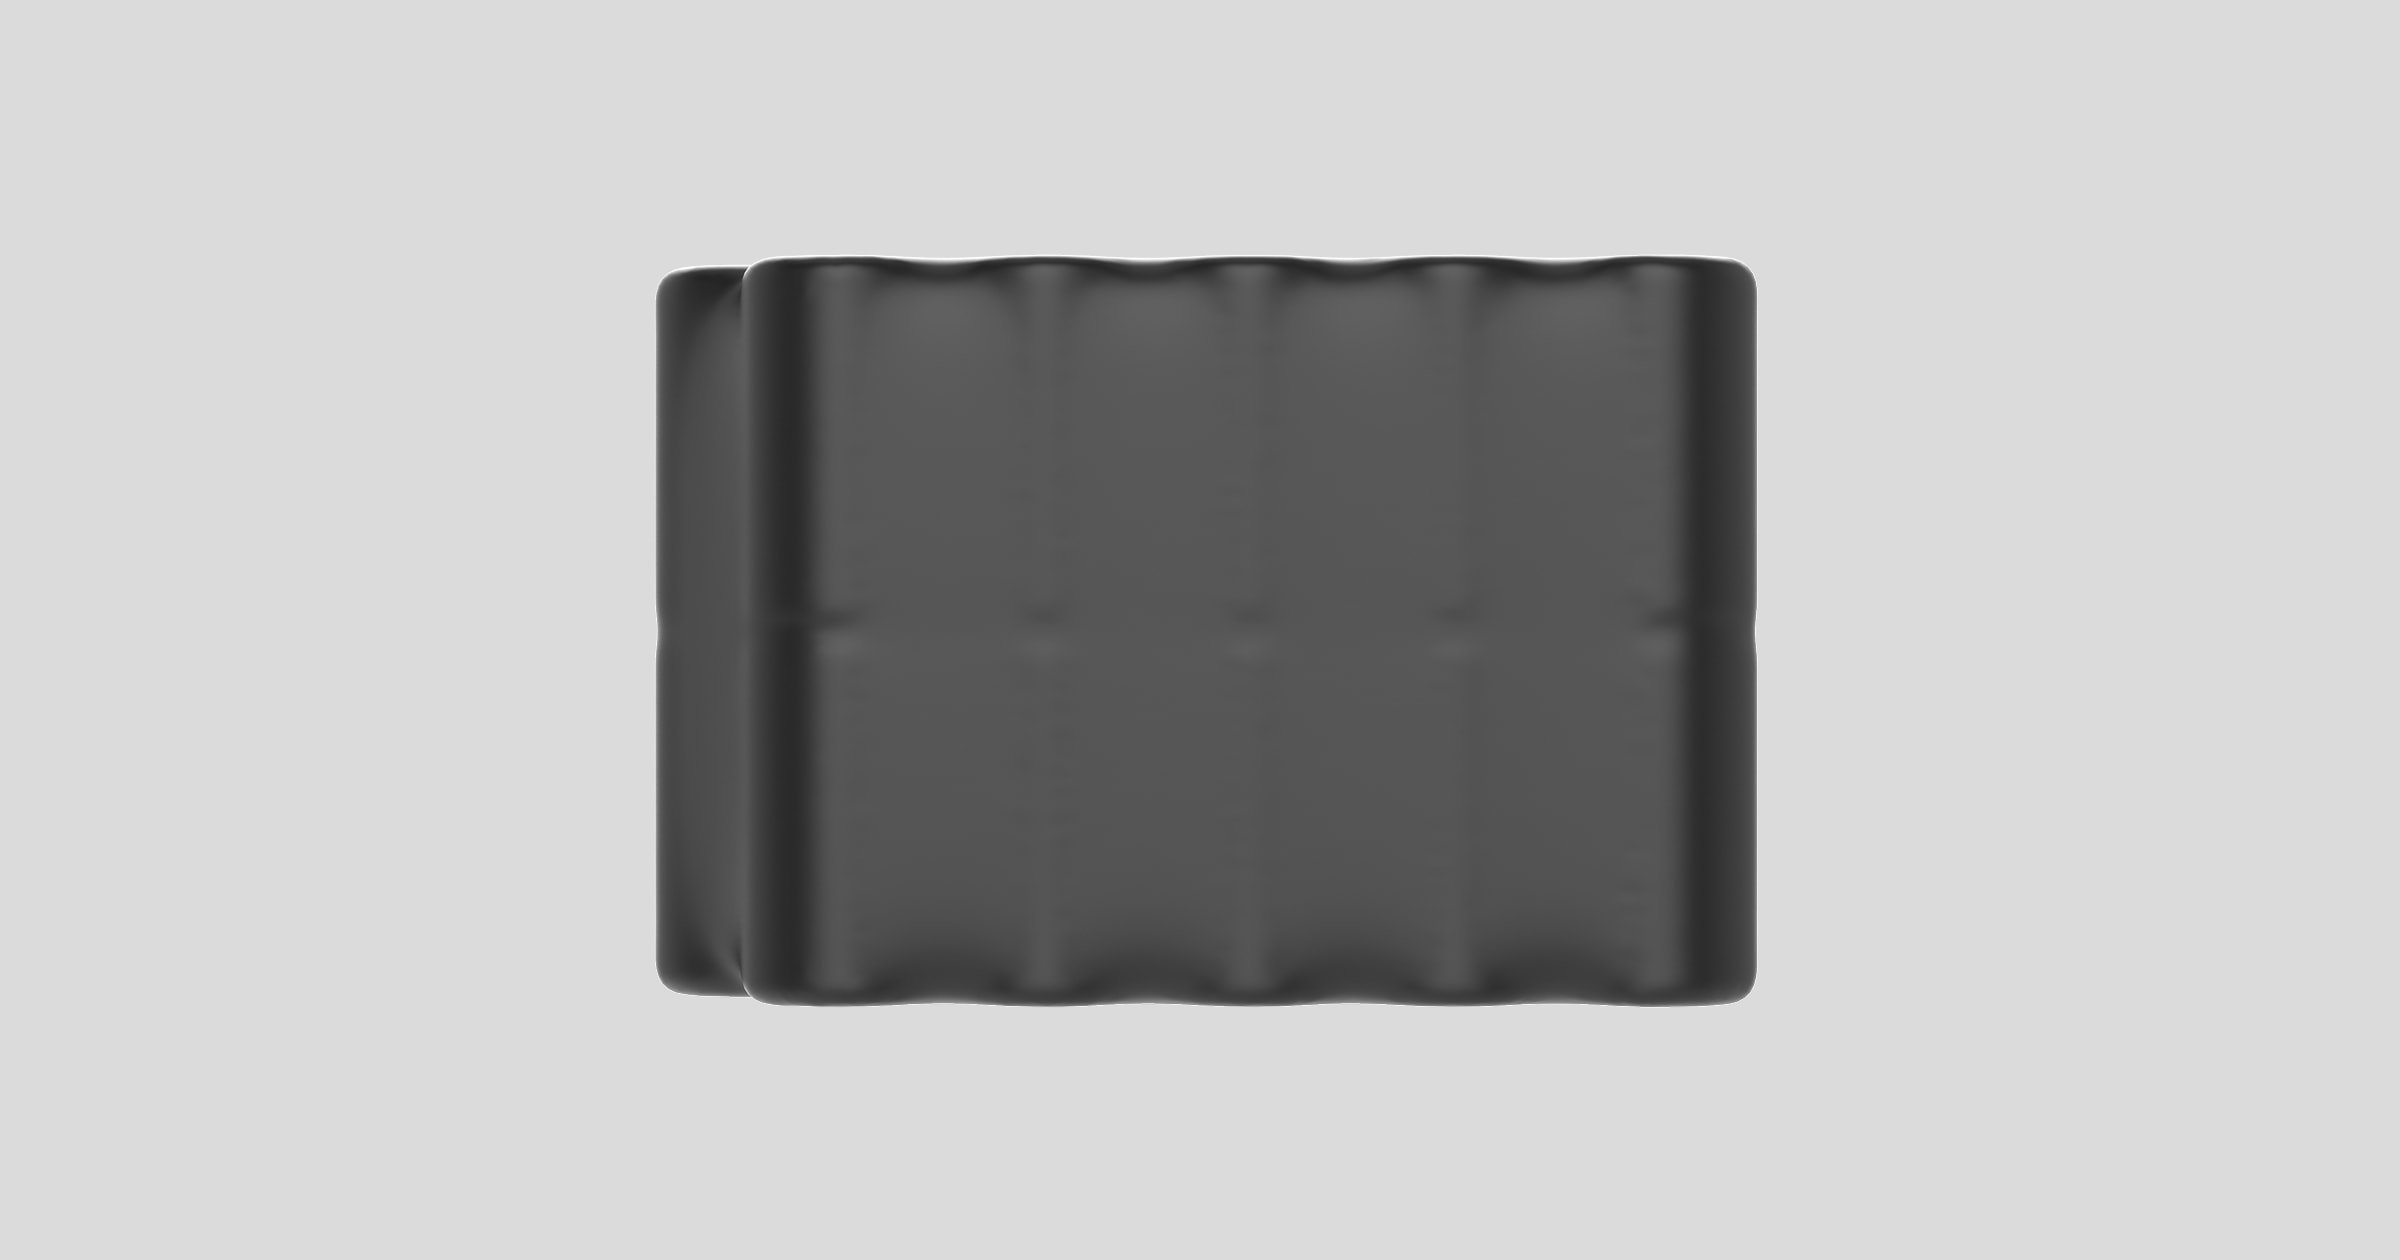
Internal battery NB (7.2V/190Ah) is a non-rechargeable lithium thionyl chloride battery for powering the compatible hub. The battery’s parameters can be set in the hub settings in Ajax PRO apps.
Functional elements
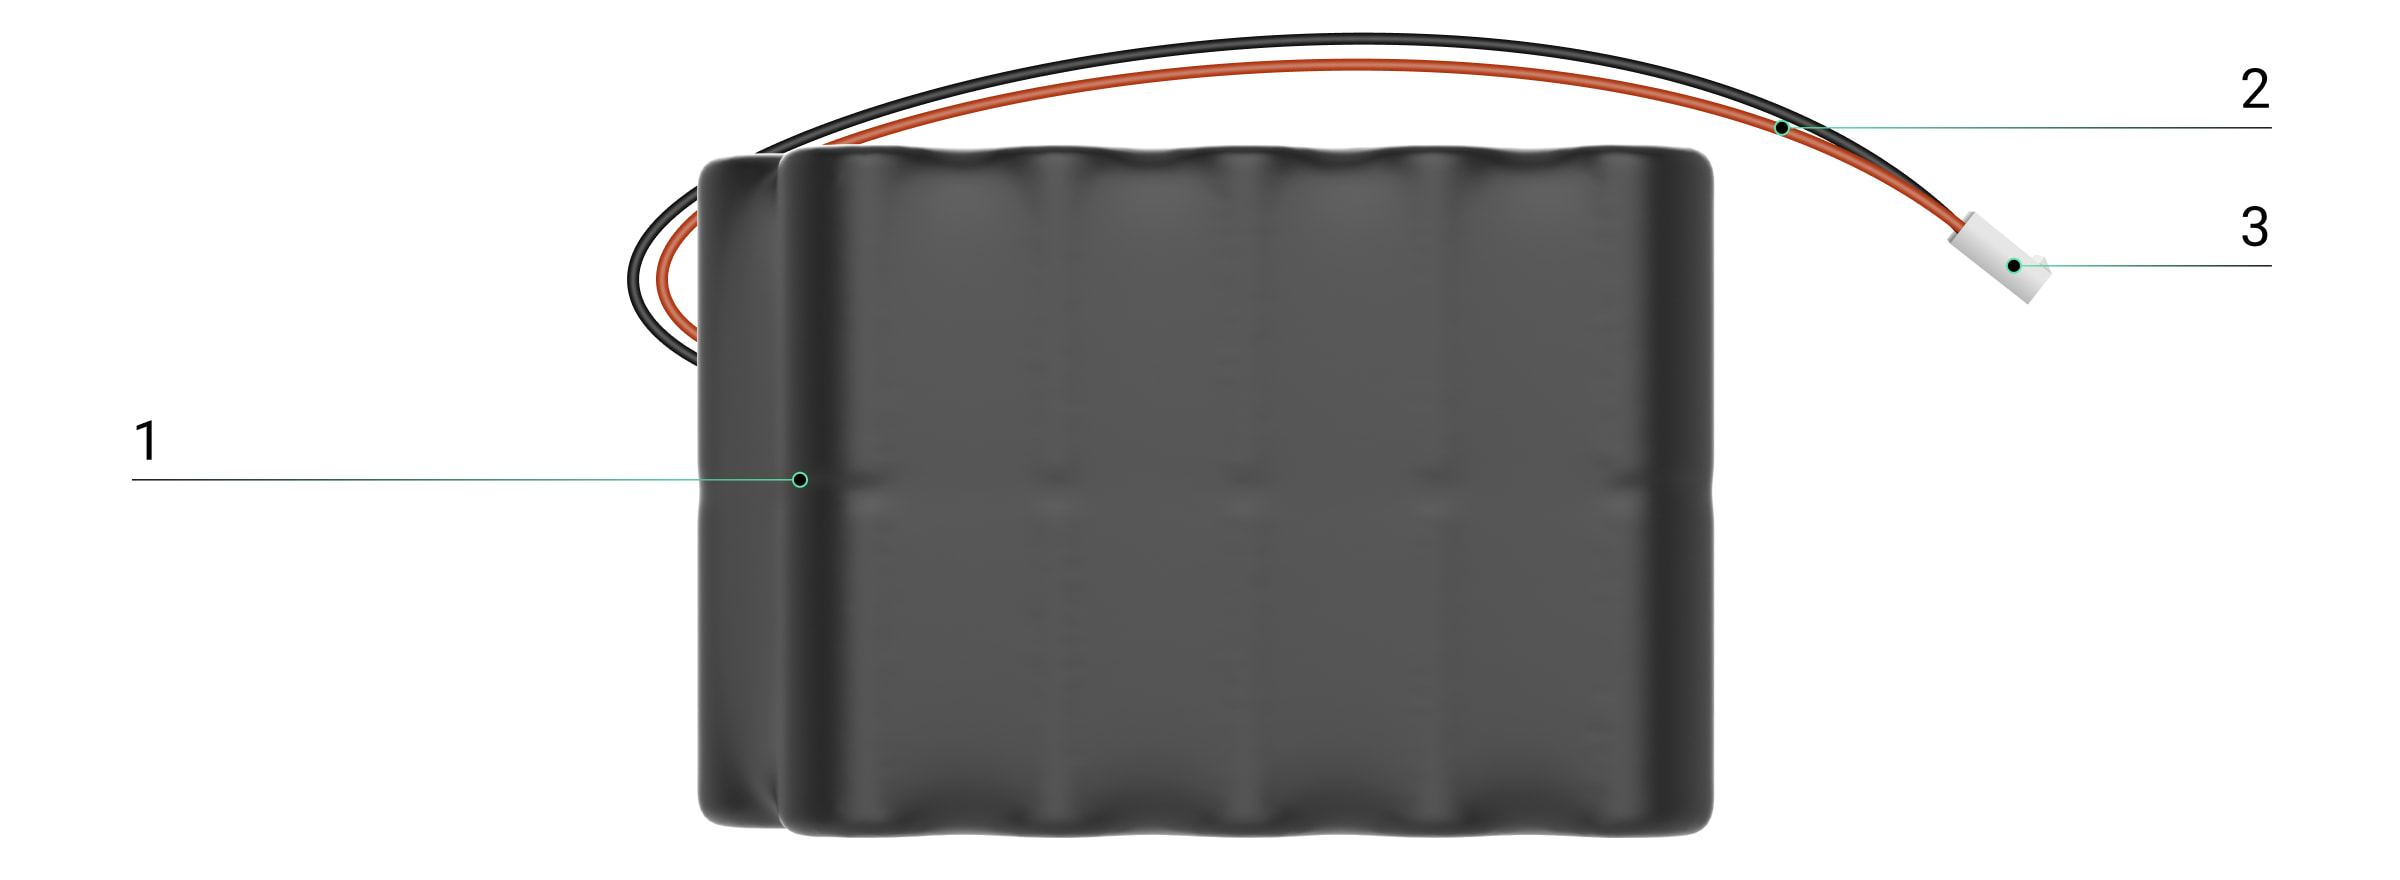
- Battery.
- Cable for connecting the battery to the hub.
- Connector for attaching the battery to the hub.
Compatible hubs
A compatible Ajax hub is required for the battery to operate.
Operating principle
Internal battery NB (7.2V/190Ah) is an internal non-rechargeable battery used to power Hub BP Jeweller (without casing). It can energize the hub both independently and as a backup power source when an external battery is used.
Selecting an installation site
When choosing the location of the battery, consider the factors that affect its operation:
- Operating temperature range.
- Permissible humidity level.
When the battery is not in use, storage temperature and humidity must comply with the permissible levels specified for the battery.
To extend the battery life, enable the Battery power saver mode.
The battery must be installed into the casing of the compatible hub.
Consider the placement recommendations when designing your Ajax system. The security system must be designed and installed by specialists. The list of recommended Ajax partners is available here.
Where the battery cannot be installed
- In places with high temperatures. For example, near heat sources, such as radiators, heaters, direct sunlight, etc. High temperatures may result in battery overheating, rapid self-discharge, damage to its components, or explosion and fire.
- In places with high humidity. Moisture may corrode the contacts or cause a short circuit.
- Near flammable materials. Never place the battery near flammable liquids or materials. Doing so increases the risk of fire or explosion, especially if a short circuit occurs.
- In the Hub BP Jeweller casing.
The battery capacity depends on its installation site. The side with the cable outlet must face upward — this orientation ensures optimal performance. With such an installation, capacity loss is minimal (up to 10%). If the battery is installed with the cable facing downward, capacity loss may increase to as much as 25%.
Low temperatures may reduce battery capacity and shorten the battery life.
Preparing for installation
Before installing Internal battery NB (7.2V/190Ah), ensure it is compatible with the hub. Also, read this manual and the hub user guide.
Cable arrangement
When preparing to route cables, check the electrical and fire safety regulations in your region. Strictly follow these standards and regulations. Tips for cable arrangement are available in this article.
Installation and configuration
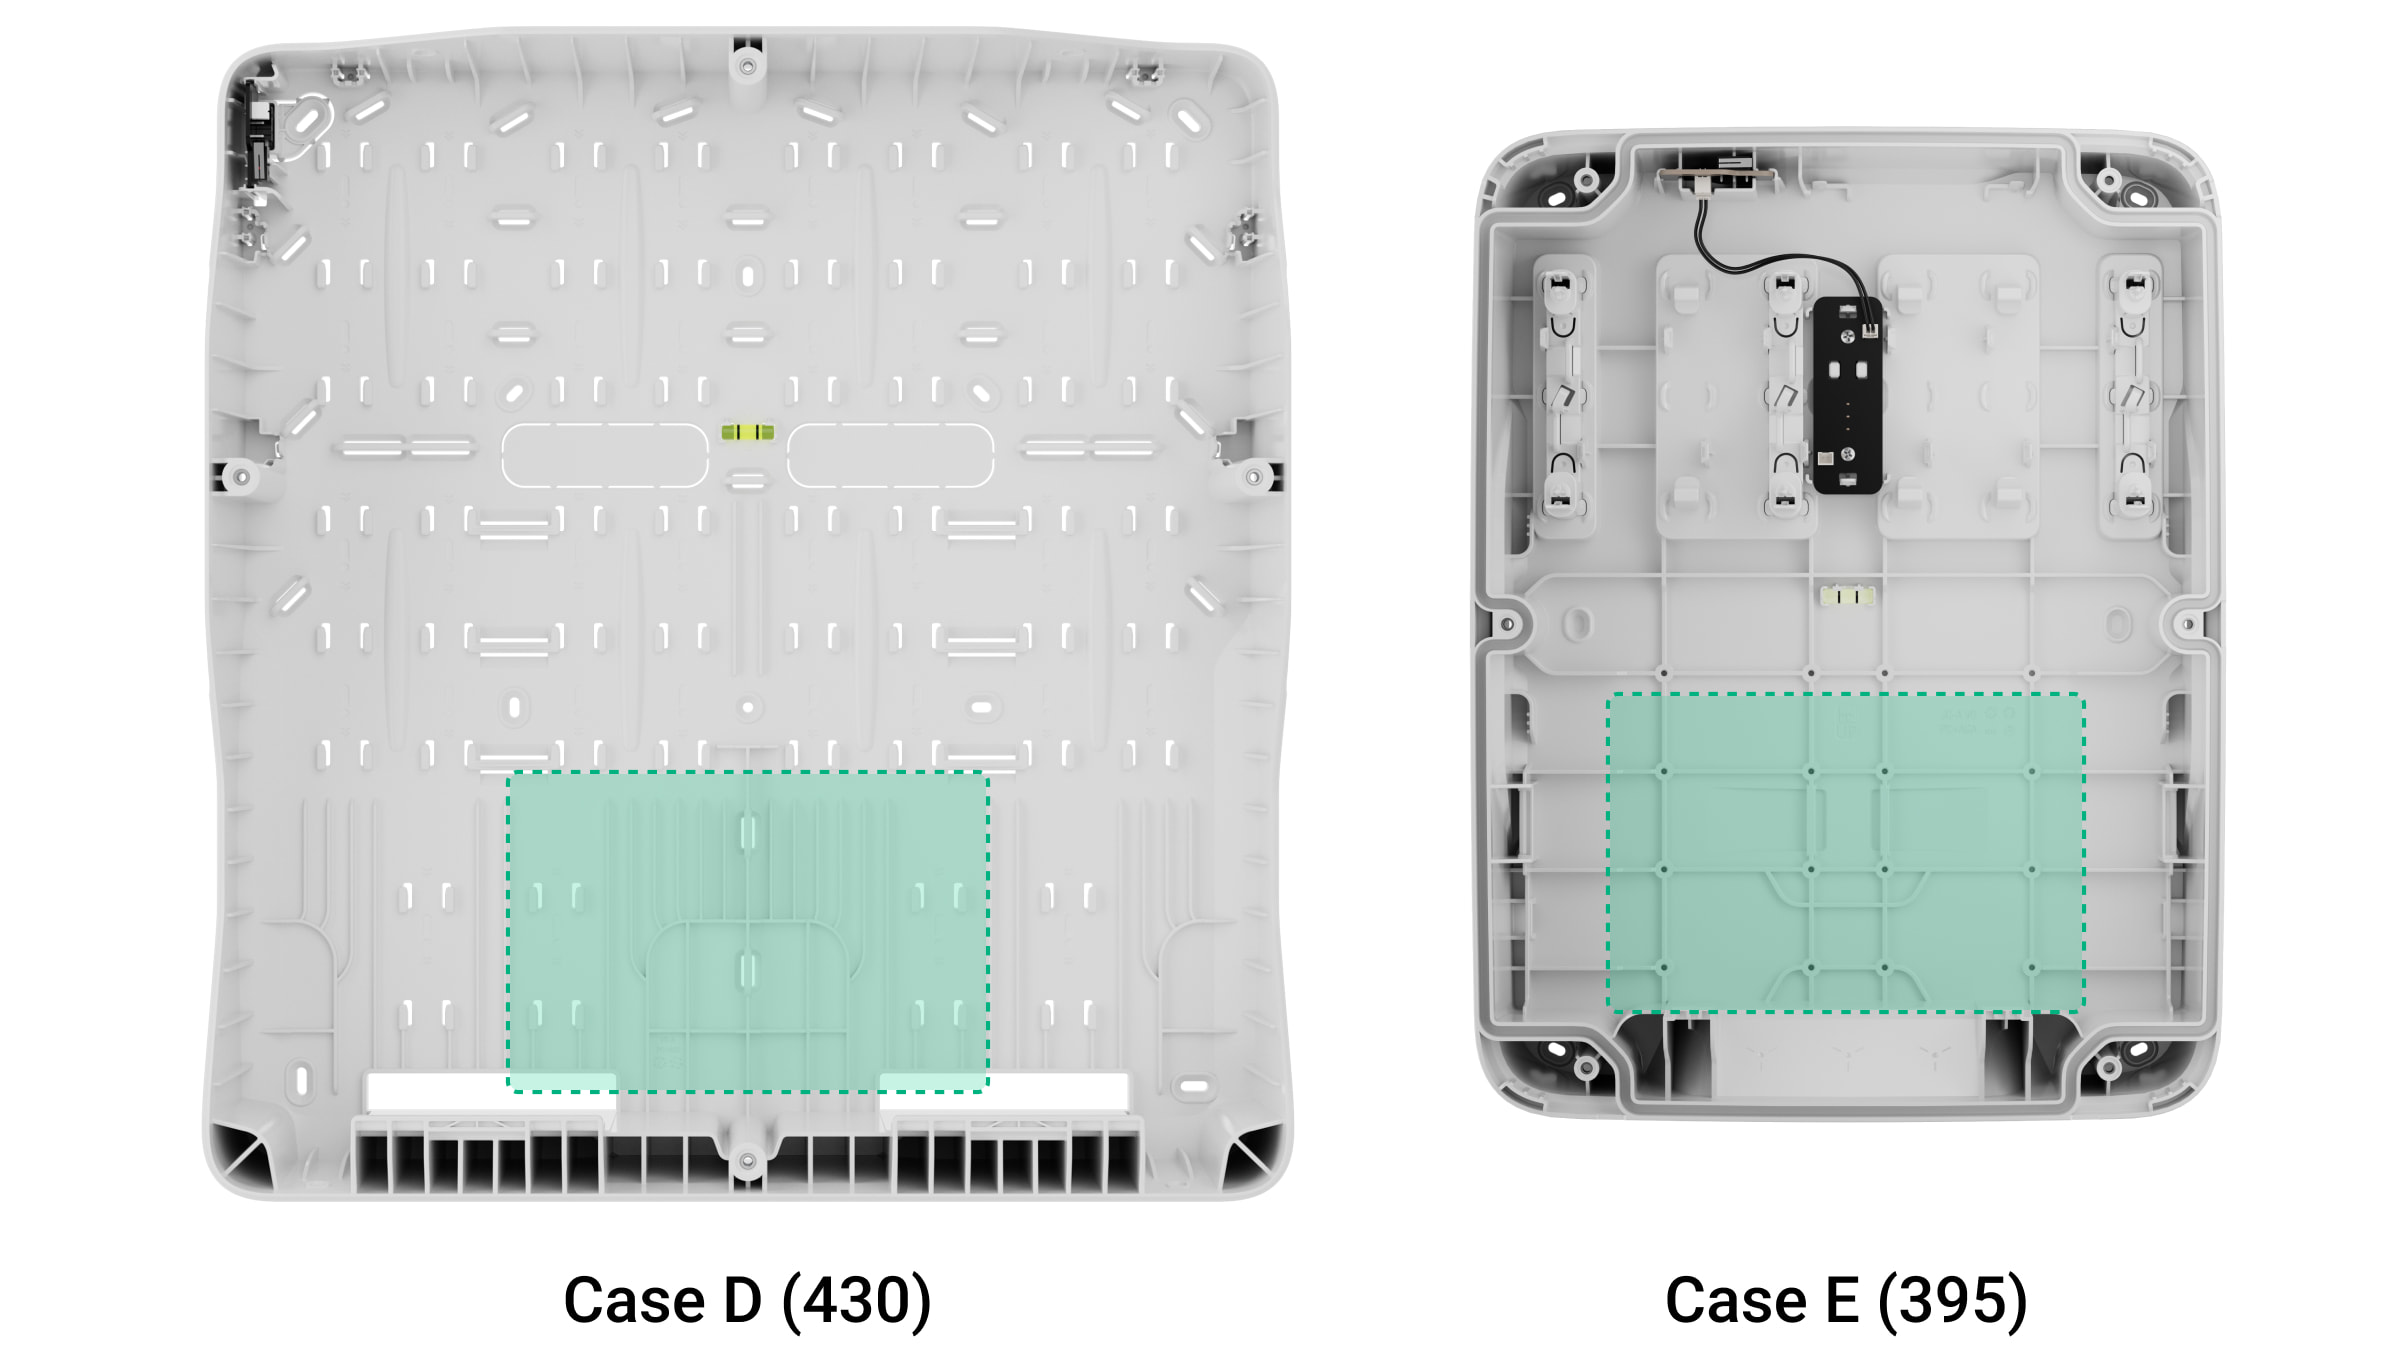
Before installation, ensure that you have selected the optimal location that meets the requirements in this manual. The battery must be installed into Case E (395) (coming soon) or Case D (430), which are sold separately.
Only a professional electrician should install the battery.
Installing the battery in the casing
Before installing the battery, read the user manuals of the compatible hub and Ajax Case. This will help you install the battery correctly and configure the hub settings.
- Remove the casing lid.
- Turn off the hub.
- Install the battery in the compatible Ajax Case.
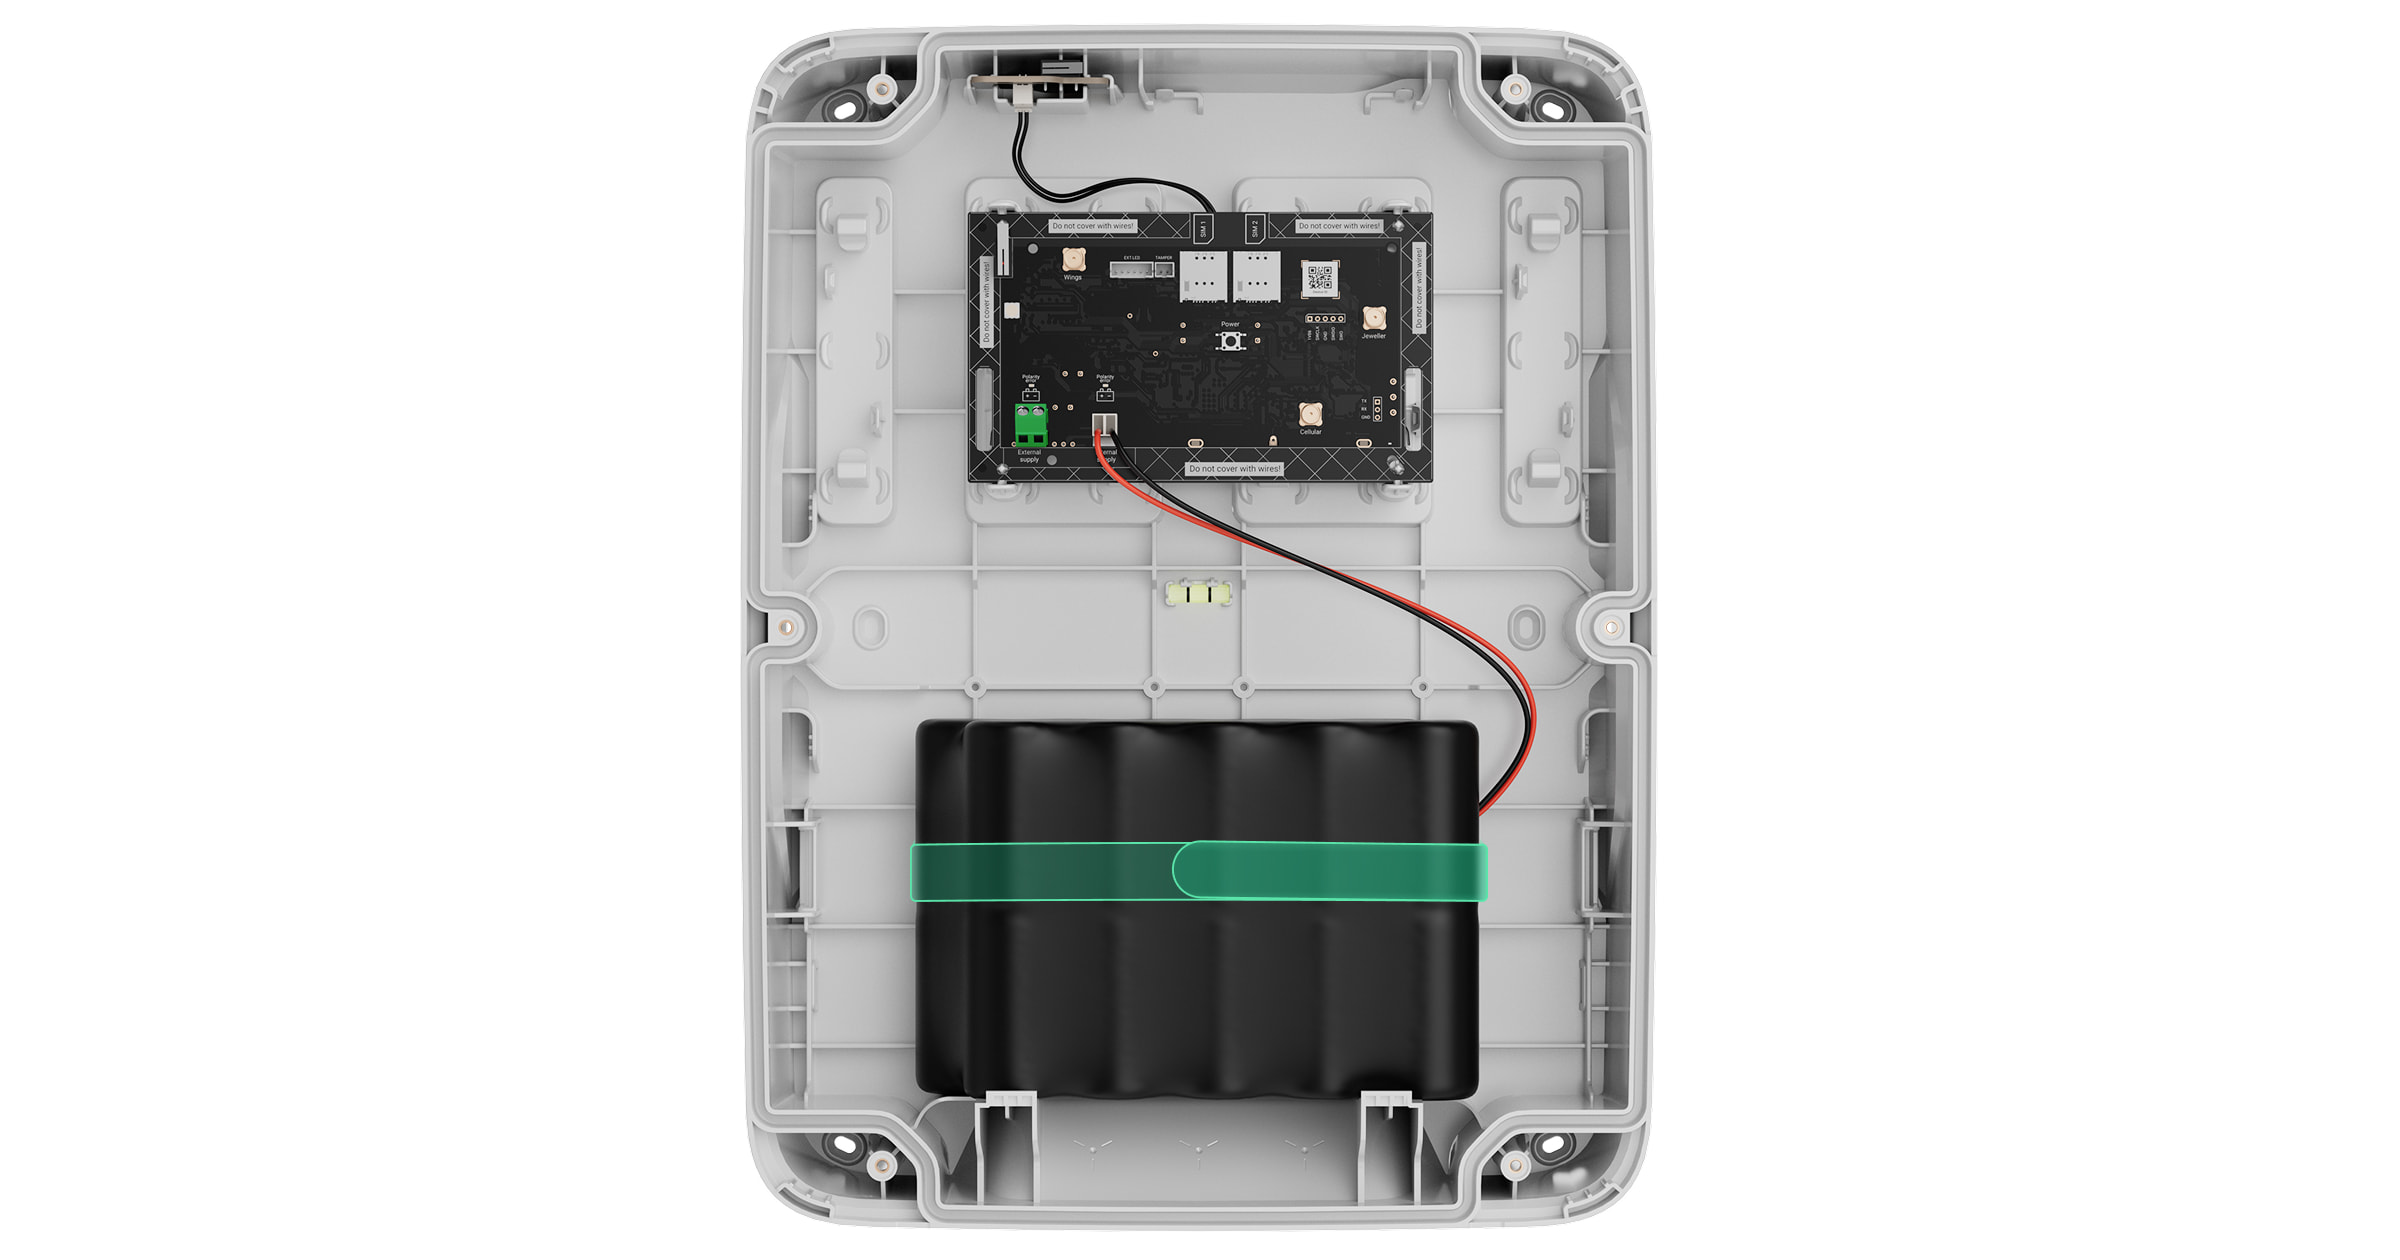
- Locate the internal battery connector on the board.
- Connect the battery to the board connector.

Observe the polarity. If the battery is connected incorrectly, it will not power the hub, and the connector can be damaged.
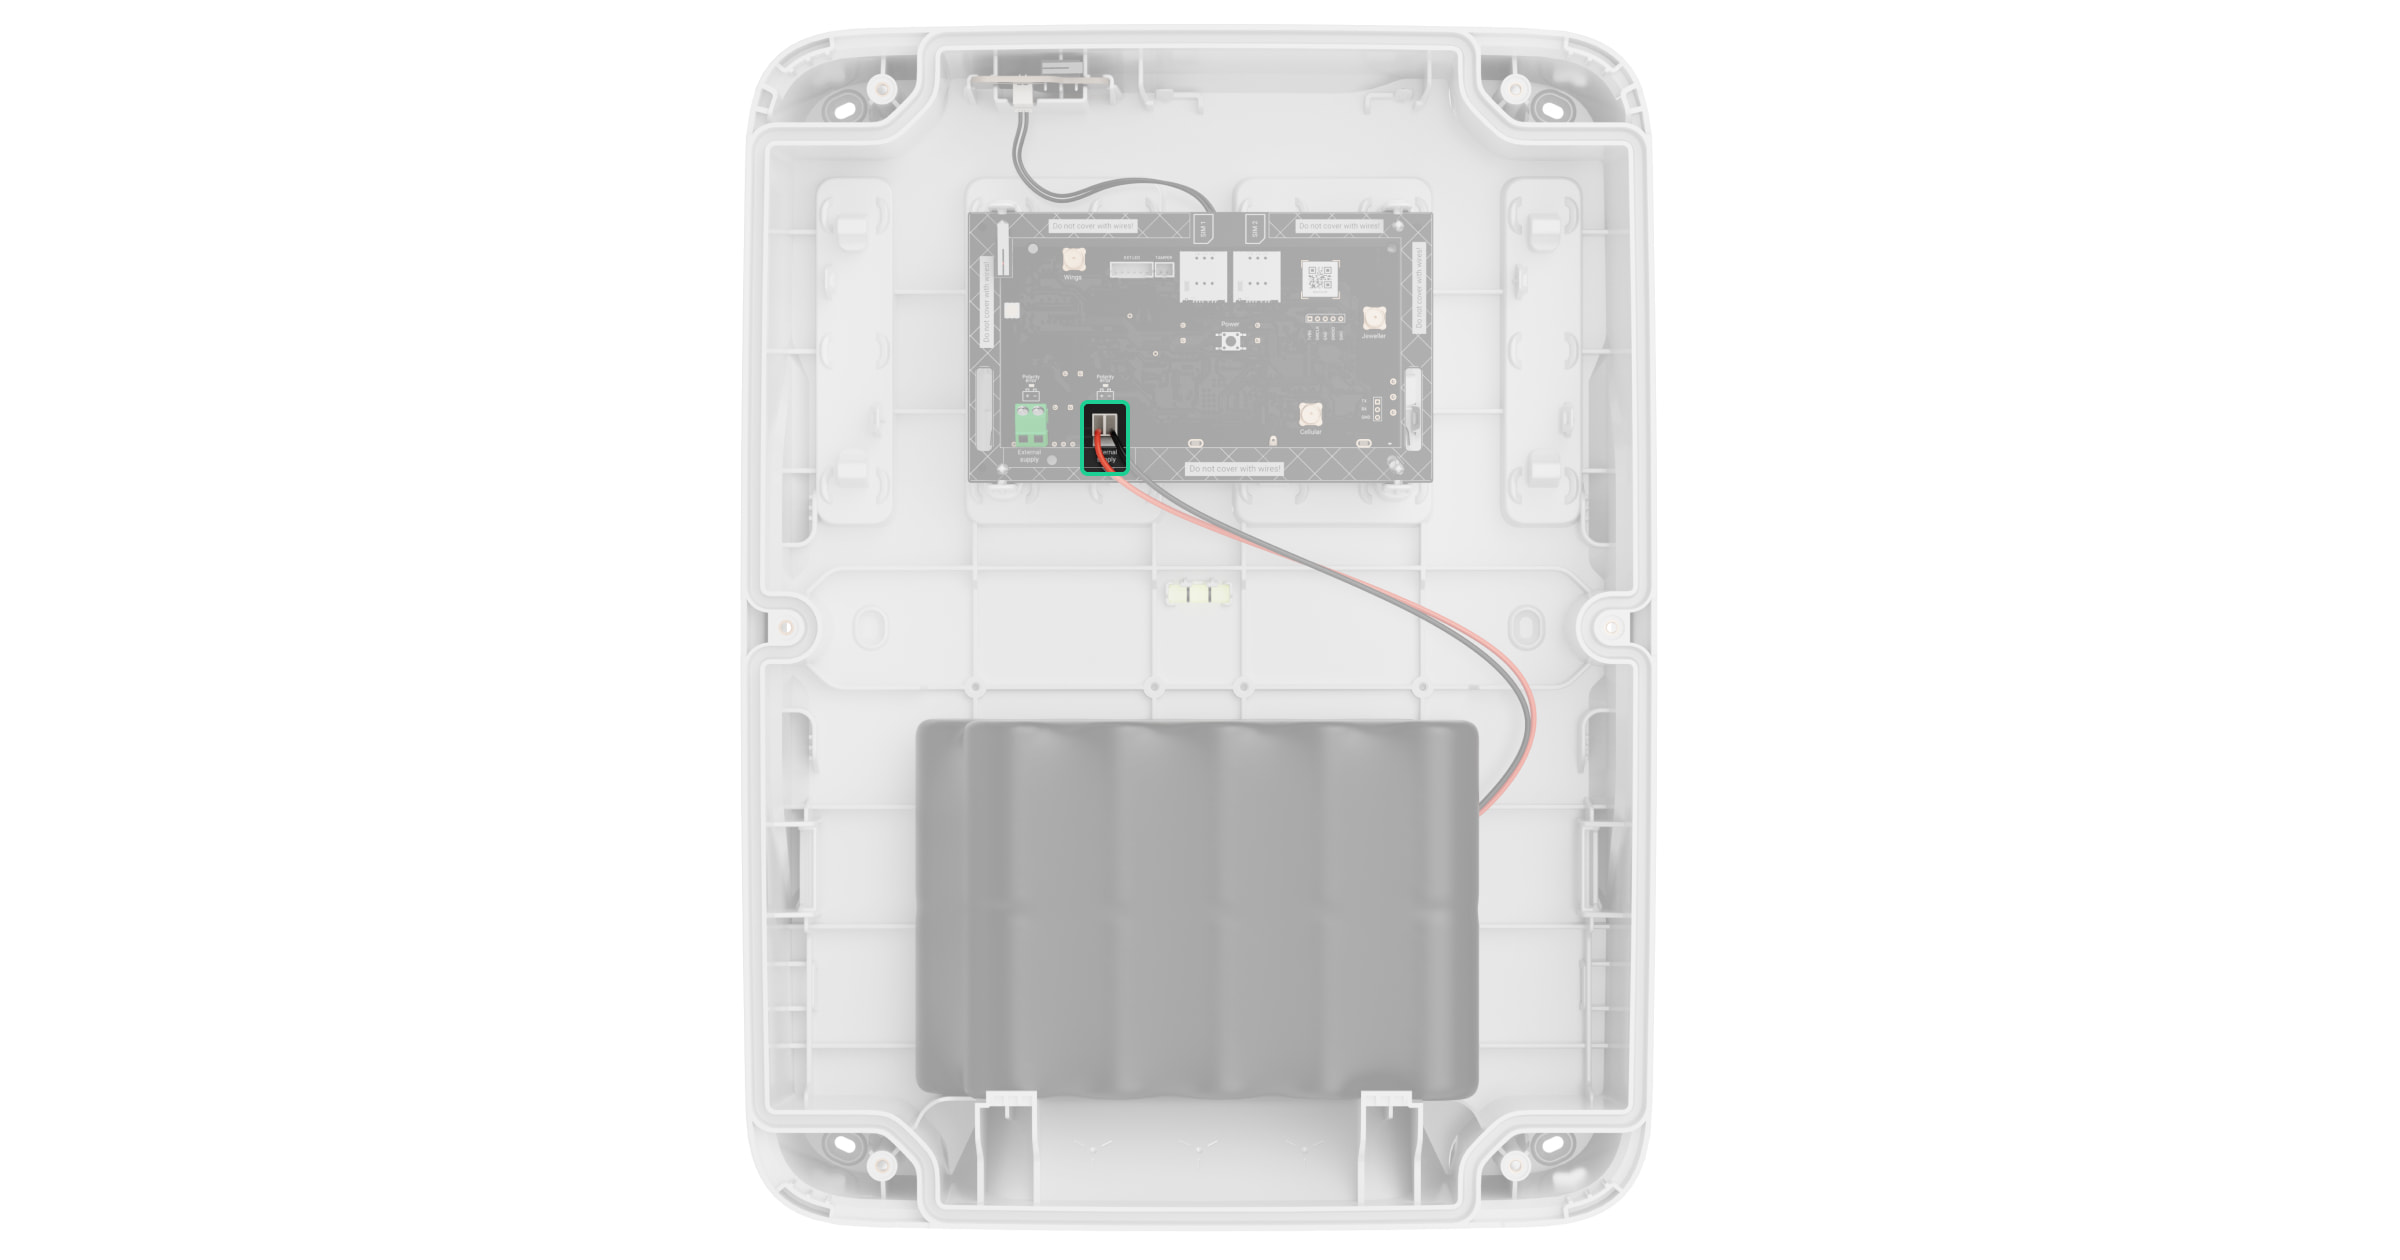

The battery cable should not lie on or under the hub board, as this may impair communication between the hub and connected devices.
- Secure the battery in the casing with the hook-and-loop fastener (included in the Case D (430) and Case E (395) complete sets). Do not tighten the fastener too much, as this may damage the board and cell contacts inside the battery.
- Turn on the hub.
- Close the casing lid.
- Select the battery type in the hub settings.
- Check the battery connection state in an Ajax app.
Configuring the battery
After installing the battery, select the correct hub settings in the Ajax PRO app.
- Select the required space or object.
- Go to the Devices
 tab.
tab. - Select the hub from the list.
- Go to its Settings
 .
. - Go to the Service menu.
- Go to the Battery settings menu.
- Select the Non-rechargeable lithium battery option for the Internal battery type setting.
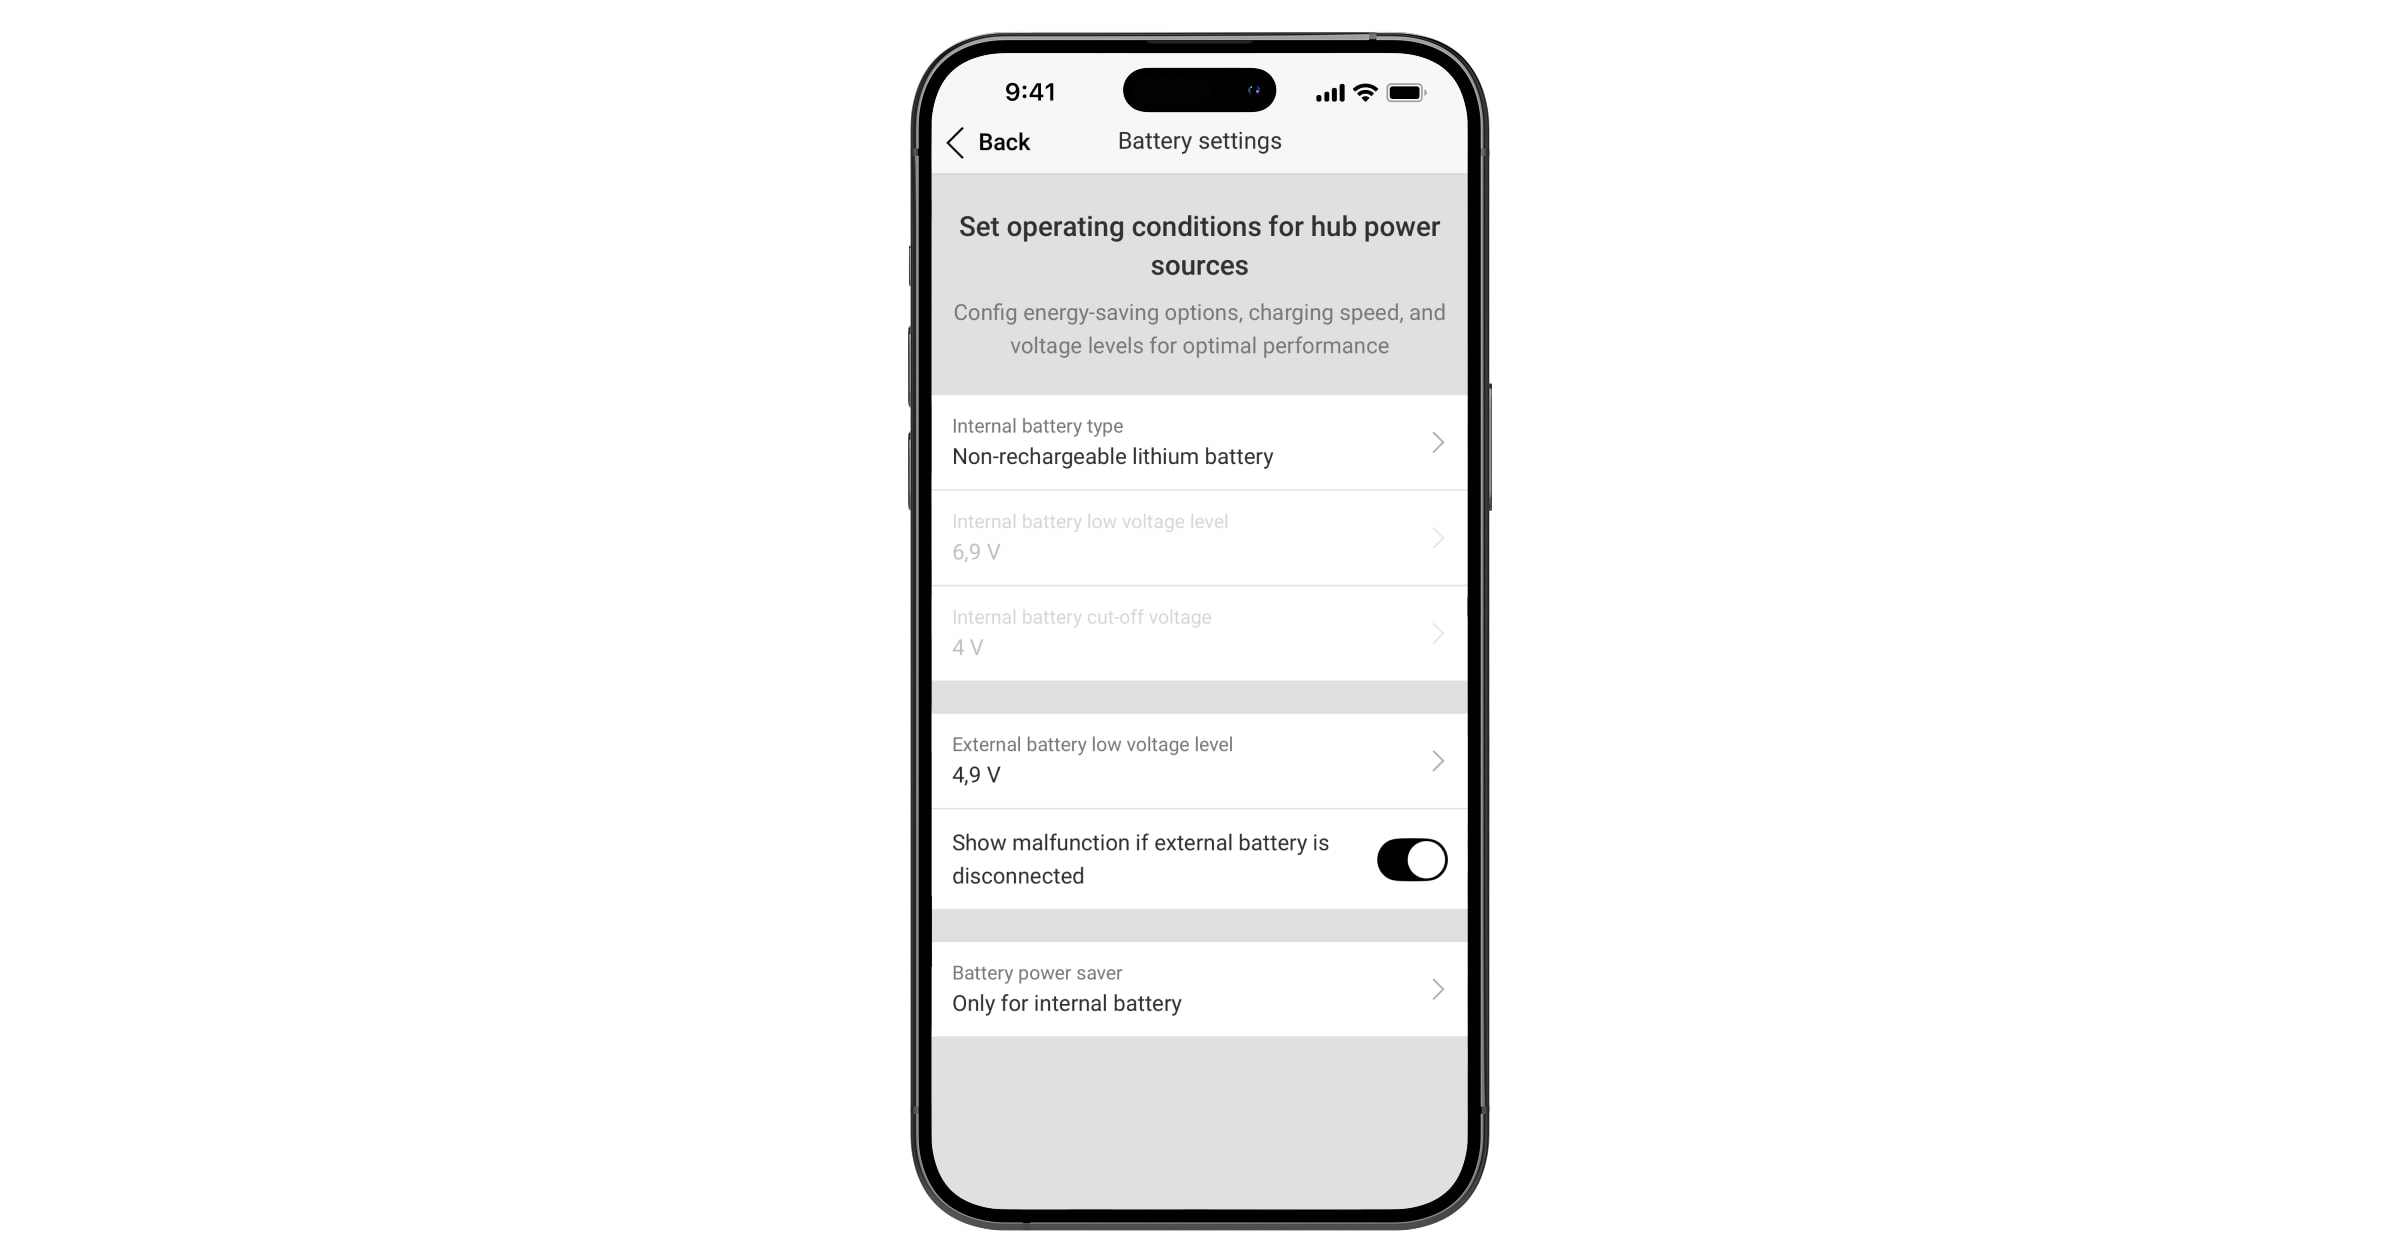
- Configure other battery settings if necessary.
- Tap Back to save the settings.
States
The hub states include information about the battery connection status. They can be found in Ajax apps:
- Go to the Devices tab.
- Select the hub from the list.
Maintenance
Internal battery NB (7.2V/190Ah) is maintenance-free and non-rechargeable.
If the battery is not used for a long time, it should be stored at a temperature from −13 °F to 149 °F. This is necessary to reduce battery degradation.
Open-circuit voltage does not reflect the actual state of charge. A charged and a discharged battery may show similar voltage without a load.
