LifeQuality Jeweller is een draadloze luchtkwaliteitsdetector. Meet de temperatuur, vochtigheid en de CO2-concentratie (koolstofdioxide) in een ruimte. Het meldt luchtvervuiling via de led-indicatie en meldingen in de Ajax-apps en maakt automatiseringsscenario’s mogelijk.
Een hub is nodig om de detector te laten werken. De lijst met compatibele hubs en signaalversterkers is hier beschikbaar.
LifeQuality is onderdeel van het Ajax-systeem en communiceert met de hub via twee beveiligde radioprotocollen: Jeweller en Wings. De detector gebruikt Jeweller om metingen te verzenden en Wings voor gegevensback-ups. Het communicatiebereik van de hub bedraagt maximaal 1.700 meter zonder obstakels.
Functionele elementen
- Led-indicatie met een aanraakknop. Meldt de luchtkwaliteit en andere detector gebeurtenissen.
- SmartBracket-montagepaneel. Om het paneel te verwijderen, draait u het tegen de klok in.
- Aan/uit-knop.
- QR-code en ID (serienummer) van het apparaat. Dit wordt gebruikt om verbinding te maken met het Ajax-systeem.
Werkingsprincipe
LifeQuality Jeweller is een draadloze luchtkwaliteitsdetector. De detector meet elke minuut de temperatuur, luchtvochtigheid en CO2-concentratie (kooldioxide).
LifeQuality-metingen zijn te zien in de Ajax-apps op het tabblad Apparaten ![]() . Een PRO of een gebruiker met rechten om het systeem te configureren kan drempels voor comfort instellen voor temperatuur, vochtigheid en CO2-concentratie (kooldioxide). Wanneer de waarden de opgegeven grenzen overschrijden, ontvangen gebruikers van de hub meldingen waarin wordt aangegeven welke waarde de drempel overschrijdt. Hiermee kunt u een optimaal microklimaat in een ruimte creëren, en op tijd reageren op de metingen van de detector.
. Een PRO of een gebruiker met rechten om het systeem te configureren kan drempels voor comfort instellen voor temperatuur, vochtigheid en CO2-concentratie (kooldioxide). Wanneer de waarden de opgegeven grenzen overschrijden, ontvangen gebruikers van de hub meldingen waarin wordt aangegeven welke waarde de drempel overschrijdt. Hiermee kunt u een optimaal microklimaat in een ruimte creëren, en op tijd reageren op de metingen van de detector.
Ajax-automatiseringsapparaten reageren op wijzigingen in LifeQuality-waarden en voeren door de gebruiker bepaalde acties uit met automatiseringsscenario’s. WallSwitch schakelt bijvoorbeeld de verwarming in wanneer de opgegeven minimumtemperatuur wordt bereikt. Door LifeQuality te gebruiken in combinatie met Ajax-automatiseringsapparaten, toevoersystemen, luchtbevochtigers en airconditioning, is het eenvoudig om binnen een comfortabel microklimaat te handhaven.
Temperatuur- en vochtigheidssensor
Temperatuur en vochtigheid worden gemeten door een ingebouwde gecombineerde SHT40-detector met digitale sensoren van de Zwitserse fabrikant Sensirion. De detector is geïnstalleerd in een geïsoleerd deel van het hoofdpaneel. Hierdoor wordt de invloed van andere componenten op het paneel uitgesloten en is de meetnauwkeurigheid gewaarborgd: de meetnauwkeurigheid van de temperatuur is ±0,2 °C en die van de luchtvochtigheid ±1,8%.
LifeQuality levert nauwkeurigere temperatuurmetingen dan andere Ajax-apparaten. Als LifeQuality in het systeem is opgenomen, wordt in de Ajax-apps op het tabblad Ruimtes ![]() alleen de temperatuur weergegeven die door LifeQuality is gemeten. De temperatuurmetingen van andere apparaten worden genegeerd. Microklimaatmetingen houden alleen rekening met gegevens van andere LifeQuality-apparaten die aan de ruimte zijn toegevoegd.
alleen de temperatuur weergegeven die door LifeQuality is gemeten. De temperatuurmetingen van andere apparaten worden genegeerd. Microklimaatmetingen houden alleen rekening met gegevens van andere LifeQuality-apparaten die aan de ruimte zijn toegevoegd.
CO2-sensor
De CO2-concentratie wordt gemeten met een ingebouwde niet-dispersieve infrarooddetector (NDIR) van de Zweedse fabrikant Senseair. Dit type detector is beschermd tegen meetfouten die kunnen ontstaan door aerosolen, parfums of dampen van andere stoffen.
Het werkingsprincipe van de detector is gebaseerd op het detecteren van veranderingen in de intensiteit van infraroodstraling. Lucht komt van nature de detectorkamer binnen, waar de infraroodlamp straling doorlaat. De wanden van de kamer weerkaatsen de infrarode straal naar de infraroodsensor, die de straling absorbeert. Met een speciale coatingtechnologie in de kamer is de meetnauwkeurigheid ± (30 + 3%) ppm.
In het migratieproces door de kamer verandert de stralingsintensiteit als gevolg van de absorptie van een deel van de straling door kooldioxidemoleculen. Wanneer de straling het eindpunt bereikt en wordt geabsorbeerd door de infraroodsensor, detecteert de detector nauwkeurig de CO2-concentratie.
Gegevensopslag
De detector meet temperatuur, het vochtigheidsniveau en de CO2-concentratie elke minuut. In de Ajax-apps kunnen gebruikers de huidige LifeQuality-metingen en de meetgeschiedenis bekijken. De meetgeschiedenis wordt weergegeven in grafieken. Grafieken tonen de trend van de geselecteerde luchtkwaliteitswaarde over het afgelopen uur, dag, week, maand of jaar. Het Ajax-systeem slaat deze gegevens maximaal 2 jaar op in de Ajax Cloud-server.
LifeQuality heeft ook een ingebouwd geheugen waarmee de detector metingen voor 72 uur kan opslaan als de communicatie met de hub of de signaalversterker wegvalt. Zodra de verbinding hersteld is, worden alle waarden naar de Ajax-apps verzonden en gesynchroniseerd met de grafieken.
Kalibratie
LifeQuality kan de CO2-sensor automatisch kalibreren. Dankzij deze functie kan de sensor voortdurend de meest nauwkeurige metingen van de kooldioxideconcentratie in de ruimte doorgeven. De temperatuur- en vochtigheidssensor wordt in de productiefase gekalibreerd en hoeft niet opnieuw gekalibreerd te worden.
De ingebouwde CO2-sensor is gekalibreerd tijdens de productiefase en wordt automatisch elke 15 dagen opnieuw gekalibreerd zonder tussenkomst van een gebruiker of installateur. De automatische kalibratie is effectief voor geventileerde ruimtes waar de CO2-concentratie minstens om de 15 dagen wordt verlaagd tot 400 ppm. Als de detector in een ongeventileerde ruimte wordt gebruikt, raden we aan om deze eenmaal per jaar handmatig te kalibreren. U kunt de kalibratie handmatig uitvoeren in Ajax-apps.
De kalibratie van de CO2-sensor kan niet worden teruggezet naar de productieversie of de vorige versie. Dit wordt van kracht zodra het kalibratieproces is voltooid. Als de procedure wordt onderbroken, behoudt het apparaat het resultaat van de vorige kalibratie.
Protocollen voor gegevensoverdracht van Jeweller en Wings
Jeweller en Wings zijn draadloze protocollen voor een snelle en betrouwbare tweezijdige verbinding tussen de hub en aangesloten apparaten. Jeweller-technologie wordt gebruikt om gebeurtenissen en meetwaarden door te geven. Als de verbinding wordt verbroken, kunt u met Wings de gegevensback-ups van de detector naar de hub sturen wanneer de verbinding wordt hersteld.
De protocollen ondersteunen blokversleuteling met een dynamische sleutel en verificatie van het apparaat bij elke sessie om sabotage en spoofen te voorkomen.
Om de verbinding met systeemapparaten te bewaken en hun status weer te geven, beschikken Ajax-apps over een systeem van hub-detector-polling met een frequentie van 12 tot 300 seconden. De polling-frequentie kan worden ingesteld door een PRO of een gebruiker met rechten om het systeem te beheren in de instellingen van de hub.
Gebeurtenissen naar de meldkamer verzenden
Het Ajax-systeem kan gebeurtenissen en alarmen verzenden naar de PRO Desktop-bewakingsapp, en naar de meldkamer via SurGard (Contact ID), SIA DC-09 (ADM-CID), ADEMCO 685 en andere protocollen. De lijst met ondersteunde protocollen vindt u hier.
Alleen meldingen bij het verlies van communicatie tussen LifeQuality en de hub (of de draadloze signaalversterker) worden doorgegeven aan de meldkamer. Gebruik PRO Desktop om alle gebeurtenissen van de slimme luchtkwaliteitsdetector te ontvangen.
Dankzij de adresseerbaarheid van Ajax-apparaten kunnen er niet alleen gebeurtenissen naar PRO Desktop en de meldkamer worden gestuurd, maar ook het type van het apparaat, de naam, de groep en de virtuele ruimte die eraan is toegewezen. De lijst van verzonden waarden kan variëren, afhankelijk van het type meldkamer en het geselecteerde communicatieprotocol.
Het ID en het loopnummer (zone) van de melder zijn beschikbaar in de statussen.
Aan het systeem toevoegen
Voordat u een apparaat toevoegt
- Installeer de Ajax-app.
- Log in op uw account of maak een nieuwe aan.
- Selecteer een space of maak een nieuwe aan.

Een space is beschikbaar voor apps van deze versies of nieuwer:
- Ajax Security System 3.0 voor iOS.
- Ajax Security System 3.0 voor Android.
- Ajax PRO: Tool for Engineers 2.0 voor iOS.
- Ajax PRO: Tool for Engineers 2.0 voor Android.
- Ajax PRO Desktop 4.0 voor macOS.
- Ajax PRO Desktop 4.0 voor Windows.
- Voeg minstens één virtuele ruimte toe.
- Voeg een compatibele hub toe aan de space. Zorg dat de hub aanstaat en toegang heeft tot het internet via een ethernetkabel, wifi, en/of een mobiel netwerk.
- Zorg ervoor dat de space is uitgeschakeld en de hub niet begint met updaten door de status in de Ajax-app te controleren.
Alleen een PRO of beheerder van een space met rechten om het systeem te configureren kan een apparaat aan de hub toevoegen.
LifeQuality moet zich binnen het dekkingsgebied van het radionetwerk van de hub bevinden. Om te werken via een ReX 2-signaalversterker, verbindt u LifeQuality eerst met de hub. Sluit vervolgens de detector aan op de signaalversterker in de instellingen.
Houd er rekening mee dat LifeQuality niet werkt met de ReX-radiosignaalversterker.
LifeQuality Jeweller toevoegen aan de hub
- Open de Ajax-app.
- Selecteer de hub als u er meerdere heeft of als u de PRO-app.
- Ga naar het tabblad Apparaten
 . Klik op Apparaat toevoegen.
 - Geef de naam van het apparaat op.
- Scan de QR-code van de hub of voer de ID handmatig in. De QR-code bevindt zich op de behuizing en op de verpakking van het apparaat. De ID vindt u onder de QR-code.
- Selecteer een virtuele ruimte en beveiligingsgroep (als de groepsmodus ingeschakeld).
- Klik op Toevoegen.
Als het maximale aantal apparaten aan de hub wordt toegevoegd, ontvangt u een melding als de limiet van de hub wordt overschreden. Het aantal apparaten dat u op de hub kunt aansluiten, hangt af van het model van de hub.
- Zet LifeQuality aan door de aan/uit-knop 3 seconden ingedrukt te houden. Het verbindingsverzoek met de hub wordt alleen verzonden als de melder is ingeschakeld. Als het koppelen van de melder met de hub mislukt, probeer het dan na 5 seconden opnieuw.
De melder kan geen verbinding maken met de hub als ze op verschillende radiofrequenties werken. Het radiofrequentiebereik van het apparaat kan per regio verschillen. Neem alstublieft contact op met onze technische ondersteuning voor informatie over het operationele frequentiebereik van uw apparaten.
Eenmaal verbonden verschijnt LifeQuality in de apparatenlijst van de Ajax-app. De statusupdate van het apparaat hangt af van het polling-interval dat is ingesteld in de instellingen van Jeweller of Jeweller/Fibra. De standaardwaarde is 36 seconden.
LifeQuality werkt met slechts één hub. Als de melder is verbonden met een nieuwe hub, stopt het met het verzenden van gegevens naar de oude hub. Zodra LifeQuality is toegevoegd aan een nieuwe hub, wordt deze niet verwijderd van de apparatenlijst van de oude hub. Dit moet gedaan worden via de Ajax-apps.
Indicatie
De led-indicatie van LifeQuality kan de status van de detector en de luchtkwaliteit weergeven.
| Led-indicatie | Gebeurtenis | Opmerkingen |
| Licht langzaam op en gaat langzaam uit na het aantikken van de led van het apparaat. | Scherm met gekozen waarden: temperatuur, vochtigheid, het CO2-niveau, verslechtering van een waarde. |
De kleur van de led van het apparaat is afhankelijk van de geselecteerde waarde. Wanneer temperatuur, vochtigheidsniveau of verslechtering van een indicator is geselecteerd:
Wanneer de CO2-concentratie (koolstofdioxide) in de lucht is geselecteerd:
De detector reageert niet op het tikken op de led van het apparaat als de batterijen leeg zijn. |
| Knippert elke drie seconden met de kleur van het huidige niveau. | Scherm met gekozen waarden: temperatuur, vochtigheid, het CO2-niveau, verslechtering van een waarde. |
De kleur van de led van het apparaat is afhankelijk van de geselecteerde waarde. Wanneer temperatuur, vochtigheidsniveau of verslechtering van een indicator is geselecteerd:
Wanneer de CO2-concentratie (koolstofdioxide) in de lucht is geselecteerd:
Het logo licht kort op als de optie Informeer bij abnormale waarden is ingeschakeld in de instellingen. |
| Licht 1 seconde groen op. | De melder wordt ingeschakeld. | |
| Licht rood op en knippert dan drie keer. | De melder wordt uitgeschakeld. | |
| Licht rood op. | Op de aan/uit-knop drukken wanneer de detector aan staat. | Verschijnt alleen als de aan/uit-knop wordt ingedrukt. Als de knop langer dan 2 seconden wordt ingedrukt, gaat de detector drie keer kort branden en schakelt vervolgens uit. |
| Knippert zes keer rood en knippert dan nog drie keer, maar sneller. | De melder is van de hub verwijderd. | Licht op wanneer de detector informatie ontvangt dat deze van de hub is verwijderd. |
| Licht 1 seconde groen op. Knippert zes keer rood en knippert dan nog drie keer, maar sneller. | Een detector inschakelen die niet aan de hub is toegevoegd. | |
| Licht driemaal langzaam rood op. | Batterij bijna leeg. | Licht op na tikken op de led van het apparaat. |
| Licht langzaam blauw op met een interval van 6 seconden. | De CO2-sensor (koolstofdioxide) wordt gekalibreerd. | Kalibratie duurt maximaal 20 minuten. |
| Licht 1 seconde rood op. | De versnellingsmeter is geactiveerd, de detector is verplaatst. |
Testen van de functionaliteit
Het Ajax-systeem biedt verschillende tests voor het kiezen van een installatieplaats met een stabiel signaal voor de apparaten. De Jeweller- en Wings-signaalsterktetests zijn beschikbaar voor LifeQuality. Deze test bepaalt de sterkte en stabiliteit van het signaal op de beoogde locatie van het apparaat.
Om een test uit te voeren, in de Ajax app:
- Selecteer de hub als u er meerdere heeft of als u de PRO-app.
- Ga naar het tabblad Apparaten .
- Selecteer LifeQuality.
- Ga naar de instellingen door op het tandwielpictogram te klikken
 .
. - Selecteer de test.
- Voer de test uit volgens de aanwijzingen van de app.
TDe tests starten niet onmiddellijk, maar niet later dan een enkel pinginterval tussen de hub en detector (standaard 36 seconden). U kunt het ping-interval van het apparaat wijzigen in het menu Jeweller (of Jeweller/Fibra) in de instellingen van de hub.
Pictogrammen
Pictogrammen geven enkele statussen van LifeQuality en de gemeten indicatoren van de luchtkwaliteit aan. U kunt ze in de Ajax-app inzien via het tabblad Apparaten![]() .
.
Statuspictogrammen
| Pictogram | Waarde |
|
Jeweller-signaalsterkte tussen LifeQuality en de hub (of signaalversterker). De aanbevolen waarde is twee of drie streepjes. |
|
|
Laadniveau van de LifeQuality-batterij. |
|
| Storing gedetecteerd. De lijst met storingen is beschikbaar in de statussen van het apparaat. | |
| LifeQuality is verbonden via de signaalversterker. | |
|
LifeQuality is uitgeschakeld. |
|
| Het apparaat heeft de verbinding met de hub verloren of de hub heeft de verbinding met de Ajax Cloud server verloren. | |
|
Het apparaat is niet overgezet naar de nieuwe hub. |
Pictogrammen voor luchtkwaliteit
|
Luchttemperatuur in de ruimte waar LifeQuality is geïnstalleerd. Gemeten in Celsius of Fahrenheit, dit is afhankelijk van de instellingen van de app. In de normale status is de tekst zwart gekleurd. De tekst verandert naar geel wanneer de temperatuur buiten de comfortgrenzen valt die in de instellingen zijn ingesteld. |
|
|
Vochtigheidsniveau in de ruimte waar LifeQuality is geïnstalleerd. Gemeten in procenten. In de normale status is de tekst zwart gekleurd. De tekst verandert naar geel wanneer de vochtigheidsgraad buiten de comfortgrenzen valt die in de instellingen zijn ingesteld. |
|
|
Niveau van CO2-concentratie (koolstofdioxide) in de ruimte waar LifeQuality is geïnstalleerd. Gemeten in ppm (parts per million). De kleur van de tekst hangt af van de concentratie:
|
Statussen
Het statusscherm bevat informatie over het apparaat en de bedrijfswaarden. U kunt de statussen van LifeQuality bekijken in de Ajax-apps. Om ze te bekijken:
- Open de Ajax-app.
- Selecteer de hub als u er meerdere heeft of als u de PRO-app.
- Ga naar het tabblad Apparaten .
- Selecteer LifeQuality in de lijst.
| Waarde | Betekenis |
| Gegevensimport | Geeft de fout weer bij het overzetten van gegevens naar de nieuwe hub:
|
| Storing |
Als u op Het veld wordt alleen weergegeven als er een storing is gedetecteerd. |
| Temperatuur |
Luchttemperatuur in de ruimte waar LifeQuality is geïnstalleerd. Gemeten in Celsius of Fahrenheit, dit is afhankelijk van de instellingen van de app. In de normale status is de tekst zwart gekleurd. De tekst verandert van kleur als de temperatuur buiten de opgegeven grenzen valt. |
| Vochtigheid |
Vochtigheidsniveau in de ruimte waar LifeQuality is geïnstalleerd. Gemeten in procenten. In de normale status is de tekst zwart gekleurd. De tekst verandert van kleur als de vochtigheidsgraad buiten de opgegeven grenzen valt. |
| CO2-niveau |
Niveau van CO2-concentratie (koolstofdioxide) in de ruimte waar LifeQuality is geïnstalleerd. Gemeten in ppm (parts per million). De kleur van de tekst hangt af van de concentratie:
|
| Jeweller-signaalsterkte |
Signaalsterkte tussen LifeQuality en de hub of draadloze signaalversterker via Jeweller. De aanbevolen waarde is twee of drie streepjes. Jeweller is een protocol voor het verzenden van gebeurtenissen en alarmen van LifeQuality. |
| Verbinding via Jeweller | Verbindingsstatus tussen LifeQuality en de hub of een signaalversterker via Jeweller:
|
| Wings-signaalsterkte |
Signaalsterkte tussen LifeQuality en de hub of de signaalversterker via het Wings-kanaal. De aanbevolen waarde is twee of drie streepjes. Wings is een protocol voor het verzenden van de back-upgegevens van LifeQuality. |
| Verbinding via Wings | Verbindingsstatus tussen LifeQuality en de hub of een signaalversterker via Wings:
|
| Batterijlading | De batterijlading van het apparaat:
Als de laadniveau laag is, ontvangen de Ajax-apps en het beveiligingsbedrijf een gerelateerde melding. Na de melding dat de batterij bijna leeg is, kan de detector nog enkele maanden werken onder normale omstandigheden. We raden echter wel aan om de batterijen direct te vervangen nadat u de melding heeft ontvangen. Zo wordt de batterijlading weergegeven |
| Alarm bij verplaatsing | Alarmstatus wanneer de versnellingsmeter geactiveerd wordt:
Het alarm wordt geactiveerd als de behuizing wordt gedraaid of verwijderd van het SmartBracket-montagepaneel. |
| Naam van de radiosignaalversterker | Wordt weergegeven wanneer het apparaat werkt via een signaalversterker. |
| Permanente deactivering | Geeft de status van de deactiveringsfunctie van het apparaat weer:
|
| Firmware | De firmwareversie van LifeQuality. |
| Apparaat-ID | LifeQuality ID (serienummer). Het bevindt zich ook op de behuizing onder de QR-code en de verpakking van het apparaat. |
| Apparaatnr. | Lusnummer (zone) van LifeQuality. Gebeurtenissen worden naar de meldkamer gestuurd met dit nummer. |
Instellingen
Zo past u de instellingen van LifeQuality aan in de Ajax-app:
- Open de Ajax-app.
- Selecteer de hub als u er meerdere heeft of als u de PRO-app gebruikt.
- Ga naar het tabblad Apparaten .
- Selecteer LifeQuality in de lijst.
- Ga naar de Instellingen door op het tandwielpictogram te klikken.
- Stel de vereiste instellingen in.
- Klik op Terug om de nieuwe instellingen op te slaan.
| Instellingen | Waarde |
| Naam |
Naam van de melder. Wordt getoond in de lijst van alle hub-apparaten, sms-berichten en notificaties in het logboek. Als u de naam wilt aanpassen, klikt u op het tekstveld. De naam kan uit maximaal 12 cyrillische tekens of 24 Latijnse tekens bestaan. |
| Ruimte |
De virtuele ruimte waaraan het apparaat is toegewezen. Als u de ruimte wilt aanpassen, klikt u op het veld. De naam van de ruimte wordt weergegeven in de sms-berichten en meldingen in het logboek. |
| Instellingen luchtmonitor | |
| Temperatuur |
De instellingen van de onder- en bovengrens van een comfortabele temperatuur. Als de temperatuur deze limieten overschrijdt, ontvangen gebruikers hiervan een melding. De temperatuur kan worden ingesteld tussen 0 en +50 °C. |
| Vochtigheid |
De instellingen van de onder- en bovengrenzen van een comfortabel luchtvochtigheidsniveau. Als de luchtvochtigheidsgraad deze limieten overschrijdt, ontvangen gebruikers hiervan een melding. De luchtvochtigheid kan worden ingesteld binnen een bereik van 0% tot 100%. |
| CO2-niveau |
De instellingen van de onder- en bovengrens van een comfortabele kooldioxideconcentratie in de lucht. Als de concentratie deze limieten overschrijdt, ontvangen gebruikers hiervan een melding. De CO2-concentratie kan worden ingesteld binnen het bereik van 400 ppm tot 2500 ppm. |
| Meldingen | Meldingen die gebruikers ontvangen van LifeQuality:
|
| Gevoeligheid | De instellingen van de gevoeligheidsdrempel voor de sensoren van het apparaat en de periode waarbinnen gebruikers op de hoogte worden gesteld van verslechtering bij de luchtkwaliteit:
|
| Led-indicatie | De instellingen van de waarden die worden aangegeven na het drukken op de led van het apparaat:
Als de schakelaar Informeer bij abnormale waarden is ingeschakeld, knippert de led van het apparaat zodra de geselecteerde waarde de acceptabele grens overschrijdt die zijn bepaald in de instellingen van het apparaat. Het inschakelen van de optie verkort de batterijduur van het apparaat. |
| Scenario’s |
Het menu voor het instellen van automatiseringsscenario’s op basis van temperatuur, luchtvochtigheid en CO2-niveau. |
| Jeweller-signaalsterktetest |
Schakelt het apparaat naar de testmodus voor de signaalsterkte van Jeweller. De test helpt bij het controleren van de signaalsterkte tussen het apparaat en de hub of signaalversterker om de optimale installatieplaats voor LifeQuality te bepalen. De aanbevolen waarde is twee of drie streepjes. |
| Wings-signaalsterktetest |
Schakelt het apparaat naar de testmodus voor de signaalsterkte van Wings. De test helpt bij het controleren van de signaalsterkte tussen het apparaat en de hub of signaalversterker om de optimale installatieplaats voor LifeQuality te bepalen. De aanbevolen waarde is twee of drie streepjes. |
| CO2-sensorkalibratie |
Start de handmatige kalibratie van de kooldioxidesensor. Kalibratie is vereist als de detector in een ongeventileerde ruimte wordt geïnstalleerd. Onder deze omstandigheden moet het apparaat eenmaal per jaar handmatig worden gekalibreerd. |
| Gebruikershandleiding | Opent de Gebruikershandleiding van LifeQuality in de Ajax-app. |
| Permanente deactivering | Hiermee kan het apparaat uitgeschakeld worden zonder het uit het systeem te verwijderen. Er zijn twee opties beschikbaar:
|
| Ontkoppelen | Koppelt LifeQuality los van de hub en wist de instellingen. |
Scenario’s instellen
- Open de Ajax-app.
- Selecteer de hub als u er meerdere heeft of als u de PRO-app.
- Ga naar het tabblad Apparaten .
- Selecteer LifeQuality in de lijst.
- Ga naar de Instellingen door op het tandwielpictogram te klikken.
- Ga naar het menu Scenario’s.
- Kies een van de indicatoren:
- Temperatuur
- Vochtigheid
- CO2
- Bepaalde grenzen van de waarden:
- Hoger Dan of Lager Dan om te bepalen welke gebeurtenis het scenario moet activeren.
Om een scenario te maken voor beide opties, moet u twee verschillende scenario’s aanmaken, een voor Hoger Dan en een andere voor Lager Dan.
- De waarde waarbij het scenario wordt geactiveerd.
De waarden die gelden als de grenzen voor comfort zijn standaard ingesteld voor LifeQuality in de instellingen. U kunt ze wijzigen voor het scenario. Dit heeft geen invloed op de meldingsinstellingen wanneer deze grenzen worden overschreden.
- Hoger Dan of Lager Dan om te bepalen welke gebeurtenis het scenario moet activeren.
- Klik op Volgende.
- Selecteer de automatiseringsapparaten die moeten worden geactiveerd wanneer de metingen de in het scenario gespecificeerde limiet overschrijden.
- Specificeer:
- Naam van het scenario
- Actie van het automatiseringsapparaat
- Klik op Opslaan.
Als het apparaat offline is, zal deze het scenario niet uitvoeren omdat het deze de activering van het scenario mist (bijvoorbeeld bij een stroomstoring of wanneer de verbinding tussen de hub en het apparaat wegvalt).
Voorbeeld: De geautomatiseerde actie staat gepland voor 10.00 uur, dus deze moet om 10.00 uur beginnen. Om 09:55 valt de stroom uit en wordt tien minuten later hersteld. Het automatiseringsscenario start niet om 10.00 uur. en start ook niet onmiddellijk nadat de stroom weer is ingeschakeld. Deze geplande actie wordt dus gemist.
Grafieken met metingen van het apparaat bekijken
Grafieken zijn beschikbaar met firmwareversie van OS Malevich 2.15 en in apps van de volgende versies en nieuwer:
- Ajax Security System 2.23.1 voor iOS
- Ajax Security System 2.26.1 voor Android
- Ajax PRO: Tool for Engineers 1.17.1 voor iOS
- Ajax PRO: Tool for Engineers 1.17.1 voor Android
- Ajax PRO Desktop 3.6.1 voor macOS
- Ajax PRO Desktop 3.6.1 voor Windows
- Open de Ajax-app.
- Selecteer de hub als u er meerdere heeft of als u de PRO-app.
- Ga naar het tabblad Apparaten .
- Selecteer LifeQuality.
- Selecteer een indicator:
- Temperatuur
- Vochtigheid
- CO2
- Selecteer een interval:
- Uur
- Dag
- Week
- Maand
- Jaar
U kunt ook binnen het scherm schakelen tussen metingen van de detector. Selecteer hiervoor de indicator in het bovenstaande menu.
Om de meetwaarden voor de gespecificeerde periode te bekijken, klikt u op de overeenkomstige kolom van de grafiek.
Grafieken kunnen gaten vertonen als op dat moment de verbinding tussen LifeQuality en de hub langer dan 72 uur was verbroken of als LifeQuality was uitgeschakeld.
De CO2-sensorkalibratie handmatig starten
Plaats de detector buiten en laat deze daar 10 – 15 minuten staan voordat u met de kalibratie begint. Neem het bijvoorbeeld mee naar buiten of laat het bij een open raam staan. De CO2-sensor is gekalibreerd bij een bedrijfstemperatuur van 0 tot +50 °C.
Om de kalibratie te starten:
- Open de Ajax-app.
- Selecteer de hub als u er meerdere heeft of als u de PRO-app gebruikt.
- Ga naar het tabblad Apparaten .
- Selecteer LifeQuality in de lijst.
- Ga naar de instellingen door op het tandwielpictogram te klikken.
- Ga naar het menu voor de СО2-sensorkalibratie.
- Klik op Start en wacht tot de kalibratie is voltooid.
Het duurt maximaal 20 minuten om de CO2-sensor te kalibreren. Nadat u op de knop Start heeft geklikt, begint de timer in de app met aftellen. De kalibratie eindigt automatisch nadat het aftellen is voltooid, plaats LifeQuality daarna terug op de geselecteerde installatieplaats.
Selectie van de installatieplaats
Het apparaat is uitsluitend bedoeld voor gebruik binnenshuis.
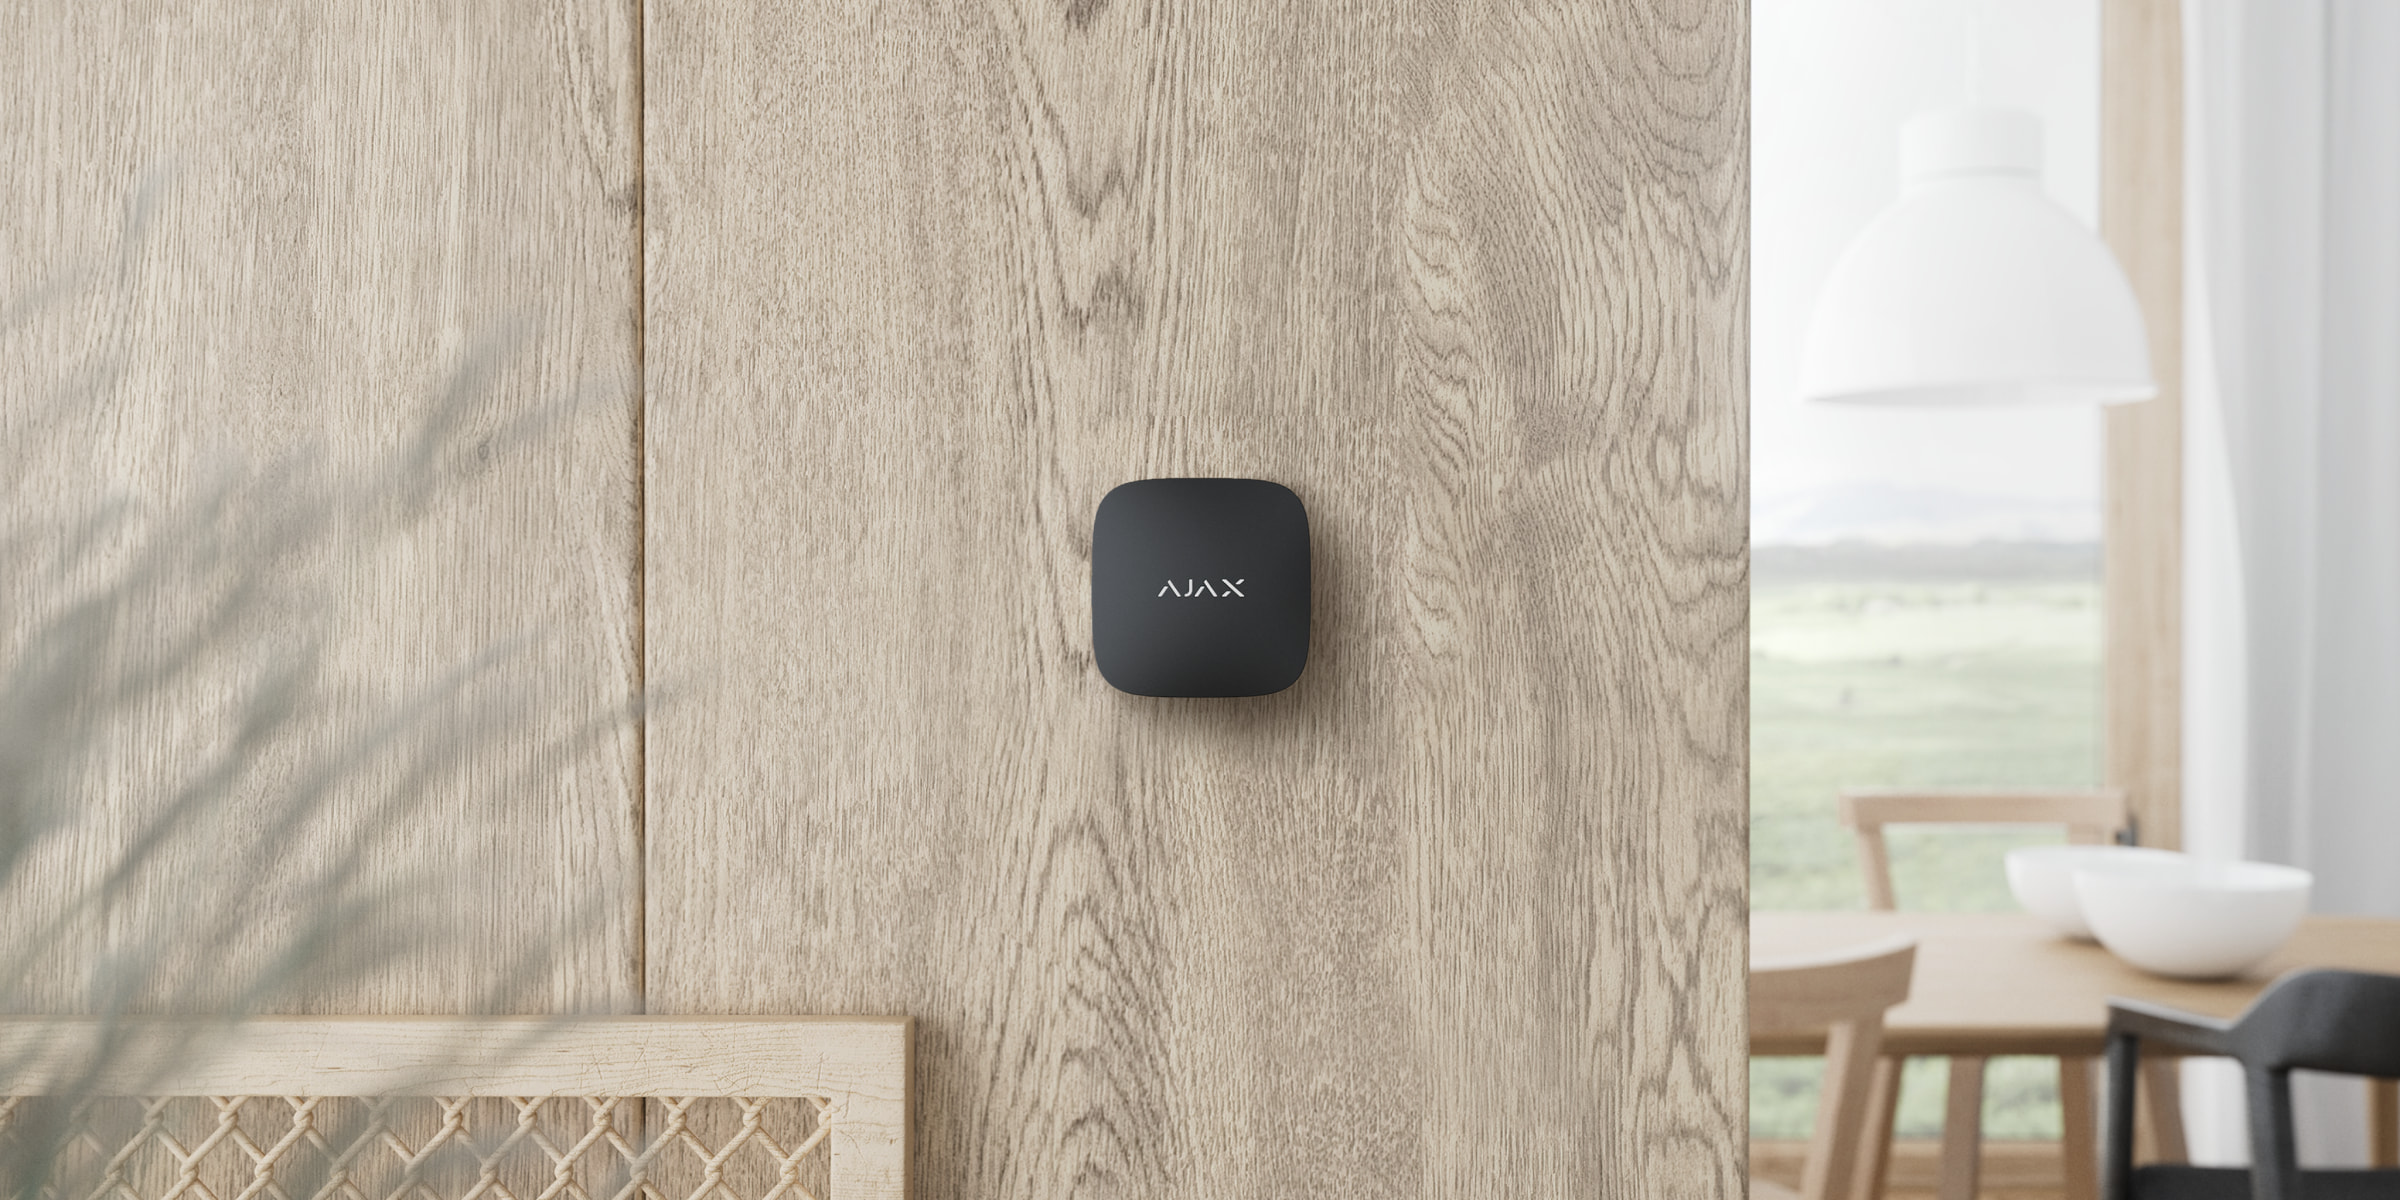
LifeQuality kan op een verticaal oppervlak worden gemonteerd met behulp van een meegeleverde installatiekit. Het apparaat kan ook zonder montage op een horizontaal oppervlak worden geplaatst. We raden aan het apparaat op een verticaal oppervlak of aan het plafond te monteren. Het voorkomt dat het apparaat wordt verplaatst of per ongeluk valt.
We raden aan om de detector op ooghoogte te installeren. Plaats het bijvoorbeeld op kantoor op ooghoogte als u zit of in de slaapkamer naast het bed. LifeQuality kan worden geïnstalleerd in elke ruimte waar veel mensen komen. Eén detector werkt effectief in één ruimte, ongeacht de grootte.
Bij de keuze waar u de melder wilt installeren, moet u rekening houden met welke waarden de werking ervan beïnvloeden:
- Jeweller-signaalsterkte.
- Wings-signaalsterkte.
- Afstand tussen de melder en de hub.
- Aanwezigheid van obstakels die de doorgang van het radiosignaal tussen apparaten verhinderen: muren, plafonds tussen verdiepingen, grote objecten in de ruimte.
Volg bij het ontwerpen van een Ajax-systeem voor het object altijd de plaatsingsadviezen. Het beveiligingssysteem moet ontworpen en geïnstalleerd zijn door specialisten. De lijst met aanbevolen Ajax-partners vindt u hier.
Signaalsterkte
De signaalsterkte van de Jeweller/Wings wordt bepaald door de verhouding van het aantal verwachte pakketten met het aantal niet-geleverde of corrupte gegevenspakketten die gedurende een bepaalde tijd tussen de hub en de detector worden uitgewisseld. De signaalsterkte wordt aangegeven door het pictogram ![]() op het tabblad Apparaten
op het tabblad Apparaten ![]() :
:
- Drie streepjes — uitstekende signaalsterkte.
- Twee streepjes — goede signaalsterkte.
- Eén streepje — lage signaalsterkte; een stabiele werking wordt niet gegarandeerd.
- Doorgestreept pictogram — geen signaal; stabiele werking kan niet gegarandeerd worden.
Controleer de signaalsterkte van Jeweller en Wings op de installatieplaats. We kunnen geen stabiele werking garanderen als de signaalsterkte slechts één of nul streepjes bedraagt. Verplaats in dit geval het apparaat. Verplaats het minstens 20 cm zodat de signaalontvangst aanzienlijk kan verbeteren.
Als de detector na het verplaatsen nog steeds een laag of instabiel signaal heeft, gebruik dan een ReX 2.
LifeQuality is niet compatibel met de ReX-signaalversterker. De lijst met compatibele signaalversterkers is hier beschikbaar.
Installeer de melder niet:
- Buitenshuis. Dit kan de melder beschadigen.
- Op plekken met snelle luchtcirculatie. Bijvoorbeeld in de buurt van ventilators, open ramen of deuren. Dit kan leiden tot onjuiste metingen.
- Tegenover objecten met snel veranderende temperatuur. Bijvoorbeeld in de buurt van elektrische en gaskachels. Dit kan leiden tot onjuiste temperatuurmetingen.
- Op plaatsen waar de detector een lage of onstabiele signaalsterkte heeft. Dit kan leiden tot een verbindingsverlies tussen de detector en de hub of de draadloze signaalversterker.
- In gebouwen met een temperatuur en luchtvochtigheid buiten de toegestane grenzen. Dit kan de melder beschadigen.
- In gesloten botanische tuinen, kassen en ruimtes met een groot aantal planten. De detector is niet geschikt voor gebruik in dergelijke omstandigheden.
Installatie
- Verwijder het SmartBracket-montagepaneel van de melder. Om het paneel te verwijderen, draait u het tegen de klok in.
- Bevestig het SmartBracket-paneel op een verticaal oppervlak met dubbelzijdig plakband of andere tijdelijke bevestigingsmiddelen. Het montagepaneel heeft een UP-teken dat de juiste positie van het paneel aangeeft.

Gebruik dubbelzijdig plakband voor tijdelijke bevestiging. Als een apparaat met permanent plakband is bevestigd, kan op elk moment van het oppervlak loskomen, wat tot schade kan leiden als het apparaat valt.
- Voer de Jeweller– en Wings-signaalsterktetests uit. De aanbevolen waarde is twee of drie streepjes.
Als de signaalsterkte laag is (een enkel streepje) of ontbreekt, kunnen we geen stabiele werking van het systeem garanderen. Verplaats het apparaat minstens 20 cm zodat de signaalontvangst aanzienlijk kan verbeteren. Als na de verplaatsing nog steeds een lage of onstabiele signaalsterkte wordt gemeld, gebruik dan de ReX 2-radiosignaalversterker. - Verwijder de detector van het montagepaneel.
- Bevestig het SmartBracket-paneel met de meegeleverde schroeven op alle bevestigingspunten. Als u andere bevestigingsmiddelen gebruikt, let er dan op dat deze het montagepaneel niet beschadigen of vervormen.
- Bevestig de melder op het bevestigingspaneel van SmartBracket.
Storingen
Als er een storing wordt gedetecteerd (er is bijvoorbeeld geen verbinding met de hub of signaalversterker), dan geeft de Ajax-app een storingsteller weer in het apparaatveld.
Alle storingen worden weergegeven in de statussen van de detector. Velden met storingen worden rood gemarkeerd.
Het apparaat kan storingen melden aan de meldkamer van het beveiligingsbedrijf, maar ook aan gebruikers via pushmeldingen en sms-berichten.
LifeQuality-storingen
- De CO2-sensor moet worden gekalibreerd.
- Er geen verbinding is met de hub of de signaalversterker.
- De detector heeft de fout van een of meerdere ingebouwde sensoren geregistreerd.
- De batterijlading is laag.
Onderhoud
Controleer regelmatig het functioneren van de detector. De optimale testfrequentie is elke drie maanden. Verwijder stof, spinnenwebben en ander vuil van de behuizing. Gebruik een zachte, droge doek die geschikt is voor het onderhoud van de apparatuur. Gebruik geen middelen die alcohol, aceton, benzine of andere actieve oplosmiddelen bevatten om het apparaat te reinigen.
Volledige set
- LifeQuality.
- Installatiekit.
- Snelstartgids.
Garantie
De garantie op de producten van de Limited Liability Company, “Ajax Systems Manufacturing”, is 2 jaar geldig na aankoop.
Als het apparaat niet goed werkt, neem dan eerst contact op met de technische ondersteuning van Ajax. In de meeste gevallen kunnen technische problemen op afstand worden opgelost.
Contact opnemen met de technische ondersteuning
