KeyArm Zone é um tipo de entrada dedicado que permite alternar os modos de a armar do sistema com dispositivos de terceiros ligados a Módulos de integração Ajax. Esses dispositivos de terceiros podem incluir controladores de acesso, interruptores de chave mecânicos, interruptores de botão, controladores de rádio, relés telefónicos e muito mais.
KeyArm permite-lhe armar/desarmar o sistema, grupos individuais ou configurar Modo Noturno. Esta funcionalidade está disponível em apps Ajax.
Requisitos do sistema
A funcionalidade KeyArm é suportada por todos os módulos de integração adicionados aos hubs (exceto o Hub (2G) Jeweller e o Hub (4G) Jeweller) com o OS Malevich 2.17 e posterior. Um PRO ou um utilizador com direitos de configuração do sistema pode configurar a função.
Utilize as versões mais recentes das apps Ajax e OS Malevich para aceder a todas as funcionalidades disponíveis e garantir o funcionamento correto do sistema.
Como funciona a definição
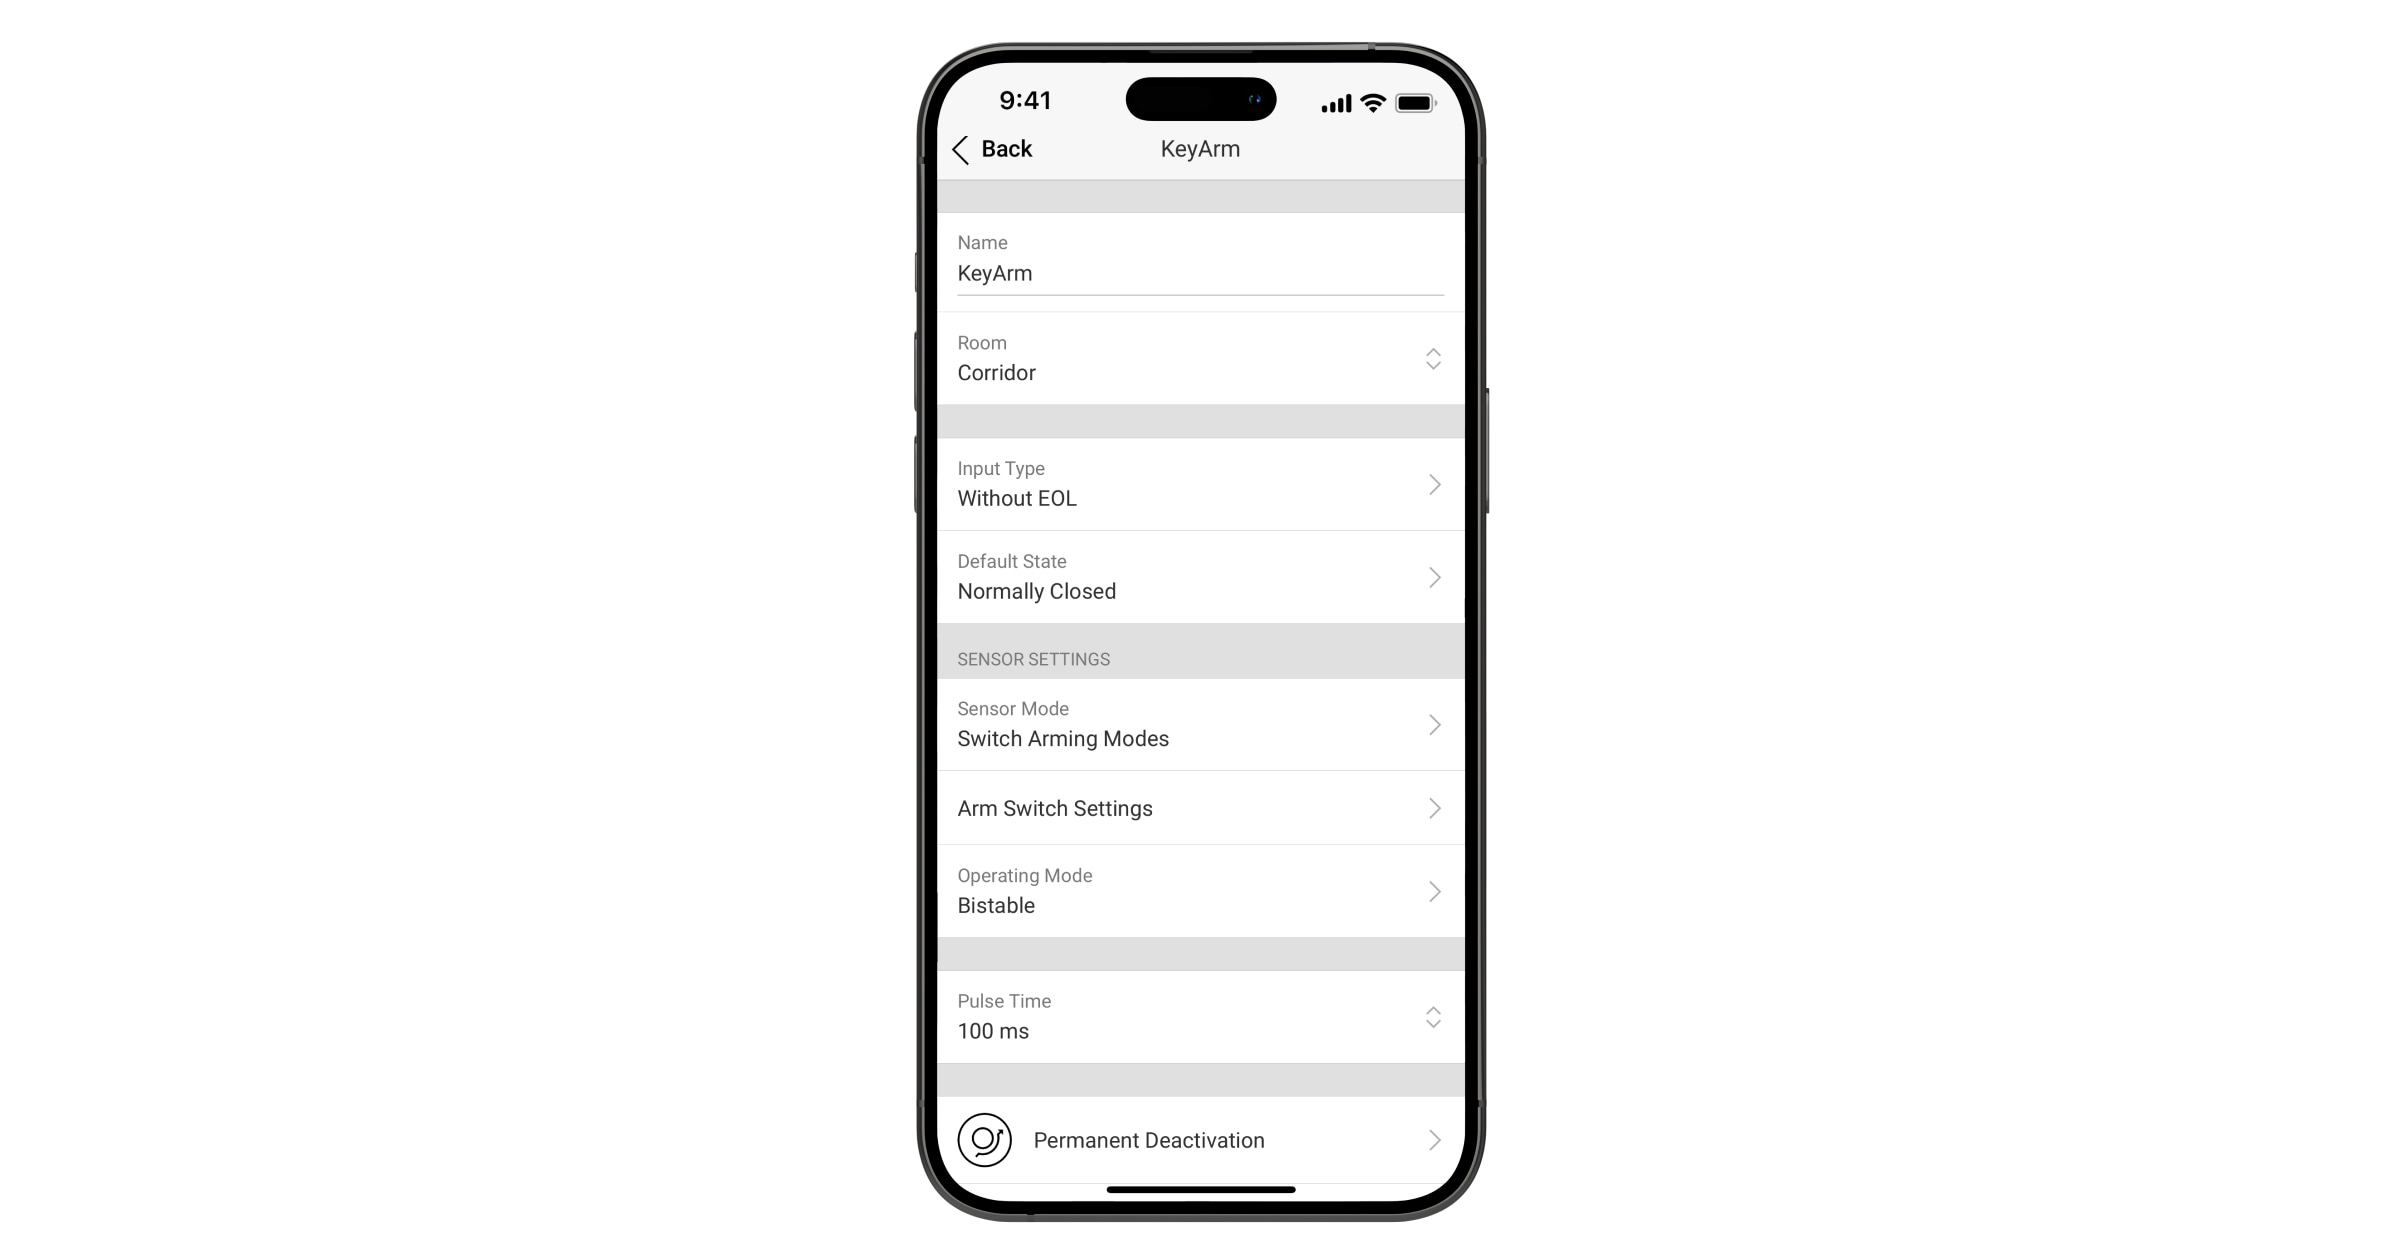
- Ação predefinida: a ação executada no estado do sistema quando o KeyArm Zone é acionado. É possível definir a opção Armar/Desarmar alternando, Apenas armar, ou Apenas desarmar para a ação do dispositivo KeyArm.
- Objetos de segurança: alterar o estado de todo o sistema, de um grupo individual ou de um conjunto de grupos, ou gerir o modo Noturno.
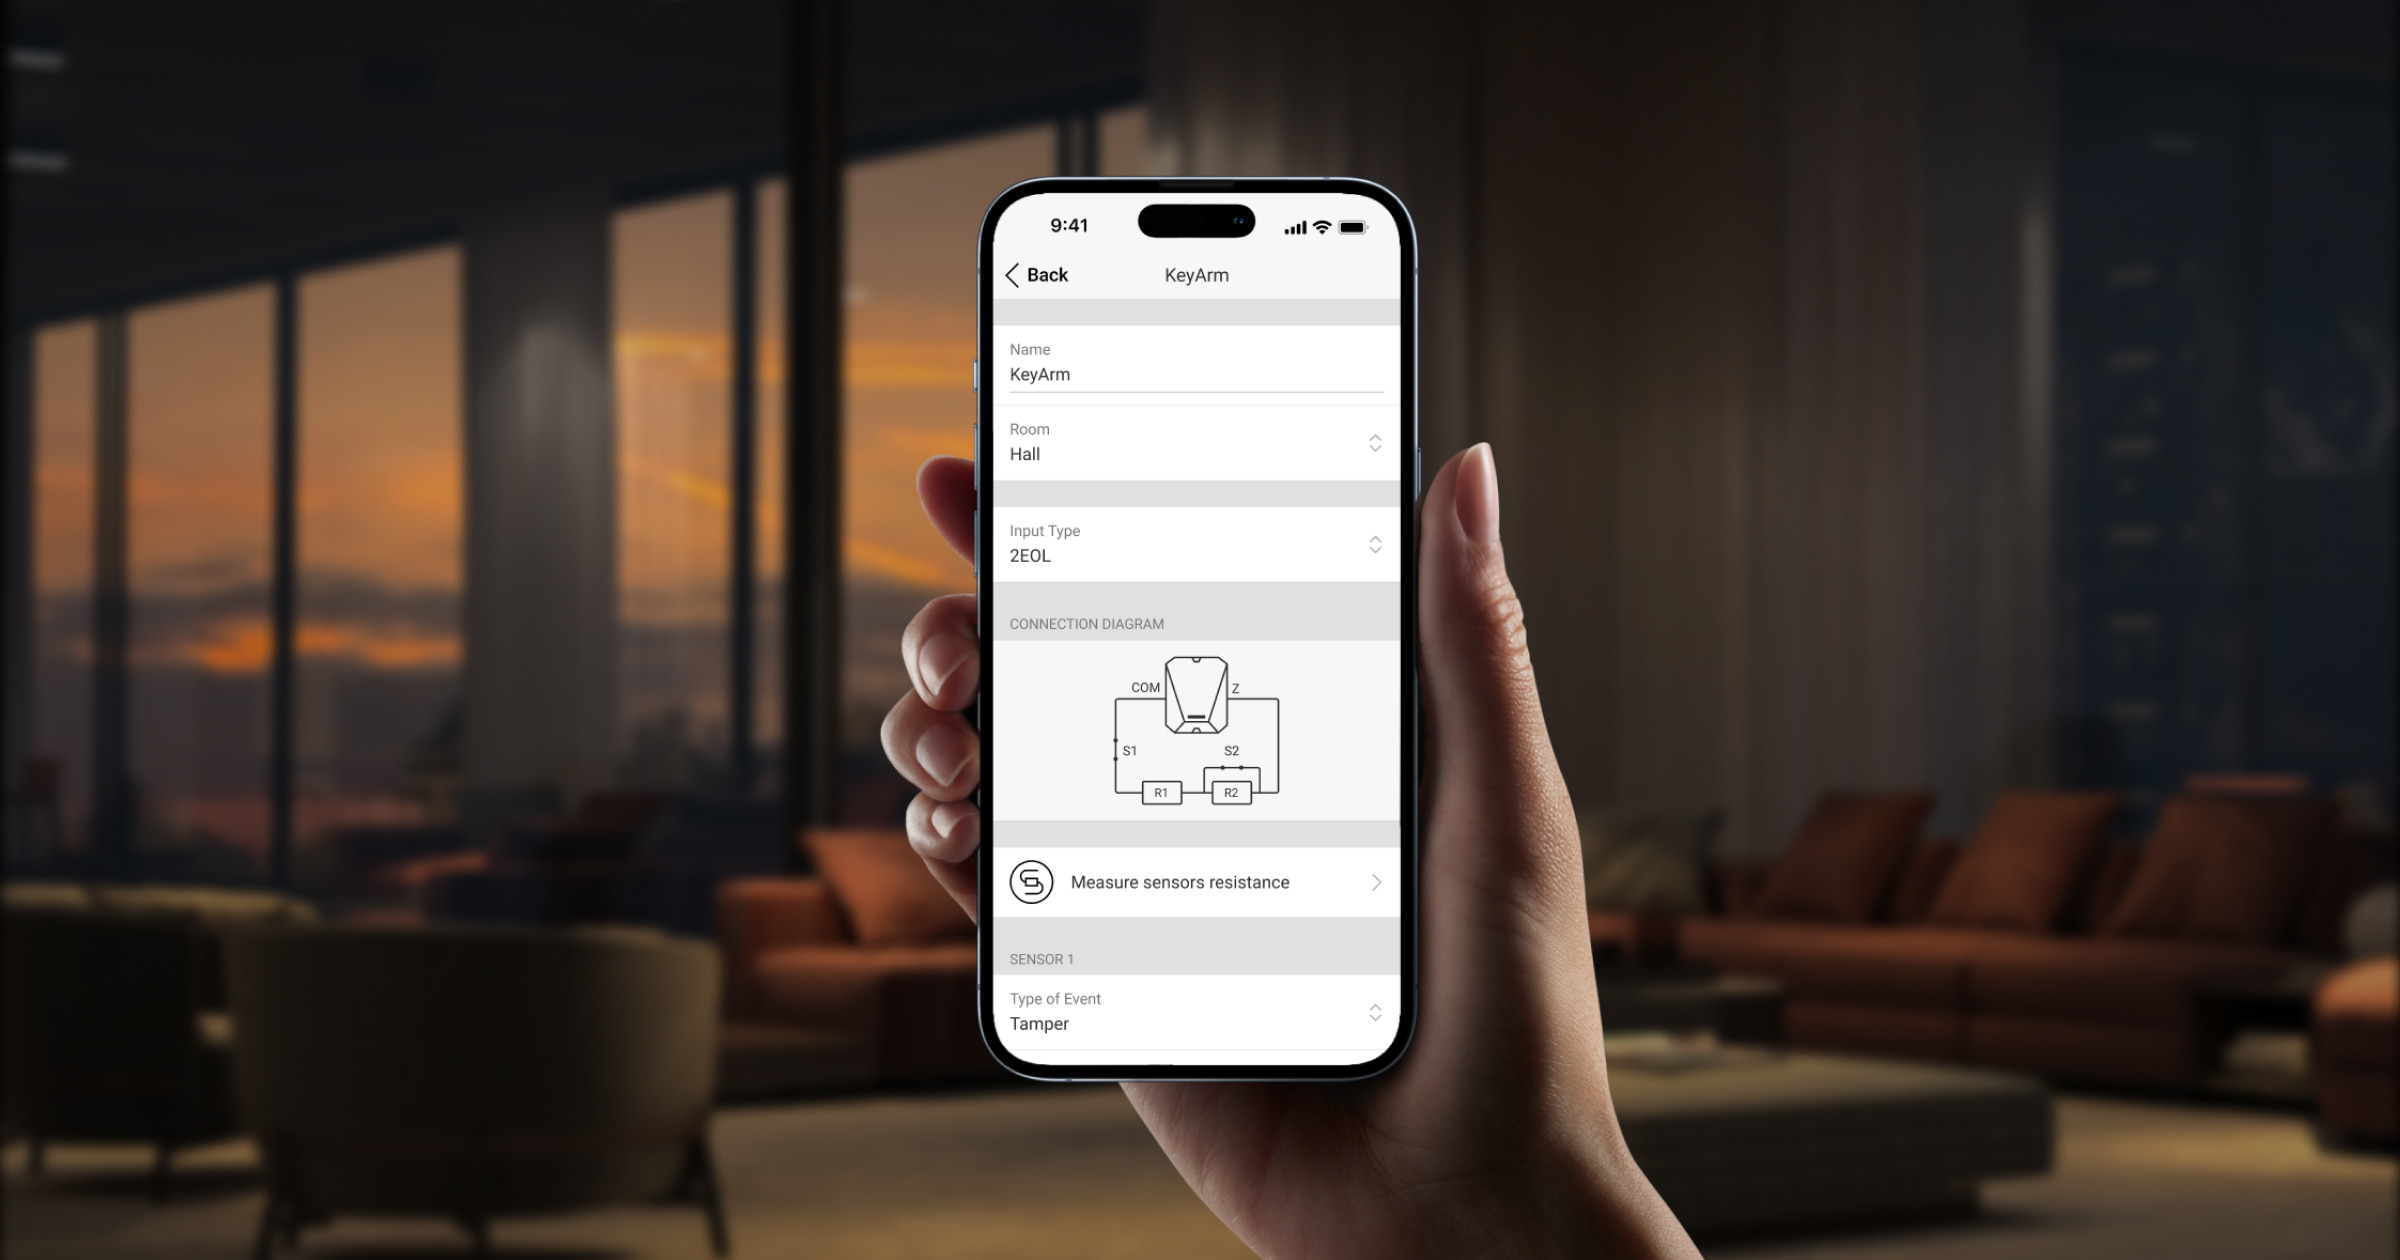
- Tipo de entrada: configuração da ligação do dispositivo KeyArm à entrada. Dependendo da versão do Transmitter ou do MultiTransmitter, pode ser Sem EOL, EOL, 2EOL, ou 3EOL.
- Estado por defeito: pode ser Normalmente Fechado (NC) ou Normalmente Aberto (NO).
- Modo de funcionamento: pode ser Biestável ou Impulso.
Dependendo do hub utilizado, pode instalar e configurar até 18 ou 50 KeyArm Zones para o seu sistema.
| Modelos de Hub | Quantidade de KeyArm Zones |
| Hub Plus Jeweller | 50 |
| Hub 2 Plus Jeweller | 50 |
| Hub 2 (2G) Jeweller | 18 |
| Hub 2 (4G) Jeweller | 18 |
| Superior Hub Hybrid (2G) | 18 |
| Superior Hub Hybrid (4G) | 18 |
Além disso, as verificações da integridade do sistema (SIC) regulares e o bloqueio total do KeyArm quando é acionado um alerta de tamper proporcionam a máxima segurança do sistema.
Bloquear o interruptor para armar se a tampa for aberta
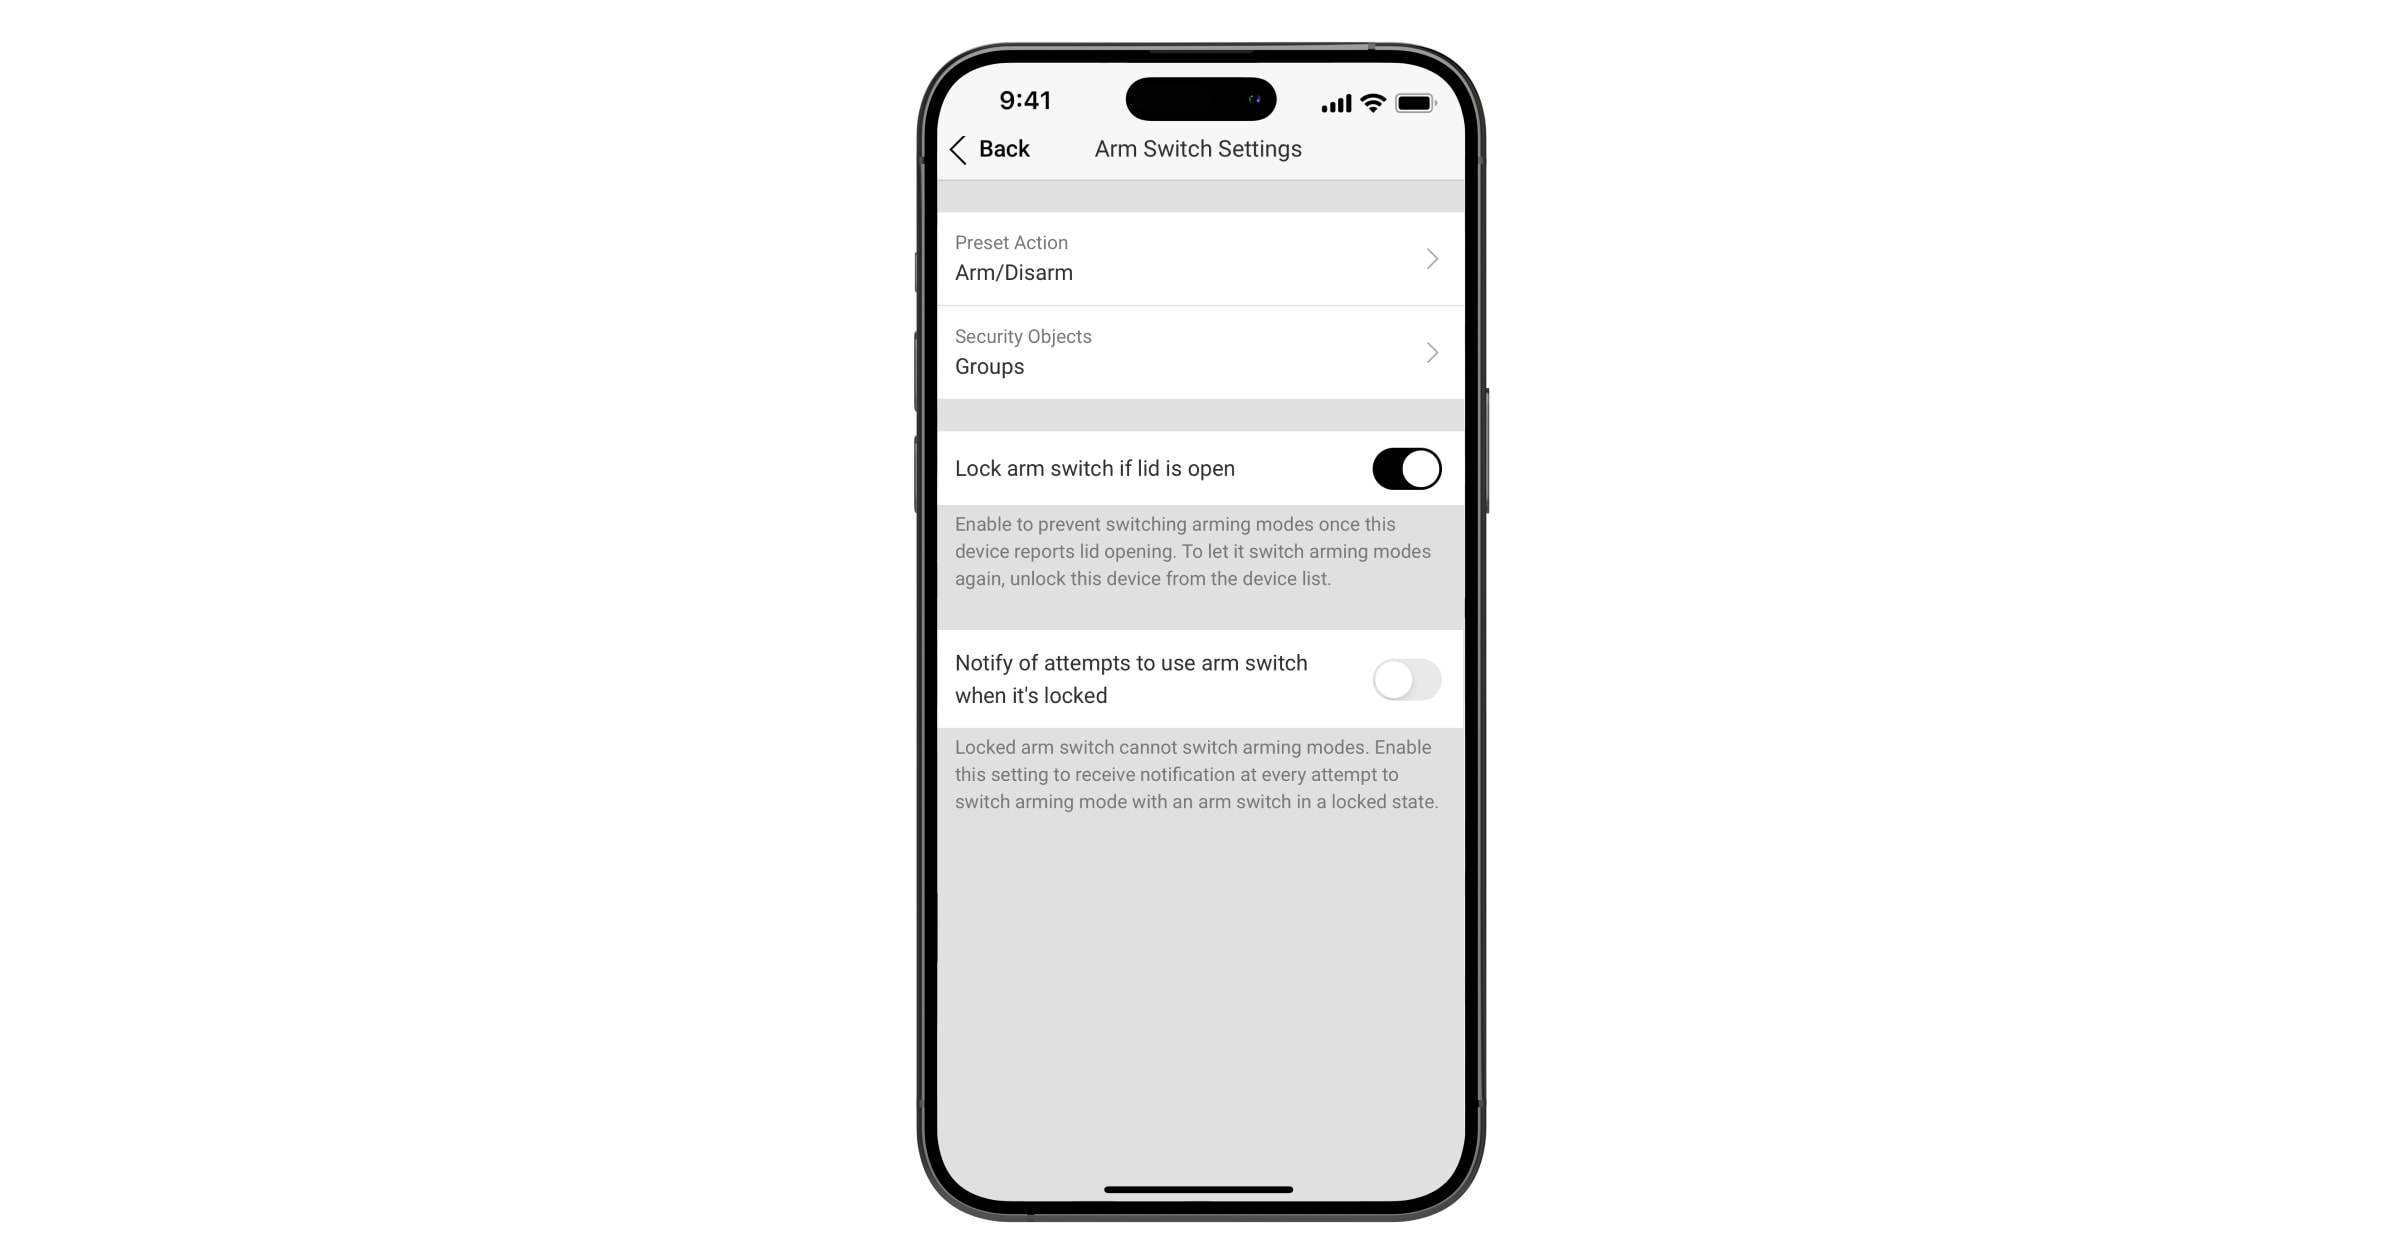
Para aumentar a fiabilidade do sistema, oferecemos a possibilidade de bloquear o KeyArm se a sua entrada comunicar um alerta de tamper para evitar que o sistema seja armado/desarmado através de um controlador de acesso de terceiros avariado. Com o sistema operativo Malevich 2.19, é possível ativar as notificações caso haja uma tentativa de mudar o modo de armar com o interrutor de armar bloqueado.
Note que a funcionalidade de bloqueio só está disponível para módulos de integração com um dos tipos de entrada de sensor configurado como tamper.
É possível ativar e controlar o bloqueio de alerta de tamper do KeyArm nas apps Ajax. A seguinte secção descreve como configurar o KeyArm Zone.
Além disso, se o KeyArm tiver sido bloqueado por um alerta de tamper acionado, só o pode desbloquear na app Ajax.
Ligar e adicionar ao sistema
Os dispositivos típicos de controlo de acesso de terceiros devem ser ligados à entrada KeyArm da mesma forma que qualquer outro dispositivo de ativação.
Dependendo do dispositivo utilizado para a KeyArm Zone, a configuração do tipo de entrada pode ser NO, NC, EOL, 2EOL, ou 3EOL.
Assim que o dispositivo de controlo de acesso estiver ligado ao módulo de integração, deve adicioná-lo ao sistema na app Ajax. Para adicionar o dispositivo de terceiros ao sistema, consulte o manual do utilizador do módulo de integração.
Ativação e configuração do KeyArm Zone na app
Existe uma ligeira diferença entre a configuração do Transmitter Jeweller e a de outros módulos de integração.
- Abra a app Ajax e selecione o hub. Certifique-se de que está desarmado.
- Aceda o separador Dispositivos
.
- Localize o módulo de integração e aceda aos respetivos Dispositivos.
- Selecione o dispositivo pretendido e aceda às suas Definições
.
- Aceda à definição Modo do sensor.
- Selecione a opção Mudança dos modos de segurança.
- Aceder às Definições do interrutor para armar.
- Configure as seguintes definições de acordo com as suas necessidades:
-
- Se o KeyArm Zone estiver configurado para entrada NO, NC ou EOL:
- selecione armar Ação predefinida;
- selecione Objetos de segurança a serem controlados pelo KeyArm.
- selecione Armar instantâneo apesar da deteção de anomalias no sistema (disponível se Verificação de integridade do sistema e a Permissão para armar estiverem ativadas e as opções Armar/desarmar ou Apenas armar estiverem selecionadas para a definição de Ação predefinida).
- Se o KeyArm Zone estiver configurado para entrada NO, NC ou EOL:
A funcionalidade de Armar instantâneo apesar da deteção de anomalias no sistema está disponível para os hubs com OS Malevich 2.24 ou posterior.
- Se o KeyArm Zone estiver configurado para entrada 2EOL ou 3EOL:
- selecione armar Ação predefinida;
- selecione Objetos de segurança a serem controlados pelo KeyArm;
- selecione Armar instantâneo apesar da deteção de anomalias no sistema (disponível se Verificação de integridade do sistema e a Permissão para armar estiverem ativadas e as opções Armar/desarmar ou Apenas armar estiverem selecionadas para a definição de Ação predefinida).
- configure a definição Bloquear o interruptor para armar se a tampa for aberta;
- configure a função Notificar de tentativas de utilização do interrutor de armar quando este está bloqueado (disponível se a função Bloquear o interruptor para armar se a tampa for aberta estiver ativada).
A funcionalidade Notificar de tentativas de utilização do interrutor de armar quando este está bloqueado está disponível para hubs com o SO Malevich 2.19 ou posterior.
-
Note que para as configurações de entrada 2EOL e 3EOL, o KeyArm Zone só pode ser ativado para o Sensor 2. Neste caso, o bloqueio de alerta de tamper de KeyArm pode ser ativado se o Sensor 1 ou o Sensor 3 for configurado como um evento de Alarme de tamper.


