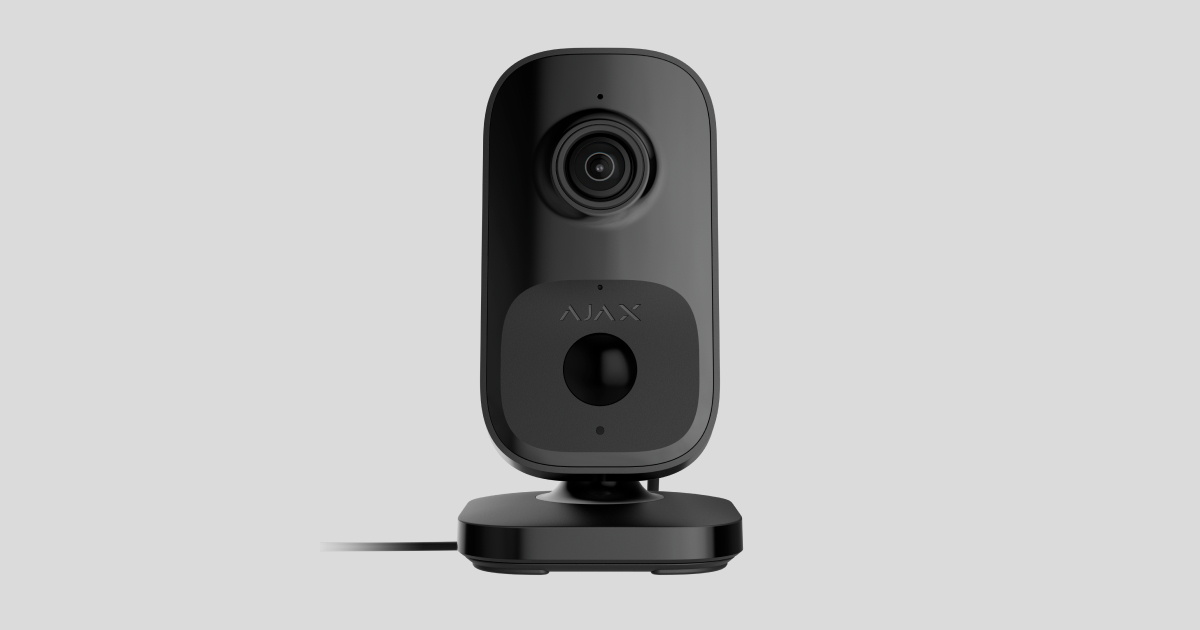
IndoorCam é uma câmara de segurança Wi-Fi com IA incorporada, sensor PIR e controlo através de app Ajax. Possui retroiluminação por infravermelhos (IV) inteligente, deteção de movimento e reconhecimento de objetos. A câmara permite aos utilizadores ver vídeos arquivados e assistir a transmissões em direto. Foi concebida apenas para utilização em interiores.
A IndoorCam está ligada ao sistema através de Wi-Fi e pode ser emparelhada com um hub como canal de comunicação de reserva. Os vídeos gravados podem ser armazenados num Ajax NVR adicionado à mesma rede ou no arquivo Ajax Cloud Storage, de acordo com a subscrição.
Também estão disponíveis versões de câmaras com outras carcaças. Todas as câmaras Ajax estão disponíveis aqui.
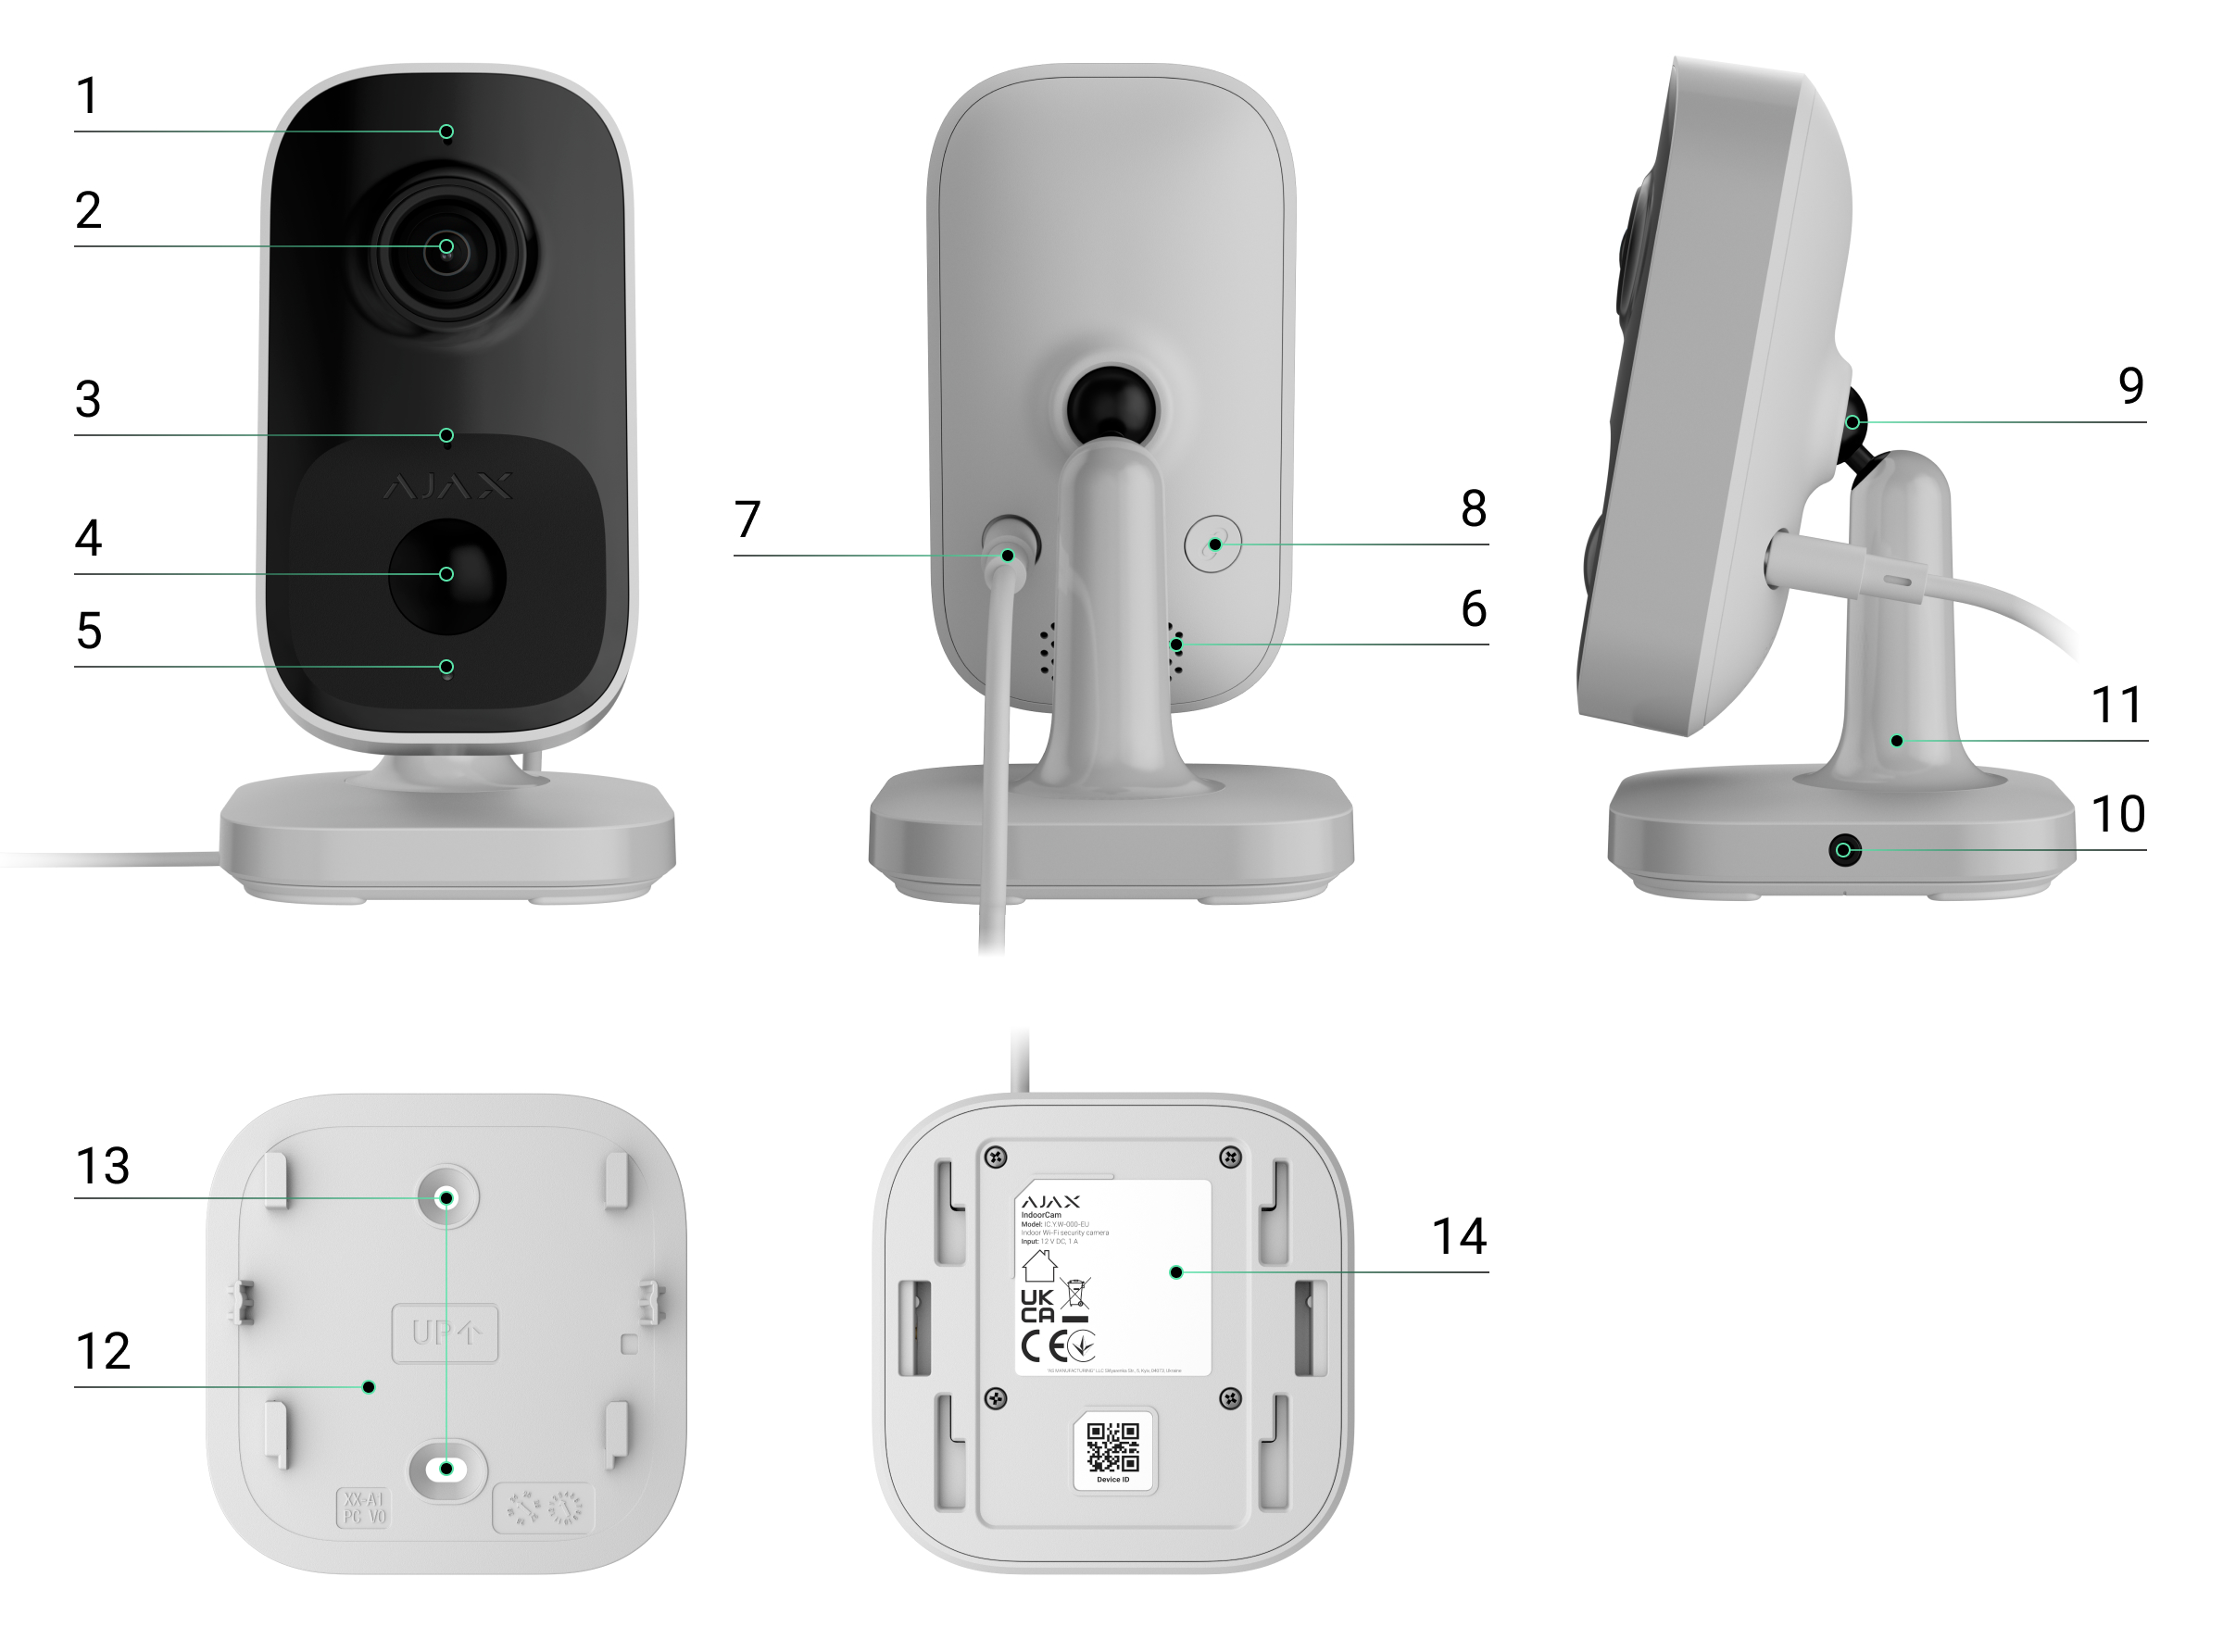
Elementos funcionais
- Indicador LED.
- Lente da câmara.
- Microfone.
- Lente do sensor de movimento.
- Sensor de luz ambiente.
- Altifalante.
- Conector de alimentação elétrica.
- Botão de emparelhamento.
- Dobradiça.
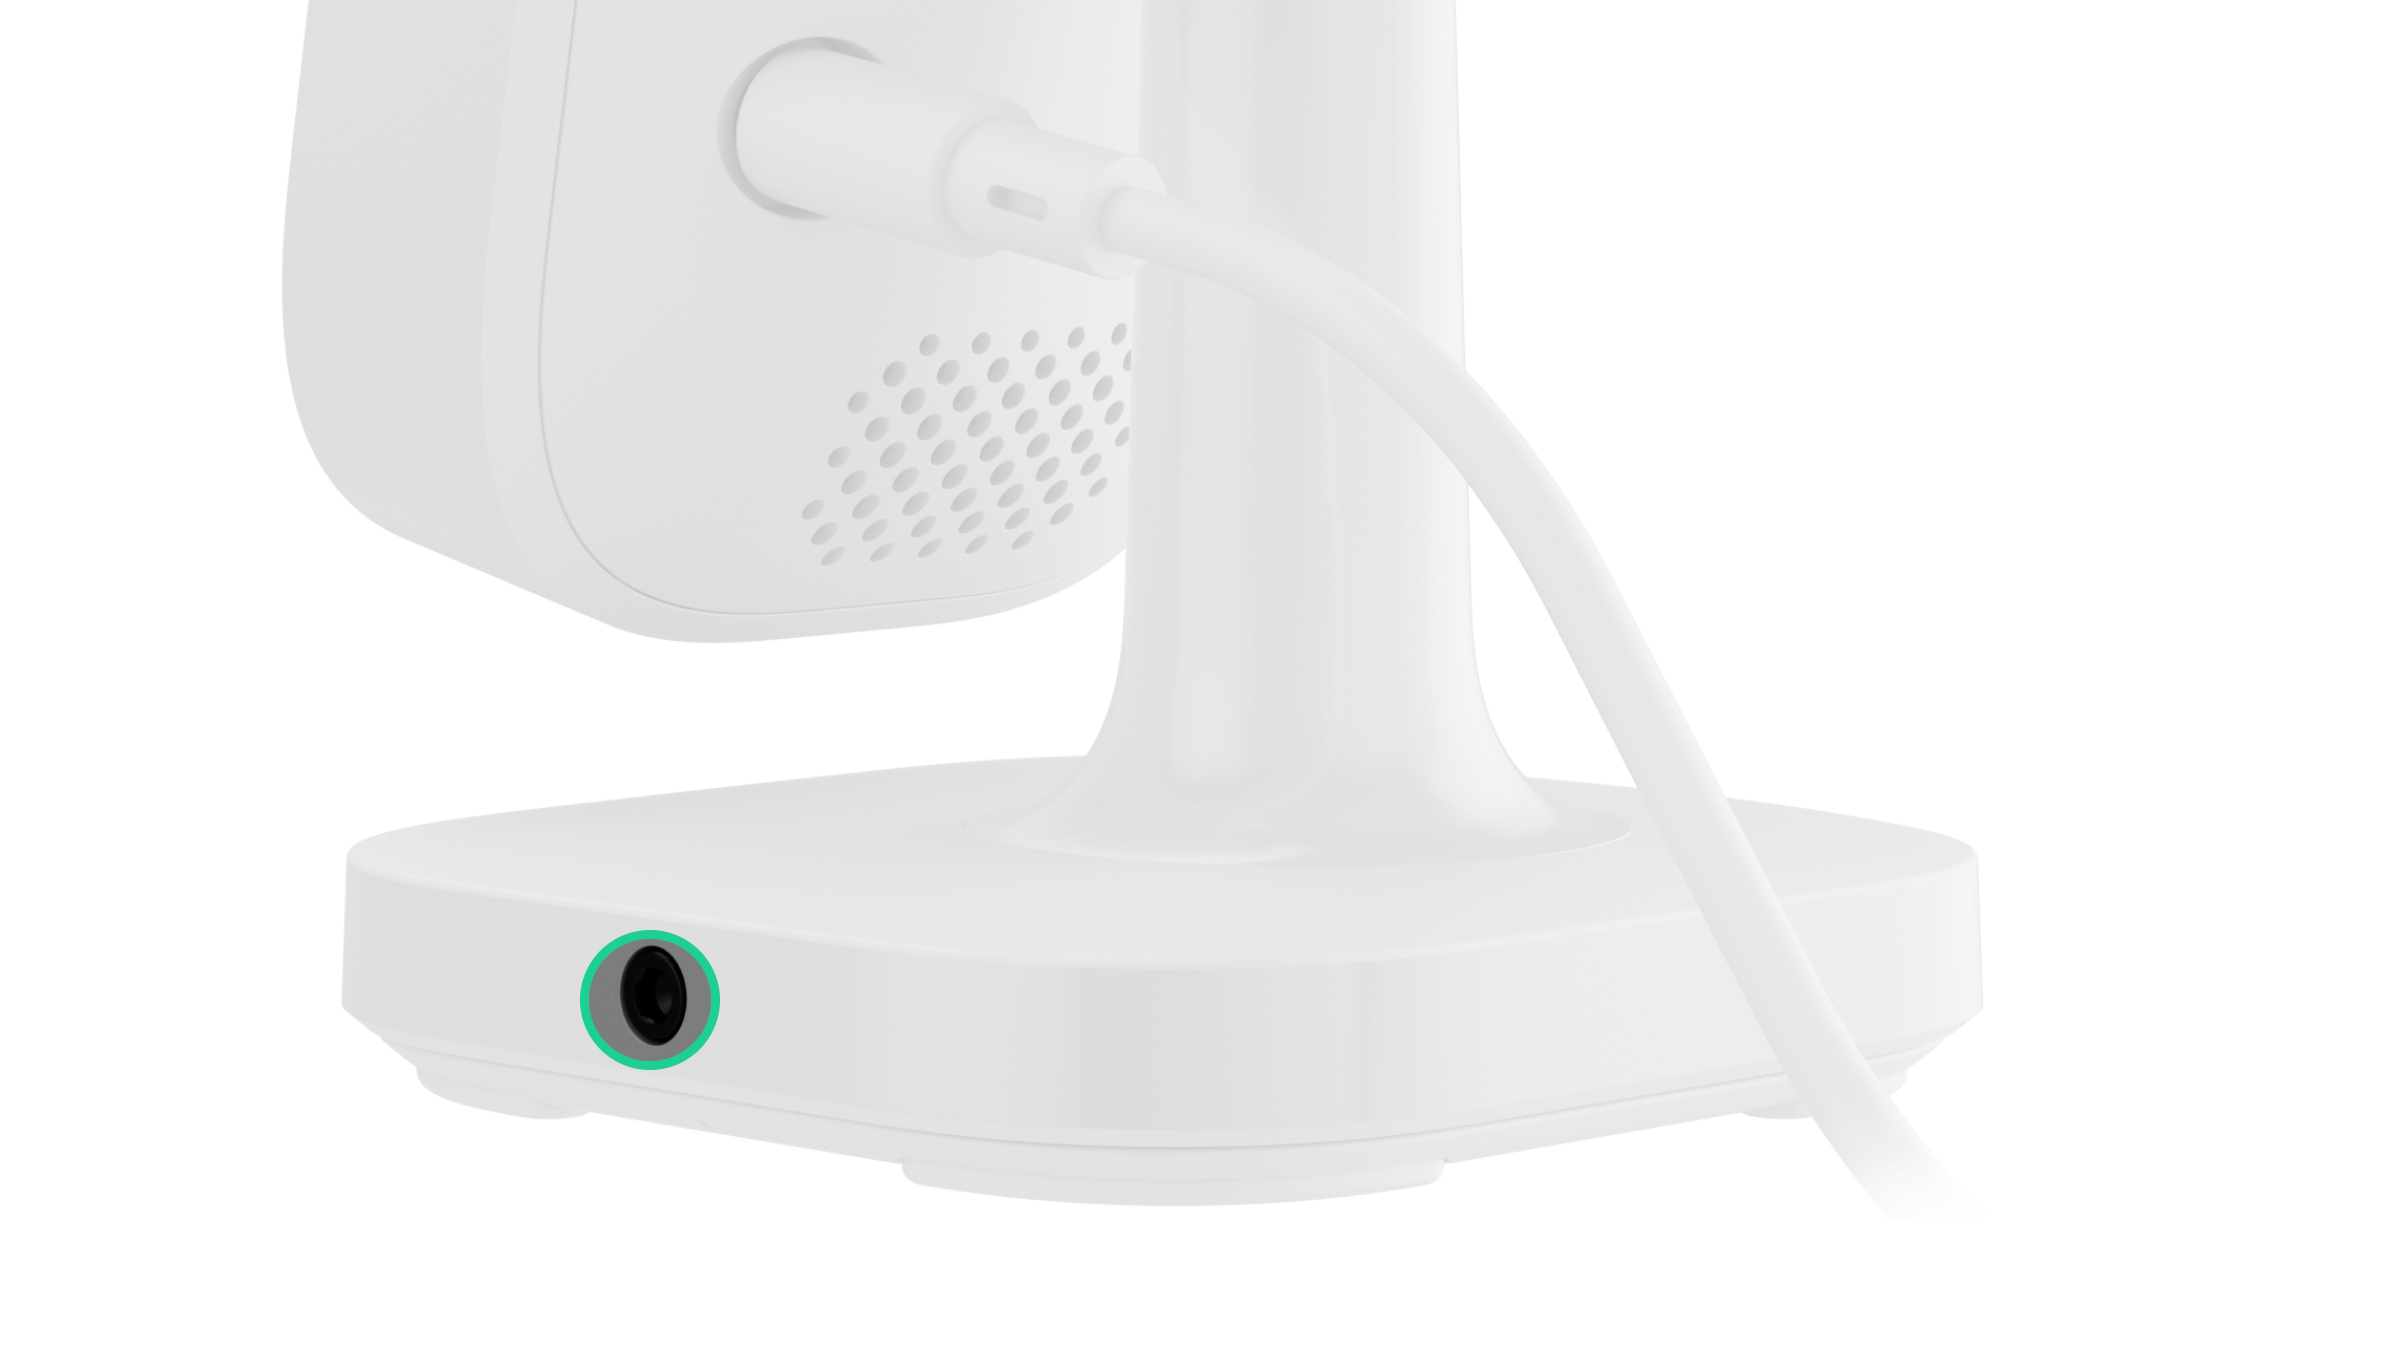
- Orifício para fixar o dispositivo no painel de instalação com um parafuso de fixação.
- Suporte giratório.
- O painel de instalação do suporte giratório.
- Furos para fixar o painel de instalação do suporte giratório à superfície.
- Código QR com o ID do dispositivo. Utilizado para adicionar a câmara a um espaço.
Princípio do funcionamento
A IndoorCam possui uma câmara com iluminação IV, um indicador LED, bem como um microfone e um altifalante. O dispositivo é utilizado para controlar a situação nas instalações e gravar vídeos.
A IndoorCam é uma câmara IP que utiliza inteligência artificial (IA) para o reconhecimento de objetos. Os seus algoritmos podem identificar objetos em movimento e distinguir pessoas, animais ou veículos.
O dispositivo possui iluminação IV inteligente, garantindo a captura de imagens de alta qualidade mesmo em condições de pouca luz. A IndoorCam ajusta automaticamente a intensidade da iluminação em tempo real para evitar a sobre-exposição, permitindo uma visibilidade clara de objetos que estão longe ou demasiado perto da câmara em condições de pouca luz.
Para guardar os vídeos gravados, é necessário adicionar a IndoorCam a um Ajax NVR ou ativar o arquivo na nuvem.
A IndoorCam permite-lhe:
- Veja o vídeo em tempo real com a possibilidade de fazer zoom para ver mais de perto.
- Aceder a vídeos arquivados, navegando através deles com base na cronologia de gravação e no calendário (esta funcionalidade está disponível se o dispositivo estiver ligado a um NVR Ajax ou se o arquivo na nuvem estiver ativado).
- Configurar zonas de deteção de movimento e ajustar o nível de sensibilidade.
- Ver o Video wall, que combina imagens de todas as câmaras conectadas.
- Aceder rapidamente ao controlo dos dispositivos de automatização a partir do menu do leitor de vídeo das câmaras.
- Criar cenários de vídeo que enviam um vídeo curto da câmara selecionada para a app Ajax quando o detetor é acionado.
- Descarregar os segmentos de gravação de vídeo necessários do arquivo para smartphones ou PCs (esta funcionalidade está disponível se o dispositivo estiver conectado a um NVR Ajax ou se o arquivo na nuvem estiver ativado).
Os segmentos de gravação de vídeo descarregados da IndoorCam com firmware 2.279 e posterior têm a assinatura digital Ajax que verifica a integridade do vídeo exportado. Para verificar a autenticidade dos vídeos descarregados, utilize o software Leitor multimédia Ajax.
- Configure a ligação através de ONVIF para integrar o dispositivo com sistemas de gestão de vídeo (VMS), tais como Milestone, Genetec, Axxon e Digifort.
A autorização ONVIF é suportada pela IndoorCam com uma versão de firmware 2.377 ou posterior.
Um administrador ou PRO com direitos de configuração do sistema pode estabelecer uma ligação através de ONVIF em:
- Ajax Security System com a versão da app 3.25 ou posterior.
- Ajax PRO: Tool for Engineers com a versão da app 2.25 ou posterior.
- Ajax PRO Desktop com a versão da app 4.20 ou posterior.
- Ajax Desktop com a versão da app 4.21 ou posterior.
Cenários de vídeo
Um sistema Ajax permite a utilização de câmaras IP para verificação de alarmes. Os cenários de vídeo permitem comprovar os disparos de alarme com o vídeo correspondente das câmaras instaladas na instalação.
As câmaras podem ser configuradas para responder a alarmes de um único dispositivo, de vários dispositivos ou de todos os dispositivos conectados. Os detetores combinados podem registar vários tipos de alarmes, permitindo-lhe configurar respostas a uma vasta gama de tipos de alarme, quer seja apenas um, vários ou todos eles.
Também é possível configurar as sirenes para serem ativadas quando for detetado um movimento ou um objeto específico reconhecido pela IA. Quando os dispositivos de vídeo detetam movimento ou um objeto específico reconhecido pela IA, o sistema ativa automaticamente as sirenes adicionadas ao hub para emitir um alarme.
Video wall
O utilizador pode gerir os vídeos no separador Video wall , acessível a partir do momento em que tenha sido adicionada pelo menos uma câmara. Esta função garante um acesso rápido a todas as câmaras ligadas, que são apresentadas de acordo com as definições de privacidade.
Nas apps Ajax móveis, é possível:
- Alternar entre câmaras.
- Procurar a câmara pretendida pelo nome.
- Gerir uma câmara PTZ.
No Ajax PRO Desktop, é possível:
- Alternar entre câmaras.
- Procurar a câmara pretendida pelo nome.
- Organizar as câmaras por sala, NVR ou grupo.
- Gerir uma câmara PTZ.
- Guardar layouts personalizados para apresentação de vídeo das câmaras.
- Alterar a ordem pela qual o vídeo da câmara é apresentado.
- Criar modelos para apresentar vídeos numa apresentação de diapositivos.
Zonas de privacidade
O sistema permite ocultar partes da imagem. Por exemplo, se uma área ou objeto sensível estiver à vista, a atividade à sua volta pode ser gravada sem revelar o seu conteúdo, configurando a zona certa. Nenhum movimento ou objeto será detetado e gravado na zona de privacidade.
Para o fazer, nas apps Ajax:
- Aceda o separador Dispositivos
.
- Selecione o dispositivo na lista. Se estiver ligado ao gravador de vídeo em rede, selecione NVR e toque em Câmaras.
- Aceda às Definições tocando duas vezes no ícone da engrenagem
.
- Selecione o menu Zonas de privacidade.
- Aceda ao menu Configurar zonas de privacidade. Selecione a área pretendida.
- Toque no ícone
. Regresse às definições da câmara.
O utilizador pode criar até quatro zonas privadas.
Atualizações de firmware
Se estiver disponível uma nova versão de firmware para a IndoorCam, o ícone aparece nas apps Ajax no separador Dispositivos
. Um administrador ou um PRO com acesso às definições do sistema pode lançar uma atualização através dos estados ou definições do dispositivo. As instruções no ecrã ajudam a atualizar o firmware com êxito.
Funcionamento com um hub Ajax
O sistema permite configurar um canal de comunicação de reserva para o dispositivo, de modo a que este continue a transmitir eventos e alarmes se a rede Wi-Fi estiver em baixo ou perdida.
O canal de comunicação de reserva consiste em adicionar o dispositivo ao hub, o que lhe permite comunicar através dos protocolos de rádio Jeweller e Wings. O dispositivo pode transmitir alarmes, eventos e verificações de fotografias utilizando estes protocolos para o manter informado. No entanto, as transmissões em direto e as gravações arquivadas durante o período em que a ligação Wi-Fi foi perdida não estarão disponíveis.
Quando a IndoorCam é adicionada ao hub, ocupa uma ranhura entre os dispositivos do hub.
Hubs e repetidores compatíveis
Para que o dispositivo funcione, é necessário um hub Ajax com o sistema operativo OS Malevich 2.28 e versões posteriores.
Protocolos de transferência de dados Jeweller e Wings
O Jeweller e o Wings são protocolos de transferência de dados sem fios que fornecem uma comunicação bidirecional rápida e fiável entre o hub e os dispositivos. O dispositivo utiliza o Jeweller e o Wings como canal de comunicação de reserva para transmitir eventos e fotografias.
Seleção do local de instalação
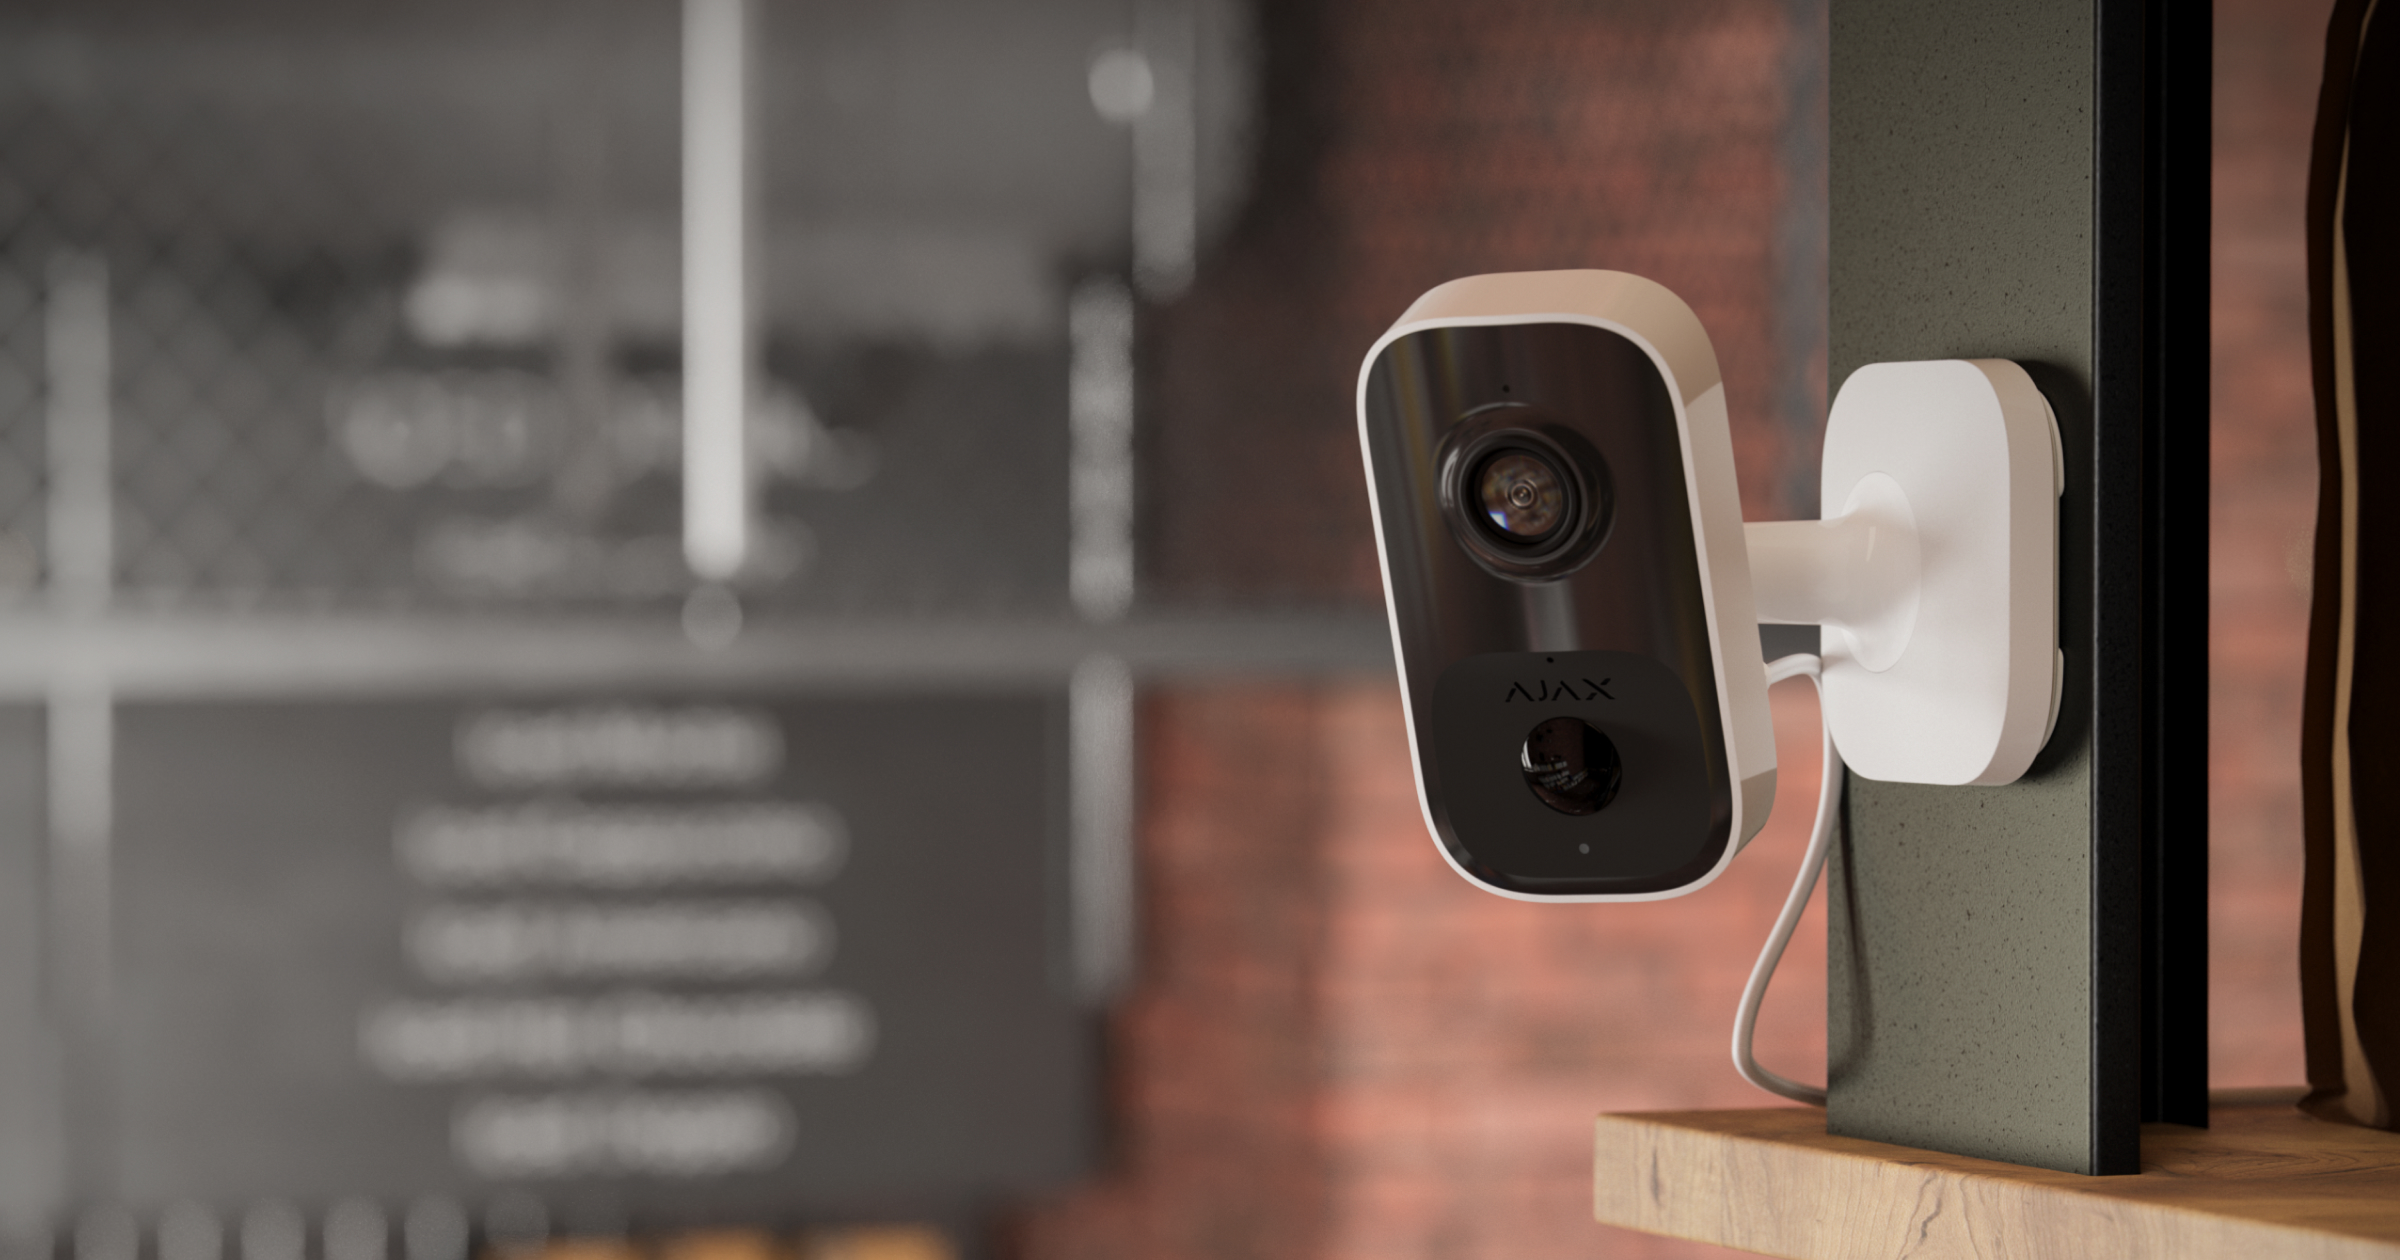
Ao escolher o local onde colocar a IndoorCam, considere os parâmetros que afetam o seu funcionamento:
- Intensidade do sinal Wi-Fi.
- Intensidade do sinal do Jeweller e do Wings. Isto é aplicável se o dispositivo estiver emparelhado com o hub.
- A presença de objetos ou estruturas que possam obstruir a visão do dispositivo.
Considere as recomendações de colocação ao desenvolver um projeto de sistema para a instalação. Apenas os especialistas devem conceber e instalar um sistema Ajax. Uma lista de parceiros recomendados está disponível aqui.
Intensidade do sinal
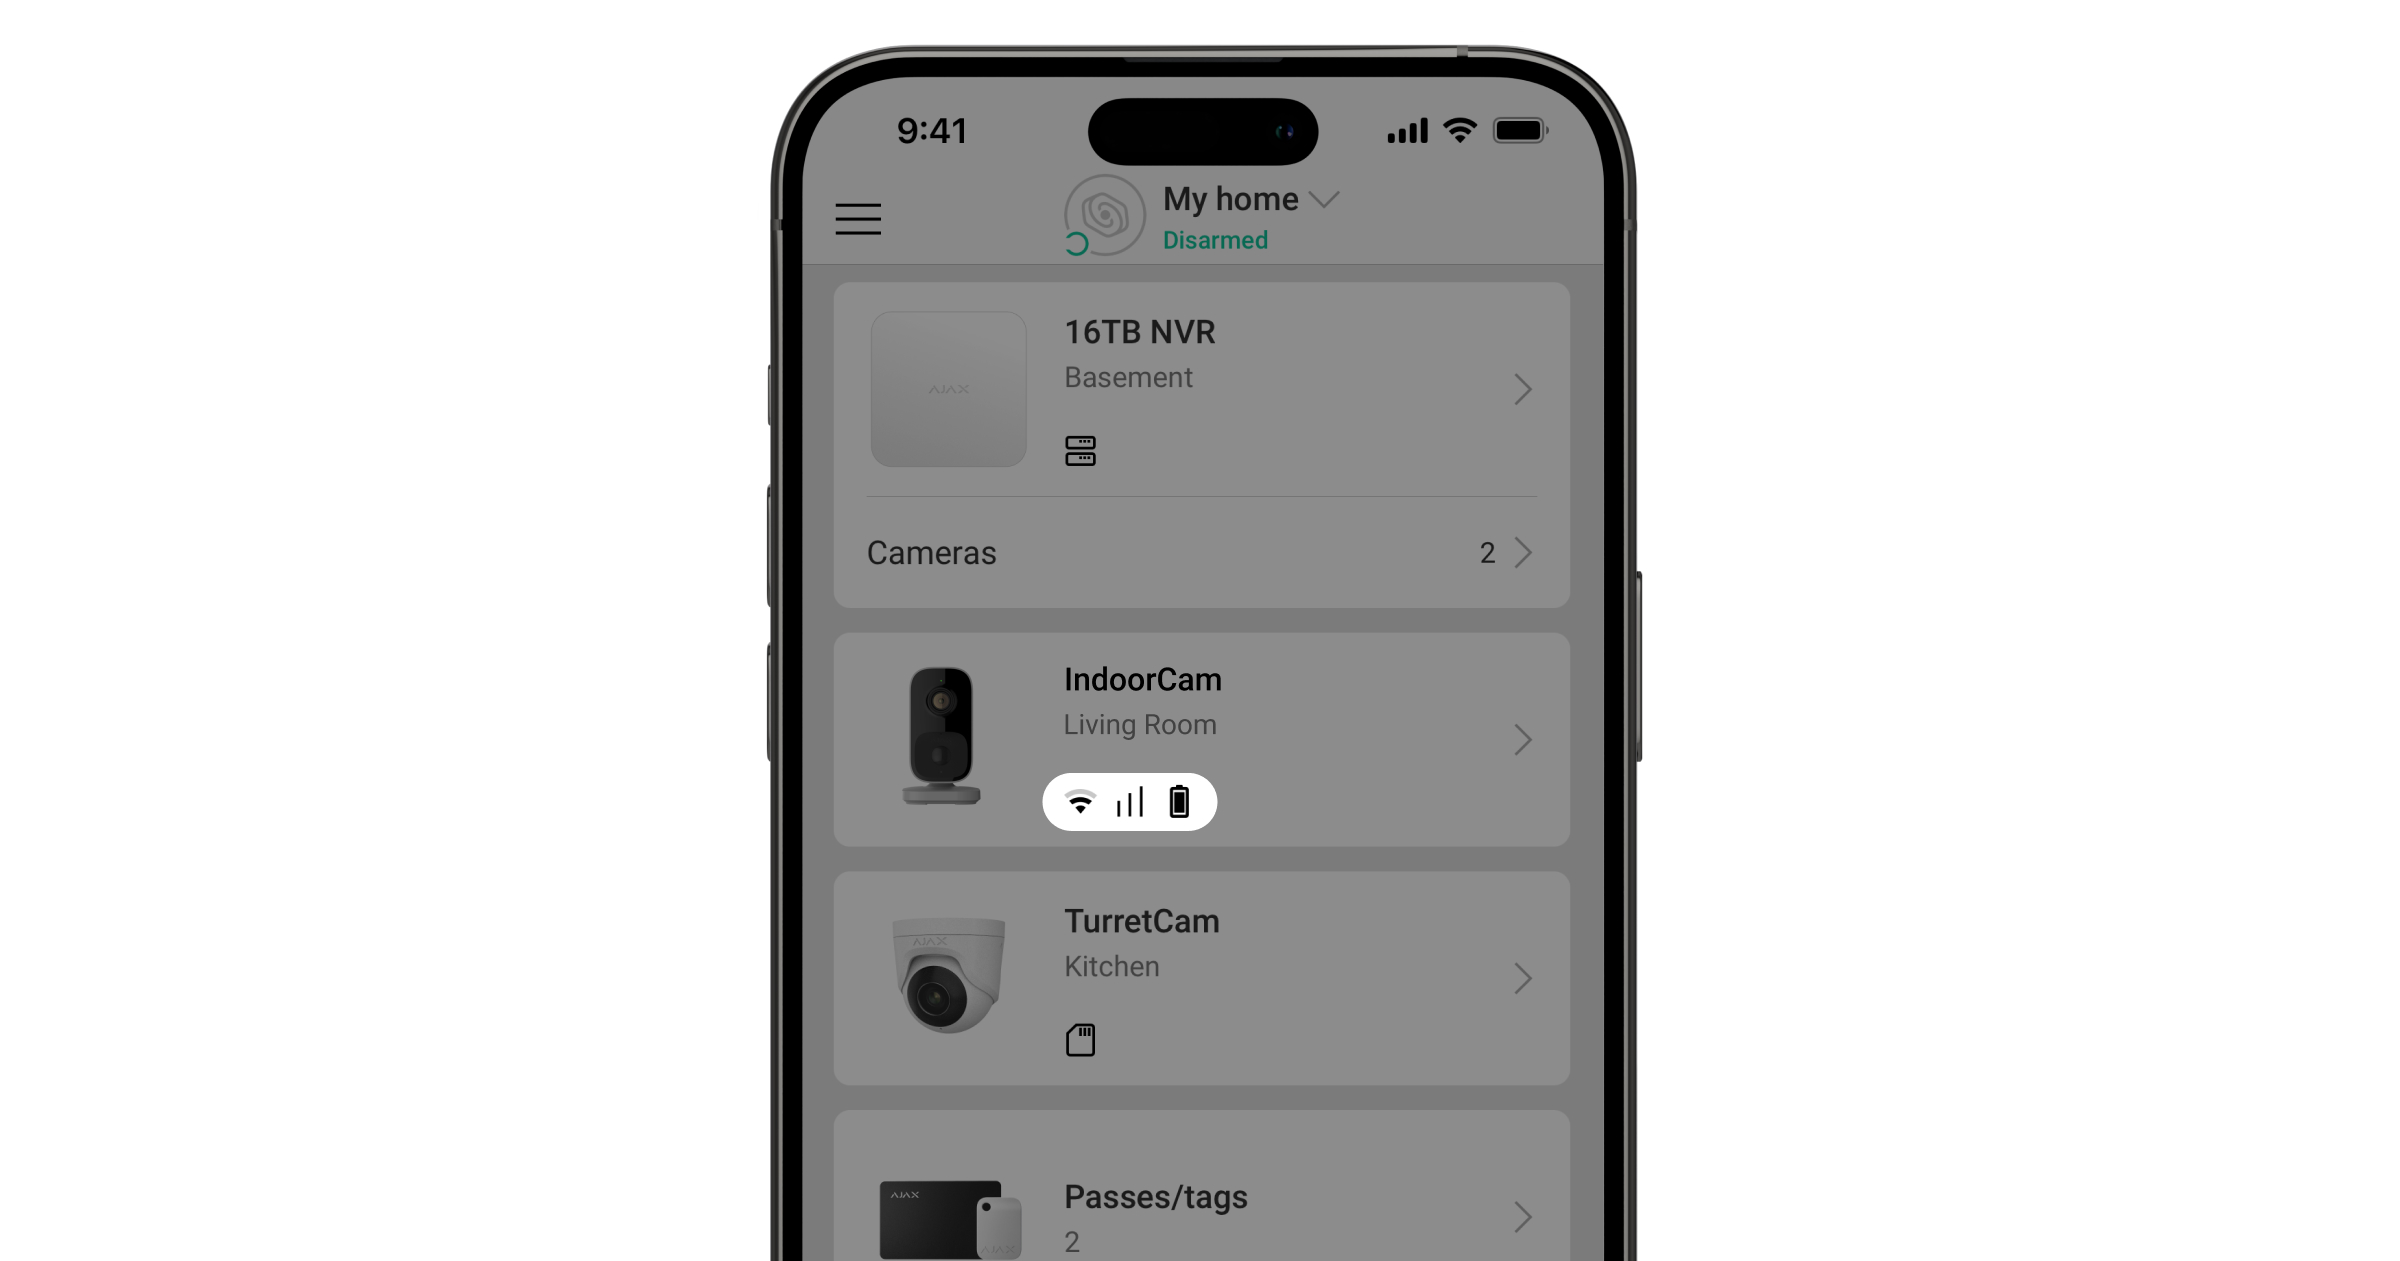
A intensidade do sinal é determinada pelo número de pacotes de dados não entregues ou corrompidos durante um determinado período de tempo. Nas apps Ajax, no separador Dispositivos , o ícone
indica a intensidade do sinal Wi-Fi, enquanto o ícone
indica a intensidade do sinal com o hub:
- três barras — excelente intensidade de sinal;
- duas barras — boa intensidade de sinal;
- uma barra — fraca intensidade de sinal, não é garantido um funcionamento estável;
- Ícone riscado — sem sinal.
Não instale o detetor
- Em locais com temperatura e humidade fora dos limites permitidos. Isto pode danificar o dispositivo.
- Em locais onde objetos ou estruturas possam obstruir a visão do aparelho.
- Em locais com intensidade de sinal Wi-Fi baixa ou instável.
- Em locais com uma intensidade de sinal Jeweller ou Wings baixa ou instável. Isto é aplicável se o dispositivo estiver emparelhado com um hub.
Não se recomenda a instalação do dispositivo sob luz solar direta. Isto pode provocar um sobreaquecimento e danificar os componentes elétricos do aparelho.
Instalação
Antes de instalar a IndoorCam, certifique-se de que escolheu o local ideal em conformidade com os requisitos deste manual.
Ao ligar uma fonte de alimentação externa e utilizar a IndoorCam, siga as normas gerais de segurança elétrica para a utilização de aparelhos elétricos, bem como os requisitos dos atos jurídicos regulamentares sobre segurança elétrica.
A carcaça da IndoorCam possui um conetor de alimentação para ligar uma fonte de alimentação de 12 V⎓ (incluída no conjunto completo da câmara).
Não instale o dispositivo:
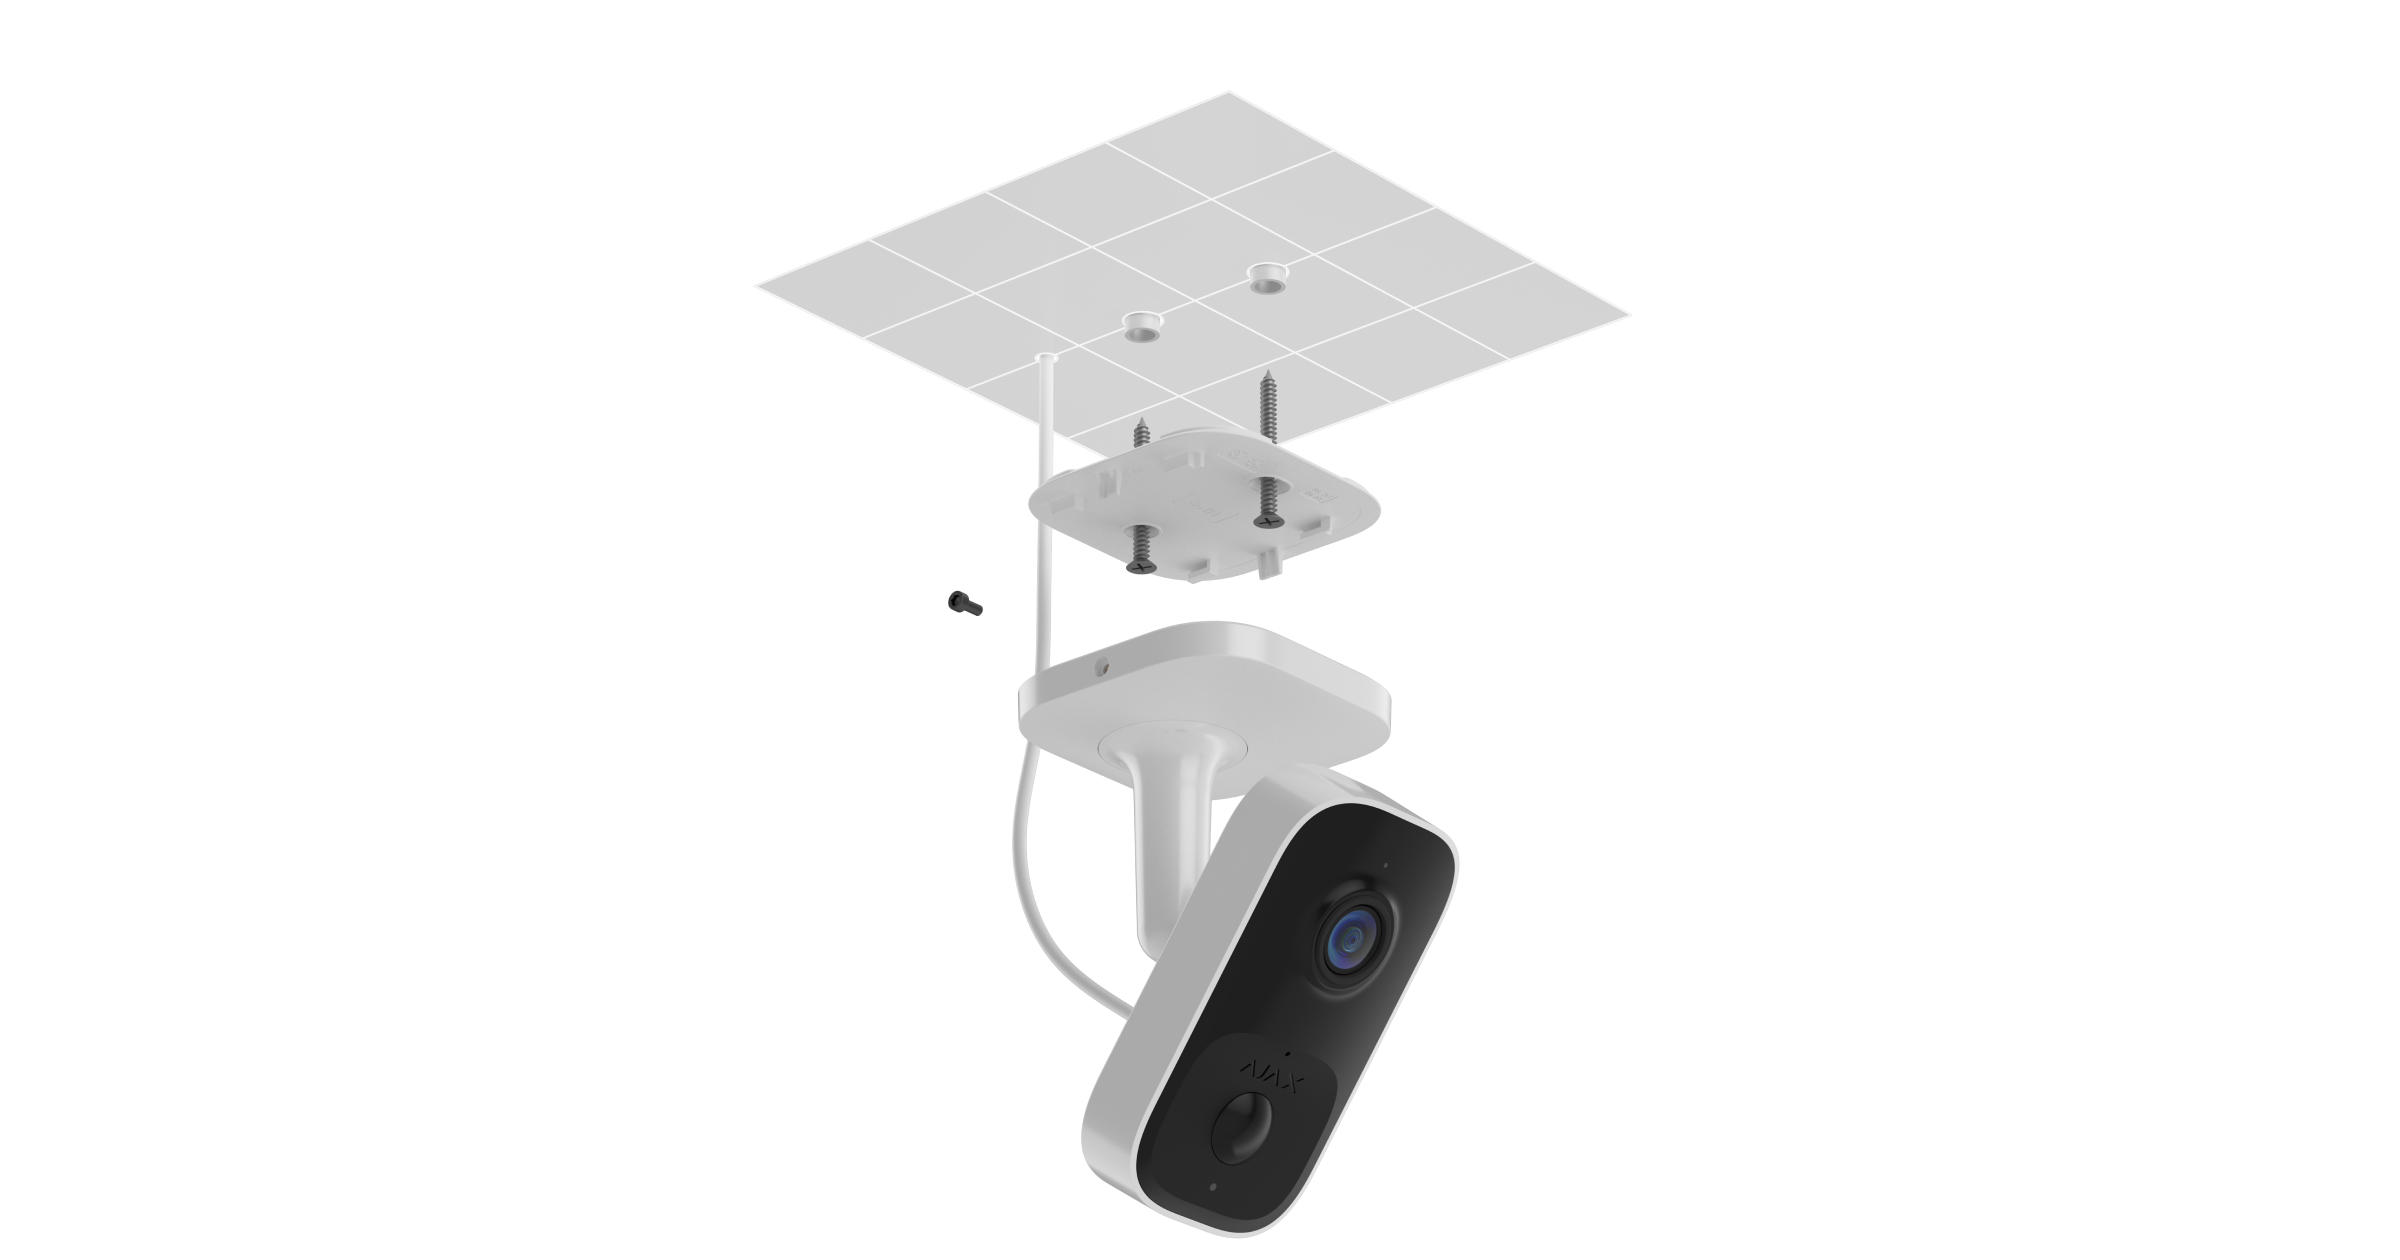
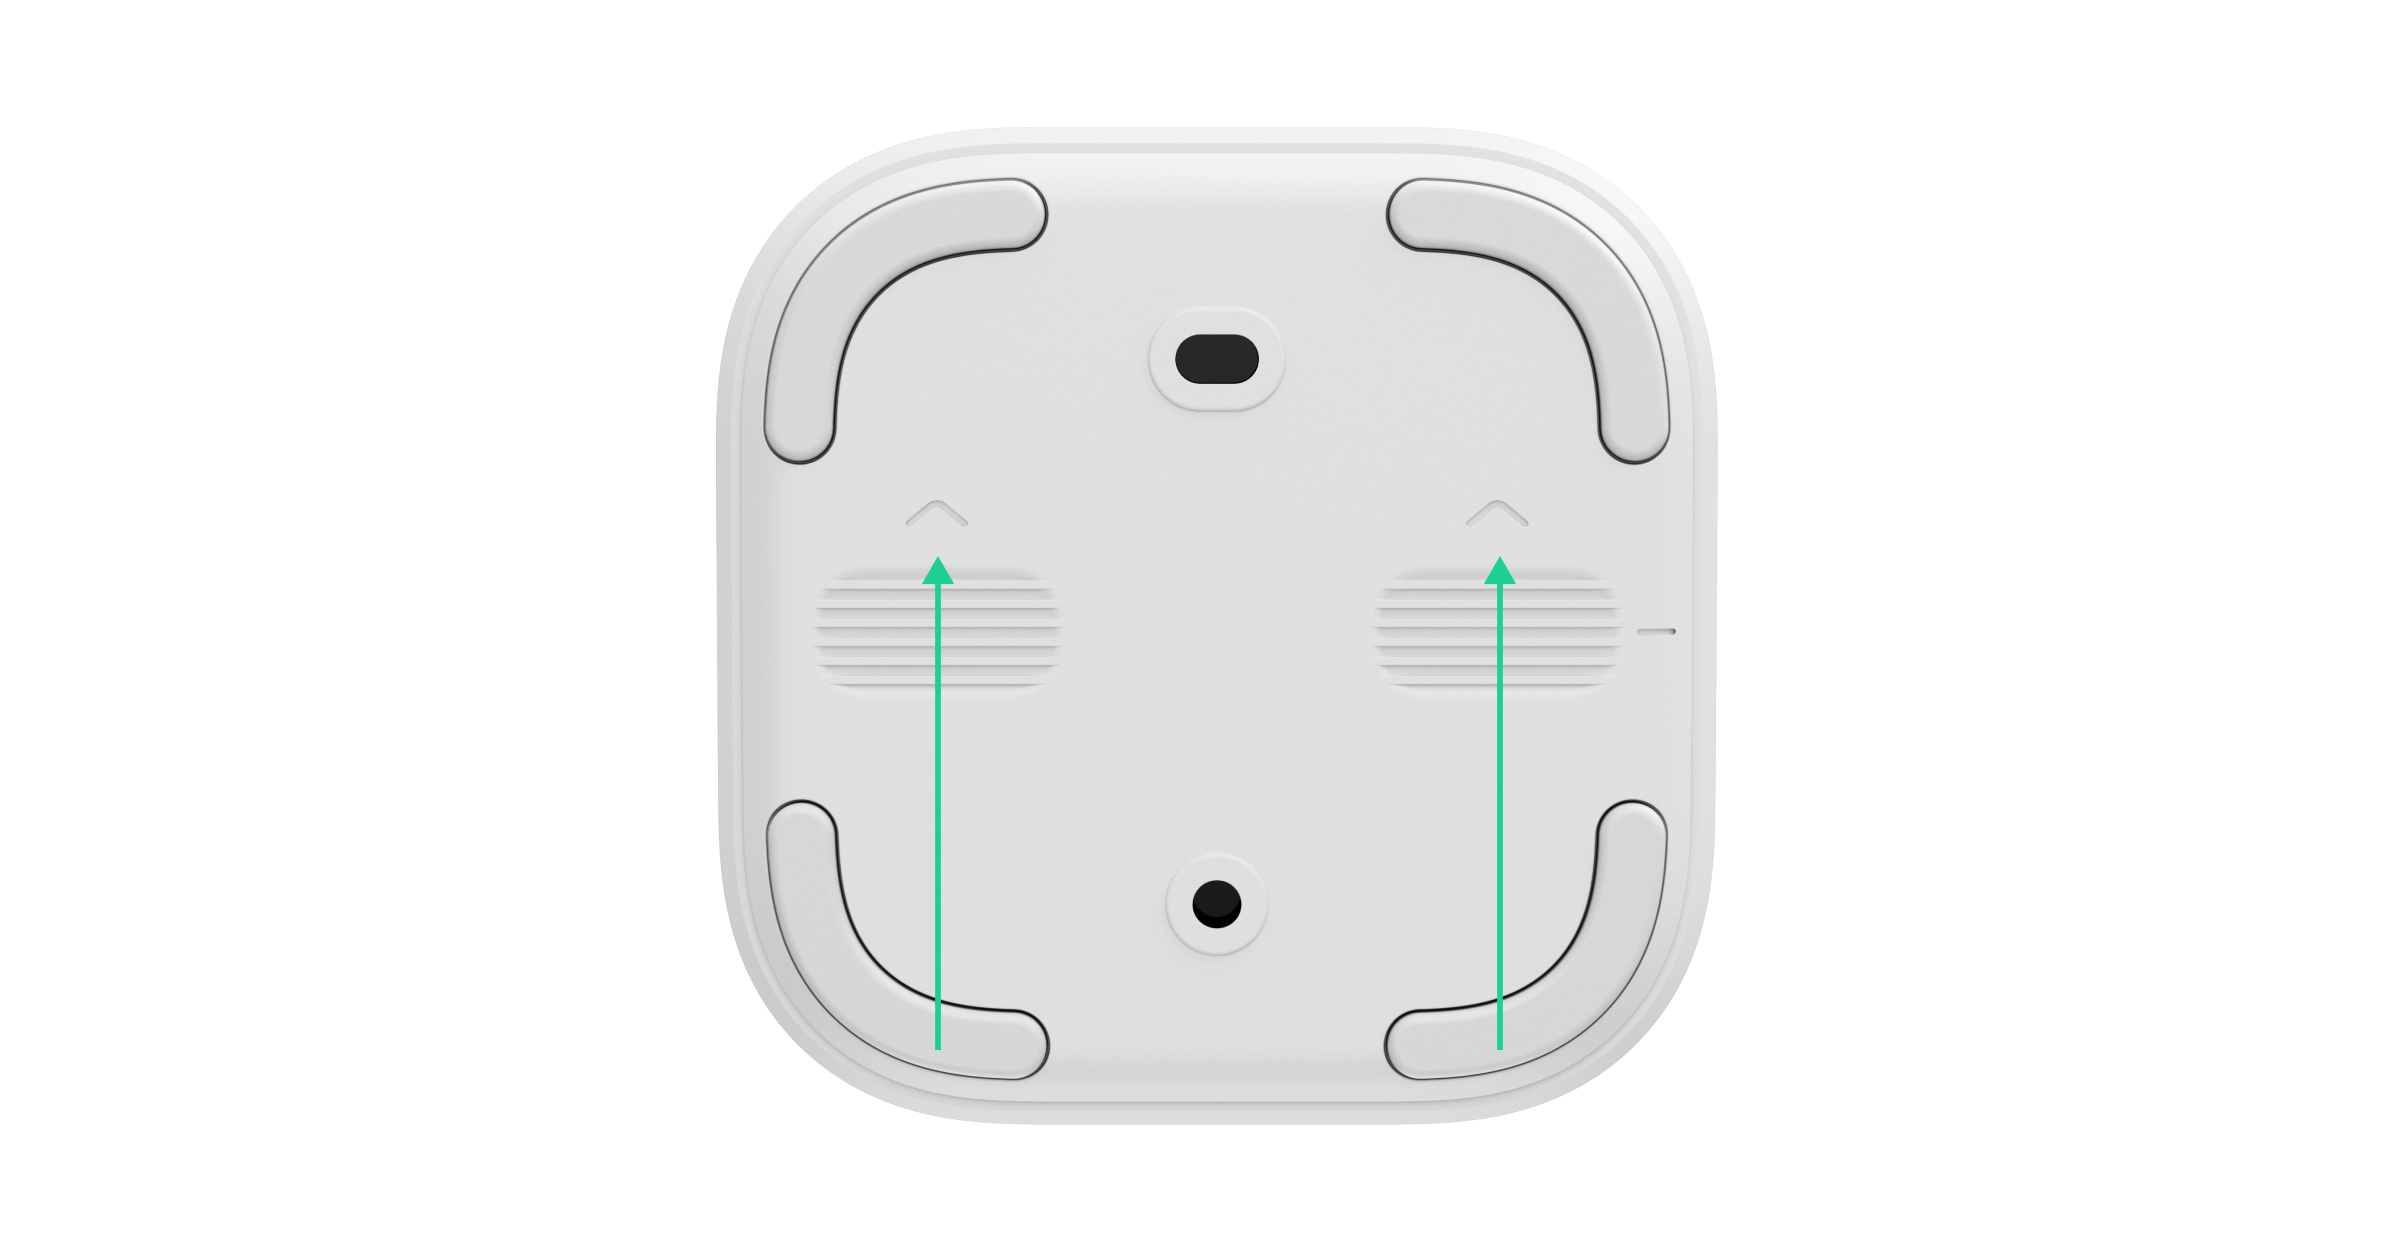
- Retire o painel de instalação do suporte giratório do dispositivo. Para isso, deslize o painel na direção marcada.
- Fixe o painel de instalação utilizando fixadores temporários (por exemplo, fita adesiva de dupla face).
A fita de dupla face só pode ser utilizada para uma instalação temporária. O dispositivo fixado pela fita adesiva pode soltar-se da superfície em qualquer altura.
- Ligue a fonte de alimentação (incluída no conjunto completo da câmara) ao conetor correspondente.
- Ligue a alimentação externa.
- Adicione a IndoorCam ao sistema.
- Coloque o dispositivo no painel de instalação.
- Teste o funcionamento do dispositivo e verifique os ângulos de visão da câmara. Ajuste a inclinação e a posição panorâmica da câmara.
- Se os ângulos de visão da câmara estiverem corretos e o dispositivo funcionar como esperado, retire o dispositivo do painel de instalação.
- Fixe o painel de instalação na superfície com os parafusos agrupados. Utilize todos os pontos de fixação.
Se utilizar outros elementos de fixação, certifique-se de que não danificam ou deformam o painel de instalação.
- Coloque o dispositivo no painel de instalação.
- Fixe o parafuso de fixação na parte lateral da carcaça do dispositivo. O parafuso é necessário para uma fixação mais fiável e para proteger o detetor de uma desmontagem rápida.
Adicionar ao sistema
Antes de adicionar um dispositivo
- Instale a app Ajax.
- Inicie sessão na sua conta ou crie uma nova conta.
- Selecione um espaço ou crie um novo.
- Adicione pelo menos uma sala virtual.
- Certifique-se de que o espaço está desarmado.
Apenas um PRO ou um administrador de espaço com direitos para configurar o sistema pode adicionar o dispositivo ao espaço.
Adicionar ao espaço
Antes de adicionar ao sistema, certifique-se de que verificou o seguinte:
- Um sinal Wi-Fi cobre o local de instalação da IndoorCam.
- A fonte de alimentação externa da IndoorCam está ligada.
- Está perto da IndoorCam com o seu smartphone com uma app Ajax instalada.
- Tem a palavra-passe da sua rede Wi-Fi nas suas mãos.
Note que a IndoorCam funciona apenas com redes Wi-Fi de 2,4 GHz.
- Abra a app Ajax. Selecione um espaço ao qual pretende adicionar o dispositivo.
- Aceda ao separador Dispositivos
e toque em Adicionar Dispositivo.
- Digitalize o código QR ou introduza o ID manualmente. Um código QR com identificação está na carcaça do dispositivo. Além disso, está duplicado na embalagem do dispositivo.
- Dê um nome ao dispositivo.
- Selecione a sala virtual e o grupo de segurança (se o modo de grupo estiver ativado). Toque em Adicionar dispositivo para continuar.
- Prima o botão de emparelhamento para adicionar o dispositivo. Aguarde que a IndoorCam entre no modo de configuração. Quando o LED estiver a piscar a azul, toque em Seguinte para continuar:
- Se a IndoorCam não tiver sido previamente ligada à sua rede Wi-Fi, o dispositivo ativará o modo de Ponto de Acesso (PA). Em seguida, o seu smartphone pedirá para se ligar ao PA. Toque em Conectar para permitir a ligação.
- Se a IndoorCam tiver sido previamente ligada à sua rede Wi-Fi, o dispositivo ligar-se-á à rede Wi-Fi e verá a imagem em direto do dispositivo. Avance para o passo 9 abaixo.
- Selecione a rede Wi-Fi pretendida na lista.
- Introduza a palavra-passe da rede selecionada para ligar o dispositivo ao Wi-Fi. Aguarde que a IndoorCam estabeleça a conexão. Uma vez ligado, verá a imagem em direto do dispositivo.
- Toque em Concluir para adicionar o dispositivo.
O dispositivo conectado aparecerá na lista de dispositivos da app Ajax.
Note que a IndoorCam só é compatível com um espaço. Para ligar o dispositivo ao novo espaço, retire-o da lista de dispositivos do espaço antigo. Este processo de remoção tem de ser feito manualmente numa app Ajax.
Emparelhamento com um NVR Ajax
Se a IndoorCam já tiver sido adicionada ao espaço como um dispositivo autónomo, pode facilmente emparelhá-la com um Ajax NVR. Caso contrário, consulte a secção Adicionar ao espaço para saber como adicionar a IndoorCam ao NVR ou como um dispositivo autónomo.
Para emparelhar a IndoorCam com o NVR, numa app Ajax:
- Aceda ao separador Dispositivos
.
- Selecione NVR na lista e toque em Câmaras.
- Toque em Adicionar câmara e aguarde até a verificação da rede estar concluída e serem apresentados os dispositivos disponíveis ligados à rede local.
Note que a IndoorCam deve estar ligada à mesma rede local que o NVR.
- Selecione o dispositivo.
- Atribua um nome ao dispositivo, selecione uma sala virtual e um grupo e, em seguida, toque em Concluir.
- Aguarde que o sistema adicione o dispositivo e, em seguida, toque em Fechar.
O dispositivo aparecerá agora na lista de câmaras NVR numa app Ajax.
Emparelhamento com um hub Ajax
Se o hub for adicionado ao seu sistema, pode configurar o canal de comunicação de reserva entre a IndoorCam e o hub. Antes de adicionar, verifique se o seu hub é compatível com a IndoorCam.
Quando a IndoorCam é adicionada ao hub, ocupa uma ranhura entre os dispositivos do hub.
Para emparelhar a IndoorCam com o hub, na app Ajax:
- Aceda ao separador Dispositivos
.
- Selecione IndoorCam na lista de dispositivos. Se estiver ligada ao gravador de vídeo em rede, selecione NVR e toque em Câmaras.
- Aceda às Definições tocando duas vezes no ícone da engrenagem
.
- Aceda a Conexão.
- Selecione a opção de Canal de rádio de reserva.
- Toque em Configurar. O hub adicionado ao espaço será apresentado.
- Toque em Conectar para emparelhar a IndoorCam com o hub.
Quando a IndoorCam estiver emparelhada com o hub, recomenda-se a execução dos testes de intensidade de sinal Jeweller e Wings.
Configuração da rede Wi-Fi
Numa app Ajax, pode configurar a ligação de rede Wi-Fi para a sua IndoorCam. Pode alterar as definições atuais da rede Wi-Fi ou ligar o dispositivo a outra rede Wi-Fi disponível.
Note que a IndoorCam funciona apenas com redes Wi-Fi de 2,4 GHz.
Para configurar a ligação Wi-Fi, numa app Ajax:
- Aceda ao separador Dispositivos
.
- Selecione IndoorCam na lista de dispositivos. Se estiver ligada ao gravador de vídeo em rede, selecione NVR e toque em Câmaras.
- Aceda às Definições tocando duas vezes no ícone da engrenagem
.
- Aceda a Conexão.
- Selecione a opção Wi-Fi.
- No menu seguinte, é possível:
- Alterar as definições da rede Wi-Fi atual: selecionar a rede atual e configurar as definições necessárias.
- Ligar a outra rede Wi-Fi: selecionar a rede Wi-Fi pretendida na lista de disponíveis e introduzir a palavra-passe para ligar.
- Repor a ligação Wi-Fi se o dispositivo estiver offline: toque em Repor rede Wi-Fi e prossiga com os passos descritos na aplicação.
Reposição das predefinições
Para repor as predefinições da câmara:
- Prima e mantenha premido o botão de emparelhamento.
- Ligue a câmara enquanto o botão de emparelhamento é premido e aguarde até que o indicador LED acenda a violeta. Isto demorará cerca de 50 segundos.
O indicador LED do botão acende a azul durante 20 segundos depois de ligar a câmara com um botão de emparelhamento premido. De seguida, desliga-se durante 30 segundos e acende-se em violeta. Isto significa que a câmara foi restaurada para as predefinições.
- Solte o botão.
Ícones
Os ícones numa app Ajax apresentam alguns dos estados da IndoorCam. Pode verificar os ícones no separador Dispositivos .
| Ícone | Significado |
|
Os serviços suplementares são ativados de acordo com a assinatura. |
|
| Intensidade do sinal Wi-Fi. Apresenta a intensidade do sinal através do canal de comunicação Wi-Fi. O valor recomendado é de 2–3 barras. | |
| Sem sinal de Wi-Fi. | |
|
Intensidade do sinal do canal de reserva. Apresenta a intensidade do sinal entre o hub e o dispositivo. O valor recomendado é de 2–3 barras. |
|
| A ligação através de Jeweller foi perdida. | |
|
O dispositivo funciona em modo Noturno. |
|
| Não há acesso para ver o vídeo do dispositivo. | |
| O detetor funciona através do repetidor do sinal de rádio. | |
| Está disponível uma atualização de firmware. Aceda aos estados ou definições do detetor para encontrar a descrição e lançar uma atualização. | |
| A instalação do novo firmware falhou. | |
| O dispositivo perdeu a ligação com o servidor Ajax Cloud. | |
|
A ligação do dispositivo através de ONVIF está ativada. |
Estados
Os estados incluem informações sobre o dispositivo e os seus parâmetros de funcionamento. Pode encontrar os estados da IndoorCam em apps Ajax:
- Aceda ao separador Dispositivos
.
- Selecione IndoorCam na lista.
| Parâmetro | Significado |
| Serviços extra |
O campo está disponível nas apps Ajax PRO e é apresentado quando estão disponíveis ou ativados serviços extra para o dispositivo, de acordo com a subscrição. Tocar no campo mostra as informações sobre os serviços atribuídos e os contactos da empresa que presta esses serviços. |
| Avaria |
Tocar em O campo só é apresentado se for detetada uma avaria. |
| Atualizações de firmware | O campo é apresentado quando a atualização do firmware está disponível:
Tocar em |
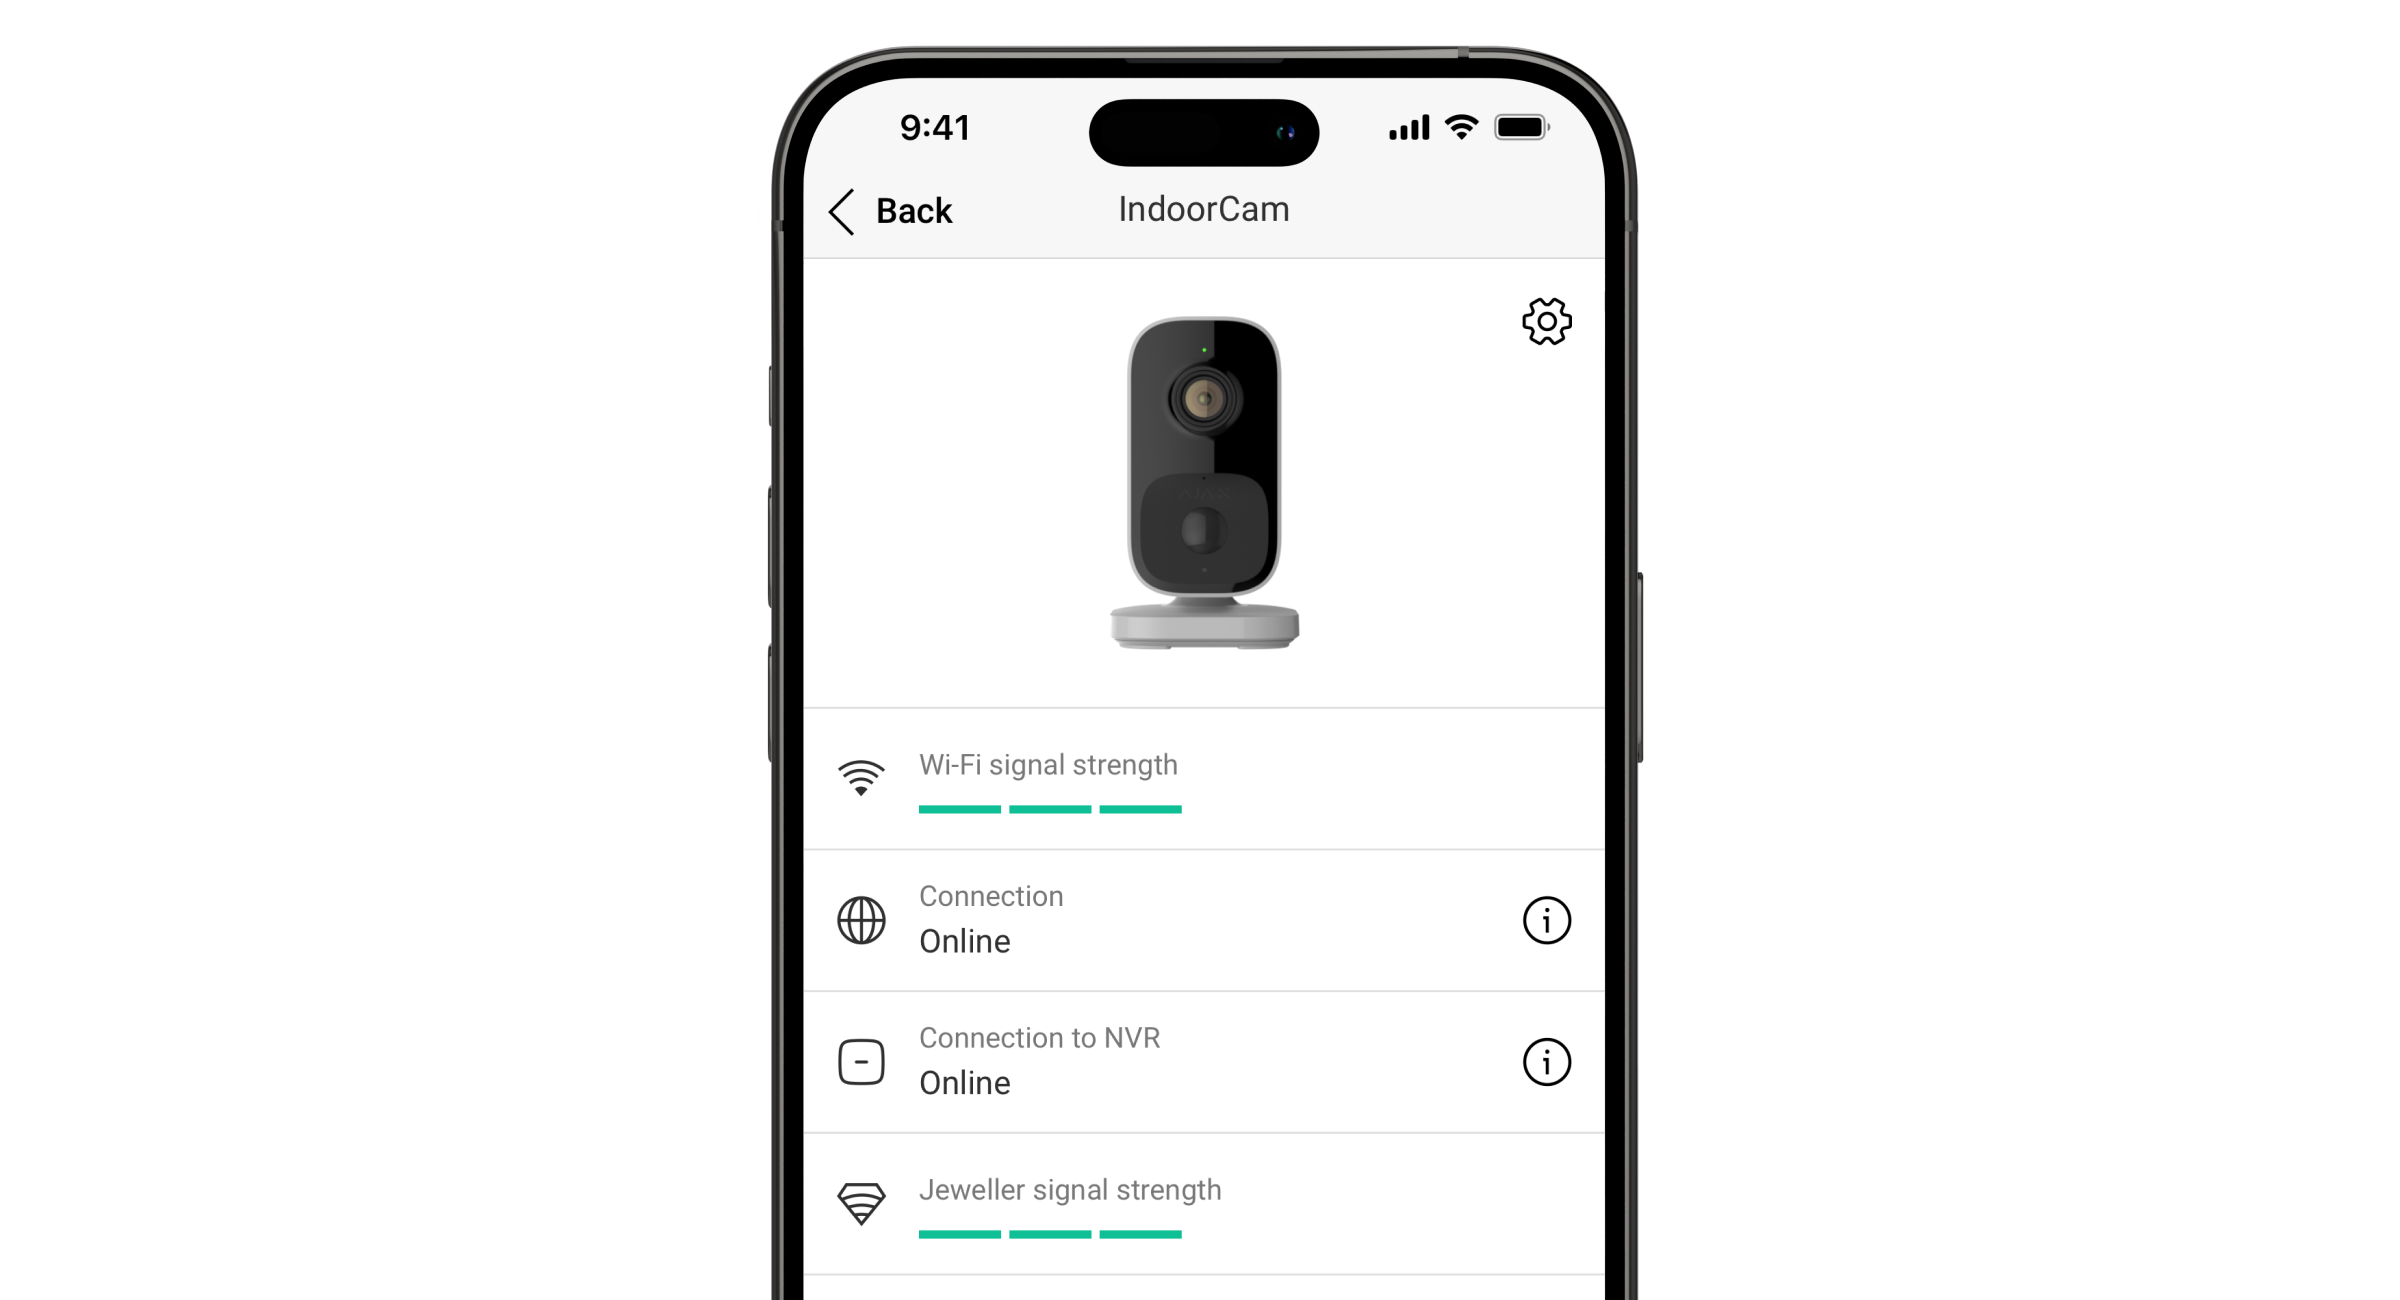
| Intensidade do sinal Wi-Fi | Intensidade do sinal Wi-Fi através do canal de comunicação Wi-Fi. O valor recomendado é de 2-3 barras. |
| Conexão | O estado da ligação do dispositivo à Internet através de Wi-Fi:
Tocar em |
| Ligação à NVR |
Apresentado quando o dispositivo está ligado ao NVR. O estado da ligação do dispositivo ao NVR:
Tocar em |
| Intensidade de sinal Jeweller |
Intensidade do sinal do Jeweller entre o dispositivo e o hub (ou o repetidor do sinal de rádio). O valor recomendado é de 2-3 barras. O Jeweller é um protocolo para a transmissão de eventos. O campo é apresentado quando o dispositivo é adicionado ao hub. |
| Ligação através de Jeweller | Estado da ligação no canal Jeweller entre o dispositivo e o hub (ou o repetidor):
O campo é apresentado quando o dispositivo é adicionado ao hub. |
| Intensidade do sinal de Wings |
A intensidade do sinal de Wings entre o dispositivo e o hub (ou o repetidor). O valor recomendado é de 2-3 barras. O Wings é um protocolo para a transmissão de verificações fotográficas. O campo é apresentado quando o dispositivo é adicionado ao hub. |
| Ligação via Wings | Estado da ligação no canal Wings entre o dispositivo e o hub (ou o repetidor):
O campo é apresentado quando o dispositivo é adicionado ao hub. |
| <Range extender name> | Estado da ligação do dispositivo ao repetidor do sinal de rádio:
O campo aparece se o detetor funcionar através do repetidor do sinal de rádio. |
| Local de armazenamento | Apresenta a lista de dispositivos de armazenamento ligados à IndoorCam:
Tocar em |
| Arquivo na nuvem | Apresenta o estado do Ajax Cloud Storage:
|
| Resolução | A resolução atual da câmara. |
| Taxa de fotogramas | A taxa de fotogramas atual da câmara. |
| Taxa de bits | A taxa de bits atual da câmara. |
| Codec de vídeo | O codec de vídeo atual:
|
| Deteção de movimento por análise de fotogramas | O estado da função de Deteção de movimento:
|
| Deteção de objetos | A definição da funcionalidade Deteção de objetos:
|
| Deteção de movimento com PIR | O estado da funcionalidade Deteção de movimento com PIR:
|
| Integração ONVIF |
Mostra o estado atual da integração ONVIF do dispositivo. Este estado é apresentado apenas quando a integração ONVIF está ativada. |
| Permissões para visualizar |
Apresenta o número de utilizadores que têm acesso para ver vídeos a partir do dispositivo. Ao tocar em |
| Tempo de atividade | O tempo de funcionamento do dispositivo desde a última reinicialização. |
| Firmware | Versão do firmware do dispositivo. |
| ID do dispositivo | ID do dispositivo. Também disponível no código QR na carcaça do dispositivo e na sua caixa de embalagem. |
| Número do Dispositivo | Número do dispositivo. Este número é transmitido à CRA em caso de alarme ou evento. |
Definições
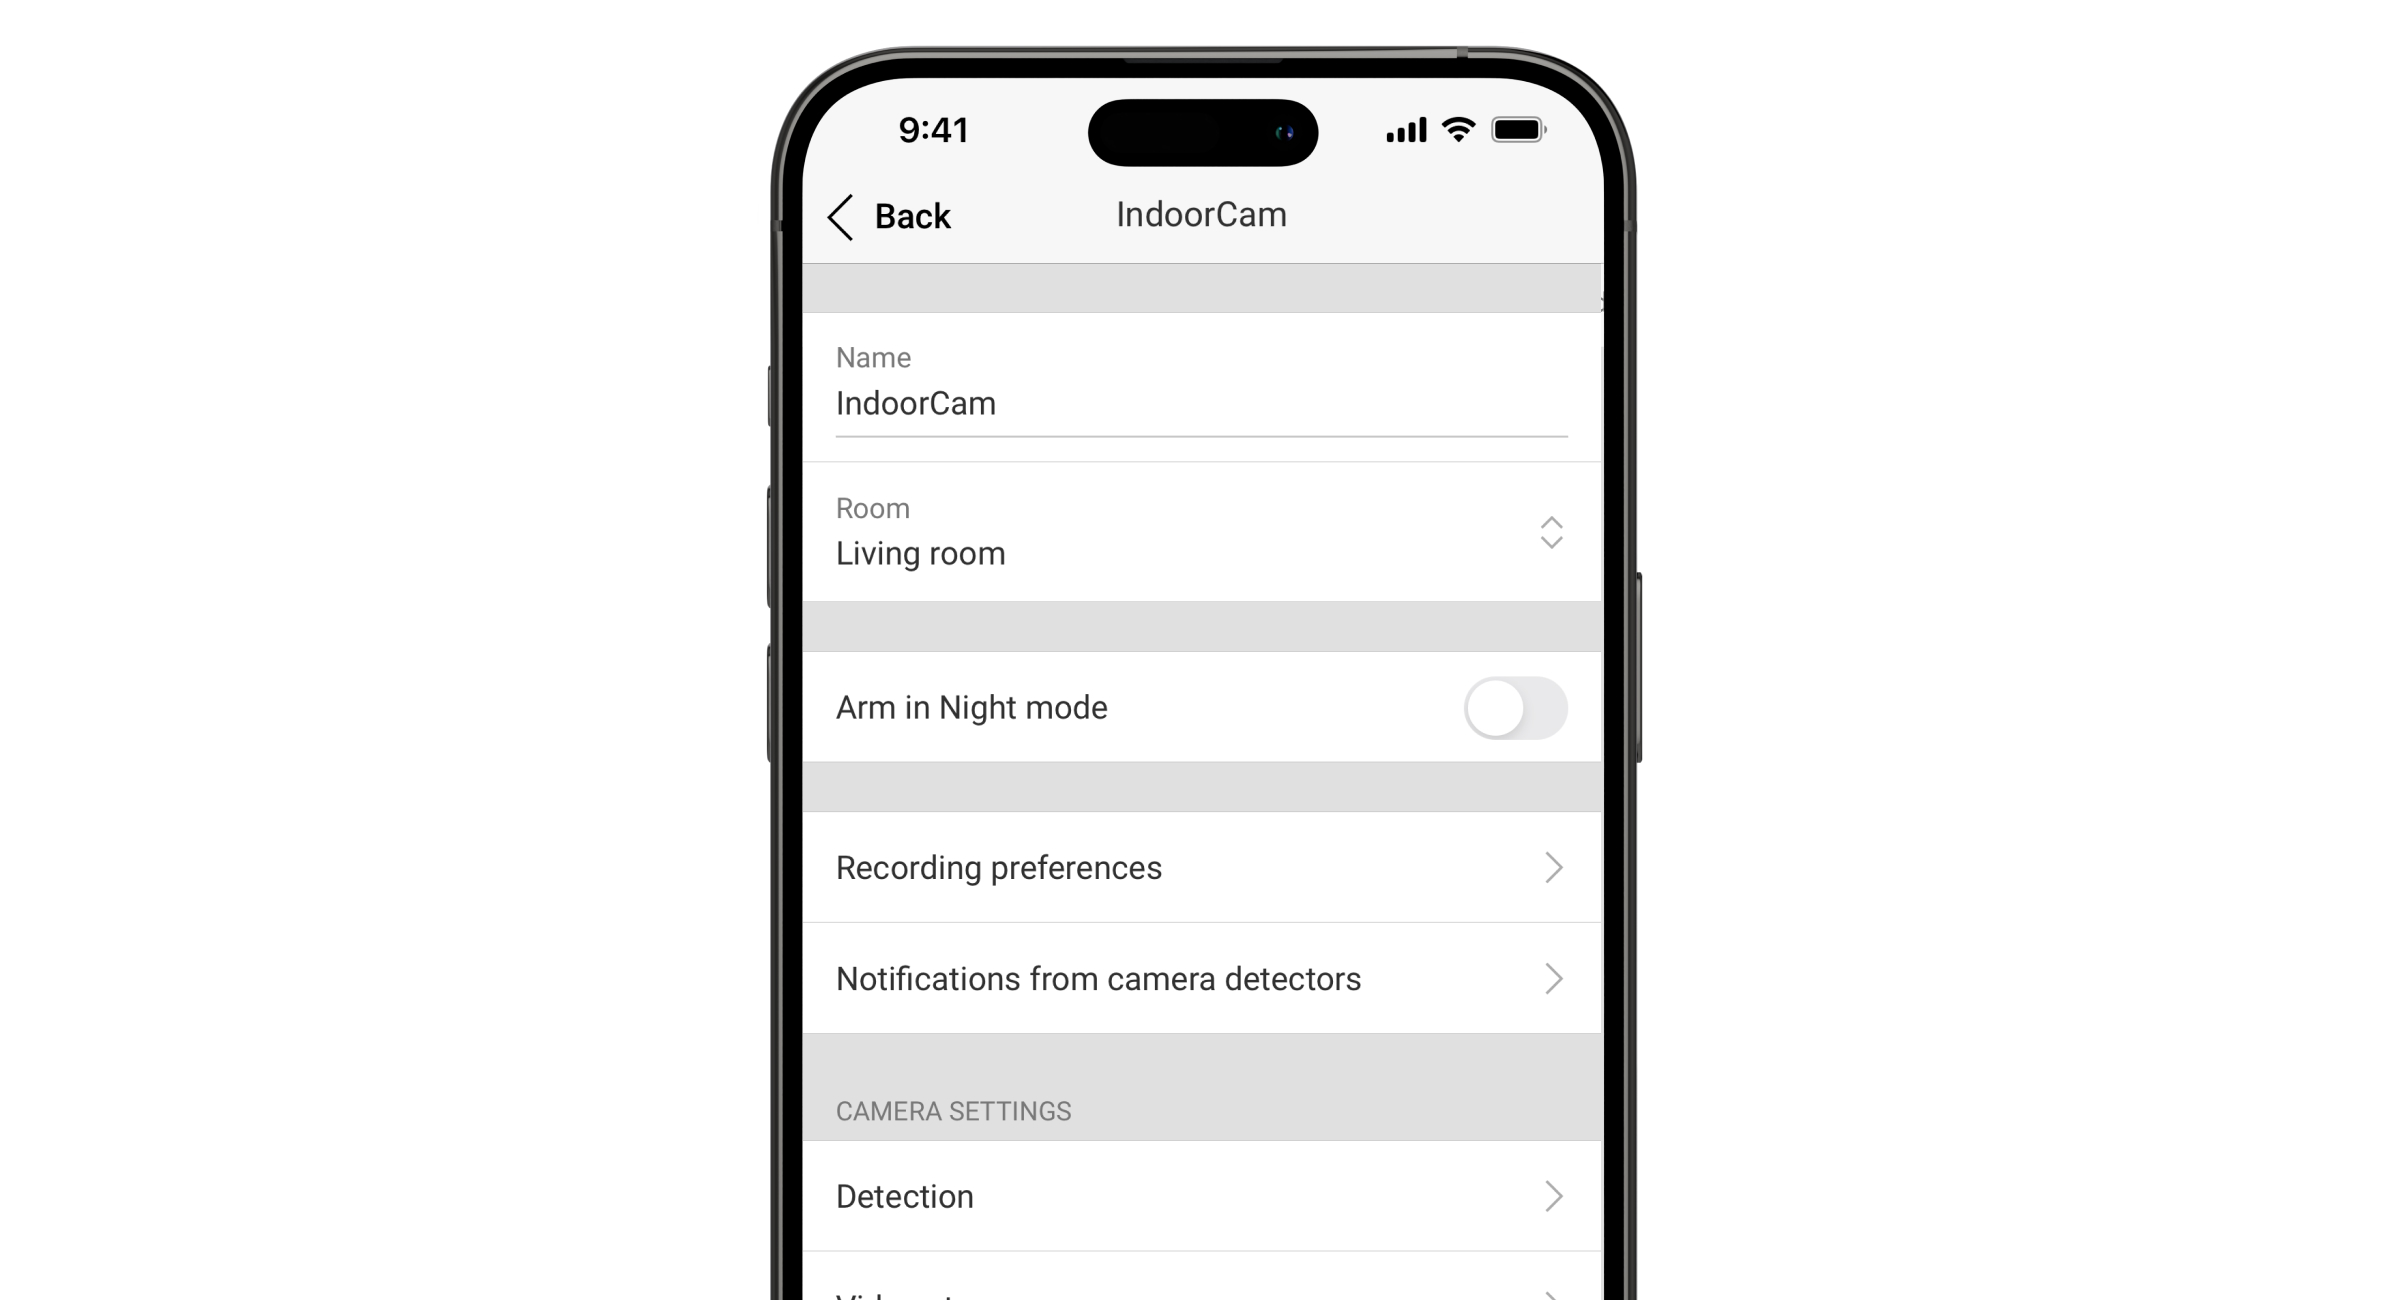
Para alterar as definições da câmara, na app Ajax:
- Aceda o separador Dispositivos
.
- Selecione IndoorCam na lista. Se a IndoorCam estiver ligada ao gravador de vídeo, selecione NVR e toque em Câmaras.
- Aceda as Definições tocando no ícone de engrenagem
.
- Defina os parâmetros necessários.
- Toque em Voltar para guardar as novas definições.
| Definições | Valor |
| Nome |
Nome do dispositivo. Apresentado na lista de dispositivos do hub, texto SMS e notificações no historial de eventos. Para alterar o nome, toque no campo de texto. O nome pode conter até 24 caracteres latinos ou até 12 caracteres cirílicos. |
| Sala |
Seleção da sala virtual à qual a IndoorCam está atribuída. O nome da sala aparece no texto do SMS e nas notificações no historial de eventos. |
| Armar no Modo Noturno |
Quando ativado, o detetor passa para o modo armado quando o sistema está definido para o Modo Noturno. |
| Preferências de registo | Seleção do Modo de gravação para cada memória:
Seleção do modo armado quando a câmara grava vídeo:
|
| Notificações dos detetores de câmara |
Abre um menu com as definições de Notificações dos detetores da câmara. |
| Deteção |
Abre um menu com definições de Deteção. |
| Transmissão de vídeo |
Abre um menu com definições de Fluxo de vídeo. |
| Imagem |
Abre um menu com definições de Imagem. |
| Áudio | Definições para a captação e reprodução de áudio.
|
| Zonas de privacidade |
Permite ao utilizador selecionar zonas que não são apresentadas no vídeo da câmara. Em vez disso, o utilizador vê um retângulo preto. |
| Atualizações de firmware |
Passa o dispositivo para o modo de atualização do firmware se uma nova versão estiver disponível. |
| Conexão | Abre um menu com definições de Conexão:
|
| Arquivo |
Seleção da profundidade máxima do arquivo. Pode ser definido no intervalo de 1 a 360 dias ou pode ser ilimitado. Permite ao utilizador formatar o arquivo na nuvem. |
| Serviço |
Abre um menu com definições de Serviço. |
| Teste de intensidade de sinal do Jeweller |
Passa o dispositivo para o modo de teste de intensidade do sinal do Jeweller. O teste permite-lhe verificar a intensidade do sinal entre o hub (ou o repetidor de alcance do sinal de rádio) e o dispositivo através do protocolo de transferência de dados sem fios Jeweller para selecionar o local de instalação ideal. Disponível se o dispositivo estiver emparelhado com o hub. |
| Teste de intensidade de sinal do Wings |
Passa o dispositivo para o modo de teste de intensidade do sinal do Wings. O teste permite-lhe verificar a intensidade do sinal entre o hub (ou o repetidor de alcance do sinal de rádio) e o dispositivo via o protocolo de transferência de dados sem fios Wings para selecionar o local de instalação ideal. Disponível se o dispositivo estiver emparelhado com o hub. |
| Comunicar um problema | Permite descrever um problema e enviar um relatório. |
| Monitorização |
A definição está disponível em apps Ajax PRO. Permite a um PRO com direitos de configuração do sistema efetuar a configuração:
|
| Guia do utilizador | Abre o manual do utilizador da IndoorCam numa app Ajax. |
| Desemparelhar do NVR |
Desemparelha o dispositivo do NVR ao qual foi emparelhado. A opção está disponível se o dispositivo estiver emparelhado com o NVR. |
| Eliminar dispositivo | Apaga todas as definições do dispositivo e elimina o dispositivo do espaço. Além disso, desemparelha o dispositivo do NVR e do hub, se essas ligações estiverem configuradas. |
Notificações por detetores de câmara
| Definições | Significado |
| Notificar se detetado | O utilizador pode selecionar o tipo de objeto ou movimento e, quando este é reconhecido, é recebida uma notificação e as sirenes são ativadas:
Note que os tipos correspondentes de objeto ou movimento devem ser ativados nas definições de Deteção. Para especificar se a deteção de movimento deve ativar as sirenes, toque no tipo de objeto ou movimento necessário e ative a opção Ativar sirenes ao detetar. A funcionalidade está disponível quando a câmara e pelo menos uma sirene são adicionadas a um hub Ajax com OS Malevich 2.31 e versões posteriores. |
| Confirmar as deteções com o sensor PIR |
Quando esta opção está selecionada, o utilizador recebe notificações apenas quando as deteções são captadas pelo reconhecimento de objectos/movimento e pelo sensor PIR. Se o movimento for detetado apenas por um sensor, o sistema não envia notificações. Disponível para as opções Humano, Animal de estimação e Qualquer movimento (por análise de fotogramas). |
| Quando notificar | Seleção do modo de envio de notificações pela câmara:
|
| Intervalo na notificação de eventos semelhantes |
Seleção do intervalo de tempo para notificar eventos semelhantes: de 30 segundos a 8 horas. O intervalo predefinido é de 3 minutos. O tempo selecionado aplica-se a cada tipo de deteção separadamente e ajuda a evitar a informação repetida do mesmo motivo de acionamento. |
| Duração da deteção de objetos para notificação |
Seleção do tempo que um objeto deve permanecer no campo de visão da câmara para que o sistema envie uma notificação sobre o objeto detetado. Os valores disponíveis são Notificar instantaneamente ou 2, 3, 4 ou 5 segundos. O tempo predefinido é de 2 segundos. |
Definições de deteção
| Definições | Valor |
| Deteção de movimento com PIR | Quando a opção está ativada, o dispositivo utiliza o sensor PIR incorporado para a deteção de movimento. |
| Sensibilidade do sensor PIR | O nível de sensibilidade do sensor de movimentos PIR. Permite adaptar o dispositivo às condições do local para filtrar os falsos acionamentos:
A opção está disponível quando o Deteção de movimento com PIR está ativado. |
| Deteção de movimento por análise de fotogramas | Quando a opção está ativada, a câmara deteta o movimento utilizando o seu software incorporado. |
| Analisar imagem |
O algoritmo de software de análise de imagens utilizado para a deteção de movimentos. A opção está disponível quando a opção Deteção de movimento por análise de fotogramas está ativada. |
| Definições de deteção de movimento | Abre um menu com definições de deteção de movimento:
A opção está disponível quando a opção Deteção de movimento por análise de fotogramas está ativada. |
| Deteção de objetos | Quando a opção está ativada, a câmara identifica o tipo de objetos em movimento utilizando um algoritmo incorporado. No vídeo, pessoas, animais de estimação e veículos são destacados com retângulos coloridos. |
| Definições de deteção de objetos | Abre o menu com as definições de deteção de objetos:
A opção está disponível quando a Deteção de objetos está ativada. |
Definições do fluxo de vídeo
Definições para parâmetros de fluxo principal e de fluxo secundário.
| Definições | Valor |
| Fluxo principal | |
| Codec de vídeo | Seleção da norma de compressão de vídeo:
|
| Resolução | Seleção da resolução principal:
|
| Taxa de fotogramas | Seleção da velocidade de fotogramas: de 3 a 25 com um incremento de 1 fotograma/s. |
| Tipo de taxa de bits | Seleção do tipo de taxa de bits:
|
| Taxa de bits | Definição da taxa de bits em kbit/s. |
| Comprimento do GOP | Seleção do comprimento do GOP: de 1 a 250 com um incremento de 1 fotograma. |
| Qualidade VBR / Qualidade CBR | Seleção da qualidade da compressão: de 0 a 100 com um incremento de 1. |
| Fluxo secundário | |
| Codec de vídeo | Seleção da norma de compressão de vídeo:
|
| Resolução | Seleção da resolução do fluxo secundário:
|
| Taxa de fotogramas | Seleção da velocidade de fotogramas: de 3 a 25 com um incremento de 1 fotograma/s. |
| Tipo de taxa de bits | Seleção do tipo de taxa de bits:
|
| Taxa de bits | Definição da taxa de bits em kbit/s. |
| Comprimento do GOP | Seleção do comprimento do GOP: de 1 a 250 com um incremento de 1 fotograma. |
| Qualidade VBR / Qualidade CBR | Seleção da qualidade da compressão: de 0 a 100 com um incremento de 1. |
Configurações da imagem
Definições para a qualidade de imagem da câmara.
| Definições | Valor |
| Brilho | Ajustar a luminosidade da imagem. |
| Saturação de cor | Ajustar a saturação da cor da imagem. |
| Nitidez | Ajustar a nitidez da imagem. |
| Contraste | Ajustar o contraste da imagem. |
| Wide Dynamic Range (WDR) |
Ativação ou desativação do WDR. Quando o WDR está ativado, ajuda a melhorar as imagens da câmara, com áreas demasiado escuras ou claras. |
| Modo dia/noite (filtro de corte IV) | Seleção do modo de visão da câmara em função das condições de luminosidade:
|
| Limiar de iluminação para comutação de modo | Seleção do limiar de iluminação para alternar entre o modo diurno e noturno:
Esta definição está disponível se o Modo diurno/noturno (filtro de corte IV) estiver definido para Auto. |
| Iluminação por infravermelhos (IV) | Ajustar a intensidade da retroiluminação IV:
A definição é utilizada para captar imagens nítidas à noite ou com pouca luz e assegura a visibilidade utilizando LEDs IV quando a iluminação convencional é ineficaz. |
| Intensidade de IV |
Ajustar a intensidade da retroiluminação IV. Esta definição está disponível se a Iluminação por infravermelhos (IV) estiver definida para Personalizado. |
Configurações de serviços
| Definições | Valor |
| Fuso horário |
Seleção do fuso horário. É configurado por um utilizador e é apresentado quando um utilizador visualiza um vídeo da câmara. |
| Indicação LED na deteção de movimento |
Quando a opção está ativada, o LED do dispositivo fica intermitente se for detetado movimento pelo sensor PIR. A opção Deteção de movimento com PIR deve ser ativada nas definições de Deteção. |
| Ligação através de ONVIF |
Configuração da ligação do dispositivo através de ONVIF a VMSs de terceiros. |
| Ligação ao servidor | |
| Atraso do alarme de perda de conexão com nuvem, seg |
O atraso ajuda a reduzir o risco de um falso evento de perda de ligação ao servidor. O atraso pode ser definido num intervalo de 30 a 600 segundos. |
| Intervalo de consulta da nuvem, seg |
A frequência de consulta do servidor Ajax Cloud é definida no intervalo de 30 a 300 segundos. Quanto mais curto for o intervalo, mais rapidamente será detetada a perda de conexão à nuvem. |
| Seja notificado da perda de ligação ao servidor sem alarme | Quando a opção está ativada, o sistema notifica os utilizadores sobre a perda de ligação ao servidor utilizando um som de notificação padrão em vez de um alerta de sirene. |
Indicação
Dependendo do estado do dispositivo, o indicador LED IndoorCam pode acender-se em várias cores com padrões diferentes.
| Evento | Indicação | Nota |
| Ligar o dispositivo. | O LED acende-se a verde durante cerca de 2,5 s. | |
| O dispositivo está a iniciar-se. | O LED pisca a laranja. | A indicação dura até ao arranque do dispositivo. |
| O dispositivo está no modo de Ponto de Acesso (PA). | O LED pisca continuamente a azul. | A indicação dura até o dispositivo estar ligado ao Wi-Fi. |
| A ligação à Ajax Cloud foi bem sucedida. | O LED acende-se a verde durante cerca de 3,5 s. | A indicação só está disponível quando o dispositivo está a ser configurado. |
| A ligação à Ajax Cloud falhou. | O LED acende-se a vermelho durante cerca de 1 s. | A indicação só está disponível quando o dispositivo está a ser configurado. |
| Descarregar uma nova versão de firmware do dispositivo. | Acende-se a verde duas vezes e apaga-se de 3 em 3 segundos. | |
| O firmware do dispositivo está a ser atualizado. | O LED acende-se constantemente a verde. | A indicação dura até que a atualização do firmware esteja concluída. |
| O dispositivo está a ser restaurado para as definições de fábrica. | O LED pisca a violeta a cada 1,5 s. | |
| O movimento é detetado por um sensor PIR. | O LED acende-se a branco durante cerca de 2,5 s com 50% da luminosidade. | |
| Está a decorrer uma comunicação de voz bidirecional. | O LED acende-se constantemente a branco com 50% da luminosidade. |
Avaria
Quando o dispositivo deteta uma avaria, é apresentado um contador de avarias na app Ajax no canto Superior esquerdo do ícone do dispositivo. Todas as avarias podem ser vistas nos estados do dispositivo. Os campos com avarias vão ser indicados com vermelho.
Uma avaria é apresentada se:
- O dispositivo perdeu a ligação com o servidor.
- A temperatura do dispositivo está fora dos limites aceitáveis.
- Não há conexão com o hub ou com o repetidor do sinal de rádio através do Jeweller. Esta avaria é possível se o dispositivo estiver emparelhado com o hub.
- Não há ligação com o hub ou o repetidor do sinal de rádio através do Wings. Esta avaria é possível se o dispositivo estiver emparelhado com o hub.
Manutenção
Verifique o funcionamento do aparelho regularmente. Se notar alguma degradação da imagem, perda de nitidez ou escurecimento, verifique se a câmara tem sujidade. Limpe a carcaça do dispositivo do pó, teias de aranha e outros contaminantes à medida que vão surgindo. Utilize um pano macio e seco adequado para a manutenção do equipamento.
Ao limpar o dispositivo, evite o uso de substâncias que contenham álcool, acetona, gasolina e outros solventes ativos. Limpe a lente com cuidado, pois os riscos podem resultar em imagens de má qualidade e na avaria da câmara.
Garantia
A garantia dos produtos da sociedade de responsabilidade limitada “Ajax Systems Manufacturing” é válida durante 2 anos após a compra.
Se o dispositivo não funcionar corretamente, recomendamos que contacte primeiro o serviço de assistência, uma vez que a maioria dos problemas técnicos pode ser resolvida remotamente.
Contactar o Apoio Técnico:
Fabricado por “AS Manufacturing” LLC
