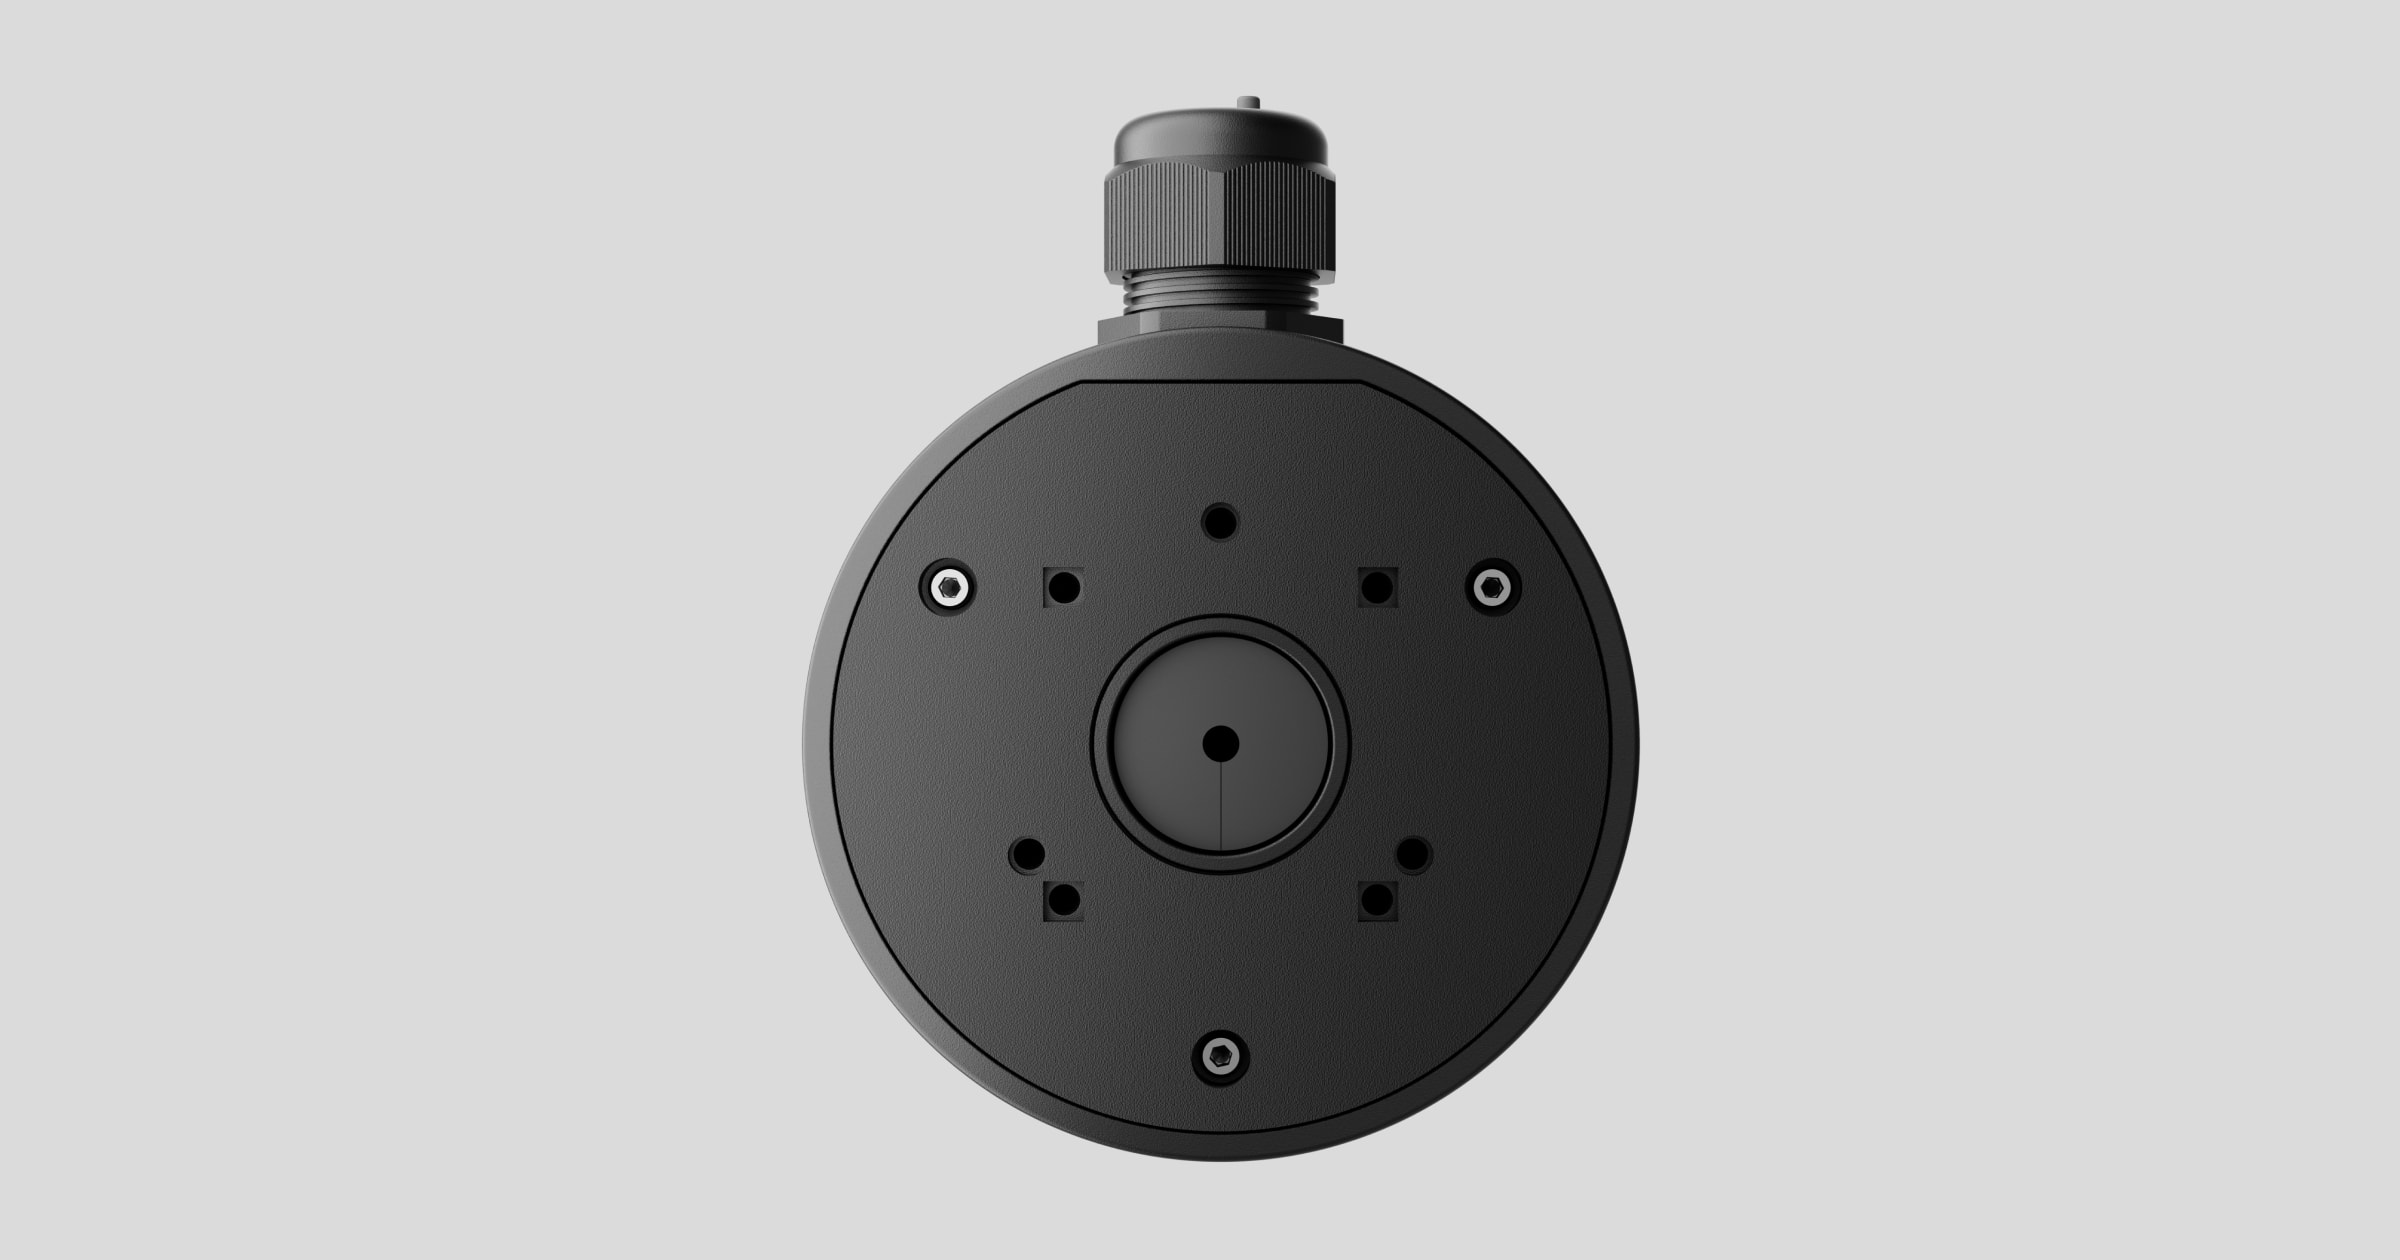
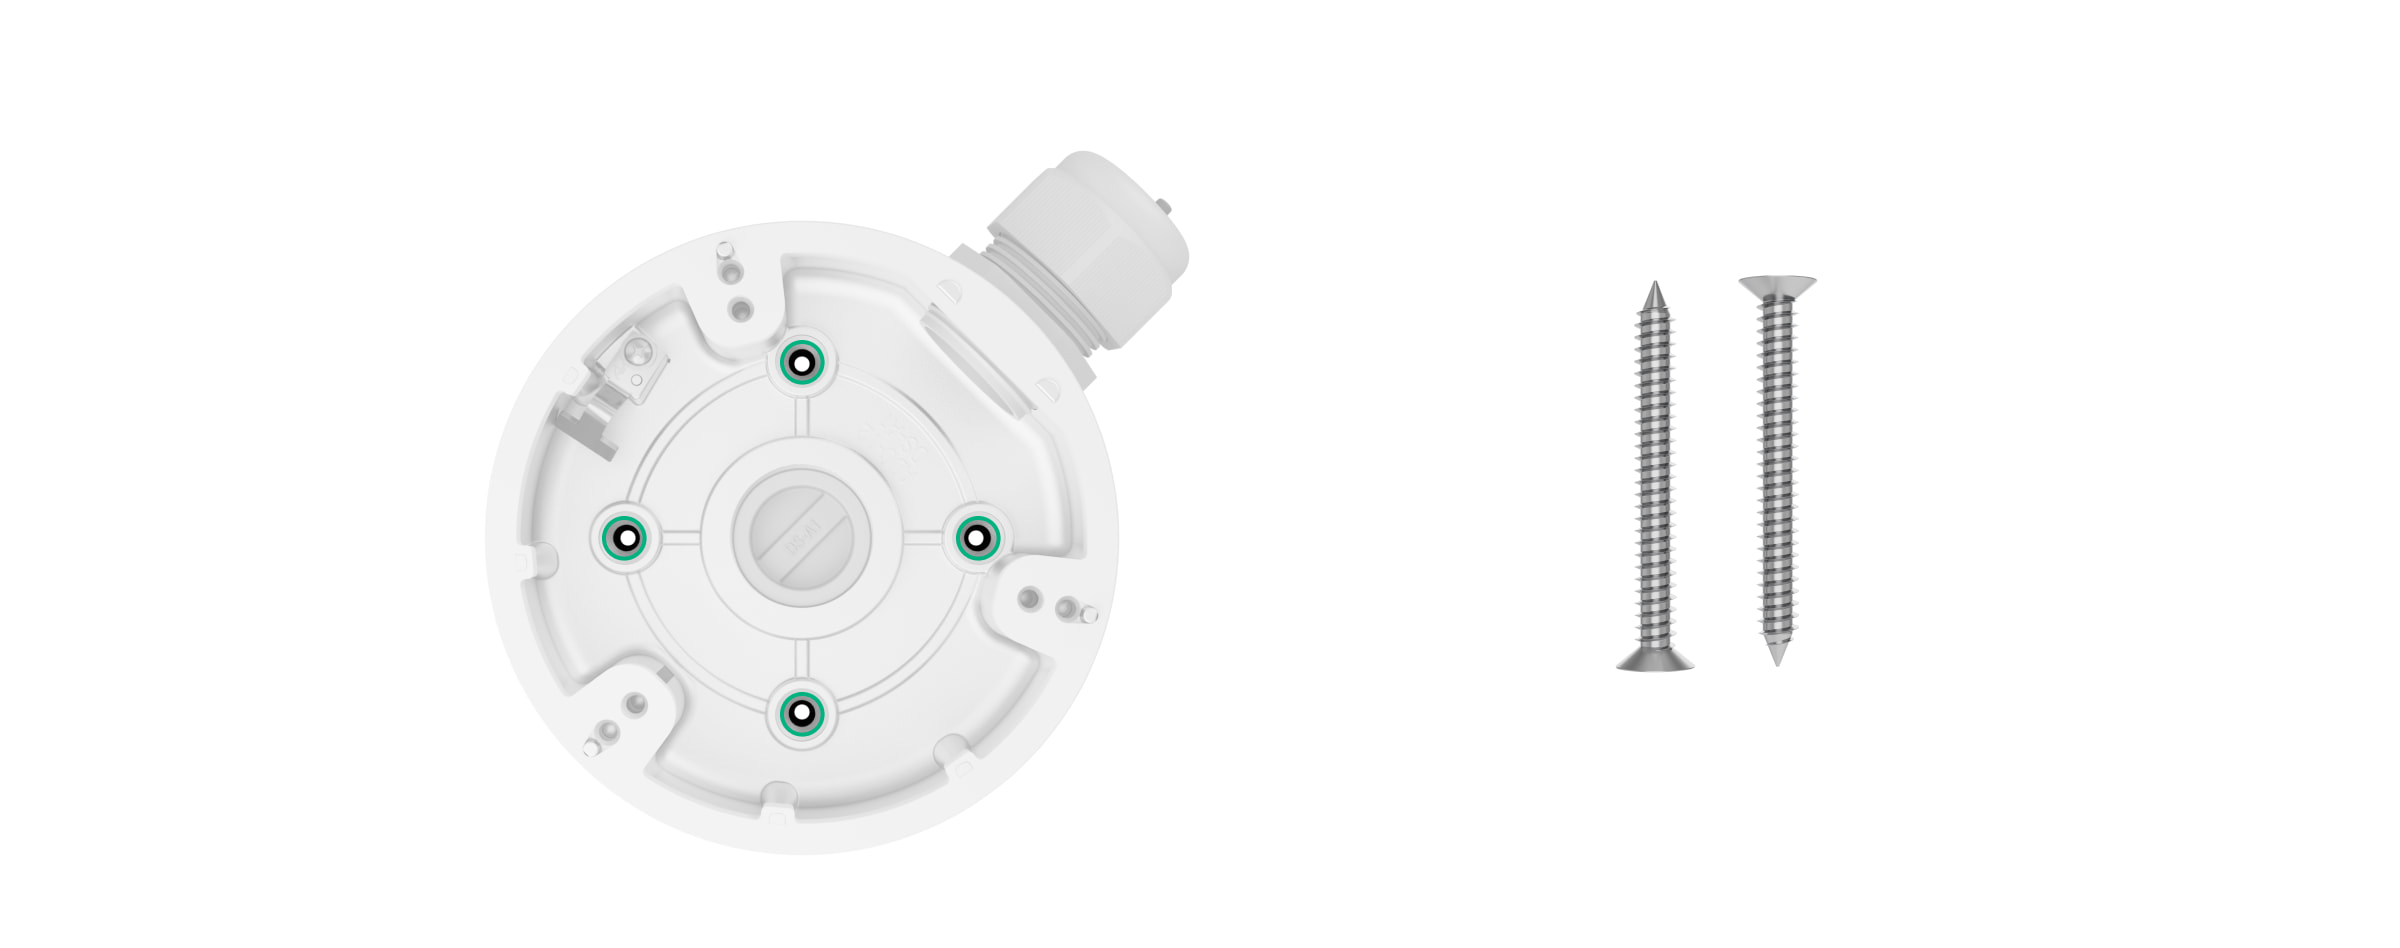
A JunctionBox (118×59) é uma caixa de montagem concebida para instalar câmaras Ajax.
O conjunto completo fornece todas as fixações para a instalação. A caixa de montagem é à prova de água e tem um bucim, permitindo a instalação no interior e no exterior.
Elementos funcionais
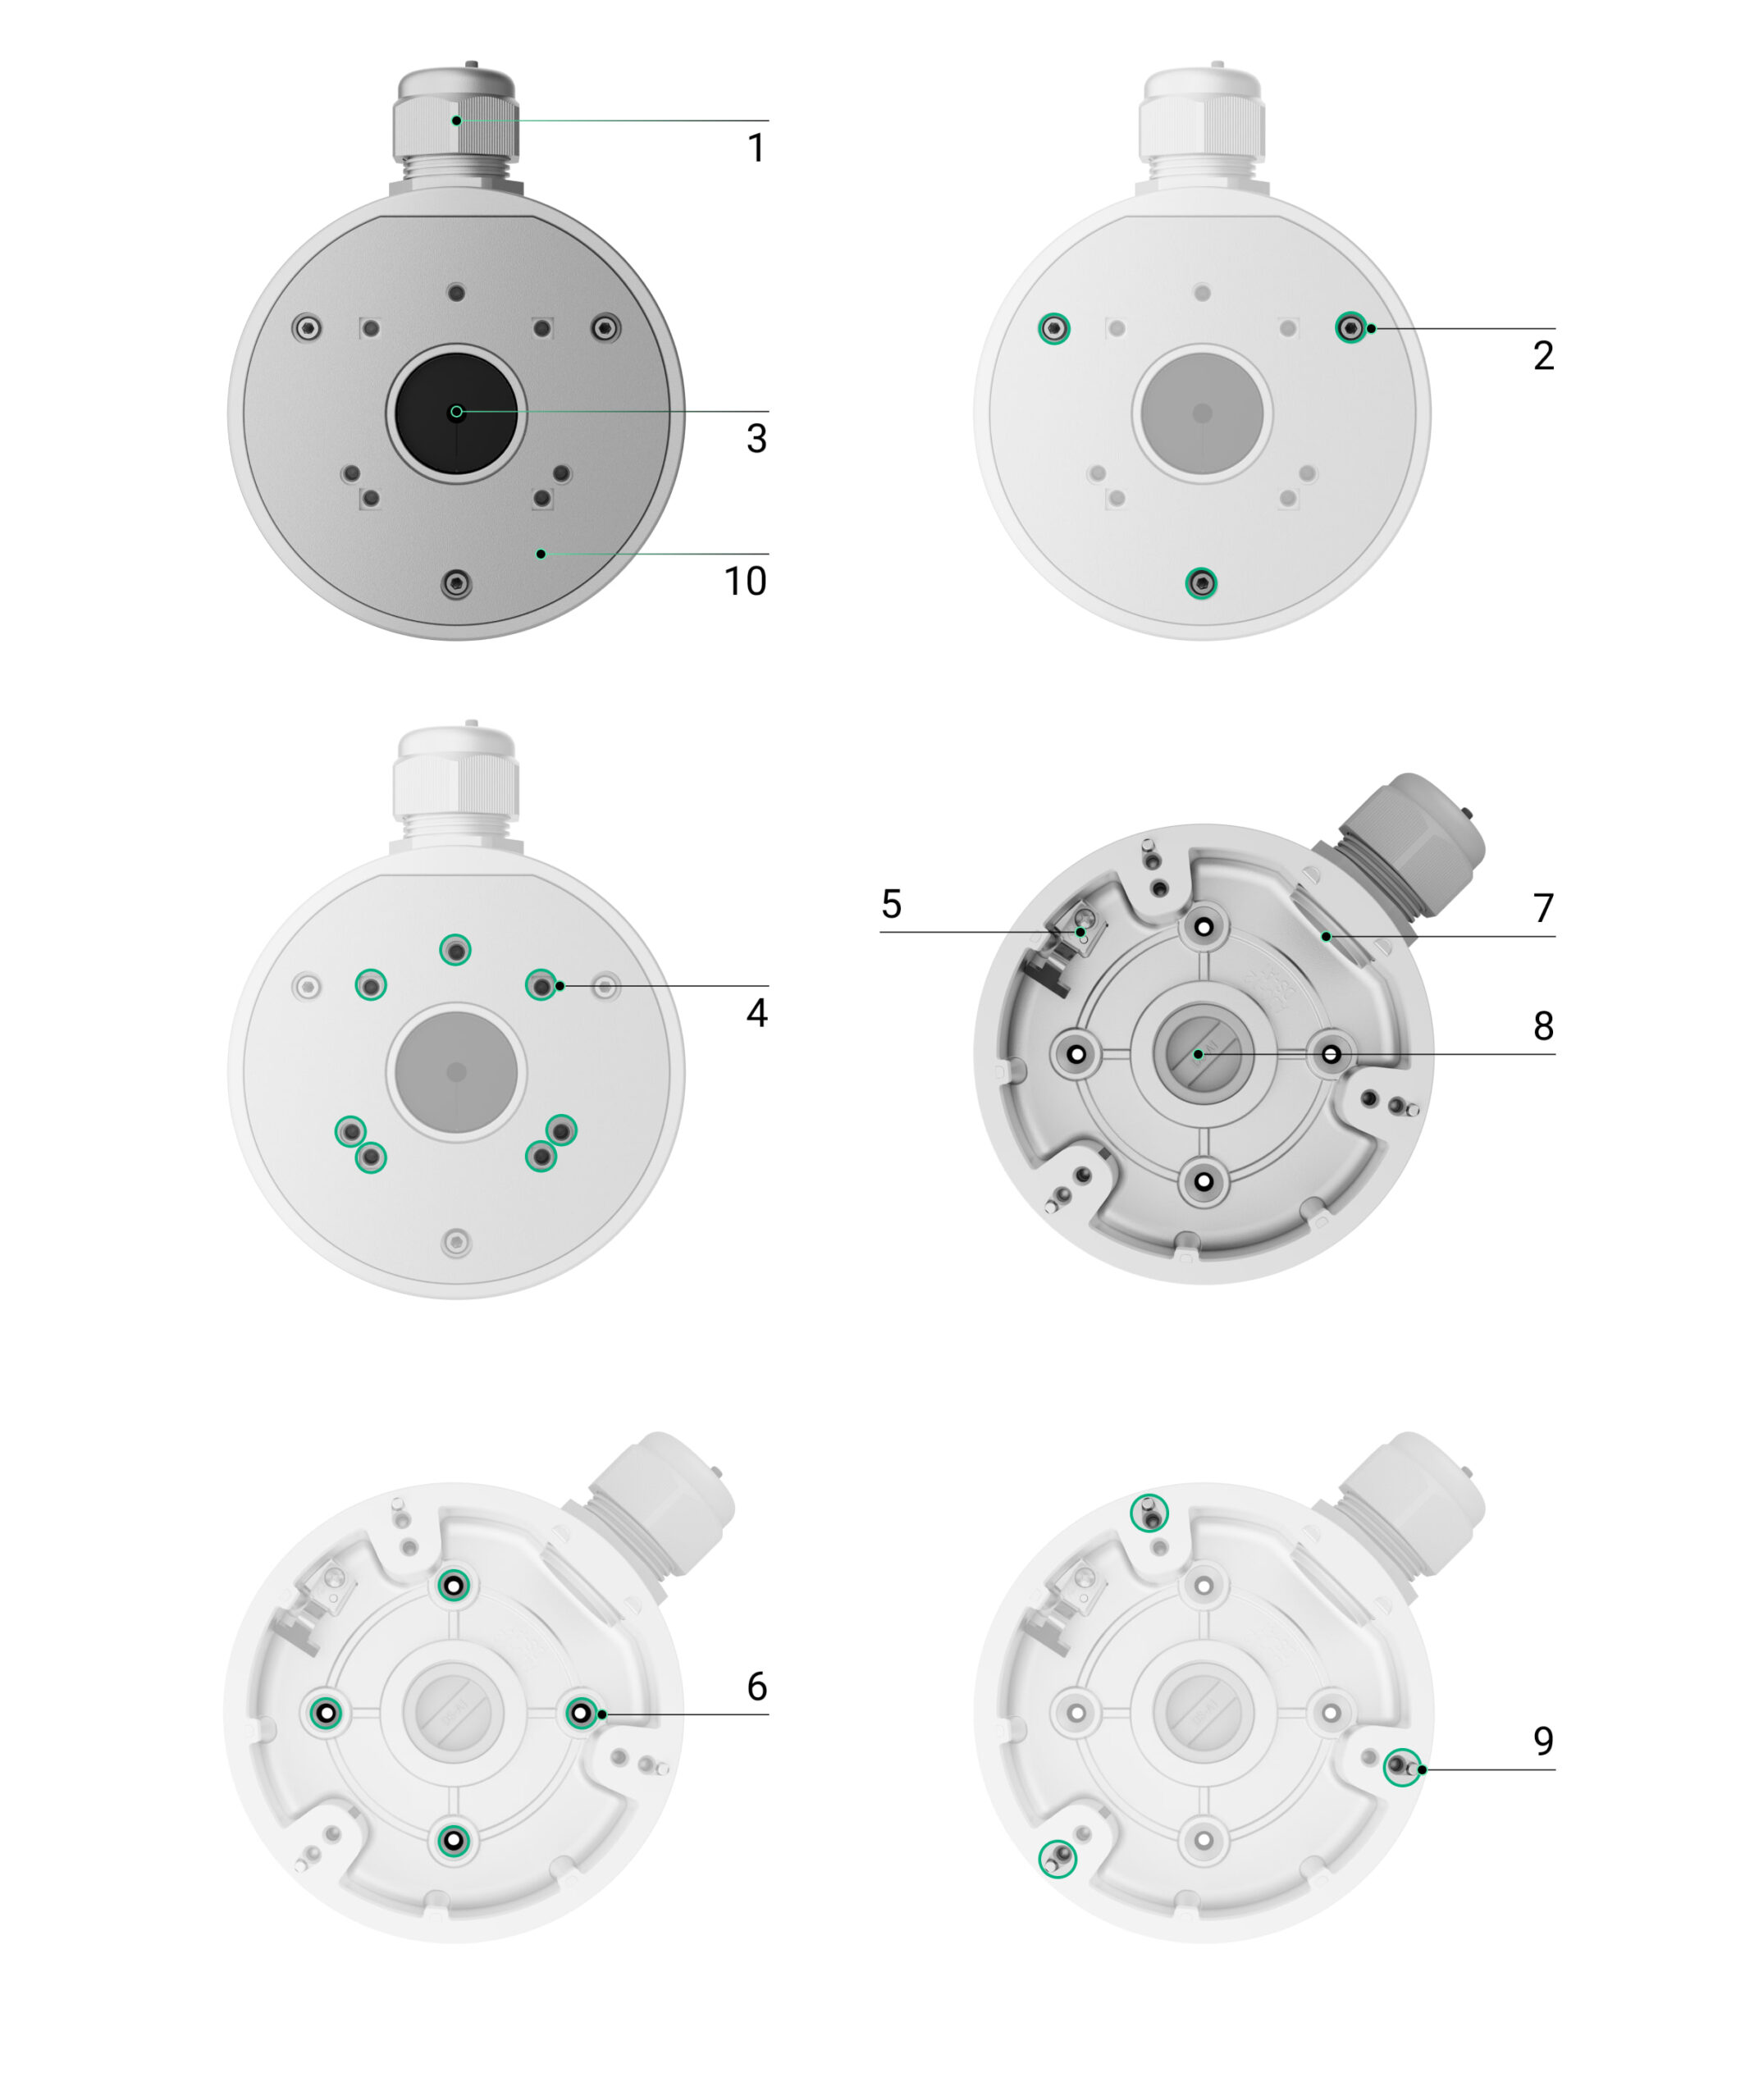
- Bucim PG21.
- Furos para fixar a tampa da caixa de montagem à carcaça da caixa de montagem.
- Tampão do bucim. Remova o tampão para passar os fios.
- Furos para fixar a câmara à tampa da caixa de montagem.
- Terminal de ligação à terra.
- Furos para fixar a JunctionBox à superfície.
- Buraco para passar os fios. Feche-o com o tampão se estiver a passar os fios de forma diferente.
- Tampão do bucim. Remova o tampão para passar os fios.
- Furos para fixar a câmara (DomeCam Mini) à carcaça da caixa de montagem.
- A tampa da Junctionbox.
Dispositivos compatíveis
Na JunctionBox (118×59) é possível instalar uma das câmaras seguintes:
A JunctionBox (118×59) é vendida separadamente das câmaras Ajax..
Principais características
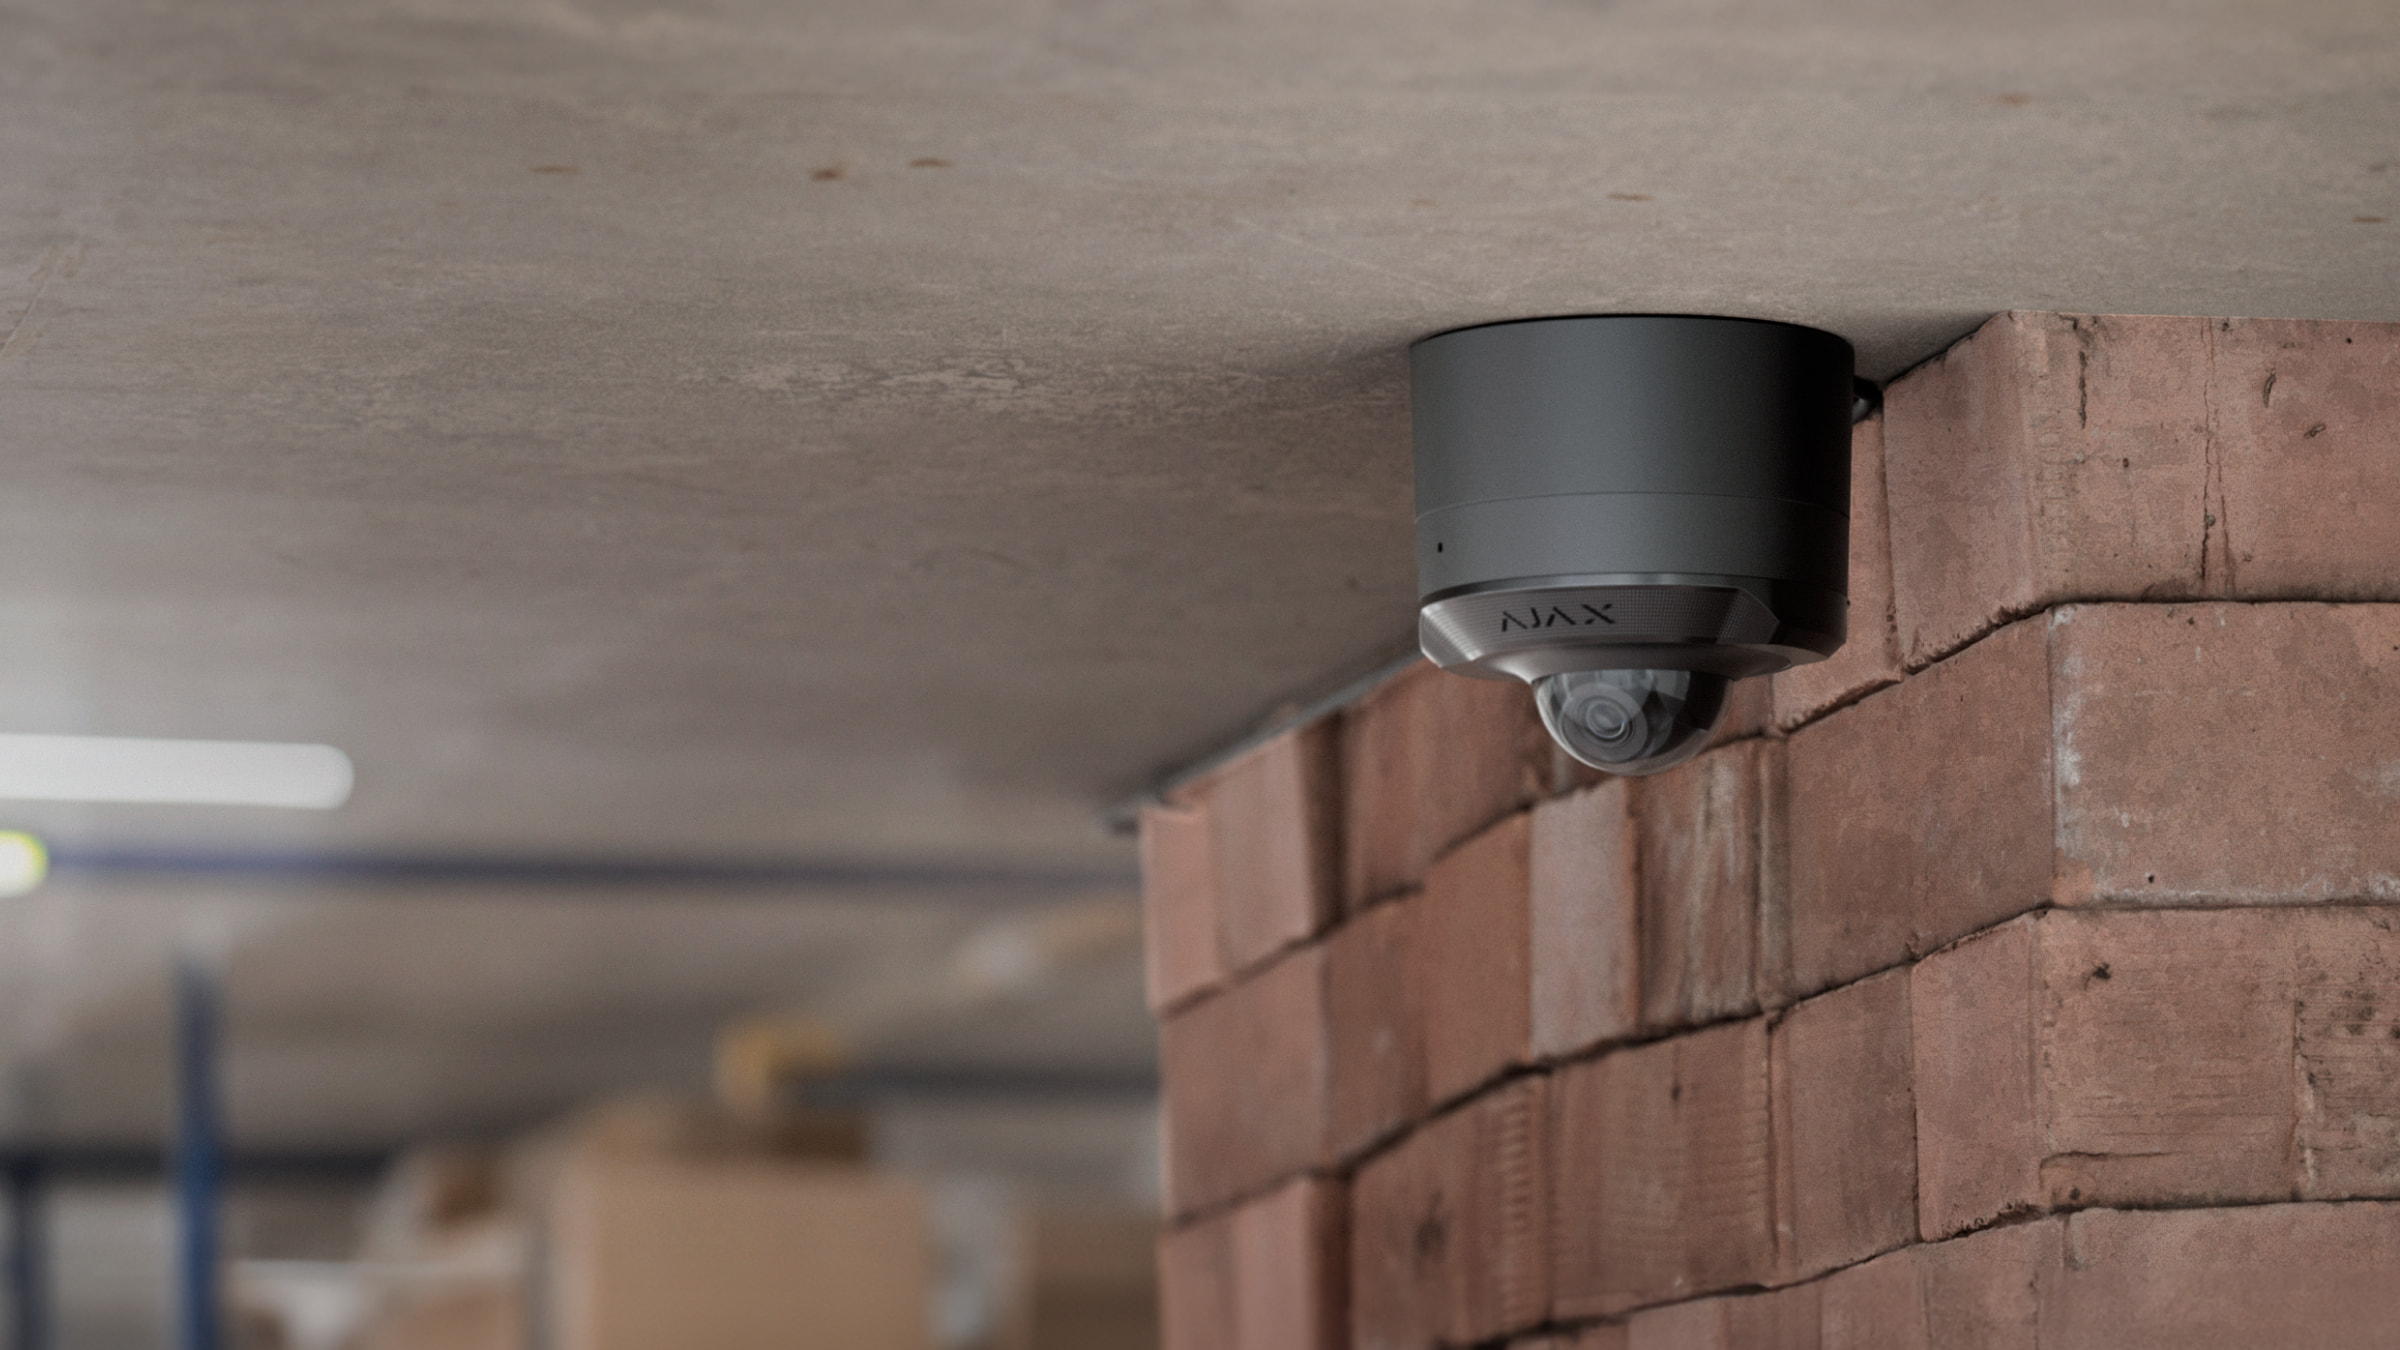
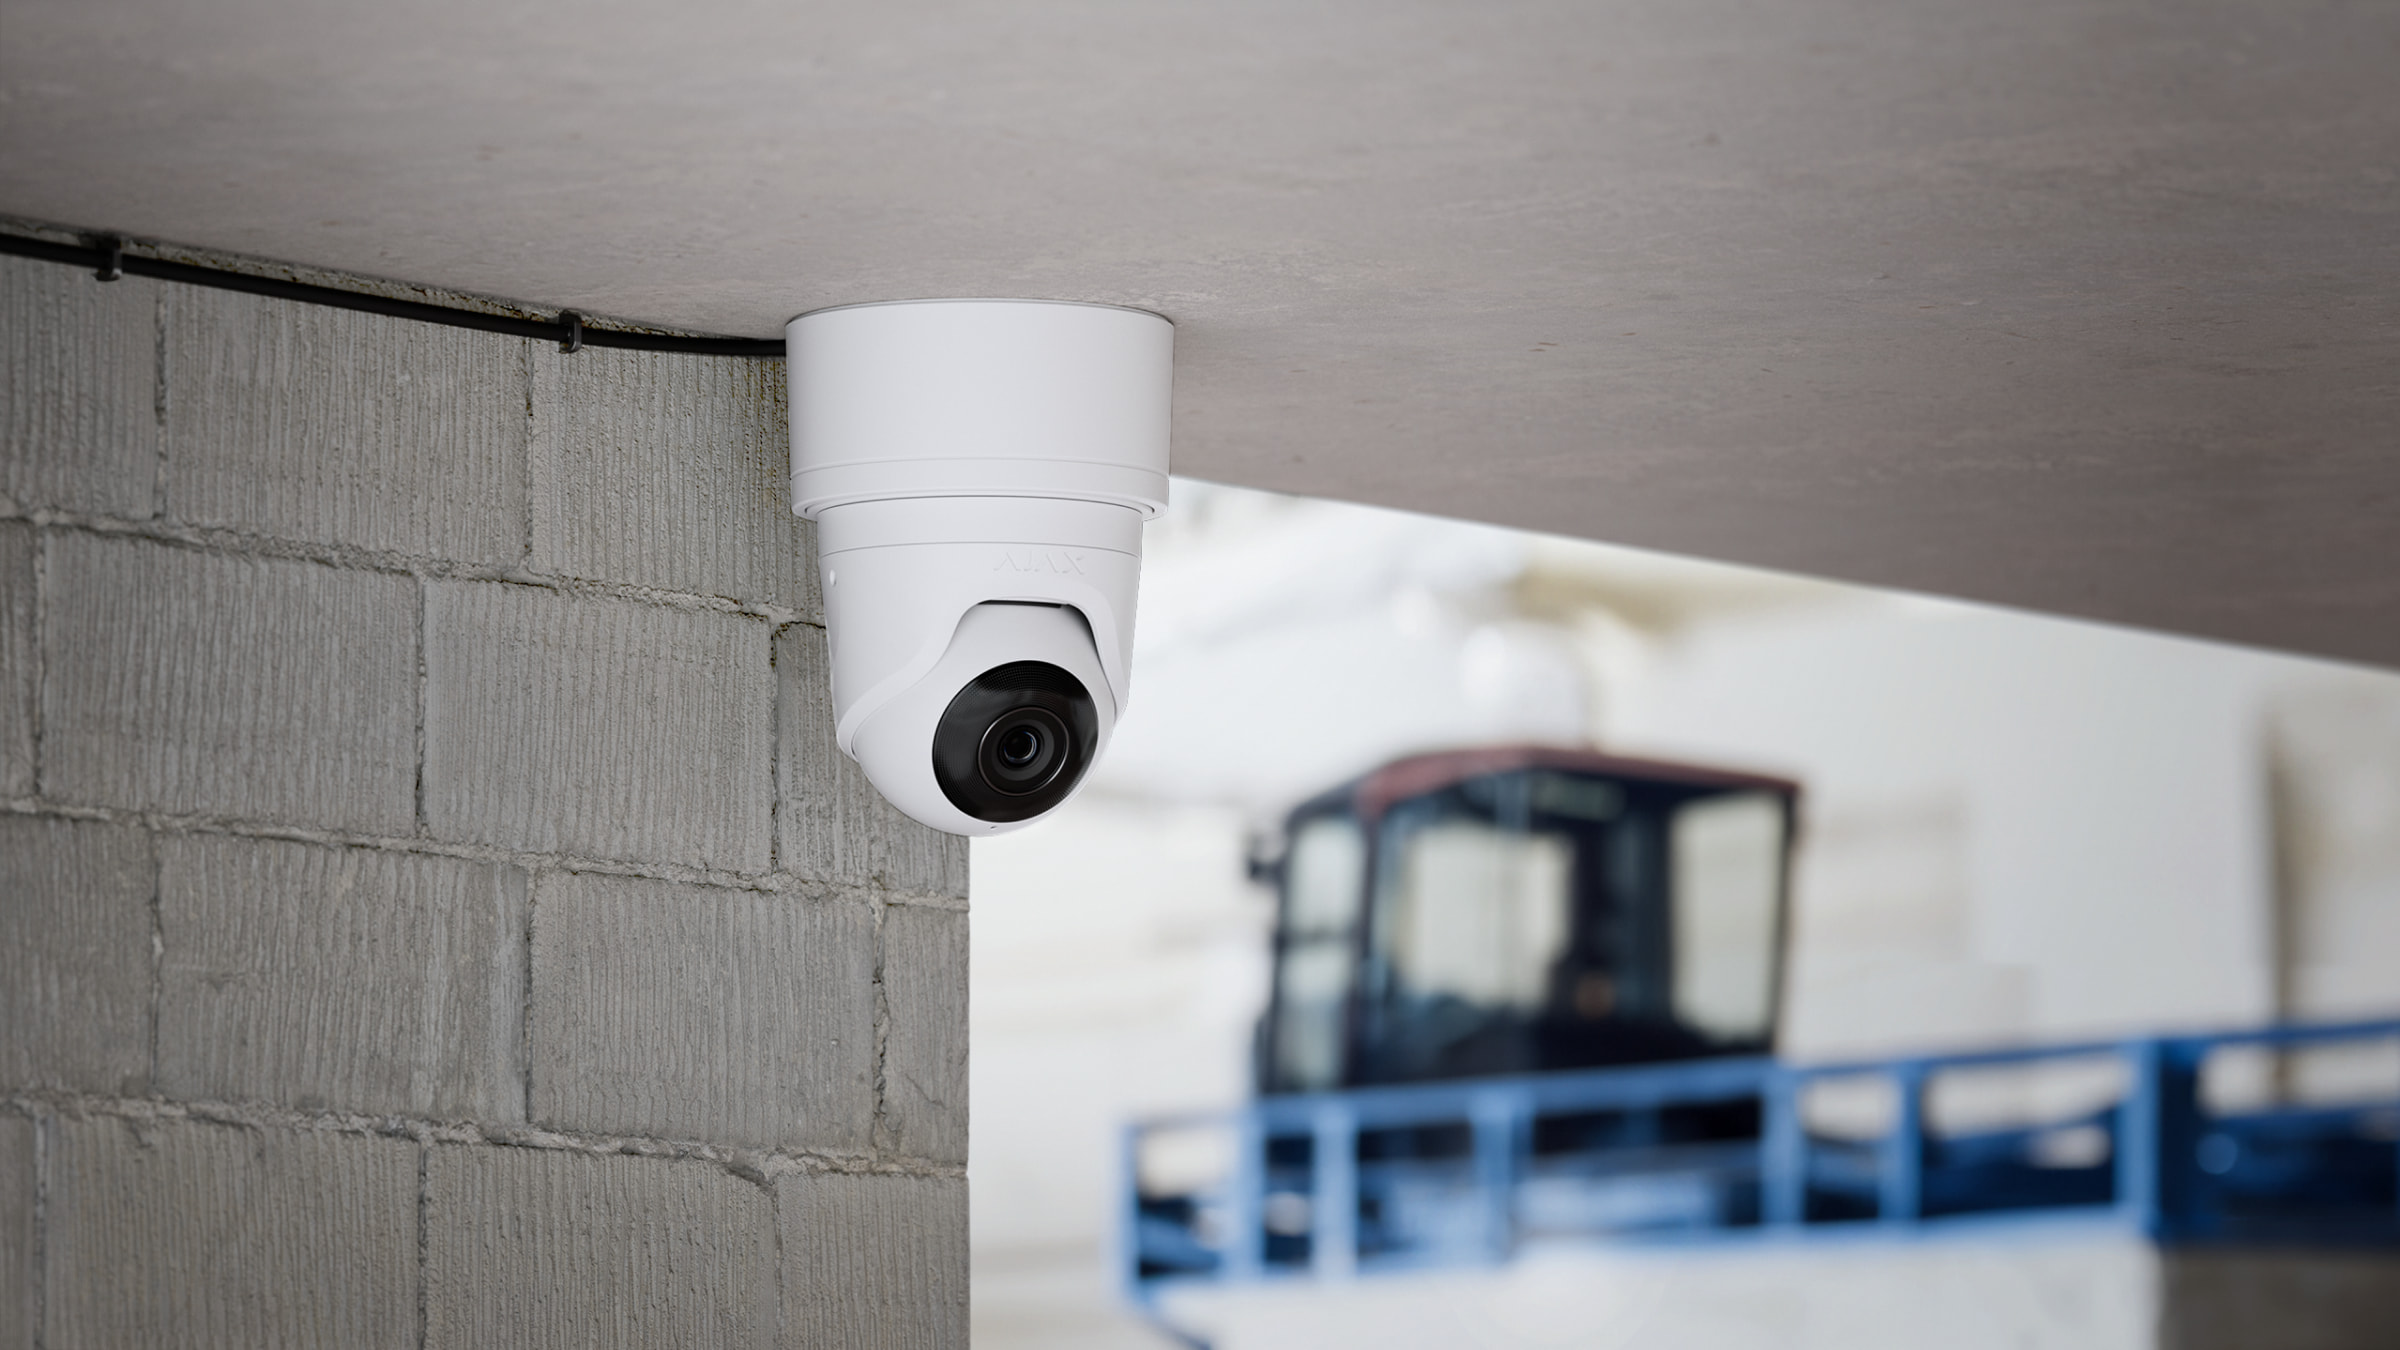
A JunctionBox (118×59) é uma caixa de montagem à prova de água para a gestão de cabos das câmaras IP Ajax. Permite a instalação prática de câmaras Ajax em paredes de betão, tetos ou colunas, tanto no exterior como no interior.
A caixa de montagem tem o bucim PG21 para proteger o cabo contra danos, perda de isolamento e flexão excessiva durante a instalação e o funcionamento. O anel de vedação para um ou dois cabos no bucim impede a entrada de água, pó e outros contaminantes na caixa de montagem da câmara.
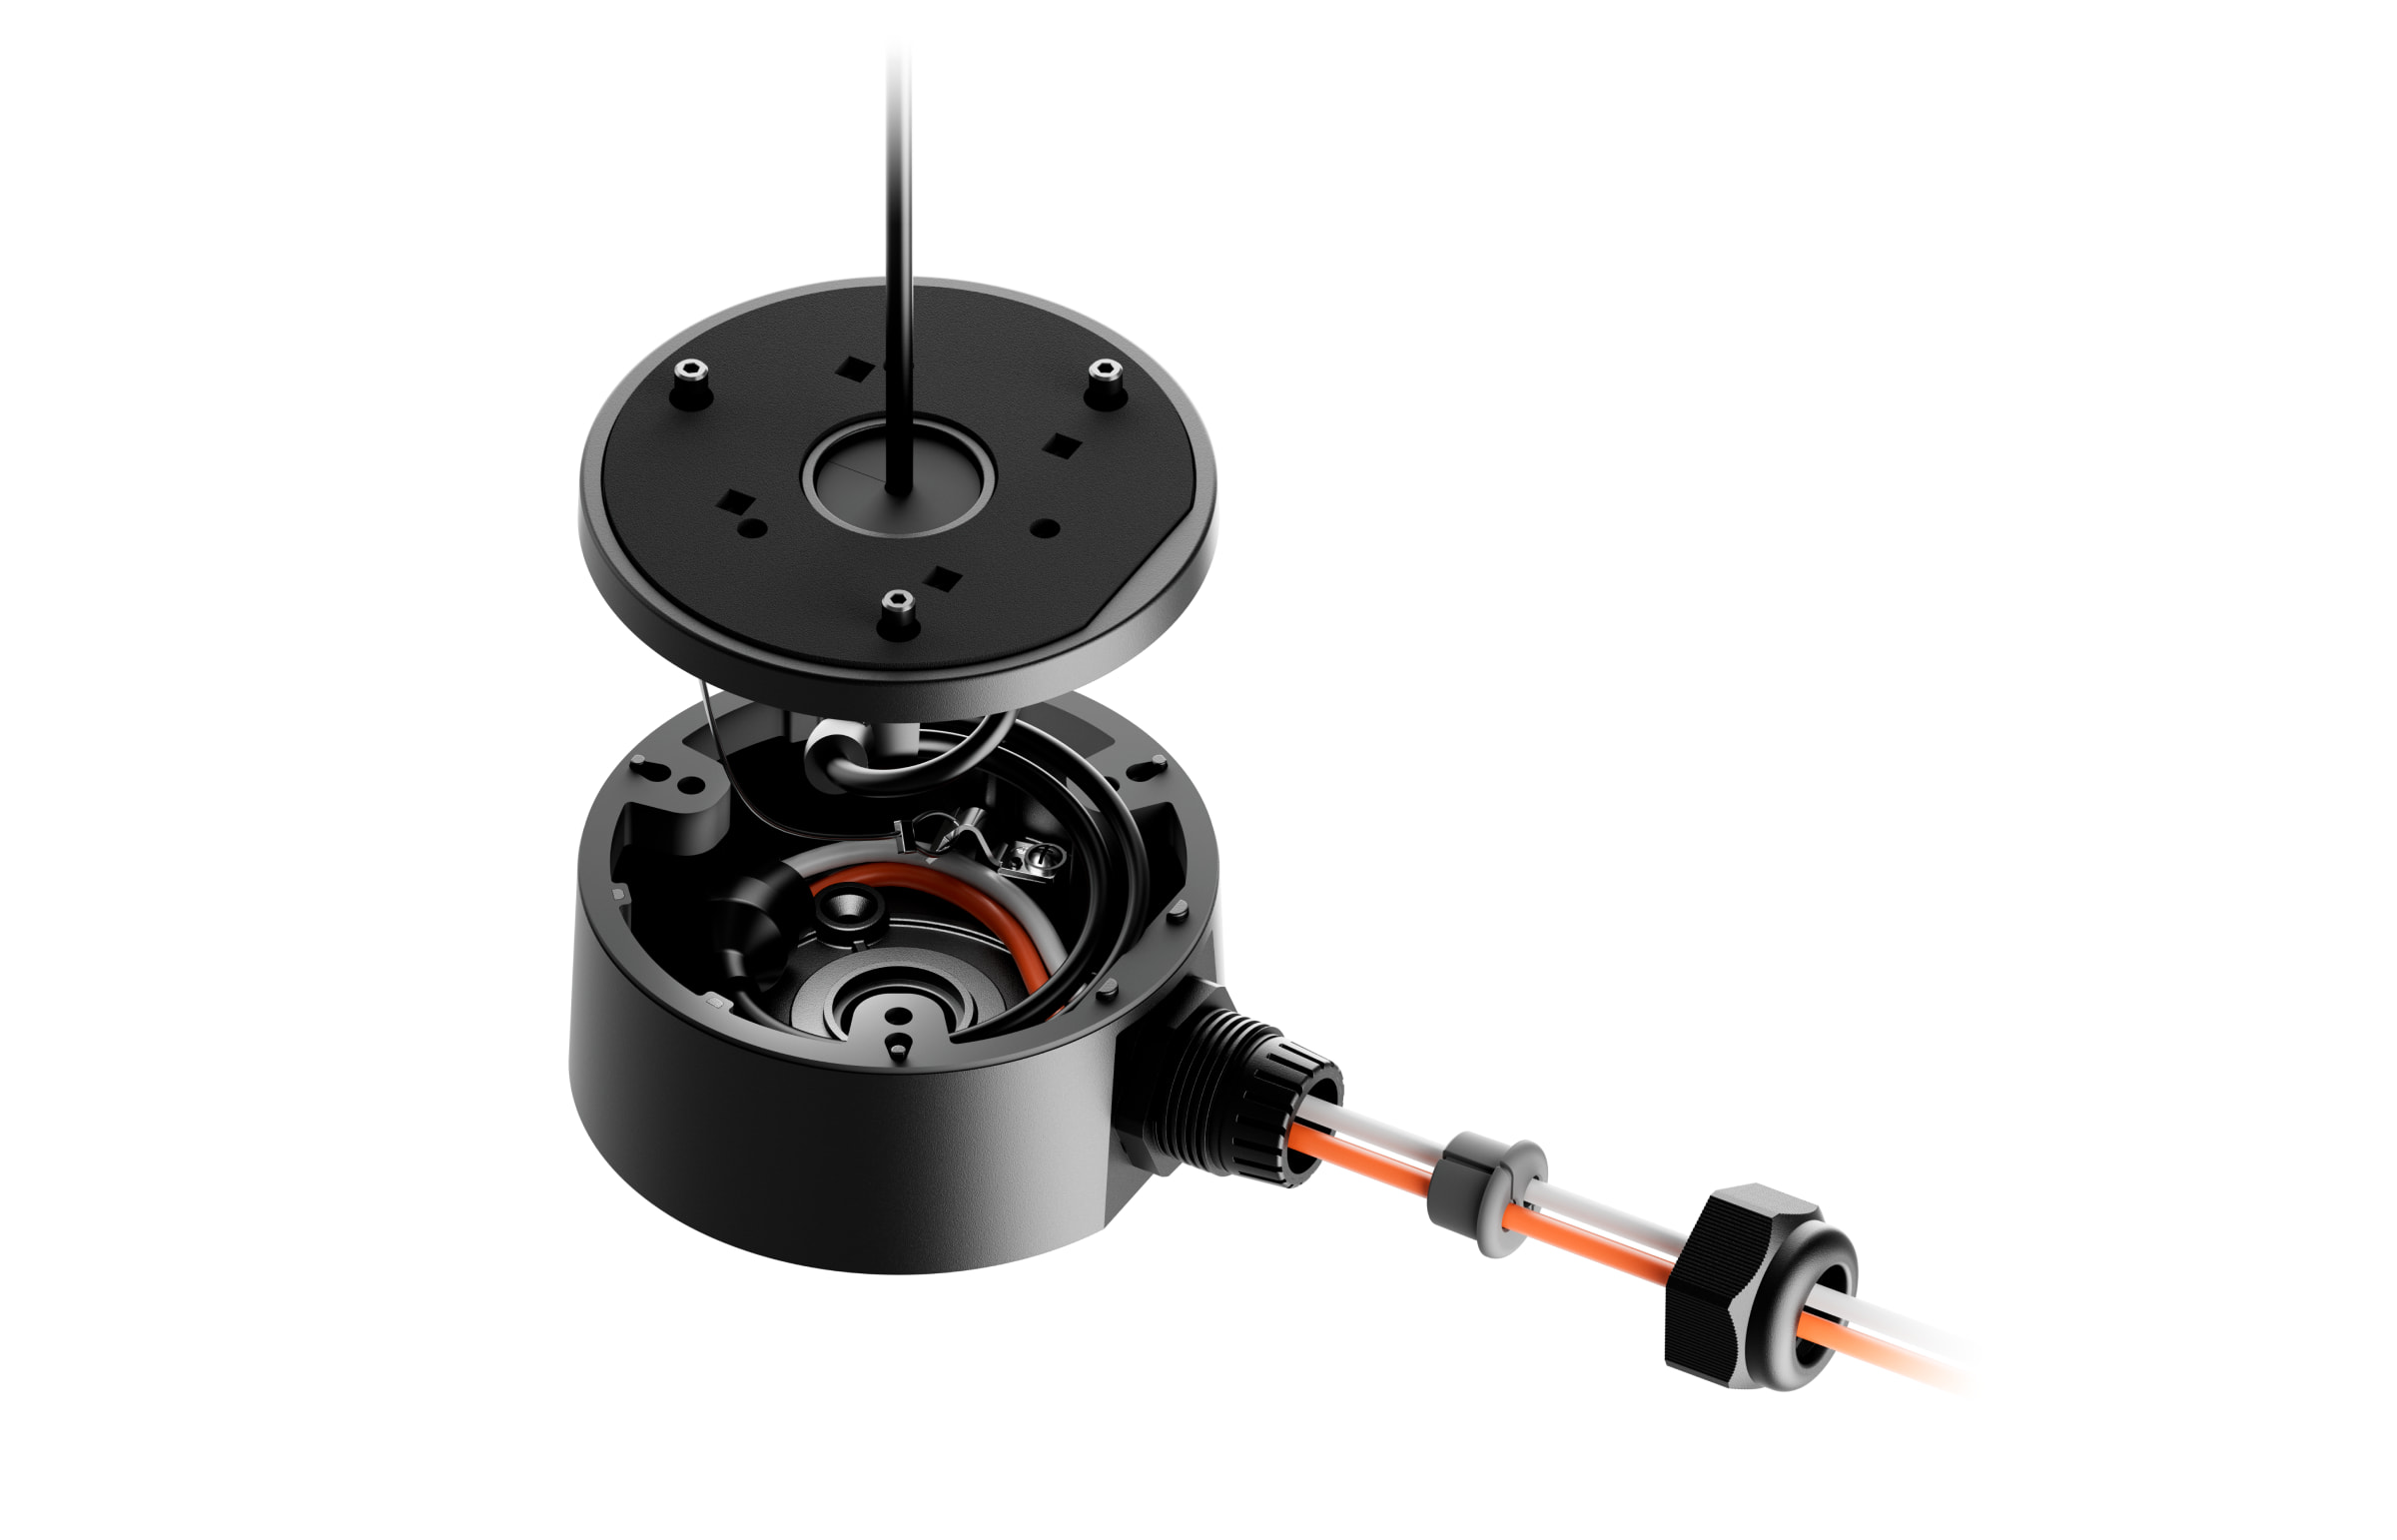
A JunctionBox está equipada com um fio de montagem para fixar a tampa durante a instalação. O fio de montagem garante que a tampa não se solte da caixa de montagem da câmara até que seja devidamente segura com parafusos. O fio de montagem está ligado ao terminal de ligação à terra.
A ligação à terra é realizada por um especialista em conformidade com as regras e regulamentos locais de segurança elétrica.
Selecionar o local de instalação
O local de instalação da JunctionBox deve respeitar as recomendações de montagem dos dispositivos instalados com a caixa.
Siga estas recomendações ao conceber o projeto do sistema Ajax para um objeto.
A JunctionBox não pode ser instalada
- Em interiores ou exteriores onde os níveis de temperatura e humidade não estejam em conformidade com os parâmetros de funcionamento especificados. Isto pode danificar a caixa de montagem.
- Em locais onde as condições não cumprem os requisitos para um dispositivo instalado utilizando a caixa de montagem.
Preparar para instalar
Disposição dos cabos
Ao preparar a passagem dos cabos, verifique os regulamentos de segurança elétrica e contra incêndios da sua região. Respeite rigorosamente estas normas e regulamentos. Este artigo fornece sugestões para a disposição dos cabos.
Passagem de cabos
Recomendamos que leia atentamente a secção Seleção do local de instalação antes da instalação. Evite desvios em relação ao projeto do sistema. A violação das regras básicas de instalação e das recomendações deste manual pode levar a um funcionamento incorreto e à perda de ligação com os dispositivos instalados com a JunctionBox.
Preparar para a ligação
Se precisar de passar cabos através do bucim, aparafuse-o no furo necessário. Feche o outro furo com o tampão do bucim.
Para passar os cabos através do bucim:
- Desmonte o bucim.
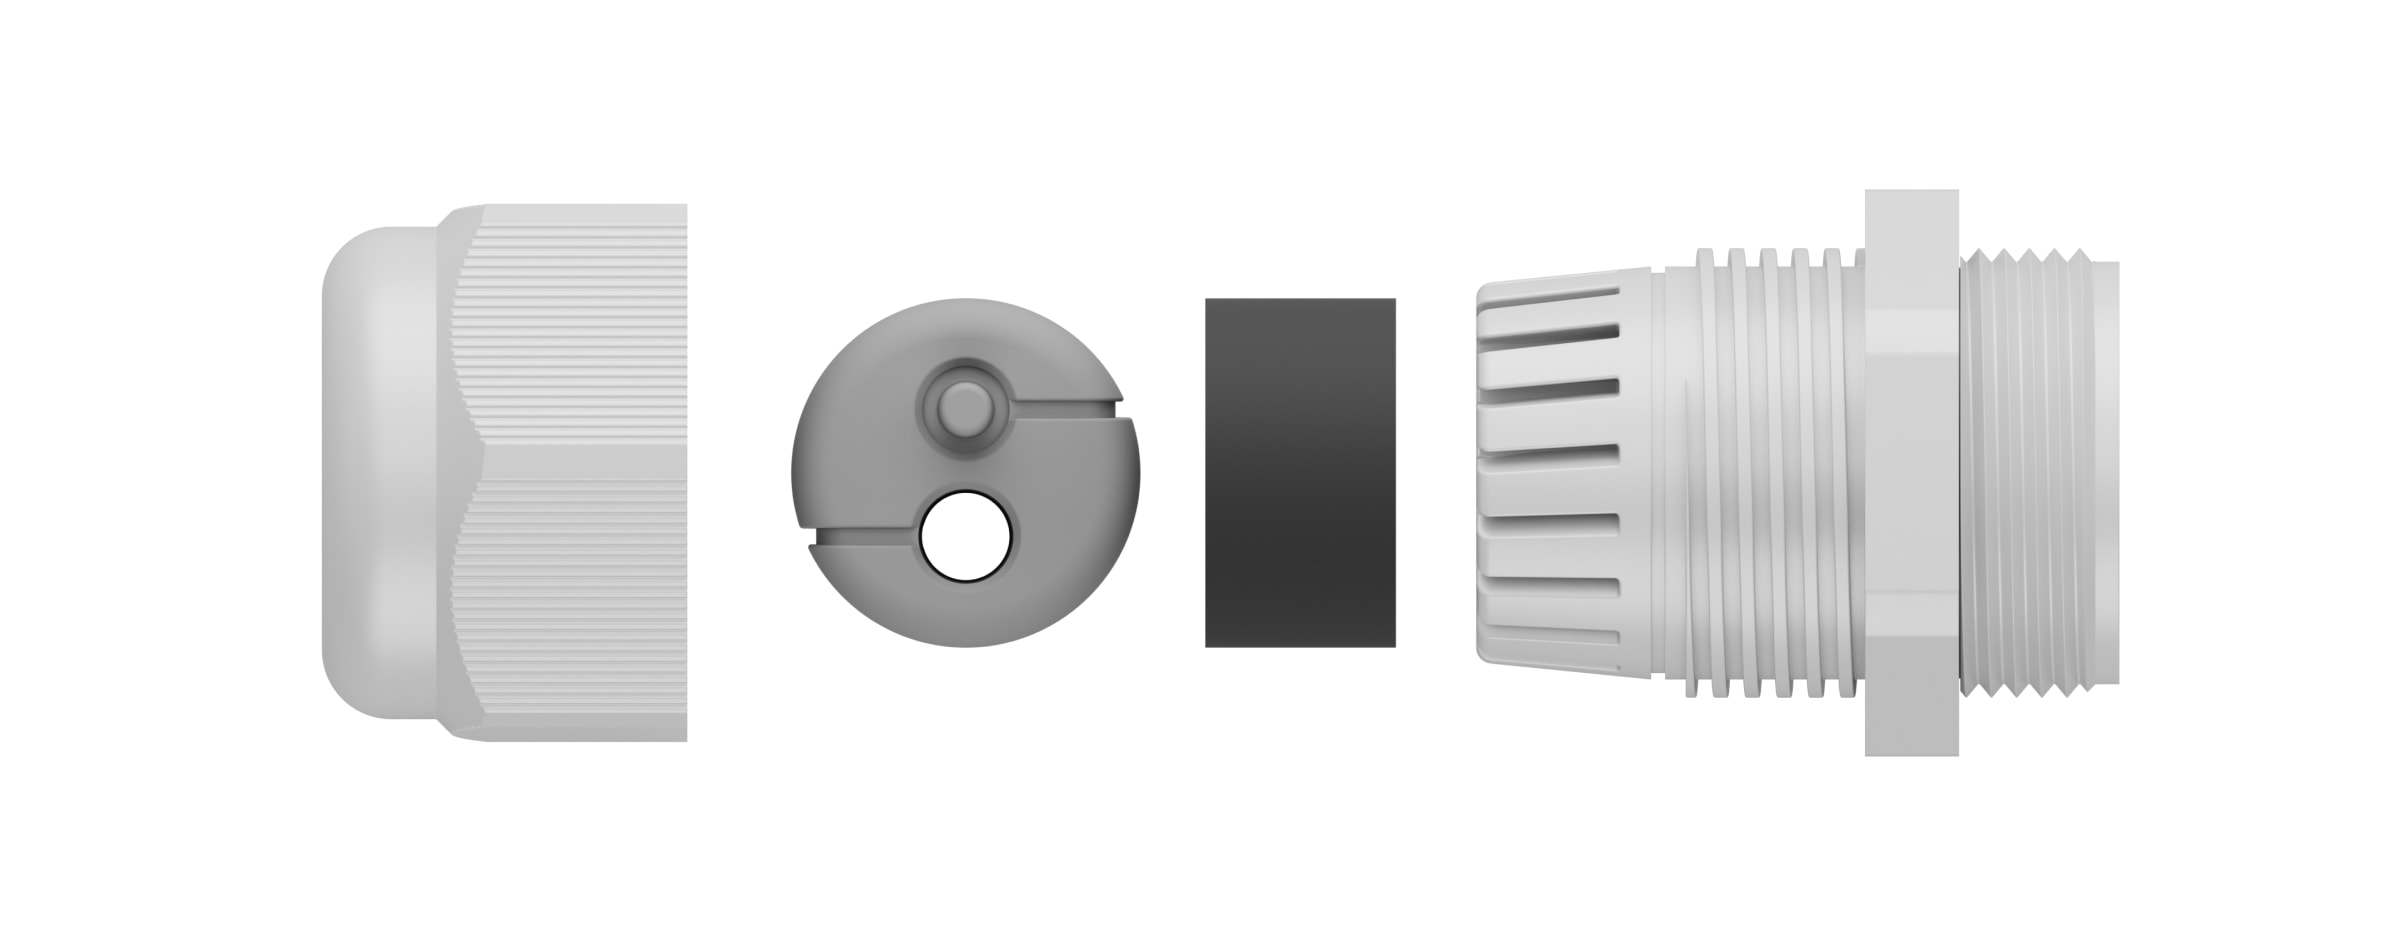
- Corte o anel de vedação de borracha cinzento ao longo das linhas de corte, tendo em conta o número de cabos. O anel de borracha preto deve permanecer intacto.
- Passe um ou dois cabos através do anel de vedação de borracha cinzento. Coloque o anel de borracha preto.
- Monte o bucim. Aparafuse o bucim no furo necessário.
Instalação
Antes da instalação, certifique-se de que selecionou o local ideal para a caixa de montagem e que este cumpre os requisitos deste manual.
Como instalar a JunctionBox
- Prepare previamente o furo no fundo ou no lado da caixa de montagem: retire o tampão do bucim e feche o outro furo.
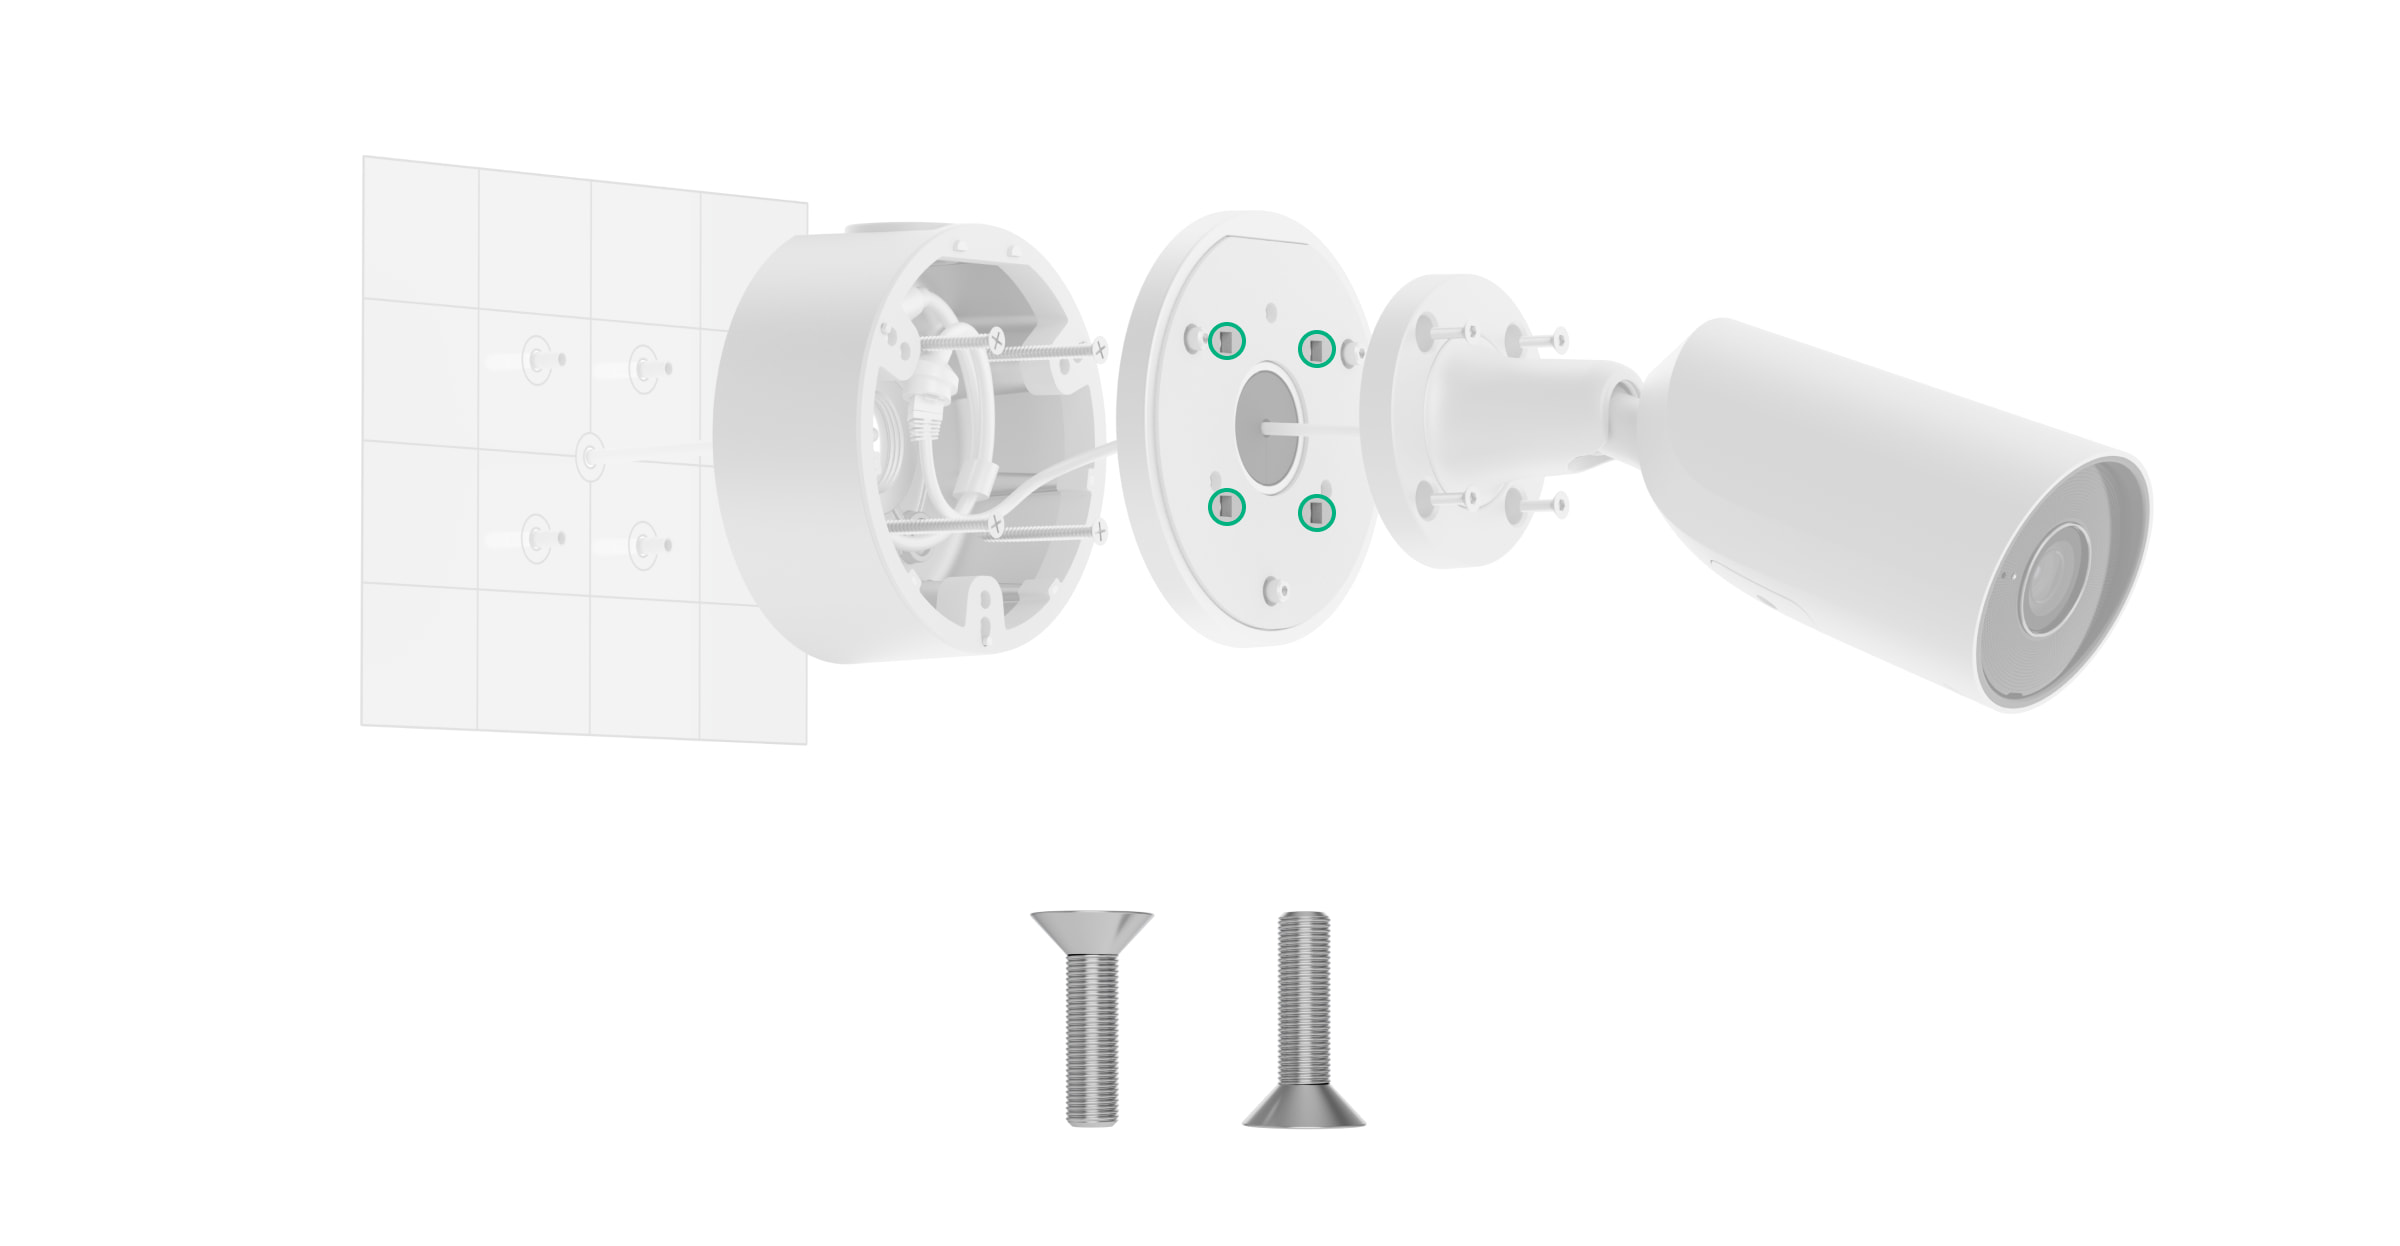
- Utilizando o modelo de instalação, marque os locais para os furos na superfície onde pretende instalar a JunctionBox. Se necessário, certifique-se de que o modelo corresponde ao ponto de entrada do cabo. Fixa o modelo no local de instalação escolhido e faça quatro furos conforme indicado no modelo.
- Insira o tubo ou o tubo ondulado (até Ø 16 mm) no furo da caixa de montagem, se necessário.
- Se necessário, passe um ou dois cabos para a carcaça da caixa de montagem através do furo no fundo.
- Fixa a JunctionBox na superfície vertical ou horizontal no local de instalação escolhido com os parafusos incluídos, utilizando todos os pontos de fixação.
- Se necessário, aparafuse o bucim no furo necessário na parte lateral da caixa de montagem.
- Encaminhe os cabos da câmara através do tampão do bucim na tampa da JunctionBox.
- Ligue o cabo Ethernet à câmara. Se for alimentado por PoE, não é necessária qualquer fonte de alimentação externa; caso contrário, ligue a fonte de alimentação externa e o cabo Ethernet.
- Encaminhe os cabos para o interior da caixa de montagem da câmara.
- Coloque a tampa sobre a carcaça e prendê-la com os parafusos incluídos, utilizando chave sextavada incluída (Ø 3 mm). O método de instalação depende da configuração da câmara.

- Instale a câmara na tampa da JunctionBox.
- Verifique o aperto da JunctionBox.
Como instalar a câmara na JunctionBox
BulletCam
Para instalar a BulletCam na JunctionBox:
- Desaperte o parafuso do suporte de montagem giratório da BulletCam com a chave sextavada incluída (Ø 2 mm) e rode o suporte se precisar de mudar a posição do canal do cabo. Volte a apertar o parafuso.
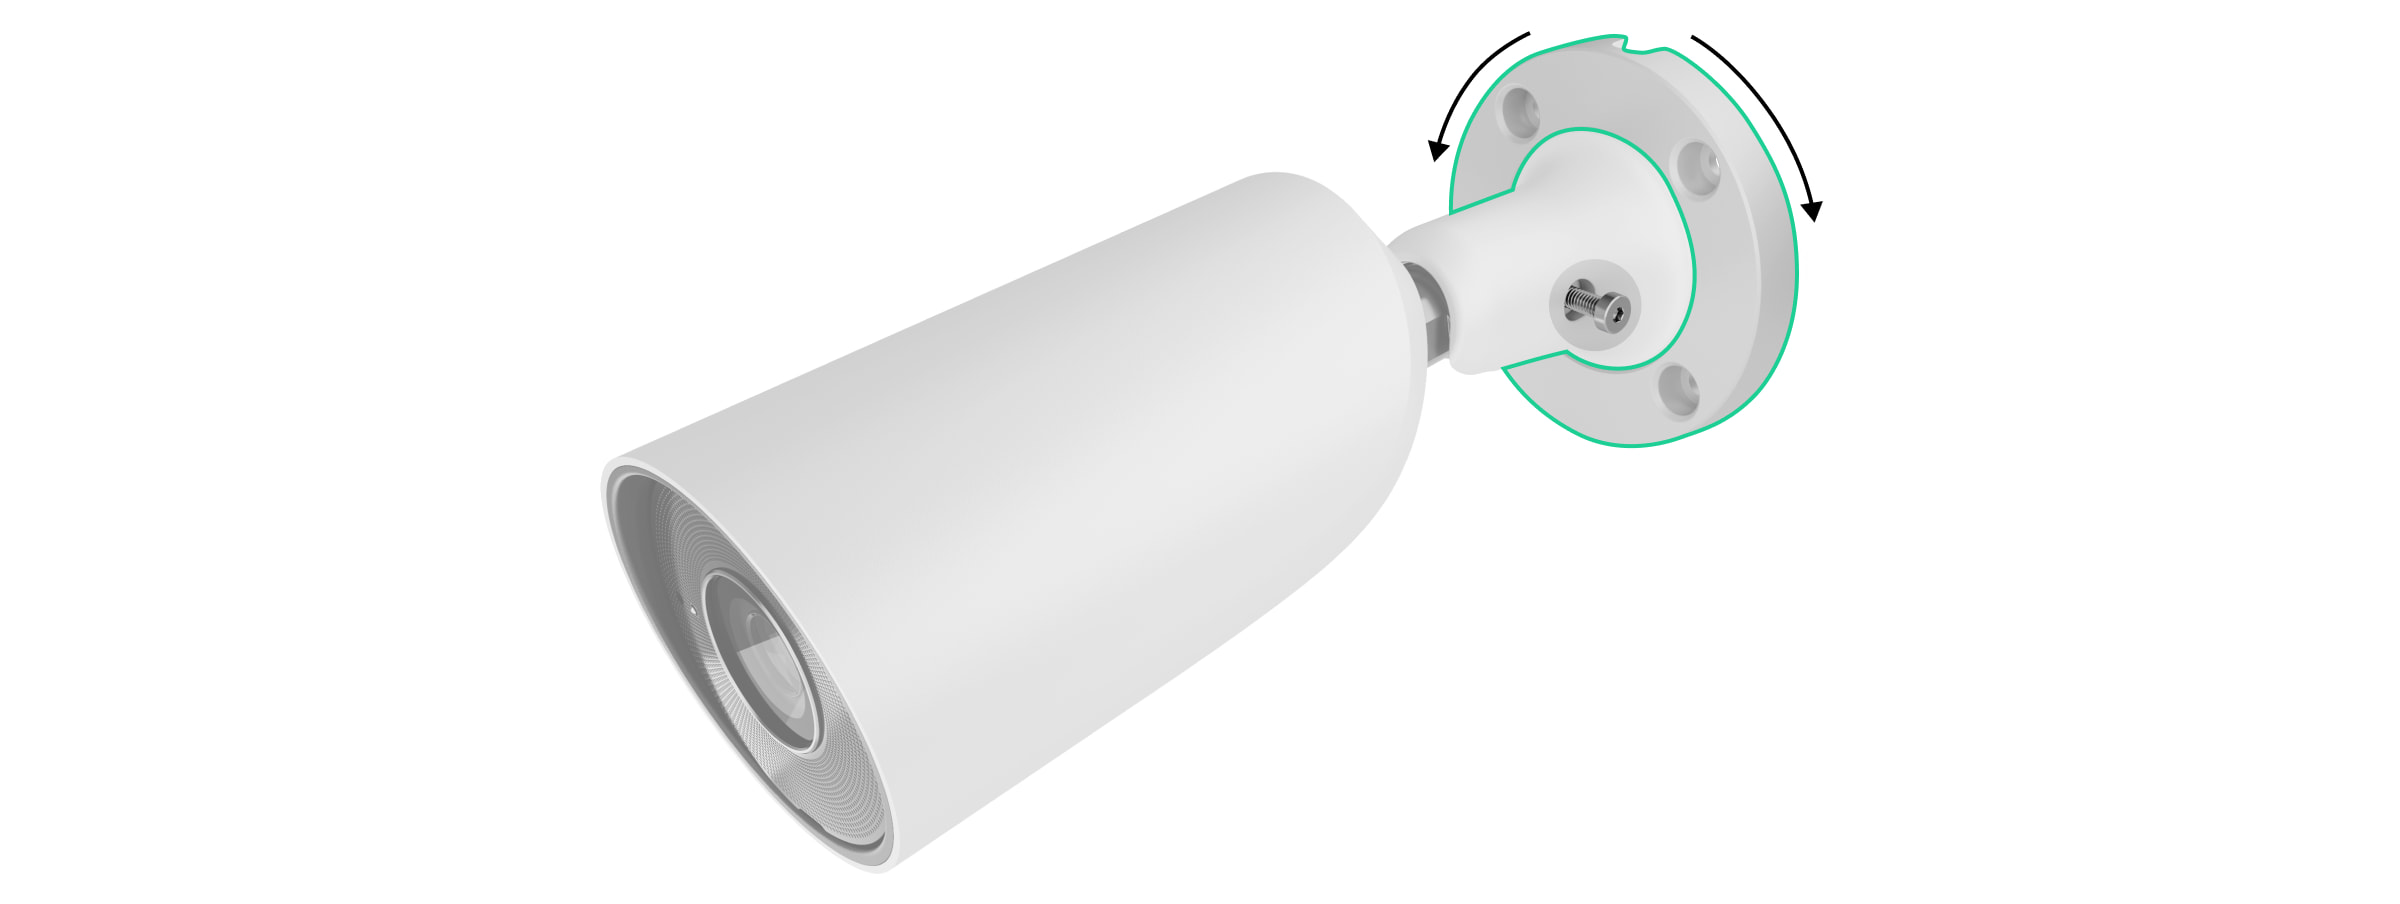
- Encaminhe o cabo através do tampão do bucim na tampa da JunctionBox e prende o suporte de montagem giratório à superfície utilizando os parafusos М4×12 incluídos.
DomeCam Mini
Para instalar a DomeCam Mini na JunctionBox:
- Retire a lente facetada.
- Com a chave sextavada (Ø 2,5 mm) incluída, retire os parafusos que fixam a tampa de proteção.
- Ajuste a posição da câmara através da rotação da carcaça. Aperte os dois parafusos que seguram a carcaça da lente da câmara. Volte a colocar a tampa de proteção e aperte os parafusos.
- Encaminhe o cabo para a JunctionBox e fixa a câmara à caixa de montagem utilizando os parafusos М4×20 incluídos. A DomeCam Mini está instalada sem a tampa.
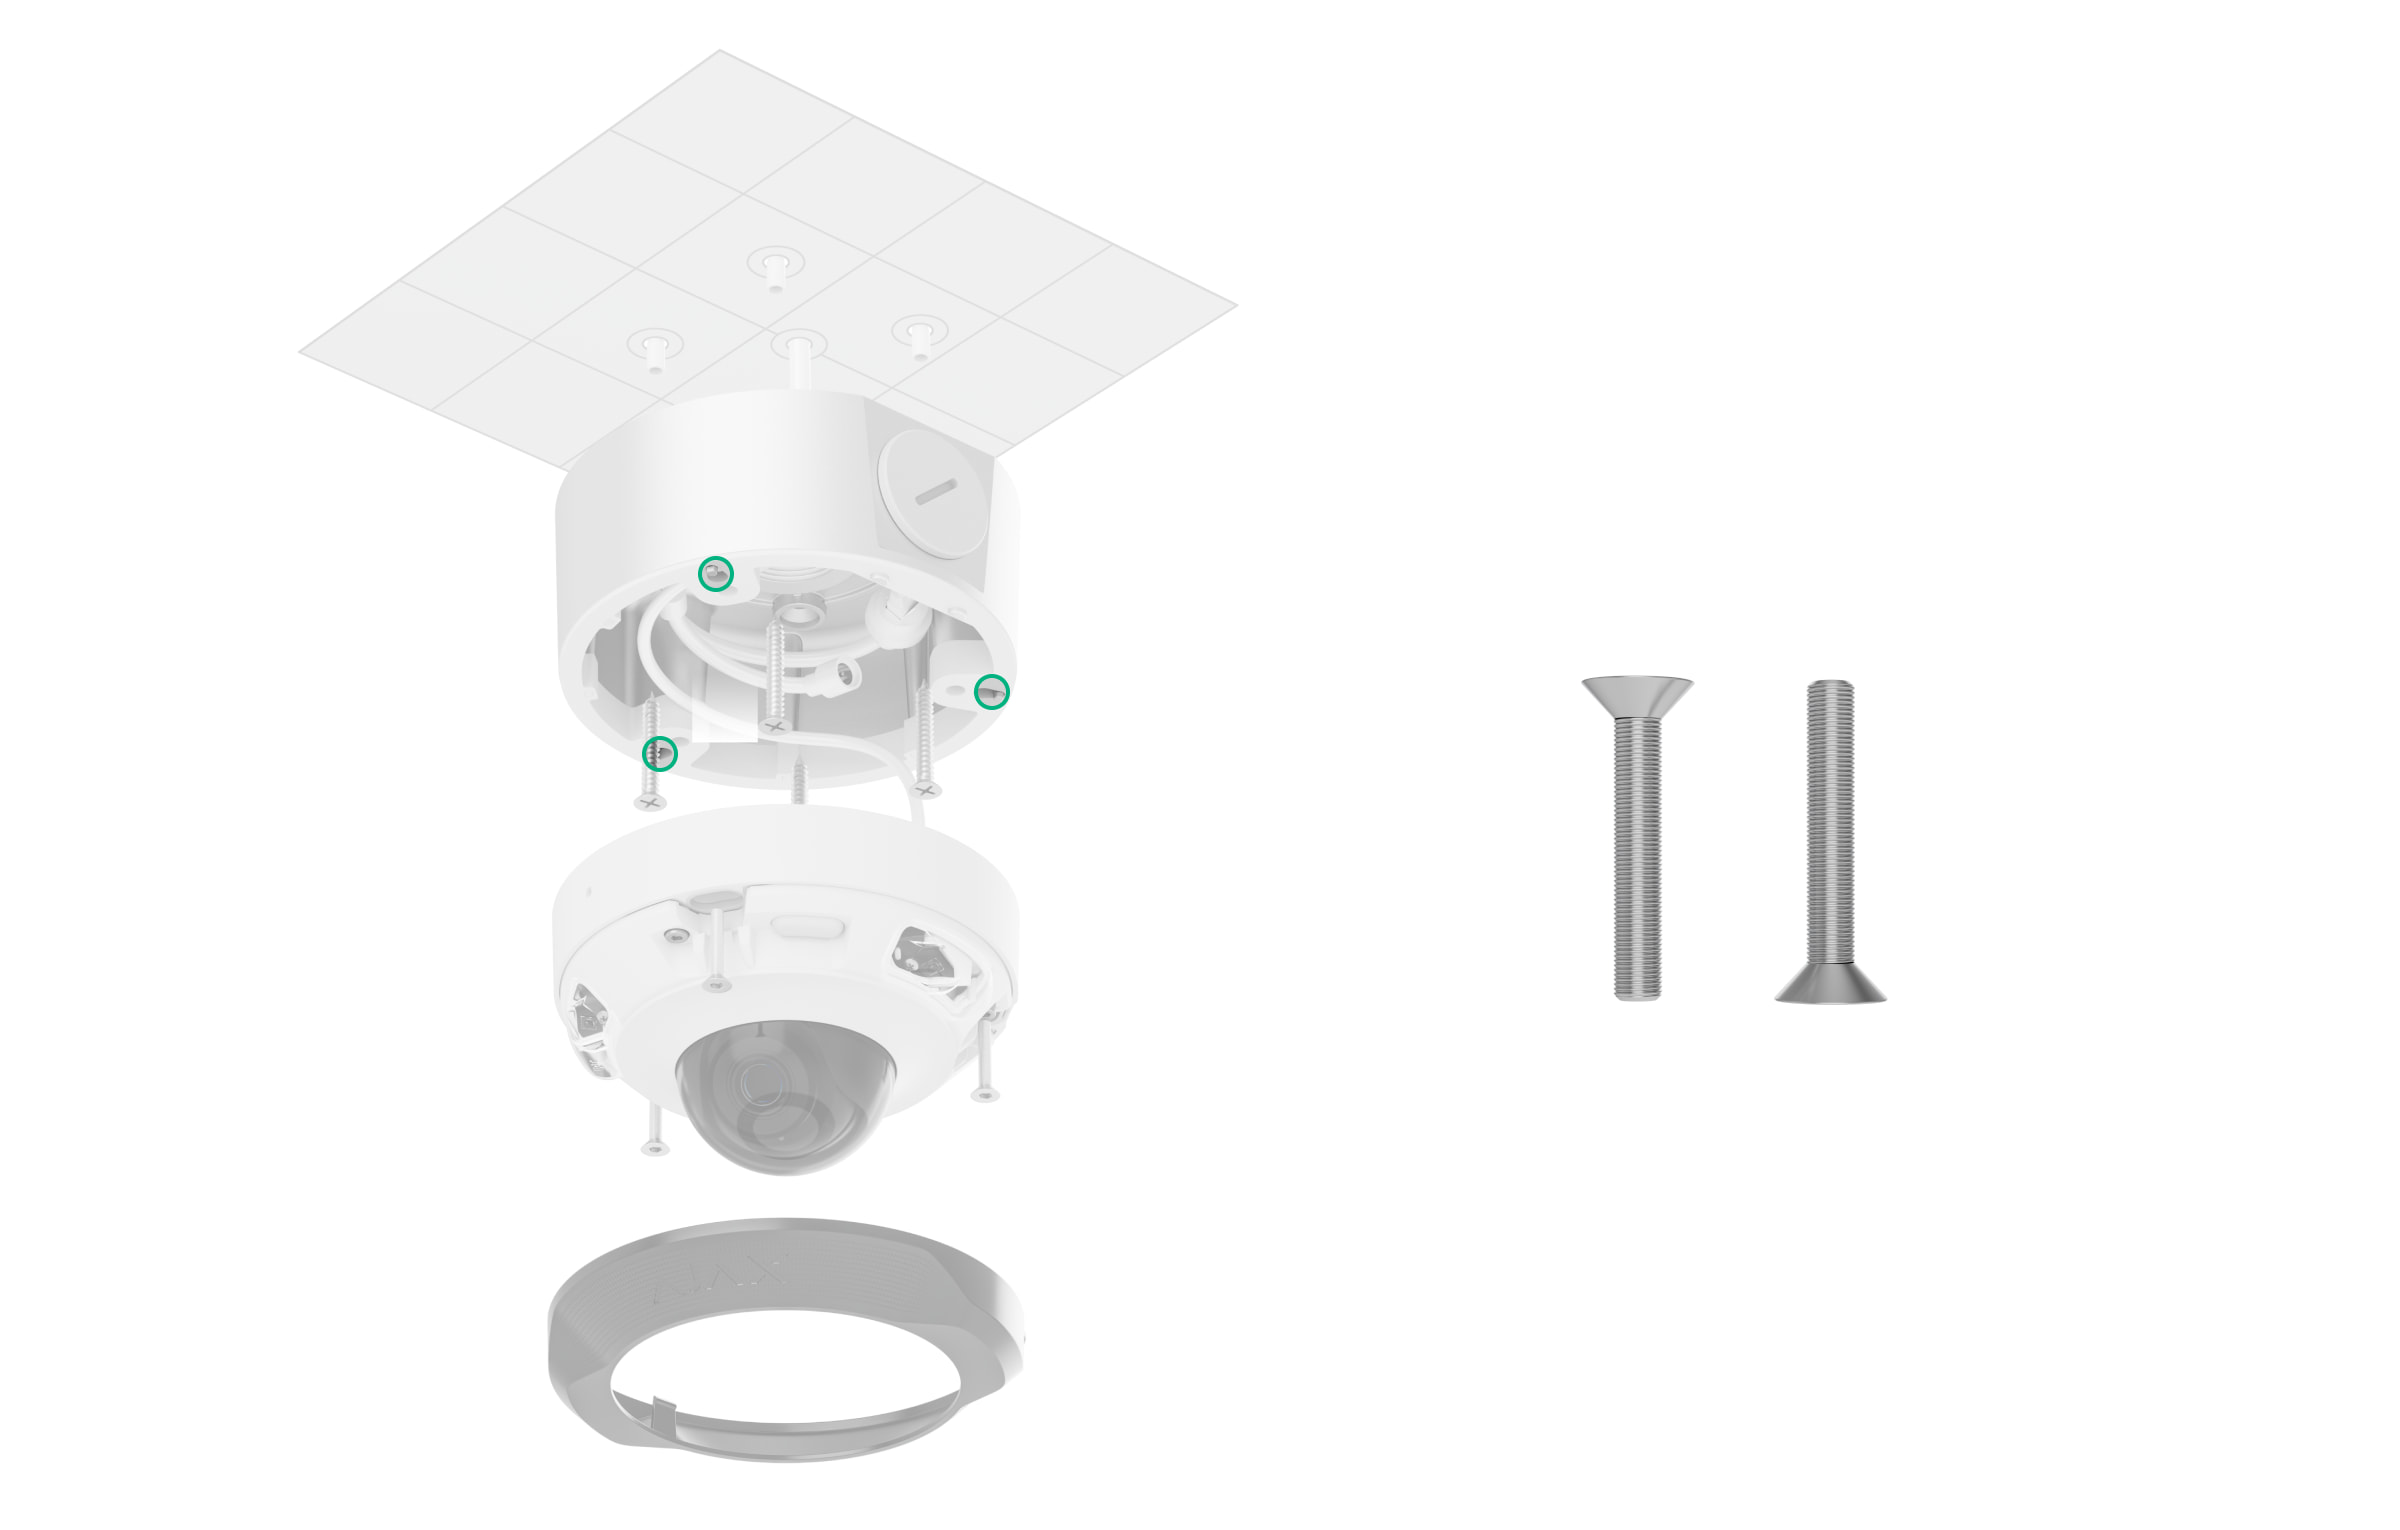
- Fixa a lente facetada.
TurretCam
Para instalar a TurretCam na JunctionBox:
- Utilizando a chave sextavada incluída (Ø 2 mm), desaperte os dois parafusos e retire a carcaça da câmara do suporte. Certifique-se de apoiar a carcaça para evitar que a câmara caia.
- Encaminhe o cabo através do suporte da câmara e fixa o suporte à tampa da JunctionBox utilizando os parafusos М4×12 incluídos.
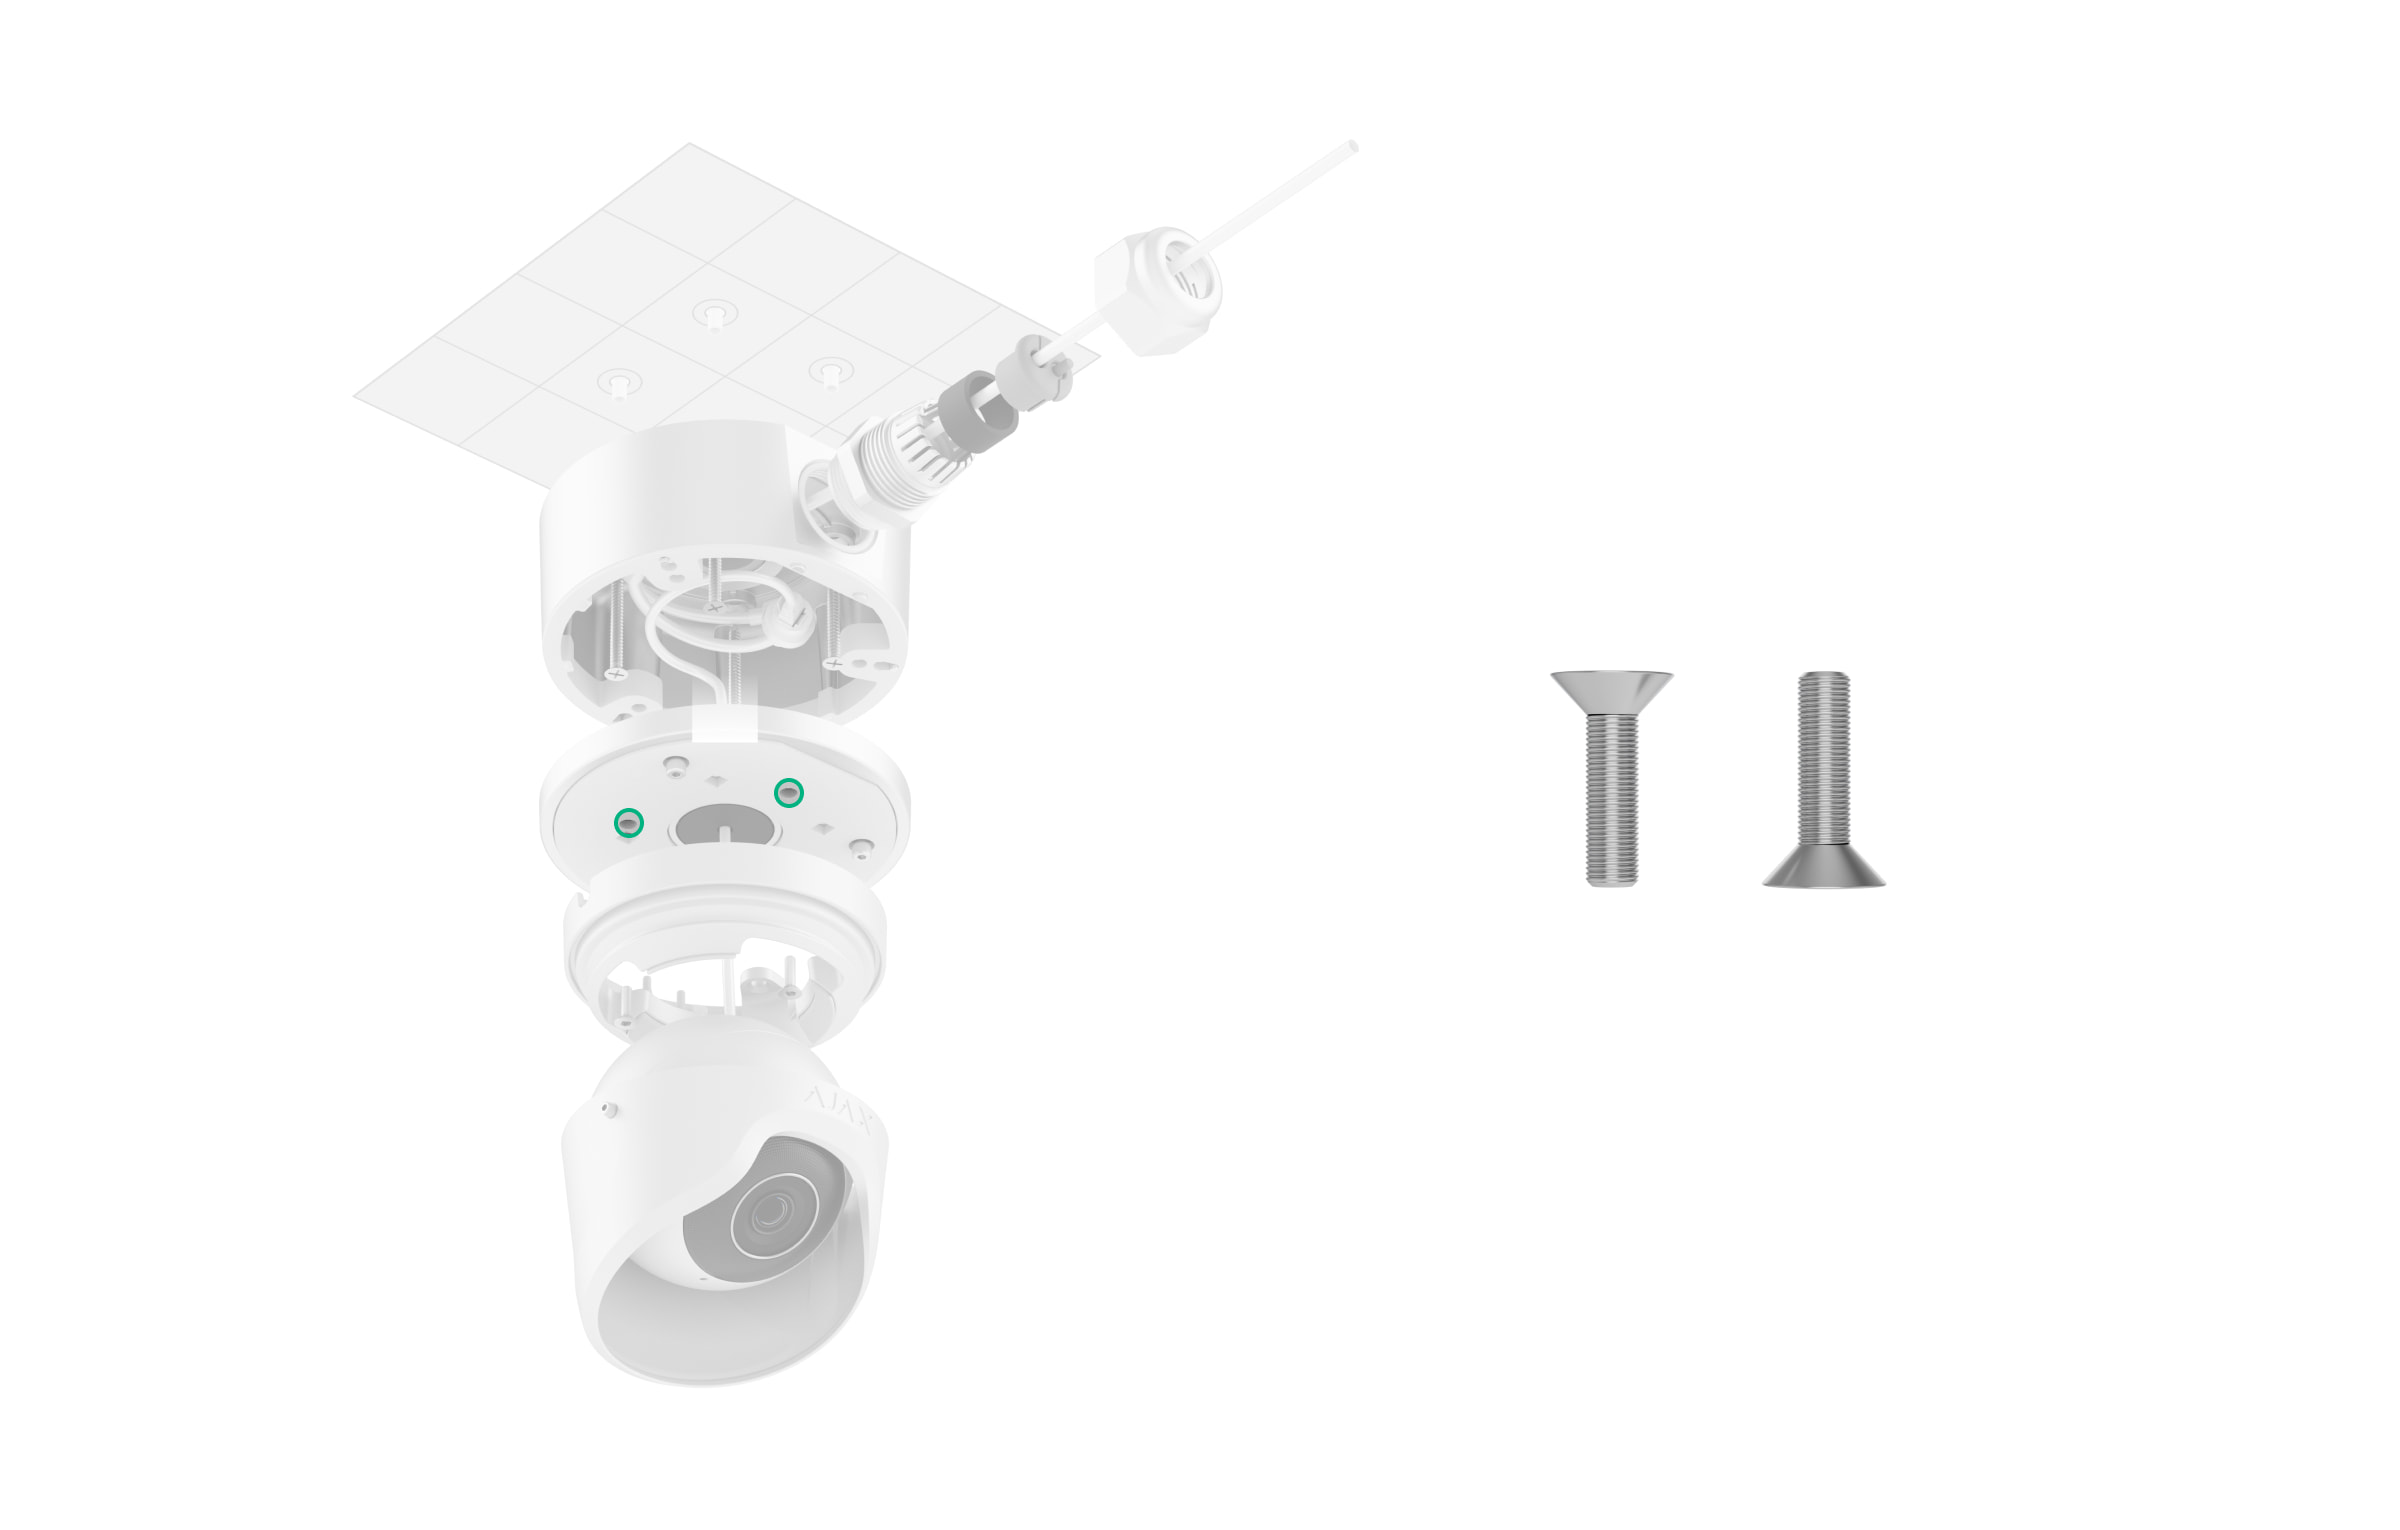
- Coloque a carcaça da câmara no suporte, certificando-se de que a lente da câmara está virada para a área protegida. Fixá-la no lugar, apertando os dois parafusos do suporte com a chave sextavada (Ø 2 mm) incluída.
Manutenção
A JunctionBox não necessita de manutenção.
Garantia
A garantia dos produtos da empresa de responsabilidade limitada “Ajax Systems Manufacturing” é válida durante 2 anos após a compra.
Se o dispositivo não funcionar corretamente, contacte primeiro o Suporte Técnico Ajax. Em maioria dos casos, os problemas técnicos podem ser resolvidos remotamente.
Contactar o Suporte Técnico:
