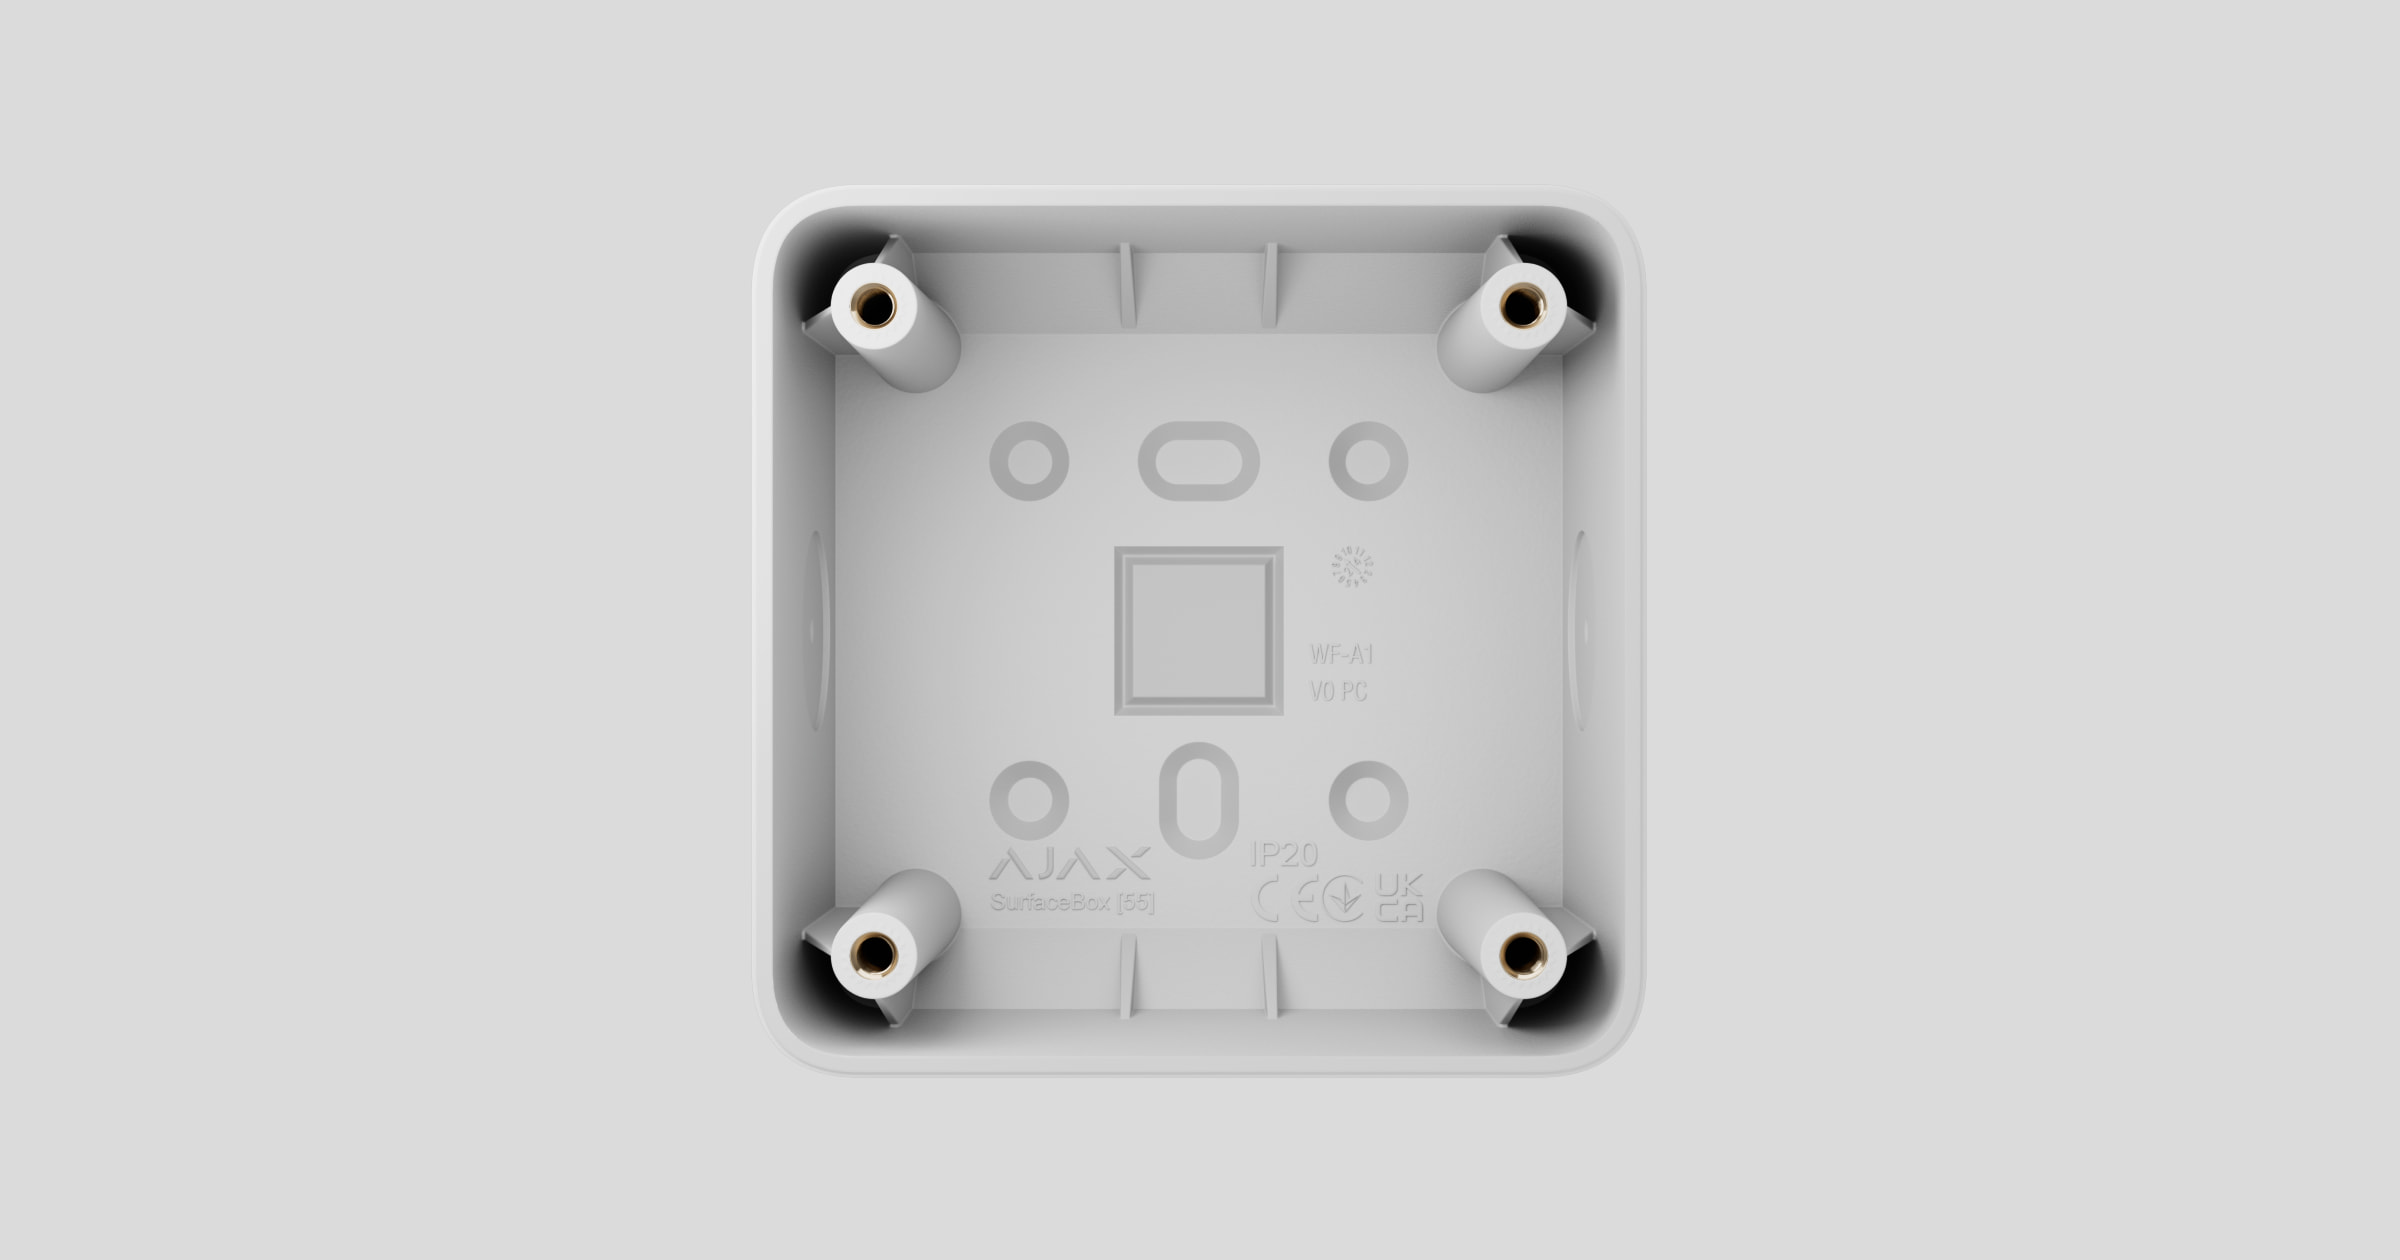
SurfaceBox [55] é uma caixa de montagem de superfície projetada para instalar um dispositivo LightSwitch ou Outlet de tipo europeu (55).
Fornece uma solução agradável e arrumada para instalar um dispositivo LightSwitch ou Outlet quando incorporar uma caixa de montagem na parede for impossível ou impraticável. A forma da SurfaceBox [55] alinha-se suavemente com o painel tátil do LightSwitch e com a tampa da Outlet.
Elementos funcionais
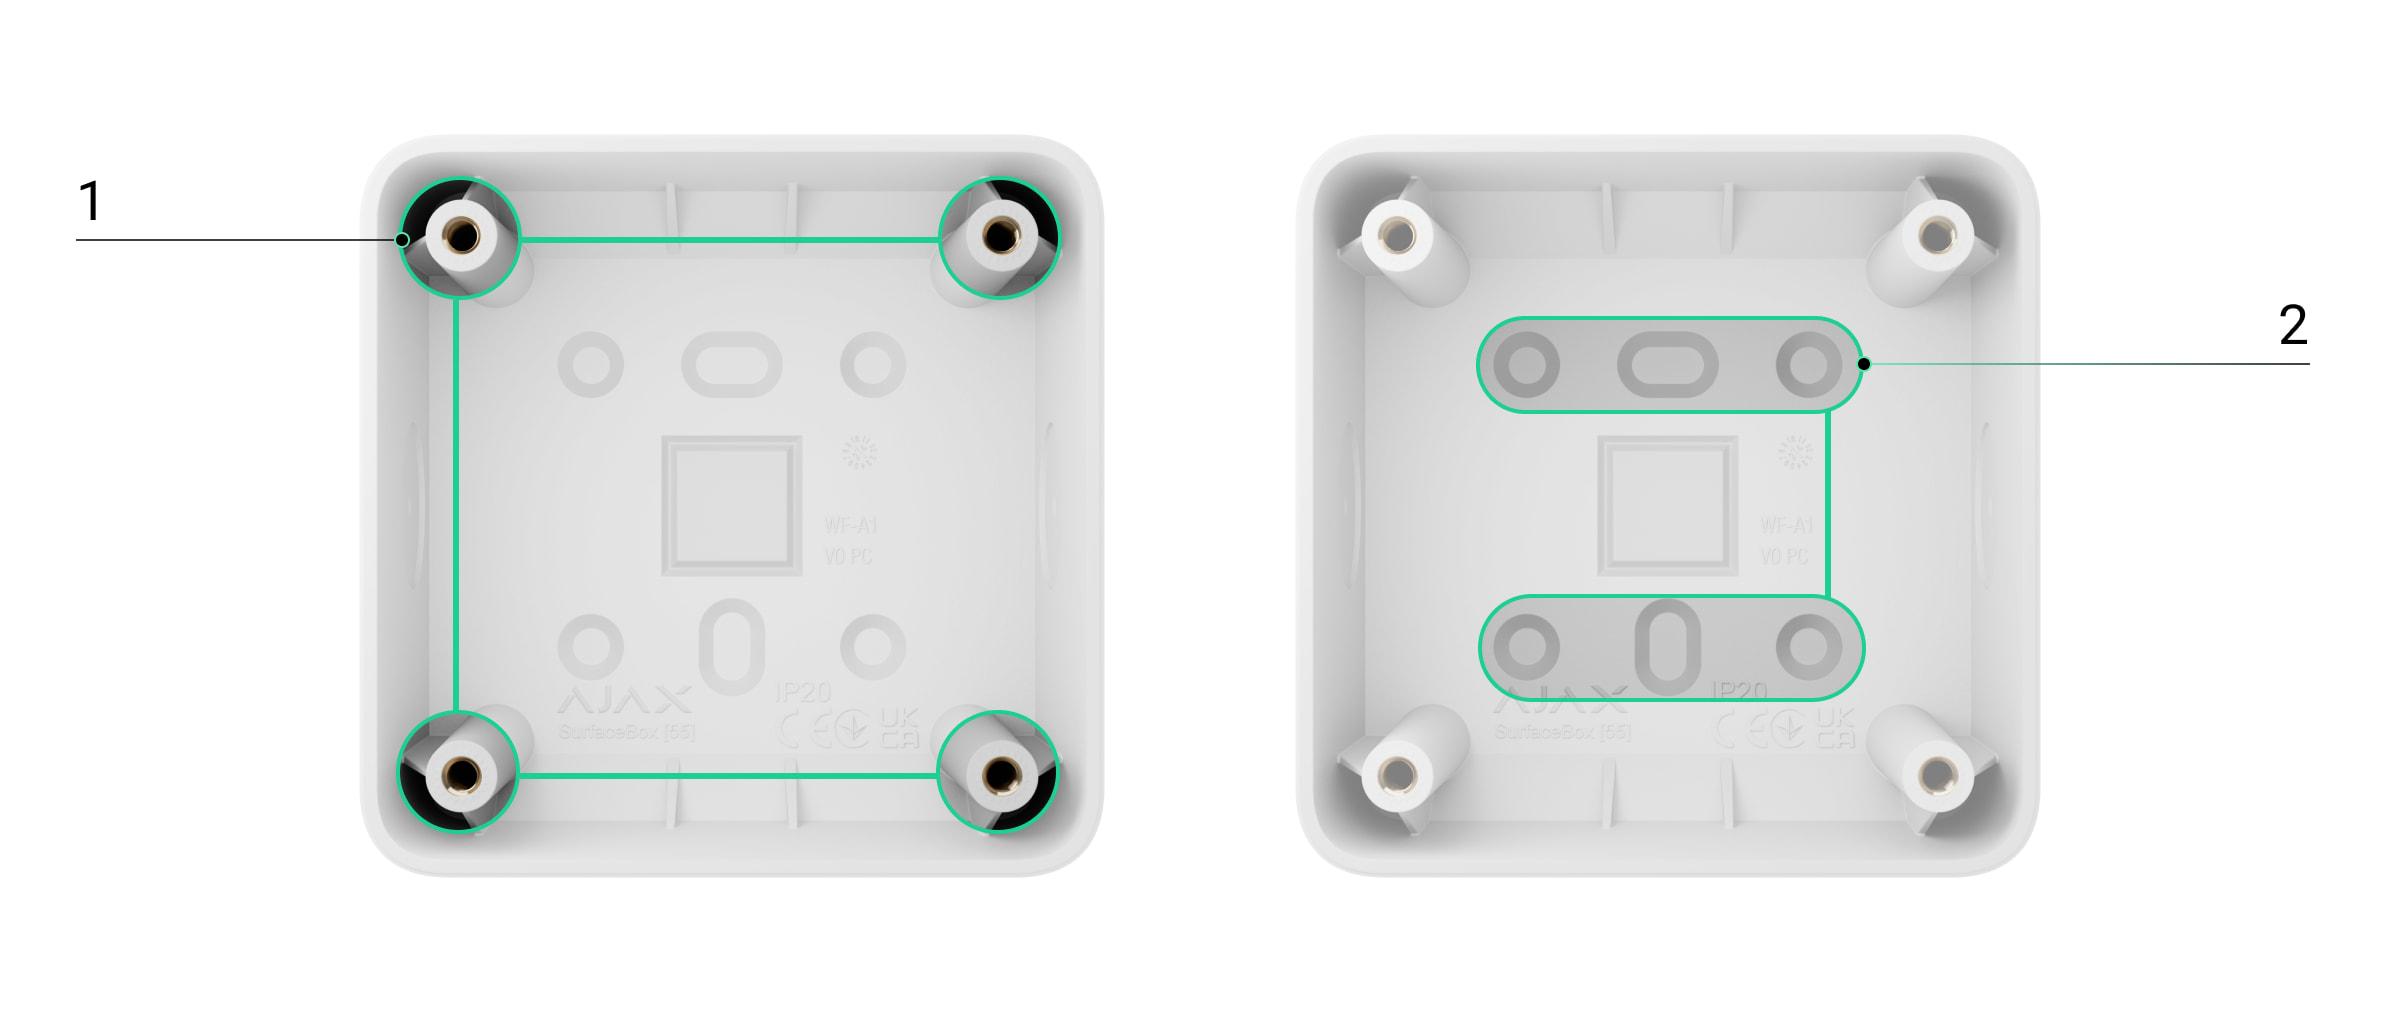
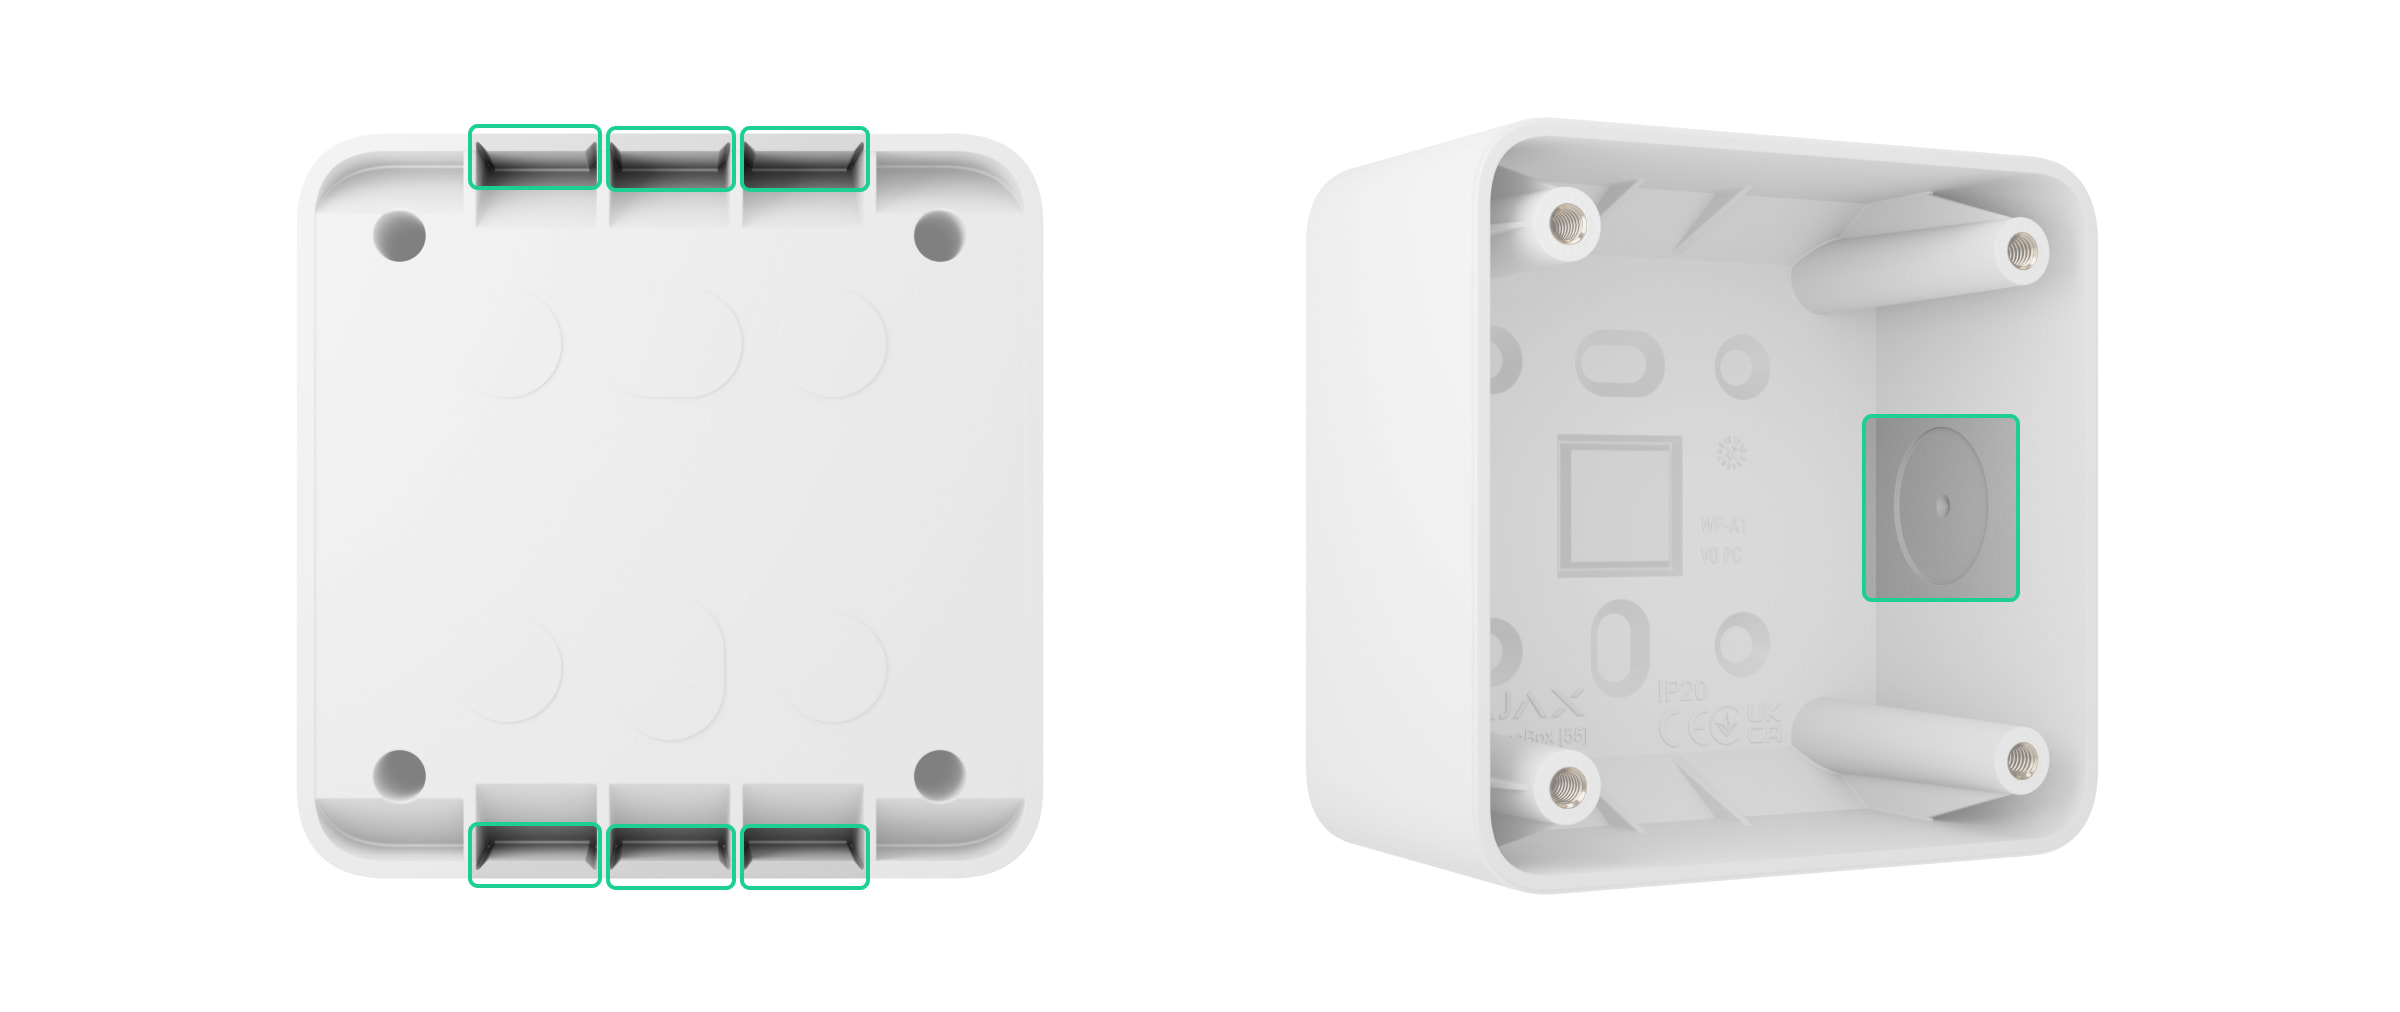
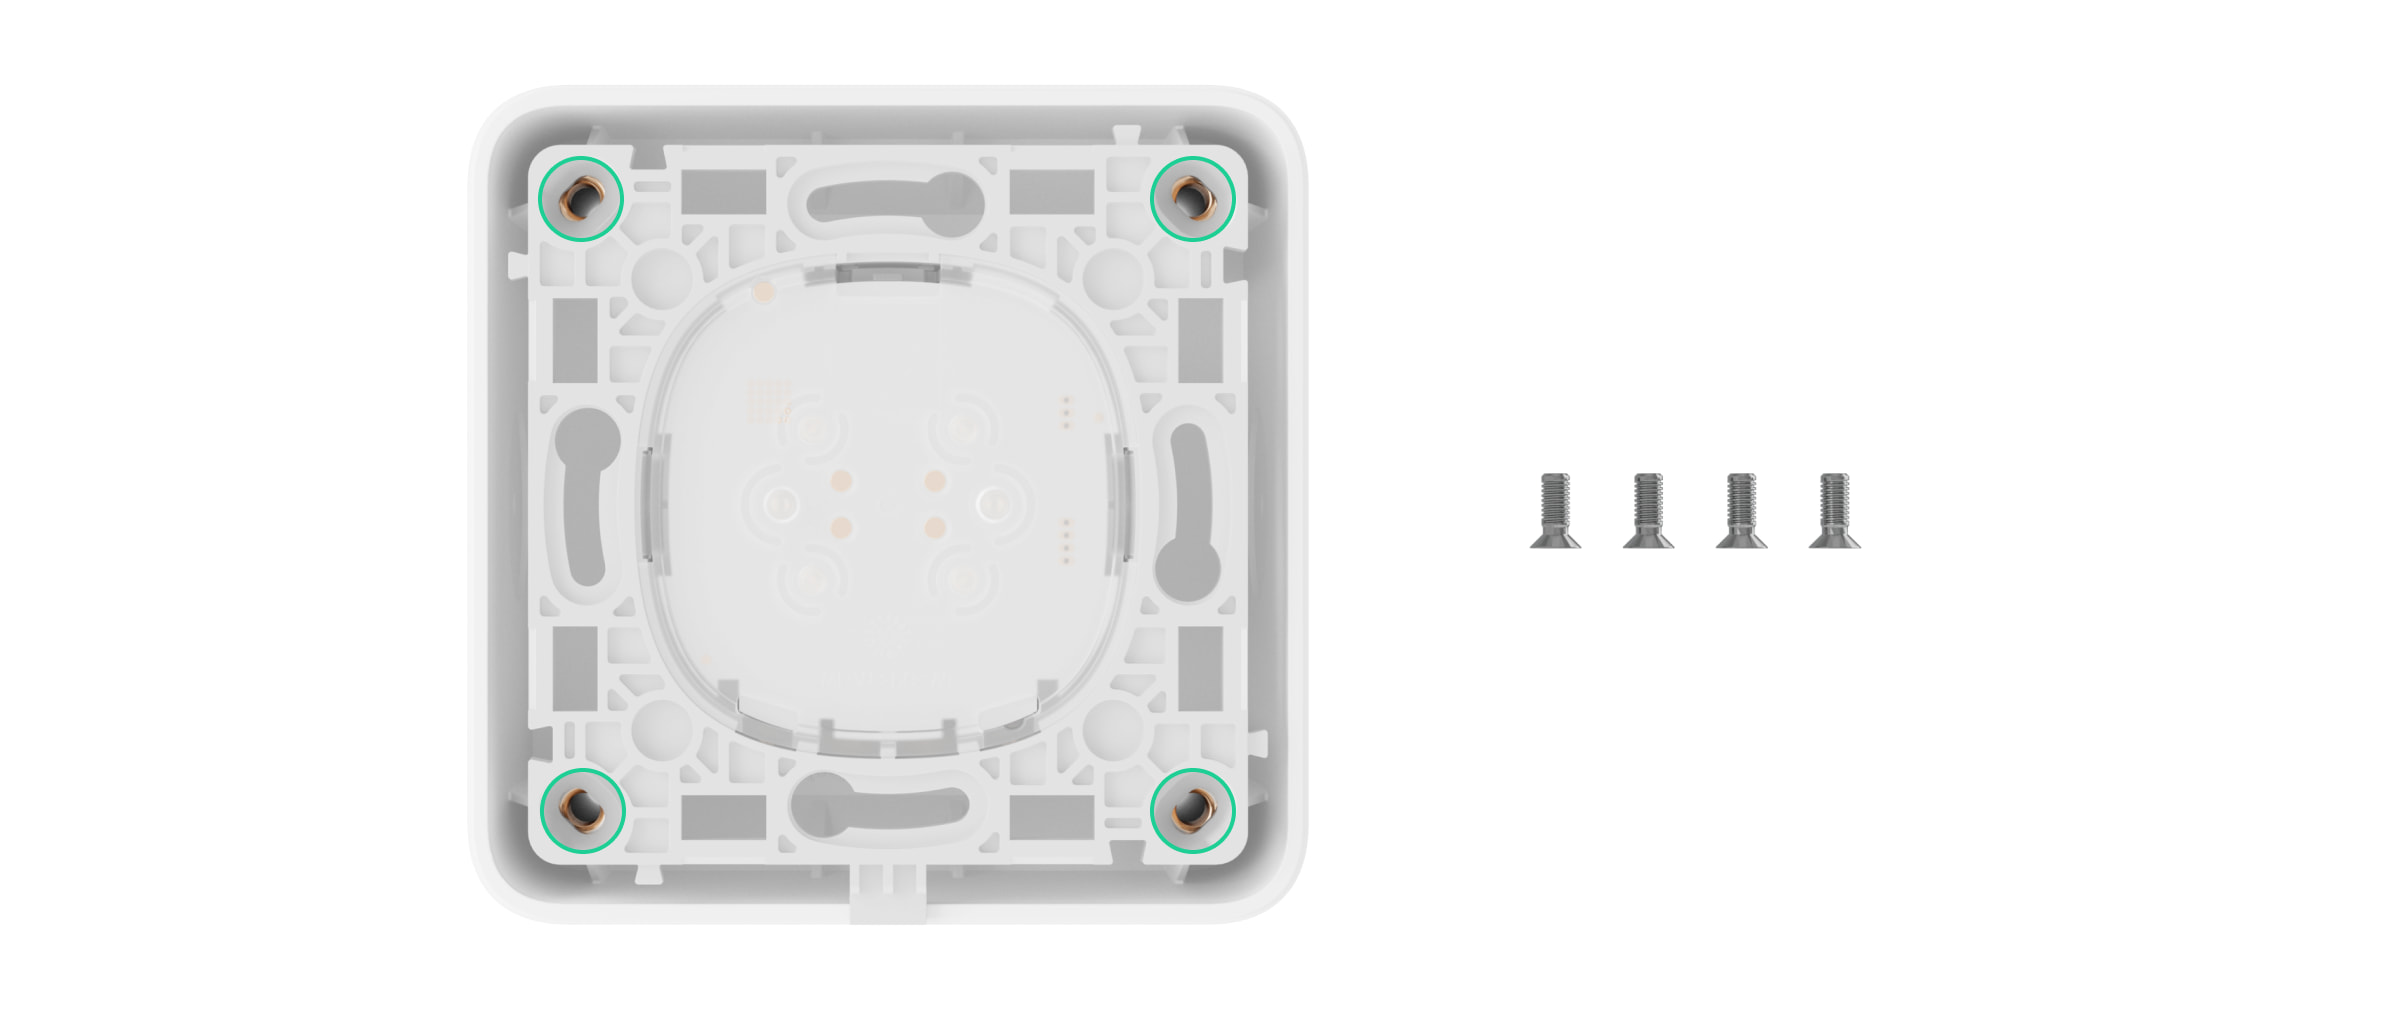
- Pontos de fixação para fixar um dispositivo LightSwitch ou Outlet na SurfaceBox [55] com parafusos.
- Pontos de fixação para fixar a SurfaceBox [55] à superfície.
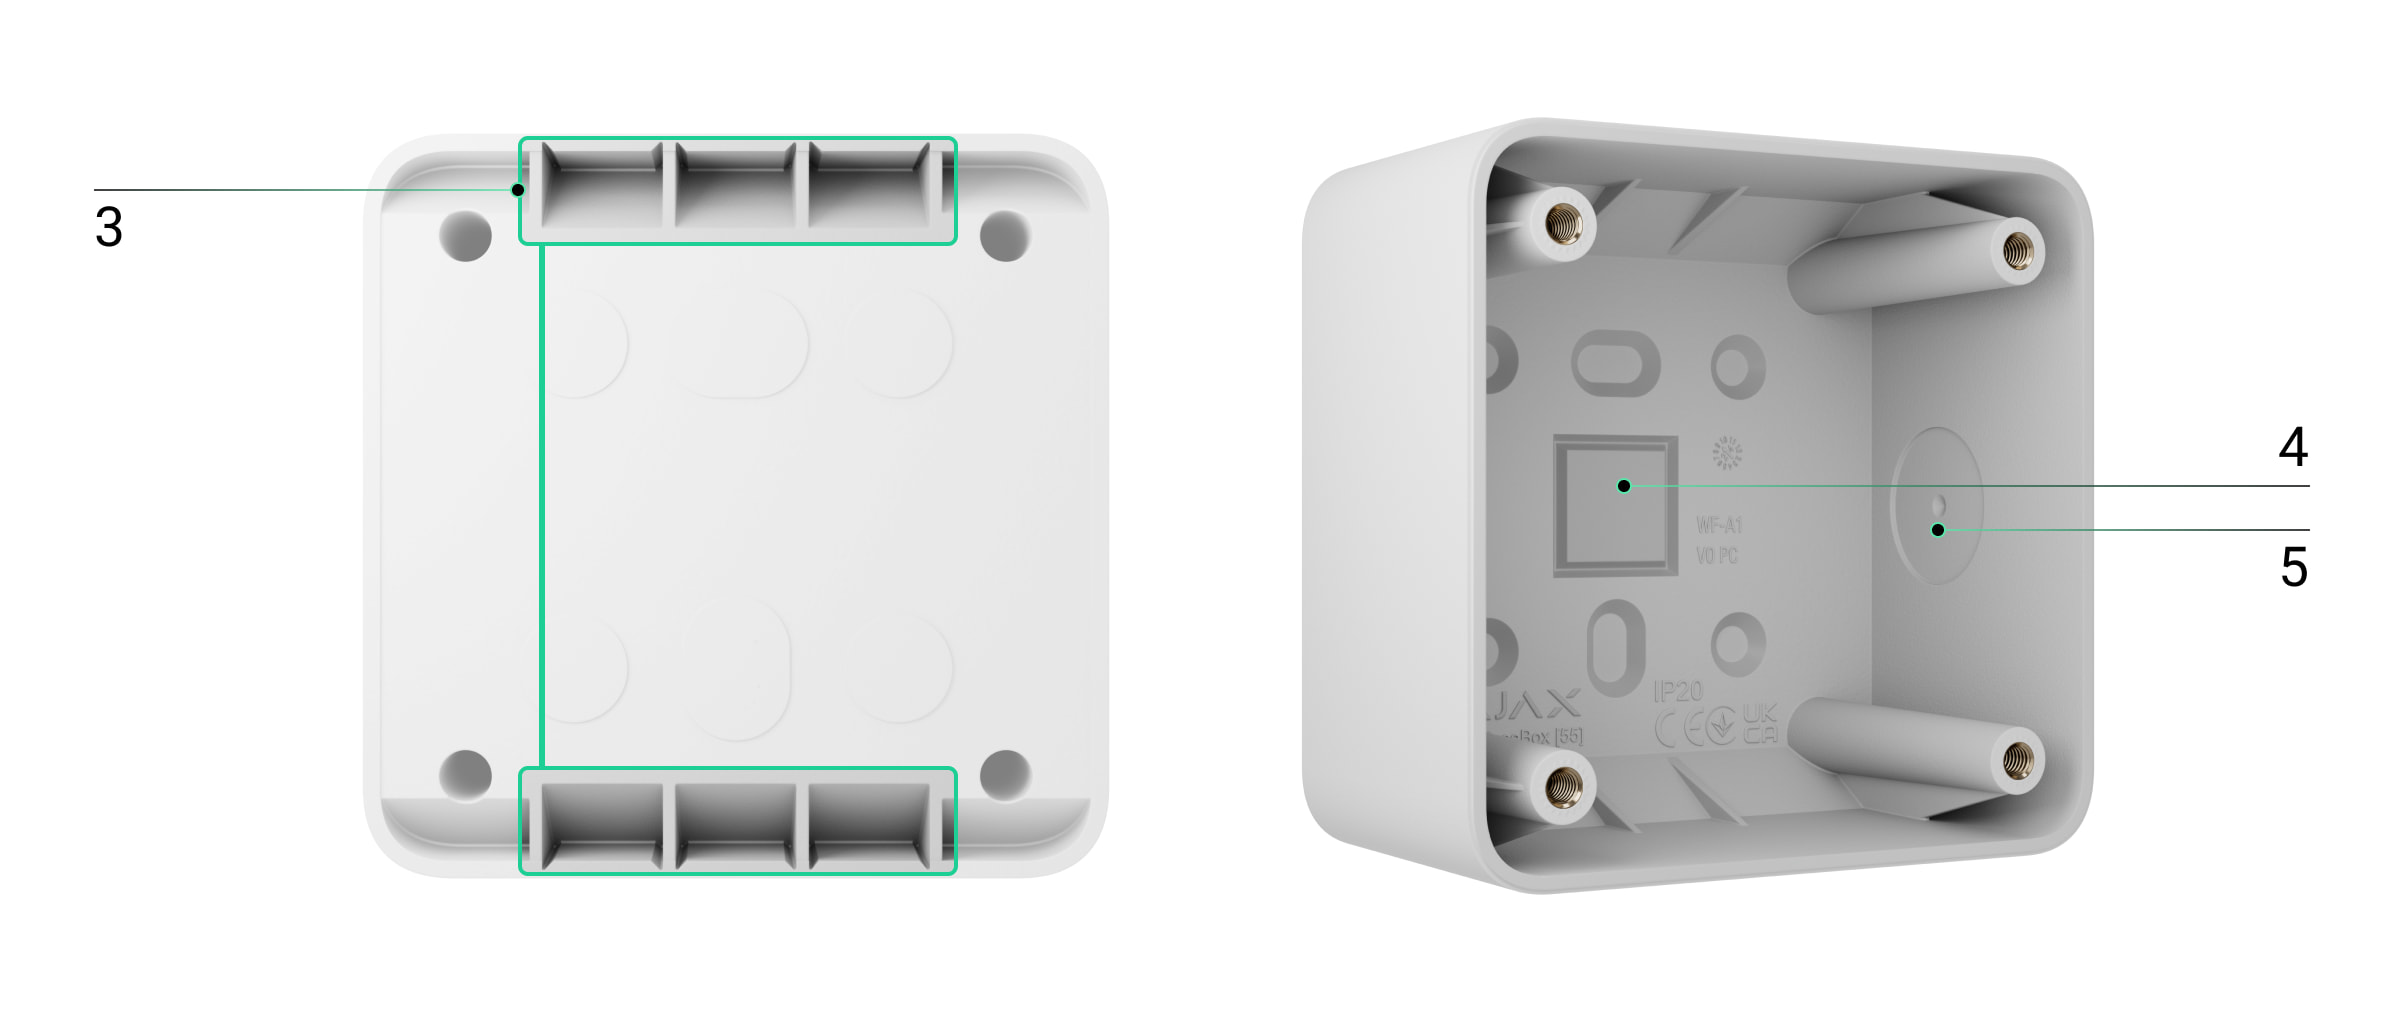
- Furos para passar cabos da parte de trás do dispositivo.
- Furo para passar cabos da parte de trás do dispositivo.
- Recesso para perfurar um furo para passar cabos pela lateral. Existem dois recortes nos lados opostos do dispositivo.
Dispositivos compatíveis
Pode instalar um dispositivo LightSwitch ou Outlet de tipo europeu (55) na SurfaceBox [55]. Os seguintes dispositivos são compatíveis:
- Dispositivos LightSwitch:
- Dispositivos Outlet:
A SurfaceBox [55] é vendida separadamente dos dispositivos LightSwitch e Outlet.
Principais características
A SurfaceBox [55] fornece uma solução conveniente quando um dispositivo LightSwitch ou Outlet deve ser instalada diretamente na parede ou noutra superfície onde a incorporação de uma caixa de montagem é impossível ou impraticável. Vários pontos de fixação permitem a montagem da SurfaceBox [55] em qualquer superfície, como betão, tijolo, madeira, paredes de gesso, etc.
O design da SurfaceBox [55] permite a passagem de cabos para o interior a partir da parte traseira ou lateral da caixa de montagem. Para todas as opções, consulte a secção de Passagem de cabos.
A forma da SurfaceBox [55] alinha-se suavemente com o painel tátil do LightSwitch e com a tampa da Outlet.
Qualquer eletricista certificado pode fazer a instalação do dispositivo; não é necessária formação especial.
A SurfaceBox [55] foi concebida para a instalação de apenas um único dispositivo LightSwitch ou Outlet.
Seleção do local de instalação
O local de instalação da SurfaceBox [55] tem de cumprir as recomendações de montagem para um dispositivo compatível que seja instalado no interior da caixa de montagem. Siga estas recomendações ao conceber o projeto do sistema Ajax.
A SurfaceBox [55] não pode ser instalada
- No exterior. O dispositivo destina-se exclusivamente a uso em ambientes interiores.
- Em locais onde os níveis de temperatura e humidade não estejam de acordo com os parâmetros de funcionamento especificados. Isto pode danificar a SurfaceBox [55].
- Em locais onde as condições não cumprem os requisitos para um dispositivo instalado dentro SurfaceBox [55].
Preparar a instalação
Organização dos cabos
Ao preparar a passagem dos cabos, leia os regulamentos de segurança elétrica e contra incêndios da sua área. Respeite rigorosamente estas normas e regulamentos.
Passagem de cabos
A SurfaceBox [55] permite a passagem de cabos para o interior a partir da parte traseira, lateral, Superior ou inferior.
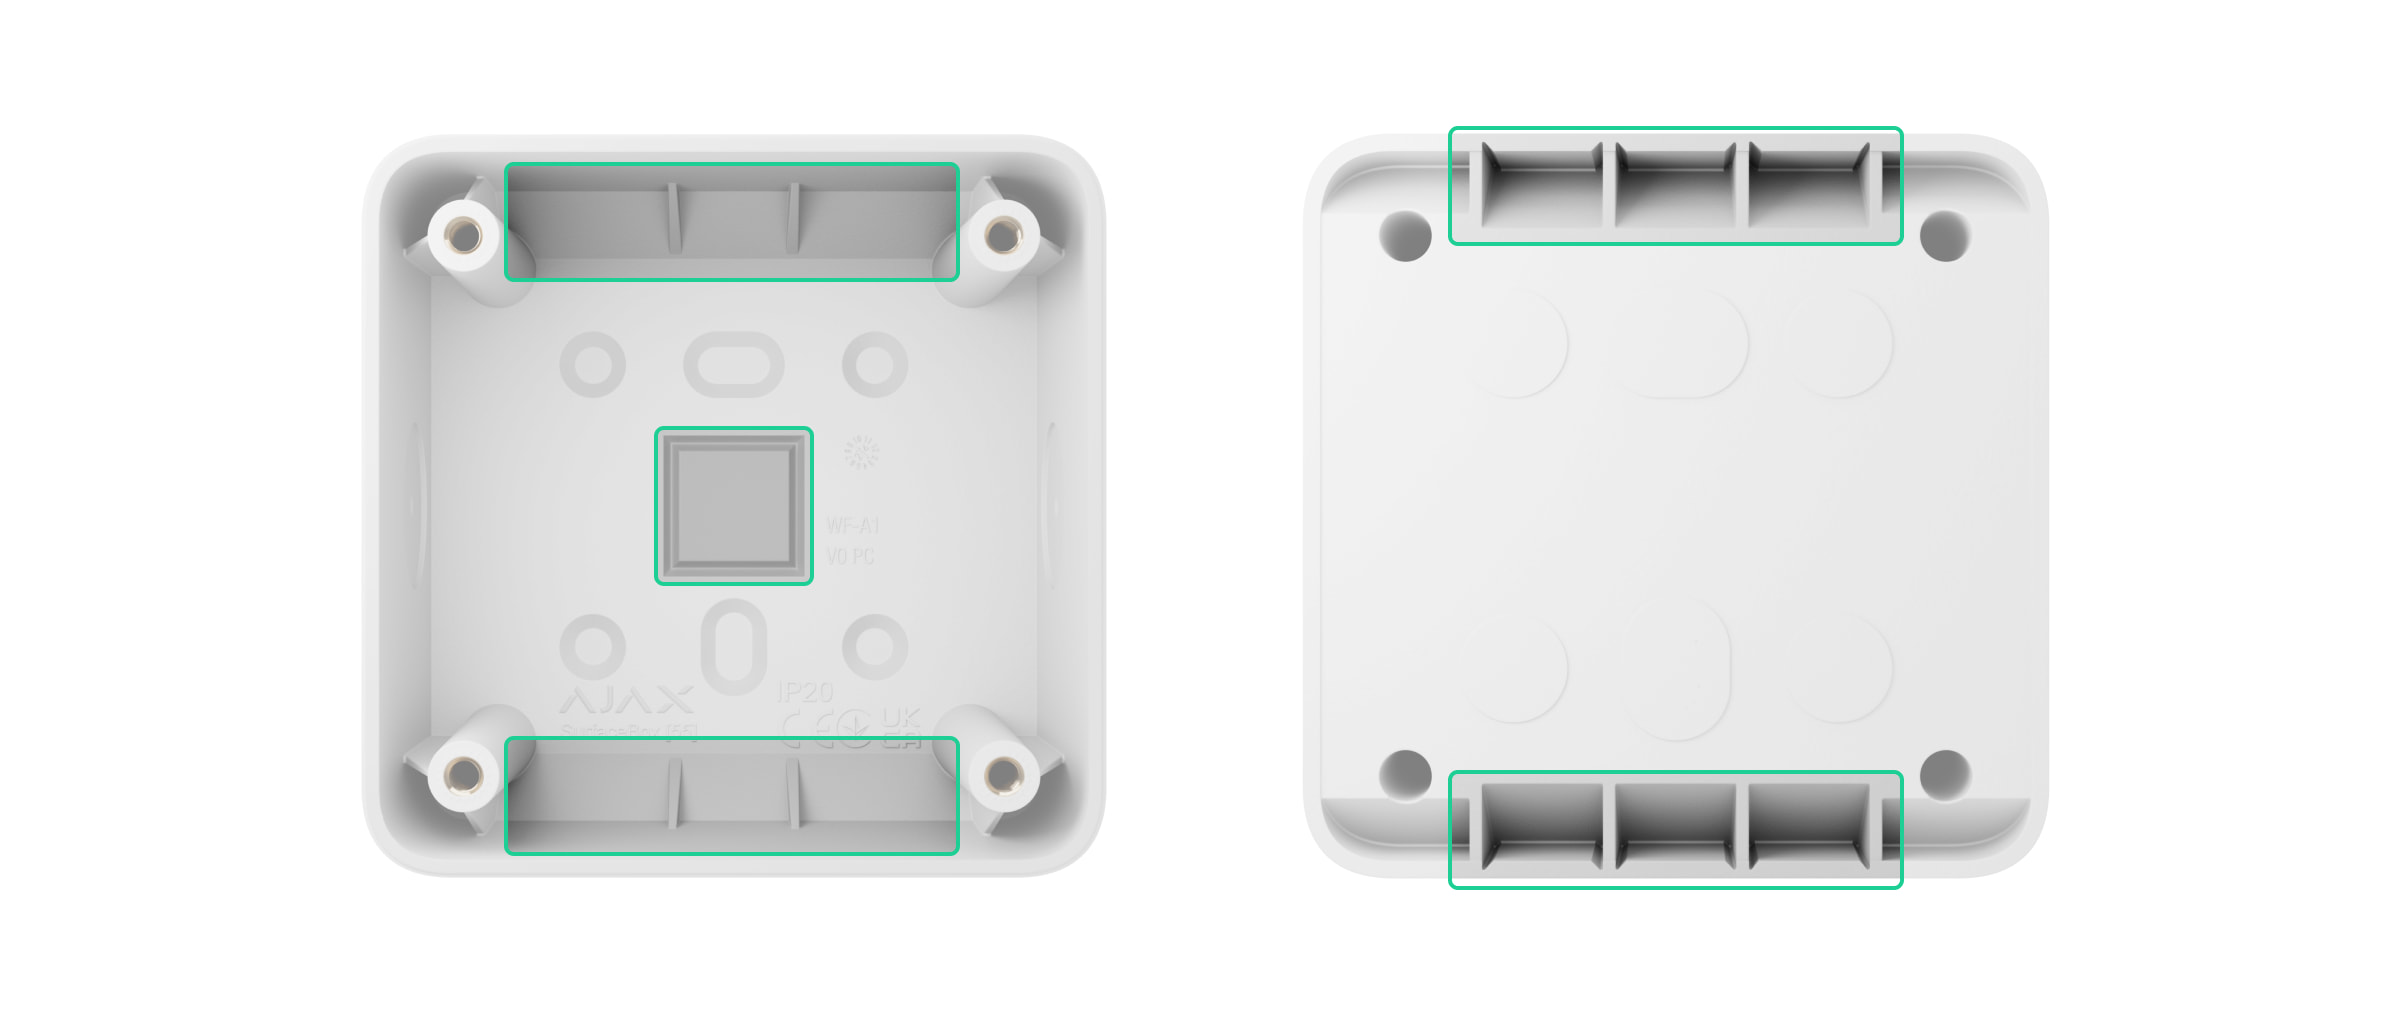
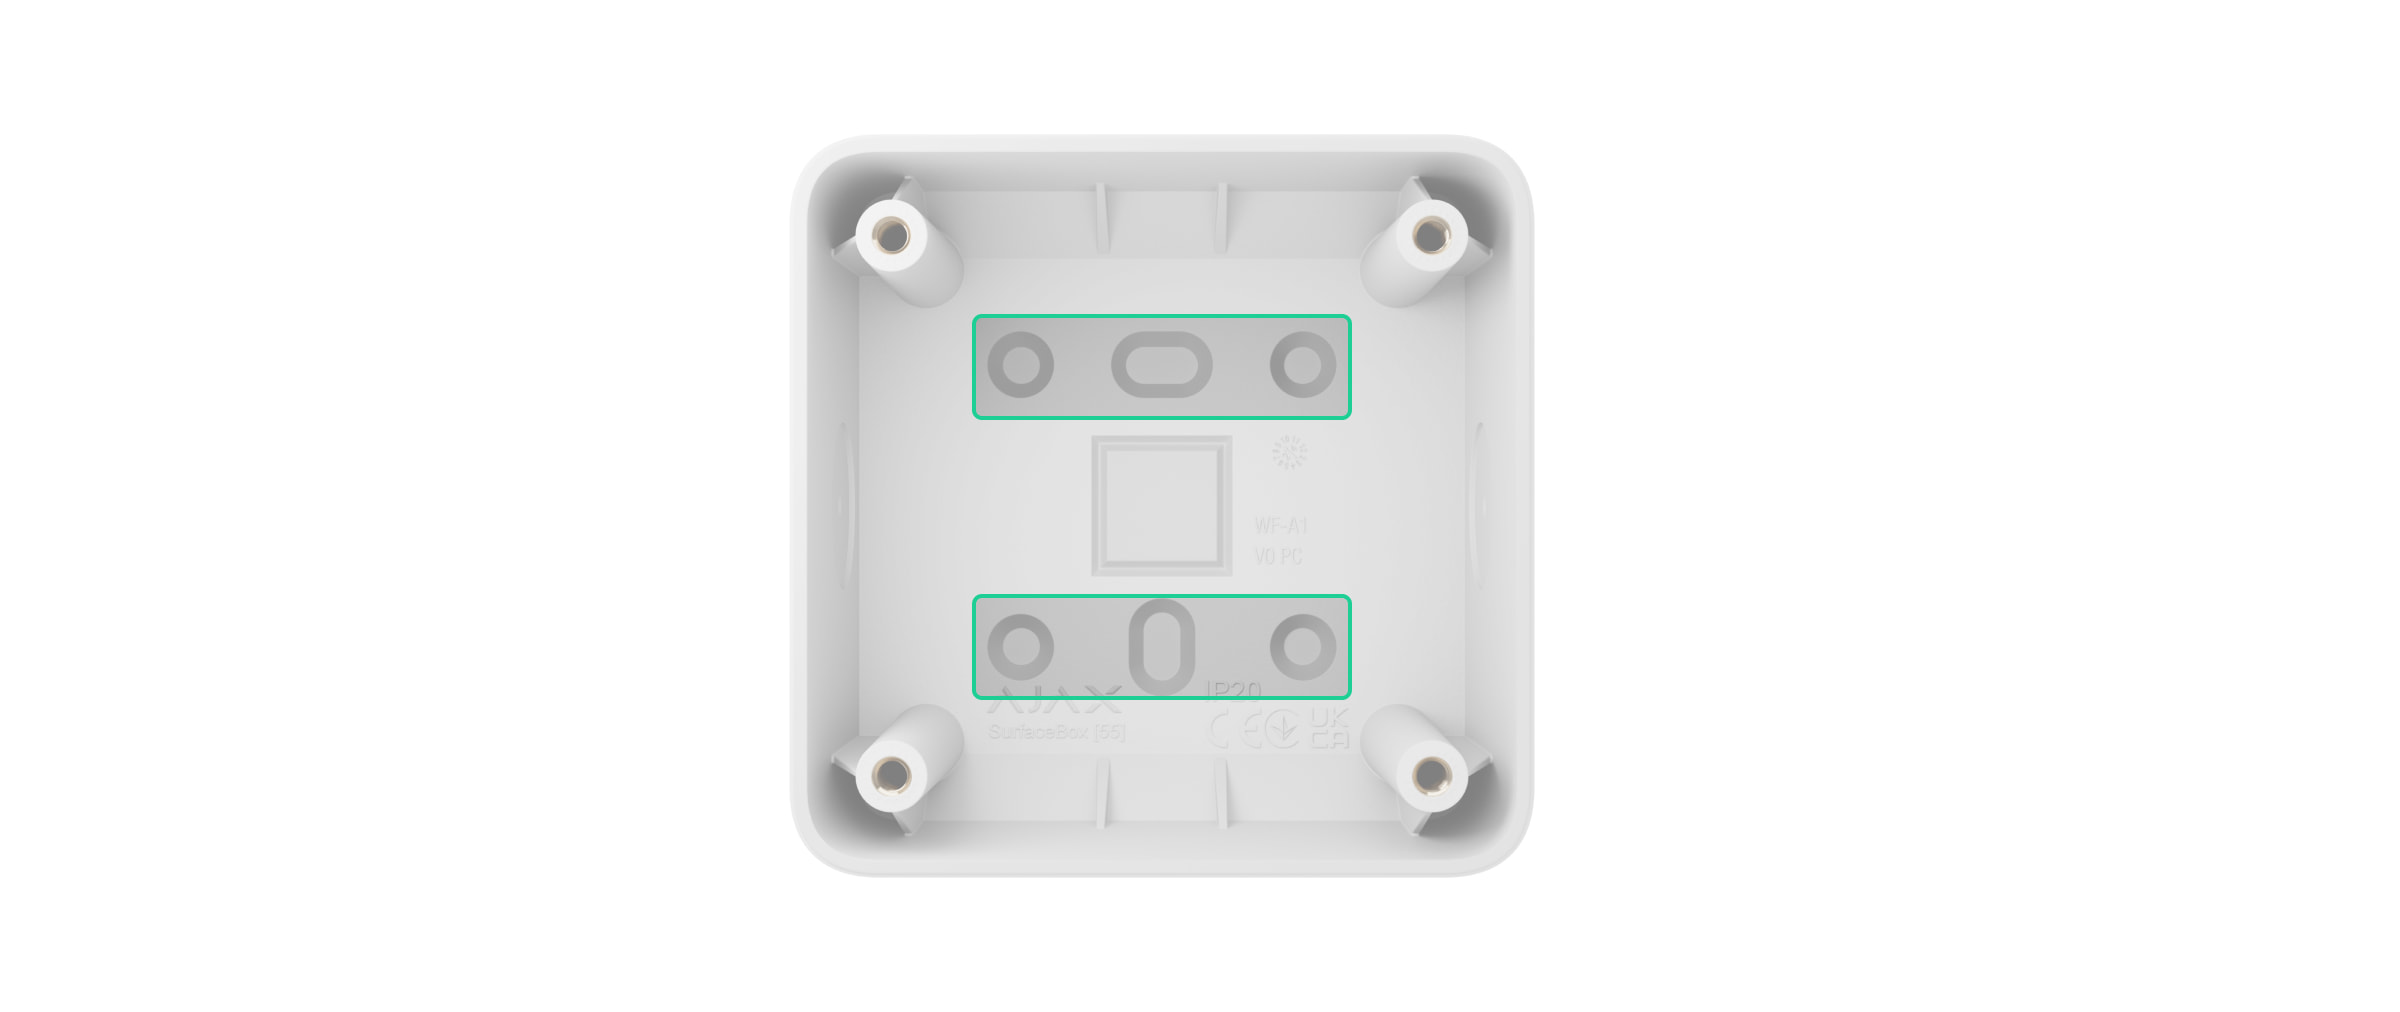
Para passar o cabo a partir da parte de trás, pode utilizar os furos central, Superior ou inferior assinalados na imagem.
Para passar o cabo pela parte lateral, Superior ou inferior, pode separar qualquer uma das seis secções na parte Superior ou inferior do dispositivo ou utilizar a reentrância lateral destacada na imagem. Utilize um alicate para partir uma secção da carcaça do dispositivo ou faça o furo nas áreas destacadas, tendo em conta o tamanho do tubo, do tubo corrugado, da conduta ou dos cabos.
A parte superior, inferior e ambos os lados da SurfaceBox [55] são semelhantes e simétricos. Portanto, pode girá-la 90° ou 180° para uma rotação conveniente do cabo e montagem na superfície.
Preparação dos cabos para conexão
Remova a camada isolante e descasque o cabo com um descascador de isolamento especial. As extremidades dos fios inseridos nos terminais do dispositivo devem ser estanhadas ou cravadas com uma manga. Isto garante uma conexão fiável e protege o condutor da oxidação.
Consulte o manual do utilizador do dispositivo que será instalado na SurfaceBox [55] para verificar os requisitos específicos de preparação dos cabos. Siga estes requisitos para garantir o funcionamento estável do dispositivo.
Instalação
Antes da instalação, certifique-se de que selecionou a localização ideal para a SurfaceBox [55] e que este cumpre os requisitos deste manual.
Ao instalar e utilizar um dispositivo LightSwitch ou Outlet na SurfaceBox [55], siga as regras gerais de segurança elétrica para a utilização de aparelhos elétricos, bem como os requisitos dos regulamentos de segurança elétrica.
A instalação só deve ser efetuada por um eletricista ou instalador qualificado. Não ligue a alimentação do dispositivo até que todos os componentes estejam corretamente instalados.
Instalação da SurfaceBox [55]
- Desligue o cabo de alimentação que vai conectar ao dispositivo instalado na SurfaceBox [55].
- Prepare o furo para passar o cabo na caixa de montagem com antecedência. Consulte a secção sobre Passagem de cabos para ver todas as opções.
- Introduza o tubo ou o tubo corrugado no furo preparado na caixa de montagem, se necessário.
- Passe o cabo para a caixa de montagem através do furo feito.
- Fixe a SurfaceBox [55] na superfície no local de instalação selecionado, utilizando os fixadores adequados através dos pontos de fixação correspondentes.
O kit de instalação não inclui fixadores para fixar a SurfaceBox [55] a uma superfície. Dependendo do tipo de superfície, utilize os fixadores apropriados.
Instalar o dispositivo na SurfaceBox [55]
- Desligue o cabo de alimentação que vai conectar ao dispositivo instalado na SurfaceBox [55], se ainda não o tiver feito.
- Prepare os fios para conexão a um dispositivo LightSwitch ou Outlet de acordo com os requisitos do mesmo. Consulte o manual do utilizador do dispositivo que será instalado na SurfaceBox [55].
- Conecte os fios a um dispositivo LightSwitch ou Outlet de acordo com o esquema especificado para o dispositivo. Consulte o manual do utilizador do dispositivo que será instalado na SurfaceBox [55].
- Instale um dispositivo LightSwitch ou Outlet na SurfaceBox [55] e fixe-o com os parafusos fornecidos.
Utilize apenas parafusos com rosca métrica para instalar um dispositivo LightSwitch ou Outlet na SurfaceBox [55]. Os parafusos com rosca em polegadas não são compatíveis e podem danificar a rosca nos pontos de fixação da SurfaceBox [55].
- Conclua a instalação de um dispositivo LightSwitch ou Outlet de acordo com os passos do manual do utilizador para o dispositivo correspondente.
- Ligue a alimentação elétrica.
Os manuais de utilizador dos dispositivos LightSwitch ou Outlet podem ser encontrados na página de Suporte da Ajax.
Manutenção
O dispositivo não requer manutenção.
Garantia
A garantia dos produtos da sociedade de responsabilidade limitada “Ajax Systems Manufacturing” é válida durante 2 anos após a compra.
Se o dispositivo não funcionar corretamente, recomendamos que contacte primeiro o serviço de assistência, uma vez que a maioria dos problemas técnicos pode ser resolvida remotamente.
Contactar o Apoio Técnico:
Fabricado por “AS Manufacturing” LLC
