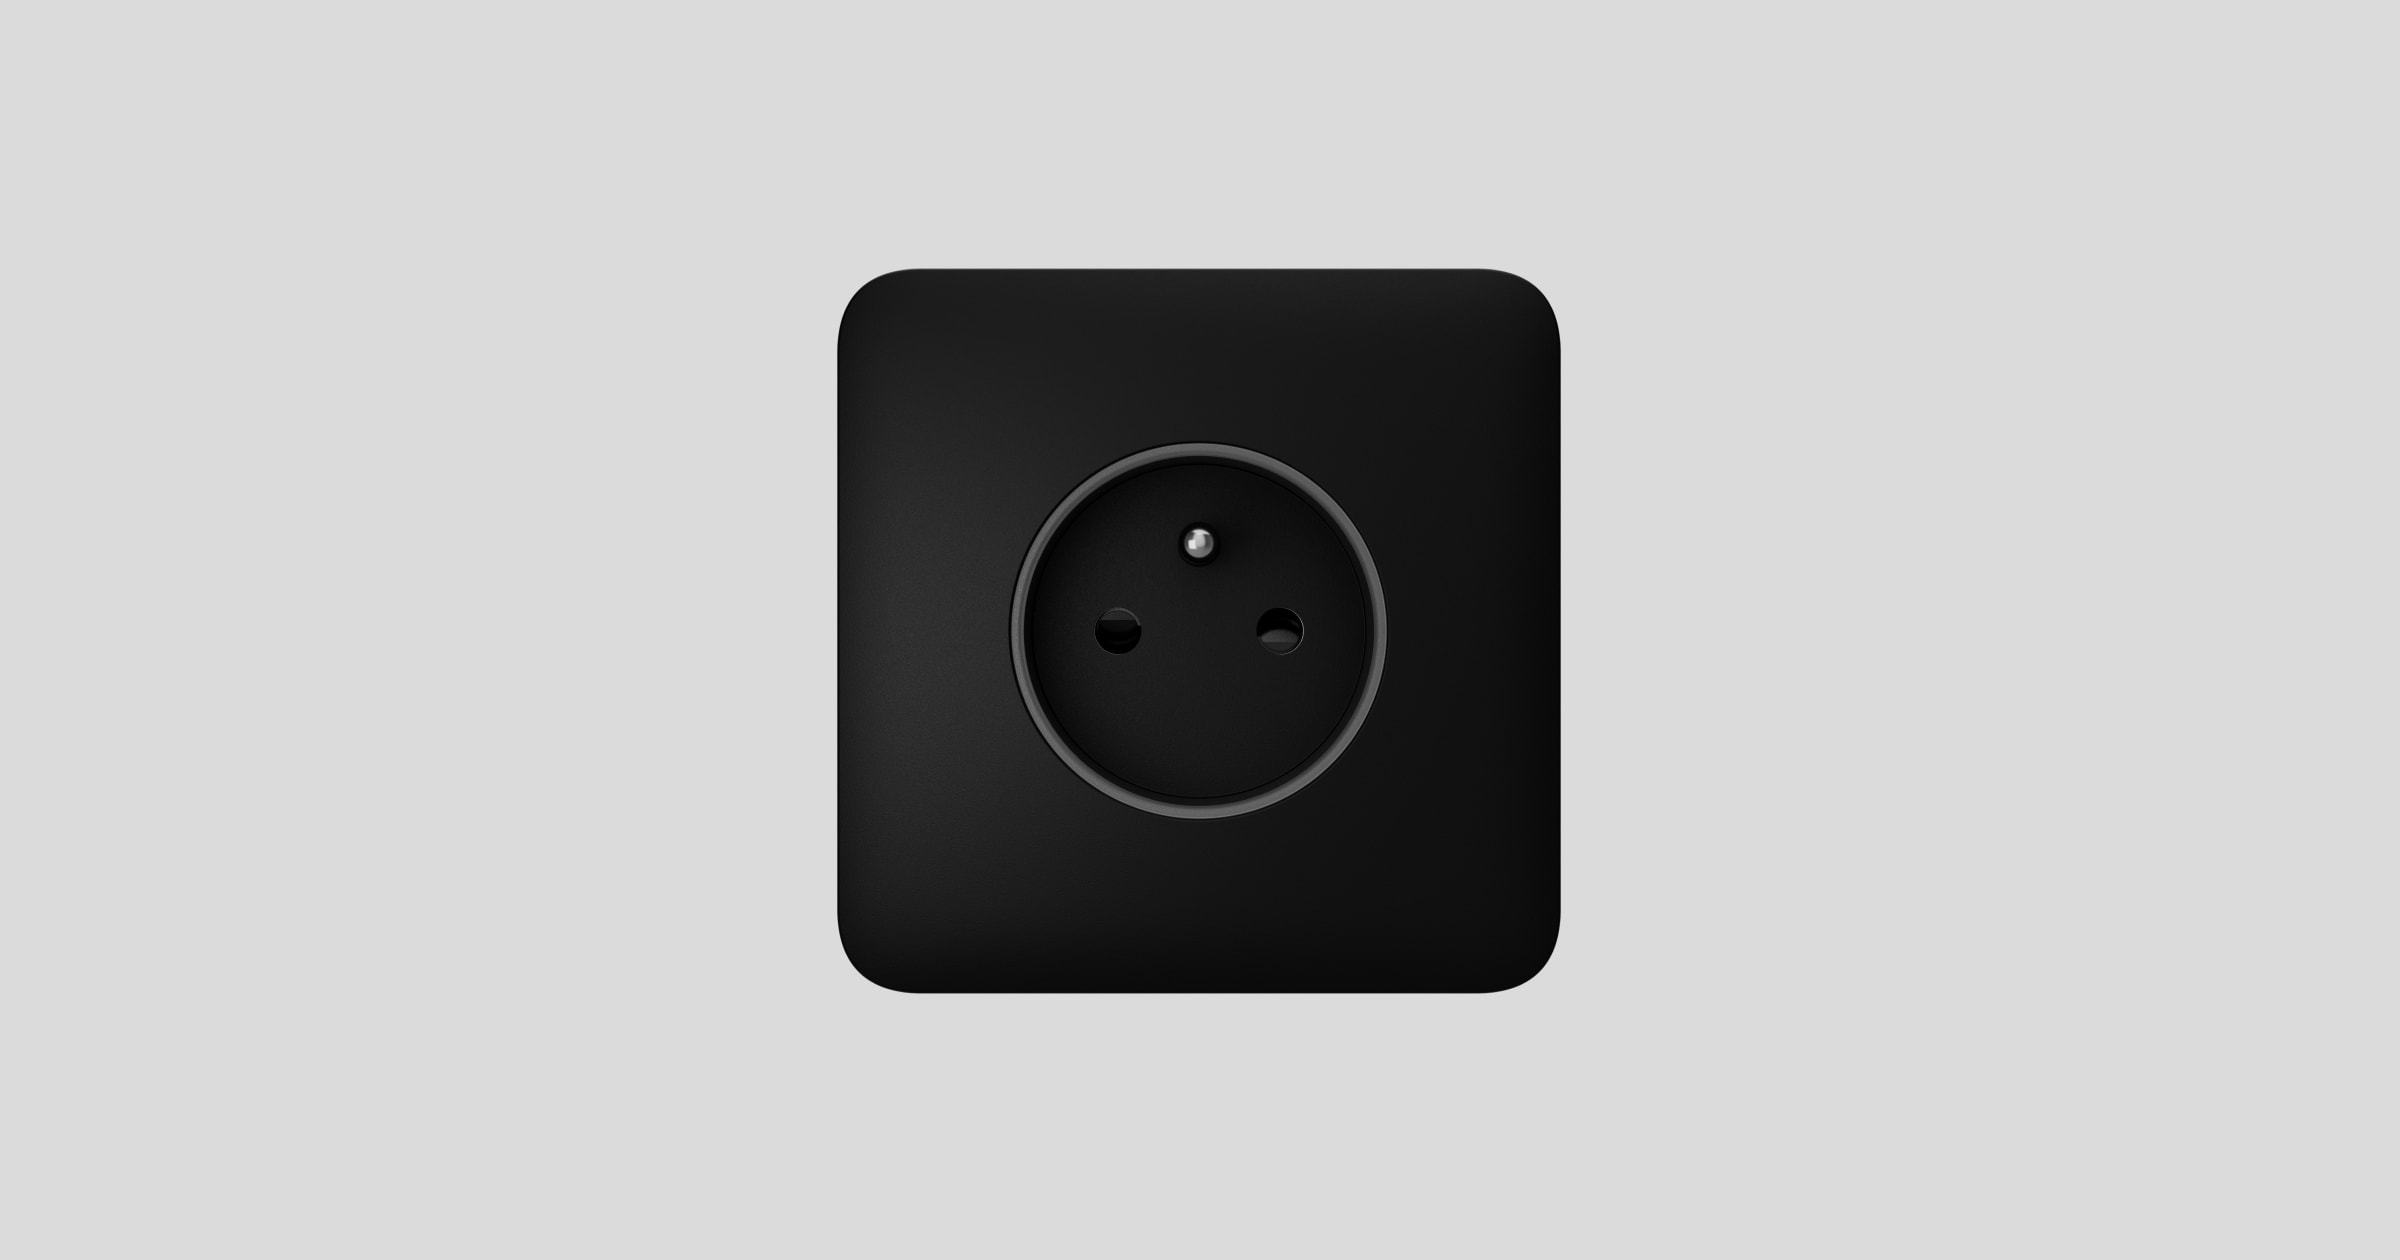
A Outlet (basic) [type E] é uma tomada integrada normal que não pode ser adicionada a um sistema Ajax e controlada através da app. Têm um design e cores idênticos aos das tomadas e interruptores de luz inteligentes Ajax e podem ser instalados lado a lado na mesma estrutura. Em conformidade com a ficha europeia de tipo E, possui um terminal de ligação à terra e proteção contra poeiras e salpicos que também impedem a introdução de objetos como chaves de fendas, tesouras ou alfinetes na tomada.
Utilize o configurador online de interruptores e tomadas Ajax para montar o seu conjunto personalizado. Combine dispositivos numa estrutura, escolha a cor e descarregue a sua configuração em PDF.
Também está disponível uma tomada básica para uma ficha de tipo F — Outlet (basic) [type F].
Design
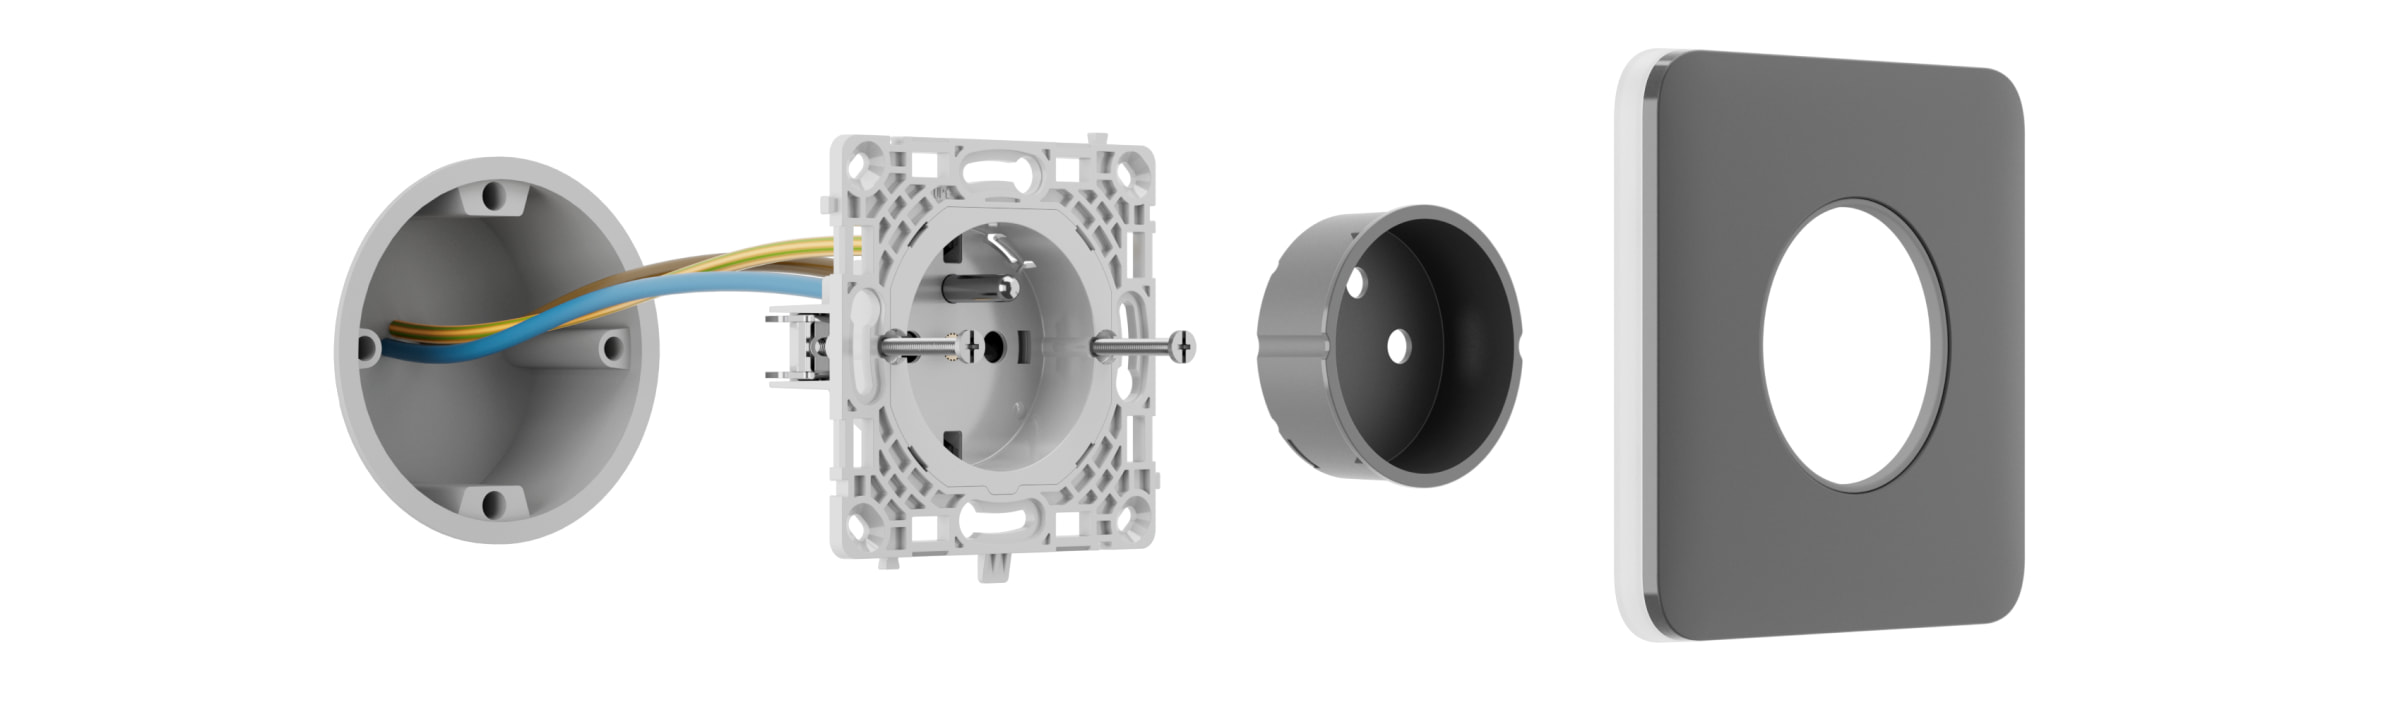
A Outlet (basic) [type E] é um dispositivo pré-fabricado que consiste nos seguintes componentes:
- Opções de núcleo:
- OutletCore (basic) [type E]
- OutletCore (basic) vertical [type E]
- Opções de tampa:
- SoloCover (basic) [type E]
- SideCover (basic) [type E]
- СenterCover (basic) [type E]
- Opções de estrutura:
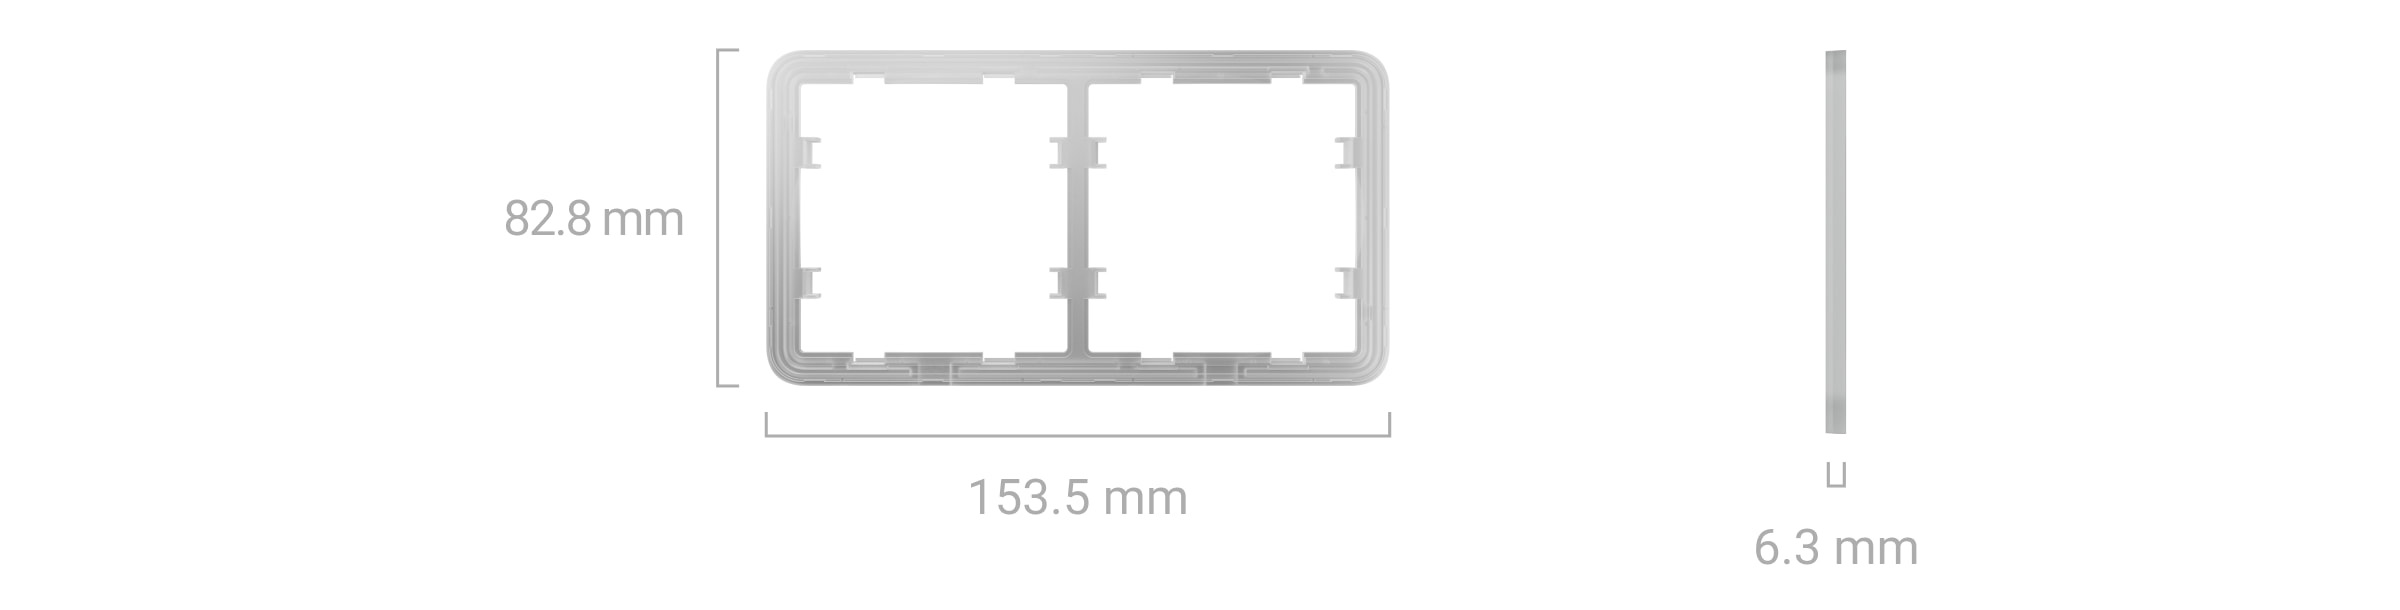
- Frame (2 seats)
- Frame (2 seats) vertical
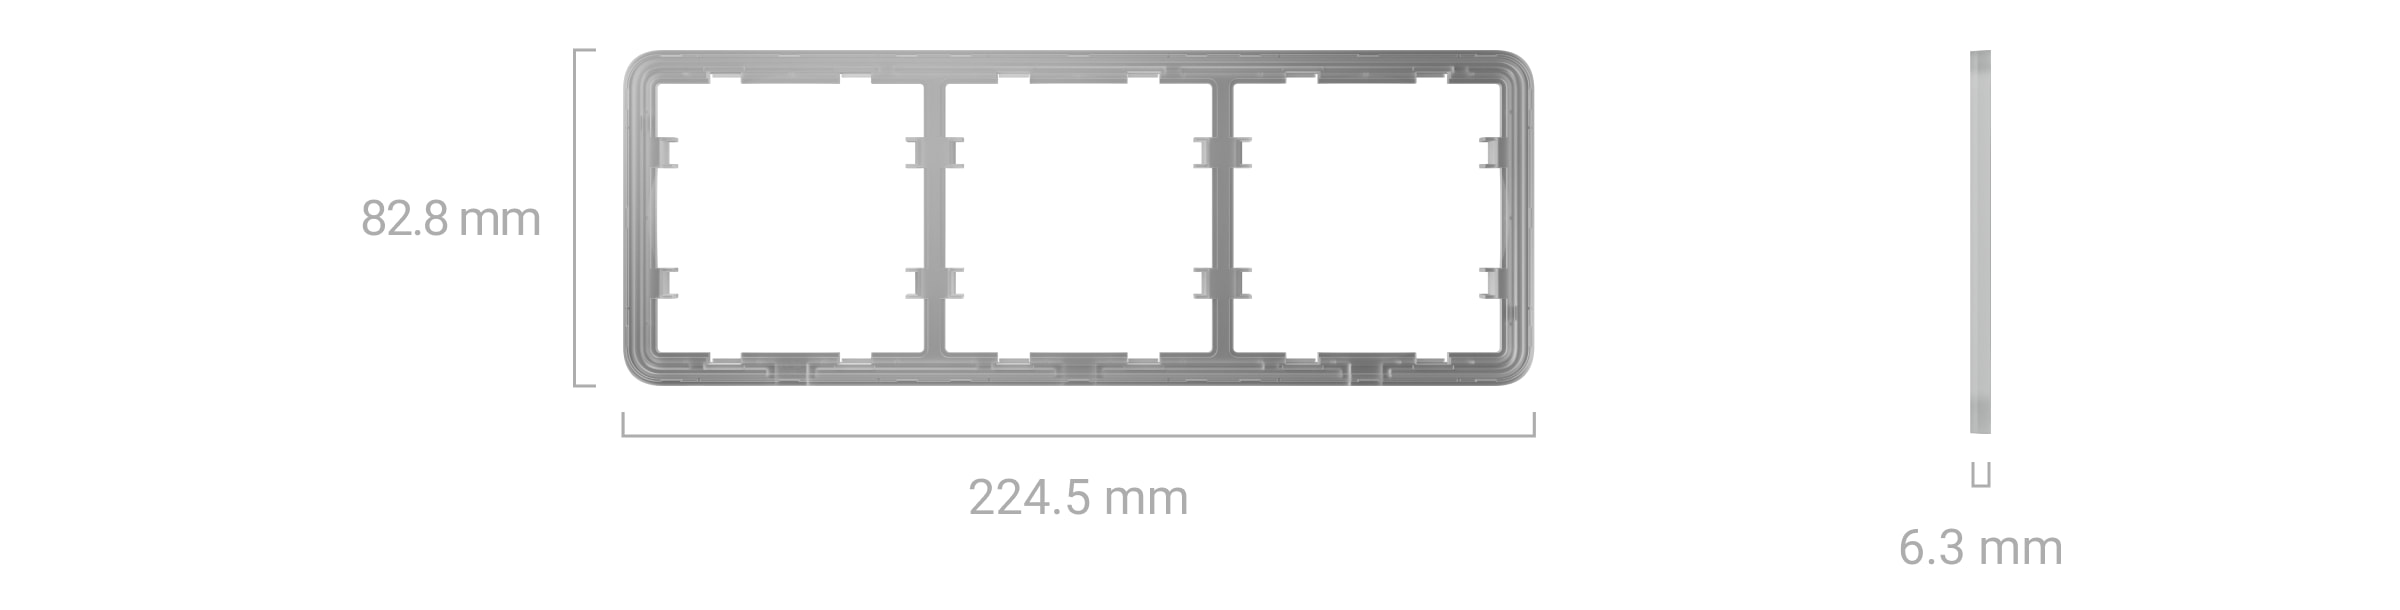
- Frame (3 seats)
- Frame (3 seats) vertical
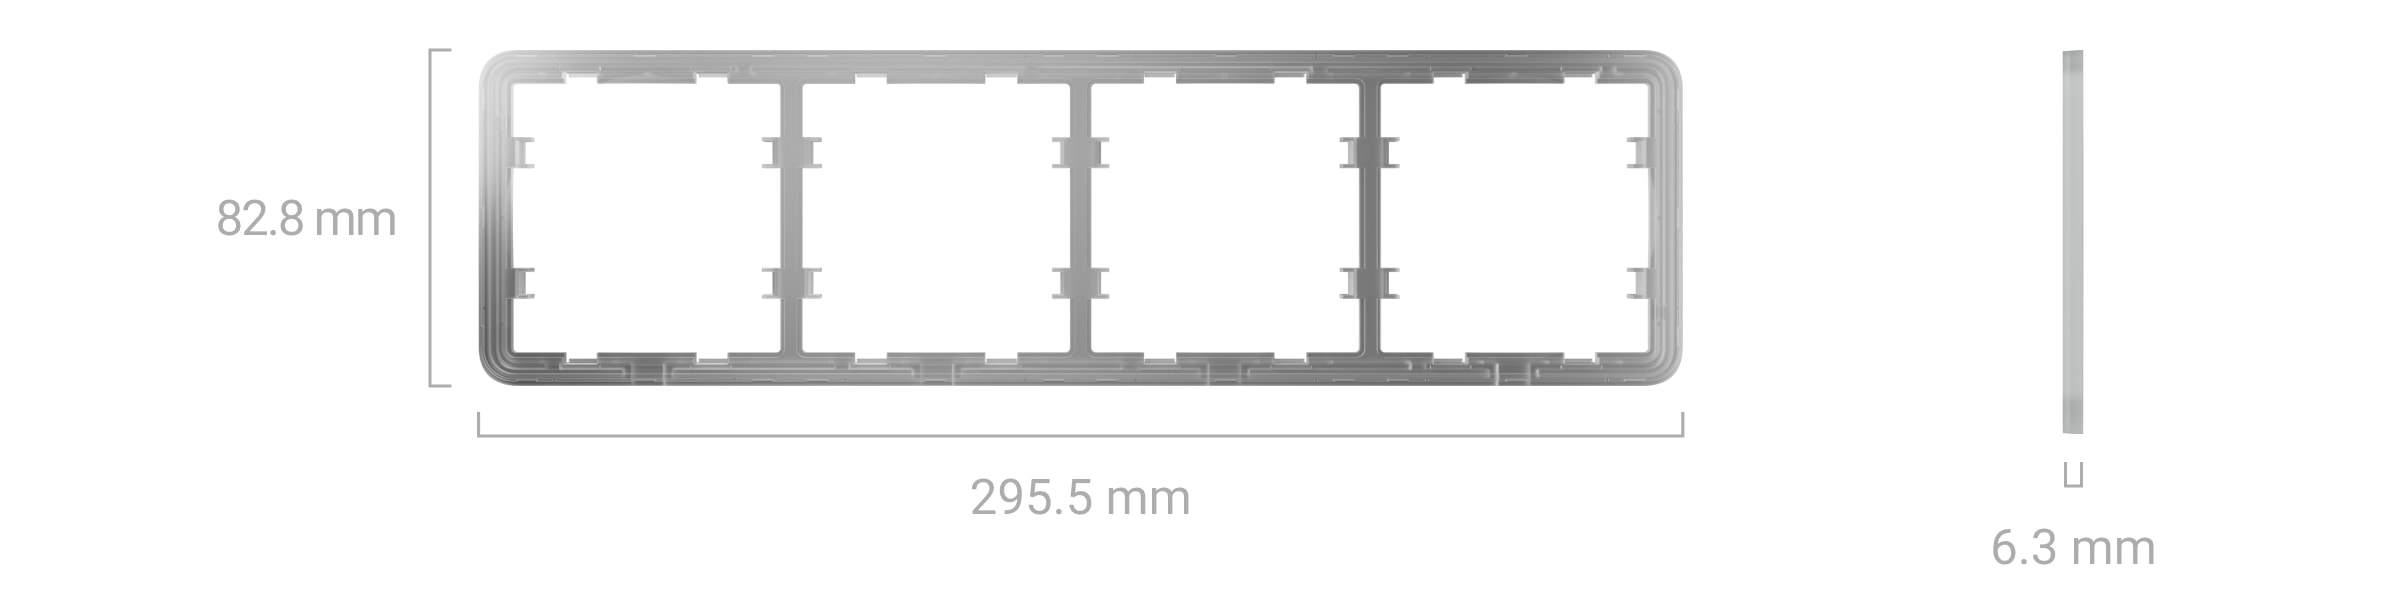
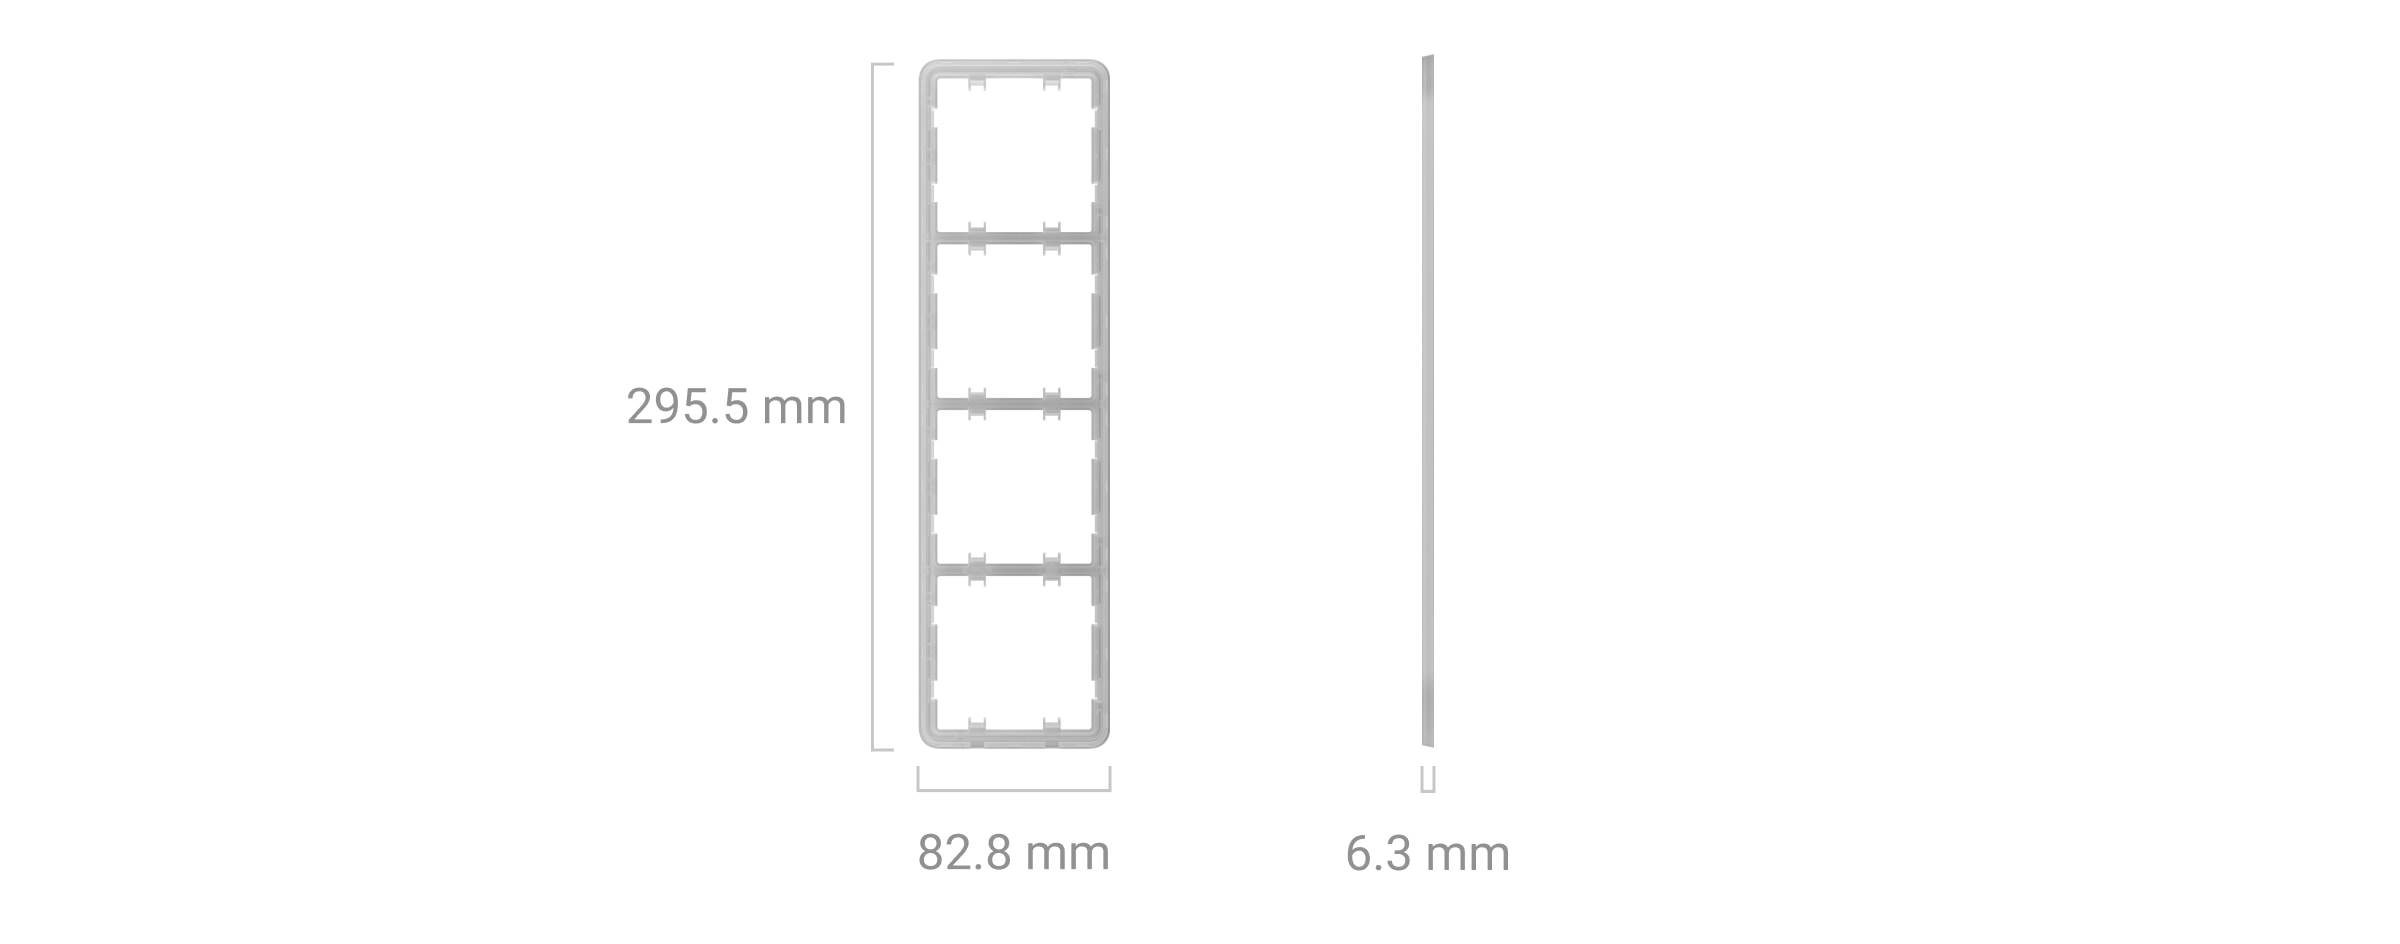
- Frame (4 seats)
- Frame (4 seats) vertical
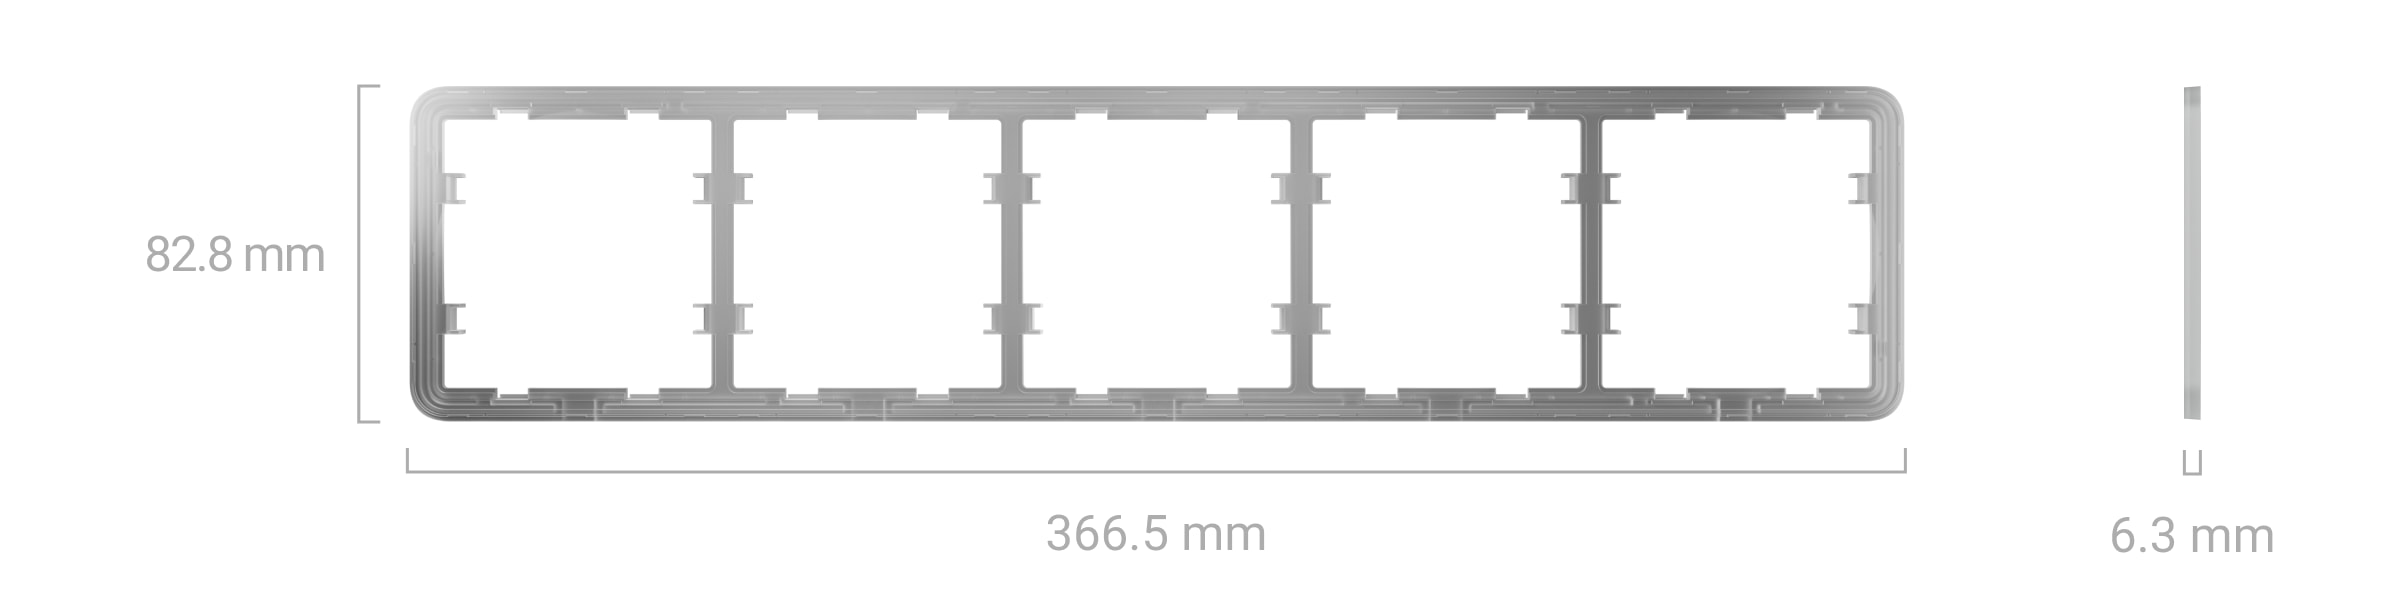
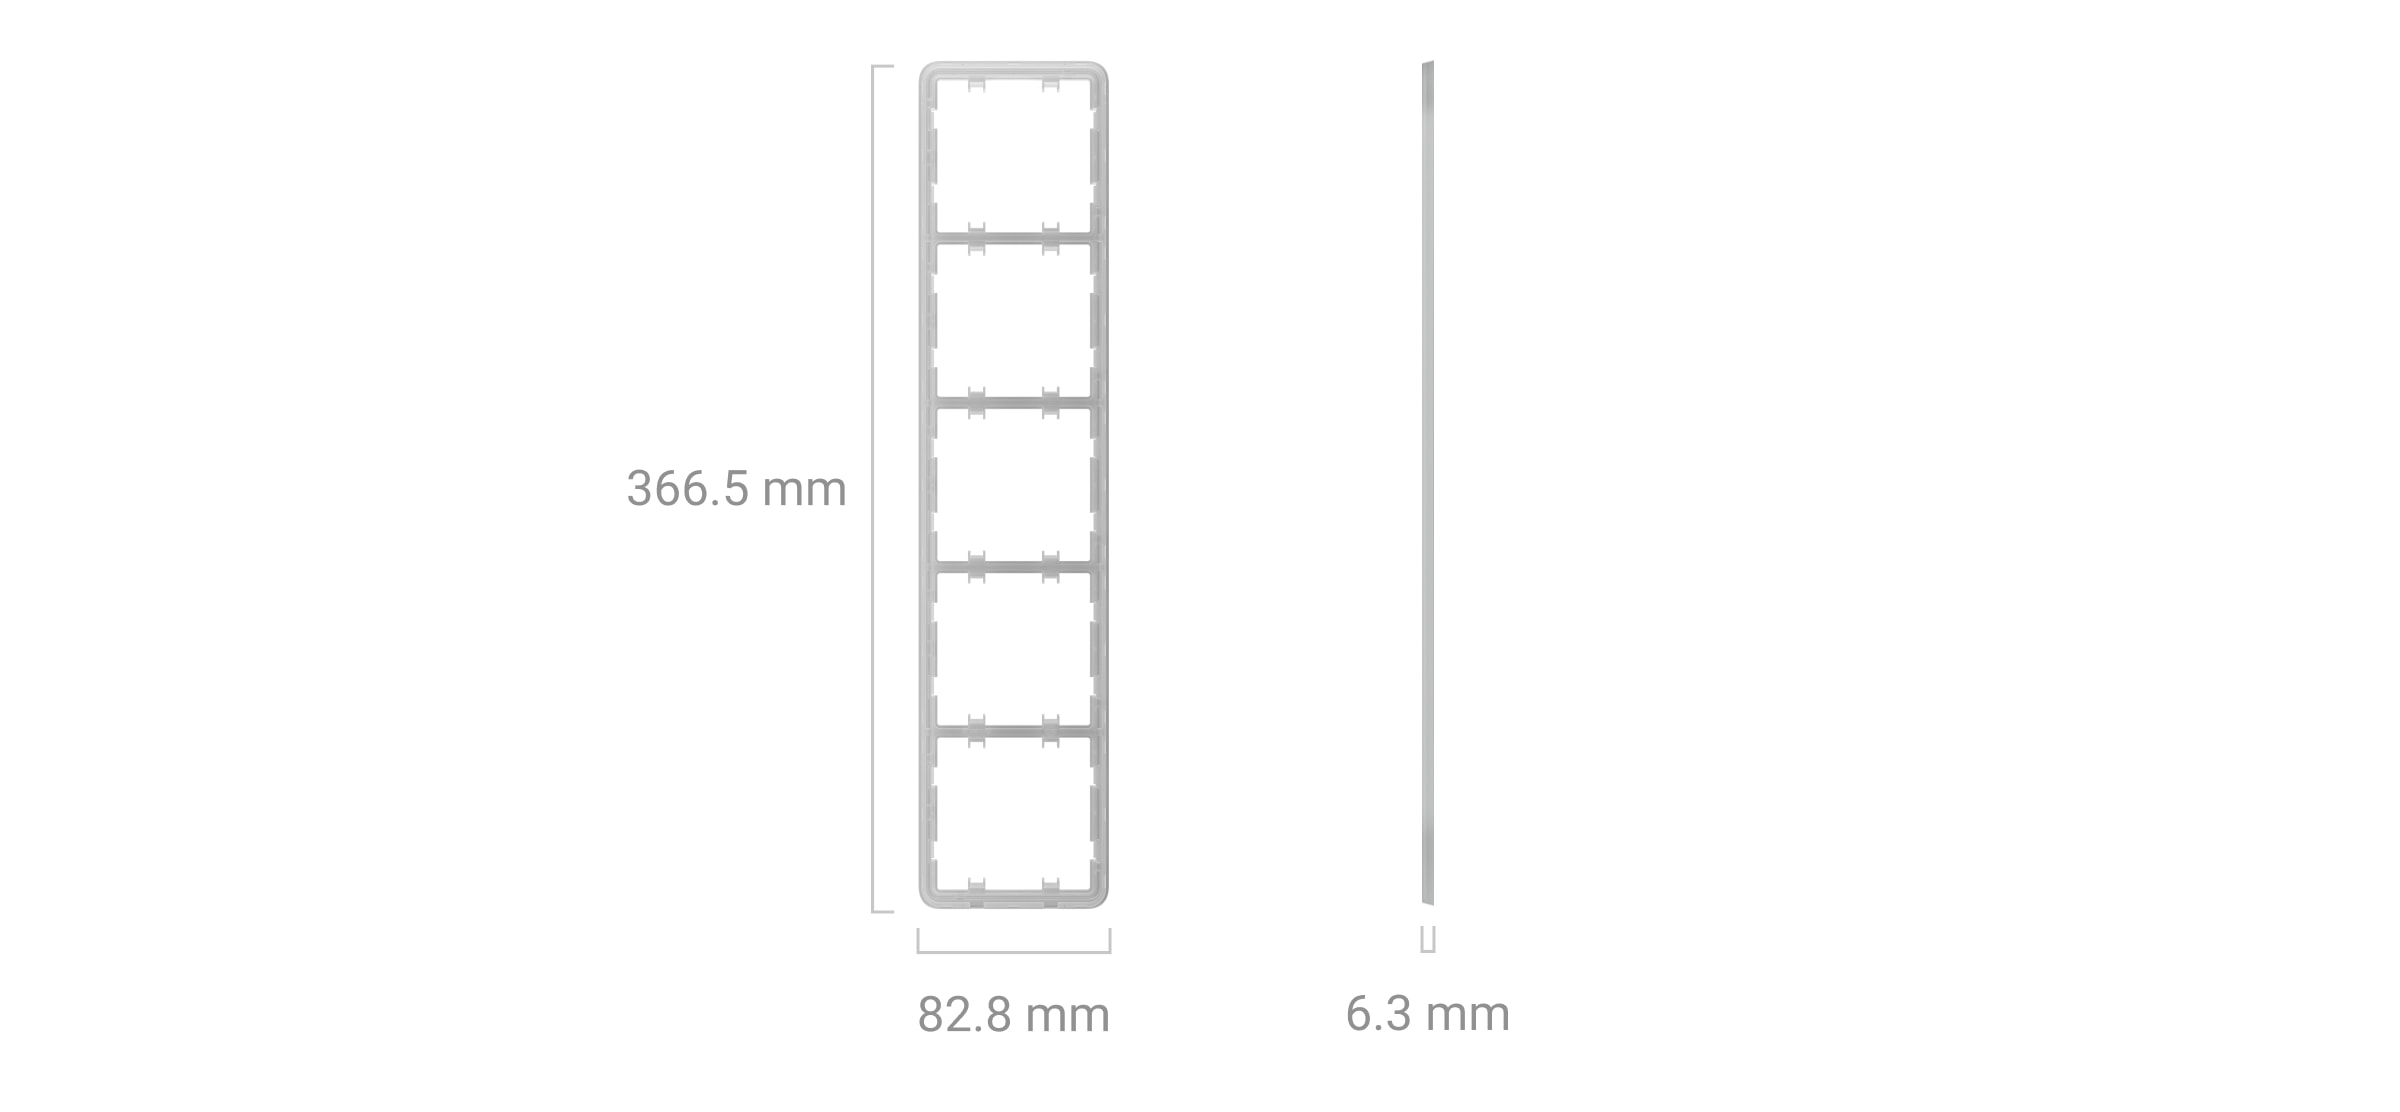
- Frame (5 seats)
- Frame (5 seats) vertical
Todos os componentes são comprados separadamente e são instalados por encaixe uns nos outros.
Escolha a tampa adequada para a Outlet (basic) [type E] com base no seu plano de instalação:
- como um dispositivo separado — SoloCover (basic) [type E];
- à direita ou à esquerda (em cima ou em baixo) de outras Outlets* ou LightSwitches — SideCover (basic) [type E];
- entre dispositivos — CenterCover (basic) [type E].
Cada tampa é composta por duas partes: o painel frontal e a tampa do recipiente. Para a instalação lado a lado de dois ou mais dispositivos, também vai necessitar de Frame.
Os dispositivos combinados numa estrutura podem ser instalados na horizontal e na vertical. A instalação vertical só é suportada por núcleos e estruturas com a etiqueta “vertical” no nome. A SideCover (basic) e a СenterCover (basic) podem ser utilizadas para combinações horizontais e verticais de dispositivos.
Utilize o configurador online de interruptores e tomadas Ajax para montar o seu conjunto personalizado. Combine dispositivos numa estrutura, escolha a cor e descarregue a sua configuração em PDF.
* As combinações com tomadas só estão disponíveis na orientação horizontal.
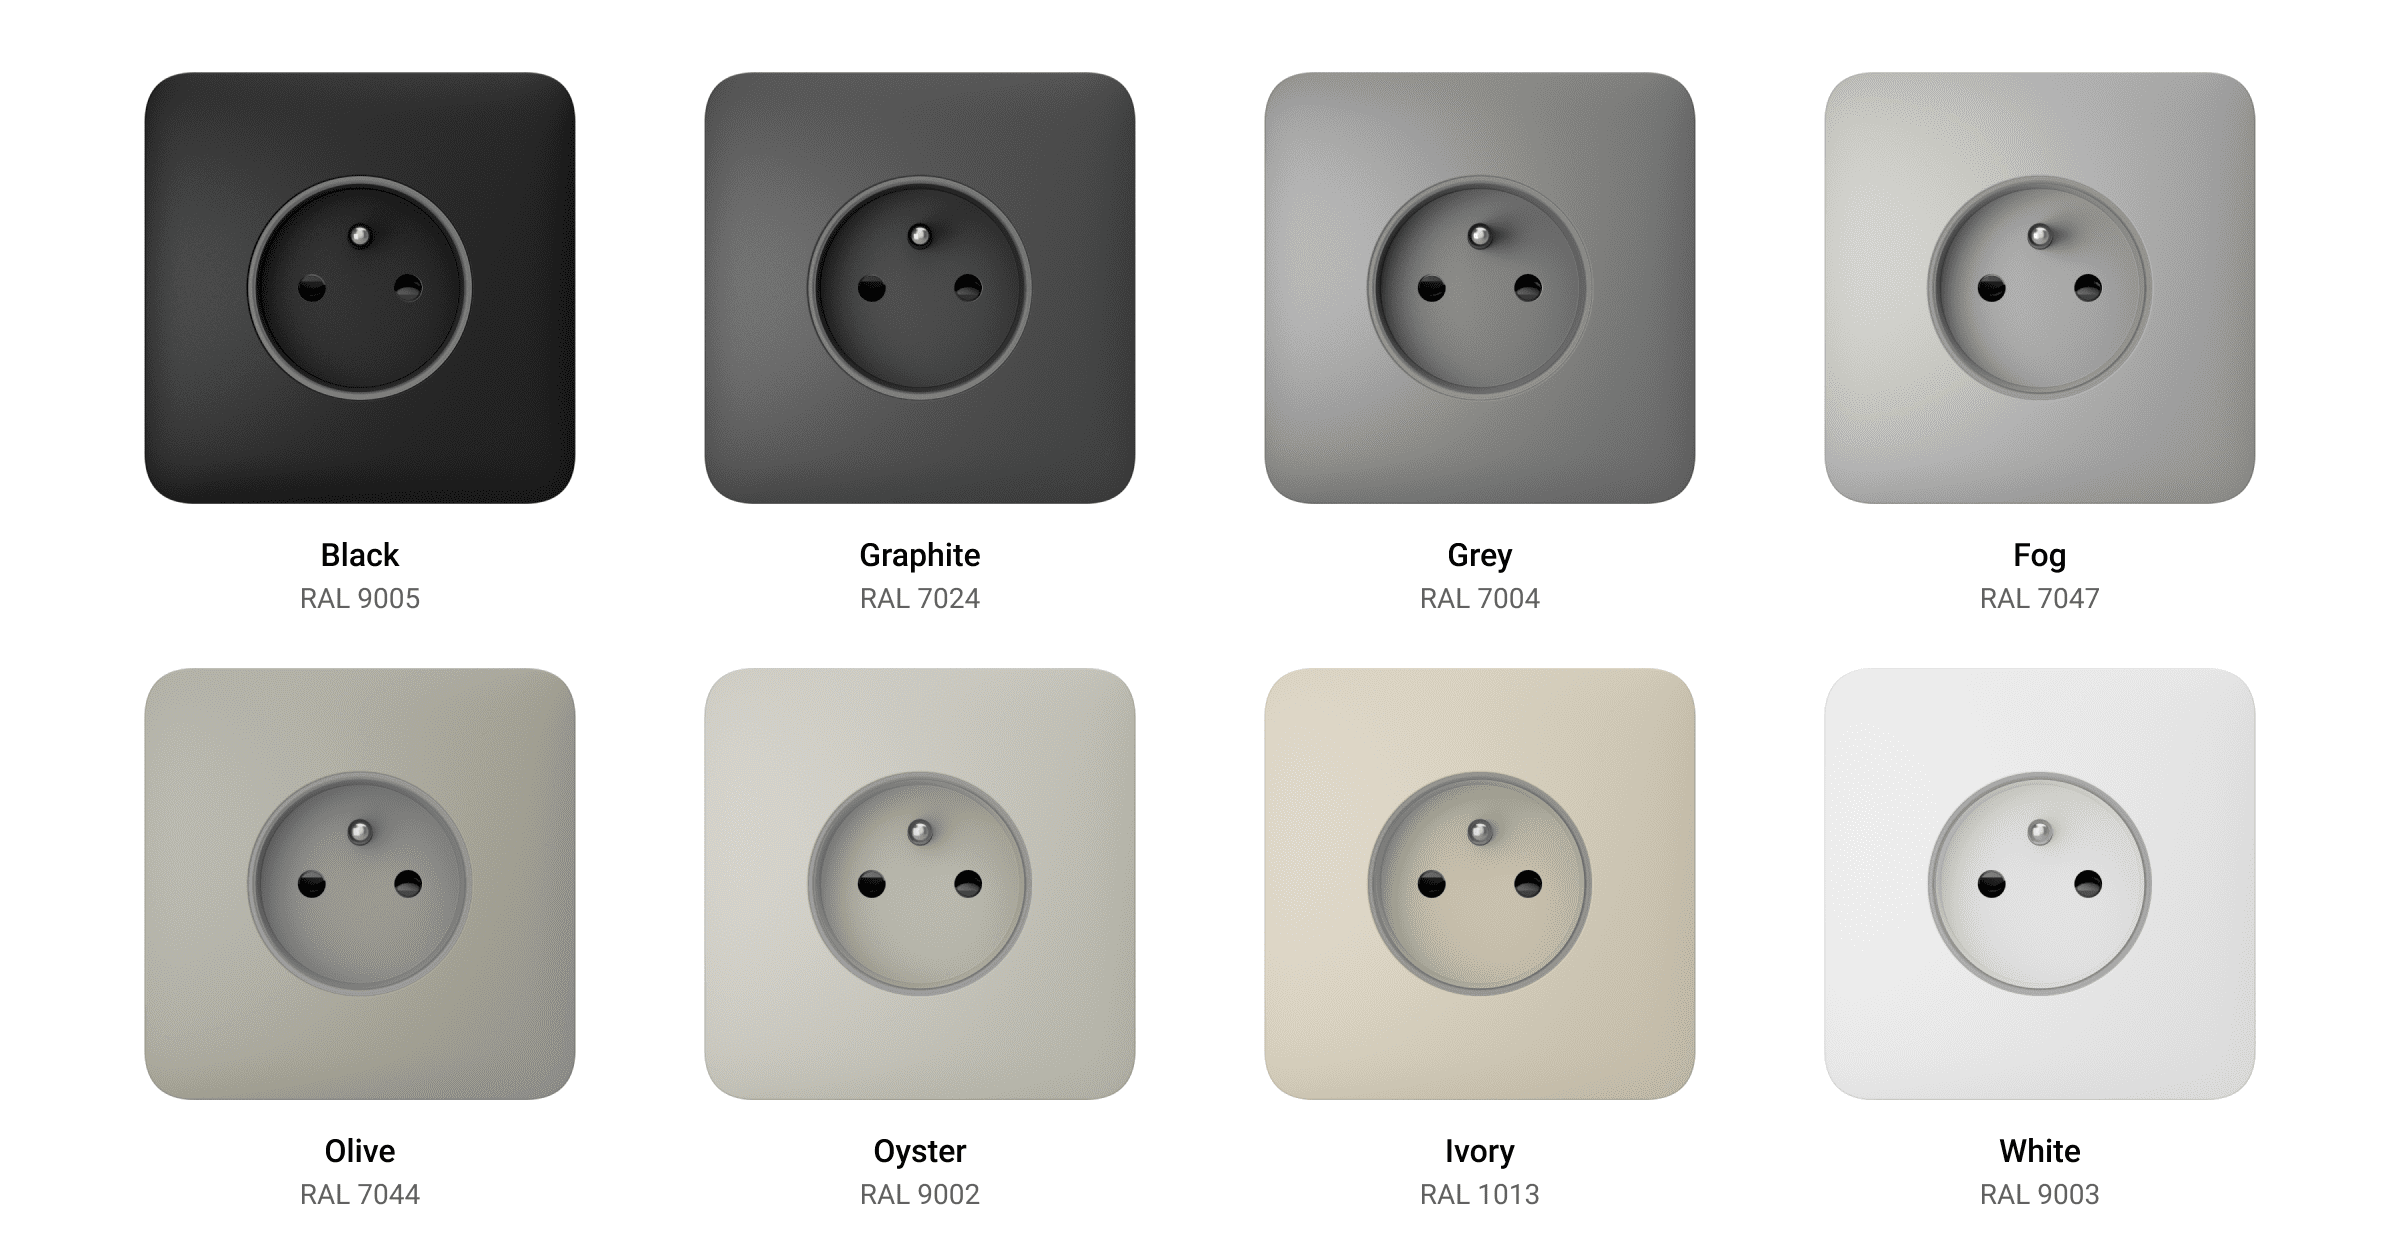
Cores
A linha de produtos inclui 8 cores de painéis táteis: Branco (White), Nevoeiro (Fog), Cinzento (Grey), Grafite (Graphite), Marfim (Ivory), Ostra (Oyster), Azeitona (Olive) e Preto (Black).
The RAL colors below are as close as an approximation of the actual color. However, they may slightly differ, so please only use them as a guide to the color choice.
Elementos funcionais
Núcleo
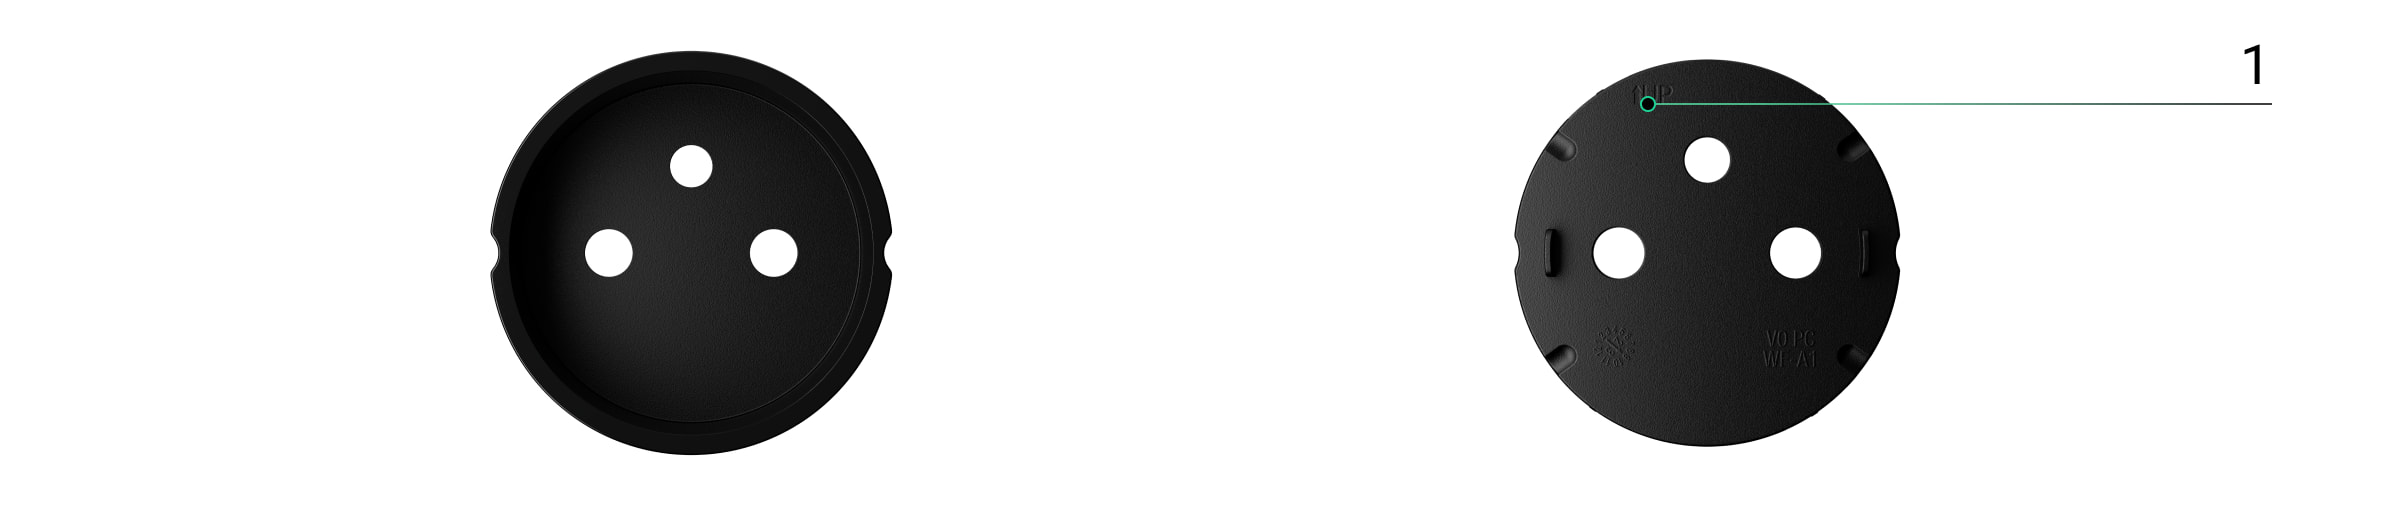
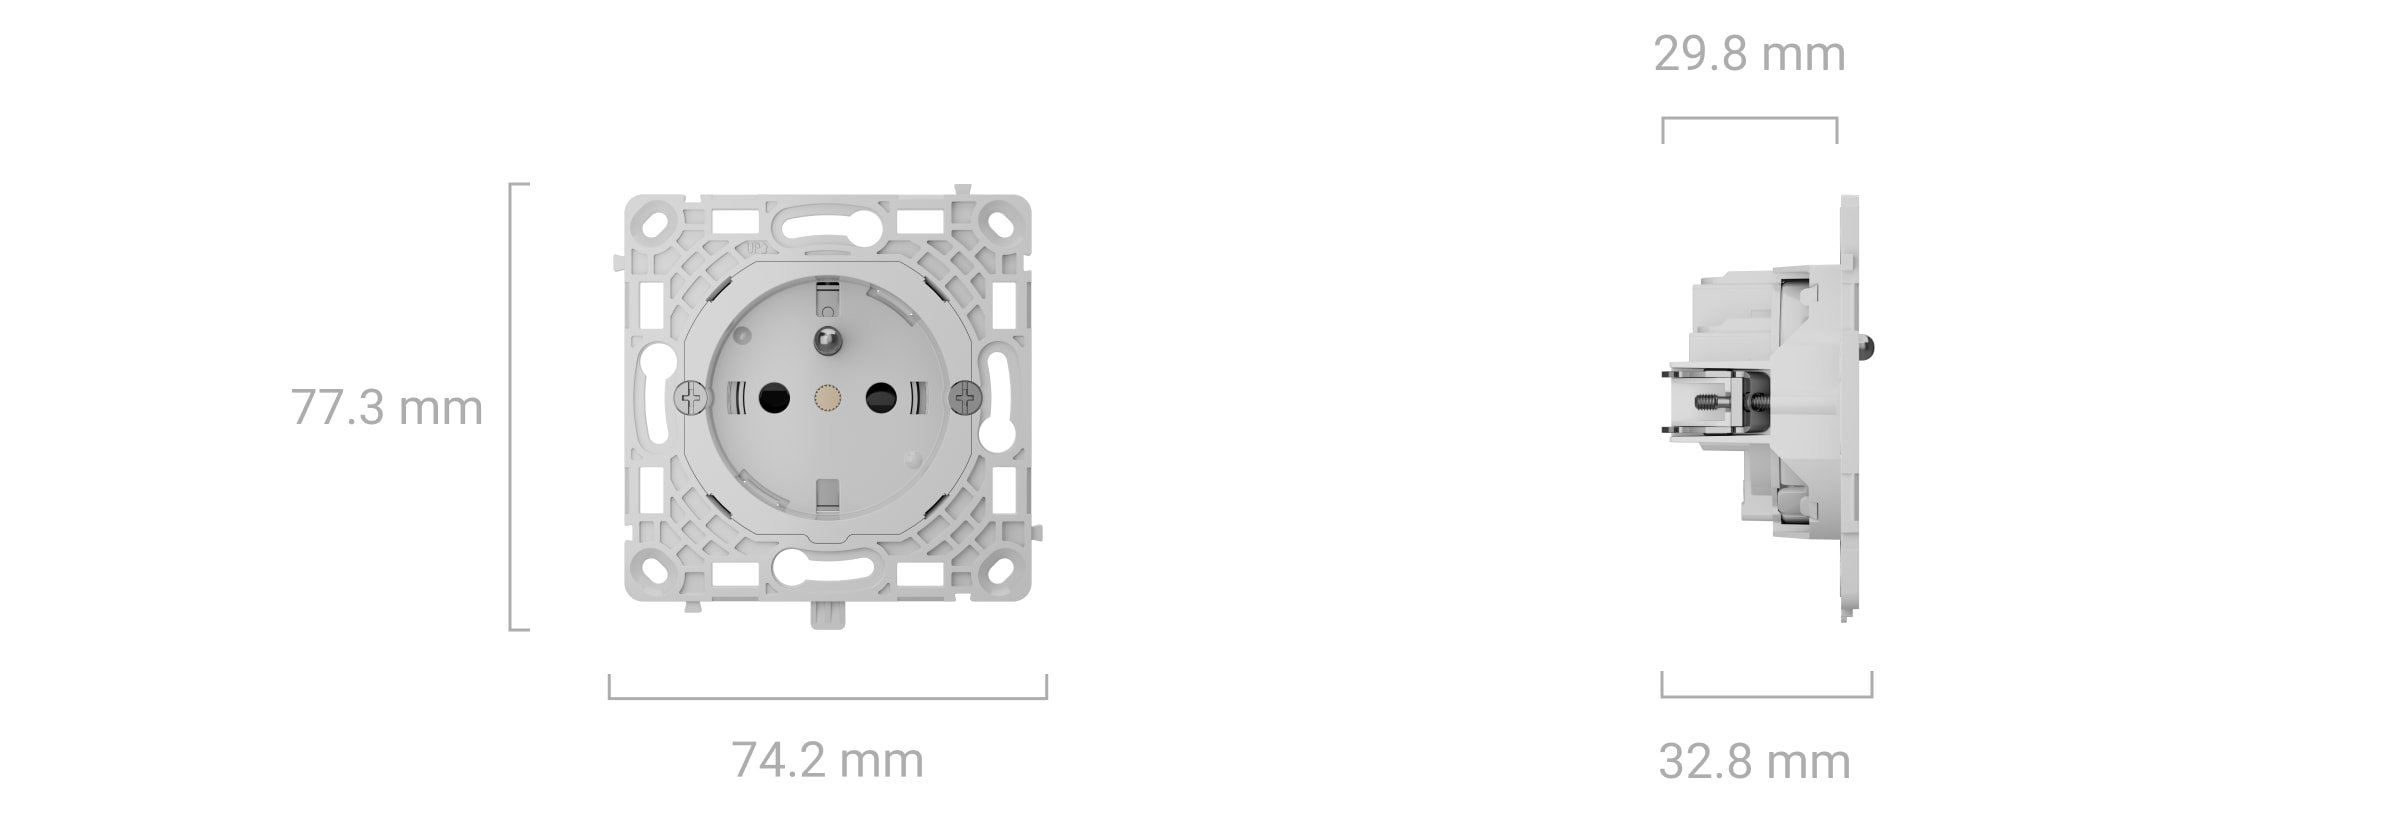
OutletCore (basic) [type E]
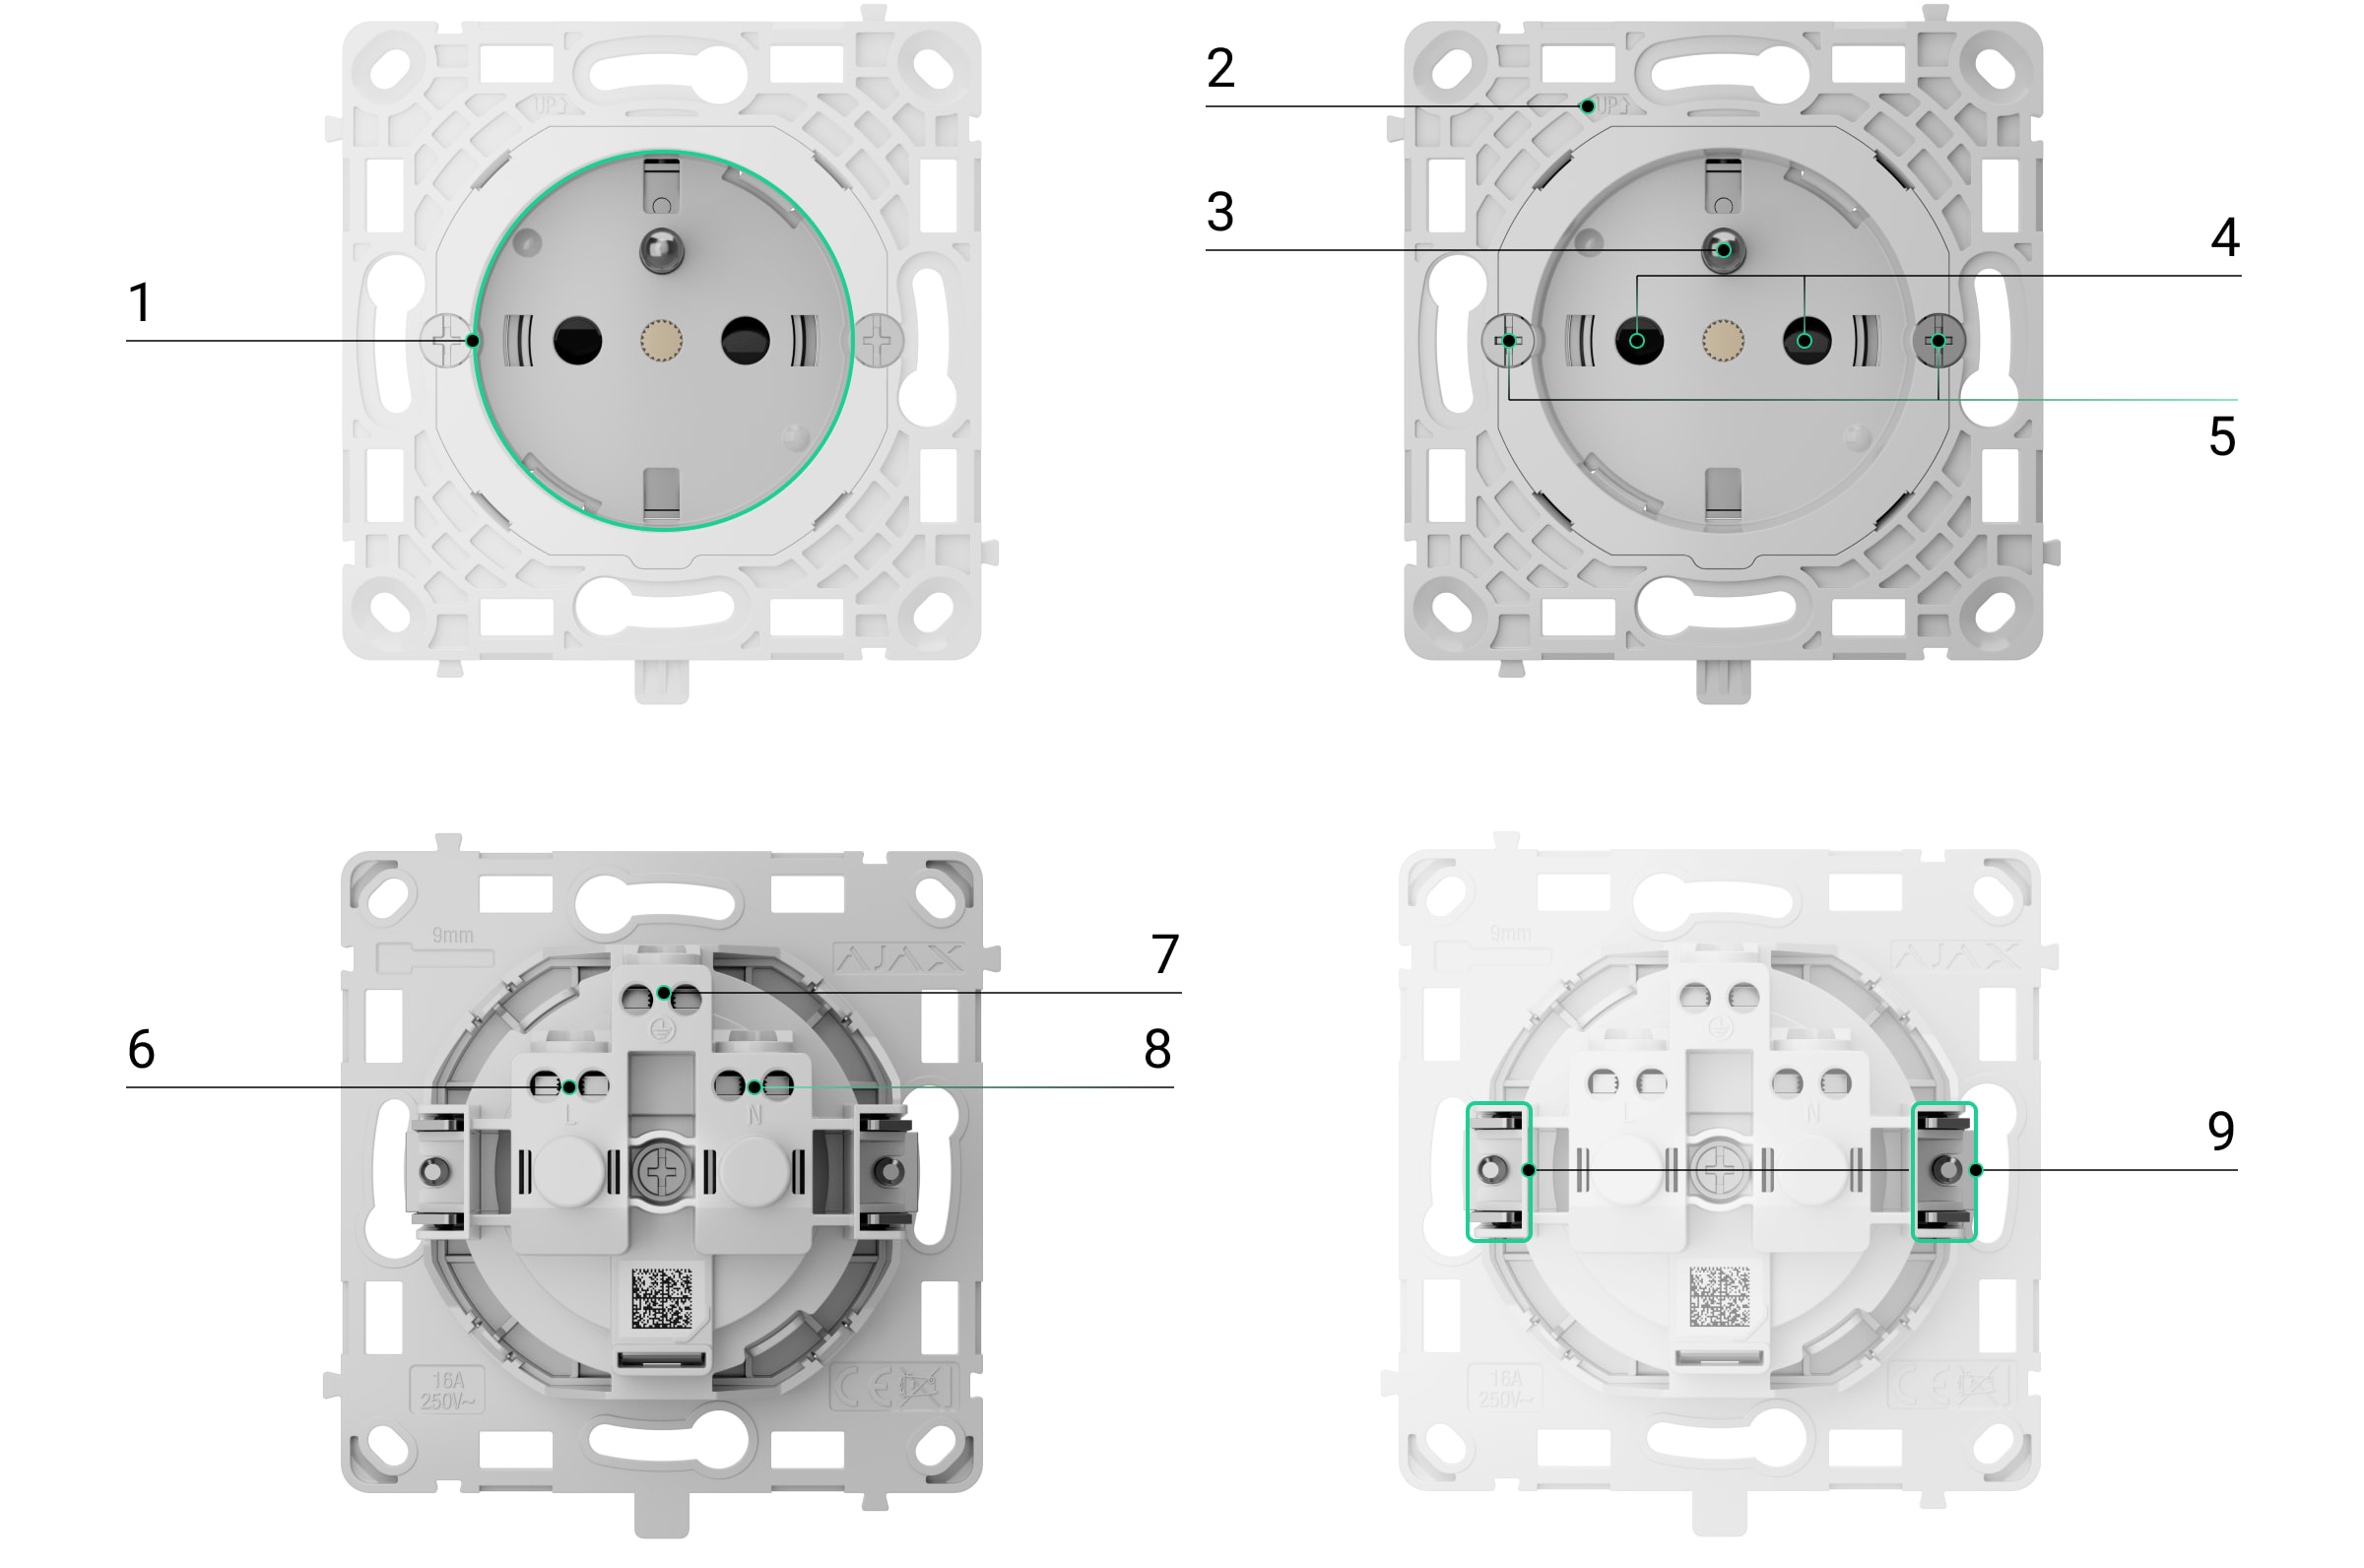
- Outlet (type E).
- A chave UP, que marca a parte superior da carcaça da tomada.
- Terminal de ligação à terra.
- Proteção especial interna contra pequenos objetos.
- Parafusos para fixação de garras de montagem.
- Terminal de ligação da fase de alimentação elétrica (L).
- Terminal para ligação à terra.
- Terminal para conectar a fonte de alimentação neutra (N).
- Garras de montagem para fixar a tomada na caixa de montagem.
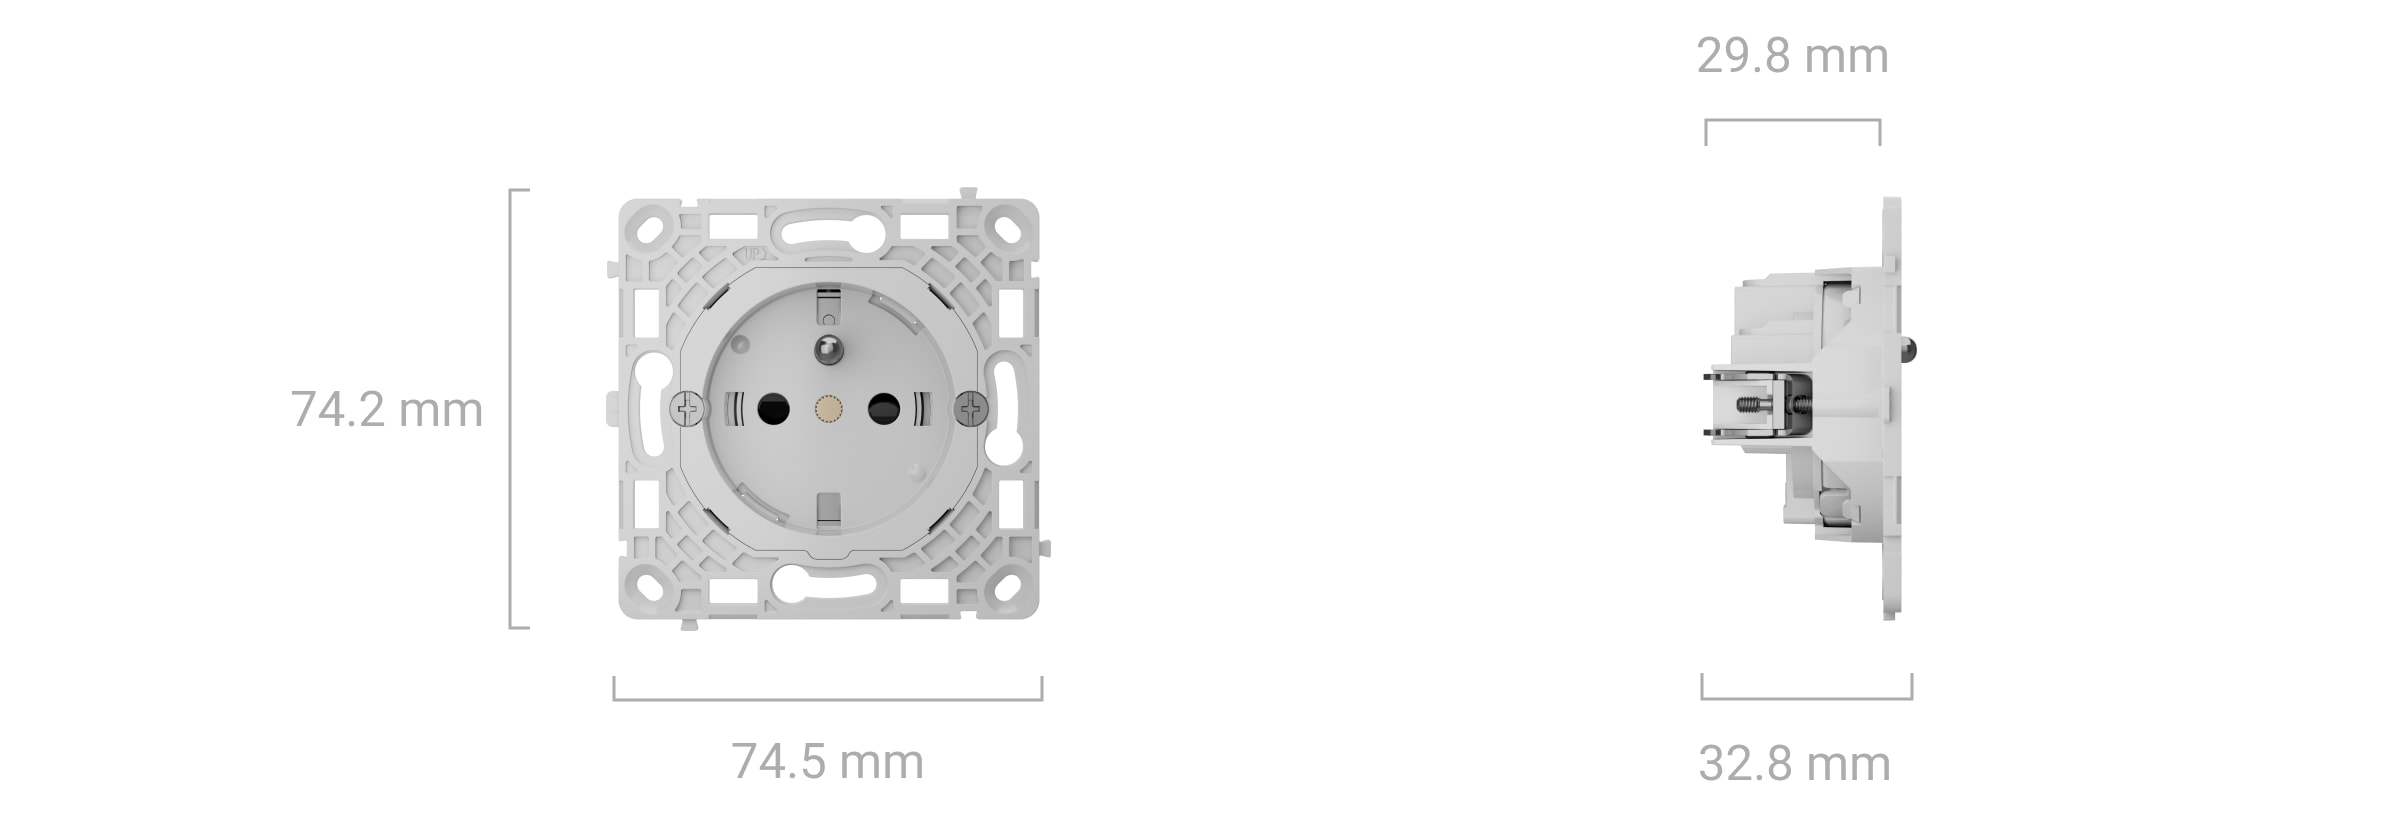
OutletCore (basic) vertical [type E]

- Outlet (type E).
- A chave UP, que marca a parte superior da carcaça da tomada.
- Terminal de ligação à terra.
- Proteção especial interna contra pequenos objetos.
- Parafusos para fixação de garras de montagem.
- Terminal de ligação da fase de alimentação elétrica (L).
- Terminal para ligação à terra.
- Terminal para conectar a fonte de alimentação neutra (N).
- Garras de montagem para fixar a tomada na caixa de montagem.
Tampas
Painel frontal
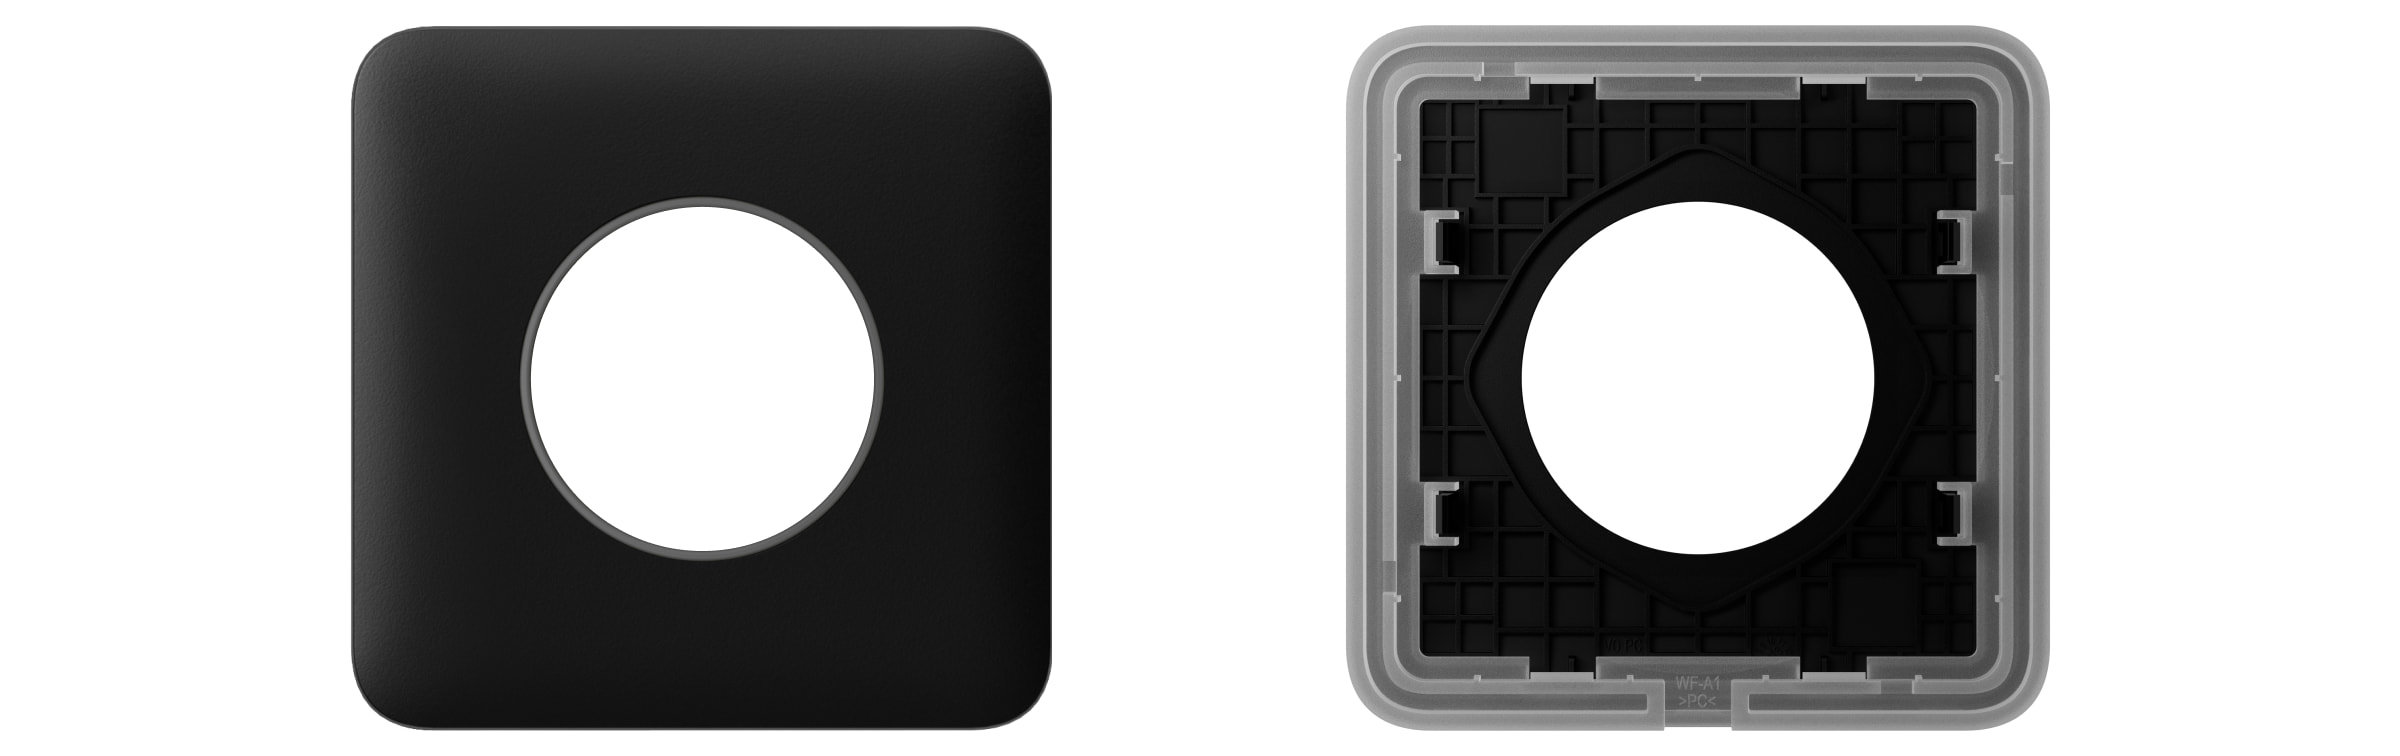
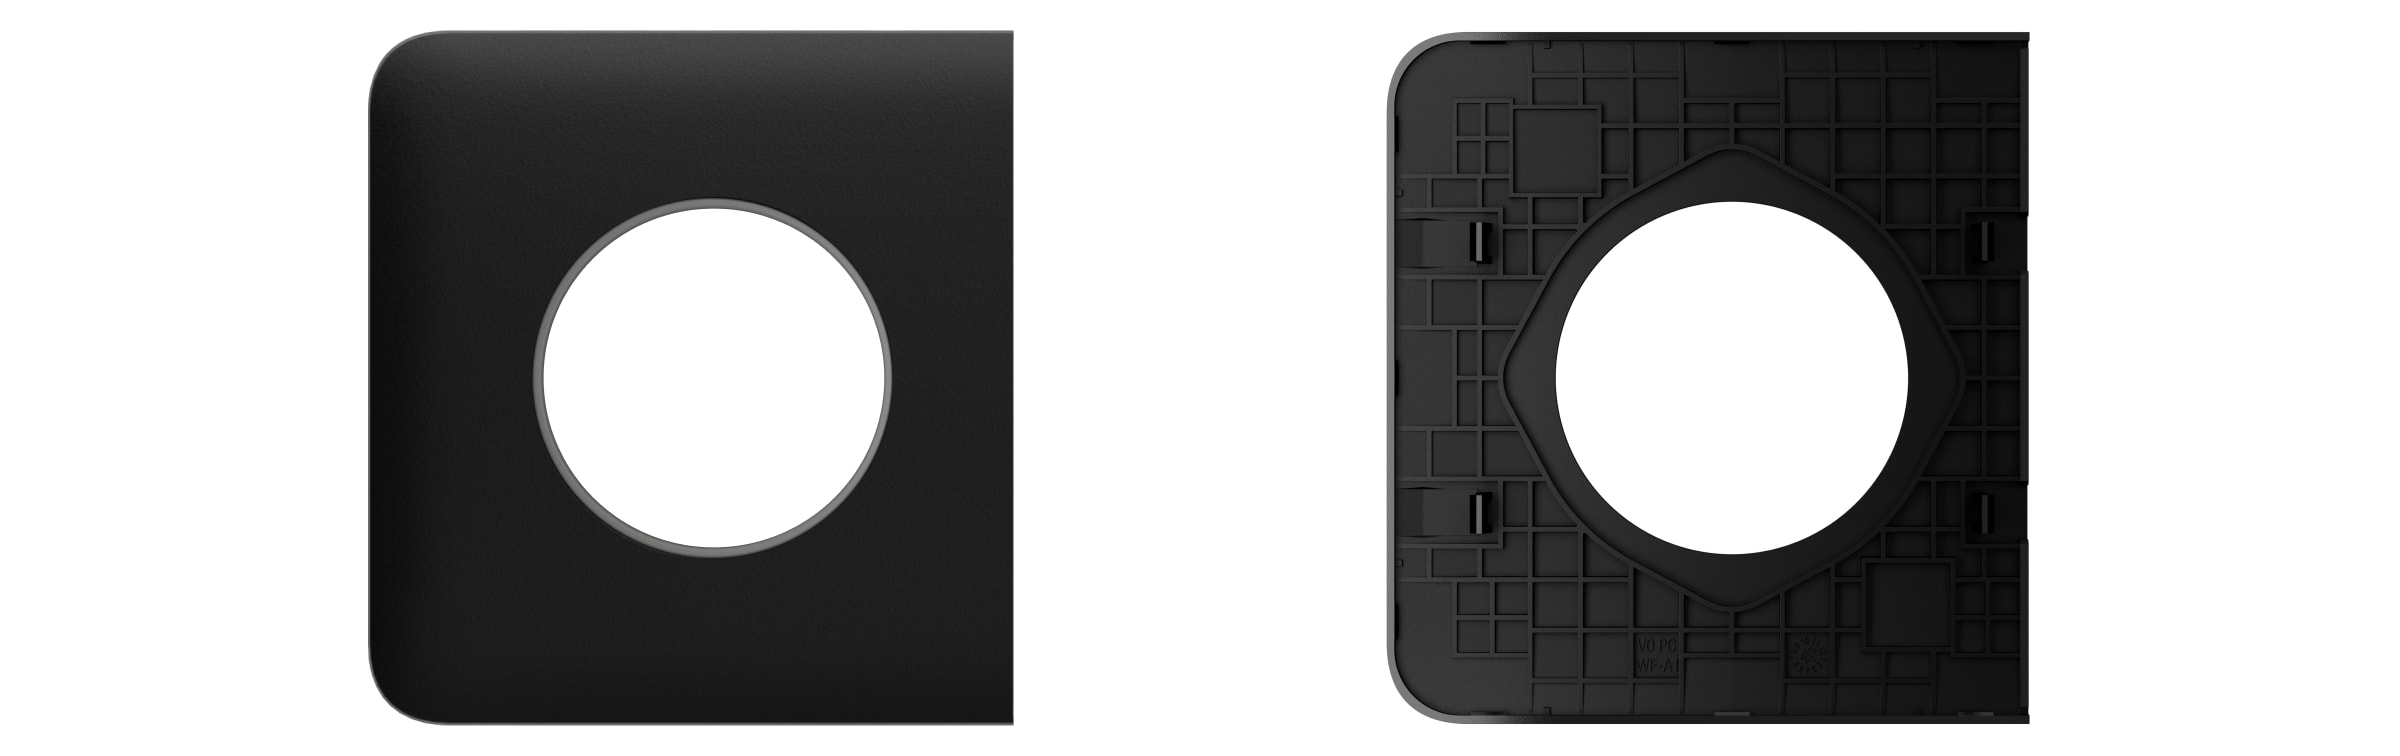
O painel frontal da SoloCover (basic) [type E].
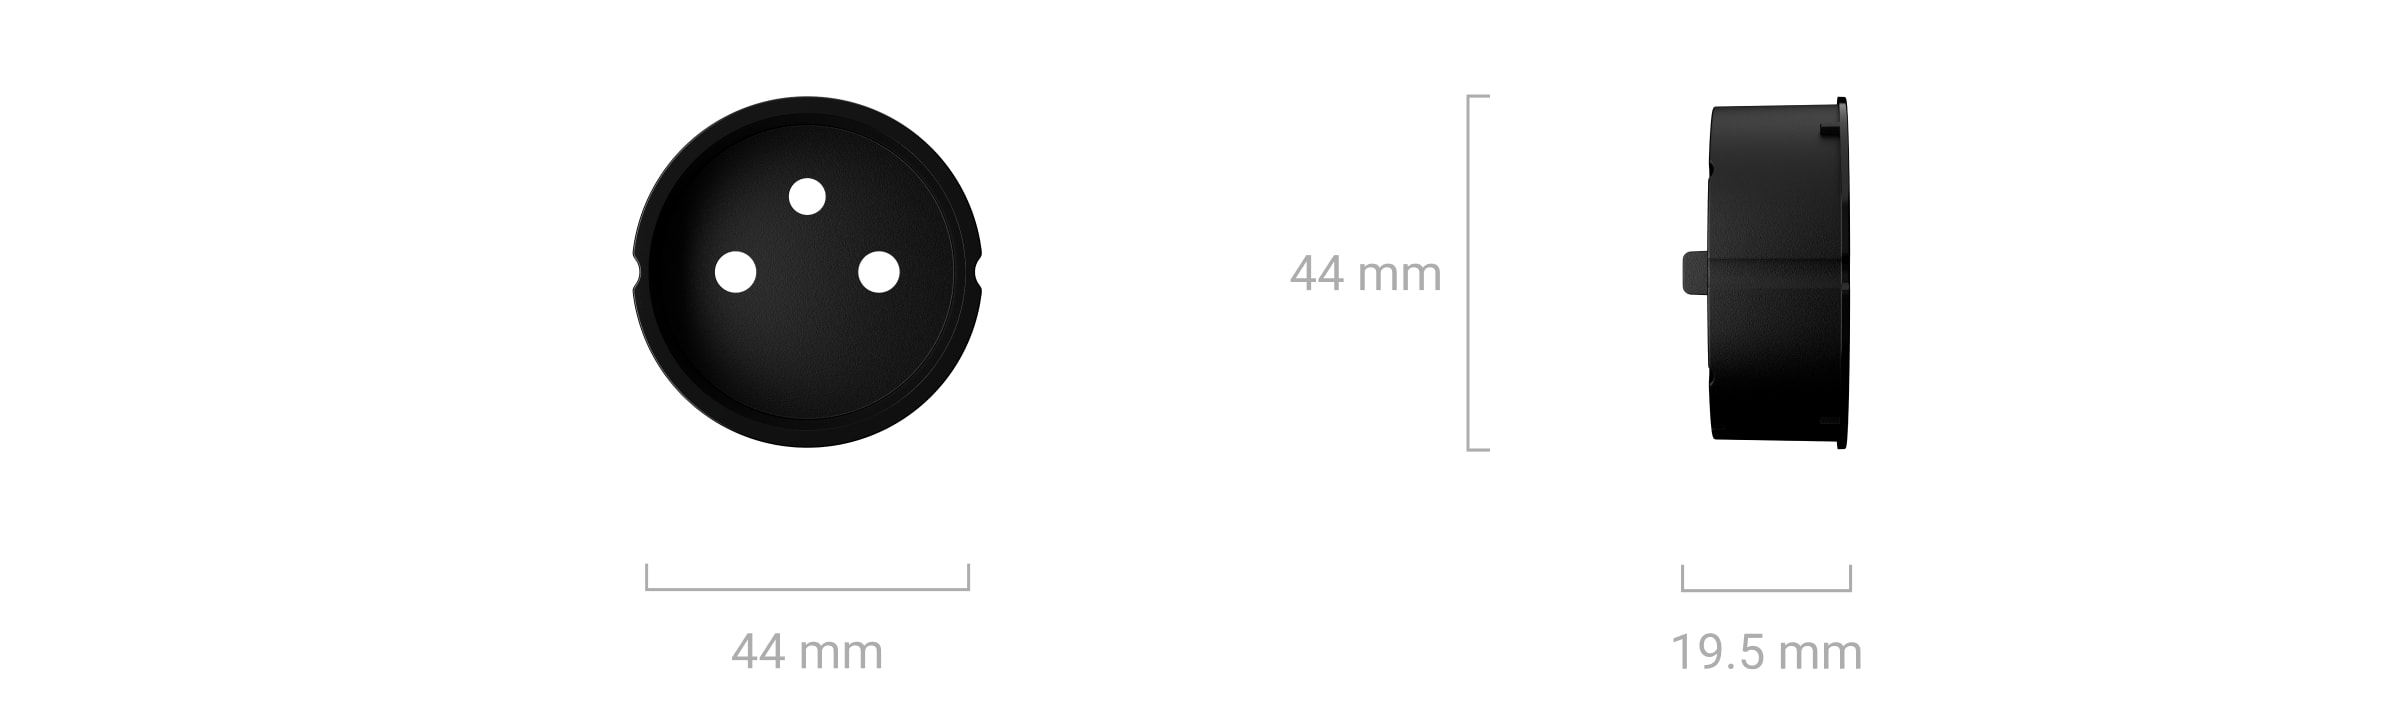
Tampa do recipiente
- A chave UP para instalar corretamente a tampa no núcleo. A chave correspondente encontra-se no núcleo de tomada, marcando a parte superior da carcaça de tomada.
Painel frontal
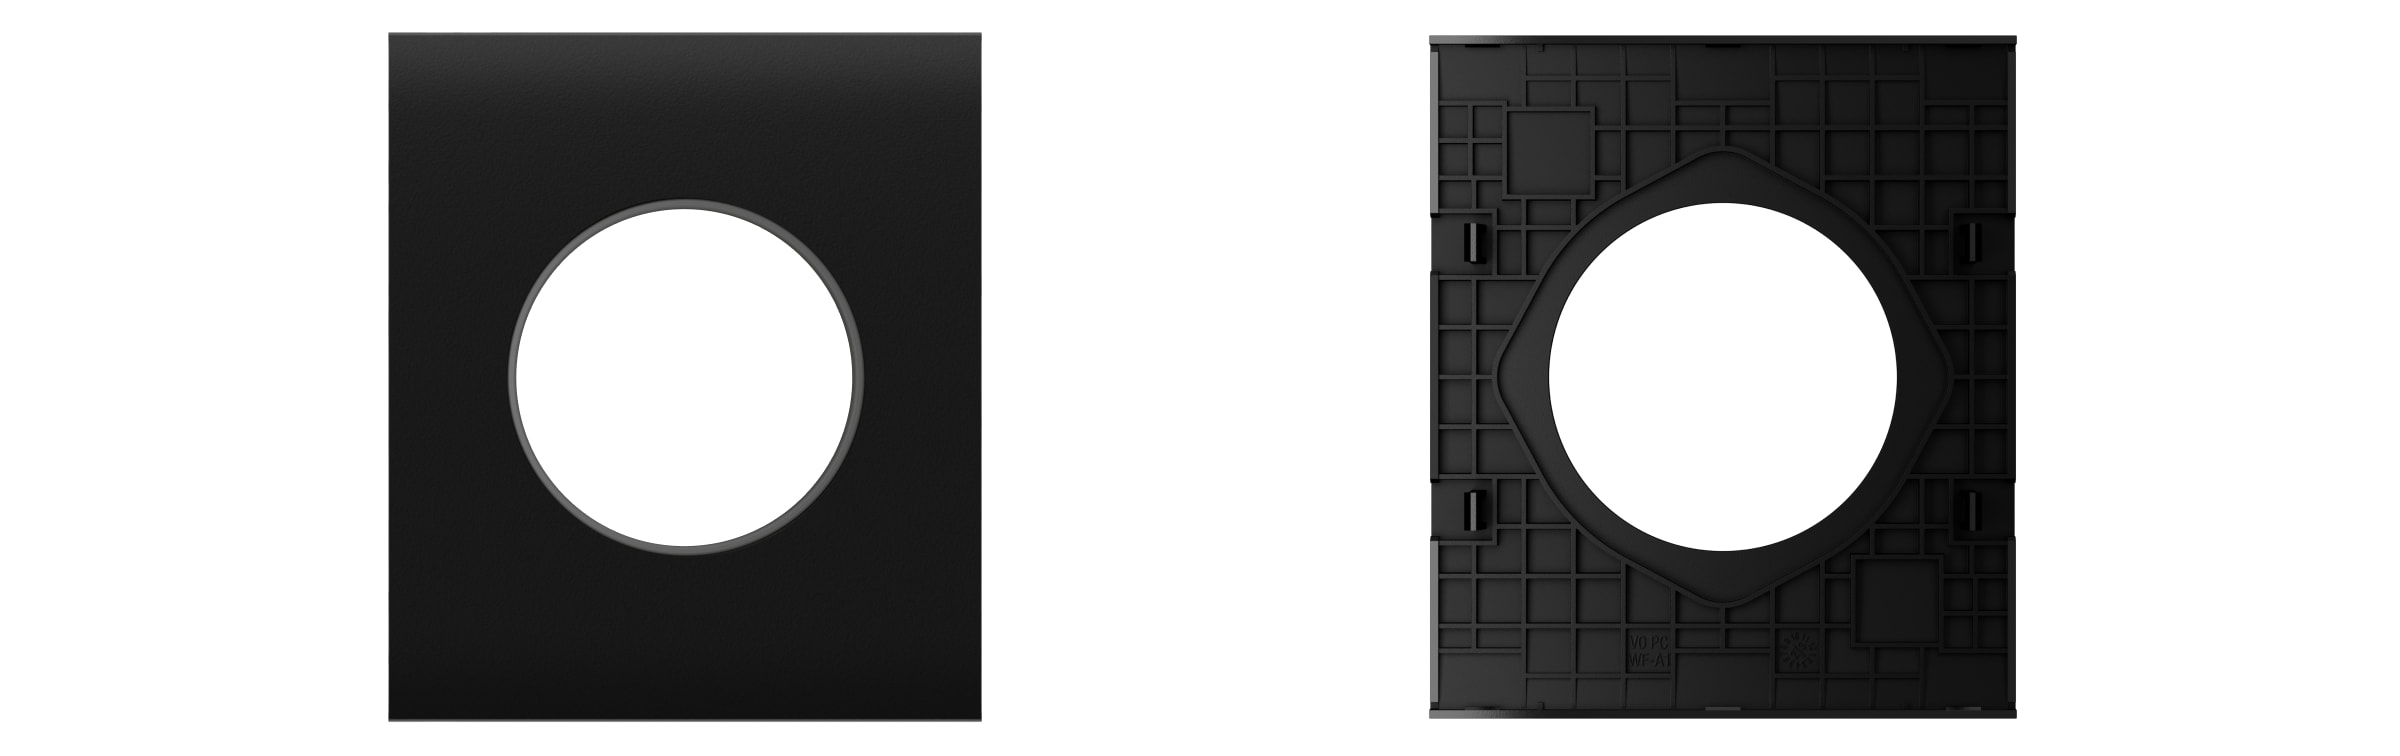
O painel frontal da SideCover (basic) [type E].
Tampa do recipiente
- A chave UP para instalar corretamente a tampa no núcleo. A chave correspondente encontra-se no núcleo de tomada, marcando a parte superior da carcaça de tomada.
Painel frontal
O painel frontal da CenterCover (basic) [type E].
Tampa do recipiente
- A chave UP para instalar corretamente a tampa no núcleo. A chave correspondente encontra-se no núcleo de tomada, marcando a parte superior da carcaça de tomada.
Estruturas
As estruturas Frame estão disponíveis com 2 a 5 assentos, tanto em orientação horizontal quanto vertical. Estas estruturas são utilizadas quando se instalam vários dispositivos Outlet e/ou LightSwitch* numa fila.
* As combinações com tomadas só estão disponíveis na orientação horizontal.

Estrutura para dois dispositivos.
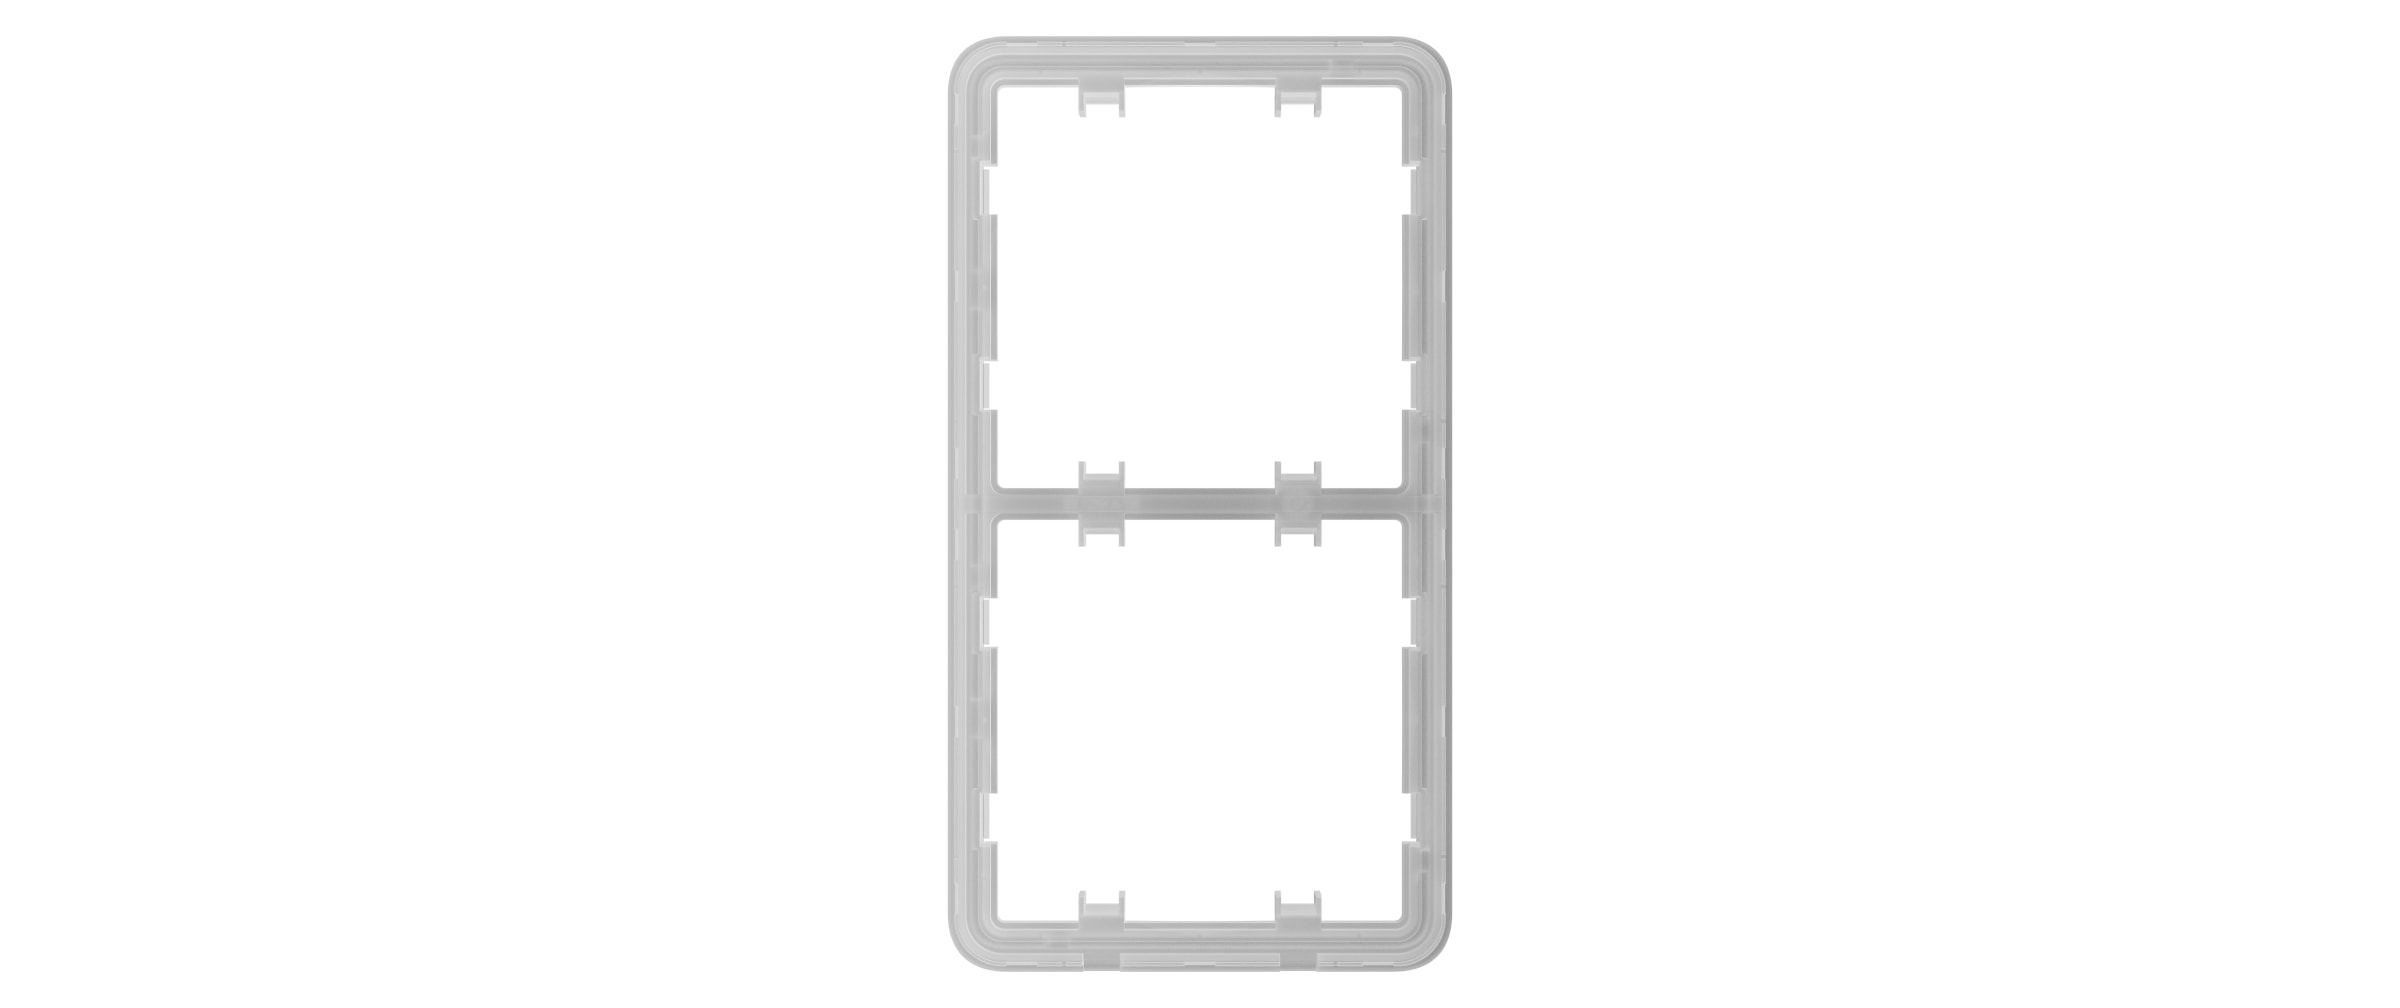
Estrutura vertical para dois dispositivos.
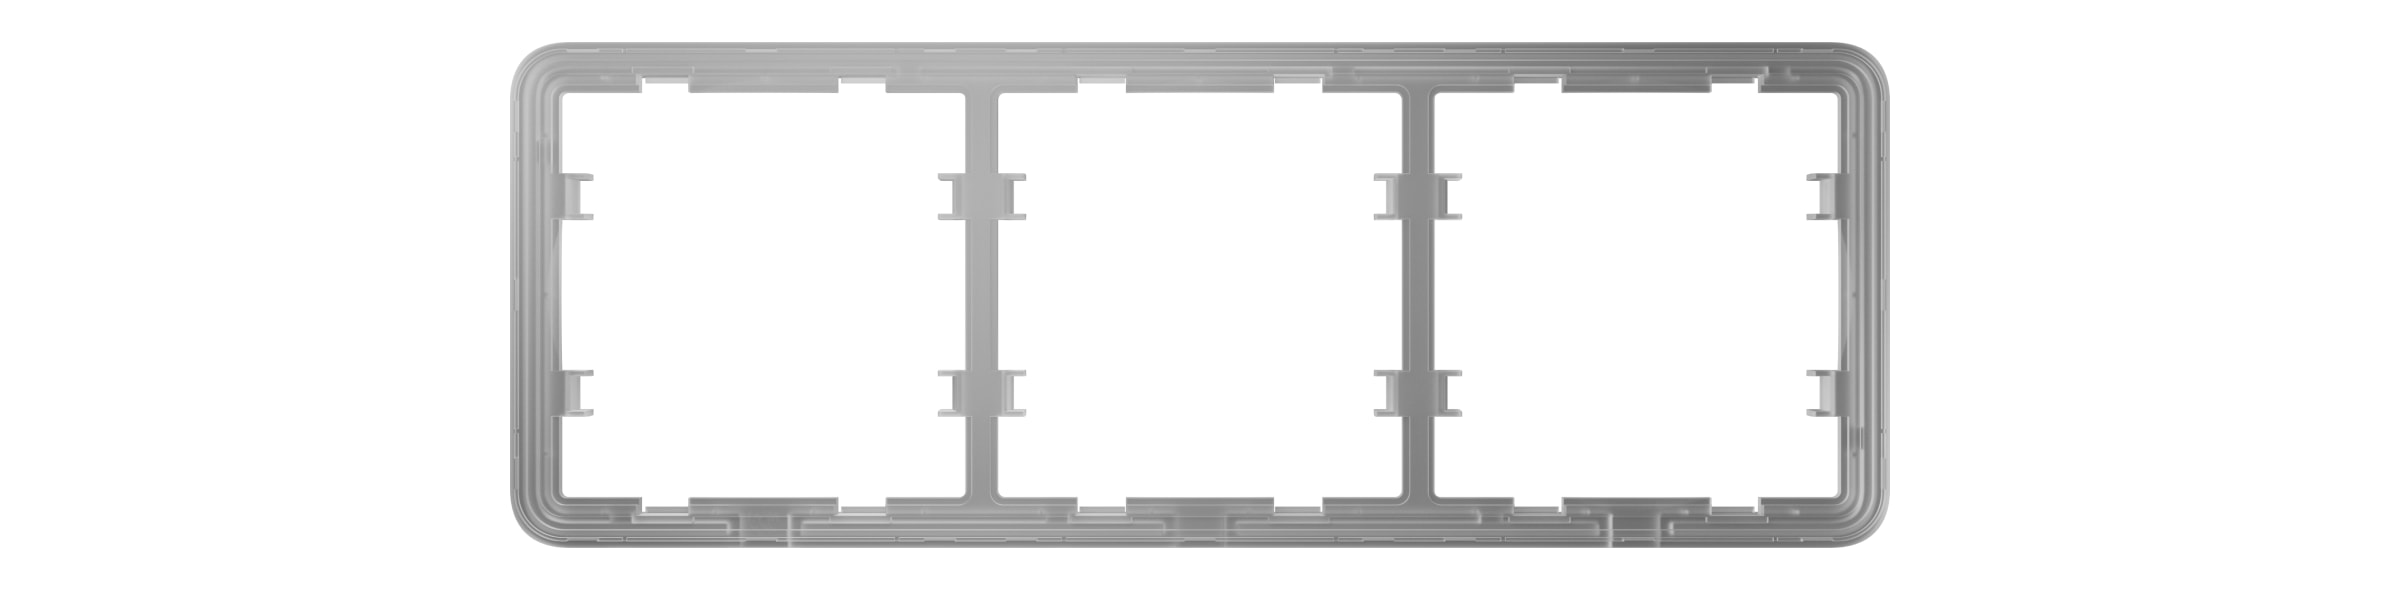
Estrutura para três dispositivos.
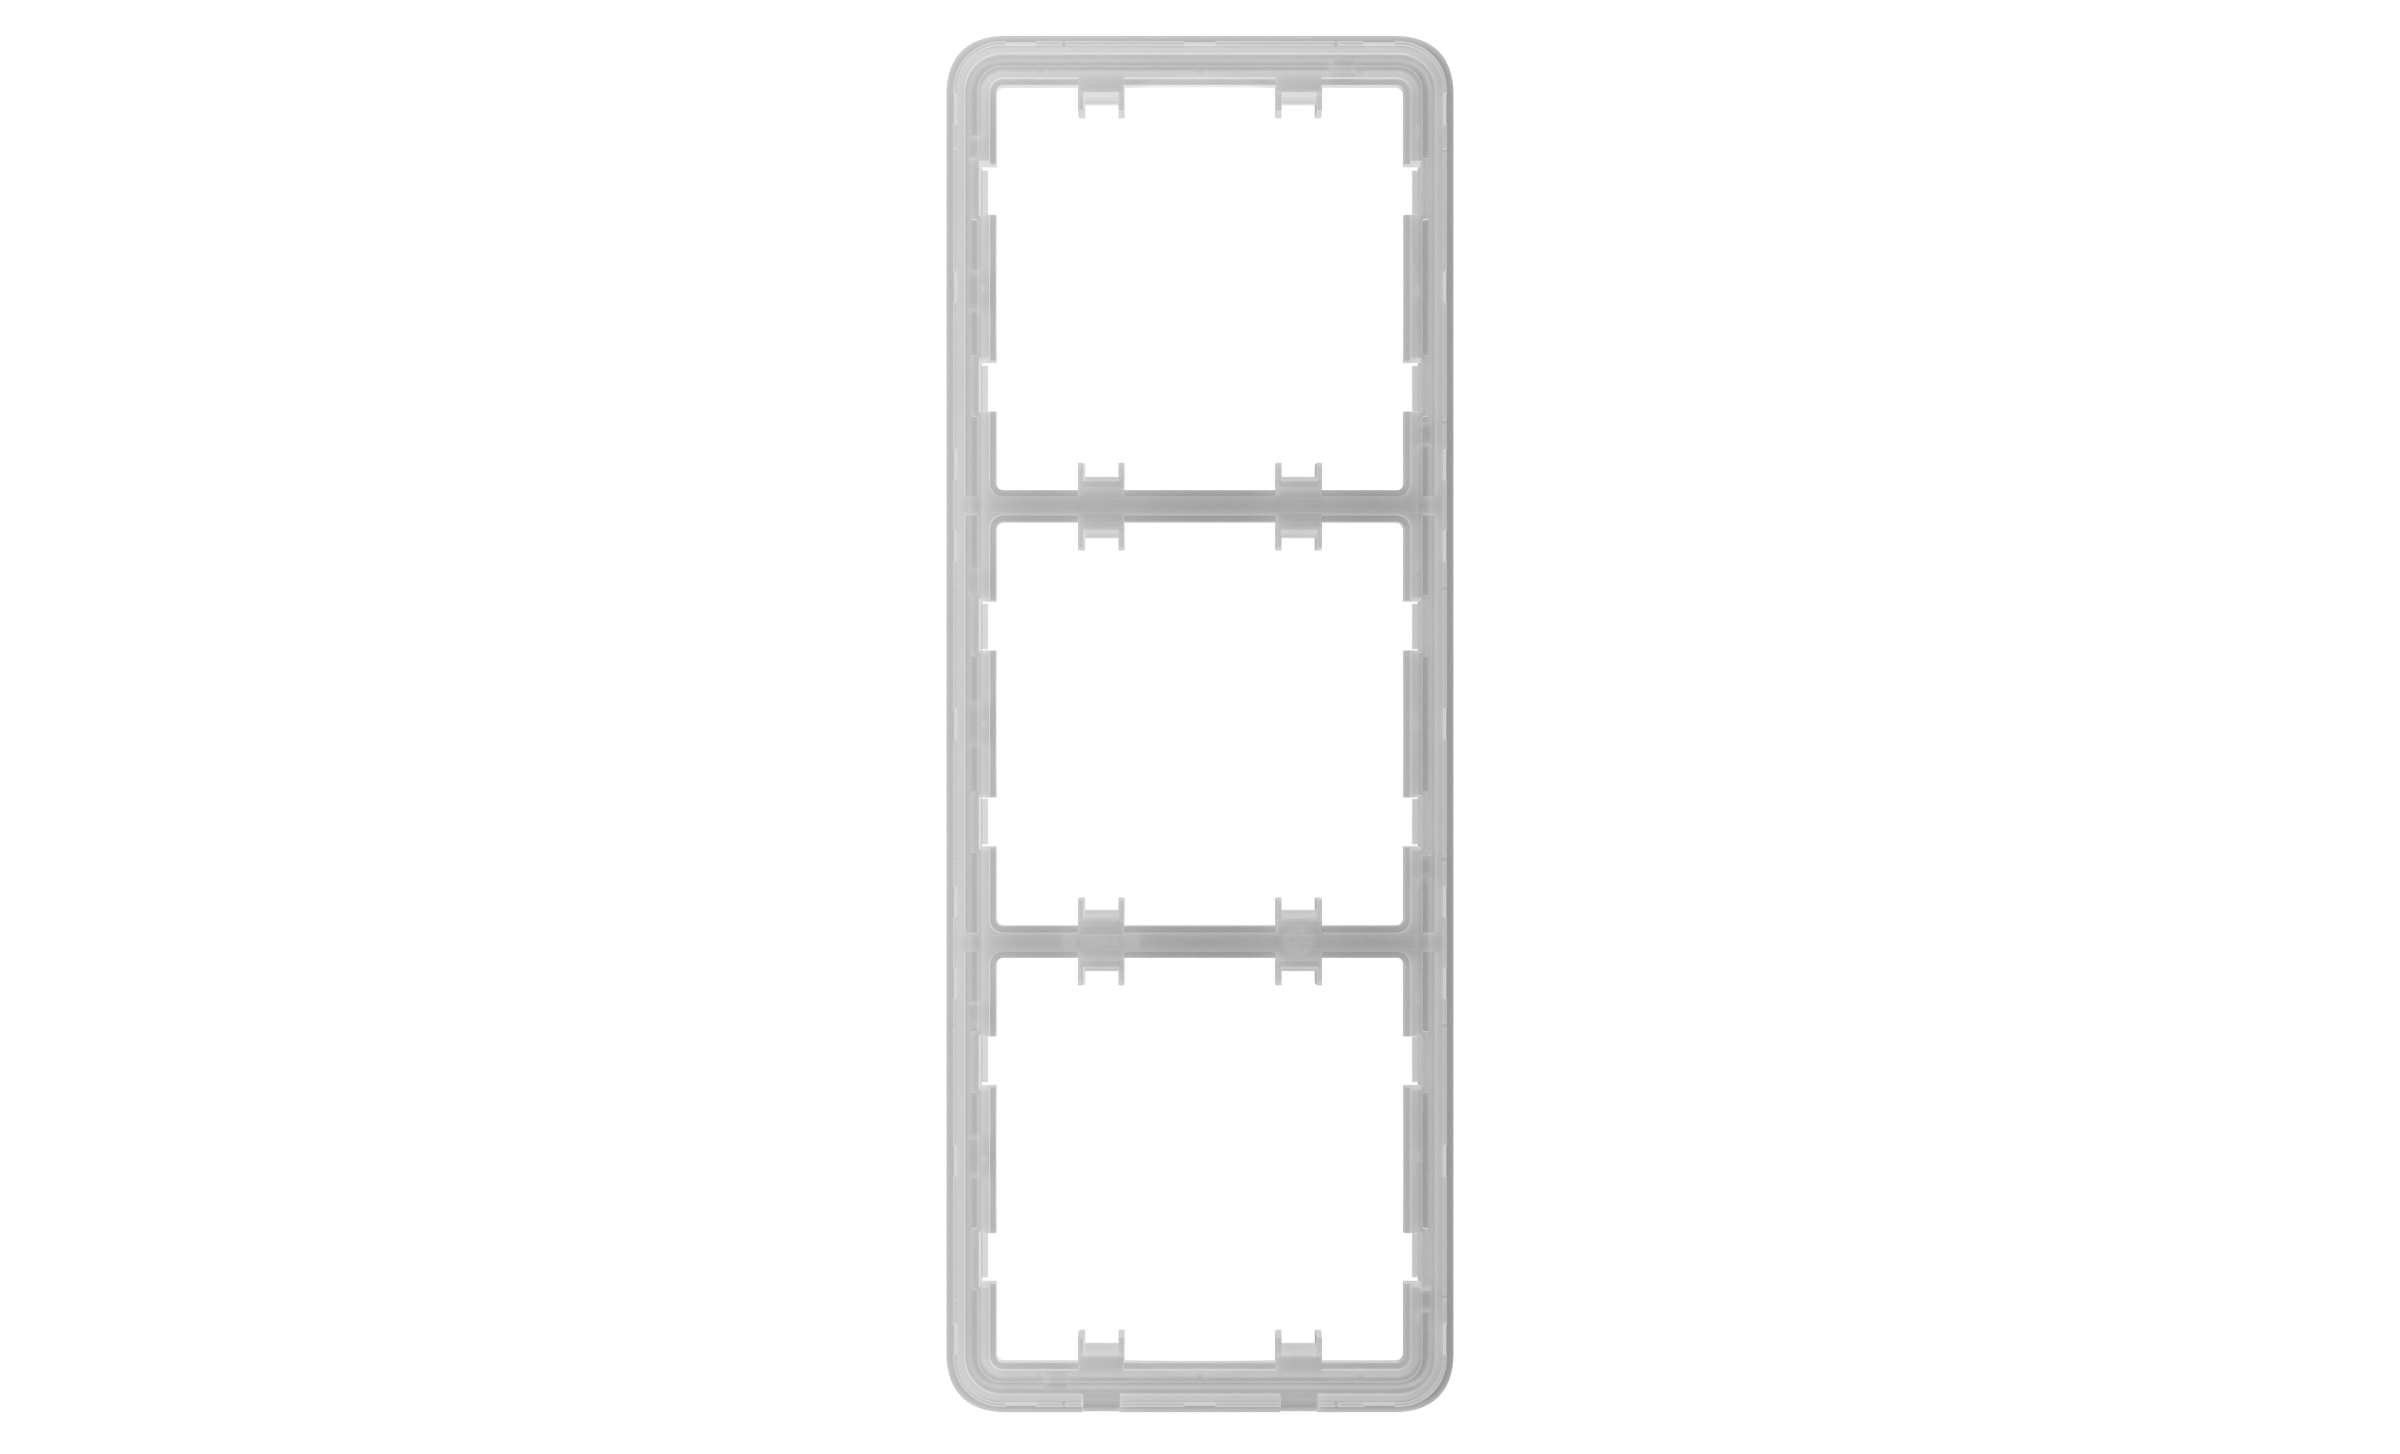
Estrutura vertical para três dispositivos.
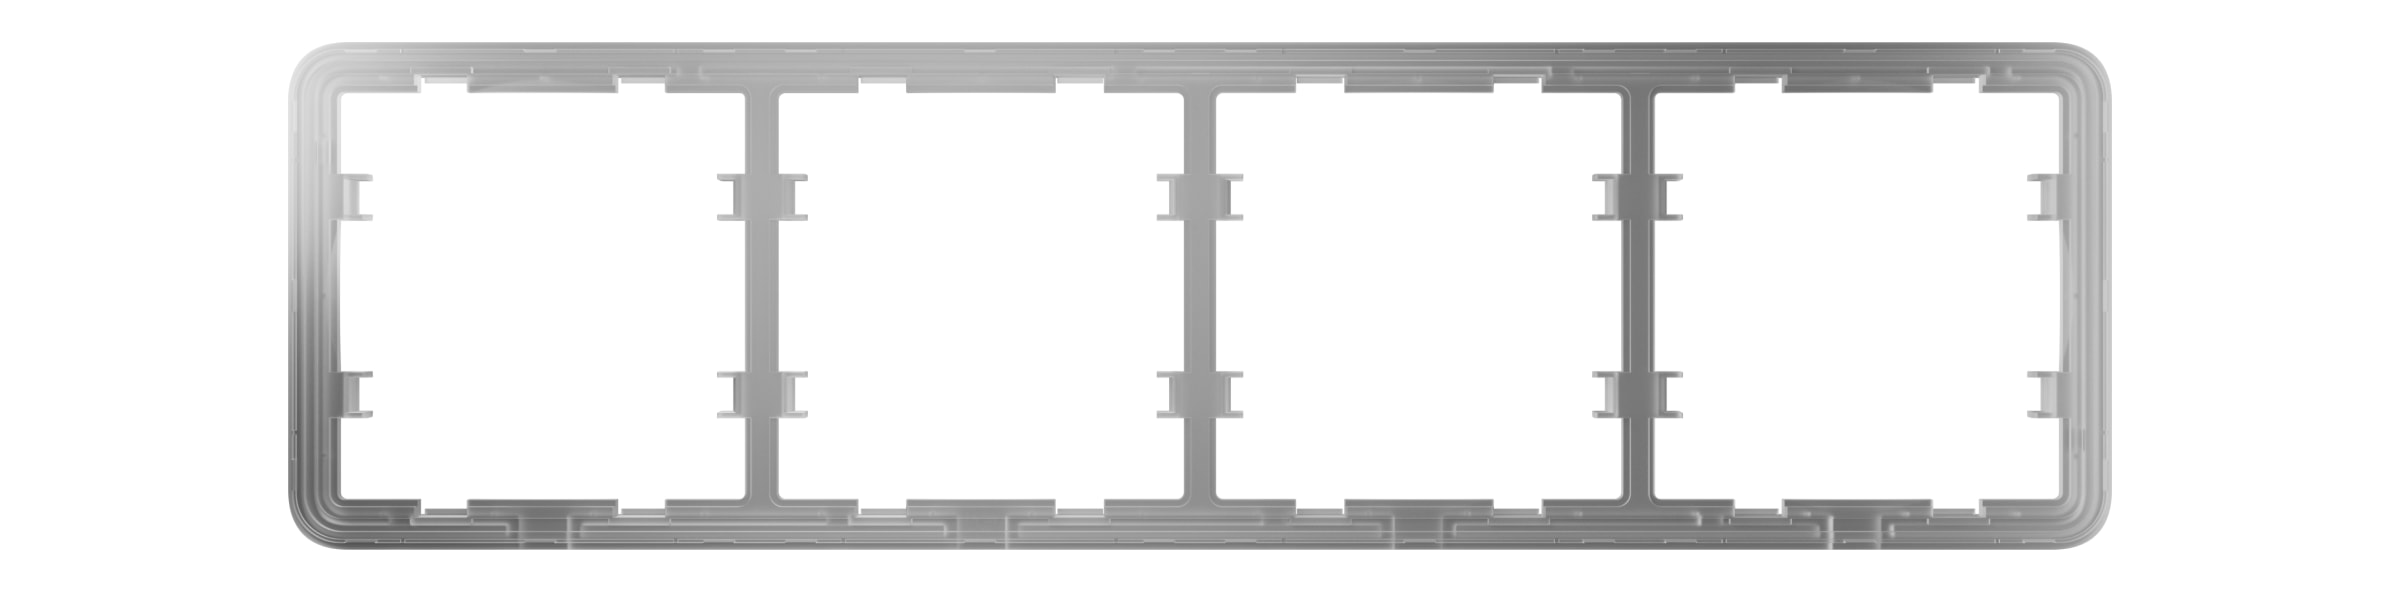
Estrutura para quatro dispositivos.

Estrutura vertical para quatro dispositivos.
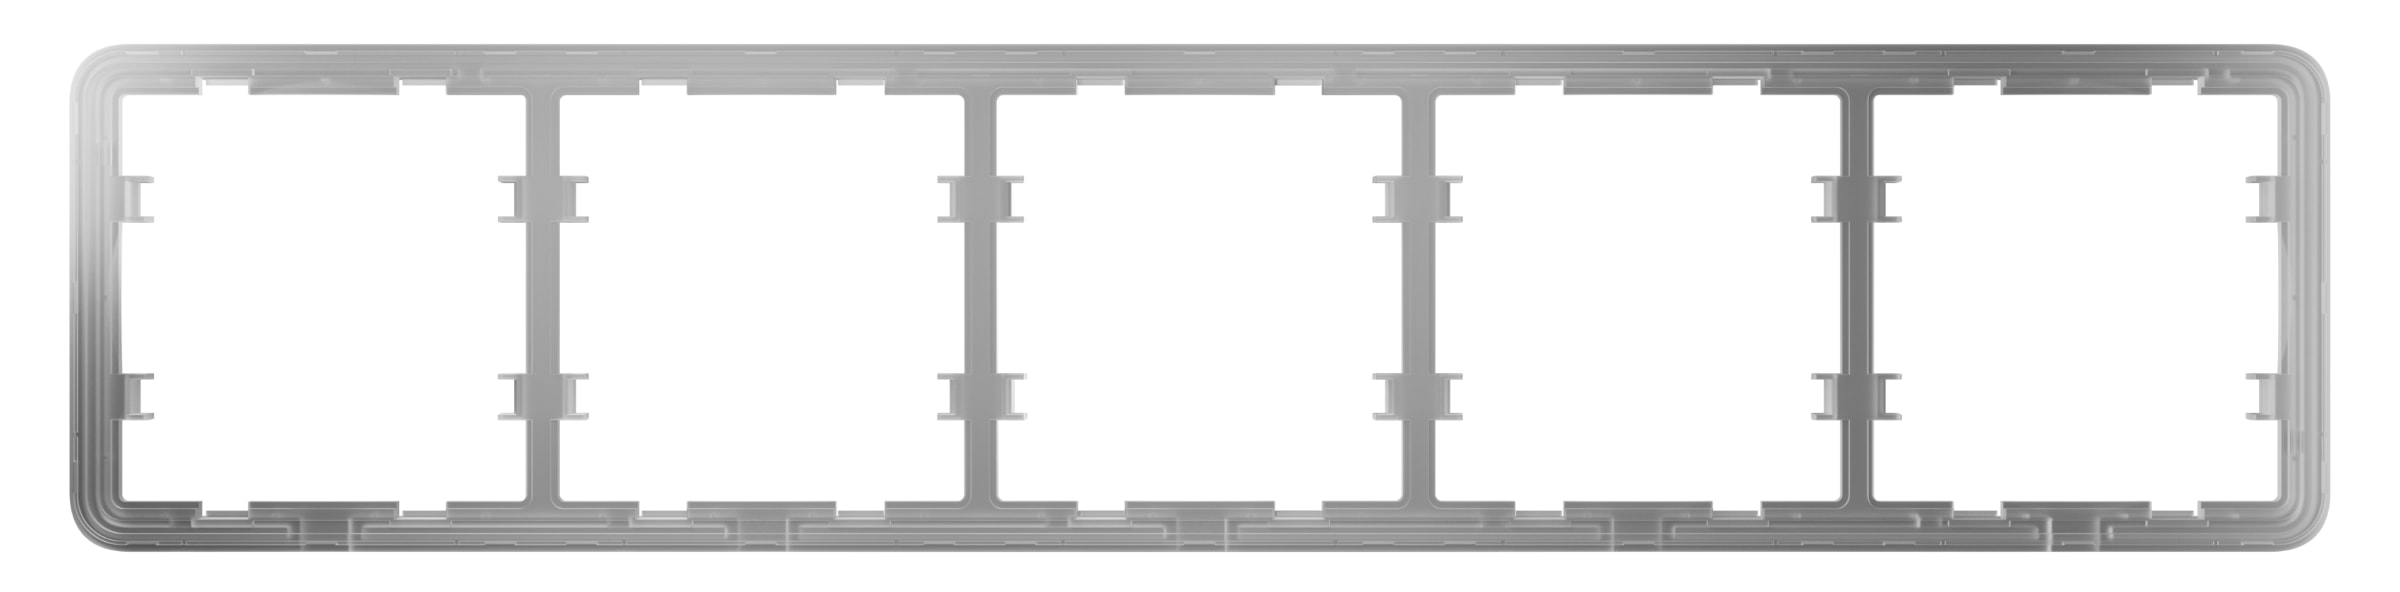
Estrutura para cinco dispositivos.
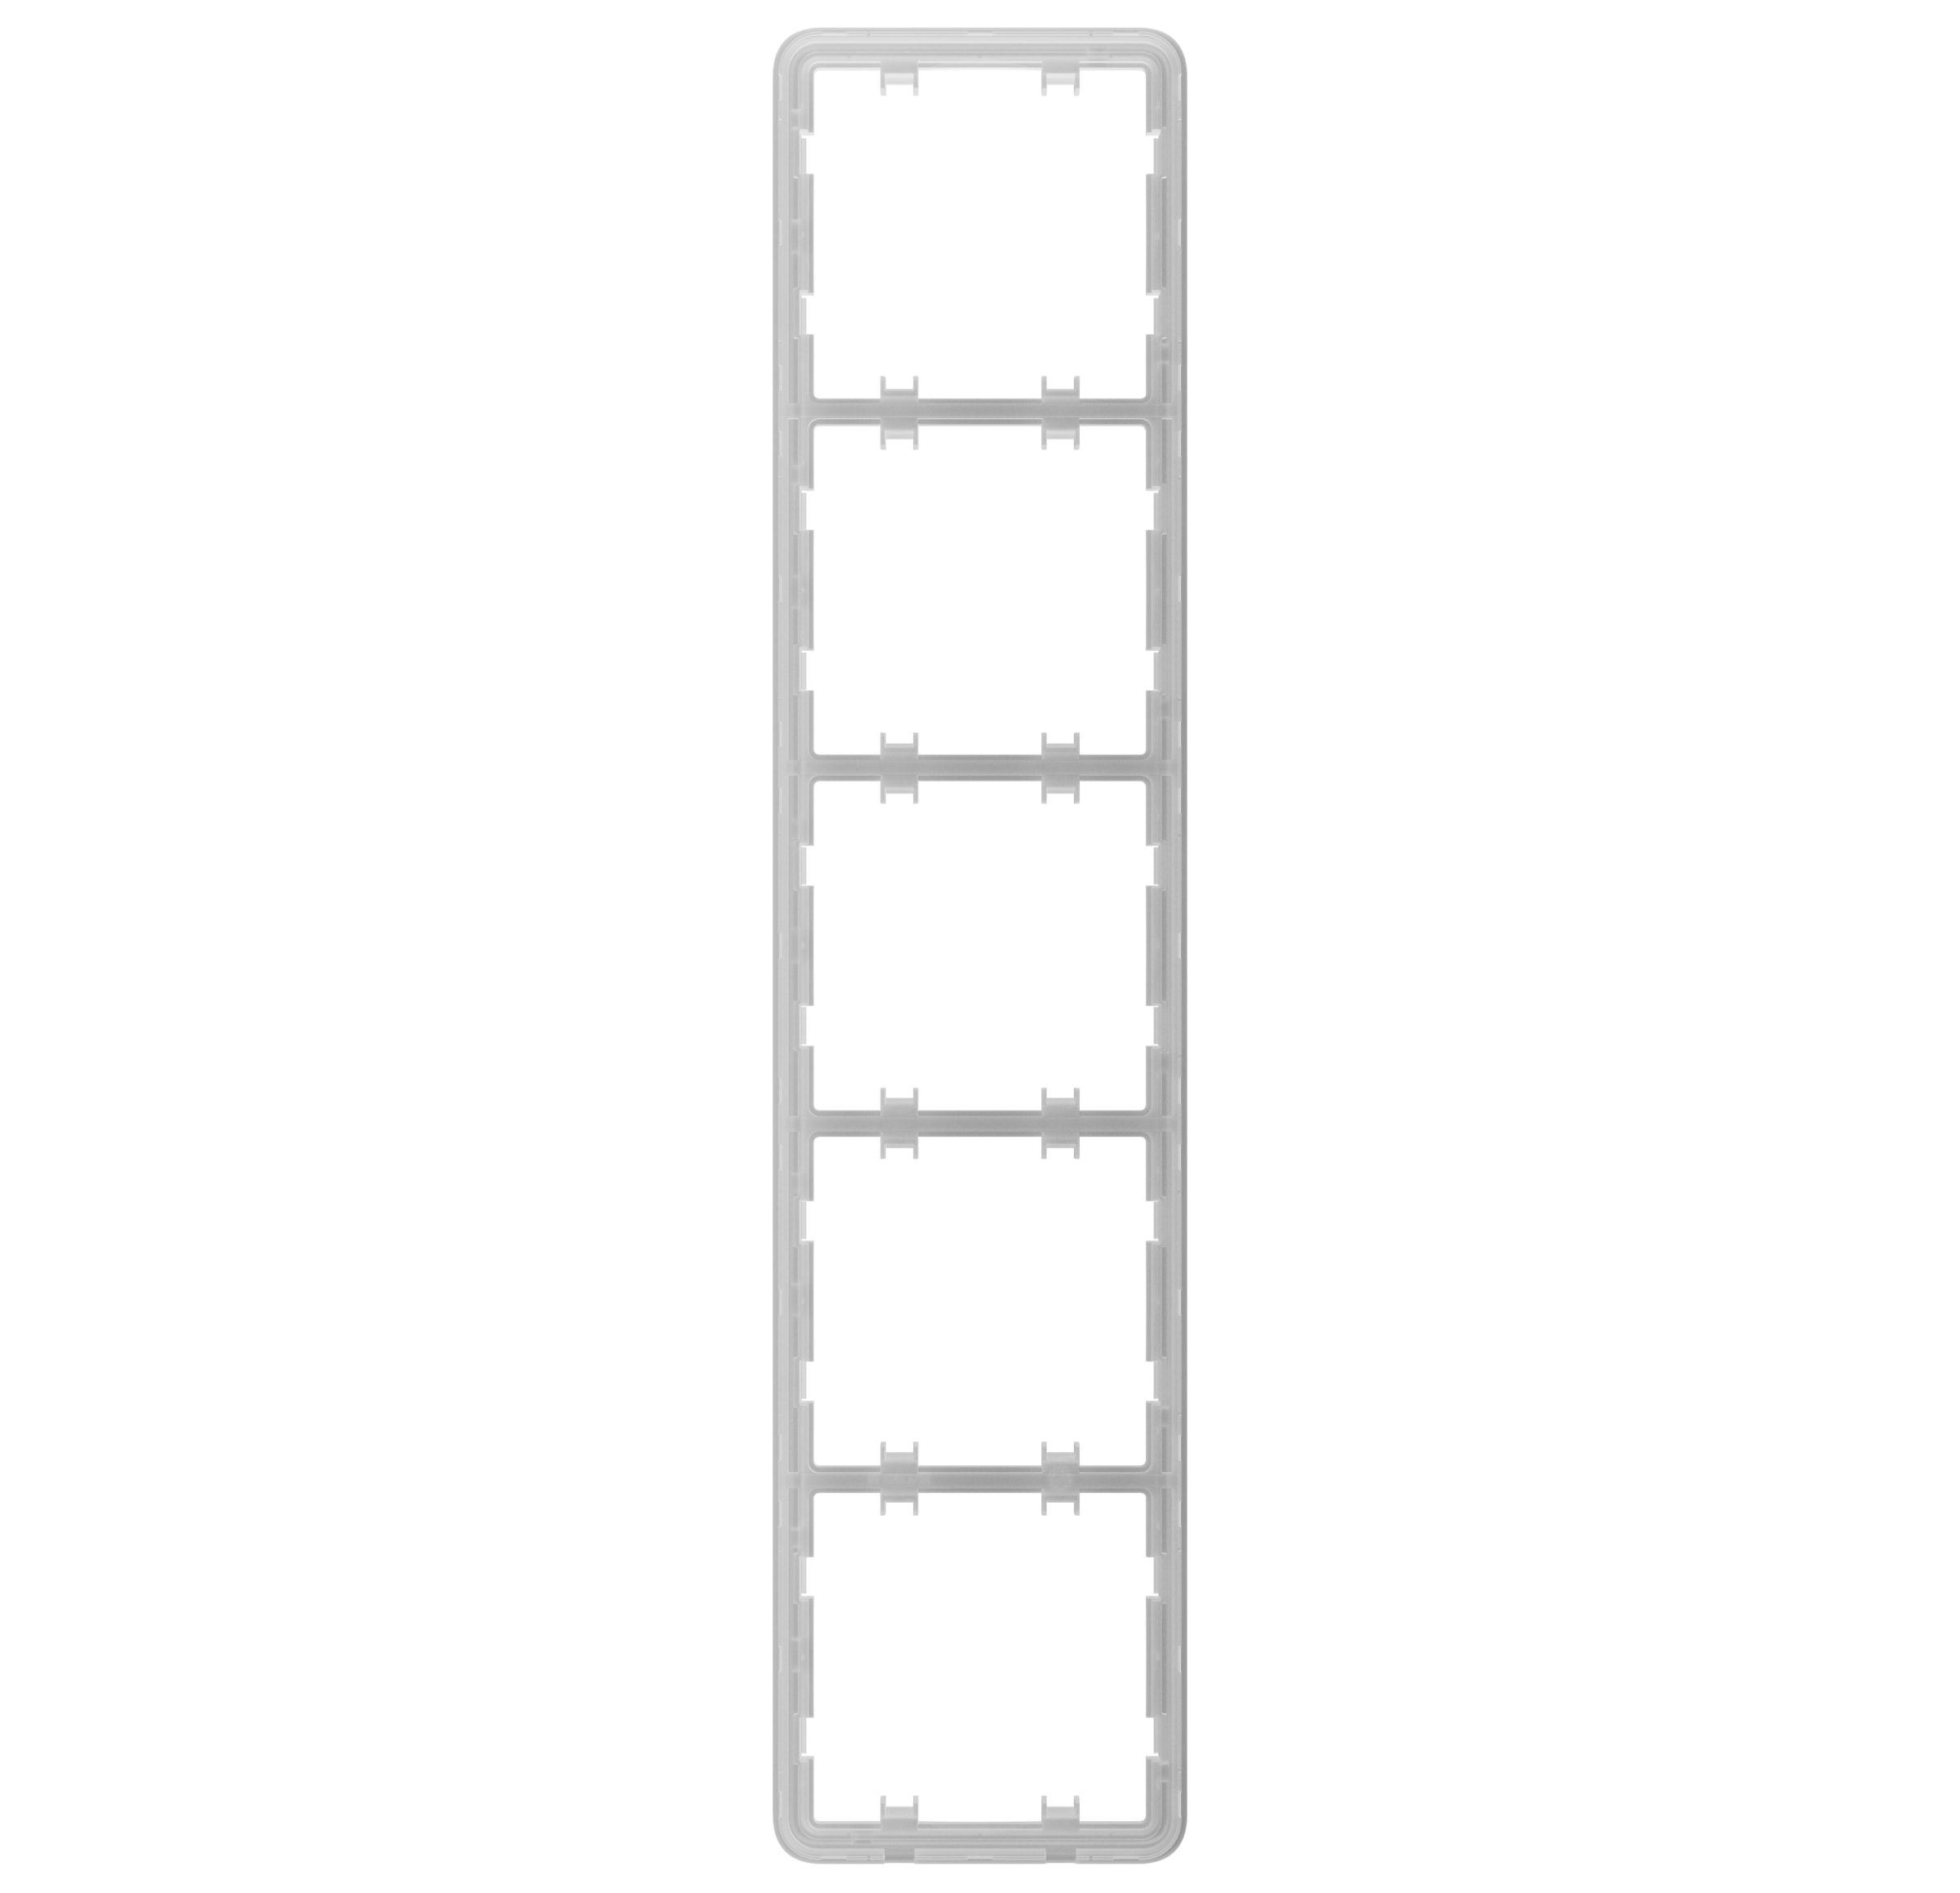
Estrutura vertical para cinco dispositivos.
Dimensões
Núcleo
Tampas
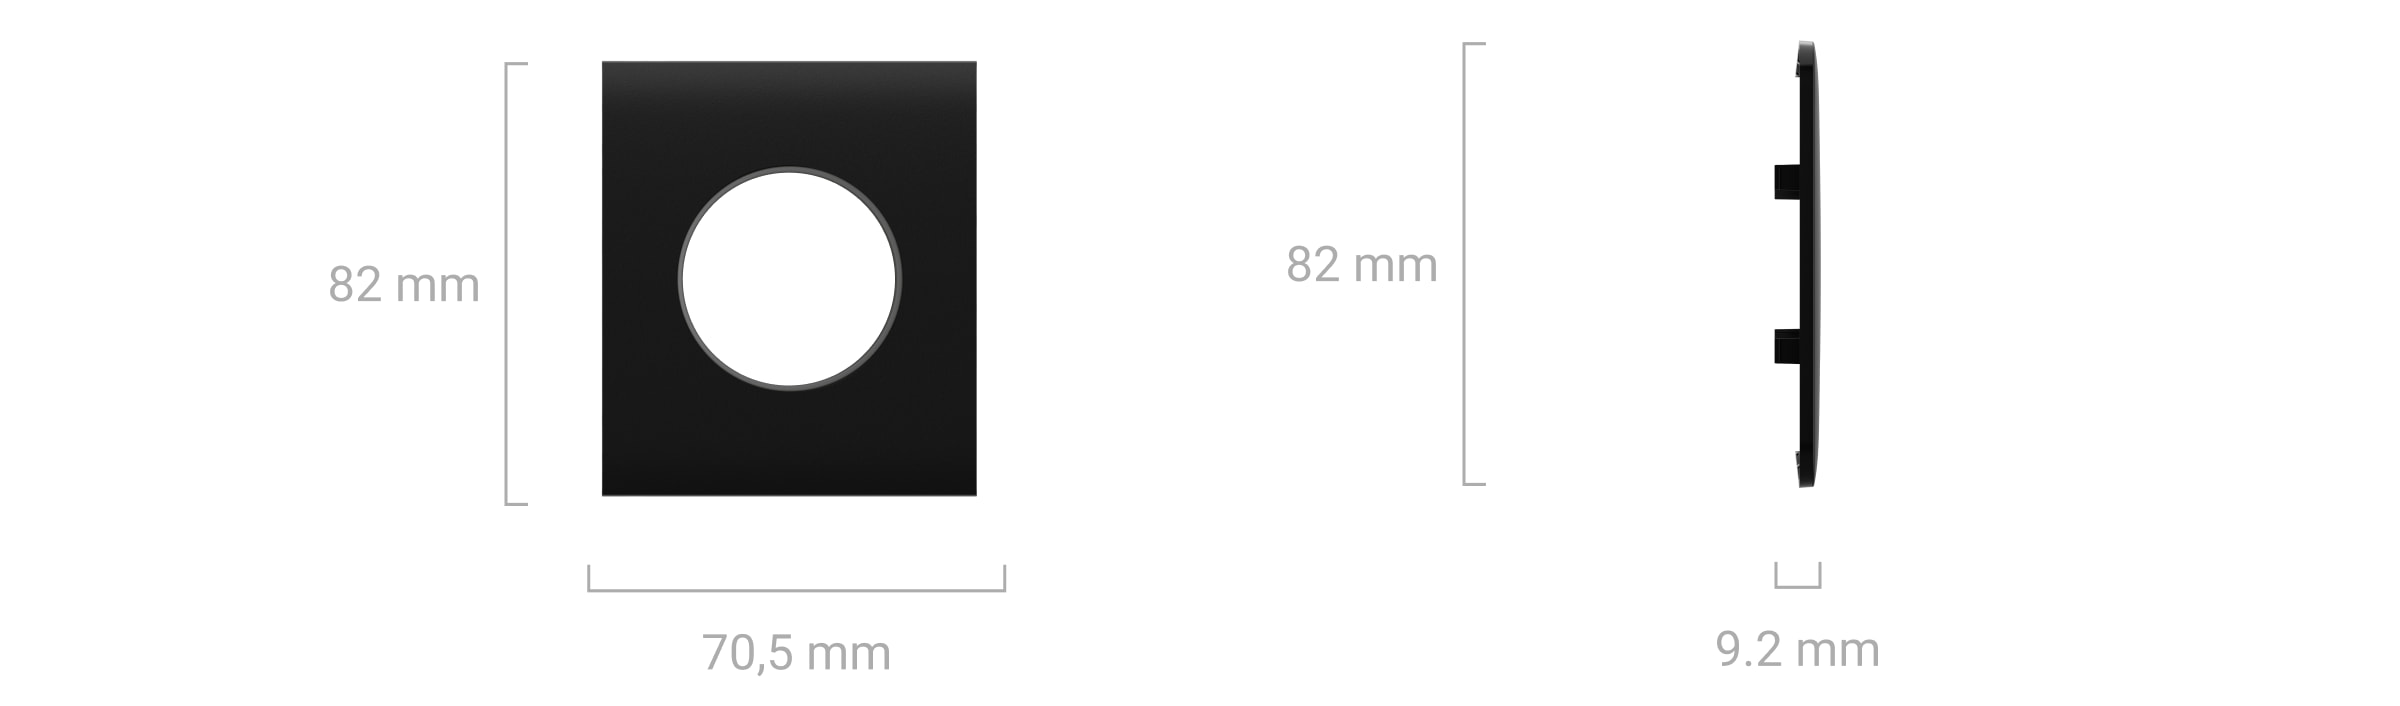
Painel frontal

Tampa do recipiente
Painel frontal

Tampa do recipiente
Painel frontal
Tampa do recipiente
Estruturas


Hubs e repetidores compatíveis
A Outlet (basic) [type E] não é compatível com hubs e repetidores. É uma tomada incorporada normal que não pode ser adicionada a um sistema Ajax e controlada através da app.
Uma tomada integrada inteligente que pode ser adicionada a um sistema Ajax e controlada através da app também está disponível — Outlet [type E] Jeweller.
Princípio do funcionamento
A Outlet (basic) [type E] fornece energia aos aparelhos elétricos ligados. Funciona com uma tensão de 250 V~, 50/60 Hz, com uma corrente de carga máxima de 16 A. A carga resistiva máxima da tomada é de 3,6 kW.
A tomada está em conformidade com a ficha europeia tipo E e possui um terminal de ligação à terra e proteção especial interna contra pequenos objetos.
A Outlet (basic) [type E] deve ser ligada aos cabos de alimentação neutra, da fase e de ligação à terra. Note que o dispositivo foi projetado exclusivamente para uso no interior.
Instalação
Ao instalar e utilizar a Outlet (basic) [type E], siga as regras gerais de segurança elétrica para a utilização de aparelhos elétricos, bem como os requisitos dos regulamentos de segurança elétrica.
A instalação da Outlet (basic) [type E] deve ser realizada exclusivamente por um eletricista ou instalador profissional qualificado. Evite ligar a alimentação da tomada até que a tampa esteja corretamente instalada.
Para instalar a Outlet (basic) [type E]:
- Desligue os cabos de alimentação aos quais a Outlet (basic) [type E] será ligada.
- Prepare as caixas de montagem e retire as tomadas pré-instaladas, se existirem. Desligue os fios, garantindo que cerca de 9 mm de fio nu fiquem expostos.
- Instale a tampa do recipiente. Para um alinhamento correto, faça coincidir a chave UP da tampa do recipiente com a do painel frontal do núcleo.
- Ligue os cabos à OutletCore (basic) [type E] de acordo com os seguintes esquemas de cablagem:
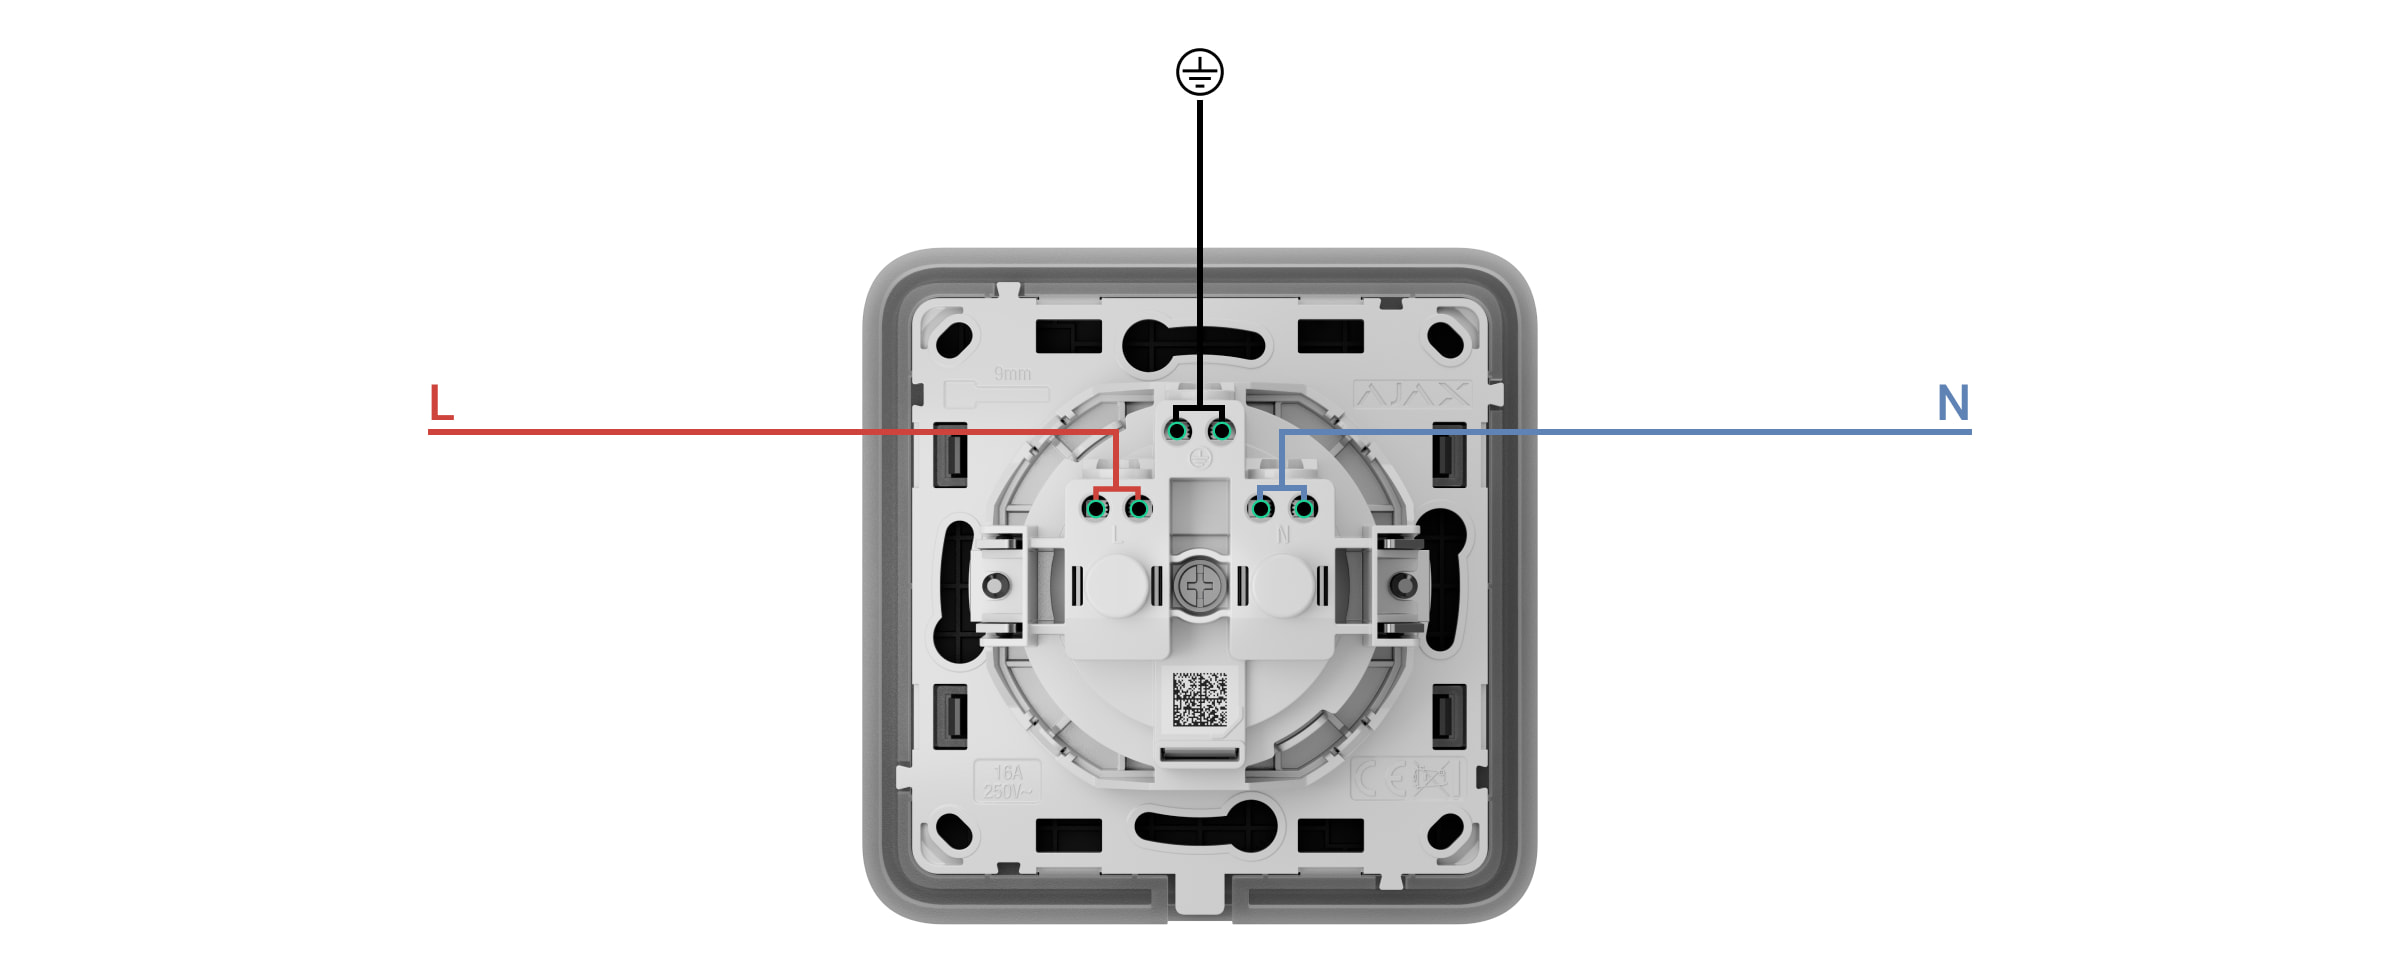
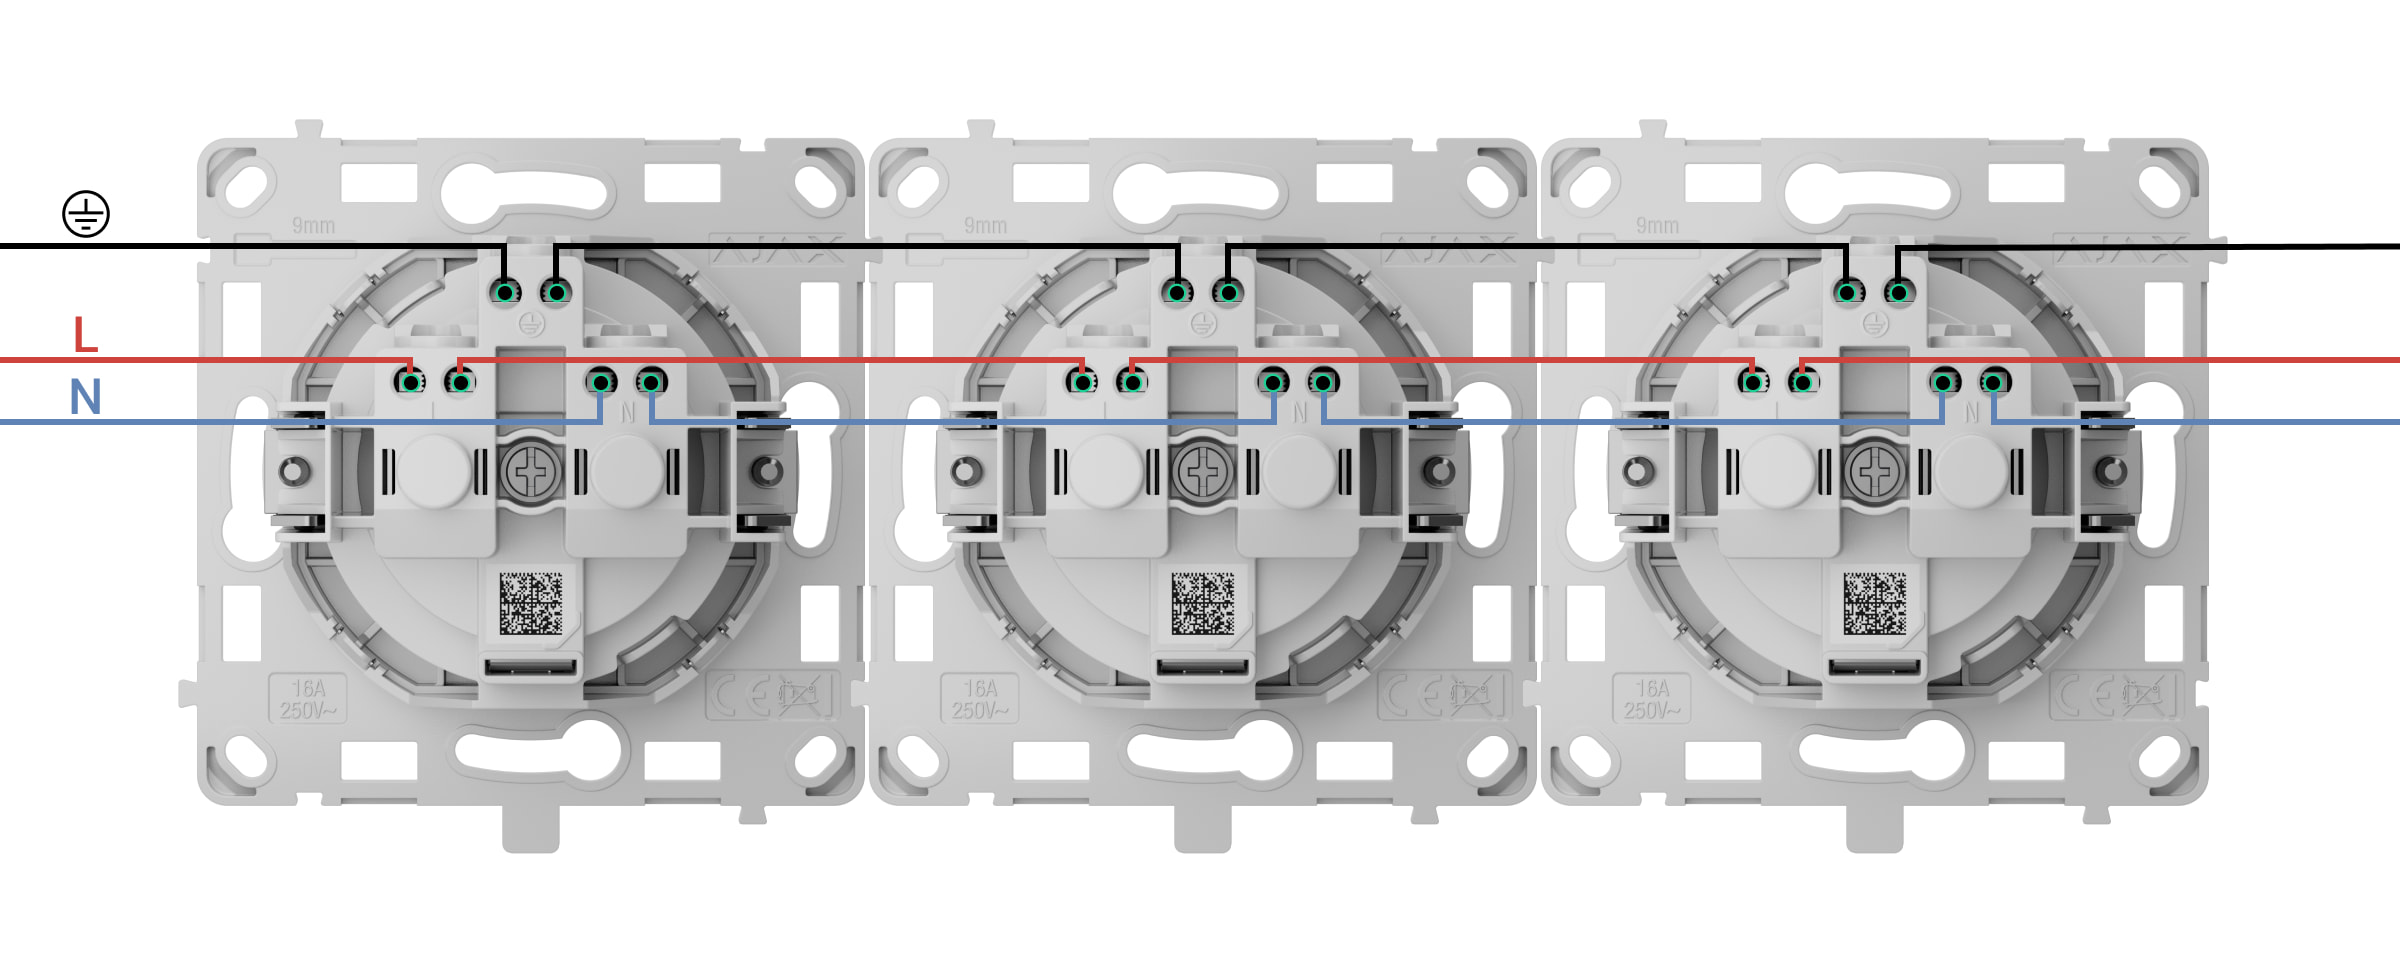
Esquema de ligação de fios para uma tomada Esquema de ligação de fios para múltiplas tomadas - Ligue a fase de alimentação elétrica ao terminal L.
- Ligue o neutro da alimentação elétrica ao terminal N.
- Ligue o cabo de ligação à terra ao terminal designado
 .
.
- Instale o OutletCore (basic) [type E] na caixa de montagem e insira cuidadosamente os cabos. Aperte os parafusos para fixar as garras de montagem. Aperte o núcleo da tomada com os parafusos empacotados.
- Instale os restantes núcleos da tomada, se necessário.
- Se estiver a instalar várias tomadas ou interruptores LightSwitch Jeweller, monte a estrutura com o número de assentos adequado.
- Instale os painéis frontais necessários.
- Ligue a alimentação.
Não instalar a Outlet (basic) [type E]:
- No exterior, pois pode levar à falha da tomada.
- Dentro de locais com temperatura e humidade fora dos limites permitidos, uma vez que tal pode danificar o aparelho.
Manutenção
Verifique o funcionamento do aparelho regularmente. Limpe a carcaça do dispositivo do pó, teias de aranha e outros contaminantes à medida que vão surgindo. Utilize um pano macio e seco adequado para limpar equipamento eletrónico. Ao limpar o dispositivo, evite o uso de substâncias que contenham álcool, acetona, gasolina e outros solventes ativos.
Especificações técnicas
Conjunto completo
Outlet (basic) [type E] é um dispositivo pré-fabricado. Todas as peças são vendidas em separado.
Utilize o configurador online de interruptores e tomadas Ajax para montar o seu conjunto personalizado. Combine dispositivos numa estrutura, escolha a cor e descarregue a sua configuração em PDF.
Garantia
A garantia para os produtos “Ajax Systems Manufacturing” da Limited Liability Company é válida por 2 anos após a data de compra.
Se tiver algum problema com a funcionalidade do dispositivo, recomendamos que contacte primeiro o Apoio Técnico Ajax. Em maioria dos casos, os problemas técnicos podem ser resolvidos remotamente.
Contactar o Apoio Técnico:
